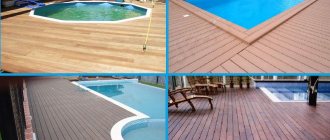
Types and properties of paving slabs
Before the advent of man-made tiles, roads and squares were paved with natural stone.
It was expensive and not always available. With the invention of concrete, artificial paving stones became popular. The technology originated in Holland and spread throughout the world. Large and small enterprises have mastered the production of products using vibration casting, hyper- or vibrocompression. The raw material used is a mixture of cement, fillers and water. Externally, the products differ in surface texture. Pressed paving stones are rough, cast paving stones are smooth and glossy.
The physical characteristics of tiles made by different methods are very similar:
- compressive strength at the level of 300-500 kg/cm²;
- abrasion 0.3-0.7 g/cm²;
- water absorption 4.5-6% of volume;
- frost resistance F 200-400 cycles.
But experts say that pressed products are less slippery, not as susceptible to frost, and last longer than analogues made by vibration casting.
Comparative characteristics of different types of tiles
Concrete paving slabs are the most common. For paving various objects, paving stones made of natural stone, clinker, rubber or treated wood are also used. Exotic lovers are offered luminous coatings with photo printing and 3D effect.
What are paving stones
Since ancient times, the raw materials for the production of this building material have been roughly processed natural materials (wild stone, granite, marble, gabbro, diabase, sandstone), hewn to a rectangular shape.
Due to the high cost of the natural product, the modern production of road surfaces began to use concrete or polymer concrete, which are not inferior in their performance characteristics to natural structures. And in some respects (weight, processing, price) it is better.
- By vibration casting or vibrocompression, bricks of any shape are obtained;
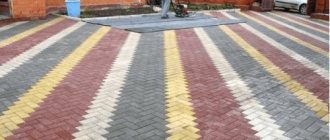
- By adding dyes to the mixture, paving stones can be made in a variety of colors;
- Production technology allows us to obtain elements with a smooth and even surface;
- The exact dimensions of the products make it easier to fit them when laying.
Another type of modern path covering is clinker paving stones. It is made from ordinary brick. To increase wear resistance, the bars are pressed, tinted and fired. Therefore, this type is more expensive than products made from cement or concrete mixtures.
Preparatory work
Before starting work, you need to purchase tiles, consumables, and tools.
How to calculate the amount of material needed
The calculation method depends on the drawing that is supposed to be posted. Complex compositions require a special approach and specific recommendations. The quantity is calculated based on the selected pattern, after drawing up a preliminary sketch plan of the entire site.
If simple shapes are chosen, it is worth remembering the school geometry course and calculating the area of a specific geometric figure that the site or its individual parts represent.
The area of all parts that need to be covered will be taken as a basis. The number of tiles per square meter is indicated by the manufacturer on the packaging, so the required number of sets to be purchased is calculated using simple mathematical operations.
Experts advise purchasing material with a reserve of one square meter for each part of the surface to be coated. This is necessary so that there are fewer joints in oblique corners.
REFERENCE. There are special online calculators that automatically calculate the number of tiles after entering parameters (area of the plot, size of the blocks). Using it, accurate calculations are made.
Additionally, a curb is purchased, which is installed to prevent the blocks from moving along the edge. Its quantity is calculated according to the length of the perimeter of the covered area.
When purchasing material and planning the size of the covering, you need to try to make calculations in such a way that there is no need to lay cut pieces along the edges. The fewer cut pieces there are in the coating, the more aesthetically pleasing it will look.
What you will need
Installing paving slabs with your own hands requires the use of special tools:
- Tamping
- Roulette.
- Rubber hammer.
- Line or cord for marking.
- Rule.
- Level.
- Grinder with discs for concrete.
- Master OK.
- Rake.
- Broom.
In addition to tools, consumables are purchased:
- Sand (for a standard area 2-3 tons).
- Cement.
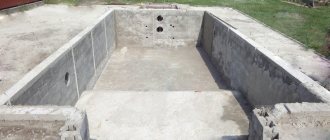
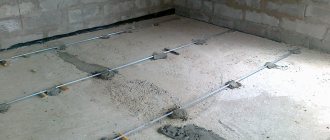
Preparing the base
Careful preparation of the base is the key to quality installation. After drawing up the plan, markings are made using pegs with a thread stretched across them. The quality of the soil in various parts is preliminarily assessed, and the sides of the slope are determined. If it is located towards the house and yard buildings, a drainage system is first thought through.
The sites are carefully leveled, soil is removed to a height of 15-20 centimeters. Then the surface is compacted. At the same time, drainage and sewer pipes are being installed.
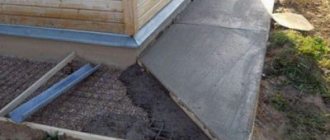
After leveling and compacting, a cushion of crushed stone is poured. For garden paths made of paving slabs with your own hands, the thickness of the layer is 10-15 centimeters; for parking areas and roadways, the thickness of the crushed stone doubles.
The pillow is compacted by a special machine and covered with geotextile, which will prevent sand from penetrating between the crushed stone. In areas with weak, loose soil, geotextiles are additionally laid under crushed stone.
The prepared cushion is filled with a cement-sand mixture (1X5), sand is poured on top of such a height so that the slabs are 1 cm above the surface before compaction.
ADVICE. To prepare the base, it is advisable to use guides made of boards along the height of the pillow. The foundation requires especially careful preparation if the site has soft soil. It is compacted after moistening.
The entire further process will depend on the quality of foundation preparation.
Important to avoid mistakes! If you want to know how to lay paving slabs with your own hands, watch this video of a man who decided to lay them incorrectly:
Useful tips and tricks for your device
Despite the fact that the technology for laying paving slabs is quite simple, pay attention to the following recommendations:
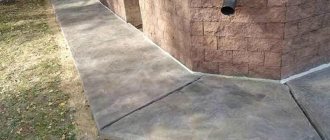
- When laying the coating on a concrete base, be sure to arrange a slope for rainwater runoff. You can use a longitudinal, transverse or transverse-longitudinal slope of the coating. The optimal slope is 1 cm per meter. As a result, water will not collect between the tiles and the concrete base, which will protect the coating from swelling. In this case, a gap for water drainage is made between the tile covering and the curb.
- The width of the track is selected as a multiple of the dimensions of one covering element. Do not think that large-sized products are installed faster. Due to their significant weight, they are more difficult to lift, move and level on the base.
- All underground communications on the site are laid before the construction of paths and driveways. Otherwise, the coating will have to be dismantled. If some communications are planned to be carried out in the future, then plastic pipes are laid under the path at the place where they are carried out (the cross-section is chosen based on the size of the communications).
- To prevent grass from growing between the individual covering elements in the future, a layer of geotextile is laid in front of the foundation.
- Laying the tile covering is carried out only on a dry base, so work is not carried out during or after rain.
- The base for the tiles is carefully leveled. To arrange the pillow, purified sand without impurities and clay is used.
- The size of the track is selected taking into account the selected covering elements. If you plan to make a pattern or ornament, then it is worth drawing a diagram in advance and calculating the width of the coating, taking into account the seams. The circular method of laying products will require cutting some elements to the desired size.
At the preparation stage, it is worth considering the coating pattern. The sketch will allow you to get an idea of the future creation and calculate the required number of elements of a particular color and configuration. If paving slabs are laid by a master, the price, of course, for paving with a pattern or ornament will be higher.
Advice! The most options for patterned layouts are obtained when using rectangular paving stones.
Technology for laying paving slabs on sand and concrete
The use of a concrete base for paving a sidewalk requires the use of reinforcing elements. For these purposes, it is recommended to use reinforced plates with a cellular structure. The concrete mixture will subsequently be poured into these voids.
This paving technology offers two significant advantages. On the one hand, the coating acquires a high level of strength, on the other hand, thanks to this, the pavement is able to withstand serious loads under conditions of intensive use. The only disadvantages include the high cost of such construction.
The technology of paving on a sand cushion is one of the classic methods of designing sidewalks. Even a special rubber coating intended for paths can be laid on this type of base.
Sand cushion for paving stones or paving slabs. Note! When laying paving slabs on sand with your own hands, use a special tool (wooden mallet, rubber mallet) to avoid damaging the coating.
Working with sandy surfaces is characterized by simplicity. In this case, you can even make the sidewalk yourself. But this does not mean that the technology does not require some effort and effort on your part.
Paving slabs are a functional covering for the local area.
There are also negative aspects of the technology, which involves paving tiles on sand. The base may wash out from under the tiles during heavy rains. To avoid this, you will need to install special borders along the entire perimeter of the path. Their installation significantly complicates the technology.
Rules for constructing paving stone paths
Knowing some aspects will help make a comfortable and durable design.
- The width of the path for people to move varies from 0.6 to 1.5 m . The optimal size that allows you to disperse when meeting is at least 0.9 m. A structure with a width exceeding 1.2 m will be comfortable for pedestrians.
- Curbs should be installed on the sides, preventing the path from deforming and preventing the appearance of dirt during rainstorms.
Curbs should be installed on the sides - The path should be away from trees . This is important so that their root system cannot destroy the coating. Usually it is enough to maintain 2 meters.
- When choosing the type of substrate for paving stones, it is necessary to take into account the type of soil, purpose of the coating, characteristics of the material being laid.
What types of substrates are there?
Caring for paving slabs
It is not enough to know how to lay paving slabs; you also need to provide them with constant care so that they last the estimated period. Simple maintenance consists of periodically sweeping and washing the paving slab path (to ensure that the colored tiles remain as beautiful). In winter, you should not use metal shovels to clear snow, and do not use crowbars or ice axes to remove ice, and also sprinkle the path with anti-ice compounds containing salt.
Water repellent for paving slabs
The porous structure of concrete acts like a sponge - it absorbs water. Hygroscopicity plays its detrimental role precisely in winter, when water penetrates the pores of concrete, freezes, expands and destroys the structure of the concrete base. As a result, the appearance of microcracks, dents, cavities, and color changes.
Water-repellent compounds (materials, additives, liquids) do not protect the tiles from fading in the sun and abrasion, but only saturate the surface of the concrete and thereby prevent “saturation” with water (provide water-repellent properties).
How to treat paving slabs
Some people want the sidewalk path to shine and use the effect of wet tiles. And others, on the contrary, like matte tiles. On the question of what to impregnate the tiles with, opinions differ. According to reviews, Tiprom M, U, Neomid H2O Stop, Neogard, Penetron are used.
A budget option is an organosilicon water repellent GKZh-11 (cheap does not mean bad). The principle of application is simple: diluted with water in the proportion of 1 kg of concentrate per 25 liters of water, poured into a sprayer and sprayed over the surface of the tiled path. This volume is enough for 50-70 sq. m. tiles for processing in two layers. Spray until absorption stops and droplets appear on the tile. As a result, the tiles will always be wet (wet effect), and during rain they will not absorb water, plus their frost resistance will increase. But keep in mind that treatment with GKZh water repellent does not have a reverse effect, i.e. it cannot be removed later. The principle of operation is shown in the “before and after” photo.
Video showing the difference in water absorption of concrete treated with a water repellent.
Users recommend Enesal MP for impregnation of concrete tiles - a liquid that creates a hydrophobic barrier (membrane) in the concrete structure (in the pores) that repels water, reagents and salts.
To create the “after rain” effect (wet stone), as well as to increase the resistance of paving slabs to abrasion, a protective composition for impregnation (processing) of concrete is recommended - Eneclad CFS. And if you add bronze or aluminum powder to it, you can permanently fix the desired color shade on the surface.
The method by which the tiles were made – vibration casting or vibration pressing – is of decisive importance. Homemade tiles made by vibration casting are less stable and wear out faster, while industrial (vibration-pressed) tiles will last about 100 years.
Advice. Keep in mind that a concrete (or brick) surface treated with any water repellent cannot be changed, i.e. After this, you won’t be able to paint or glue it!
Practitioners argue that the treatment of laid tiles with impregnations is carried out from above, but water penetrates between the seams and penetrates into the “body” of the tile from the sides and lower (rear) part.
Cost of laying paving slabs
There is one more point that I would like to draw your attention to. After all, everyone is interested in how to lay paving slabs inexpensively
The cost of the work will include:
The table does not indicate prices for materials, but only for labor.
For your information, a team of four people can lay 30-50 square meters per day. area, and a machine for laying paving slabs from 300 to 800 sq.m.
As you can see from the article, laying paving slabs is not that difficult
It is important to adhere to the rules and perform each stage as efficiently as possible
Tags:
Tiles Paths Facing material Finishing material Paving slabs
- https://derevyannie-doma.com/materialy/tehnologiya-ukladki-trotuarnoy-plitki-svoimi-rukami-kak-pravil-no-klast.html
- https://bouw.ru/article/ukladka-trotuarnoy-plitki-svoimi-rukami
- https://obustroen.ru/stroymaterialy/otdelochnye-materialy/plitka/ukladka-trotuarnoj-plitki-svoimi-rukami.html
- https://stroyday.ru/stroitelstvo-doma/landshaftnyj-dizajn/ukladka-bruschatki-svoimi-rukami-poshagovaya-instrukciya.html
- https://moydomik.net/dvorov/dorozhki-i-trotuary/349-ukladka-trotuarnoy-plitki-technology.html
Materials and tools
There are 2 main types of tiles used for laying sidewalks:
- Stamped.
- Vibrocast.
- Granite.
The first type is more budget-friendly and does not require any special production costs, however, the quality of such tiles is often poor. But tiles made using vibration casting technology, on the contrary, are famous for their durability, however, there is a small disadvantage of this type - it is a high price. Tiles come in a variety of sizes and configurations, widths and lengths.
The height varies from 20 mm to 70-80 mm. Considering the purpose of the site, it is worth focusing on the size and height. For small paths, high strength is not required from the tiles, so even thin tiles from 20 mm will do. But for platforms and driveways it is better to use thicker tiles from 60 mm.
In addition to the tile itself, you will need:
- Crushed stone, sand. It is better to use a crushed stone fraction of no more than 40 mm.
- Cement or special plaster mixture.
- Geotextiles. It protects the tiles from sagging.
- Borders are usually sold individually.
Important! To calculate the number of curb stones, you need to know the length of the path itself. We multiply the value by two, and then divide the value by the length of one border, in the end we find out the required number of stones.
What tools are needed to lay paving slabs:
Hammer (rubber). Level (preferably more than 1 m). Grinder with a diamond wheel. Several trowels. Manual "rammer". "Meter". Shovel. Rope (for marking). Pegs.
NOTE Additionally, purchase rubberized knee pads and mittens. There is work to be done with water and electricity.
Comparison of clinker and concrete paving stones
Ceramic and concrete paving stones are designed to create coatings that will be used under the same conditions. Both materials are strong enough to withstand the stresses that occur when the vehicle is in motion. If installation technology is followed, they can be used for several decades without repair. But there are differences between concrete and clinker elements:
- Moisture absorption indicator. For clinker products, it can be considered zero: the material has no porosity, and moisture is not able to penetrate inside the tiles. For vibration-cast and vibration-pressed concrete products, moisture absorption is 2-3 times higher.
- Frost resistance. Directly depends on the ability to absorb moisture. Clinker is able to withstand repeated freezing and thawing due to the low moisture content of the material and the ability to repel water during operation. More porous concrete can absorb small amounts of water, which gradually breaks down the material when it freezes.
- Convenience when paving. Clinker is laid in any desired position: edgewise or flat. The elements do not have a coating, and firing makes it possible to obtain products with uniform strength throughout the entire thickness. In the manufacture of vibro-pressed and vibro-cast concrete slabs, the products have a front and back side, which allows installation in only one position.
- Resistance to aggressive environments. Clinker bricks fired at high temperatures are chemically neutral and are not affected by weak acids. Concrete is a calcareous material that, in any forming method, reacts with acid-containing liquids.
- Coating thickness. For the manufacture of entrances and platforms, it is allowed to use clinker only 4 cm thick. The standard thickness of concrete paving stones is at least 6 cm.
If the materials differ, the base for the coating is prepared using the same technology.
Features of choosing paving stones
Nowadays the construction market offers a wide range of road surfaces. The owner of the site must, first of all, decide which area he is going to pave. The aesthetic and performance characteristics of the bars directly depend on this.
Parameters that determine the purpose of the material:
Thickness
- Bars up to 30 mm thick are suitable exclusively for pedestrian areas.
- Park areas and recreational areas with increased traffic are paved with elements from 50 to 60 mm.
- For the construction of access roads and parking for cars and trucks, stones over 80 mm are used.
Advice from the experts! When purchasing a batch of bars, knock the tiles together. A dull sound indicates that the production technology of the product has been violated (insufficient drying).
Also, the product must be accompanied by a quality certificate, which reflects such characteristics as:
- Frost resistance. The indicator indicates the number of freezing and thawing cycles that the bars can withstand. For example, in the middle zone, temperature changes vary from - 25 ° C to + 25 ° C, with a frequency of 5 to 7 times. This means that the service life of tiles with a frost resistance of 200 and with 5 cycles of temperature changes will be equal to 40 years.
- Strength. Strength indicators are assessed according to three criteria: bending (resistance to oblique loads, value from 60 kg/cm²), compression (impact of vertical loads with a value from 400 kg/cm²), abrasion (for paving stones this indicator should be less than or equal to 0.4 kg/cm2).
- Water absorption. The indicator is measured as a percentage. Moreover, the lower it is, the better. For example, if the value is 1.5%, then in this case the material will absorb water at the rate of 15 g per 1 kg of paving stone weight.
Form
Decorative wave paving stones
The configuration of the elements does not affect the strength of the paving stones. Therefore, the choice of decorative elements depends on the personal preferences of the owner of the site.
Landscape designers recommend selecting several coating options. The original composition will enliven the area.
The construction market offers decorative tiles in the shape of clover, wave, parquet or honeycomb.
You can lay the bars according to your own sketch, or contact the designers.
Preparatory work
We continue to study the question of how to lay paving stones
It is important to prepare a dense and stable base. To do this, remove the top layer of soil
The thickness is calculated depending on the type of material itself. On average, 25-65 cm of the top layer of soil is removed. If the soil at the bottom of the pit is unstable, it must be cleared of tree roots and plant debris and further compacted.
If under the removed layer there are low-permeable soil layers (hum-containing chernozem, plastic clay), then the excavation is increased until stable soils are discovered.
If this entails a significant increase in the pit, then the excess removed soil is compensated with crushed stone or any soil that has suitable qualities. Laying paving stones is impossible without determining the depth of groundwater. If they are located above the level of the future foundation, it is reduced through drainage work. In small areas it is not difficult to carry out such work, but in large areas they use special equipment: bulldozers, scrapers, etc.
Preparatory stage: marking and compacting the site
First you need to decide on the size of the plot and take into account all the nuances, create a plan drawing for convenience. Choose the type of tile, what pattern or color you would like. Taking into account the dimensions, we calculate the amount of material. It is also advisable to mark the area; for this, use pegs and rope.
Check all the nuances several times, take into account inconveniences and others. Pay special attention to vegetation; trees or shrubs should be bypassed or completely removed from the site, especially if they are young trees. As the roots of trees or shrubs grow, they will begin to lift the soil, due to this, swelling of the tiles will be observed, which will break, rise and sag in some places. Therefore, it is better to make a retreat from the seedling of at least a meter, and preferably more.
Before laying paving slabs, it is necessary to carry out work to prepare the soil. First of all, it is necessary to remove the top layer of soil, which will level out uneven areas, compact the soil and create a sand and gravel cushion. The characteristics of the site depend on the purpose of the site. For arranging sidewalks, make a platform 20 cm deep, and for car parking lots and entrances 27-30 cm.
After the hole has been dug, the soil must be compacted. To do this, you need to water it with a hose with a sprinkler, after which you need to walk with a tamper. The procedure, which is simple to perform, plays an important role in the durability of the paving surface, as it helps prevent subsidence, the process of subsidence of the site, which is observed over time in the operation of the road surface.
Some recommendations when carrying out work
Laying coatings in winter requires preliminary preparation of the subgrade, underlying layer and base. Construction of the surface on frozen ground can lead to mechanical damage to the canvas during operation. Under the influence of low temperatures, moisture on the underlying surface turns into ice. The property of water to expand in volume when freezing leads to deformation of the base of the installation. During the melting process, the masonry elements shrink. To speed up thawing during work, it is not recommended to use products that can cause efflorescence on the surface of paving stones and paving slabs.
The process of landscaping the territory in winter requires compliance with the work technology. A special shelter 1.5 m high is installed on the base, previously cleared of snow. Inside there are heat generators that heat the base for 48 hours and maintain a temperature of +15ºC. As a result of this activity, the soil should warm up to a depth of 40-50 cm. To confirm the fact of heating, pits are laid over the entire area on which the coating will be installed. The masonry elements and tools are located inside the shelter (heathouse).
Geotextile layer
Preparation for installation of tiles includes laying a waterproofing layer, which is placed above the drainage as a substrate. This prevents moisture from reaching the top load-bearing layer and improves the quality and integrity of the coating. A layer of geotextile is lined on the bottom and walls of the earthen structure. The artificial material does not rot from prolonged exposure to water, does not decompose even with prolonged use, and provides the road with protection from water.
Requirements for a concrete base
Paving slabs must be installed on a fully formed surface. All work on removing vegetation cover, soil compaction, and planning is carried out in accordance with the requirements of SNiP 3.02.01-87. The key standard is to create a basic level surface.
In addition, it is necessary to maintain a slope, which ultimately should be at least 1.5 cm for every 3 m of the path length in the direction of the surface slope. The prepared base must be compacted. For these purposes, special equipment is used, not forgetting about the timely moistening of the individual layers of the foundation being constructed.
- Each base layer has its own thickness standards and compaction coefficients. According to the regulations, compacted sand is subject to sanitation (treatment with sterilizing special means).
- When arranging the foundation for pouring concrete, waterproofing must be laid. The density of the separating layer should be at least 120-150 microns. In the absence of geotextiles, dense polyethylene film with a minimum overlap of 15-20 cm should be used.
- According to the requirements of SNiP, it is necessary to use class B15 concrete mixture in the work. In this case, the optimal thickness of the concrete layer should be at least 15 cm.
- For reinforcement purposes, it is necessary to use reinforcement. Minimum reinforcement involves the use of a network with a wire diameter of 5 mm and cells of 15x15 cm. If the technology allows the replacement of reinforcement, metal fiber is added to the concrete (using fiber-reinforced concrete).
- Concrete aggregates can be washed or graded. In this case, the grain size should not exceed 2.5 cm. There should be no foreign inclusions on the surface layer of concrete. Its humidity should not exceed 5%.
- The width of the expansion joints located in the middle of the courts should be 2.5 cm. They are filled in accordance with building codes. To reduce surface tension, concrete is cut into cards using a shrink joint.
- Installation work is carried out in dry weather at a temperature not lower than +5 degrees Celsius. Within 7-10 days from the beginning of concrete hardening, the surface is protected from precipitation and moisture loss. Next, the optimal mode is maintained to increase the strength of the base.
- The evenness of the surface is controlled using a long 3-meter rod or rule. The standards allow a slight deviation: no more than 3 mm for every 3 m of length in any direction.
The drainage design is determined for each specific project individually. Drainage is a prerequisite for high-quality foundation preparation. This is necessary not only to remove moisture, but also to prevent soil erosion in the area where the tiles are laid. Waterproofing prevents water from entering from below.
Some important points
If you take into account the important points below, you will be able to create a durable and reliable coating.
- As for the width of the path, it can vary between 60-150 cm. In order for people to disperse freely when meeting, at least 90 cm is needed. But the most comfortable path will be one whose width is more than 120 cm.
- Curbs located on the sides will prevent deformation of the coating and the appearance of dirt on it.
Curbs must be installed - Place the path away from trees (at least 2 m) so that their roots do not destroy the covering.
- When choosing a substrate, take into account the purpose of the path, the type of soil, and the characteristics of the material from which the paving stones are made.
Main types of substrates
Calculator for calculating the amount of paving stones of the selected size depending on the paving area
Go to calculations
Calculator for calculating the amount of paving stones of any size in a given area, taking into account gaps
Go to calculations
Step-by-step instruction
The quality of the load-bearing layer when laying slabs on concrete is very important due to the use of rigid fixation. If done poorly, the structure will quickly crack.
Preparing a concrete pad
To improve the quality of work on preparing a concrete base for paving slabs, you can use a three-dimensional geogrid - a honeycomb-shaped structure made of a synthetic material that is resistant to rotting and chemical influences.
When stretched, such a lattice forms a frame that is stable in the horizontal and vertical directions, reinforcing any bulk material placed in the cells. The service life of such a grating is up to half a century.
- A geogrid is laid at the bottom of the trench and covered with a 15-centimeter layer of crushed stone. The height of the grate is selected so that its edges are below the level of crushed stone and do not interfere with compaction.
- The crushed stone cushion is compacted.
- A reinforcing mesh is laid on top of the crushed stone.
Along the contour of the marking, made of pegs and cord, the formwork is placed into which the concrete will be poured. Concrete is prepared and continuously poured into the formwork so that so-called cold seams, which reduce the strength of the structure, do not form in the body of the concrete pad.
Immediately after filling the formwork, a submersible vibrator is used to compact the material structure and remove air bubbles.
The concrete pad is covered with a film to avoid too rapid loss of moisture, and for the next 3-7 days its surface is periodically moistened with water.
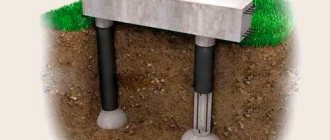
On a large area, expansion joints need to be made every 2–3 m. To do this, boards are installed perpendicular to the formwork and the ground surface, which will then need to be removed and the seams filled with an elastic compound before laying the paving stones. During temperature changes, these seams will help avoid fractures of the concrete pad. To remove moisture that has fallen onto the surface of the concrete pad under the paving stones, cut pieces of polypropylene or asbestos cement pipes are installed at some distance from each other, the upper level of which should be flush with the upper level of the concrete pad, and the lower end should be located on a layer of crushed stone. Before laying, the drainage holes are filled with fine crushed stone.
When the concrete has completely hardened, the formwork is removed.
Installation of curbs
In the recess remaining after dismantling the formwork, you need to install curbs. To do this, hard concrete is made, placed in the ditch with a trowel, and curb stones are installed on it one by one.
A rubber mallet is used to drive them into the solution. The gaps between the stones are filled with liquid concrete.
The height of the curbs should be at least 20-30mm below the top of the paving stones so as not to interfere with water flow. After a day, when the solution has hardened, the space between the curb stone and the walls of the trench is filled with sand.
How to put it correctly
The dimensions of the slabs are selected depending on the purpose: for a sidewalk, a thickness of 4–5 cm is sufficient, and if cars will drive onto the surface, then choose paving stones no thinner than 6 cm.
On a concrete base, the slabs are laid on a dry sand-cement mixture or on a cement-sand mortar.
- When using a cement-sand mixture (CSM), only sifted sand is used. The solution is prepared from 1 part cement and 3 parts sand, the consistency should be like thick sour cream. Using a trowel, the mortar is laid out in an even layer of 2–3 cm on the concrete pad. The paving stones are laid on the mortar according to the planned pattern and lightly driven into the mortar using a mallet. The horizontality of the surface should be verified as often as possible using building levels.
When using dry CFB for laying, the work is carried out in the same way as laying paving stones on a sand cushion - a layer of dry CFB (3–5 cm) is poured onto the concrete, leveled with a rule or a regular board with a smooth edge, and then the slabs are laid out on this cushion. Dry CPS is prepared at the rate of 1 part cement to 6 parts sand, but in its dry form it is not able to firmly hold the paving stones, therefore, upon completion of the work, the site is well spilled with water, which falls down through the gaps between the tiles and the mixture hardens.
Sealing seams
Between the paving stones, the seams are filled with dry fiberglass and spilled with water. The operation is repeated until the mixture stops shrinking. After 2-3 days, when the surface is completely dry, remove construction debris, sweep away small debris and dust with a broom and, if necessary, wash the surface with strong water pressure from a hose.
Useful video
You will learn even more about the technology of laying paving slabs on a concrete base from this video:
Stages of planning, design and site marking
Laying paving slabs with your own hands begins with choosing the material and planning the site.
Site layout
When planning a local area, you should not go to two extremes - do without paving at all or create a continuous covering over the entire territory. The best option is paths from the gate to the house and to the main buildings on the site and a platform for a car. This way you can avoid mud during rainy weather and at the same time preserve your lawns and perennials.
Looking ahead a little, technically, first of all it is necessary to use “beacons” to mark the area planned for installation. In this case, it is necessary to take into account the angles of the territory and observe both transverse and longitudinal slopes.
Important! The slopes must be determined before the preparatory work begins.
Selection of coating material
Now you need to decide on the choice of covering for the paths. Paving stones are considered the best option because the cost of laying paving slabs is quite reasonable, moreover, the work is easy to do yourself. The following advantages also speak in favor of this option:
- the ability to replace individual elements and dismantle the coating;
- the tiles are frost-resistant and do not float in the heat like asphalt;
- unpretentious in care;
- moisture easily seeps into the seams between the elements.
It is important to decide on the type of paving stones. Thus, factory vibro-pressed and vibro-cast elements are available for sale. Decide on the thickness, color and shape of the products. But if you want to save a little and have free time and desire, then you can make the tiles yourself.
There are several types of tile coverings on sale. Each of them differs in its characteristics, scope of use and requirements for the foundation:
- Vibro-cast products up to 4 cm thick are suitable for blind areas and walkways. The price of such elements is the lowest. Moreover, some owners make such tiles themselves.
- Vibro-cast elements up to 6 cm thick are suitable for paving driveways and parking areas. The price of such tiles is average; if desired, you can make them yourself. A base of cement and sand is prepared for installation.
- Vibropressed tiles are the most durable. Its thickness is 6-8 cm. It is used in places with heavy traffic and loads, and is manufactured only at the factory. Paving slabs are laid on a concrete base and sand cushion.
Important! The type of soil on the site affects the choice of base for paving. On moving soils, a concrete base is installed even for blind areas and sidewalks. In dense soils, a cement-sand base is made under the driveways.
We lay paving slabs with our own hands: step-by-step instructions, video
Laying of paving slabs as a covering is carried out manually diagonally. The workpieces are placed on the surface of the base in the “away” direction. This is done so as not to disrupt the integrity of the prepared and even top layer. Make sure that there is a gap of about 1-2 mm between the workpieces.
On a note! The easiest to install is the “Old Town” tile. Its blanks have special protrusions that prevent the elements from fitting tightly to each other.
In the future, these gaps will be filled with sand or a special dry mixture. This procedure is performed in order to fix the tiles in the required position. Sand during the operation of the coating will not allow the workpieces to move from their places.
After the tiles are laid on the surface of the base, they should be compacted. This must be done very carefully so as not to spoil the workpiece. Use a rubber mallet or wooden mallet. Visually control the placement of each element in accordance with the installation scheme you have chosen.
To lay the tiles evenly along and across the rows, a rope is pulled.
If it was not possible to install the tile as expected, the workpiece should be lifted, the amount of sand under it adjusted (remove or, conversely, added), level the surface using a tamper and try again to install the element correctly.
If the project involves creating a platform or path of irregular shape, with turns or curves, you will need to cut the material. Any type of tile covering can be cut quite well. For these purposes, it is better to use a grinder. Stock up on a set of discs designed for working with stone surfaces.
Before starting to cut the material, the tile should be applied to the intended installation location and marked in the form of a line. It will be used to cut off the unnecessary part that extends beyond the border. To avoid waste of material, it is recommended to cut the tiles last, when the solid pieces have already been laid.
Paving the path with installed curbs.
When the rough laying is completed, a control check of the placement of the tiles is carried out using a rule or building level to determine the presence of defects in the coating:
- unevenness;
- depressions;
- bulges.
After all defects have been eliminated, the coating is covered with river sand with a fine fraction or a mixture of sand and cement. Use a mop, broom or brush to remove excess. Use a hose to spray the surface with water. At this point, the work on laying the coating is completed.
Use the video material to visually see how the tile covering is laid. Subject to technology and the selection of high-quality materials, paving stone paths will decorate your country yard for a very long time.
Tool for laying paving stones
To make the construction of paving stone paths neat and quick, you will need the following set of tools:
- Hydraulic building level (10 m). If you do not own a laser level, which costs a lot of money, buy a regular hydraulic level.
- Construction rack bubble level 1 meter long.
- Metal profile pipe with a cross section of 20 x 40 mm: 2 meter and 6 meter pieces.
- Steel pointed pins and wooden pegs.
- White nylon cord;
- Large rubber hammer. You need to buy one high-quality mallet or three Chinese ones, as they quickly fall apart.
- Master OK.
- Two different tape measures: 2 meter and 10 meter.
- A broom or broom to sweep the seams between the tiles.
- A clamp and a heavy 100 mm steel angle. From them you need to make a device for fastening the paving stones before cutting it
Securing paving stones with a cutting clamp
- A grinder equipped with a steel disk with a diameter of 230 mm. Only use a steel disc and not abrasive cutting wheels. It is better to buy a more expensive disk with normal quality, since cheap samples quickly become unusable and will have to be replaced.
Steel 230 mm disc for cutting stone and concrete products cuts paving stones without any problems
Laying paving slabs with your own hands
Paving slabs "Old Town" have the advantage of being laid in different designs. That is, there are a lot of design and styling options. But the process itself has some rules. Firstly: the evenness of the seams. Every three to four rows, check the direction of the seam with a stretched fishing line; if necessary, straighten it with blows of a rubber hammer. Secondly: flatness on the plane. Also, every three to four rows, take a level or rule and apply it on top of the laid tile and look at the bottom gap. It should hit the minimum, if this is not the case, then we will also trim it with hammer blows, only from above. And thirdly: when laying tiles, each one should be tapped a little with a hammer. This provides additional compaction of the underlying layer of the garnet.
At the beginning of the article I gave information that the calculations will be at the end. So, when we start working on paving slabs, we ask ourselves the question: to what depth should we remove the soil and prepare the base? So, now we can calculate it. To do this, we need to know the “anchor points”, the thickness of the tiles, the features of the territory (where there will be garden paths, platforms, and most importantly - the races).
Anchor points are places on the territory where the top of the paving slabs should coincide with the elements of the building on the territory. For example: the threshold of a house, the bottom of a step, the bottom of a dedicated area, etc.
When we have all this data, we summarize the construct: the thickness of the sand cushion, plus the thickness of the crushed stone base, plus the thickness of the bedding, plus the thickness of the tiles. The thickness of the tile can be taken minus one centimeter. This centimeter is compensated when compacting the laid tiles with a vibrating plate. It should be taken into account that the thickness of the tiles may vary throughout the area, depending on the technological purpose.
So, when we have laid the tiles, if there is trimming (trimming is the place where the whole tile does not fit), then we do the trimming using a grinder with a diamond-coated disk, not forgetting about personal safety equipment (goggles, gloves), we spill the finished areas sand. The sand must be dry, finely calibrated and clean. Using a broom or garden brush, distribute the sand along the seams so that it fills the seams as much as possible; we do not sweep away the remaining sand, but leave it in an approximately even layer on the tiles.
Overview of types of paving stones
There can be many options for designing the territory. That is why manufacturers offer a large selection of paving stones for making paths. This gives the consumer the opportunity to choose the best option, taking into account his taste and the design features of the site.
Figured concrete paving stones
Concrete paving stones
The main type of paving coating is concrete products (heavy or fine-grained). The requirements for them are established in GOST 17608*2017. Based on their purpose and characteristics, paving stones are divided into 4 categories.
Table. Groups of paving stones made from concrete.
| Group | Purpose |
| A | Paving paths for pedestrians, including gardens and parks, sidewalks of local streets |
| B | Construction of surfaces in squares, public transport stops, areas for cyclists, sidewalks on main streets |
| IN | Paving driveways inside blocks, squares, car parking areas |
| G | Arrangement of high-load areas |
Concrete paving stones are laid using a certain technology
The standard standardizes the performance characteristics of all product groups.
Characteristics of all groups
Paving stones can have different shapes, but the most popular are square and rectangular products . The edges (vertical and horizontal) must be mutually perpendicular. The thickness of the slabs, depending on the shape and purpose, varies from 60 to 100 mm. The coating is available in one and two layers and can have different shades and surface textures. Paving stones are produced by casting or vibrocompression.
Ingredients for the production of products:
- Portland cement;
- fine aggregate – natural sand of fraction up to 2…2.2 mm;
- crushed stone from natural stone or gravel (up to 10...20 mm in size (depending on the thickness of the tile)) as a coarse filler;
- additives;
- pigments;
- water.
Photo of paving stones
To reinforce paving stones, steel wire or reinforcement (basalt or fiberglass) is used.
Today, concrete slabs for paving sidewalks and paths have worthy competitors.
Poor installation
Prices for concrete paving stones
Concrete paving stones
Products with rubber filling
Tiles made from crumb rubber bound with a polyurethane adhesive are also actively used today in the construction of paths, platforms and sidewalks. It has excellent characteristics; in addition, if it falls on a surface lined with rubber, it is almost impossible to get injured. Laying rubber products is not at all difficult.
Rubber paving slabs
Prices for rubber paving slabs
Rubber paving slabs
Polymer sand coating
For paving paths intended exclusively for the movement of people, tiles made from sand, polymers, additives and pigments are used. It is light in weight, can be operated under large temperature changes and has a long service life. Installation of such a coating does not present any special problems.
Polymer sand tiles
Technology for laying polymer-sand paving slabs
Prices for polymer sand tiles
Polymer sand tiles
Granite paving stones
Products that were especially popular earlier have not lost their relevance today. Paths lined with paving stones from this material are used for their intended purpose for a long time. Granite, a natural stone, is not afraid of unfavorable external environments; it is resistant to mechanical damage, vibrations and the effects of aggressive environments. And the aesthetic qualities of stone pavement do not need advertising.
Granite paving stones
Prices for granite tiles
Granite paving stones
Shapes of paving stones
The choice of product configurations is wide enough so that you can choose an option to suit your taste. The appearance of the paths, laid out using standard rectangular products, resembles masonry. The most popular options for paving stones of this type are “Old Town” (a set of rectangular and square slabs) and “Brick”. Beautiful designs are made from coil-shaped tiles. Square and radius products are also in demand.
Laying paving slabs
Installation of paving stones
Let's go directly to the answer to the question of how to lay paving stones. In principle, this is a simple process if you know some of the nuances. It is clear that each stone being laid must be located in a horizontal plane, so it must be checked with a level. If there are distortions, then the paving stones are lifted, sand is poured under it and leveled with blows of a rubber hammer. For reliability, the rule is to check the whole row for the horizontal arrangement of the material.
Some craftsmen stretch the twine horizontally for each row and carry out installation along it. This increases the speed of the process.
Installation of paving stones using a stretched stringSource i.ytimg
The second nuance concerns the bearing capacity of the road surface. For example, if paving stones are used to cover a garden path or alley around a house, then this is the technology used to lay it. The one described above.
If it is decided to use this material to cover the road from the gate to the house and the area where the car will be parked, then the paving stones will have to be “planted” on a cement-sand mortar. The recipe for the latter is: 1 part cement, 3 parts sand.
The installation operation itself is no different from the previous one. Simply, a mortar is laid under each element, on which a stone is installed, leveled along the horizon.
Laying paving stones on cement mortarSource yellowhome
There is another option for mounting on cement. It is called "dry". To do this, a layer of gravel and cement is formed. The recipe is the same. And paving stones are already laid on it, which, after completely filling the facing area, is watered with water. Moisture enters the cement-gravel layer, hydration of the cement occurs, which leads to the bonding of the layer to the stone finish.
So, we looked at three options for laying paving stones with your own hands. The last stage remains.
The video shows the technology for laying paving stones on a garden path:
Rules and design schemes
The layout of the finished product depends on the specific type of paving stone, its color, the presence of a pattern, relief, and size. The appearance of the coating depends on the installation method. Also, the design of the canvas should be combined with the landscape. Let's look at the most popular masonry samples:
- Linear. This method is also called classic, spoon, brick bond. A standard type of masonry with a simple image. Paving can be done in two ways: without shifting; with offset. The first option is used extremely rarely, as it reduces the load-bearing characteristics of the canvas. The second method is the most common. The main condition for installation is that the joints should not coincide, according to the principle of building an ordinary brick wall. The offset can be half or three-quarters, and by playing with colors you can get a diagonal and caterpillar pattern.
- Linear-angular. The bearing capacity of the surface increases, so this method is good to use in places with increased load. Depending on the arrangement of the elements, two main patterns can be distinguished: herringbone and braided. In the first case, rectangular bricks must be laid in rows at an angle of 45°, with each subsequent element located on the same curve poking into contact with half a spoon of the previous one. In the second option, the paving method is no different from the previous one, only the tiles are positioned at a right angle of 90°.
- Block. Brickwork is done in blocks. You can lay modules of two elements, alternating their horizontal and vertical arrangement, and also lay pairs through one perpendicular brick. In the first case, using only two colors, a checkerboard pattern is obtained.
- Random layout. An excellent choice, the tiles used are “Old Town”, “Brick”, “Classic Rusto”, flagstone. The elements are placed in random order, which allows you to create an original, unique design.
- Spiral, circular. One of the most difficult. The components are arranged in the shape of a circle or square.
- Artistic. Thanks to different colors, combination of different methods, and a detailed design, you can lay out beautiful designs, ornaments, and geometric shapes.
Filling joints between stones
The simplest option, which is most often used, is filling the joints with fine-grained sand. It is simply scattered onto the surface and swept with a broom or brush. Sand fills the gaps between finishing elements, giving the entire surface evenness. But that is not all.
Typically, sand filled in this way shrinks or erodes over time. Therefore, to prevent this from happening quickly, the entire surface of the path or area is watered generously. The sand in the gaps shrinks, another layer is poured in, which is watered again. Usually, filling is complete after two times.
For sites where high load-bearing capacity is required, a cement-sand mortar of liquid consistency is used instead of sand. It is simply carefully poured into the seams, filling them to the brim. The process is tedious and time-consuming.
You can replace it with a dry version. That is, scatter a cement-sand mixture over the lined surface. Use a brush to fill the gaps between the stones, and then fill the entire area with water. After the mixture shrinks, the process must be repeated.
Filling seams between pavement elementsSource trotuar-style
Benefits of paving stones
You can lay paving stones in your summer cottage yourself
The path can be created using various materials. The following types of paving stones are distinguished:
- Granite.
- Vibrocast.
- Clinker room.
The difference in material may lie in shape, color, and decor used during manufacturing. The advantages of laying paving stones include the following:
- The high strength of the material ensures a long service life even when exposed to high loads.
- Environmentally friendly, because only components of natural origin are used in production.
- Great load-bearing capacity. Some paving options can be used to create parking spaces.
- Low temperature resistance. Frosts can cause changes in the basic properties of the material, reducing their strength.
- Beautiful appearance. At the same time, it is possible to use different patterns for laying paving stones, thereby achieving different patterns.
- Easy to install. The work of laying paving slabs can be done independently; for this you only need to have tools and materials, and also follow the recommendations.
- It is possible to reuse the material. A situation often occurs when, after a long period, the owner of a site wants to make changes. Previously created paths can be dismantled, after which the paving stones are reused.
The cost of the material is quite high, so the created site must be of optimal size. It is inconvenient to walk on the created surface in heels; in addition, difficulties arise when processing the material. A common problem is the erosion of the foundation, which causes subsidence of individual areas.
Briefly about the main thing
So, we told you about how to lay paving stones with your own hands from the very beginning. Let's face it, it all seems easy. But in reality, the process of installing road material is not easy. Experience and skills in working with construction tools are required. But for those who decide to try their hand, we recommend starting in a small area somewhere in the back of the yard. If the end result does not satisfy you, then you should invite the masters.
Source
Configurations and forms
The shape of the paving stones can be any, you just have to choose the most suitable option for yourself. If you use rectangular products, the path will look like brickwork. Another good option is paving stones made in the form of a coil. Radius and square options are also popular.
The process of laying paving stones
Variety of paving slabs
According to their form, piece materials for paving paths and platforms are divided into two types:
- tiles: modules with a large length-to-thickness ratio;
- pavers: small stones with a low length to thickness ratio, almost cubic in shape.
Based on material, tiles and paving stones are divided into several types.
Cement-sand
From the name it is clear that the raw material is cement-sand mortar, often with the addition of granite screenings. This is an inexpensive and therefore popular type of coating.
Three manufacturing methods are practiced:
- vibration pressing. In addition to vibration, the solution poured into the molds is subjected to press pressure. The production of such tiles is possible only in factory conditions. It is expensive, has increased strength and wear resistance, and is installed in areas with high traffic or high loads. The surface turns out to be rough, so the coating should only be sprinkled during heavy ice conditions;
- vibration casting. The solution is poured into molds, which are subsequently installed on a vibrating table. Vibration compacts the concrete, expelling air from it. These tiles are suitable for laying in the courtyard of a private house. It is relatively cheap. Can be produced in artisanal conditions. Disadvantage: in cold weather, even slightly damp tiles become slippery; they must be sprinkled with sand;
- hyper-pressed. Forming is carried out without vibration - only with a press. This allows you to fully automate the process, thanks to which tiles with sufficiently high strength are cheaper than vibration-pressed tiles.
Polymer-sand
Instead of cement, polymers, that is, plastic, act as binders; advantages of the coating:
- durability due to high abrasion resistance;
- high frost resistance: no pores;
- rich, bright colors;
- light weight: simplifies delivery.
Disadvantages: over time, tiles, unlike cement-sand tiles, can become deformed; it also has a high coefficient of thermal expansion.
Other varieties
In addition to the above types, the following are also produced:
- clinker The modules are molded from special clay and then fired at a temperature of 1200 C. The tiles are durable, with rough colors and a varied range of natural pastel colors. The cost is relatively high;
- rubber. The raw material is a mixture of rubber, polyurethane and filler. The tiles are non-slip and soften the impact of a fall, so they are ideal for laying around the pool and on children's playgrounds;
- granite. Expensive, executive-class coating with high strength and wear resistance.
With all their diversity, cement-sand modules remain the most popular. The plasticity of raw materials allows them to be given any shape.
Basic elements of landscape design
Landscaping using natural components is carried out by land owners in accordance with their preferences, needs and financial capabilities. However, in order for the opening landscape to please the eye, it is necessary to take into account many nuances.
Laying paving stones
It is important to pay attention to the location and appearance of the main groups of elements:
- buildings, both residential and auxiliary;
- lawn;
- green spaces;
- artificial reservoirs;
- small architectural forms, decorative details;
- technical components, such as lighting, watering system, etc.;
- platforms and paths.
Paving slabs in the landscape
Garden paths can perform a primary function - providing access to objects, or a secondary function, allowing you to walk around the territory. Properly made, they help you move comfortably, without fear of getting your feet dirty. The main materials used in their construction are paving slabs and paving stones.
When choosing the type of coating, the area of the site, the characteristics of the material, and the type of cladding of buildings are taken into account. Many, using their design abilities, combine different types of products.
Types of garden paths