If you have a summer cottage, then you will certainly want to arrange it in such a way that the time spent here will be remembered for a long time as vivid impressions.
Wooden terrace around the pool
Some people make a mini football field, others a tennis court, others prefer their own garden. This article will look at how to arrange the space around the pool so that it is comfortable not only in the water, but also near the pool itself. And to do this, you can build a wooden terrace around the pool, which will accommodate a table with chairs, a sun lounger, and if you wish, you can even set up a barbecue.
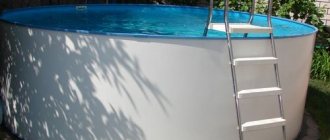
Swimming pool with decking
In a word, relaxing near the water in your courtyard will brighten up your leisure time, and the guests you invite to your place will not remain indifferent to such an original solution for arranging a recreation area.
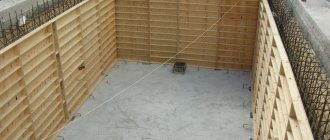
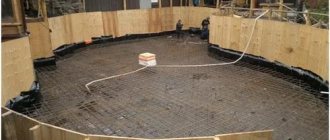
Preparatory stage of construction
To begin with, it is best to make a sketch of the structure that will need to be built. The plan will help calculate the amount of materials, visualize the final material and take into account various important details of the construction.
The first illustration shows a sketch of the pool around which the wooden deck will be built. Since in this particular case the pool is not immersed in the ground, but is located above the surface of the earth, the platform around it will be quite high, and there will be steps leading to the terrace. Fencing structures will be installed along the entire perimeter of the wooden terrace:
- railings (they are shown in green in Figure 1);
- the fence, or Privacy Screen, is what this structure is called in the west (shown in red in Figure 1). The purpose of this element is to create a closed recreation area from prying eyes.
Figure 1. Plan of the terrace around the pool
Privacy Screen - Curly carved wood panels
Consider the direction of the boards.
Attractive bathhouse designs: photos of steam rooms with a swimming pool
The design of the pool, as well as its finishing, can have a wide variety of designs. For construction, it is advisable to use a strip or column-type foundation, although concrete is also suitable. The first option is used in cases where the project or area does not have suitable conditions for installing support pillars.
Design of a bathhouse with a swimming pool: terrace – 20.3 m², relaxation room – 14.3 m², steam room – 5.2 m², swimming pool – 21 m²
Sometimes, for reasons of practicality, other types of foundations can be used. For example, if the construction of a small bathhouse is carried out on a slope, the best option would be a structure that is held in place by screw piles. To create a beautiful bathhouse, it is advisable to use timber. This material can be profiled or glued. The recommended cross-section size is 10x15 cm. If the bathhouse is located in a region with harsh climatic conditions, the diameter of the beam should be increased to 15x15 cm.
Original project of a bathhouse with a swimming pool and barbecue on an open terrace
An excellent option for developing a medium-sized plot would be a bathhouse with an outdoor terrace and a swimming pool. The dimensions of such a building will be 9.5x12 m. To save space inside the building, the pool is moved to the terrace along with a relaxation area (barbecue).
Helpful advice! By abandoning the use of a barbecue, you can refurbish the terrace, thereby obtaining a separate room for a swimming pool and a wonderful glazed veranda for relaxing after taking water treatments.
To save space indoors, the pool can be installed on an outdoor terrace
The entrance to the bathhouse from the terrace is through the hallway, where visitors can leave their outerwear. If desired, the owner can arrange a living room or a room intended for relaxation next to it. The area of this project allows you to organize in the bathhouse all the necessary premises for comfort:
- entrance hall with wardrobe (3.33 m²);
- guest or recreation room (18.88 m²);
- bathroom (4.72 m²);
- combustion chamber (4.72 m²);
- shower room (10.45 m²);
- steam room (11.74 m²).
Design of a bathhouse with a steam room, a wash room, a relaxation room, a veranda and a swimming pool on the open terrace
The advantage of such a bathhouse is the presence of a small corridor (5.29 m²) that connects the interior spaces. Thus, none of the rooms (except the living room) is a walk-through room.
Impressive projects of bathhouses with a swimming pool: photos of large-scale buildings
Owners of spacious plots of land can afford to build a large bathhouse. For convenience, it is advisable to equip such a structure with two entrances. This technique is implemented in the 12x18 m project. You can enter the building from two sides: from the porch and terrace.
The entrance from the porch leads to a small vestibule. This compact room between the street and other rooms serves as a kind of airlock that prevents cold air from entering the structure. From the rest room you can get to any point in the bathhouse. This arrangement of rooms is optimal and allows you to easily move around inside the building without creating inconvenience for guests. The second entrance from the street is through the terrace. Almost half of the total space is allocated for the installation of a swimming pool for a bathhouse. The area of the artificial reservoir is 62.46 m².
If finances and the size of the plot allow, then you can build a large bath complex
Helpful advice! If necessary, the dimensions of the pool can be reduced, and the free space can be used to furnish a bedroom or kitchen. Thanks to this, it will be possible to use the bathhouse not only for relaxation, but also for permanent or temporary residence.
Much more planning possibilities can be obtained by increasing the usable area of the bathhouse by constructing an attic. This will cost much less than building a second floor. But it will be possible to organize the premises to create additional comfort. In photographs of bathhouses with an attic you can see modern and cozy bedrooms, billiard rooms, small gyms with exercise equipment, etc.
By building an attic floor over the bathhouse with dimensions of 11x14 m, you can increase the total area of the interior to 260 m². In this case, the basement of the building will be used to accommodate technical rooms. On the ground floor it is advisable to arrange the main rooms:
Project of a large bath complex measuring 16 by 20.1 meters
- dressing room;
- shower;
- steam room;
- rest room;
- bathroom
The attic can be used to accommodate a shower room, bedroom and kitchen. Large-scale projects are good because having enough free space allows you to create a layout that will meet the personal needs and wishes of the owner, without taking into account the footage.
Supports
We are considering a terrace project on supports, each of which needs an individual foundation.
Consider the option of arranging concrete supports with a diameter of 12 inches each.
| Feet | Centimeters | Inches | Centimeters |
| 1 | 30,48 | 1 | 2,54 |
| 2 | 60,96 | 2 | 5,08 |
| 3 | 60,96 | 3 | 7,62 |
| 3,5 | 106,68 | 3,5 | 8,89 |
| 4 | 121,92 | 4 | 10,16 |
| 5 | 152,4 | 5 | 12,7 |
| 10 | 304,8 | 12,7 | 32,258 |
| 11 | 335,28 | 11 | 27,94 |
| 12 | 365,76 | 12 | 30,48 |
| 15 | 457,2 | 15 | 38,1 |
| 20 | 609,6 | 20 | 50,8 |
- According to the project, holes are dug of the appropriate diameter and a depth of about 4 feet.
The holes should be the same depth when preparing - 4 feet or approximately 123 cm - Afterwards, so-called “sleeves” made of roofing material secured with adhesive tape are inserted into these holes. They should protrude approximately 1 foot above the ground surface.
Roofing felt is installed and a frame of three reinforcing rods connected with wire is placed inside - Concrete is poured into these “sleeves”, and metal connectors are installed on top, to which wooden supports will be attached.
The solution is transported by wheelbarrow and poured into the formwork with a shovel, compacting or piercing the mixture with an in-depth vibrator
An example of attaching timber to concrete supports
To avoid digging holes again, make a sketch with dimensions that will show the coordinates of each support. It’s better, of course, to do this on a site plan, especially if there are plants in the construction area or there are communications, then you won’t have to uproot a tree or repair the water supply.
Figure 2 shows the location of concrete supports (Footings), as well as their coordinates. If the support ends up on a water pipe, or if there is a tree growing nearby, simply move the support slightly to the side. It is better to calculate everything and draw it on paper rather than face unpleasant surprises during the construction process.
Figure 2. Location of supports
Having marked the location of the supports on the site, dig holes for them and concrete them. Don't forget to install post connectors into the wet concrete supports. After the concrete has hardened, secure the vertical supports in metal connectors. Use 4" x 4" cross-section posts for supports since the deck is less than 6 feet high. If the height exceeds 6 feet, posts with a cross section of 6x6 inches should be used for supports. Metal connectors should be installed in the appropriate size.
The third picture shows a diagram of the concrete supports used in this project.
Figure 3. Scheme of concrete supports
Beams. Longitudinal location
Next, according to the project, it is necessary to install beams on vertically located supports. This is the next step in building a deck around the pool.
Triple or double beams are installed according to the load. In the case where there is no more than 12 feet between adjacent beams located in one row, then double beams are installed, as in this project under consideration, where between each two nearest beams there is no more than ten feet.
The cross-section of the longitudinal beams can vary, ranging from 2x4 inches to 2x12 inches. This choice will depend on the number and distance between adjacent lines of longitudinal beams. It is best to use as few supports as possible; accordingly, there will also be fewer beam lines, and the distance between them will be greater. But then you won’t have to dig a lot of holes for supports, which are not so easy to build.
The fourth picture is a diagram of the beams. The dimensions of these items are 2 x 10 inches.
Figure 4. Beam diagram
Hidden under the lawn
A swimming pool helps the owner of a house or cottage cope with the summer heat. But sometimes you have to choose between a green lawn and a pond, because... The area of the site is small.
A sliding deck lined with artificial grass helps solve the choice problem. It looks like a lawn, but when pulled back, it reveals a pool hidden underneath. When no one is swimming, the platform closes it, again forming a lawn. Everything is done with one click of a button.
The closed platform can be used for relaxation, games, etc.
A visual overview of this technology:
Cross beams
After the longitudinal beams are installed on the supports, transverse beams are installed on top of them. At this stage, it is important to maintain an equal gap between the timber being laid. This value will depend on two conditions:
- how the deck boards will be laid (across the beams or at an angle);
- what material will the deck board be made of?
If the boards are laid at an angle, the distance between adjacent cross beams will be 12 inches. If the deck board is laid perpendicular to the joists, then the distance between the joists will be either 16 or 24 inches.
The cross beams are installed at 24" spacing if the following materials are to be used for the deck board:
- ironwood (Ipe Wood),
Ipe decking board (Iron wood) - Tiger Wood,
tiger tree - polymer board.
Wood-polymer composite decking board
These rocks have very high strength and are slightly deformed by bending under vertical loads, so the beams can be placed at a considerable distance from each other.
Also, durable and stable materials used for deck boards include polymer boards. Their advantage also lies in the fact that they do not require protective paint coatings, and also do not have knots that reduce the strength of the materials.
This project uses a fairly soft material, namely cedar deck boards. Therefore, the cross beams will be fixed at 16 inch intervals.
Canadian red cedar decking board
For cross beams, beams with a cross section of 2" x 8" are most commonly used.
Figure 5 shows what the frame of a wooden deck around a pool will look like with the cross beams installed.
Figure 5. Frame of a wooden deck around the pool with installed cross beams
Once the beams are installed, they should be tied together, as shown in Figure 6, so that the structure becomes solid and as stable as possible.
Figure 6. Bundle of decking boards
Prices for the model range of decking boards
Terrace board
steps
The next step in building a wooden deck is to install the frame for the steps. The basis is the stringers, which are located at a distance of 16 inches from each other.
To calculate the size of the steps, you can use our calculator with instructions.
Scheme of stringers
To make them, use a board with a cross section of 2x10. In order for all the steps to be the same in length and height, you first need to make a pattern for one step, and then sequentially mark the steps on the blank for the stringer.
Stair stringer is a sawtooth-shaped wooden board or beam with rectangular teeth
For the convenience of ascending and descending the steps, the dimensions of each step, firstly, must be the same, and secondly, in terms of the height and depth of the step, they must be within certain limits. For height, it measures 6 to 8 inches, and for depth, it measures 12 to 16 inches.
There are, of course, non-standard sizes of steps, but most often they are made within the limits given above.
At the bottom, all stringers are connected by one board for stability of the structure. Figure 7 shows the frame of the terrace and steps.
Figure 7. Frame of the terrace and future steps
Hidden Water Pools transform into a patio
Patios are open courtyards enclosed by fences, building walls, or gates. They are adored for their homely atmosphere of comfort. Fountains, pools, small gazebos, and openwork paths add special beauty to the patio. A small courtyard of a private house is decorated with paving stones.
The round platform, by pressing a button, is transformed into a swimming pool, and a fountain is placed in the middle. Everything is beautifully illuminated and looks mesmerizing in the evening.
The bottom of the pool can be raised to create either a level floor or a picnic patio with the optional extension of the table.
Example:
The mechanism and design of this pool were developed by Hidden Water Pools. This option is very suitable for families with small children. You don't have to worry about letting them go outside. Let them play quietly in the yard alone. And if children want to swim, the depth of the pool can be adjusted.
A short visual overview of this technology:
Base for railings and fences
Before laying down the deck boards, you need to install the posts for the railings and fence. The posts are made from timber with a cross section of 4x4 inches. The height of the fence is 6 feet, this is enough to make the recreation area enclosed. But the height of the railing can be of two sizes.
- If the height of the terrace is less than 6 feet, then the railings are 3 feet.
- When the deck height is more than 6 feet, the railing increases to a size of 3.5 feet.
The distance between railing and fence posts should not be more than 6 feet to ensure the structure is secure enough.
In Figure 8, the posts for the railing and fence are already attached to the main frame of the terrace.
Figure 8. Diagram of fixed posts for the fence
Deck board
Now you can proceed directly to laying the deck boards on the surface of the terrace, as well as sheathing the steps. Under no circumstances should the board be installed without gaps. When the boards swell from moisture, they will increase in volume, and if there is no gap between them, they will float on top of each other. It's like if you lay laminate flooring close to the walls, leaving no gap or room for expansion.
Installation diagram for decking boards
Boards can be fastened with screws or nails, depending on how convenient it is for you and what tools are available. If you are planning to nail a deck board, an automatic nail gun will make this task easier. They will work much faster, and most importantly, your fingers will remain safe and sound.
Do-it-yourself deck board installation
When laying deck boards, it is not necessary to measure each one to the nearest inch. Along the edge of the terrace, the board may overhang a little, just after the entire terrace is covered, you will need to go with a saw along the contour and cut off the excess. The result of laying the deck board is shown in Figure 9.
Figure 9. Terrace cladding
The same deck board as on the terrace is laid on the surface of the steps. You can also cover the steps with vertical boards so that the internal frame is not visible. Such steps are called closed type, and these are the ones made in this project (Figure 10).
Figure 10. Step cladding
Railings and fence
Once the patio deck and steps are laid, you can begin installing the railings and fence.
Examples of decorative fencing - diagrams
The design of these structures is very diverse, and the materials that can be used to manufacture the components of the fencing sections may vary.
For example, sections for railings may include the following elements:
- glass partitions;
- vertical or horizontal balusters made of metal or wood;
- combined inserts.
The easiest way is to first assemble the sections for the railings, and then simply install them between the corresponding supports. But to do this, you need to accurately measure the openings between the pillars in order to make the sections correctly and not make mistakes with the dimensions.
In this project, sections were used, along the contour of which a beam with a cross section of 2x4 inches is located, and glass is inserted inside. Glass should be at least 3/4 inch thick. Figure 11 shows one such section.
Figure 11. Fence section
When all sections are made, they can be installed in place, as shown in Figure 12.
Figure 12. Installation of fencing sections
Since this terrace is not high, handrails were made for the steps along the upper part to make it more convenient to go up and down without fear of losing your balance. If the terrace is higher than 6 feet, then it is advisable to make full-fledged fencing sections along the steps.
The fence uses a board with a cross section of 1x6 inches, which is driven horizontally to the posts at 0.5 inch intervals. It is easiest to stuff it from the outside, since it is quite difficult to join the boards and supports from the inside, and you will have to make additional stiffening ribs. The thirteenth illustration shows the final result of construction.
Figure 13. The final result of constructing a terrace around the pool
Naturally, after all the work, it is necessary to apply a paint coating that will protect against moisture and termites; accordingly, the terrace will last much longer.
For this type of terrace construction, the deck board is replaced every 5-7 years, but the frame will last for decades if you make it from specially treated wood, which is called pressure treated wood, and has a characteristic green color.
Building a three-dimensional model on a computer is very helpful during construction. With this model, firstly, you will be able to clearly see the end result and see different design solutions, as well as make changes before you start construction. Secondly, with the help of such a model you can easily calculate the material and not purchase too much, which will help you save a lot.
Good luck with the construction and have a nice holiday!
Terrace board near the pool
Video - Laying decking near the pool
Video - Installation of decking boards on Twin fasteners
Why do you need a roof?
Both adults and children love to swim, especially if it is very hot outside. In addition, swimming in the fresh air is good for your health.
Clean water in the pool - leaves and other debris do not fall into it
A large reservoir at the dacha is a good supply of water, which will be useful during drought for watering the garden. This symbiosis is very beneficial.
Since watering must be regular, the water in the pool is changed frequently, so that it remains clean even without the use of filtration equipment. Only a minimum of chemicals will be required (you can learn about pool water purification from the article on our website).
Swimming pool in the country with a polycarbonate roof
Advantages of a canopy over a pool
What does a canopy do? After all, you can sunbathe in the open sun and not waste time and money on roof installation.
Let's note the advantages of using a roof for a pool:
- Any roof, even transparent, will partially reflect and dissipate heat, which solves this problem.
Swimming pool at the dacha under a roof on rails - The roof prevents leaves from tall trees growing nearby from getting into the pool. Also, birds will not shit in it and insects will not fly into it.
- If the pavilion above the pool is low and made in the form of a dome, it does not allow water to evaporate. Also, due to the reduced amount of ultraviolet radiation entering the water, the chlorine necessary for disinfection will not evaporate as actively.
The pool is completely closed from debris, although the owners will have to worry more about caring for the roof itself - Wind and rain will not interfere with swimming. Some pool covers eliminate these inconveniences and allow you to use the pool all the time.
- It happens that the canopy performs a purely camouflage role. For example, the neighbors have a two-story house from which the yard with a swimming pool can be seen at a glance. Those who do not want to expose themselves can hide behind a small, light roof.
Such a lightweight awning will protect the pool from blowing - A roofed pool can be combined with a greenhouse. This creates a unique humid atmosphere inside, which is necessary for some vegetables and fruits. For example, cucumbers in such conditions will grow incredibly quickly, and the fruits will be very juicy.
Swimming pool inside a greenhouse – combining business with pleasure - A greenhouse can be without plants. With such a roof, the water warms up faster and stays warm longer. This is convenient in regions where summers are not very hot.
Indoor swimming pool at the dacha made of polycarbonate - this height of the canopy will allow you to swim even if it is closed - Another plus is the unusual design that pleases the eye.
Disadvantages of using a roof over a pool
Of course, a canopy over a pool also has its disadvantages:
- Even a light frame roof will cost a lot, let alone profile telescopic sliding models installed on stationary pools.
However, it is worth considering that if the water in the pool gets dirty quickly, it will have to be changed frequently. Over the course of a season of operation, this can result in additional expenses of up to 10-15 thousand rubles, so the price of the roof will be gradually compensated. - The pavilion is installed mainly over stationary pools or powerful frame models. For temporary ones, this solution is not entirely suitable.
Canopy for a swimming pool at the dacha
- Installation of complex telescopic systems will require additional space, which may not be enough on site.
- If the pool itself remains clean, the roof above it will take all the “blows” and will have to be washed at least once a month, but it is better to do this more often and with the help of cleaning products.
This pool is made as an extension to the house
- If the roof above the pool is low, a greenhouse effect may be created underneath, making swimming less comfortable. Condensation will form on the roof, so it is worth providing good ventilation.
The photo shows how the owner covered his light frame pool at the dacha with an awning tent. An excellent, and most importantly, inexpensive solution that will not protect except from strong winds.
Swimming pool for a summer house with a roof - a ventilated awning is used