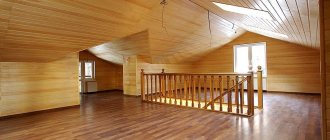
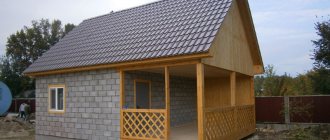
Finishing ceilings and walls with clapboard, be it wood, plastic or metal, involves performing successive stages of work. By following the correct technological processes, you will receive high-quality and durable coating.
If you choose wooden materials, they are environmentally friendly and have a lot of useful properties, your home will be filled with a wonderful woody aroma. This is a chance to reconnect with nature and old traditions. Give warmth and comfort to your family and loved ones!
Classification of lining
Depending on the type of material from which the lining is made, it is divided into the following types.
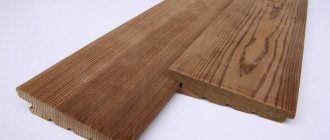
Wooden
This material has many subspecies, the difference of which is in the varieties and species of wood. It is environmentally friendly and suitable for framing any surfaces; it is often used for cladding partitions in apartments. Easy to install.
The only disadvantages include the need for pre-treatment and subsequent careful care.
Plastic
The plastic option saves your budget. Suitable for both walls and ceilings. It looks aesthetically pleasing and fits almost seamlessly.
The disadvantages of the material are its short service life. It fades in the sun and cracks in frost.
Metal
Such panels are made of aluminum and steel, which have an additional protective layer. The color scheme and texture can satisfy any buyer.
Aluminum products are designed to last quite a long time. Ideal for outdoor use. As for steel, if the integrity of the protective coating is compromised, corrosion processes will begin and the metal will rot.
Types of fasteners
Using clamps
Working with clamps takes a little longer, but installation is much more reliable.
- The number of fasteners is calculated.
- Their location occurs on each line of the frame.
- You need to measure all the walls and mark the location of the clapboards with chalk.
- With a vertical arrangement, starting work does not matter.
- And with horizontal you need to start from the bottom.
- Surfaces are treated with an antiseptic if it is outdoor work.
- The lining is attached to the sheathing, then the next lining is attached to it, etc.
It is best to purchase self-tapping screws with a size of 3x20 mm; they are not too large and not small. This type of fastener is hidden.
Using self-tapping screws without clamps
To connect the lining to the sheathing, you need to drill holes for the screws. Initially, a plastic self-tapping screw is inserted, then a metal one is screwed in. Thus, docking and strong fixation occurs, but this method is not hidden, the screws will be visible.
Using finishing nails
The use of nails is still relevant for fastening lining. For such work, nails with a small head, 30-40 mm long and no more than 1.4 mm wide are taken.
Nail fastenings:
- fastening in a groove (in a recess);
- fixation through a spike.
These fasteners and nails are more suitable for interior work. Open type of fastener.
Construction stapler
A construction stapler is often used to fasten the lining. But it is best suited for fastening plastic and PVC lining. For softer and more “obedient” materials that lend themselves well to this type of installation.
What is the difference between lining and eurolining
Both the first and second options allow you to finish any surface with high quality. However, eurolining differs in some characteristics:
- Euromaterial is produced from other types of wood using other technological processes;
- has an elongated groove for fastening;
- it has other geometric parameters;
- products undergo higher quality drying and special processing;
- characterized by an additional ventilation function;
- has a system for removing accumulated moisture, which protects the wood from destructive processes (special grooves are made on the back side of the panel so as not to disturb the aesthetics of the wood);
- has a higher cost.
Preparatory stage
Before you begin attaching the lining to any wall, you should carefully prepare.
Processing of wooden products
Initial wood processing is very important and comes first:
- If you use coniferous wood, it is first degreased and the remaining tar stains are removed. Acetone works well for these manipulations. Then everything is wiped with a damp cloth and dried.
- To achieve the same shade of wood, treat it with a solution of oxalic acid and pharmaceutical peroxide.
- It is best to immediately repair existing flaws with wood putty.
- To preserve the natural texture and add richness to the shade, stain or similar special impregnations are ideal.
If you miss the moment of processing, clapboard-lined walls can bring a lot of trouble in the future! Chemical compositions, which is very important, protect against fungal infections and the activity of various insects that destroy the structure of the tree.
Preparing walls and ceilings
High-quality prepared walls and ceilings are the key to a successful outcome of the work and durability of the coating. Therefore, we proceed step by step:
- All surfaces are cleaned of dust and other contaminants; you can use both a home and industrial vacuum cleaner.
- Concrete and brick, in order to further prevent the proliferation of fungal colonies, are treated with antiseptic and water-repellent agents. Antibacterial and antipyrite (fireproof) solutions are suitable for wood surfaces.
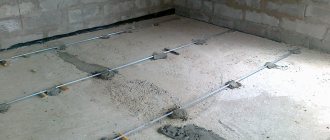
- Waterproofing on walls is necessary to create a water barrier in houses such as log houses or other wooden materials. Others do not need such protection. A vapor barrier layer (roofing felt, polyethylene, foil) is immediately laid on concrete and brick surfaces. The vapor barrier is mounted on fixed and leveled strips measuring 15x30 mm. How they will be installed - vertically or horizontally - depends on which orientation you prefer for the lining.
On a note! If the lining for the walls will be located vertically, the sheathing is mounted horizontally, and the strips for the vapor barrier are already in a vertical position and vice versa.
The vapor barrier is secured using a stapler. Make sure that the material is not too stretched, otherwise when temperature changes it may sag and condensation will accumulate there.
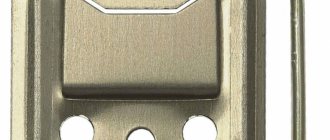
Kleimer product description.
Clamps are universal brackets made of galvanized steel, firmly attached to the frame, and the lining is placed on the hook of the bracket. This is a fairly rigid product that provides reliable fixation of the lining panel.
There are a variety of brackets with tenon-type hooks; they enter the side of the paneling, firmly engage it and protect the panel from deformation. Installing clamps is so simple that any novice craftsman can handle it.
Advantages of clampers:
- No holes in the panel that damage the product;
- Preservation of the material from cracking, water ingress and wood rotting;
- The fastening is hidden from view, the surface of the wall or building looks more beautiful and solid;
- The clamps are easy to install and dismantle without special tools;
- The clamps are reliable and durable, not subject to corrosion, as they are made of galvanized steel;
- Fasteners are selected according to the size of the panels;
- The clamping hook is durable and will not bend under the weight of the lining;
The price of clamps is slightly higher than the cost of conventional fasteners (nails and screws), this is their only drawback, but it pays off due to the obvious advantages of this fastener.
Important addition!
Carefully select the size of the clamp in accordance with the thickness and class of the panels. Two is used for plastic, three and four for euro lining, five and six for products made of linden and aspen.
Rules for fastening the clamp
Now let's begin describing the fastening of the lining using clamps. We will prepare the required number of clamps - 20 pieces per 1 square of lumber and prepare all the tools. If desired, you can calculate the required number of clamps more accurately.
To do this, we will make simple calculations: divide the length of the board in centimeters by the distance between the frame profiles in centimeters, add one to the result and find out how many fasteners are required for one panel. Then we multiply the result by the number of lining packages and the number of panels in each package. The end result will be the answer to the question: how many clamps need to be purchased in total.
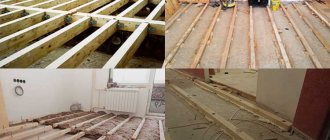
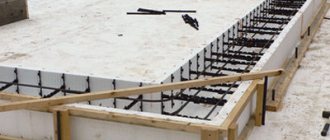
How to make sheathing for lining
To correctly align the beams under the sheathing, follow the recommendations below:
- saturate the beams with a fireproof solution and protect them from fungal infections, as described above;
- install the slats perpendicular to the lining;
- maintain the same distance, the step between the bars should be 40–50 cm;
- leave gaps between the floor and ceiling;
- the frame must be perfectly level, use plumb lines or a level to check;
- The gaps that arise between the beams and the wall at the fastening points are filled with special spacers.
Why install the sheathing?
Fastening the lining to the clamps is carried out only using lathing. Installation directly on the wall is not recommended. The thing is that decorative panels need to be installed on a perfectly flat surface, especially if it concerns a concrete or brick wall, such a result is very difficult to achieve, but with lathing the task is simplified several times.
Of course, you will still have to level the walls before starting work, but there is no need to bring them to perfection. And if you install the panels on an uneven surface, they will begin to bend and deform, which will greatly affect the visual appeal of the finish.
Another important argument in favor of lathing is that it is much easier to attach panels to wooden beams than, for example, to concrete. The lathing contributes to the safety of the panels and their durability. The distance that remains between the finishing material and the wall does not impede air circulation, therefore reducing the risk of mold and mildew.
To increase the durability of the sheathing, it is necessary to treat the wooden beams and the wall itself with an antiseptic or primer. This, even in conditions of high humidity, prevents the boards from rotting and the formation of mold and mildew.
It is important to maintain a distance between beams of about 60 cm in order to preserve the original appearance of the wooden panels and protect them from deformation. When installing planks, for the same reason, to maintain the shape of the planks, it is necessary to use a building level.
Installation of insulation
The insulation technology is quite simple. The most optimal combination of layers would be:
- insulation;
- vapor barrier;
- lining.
The existing sheathing greatly facilitates the process of additional insulation; the material is attached between the already installed racks.
One of the most popular and sought-after insulation materials is polystyrene foam, but it is not at all suitable for rooms such as bathhouses. Here it is better to use basalt wool. It has excellent characteristics, and, most importantly, does not burn.
Ways to fasten the lining
As a rule, any facing material has a tongue-and-groove system; it is designed for high-quality fixation of the planks among themselves. But the lining should also be nailed to the sheathing frame. To do this, use nails, clamps, staples or screws. In addition, the attachment points can be made hidden or open. It is important to ensure that the entire structure is properly fixed and that the planks are not damaged.
Mounting stapler
Using a mounting stapler, fasten the lining quickly and conveniently. The staples fit into the grooves and connect the facing elements well with the sheathing.
Kleimers
This method allows you to cover walls with clapboard very neatly, but is one of the most difficult. The nails must be driven directly into the grooves so they remain hidden.
The clamps securely fix the plank, but it is very important to initially accurately select the nails in size. Typically, sets of clamps already include nails; if they are not available, the choice should be based on the thickness of the grooves.
Self-tapping screws and nails
This option involves diagonal fastening. The working strip is fixed in the groove of the previous one, and the head of a nail or self-tapping screw presses it to the base.
Screws
Special decorative screws are used to secure the board on the front side. To make your walls and ceilings look aesthetically pleasing, installation should be done extremely carefully.
Vertical cladding with plastic lining: step-by-step instructions
You will need the following materials:
- dowels 6x80 mm;
- staplers;
- plastic lining;
- base skirt;
- decorative plastic corners (external, internal or universal);
- beams for the construction of sheathing (50x50 mm);
- self-tapping screws;
- glue for plastic;
- U-shaped hangers.
Step 1. Install the building sheathing. If insulation is planned, we make a double sheathing (see above). If the house does not need an additional thermal insulation layer, we limit ourselves to a single-layer sheathing.
Lathing, photo
Step 2. Take the plastic lining and fasten the outer part with self-tapping screws to the sheathing. Do not forget that the plastic panels are laid strictly perpendicular to the sheathing. We cut the plastic panel according to the required measurements with a hacksaw.
Start profile
Attaching the first panel
The panel rests on the starting profile
Step 3. We fix the inner part of the lining with a construction stapler to the frame beams. Always check that the entire surface of the panel has entered the lock to prevent further deformation of the wall and loss of integrity.
Installing a second panel
Screwing in a screw
Step 4. We insert the next board into the fastenings and fix it with a stapler to the sheathing in increments of 40 cm.
Step 5. The finishing panel is secured with a screw and press washer. After this, you should apply a decorative corner and secure it with glue.
Finish bar
Punching mounting holes in the last panel
Latching the last panel
Vertical siding
Example of façade finishing
Prices for popular models of screwdrivers
Screwdrivers
At the end of the article, we invite you to carefully read the video instructions on how to properly install lining to the facade of a building.
Video - Covering a frame house with clapboard, using the example of one wall
Installation of accessories
Finishing ceilings and walls with clapboard also involves installing fittings that allow you to hide the edges of the material. Often, a fillet or plinth is used for these purposes; they are secured with small nails.
Basic installation rules:
- floor connecting strips are fixed to the floor;
- products for ceilings are fixed accordingly;
- strips for corners, when the adjacent clapboard wall in the room is not sheathed, are mounted to this wall;
- strips for corners located between sheathed walls are installed on the shorter one.
When working with plastic lining, the fittings are glued together.
How to calculate clamps for fasteners
The low cost of clamps is a great opportunity to purchase them with a reserve. For 1 m2 you will need 20 pieces of them, but from our experience we recommend taking 30 pieces in reserve.
You can correctly calculate the number of clamps needed as follows:
- Measure the length of the lining with a tape measure.
- The location of the clamps is usually calculated at a distance of 40-60 cm. You can do +- 5 cm. It is better not to do less or more.
- The division works like this: the length is divided by the distance, plus one. Visually: 200 cm: 40 cm + 1 = 6 clamps per lining.
- Then you can calculate how many of them will be needed for all the linings and work.
- Example: 10 linings X 6 clamps = 60 clamps.
- Usually 100 staples are sold per package, but you can also find them sold individually in regular hardware stores.
It is very easy and quick to calculate how many clamps are needed for the job.
We cover the wall with clapboard
It is very important, before starting cladding, to keep the wooden material in a dry room for about 48 hours. If you get down to business right away, you risk getting the structure deformed. Make sure that during the working process the temperature is above zero and the air humidity is at least 60%.
Horizontal arrangement
How to properly attach the lining to the wall:
- Typically, the planks are installed in a horizontal direction. In this regard, we place the first bottom board with the tenon facing up.
- Fastening is carried out from the far corner (relative to the entrance to the room).
- To avoid visible defects on the top panel, we carefully monitor the horizon and vertical, starting from the first board.
- We fix the first element and again check the level for possible errors.
- Then we insert it into the grooves and secure the subsequent planks.
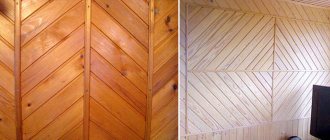
Vertical arrangement
As a rule, the lining is attached in the same way, both horizontally and vertically. Therefore, based on the instructions described above, we perform the following steps:
- We expose the panels from the far corner. Let's fix the first one.
- We drive the subsequent panels into the grooves and also fasten them. Be sure to monitor the density of the joint by lightly tapping the edge of the board.
- Wide panels are better suited for this option. With their help you can create a beautiful plane with a small number of joints.
An experienced craftsman can complete such work within a day. When installation is completed, baseboards and corners are installed. Then the walls are treated with stain and varnish.
Marking the base
In order to install each panel evenly, it is necessary to make markings on the base in advance. Installing wooden lining on clamps requires perfect precision to make it easier to monitor the level of the panels.
The marking method will depend on the direction of the panels. If the lining panels are placed vertically, the distance of the outer plank from the wall should be equal to its size. In the case of a horizontal installation method, the clamp should be located 1-2 mm from the floor.
To highlight the interior of a room, a mixed type of installation is often used, when a simple pattern is built from panels. Sometimes they are placed diagonally. Both methods require a certain skill, and if the vertical and horizontal methods do not require special skills, then difficulties may arise with the combined options.
The choice of panel placement may depend on the purpose of the room. Combined methods are more often found in living rooms, where decorative design is important. The vertical placement of the panels plays rather a practical function.
It is often found in bathhouses and helps preserve the lining from rotting (moisture does not accumulate in the seams between the panels, but flows down them).
Features of fixing lining to the ceiling
We looked at what clapboard-lined walls look like, but how to sheathe ceilings correctly? Attaching the planks to the ceiling follows the same pattern as for vertical surfaces. Self-tapping screws and a screwdriver are very helpful here; sometimes small nails are used.
If the sheathing for the panels is made of wood, it is mounted in the same way as for the wall. However, it is better to leave the distance between the bars large. When a metal frame is planned, special hangers are installed, and the guide profile is fixed to them.
Advice! To finish the ceiling, get a second person to help. The work is not difficult, but it is quite difficult to hold the panels correctly and fasten them yourself.
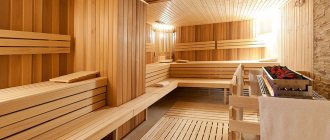
How to properly attach the lining in a bathhouse
Typically, the construction of bathhouses is made of pine wood. Many people are interested in the question of how to properly line interior walls with clapboards with their own hands. You should know that pine needles are no longer suitable for finishing a steam room; at high temperatures, they begin to release resin. When the evaporation is still weak, this aroma has a calming effect and encourages relaxation. But rich odors lead to heavier air, which is not at all good. Therefore, it is better to use birch or alder as a finishing material, which emit medicinal aromas that have a lot of useful properties.
It is also important to use special wooden nails for covering the steam room. Everyone knows that metal products become heated when the room is heated and upon contact with the skin they can cause a burn.
If you familiarize yourself with the main rules and approach the process competently, cladding the walls of your own home is not at all difficult, it is even interesting. It doesn’t matter which profile you prefer, you now know how to attach both wooden and plastic lining.
Believe that everything will work out! Good luck! And see you again!
Advantages of using clamps
In the case where the wall of a building is covered with clapboard, it is much more convenient and safer to install building materials using clamps. The use of nails for these purposes is fraught with the formation of cracks on the surface of the building material, into which moisture can penetrate, which will cause damage to the cladding. If you secure the lining with clamps, the risk of such harmful consequences is significantly reduced.
Another significant advantage of this type of fastening is that it is completely invisible, and the wall has a rather pleasant appearance due to the absence of unnecessary metal objects on it.
Fixing the lining panel using plates is quite simple, because it does not require the use of special tools. In this case, dismantling the casing is also not difficult and the likelihood of damage to the building material is very low.
Considering that the metal staples that are the clamps do not rust and are not afraid of corrosion, they will last for quite a long time.
Installation of lining using clamps
Before you start installing the lining on the plates, you need to take care of the availability of tools, and also clarify the required number of fasteners. In the case when the lining will be installed on clamps using nails, you will need a hammer, a building level and a square, and a tape measure. If self-tapping screws are used, you need to have a screwdriver or screwdriver with you, and the other tools are the same as in the first case.
The number of fasteners must be no less than 20 pieces per square meter of building material.
When installing this building material, it is very important that the wall is free of any irregularities, because the curvature will not allow the panels of the building material to be properly secured. The quality of the skin will be spoiled by the depressions and bumps formed on it
An example of such cladding is shown in the photo.
In order to avoid the above troubles, a necessary condition when installing the lining is the construction of a frame. It is made from metal profiles or wooden beams. Wooden sheathing is quite short-lived, but if it is treated with anti-rot substances, it can last much longer.
The gluers must be secured thoroughly, placing each one on two or even three self-tapping screws (nails). If you do not adhere to this rule, you may subsequently encounter a problem such as surface deformation.
You can learn how to prepare for installing the lining with your own hands, using gluers in the process, from this video.
It is also necessary to mark the surface. The marking of brackets is carried out taking into account the direction of the panels. If the lining is mounted vertically, then the fastening elements are placed at a distance equal to the width of the panel. When the planks of building material are directed horizontally, the gluers are fixed almost to the floor. This location of these parts makes it possible to screw in a screw or drive a nail without any difficulty.
Horizontal fastening of building materials is carried out as follows:
- The starting strip of building material is inserted into the clamping hook.
- The second bar is inserted into the ridge of the first and secured with a clamp.
Vertical installation has the following algorithm:
- The end where the ridge of the plank is located is pressed against the wall.
- The plates are inserted into the groove and secured with hardware.
Regardless of the direction of laying the lining, the last strip can be cut to fit the required size
It is important that it fits tightly enough into the gap
You can learn more about how to lay the lining with your own hands, using plates to fasten it, from the video.