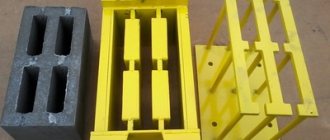
Not a single plot of land can do without a bathhouse, especially if it is a house for permanent residence of a family. If you don’t have large savings, you can choose cinder block .
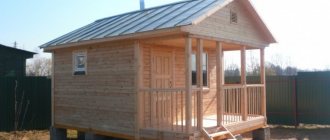
Next, we will present in detail the step-by-step construction of a bathhouse from cinder blocks with your own hands for independent construction in order to save money.
Main stages of construction
1. Laying the foundation.
The choice is influenced by the soil of the site. Under normal conditions, it is best to equip it with pillars connected to each other by reinforced concrete beams. On difficult soil (clayey or mixed type), a strip base will look more reliable. Due to the considerable degree of water absorption of cinder blocks, the height of the base of the bathhouse should be at least half a meter from ground level. After the concrete has completely hardened, they begin laying waterproofing. For this purpose, it is recommended to use molten bitumen and roofing felt.
2. Installation of walls. Before starting masonry work, it is necessary to start laying out the foundation of the heating furnace. The construction of external walls and internal partitions should be carried out in strict accordance with the approved project. Openings for windows and doors are left at the planned points. To further strengthen the bathhouse, reinforcing rods 10-12 mm thick are placed every two to three rows of block masonry.
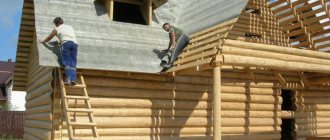
3. Construction of the roof begins with the preparation of floor beams and installation of rafters. The roofing sheet is laid on the finished structure. After this, they begin to work on the ceiling.
4. Insulation of bathhouse walls made of cinder blocks. First, basalt thermal insulator is attached to the external walls with your own hands, then foil paper. The internal surfaces of the bath are finished with several layers of protective materials. Mineral wool is placed between the beams of the wooden frame. A vapor barrier with foil is secured on top.
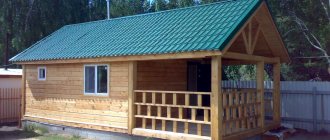
5. Exterior finishing. The building is decorated with cheap clapboard, beautiful siding or practical plaster. The most presentable and respectable appearance will be when faced with imitation timber or façade slabs.
6. Interior design. It is better to cement the floor in the bathhouse, and then insulate it and protect it from moisture with a reliable layer of waterproofing. Molten bitumen and roofing felt are suitable for this purpose. Ceramic tiles or wooden floors are used as flooring. The walls are decorated with clapboard or wood.
approximate cost
To calculate the required number of building materials for a box, they rely on the main parameters - the size of the structure and the price of one block. First, the volume of the building as a whole is determined by summing up the length of all walls and multiplying by their height and thickness. The volumes of windows and doors are subtracted from the result obtained. The residual value is divided by the volume of one cinder block. The final number will be the required number of elements. Multiplying it by the cost of bentonite (30-35 rubles), we get the amount of costs for the construction of a bathhouse structure.
The final costs of building a bathhouse consist of a combination of prices for materials, loading and unloading and installation work, and transportation. A standard one-story structure, consisting of three rooms with an open veranda, but without internal insulation, can cost approximately 200-250 thousand rubles.
Reviews of cinder block baths
“We had to build a cinder block bathhouse due to lack of money. At first I thought it was temporary, then I’ll build something more solid. On the advice of experts, I insulated the walls of the house from the outside and inside, lined them with clapboard, and raised the floor higher. The result was such a great bathhouse that now I can’t be happier. And I definitely won’t change it.”
Grigoriev N.N., Ekaterinburg.
“Several years ago we bought a nice country house. A cinder block box from a small bathhouse was found on the property. Since there was little money left after the purchase, they decided to equip it with minimal effort. Instead of wooden blocks, the facade was faced with plaster, under which a layer of foam plastic was laid. And inside they made a frame from the profile into which mineral wool and siding were secured. It turned out to be an excellent economical option for a bathhouse.”
Alexander, Sverdlovsk.
“I always dreamed of having my own bathhouse with a steam room and brooms. When the opportunity arose, I took a swing at the log house. But harsh calculations showed that I couldn’t afford that amount, so I had to save money and replace it with a cinder block. But the inside of the walls was finished with a wooden block. Now there is just a fabulous forest smell in the steam room. My family and all my friends appreciated the beauty.”
Zadorin Nikolay, Kostroma.
“I built a small bathhouse at the dacha with my own hands. I tried to properly insulate the walls, floor, ceiling and protect from moisture. The bathhouse is heated by a conventional wood-burning stove. Literally two hours later, the temperature in the steam room rises to such a temperature that any sauna would envy. The whole family has been using the sauna regularly for three years now. Since then, neither adults nor children have ever had a cold.”
Evgeny Ilchenko, Moscow region.
Exterior finishing
There are no restrictions on the materials used. It is only worth noting that cinder block walls definitely need external insulation - this will protect them from the destructive effects of severe frosts.
The walls are finished according to the standard scheme: laying a waterproofing layer, constructing lathing (its pitch is selected according to the size of the insulation elements). The sheathing is made of two layers: heat-insulating material is laid between them, and the finishing (siding or lining) is already attached to the top one.
Laying the foundation for a bathhouse made of cinder blocks
Walls built from hollow blocks are light in weight compared to other building materials. There is no need to lay a strong foundation. The forces of frost heaving that arise in the ground in winter, due to the ease of construction, can squeeze its foundation out of the ground. Therefore, for a cinder block structure, a non-buried strip foundation or a columnar foundation with a reinforced concrete grillage is used.
Cinder blocks quickly absorb moisture, so the foundation is raised above ground level by at least half a meter. When the base is ready, it is covered with a layer of waterproofing. Before erecting the walls, lay the foundation for the stove. Only a specialist can build a brick oven, so you should hire a specialist or buy a ready-made metal structure. If you don’t want to bother with firewood, buy an electric heater.
Work order
The blocks are laid on a solution that is mixed from 1 part M400 or M500 cement and 3 parts sand. To improve plasticity parameters, red clay or a similar plasticizer is added to the solution. Laying cinder blocks with your own hands is done in the following sequence:
- Mark the locations of door and window openings on the foundation.
- A small amount of mortar is placed on the corners of the foundation, leveled and the lighthouse cinder blocks are installed exactly at an angle of 90°. To accurately fit the following blocks, pull the cord, securing it at the corners.
- Applying the mortar to the foundation and the end of the block, I lay the first row of the wall. Excess solution is removed with a trowel. The thickness of the seam is no more than 1.5-2cm. If it is not planned to backfill the blocks with expanded clay, they are laid with voids down.
- Check the horizontality of the surface with a level. To level the masonry, use a rubber mallet.
- The corner blocks of the second and subsequent rows are laid in a checkerboard pattern (similar to brickwork).
When building cinder block walls with your own hands, it is important to take your time. Carefully check the horizontal and vertical planes of the walls
To do this, pick up a plumb line and level more often. Redoing sagging walls is much more difficult.
To give the structure additional strength, reinforcement with metal mesh is carried out after 3-4 rows of masonry. The internal walls in the bathhouse can be laid out both before and after the construction of the roof.
Roof installation
One of the most popular types of roofs for bathhouses is the gable structure. Its construction begins with the installation of a mauerlat - wooden beams located along the perimeter of the cinder blocks. It is on them that the rafter system and ceilings will be mounted. The mauerlat is laid a few days after the walls are erected.
A waterproofing layer is laid on top of the cinder blocks, on which wooden beams are mounted. After this, a rafter system, attic floors are erected and the roof is sheathed with roofing material (ondulin, slate, metal profiles or other suitable material). A layer of waterproofing is laid between the ceiling and the attic floor.
Floors in the bathhouse
The washing room and steam room are equipped with a concrete floor, on which a wooden grate is laid on top. The floors are made with a slope towards the drainage of water into the drainage system. The junctions between the walls and the floor are coated with bitumen for better waterproofing.
You can lay tiles on a concrete base. The grate is placed to prevent contact of feet with cold concrete. After bath procedures it is easy to take it out to dry. In other rooms you can lay a regular wooden floor.
Finishing the bath inside and outside
Before proceeding with interior decoration, waterproofing and insulation of the internal walls are carried out. A layer of waterproofing is attached to the cinder concrete using lathing with timber with a section of 50x50. Insulation (foam plastic, mineral wool or other basic insulation) is laid between the rows of the sheathing. As a finishing material inside the building, clapboard or facing wooden boards are used.
The outside of the bathhouse is finished in any way convenient for you. The walls can be plastered, covered with clapboard, siding or covered with facing bricks.
Anyone can build a cinder block bathhouse with their own hands.
Construction of walls and finishing
Experts conditionally divide the construction of a bathhouse into several stages: construction of the foundation, walls, roof and floor, insulation, interior and exterior decoration.
First of all, we prepare the area
We clear it of debris, remove the top layer of soil, it is important to remove turf and various vegetation
We make markings, drive pegs into the corners of the future building and stretch a rope between them. As you work, measure the corners of the future building; they should be 90 degrees.
If you have a columnar foundation, mark the placement of the pillars; if you have a strip foundation, mark the width of the foundation.
The foundation is the basis of any building, so pouring the foundation is very important. To make a foundation, you need to dig a pit, compact and level the soil and fill it with concrete.
The foundation must rise above the ground by at least half a meter so that the cinder block does not collapse, absorbing moisture.
When the foundation is dry, it must be covered with a waterproofing material - bitumen or roofing felt.
Reinforcement must be laid every three rows of masonry to make the structure more durable. It is best to use metal mesh as reinforcement.
The last row of cinder blocks will end with bars, which will serve as the basis for the future roof.
It is also better to immediately lay window and door openings with wooden blocks.
Cinder block masonry technology on video.
After erecting a foundation 70 cm high, the first row of blocks is laid on a mortar 2 cm thick. This is due to the fact that the blocks are as far as possible from the ground, and therefore from water. Before starting construction, it is better to tighten the measuring cord and lay the bathhouse from the corners. The thickness of the binder solution should be no more than 15 mm, otherwise the bath frame may lose its heat-insulating properties.
By periodically rechecking the evenness of the wall masonry, it will be possible to achieve a minimum consumption of finishing materials during external finishing. If hollow blocks are used during construction, then these voids do not need to be filled with concrete. This can also lead to a decrease in thermal insulation properties. It is advisable to immediately apply a waterproofing primer at the same time. So the walls are up.
There are a few things to consider when building a roof. Since increased heat generation in a bathhouse is a common occurrence, moisture will condense in the ceiling area as a result of the meeting of a warm and cold front. To prevent this, you need to install a vapor barrier film between the ceiling and the roof. Next, the roof and ceiling are additionally insulated using cotton wool. Now that the roof is in place, the next stage begins - the interior decoration of the bathhouse.
The inside of the cinder block frame needs to be plastered. Here the layer of mortar can be 1-2 cm. Next, the bars are nailed vertically onto smooth walls at a distance of approximately 50-60 cm from each other. Now the bathhouse needs to be insulated, so mineral wool is laid between these bars. Since cinder concrete itself is warm, thin cotton wool can be used.
A vapor-repellent film with a layer of foil is attached to it with a stapler to the bars. This is necessary so that the cotton wool and the frame as a whole do not become damp from the inside. Next, horizontal bars are nailed to secure the lining. These bars simultaneously allow you to maintain a gap for ventilation of the wall from the inside. To prevent the appearance of mold and mildew, the lining must be coated with an acrylic product for bath surfaces.
Features of ceiling insulation
Bathroom ceiling insulation
When installing a ceiling in a bathhouse, it is necessary to take into account not only the fact that it accounts for up to a third of heat loss, but also the fact that the accumulation of condensate on the surface reduces any insulation measures to nothing. Therefore, vapor barrier from the inside is required here much more than for walls, actually coming to the fore. This type of work in this case requires much more effort than a similar one in a sauna.
Initially, it is recommended to cover the ceiling with hewn and dried boards 40 mm thick
The wider the boards you can find, the more beautiful they will look, no matter what type they are. Even with bitches, it will be even more beautiful
It is not advisable to use clapboard; it may move. Large thickness of boards is not desirable due to the accumulation of a large amount of cold during periods of absence of heat. This leads to the appearance of condensation on the ceiling while heating the steam room. A layer of waterproofing must be placed on them; this can be a regular greenhouse film or other vapor barrier material. Everything can be covered with a 15 cm layer of dry sawdust or put mineral wool and covered with ordinary clay on top. This is a very good method that our grandfathers used. If it is glass wool, then an additional fiberboard plate is placed on it.
Speed and ease of construction, lifespan of the building
The standard dimensions of ordinary solid bricks (L*W*H) are 250*120*65 mm, which is 1.5-2 times smaller than the dimensions of cinder blocks. And thanks to the large size of the latter, the work is done much faster.
Cinder block laying
Cinder block masonry requires a perfectly horizontal foundation (strip, columnar), equipped according to all the rules. In the event of deformations and movements of the foundation, large cracks may appear on the wall of the bathhouse, which will pass not along the seams, but through the rows of the blocks themselves. However, if the bathhouse construction technologies are followed, it will last about a hundred years (by the way, wooden bathhouses are rarely used without repair work for more than 30 years).
The long service life is also affected by the fact that slag concrete is too tough and not to the taste of insects and rodents, which often live in log houses and spoil expensive wood.
There are several construction features that can cause inconvenience:
- the construction of building walls is unacceptable in rainy weather;
- the skeleton of the bathhouse must not be left without a roof for a long time;
- high-quality waterproofing is required due to the high hygroscopicity of the material;
- in cinder block buildings it is not recommended to construct reinforced concrete slab floors;
- in the case of the construction of a two-story or more building, reinforcement of the rows with metal rods is required;
- walls are erected exclusively on a high (more than 50-70 cm above soil level) foundation;
- Difficulties may arise with the installation of heat, electricity, sewer and water supply networks.
How to insulate a bath ceiling
Panel ceiling
Panels for such a ceiling are usually sold with all the necessary layers of waterproofing, insulation and moisture resistance. The standard width of the mineral wool layer contained in ceiling tiles is about ten centimeters.
Since such panels have considerable weight, it is better to lift them first and then connect them in parts at the top.
Fixed ceiling
The basis for insulating a false ceiling is the attic frame. A waterproofing layer should be placed in these floor beams, which will eventually cover the entire internal surface. The next layer is the installation of wooden flooring. Then the required amount of insulation, such as mineral wool, is placed in the spaces between the beams.
After insulation, it is necessary to ensure moisture insulation using foil material. Now you can cover the ceiling with wood paneling.
Flat ceiling
Deck ceilings are independent of the attic frame. Because they are mounted directly to the walls. For its construction, wooden boards about thirty centimeters wide are used.
Insulation is carried out from the attic side. All necessary materials (vapor barrier, insulation, waterproofing, as well as plywood flooring) are placed on top of the floor ceiling. This method of ceiling insulation is the fastest, but is only suitable for a small bathhouse.
Ventilated facade
The most reliable way to insulate a bathhouse is the ventilated facade method. Before starting work, brackets in the form of corners should be secured to the walls, and the space between the brackets should be narrower than the width of the seal.
Ventilated facade of a bathhouse using aerated concrete as an example. In a cinder block bathhouse, installation is carried out in the same way.
Between the metal corners we reinforce mineral wool mats. We seal the connecting joints with special tape. A waterproofing layer fixed to mineral wool mats will protect the insulation from moisture. After this, you can install additional fasteners for the final cladding of the facade. Glass wool or polystyrene foam can be used as insulation materials for exterior work.
Insulation of bath floors
Wooden floors are often installed in timber baths.
Concrete can be poured if the walls are built from brick, cinder block, foam block or frame method.
Sometimes, according to the personal preference of the owner, a concrete floor is also made in a wooden bathhouse.
Wherever concrete is used, it always needs special insulation, since cold and moisture have a destructive effect on it and also create discomfort in it.
The insulation of the floor in a bathhouse should be approached with particular scrupulousness, because it is most exposed to humidity, and must also withstand the contrast in temperature of the soil and the air in the room.
Before installing any floor in a bathhouse, you need to clean the soil surface and cover it with a thick layer of expanded clay (medium size) or slag. The height of the embankment of this insulation should be at least twice the width. If there is an opportunity to make the layer even thicker, you should definitely take advantage of it. In the case of a concrete foundation, expanded clay should be poured to its entire height.
Concrete floor
Before insulating and pouring the floor in the bathhouse, you should install a drain pipe. Then it must be attached to the level where the screed will later be. After this, you can start working on the floor:
- First you need to compact the soil.
- Then cover the walls with materials for.
- Sand (from eight to ten centimeters) is poured on top of the soil, after which it must be moistened and compacted.
- The next layer is roofing felt, which should protrude 15 centimeters on the walls. The overlapping sheets of material must be connected using moisture-resistant tape. You can also use tar mastic.
- Then a layer of expanded clay is poured onto the floor, the height of which should not reach the highest point of the foundation by 5 centimeters.
- After spreading the expanded clay evenly, cover it with plastic film. Then XPS boards (about five centimeters) are laid on it.
- Now you need to lay the reinforcing mesh, leaving cells from five to ten centimeters.
- Then you can set beacons for alignment. They should be placed at a slight angle towards the drain pipe so that the concrete floor has an unnoticeable slope and any excess water can flow into the drain.
- The next step is to attach the damper tape. This will ensure the safety of the screed and its evenness even with sudden changes in temperature.
- Then you can pour the concrete mixture, distribute it evenly over the entire surface of the floor and level it with the rule.
- When the screed is completed and the concrete begins to gain strength, it is coated with a special primer, which penetrates deep into the concrete and has waterproofing properties.
After the concrete and primer have completely dried, you can begin laying the tiles. Wooden flooring is also often used in a bathhouse.
Wooden floor
A traditional wooden floor in a bathhouse requires a lot of effort. Particular care should be taken to ensure waterproofing, good ventilation and preservation of floor heat. For good ventilation, it is necessary to leave several channels in the foundation, which will serve as the ventilation system of the bathhouse.
Step-by-step guide to performing the work:
- First you need to attach the drain pipe and determine the location of the drain (often it should be in the center).
- Then the soil is compacted. A layer of roofing material is laid on it, rising to the surface of the walls up to twenty centimeters high.
- A large amount of expanded clay is poured over the waterproofing layer. But it should not reach the floor beams by about 25 centimeters.
- Then the beams are installed. Before using wood to build a floor in a bathhouse, it must be treated with antiseptic agents.
- At the bottom of the beams, you need to install cranial bars, to which the rough beam will later be attached.
- After making the subfloor, it should be covered with film. Which does not allow steam and moisture to pass through.
- Then it is covered with insulation, such as mineral wool or expanded clay.
- Now the entire structure should be covered again with a film that insulates the vapor.
- The joists should be secured so that they are perpendicular to the beam frame. A hole is cut in the center for drainage.
- Boards cut at an angle of about seven degrees are attached to the flooring. They should increase the cutting angle as they approach the drain.
- Insulation should be laid in the holes between these slats (with a layer equipped with foil towards the top). The sheets of foil material are connected with waterproof tape. Subsequently, the entire sheathing must be closed.
Now you can lay the flooring on the wooden floor. It must be new, high quality and waterproof.
We make the roof
It is this stage that is performed after the walls are erected:
- Ceiling beams are made of timber measuring 100 by 100. They are installed in special niches in the wall, which were provided during construction. The ceiling covering will be attached to the beams below. Beams also need protection from condensation - an integral attribute of a bathhouse, so they should be sealed.
- The rafters are attached to pre-fixed logs or beams on the surface of the walls. It is recommended to assemble the rafter system or its individual elements on the surface of the ground, and only then lift it to the bathhouse and secure it.
- To ensure the installation strength of the rafters, special grooves are made in the base (log). The pitch of the rafters can be 0.6–1 m.
- Next comes the lathing and laying of the roofing material.
Criteria for choosing thermal insulation materials
Modern thermal insulation materials for bath insulation make it possible to carry out work on insulating floors, walls and ceilings using a variety of options. The choice of materials depends on the developer’s finances and the time he is willing to spend on the work. The higher the quality of the material, the higher its price: the bathhouse will be insulated in the best possible way.
The following are used as thermal insulation agents intended for insulation:
- expanded clay;
- slag;
- polymer materials;
- glass wool
Comparison table of thermal insulation materials.
It is necessary to determine what kind of insulation is needed to eliminate heat loss through the ceiling or floor in the bathhouse. Before work, builders study the fire resistance and structure of the material. When insulating the walls of a bathhouse, you should choose environmentally friendly materials.
The most important characteristic is the thermal conductivity of the insulation. The conditions for its installation in the bath are also taken into account.
To eliminate heat loss, materials made of polystyrene foam or mineral wool are used.
To avoid getting the insulation wet during operation, you should not use cheap materials that are not recommended for these purposes.
What supplies and tools will be needed?
For the construction of a bathhouse you will need the following tools :
- hammer;
- order;
- level;
- lace;
- trowel;
- plumb line;
- container for mixing the solution;
- a spatula with teeth or a special container;
- electric drill with attachment.
The list shows the minimum that is needed only for the construction of walls. For foundation work, you will also need a concrete mixer, roofing material, a laser level, a water level, and a square. To equip the roof, you need the material from which the flooring will be made, as well as metal or wooden structures to create a rafter-beam system.
You also need to prepare a cinder block in the required quantity and a solution. The solution used is a cement-sand mixture , which is mixed with water in a concrete mixer or bucket using a drill.
Insulation of the ceiling and roof of a cinder block bathhouse
You can insulate the ceiling and roof of a cinder block bathhouse with polystyrene foam, or even better, spray it with polyurethane foam. The insulation of a bath structure is carried out with the obligatory installation of vapor insulation, which is often confused with thermal insulation, but there is a difference, and it is quite significant. Vapor barrier is necessary to maintain normal humidity levels in combination with a certain temperature. Thermal insulation retains heat and nothing more. The differences between the processes become obvious when insulating the bathhouse ceiling.
For thermal protection of the ceiling, the already mentioned polystyrene foam is usually used. The slabs are installed in a part of the ceiling structure that is inaccessible to moisture. As for the vapor barrier device, it comes down to finishing the surface of the bathhouse ceiling with various materials that contain steam.
With a roof everything is much simpler. It is enough just to choose a good material that is not capable of transmitting heat. You can use the same polystyrene foam or polyurethane foam. The material is sprayed onto the surface to be insulated, forming a heat-resistant and durable coating.
Who doesn’t want to set up a steam room near their home to have an excellent place to spend pleasant leisure time!? But it’s one thing to kick out a block box, but you also need to know how to insulate a bathhouse made of blocks from the inside in order to minimize the consumption of heating resources.
You will be provided with instructions, as well as a video in this article.
Advantages and disadvantages
Block building materials have their pros and cons. You definitely need to know them if you plan to use blocks in the construction of a bathhouse. To begin with, it is worth considering in more detail what advantages such elements have.
There are several advantages of such material as blocks.
- A structure built from blocks will not shrink, like, for example, buildings made of wood.
- A steam room made of blocks can be built almost immediately after the main finishing.
- The construction of such a bathhouse will take a minimum amount of time.
- All repair work can be carried out without the involvement of outside help, but experts recommend inviting at least one assistant. This way construction will go much faster.
- The final cost of a block bath will be 2-3 times lower than in the case of building a wooden steam room of exactly the same dimensions.
- Block materials are absolutely safe for human health. They do not contain hazardous chemical compounds, so even at elevated temperatures they do not emit harmful substances.
- The blocks are relatively light in weight. Thanks to this characteristic, you can significantly save effort and money on preparing a high-quality foundation.
- Many consumers choose block materials for construction because they do not support combustion.
- A bathhouse made of blocks is not subject to rotting.
- The blocks are easy to maintain. They do not need to be regularly coated with antiseptic compounds, as is the case with wooden buildings. Block materials are not susceptible to mold and mildew.
- Walls built from such raw materials are “breathable” due to their diffuse properties.
- Many types of blocks, for example, gas silicate ones, boast good heat and sound insulation properties.
- The service life of quality blocks is very long.
Currently, many owners choose block materials for the construction of baths (and not only).
However, these products also have their disadvantages.
- The blocks absorb moisture, so the bathhouse must be provided with high-quality waterproofing, otherwise the material may simply collapse.
- A bathhouse made of blocks requires a vapor barrier. This is explained by the fact that condensation almost always accumulates inside walls made of such materials, so it is impossible to do without vapor barrier materials.
- Blocks are durable materials, but in this regard they are inferior to brick.
- Popular gas silicate blocks contain aluminum powder and lime. These components reduce the positive characteristics of the material.
Many problems associated with block baths can be completely avoided if they are constructed in a high-quality manner and also take care of hydro- and vapor barrier in advance.
What needs to be done to insulate a bathhouse
Below we will separately consider how to insulate a bathhouse made of expanded clay concrete blocks (cinder blocks, foam blocks), but at the same time we will talk about each plane separately. That is, it will be described separately.
We insulate the wall
In order to insulate a bathhouse made of foam blocks, expanded clay or slag blocks, first of all, you need to choose insulation. Let's say right away that the most environmentally friendly product in this situation will be felt, but since it is not available for sale on the construction market, we will have to choose from what is available. It should be taken into account that the installation will be carried out in a hot and damp room and due to with this, select the material.
| Type of insulation | Expanded polystyrene (foam) | Extruded polystyrene foam | Mineral wool |
| Environmental friendliness of the material | Not recyclable | Not recyclable | Cannot be recycled. Releases phenols |
| Chemical resistance | Destruction from diesel fuel, gasoline, acetone, oil paints and ultraviolet rays. Resistance to weak acid alkalis. Swells and crumbles when exposed to water. | When exposed to water, the material shrinks as the binder is washed out. Resistance to alkalis. At high temperatures it releases phenol | |
| Lifetime | 30 years | 50 years | 50 years |
| Thermal insulation | After 60⁰C, material destruction occurs | Excellent thermal stability |
Based on the above data, we can come to the conclusion that in order to insulate a bathhouse made of expanded clay concrete blocks, of all the listed materials, mineral wool will be the most suitable (this includes stone wool, glass wool and slag wool). Its price is not very high, and you can also choose the required thickness (from 20 to 200 mm) depending on the climate of your region. But in any case, you will need foil for waterproofing.
If the mineral wool does not have a foil layer, then it needs to be added, and foil polyethylene foam, which you see in the photo above, is excellent for this. The thickness of such material varies from 2 to 20 mm, and by covering a layer of mineral wool with this, you significantly increase the effectiveness of thermal insulation.
For wooden lining, that is, for cladding a steam room, you need a sheathing that will be mounted on brackets, or it will be thick bars between which it will be installed. The second option is simpler, but mounting the beam on a block wall is not so easy, even if it is plastered. The fact is that if the thickness of the sheathing is 100 mm, then anchor bolts will be needed to fasten it, which is not entirely acceptable for a wall made of such material.
We continue to consider how to insulate a cinder block bathhouse from the inside and will install the sheathing. Place some kind of waterproofing material on the wall, under the brackets, and then attach the consoles themselves with bod profiles. Mineral wool is threaded directly through the pawns, and then carefully covered with foil polyethylene foam, trying to ensure that there are no holes left.
Ceiling
Thermal insulation and waterproofing of the ceiling with your own hands occurs, in principle, in the same way as, only the installation plane changes. Considering that there cannot be foam blocks on the ceiling, but, for example, a wooden floor or a concrete slab, it can be successfully used as a sheathing use timber.
Floor
Almost any materials are suitable for the floor in the bathhouse, for example those that are used to insulate the loggia, that is, extruded polyethylene foam or expanded clay. After all, you will still be pouring a cement screed, so both will do, but expanded clay is much cheaper. The thickness of the thermal insulation layer will depend on the degree of soil freezing and the general temperature in your area.
Cost of work: what does the price depend on?
If it is not possible to build a sauna from a cinder block with your own hands, then you can use the services of contractors. The cost of the work will depend on several factors :
- project complexity;
- type of foundation;
- size of the building;
- construction region.
Average prices for the service in Russia range from 150,000 to 360,000 rubles per object.
Construction of sauna walls from cinder block
construction of bathhouse walls from cinder block
Laying walls from cinder blocks is a simple procedure and practically no different from laying brick walls. Every three rows it is advisable to lay a reinforcing mesh, which will increase the rigidity of the walls and the strength of the wall masonry. The first layer of masonry is made of bonded layers, then there are three spoon layers. Bonded masonry is done across the walls, and spoon masonry is done along it. It is recommended to stack the blocks together using a construction tool - a trowel, using cement-sand mortar to connect the elements. If a cinder block needs to be divided into two parts, it is cut using the sharp edge of a construction hammer or a trowel. A cement pad is laid on each new row of cinder blocks, and the next layer of material is pressed into it. To provide cinder block masonry with high strength, a reinforcing mesh is placed under each bond row. There should be no large gaps or continuous seams between the elements of the wall being formed.
Results
On the market of materials offered for construction, sand block is a profitable raw material for realizing your plans. The properties of the material provide an expanded scope of application. It is used in the construction of residential and non-residential premises, low-rise buildings, and with thickened masonry - even multi-storey buildings. By giving it preference, you will reduce costs and quickly build the planned facility.
3/5 (2 votes)
Filontsev Viktor Nikolaevich
On the website: Author and editor of articles on the website pobetony.ru Education and work experience: Higher technical education. 12 years of experience in various industries and construction sites, 8 of which were abroad. Other skills and abilities: Has the 4th group of electrical safety clearance. Perform calculations using large data sets. Current employment: For the last 4 years he has been acting as an independent consultant for a number of construction companies.
Interior finishing final work
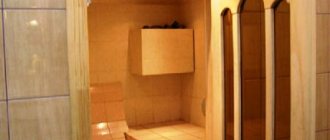
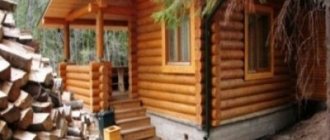
Preference has always been on the side of wood. It is convenient, hygienic, and easy to replace if necessary. Not to mention that different types of wood have different healing effects on the human body, and their very atmosphere is an integral part of traditional bath culture.
The tree must be one that is not capable of overheating and causing a burn to a person. For the interior decoration of the steam room, initially only deciduous varieties were used: ash, alder, birch, poplar, larch, aspen, linden. Resinous types of trees and any conifers are unsuitable for interior finishing. And the choice in the design of a washing room is practically unlimited: ceramic tiles, plasterboard, and any moisture-resistant decorative materials are appropriate here.
- The material must be in the required condition. The lining must spend at least a day in climatic conditions comparable to bathhouses. Otherwise, it may dry out to cracks (if it is too wet) or swell (if it is dry), which will greatly deteriorate its appearance and performance properties.
- Nail thin slats onto the finished thermal insulation with a pitch corresponding to the width of the finishing panels. Use stainless nails (bronze, copper). The best way is to assemble the panels into a groove.
- Always mount the lining in the steam room horizontally - this will allow you to easily change the lower beams as they wear out, which will prolong the operation of the sauna for a long time.
- Wood is best suited for flooring. Any synthetic coating is poisonous at bath temperatures and is therefore not suitable. It is not advisable to use oak - it is slippery and therefore dangerous. In addition, it has a low heat capacity. It is possible to install heated floors in the dressing room and rest room.
If you approach the construction and decoration of a bathhouse creatively and wisely, then more than one generation of lovers of paired procedures will delight with its unique design and therapeutic warmth.
Selecting materials and insulating a cinder block bathhouse is not as simple as it might seem at first glance. There are a number of thermal insulation products that transform the bathhouse and retain heat in it.
How to make a project?
To prepare a project for a future sauna, you can contact a special company, where they will develop a plan for the owner. You can also search for ready-made projects on the Internet or purchase from friends. What to consider when drawing up such a plan :
- The area of the plot, its boundaries, allocated for the construction of the sauna.
- Condition of the soil in the selected location.
- Necessary communications that will be connected to the sauna.
- How will communications be entered into the bathhouse?
- Dimensions of the building itself.
- Interior layout.
It is favorable to place a green area around the steam room: trees, bushes. To prevent the foundation from subsiding later, it is important to know the condition of the soil. To do this, samples are taken and examined. , as well as the arrangement of pits for drainage and sewerage, depend on the condition of the soil Electricity and water will be supplied to the building; all this is provided for in the project.
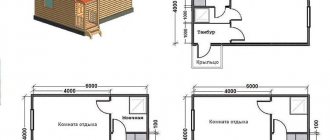
Note! In suburban areas, free-standing bathhouses are not made large. Often these are buildings measuring 6x4 meters and a ceiling height of 2.5-3 meters. A building built from cinder blocks will retain heat better if it is small.
It is important to immediately think about the number of rooms and their sizes - this will determine how much cinder block stone is needed for internal walls and partitions. The rooms that are most often located in a bathhouse are: steam room, locker room, waiting room, shower room, cooling area, relaxation room, toilet.
Photos of bathhouse projects of different sizes and layouts:
Preparatory work
Before you build a cinder block bathhouse with your own hands, you need to mark the building site. According to the project, pegs are driven into the corners of the future object and a rope is pulled over them. Then it is necessary to remove the fertile soil layer to a depth of 20 cm. After this, dig a trench around the perimeter to a depth of 30 cm below freezing of the soil. Its width should be 10 cm wider than the transverse size of the cinder block, which will take into account the installation of formwork. However, if the soil at the construction site is loose or heaving, then it is worth using a columnar structure instead of a strip structure and installing a pile foundation with a grillage. The interval between adjacent piles should be 1 - 1.5 m, and the depth of the trenches under them should be at least 3 m.
Figure 3. Marking for the construction of a bathhouse.
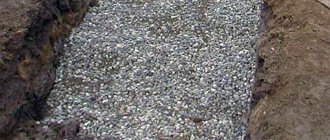
On the leveled bottom of the trench, it is necessary to fill in a sand-crushed stone cushion, regardless of whether concrete pouring or installation of piles (except screw piles) will be carried out. The thickness of each layer is 20-25 cm, each of which must be carefully compacted. The sand layer should be filled with plenty of water to simplify the compaction procedure.
What is wood concrete and its types
Wood concrete is one of the varieties of lightweight concrete, the filler of which is wood chips and/or other crushed organic aggregates. The binder is high-quality cement of a grade not lower than M400, but better than M500.
All characteristics of wood concrete, the requirements for it, are described in GOST 19222-84 and SN 549-82, the production technology is described in detail in the book by I. Kh. Nanazashvili “Arbolite - an effective building material.”
There is another building material based on wood waste - sawdust concrete. It is often confused with wood concrete. But this is a completely different building material, with different characteristics and qualities, and has a different composition (you can use sawdust rather than wood chips, and sand is also present as part of the filler).
Types of wood concrete and its application
Depending on the density, sawdust concrete can be:
- structural density from 500 kg/m3 to 800 kg/m3;
- thermal insulation - its density is up to 500 kg/m3.
Like any type of concrete building blocks, wood concrete blocks are graded for density and strength. The most popular brands and their main characteristics are shown in the table below.
Wood concrete strength grades and scope of applicationFor the construction of houses of 1.5 floors and above, wood concrete with a density of at least 600 kg/m3 is used. For one-story baths under a light roof, you can use a density of 500 kg/m3.
Also, for the construction of baths, an important characteristic of a building material is thermal conductivity. In this sense, wood concrete has very good indicators: it has even better indicators than aerated concrete and foam concrete. Can also be used as insulation.
Thermal conductivity, as is known, depends on density: the denser the block, the better it conducts heat (see table).
Thermal conductivity of wood concrete of different densities
Another important point when building baths is water absorption and hygroscopicity. Here it is worth understanding that these are two different characteristics. Water absorption (moisture absorption) is the ability of a material to absorb water (in a liquid state). If you place a wood concrete block in water, it can absorb 40-80% of its mass.
Hygroscopicity is the ability of a material to absorb vaporous moisture from the environment. So, the hygroscopicity of wood concrete is assessed as “very low”. That is, it does not accumulate steam in itself.
If we translate this into practical terms, this means approximately the following: if you protect the wood concrete from direct contact with water, there will be no problems with humidity in the building. This means that there must be good waterproofing of the foundation and the facade must be protected from precipitation - external finishing must be done. Any finishing is suitable - from plaster to cladding with any material.
Comparison of building materials by thermal conductivity
In practice, many wood concrete baths stand without finishing the outer walls for years - 5-7 years - and no problems with moisture or damage to the integrity of the blocks are observed. But this is subject to the use of high-quality blocks of the declared density and strength.
Bathhouse layout
The creation of a bathhouse layout is carried out taking into account the creation of the necessary functionality and the number of people who can simultaneously be in one room. At the same time, you should strive for the smallest possible area so that it can be warmed up easier and faster. The layout of a standard bath includes the following rooms: dressing room, washing room and steam room. In some cases, a recreation room is equipped.
Figure 1. Diagram of a cinder block bathhouse.
The area should be distributed as follows:
- The dressing room must have a minimum area of 1.5 m wide and up to 2 m long.
- The steam room and washing room are calculated based on the number of people in them at the same time with an area of 1.5-2 m2 for each, as well as taking into account the location of all the necessary furniture and accessories.
Figure 2. Drawing of a typical bathhouse design for 3 people.
The design of the heating furnace should also be chosen in advance so that the power is sufficient to efficiently heat the steam room to the required temperature and it is necessary to provide for the installation of a foundation for it if it is planned to be laid out of brick. For electric furnaces, a separate foundation is not needed, but the load-bearing capacity of the floor will need to be strengthened. The advantage of electric furnaces is the speed of heating and the need for constant heating, since they cool down quite quickly. In addition, they do not emit smoke or soot. Brick structures need to be heated for a long time due to their massiveness, but they will give off heat for a long time.
Internal thermal insulation
For residential cinder block houses and other structures made of such material there is no need for internal insulation. But the specifics of the bath imply such a need.
The internal insulation scheme is quite simple: waterproofing, timber sheathing, vapor barrier, insulation, cladding.
Building a cinder block bathhouse with your own hands is a simple task that can be done even by a beginner in the construction industry. The main thing is to pay due attention to protecting the walls from moisture and frost, and also to carry out the laying at a level.
When insulating internally, it is necessary to have a waterproofing layer - otherwise a large amount of moisture will accumulate in the walls
Advantages and disadvantages of buildings
Advantages:
- Fire safety of the material.
- With additional reinforcement of masonry blocks, the walls will withstand natural disasters.
- The material retains heat well and withstands temperature changes without deformation.
- To build a building, you do not need to have practical skills.
- Block defects can be easily eliminated with plaster.
- Laying can be done very quickly because cinder blocks are larger than standard bricks.
- This material has good sound insulation.
Flaws:
- Standard blocks do not have a very attractive appearance. To improve it, you need to buy additional decorative materials.
- Before finishing, it is necessary to waterproof the facade of the building.
- Due to high thermal conductivity, walls need to be insulated.
- Communication difficulties may arise.
There have been recorded cases in history when cinder blocks emitted radioactive radiation. This was due to the use of low-quality, cheap raw materials.
Is it possible to build with this material?
In Rus', it was customary to build baths and steam rooms only from wooden material. Today, not every owner of a plot can spend a large amount of money on the purchase of a log house or timber. Therefore, instead of wood, bathhouses are sometimes built from cinder blocks. This is a lightweight, environmentally friendly and affordable material that will perfectly cope with the task required of raw materials for the construction of such premises.
When is it advisable to build a bathhouse from cinder blocks:
- if a house is being built on the site from the same material;
- if the building is small and easily erected;
- if there are not enough funds for construction;
- if there is a plan to build quickly.
For example, if there is already a cinder block house on the site or its construction is underway, then at the same time you can remove the walls for the sauna. In this case, it is more profitable for the owner to purchase or independently make a machine for making cinder blocks with a vibrating table.
You can also buy ready-made material: for bulk purchases, the manufacturer can give a discount. If a house is being built from a different material, it makes no sense to build a cinder block steam room. It is easier to build it from the same materials from which the house is made.
Important! There is one factor that frightens land owners who want to use this material. Depending on the components added to the slag mixture, the finished block may have background radiation. In this case, it will no longer be an environmentally friendly material, and it is impractical to build a sauna from it.
Advantages and disadvantages
What are the pros and cons of a gas bathhouse made of cinder blocks? Among the positive aspects, the reviews highlight the following:
- thermal conductivity;
- speed of construction of the bathhouse;
- moisture resistance and fire resistance;
- environmental friendliness;
- price.
Let's consider each of the properties separately.
Fire and moisture resistance
Reviews say that cinder block is in no way inferior to brick in this indicator, since it does not contain flammable substances or materials. As for moisture penetration, here the cinder block is again head and shoulders above wood. Despite the fact that it is highly hygroscopic, moisture does not cause corrosion and rotting. However, the interior of the room should still be covered with waterproofing.
Environmental friendliness
What are the pros and cons (comparison) of a cinder block bathhouse in terms of environmental friendliness? When making cinder blocks, no materials are used that have an impact on human health.
Reviews say that when it comes to cost-effectiveness, there is no better material than wood. Cinder block is in second place. Here you have to spend money not only on blocks, but also on the production of cement mortar.
Thermal conductivity
The material owes its heat-insulating properties to the presence of an element such as slag, which has a high density. In terms of this property, it is significantly superior to other materials. Thermal conductivity depends on the technology for producing the block.
Reviews recommend using blocks with internal voids. This material is dense, which will ensure durability and heat retention for a long time. A high-quality cinder block should weigh about 15 kilograms. Blocks that are too light or heavy are an indicator of defective material.
Flaws
What are the pros and cons of a cinder block bathhouse? First of all, you need to pay attention to environmental friendliness. As mentioned earlier, in some factories, not cement mortar is used as a filler, but various environmental wastes. The use of such blocks will lead to serious consequences. Quality can only be checked in laboratory conditions. Although it costs money, health is more expensive.
What other pros and cons does a cinder block bathhouse made with your own hands have? Another significant disadvantage is high water absorption.
It is worth noting that cinder blocks have an unattractive appearance. But this is a controversial issue. On the one hand, the design of the bathhouse does not play an important role, since everything depends on the personal preferences of the owner. Therefore, you can leave everything in its place.
Which blocks are suitable and why?
In order for the steam room and bathhouse as a whole to meet the required characteristics, it is necessary to select the right blocks for construction. There are cinder blocks of different sizes, with a tongue-and-groove connection, blind and with voids.
The voidness of blocks can reach 40%. Blocks with a hollowness of 28-30% are excellent for constructing external walls of a room. Blocks of any size are suitable for this, but most often they use standard ones - 388x188x10 mm. From stone of the specified dimensions, often
They also build houses, but they use solid blocks.
For the construction of external walls, it is better to choose raw materials with voids, as they will serve as an additional heat insulator.
Due to the presence of holes, such blocks are light in weight, so laying is easy and quick. In just a couple of months of daily work you can build a box.
For laying internal walls between the shower room, toilet and steam room, it is better to use thinner partition blocks. In this way, the loss of space inside the building can be significantly reduced.
Geometry
Geometry
Wall blocks are produced in the form of rectangular parallelepipeds with 90-degree or rounded edges. Special blocks are produced for the corners of the building. In addition, stones of special non-standard shapes are made to order. Thus, one can note the good geometry of the individual products and the constructed building as a whole. And even if individual blocks have deviations in size, a one and a half centimeter layer of mortar connecting the rows will level out small (up to 3 mm) errors.
In terms of geometricity, cinder block is not inferior to brick and other stone building blocks.
Roof
You should not come up with complex roof structures - a bathhouse is not a place where heavy structures would be appropriate. An ordinary gable roof can completely harmoniously complete your structure. Of course, it is even easier to make a pitched roof, then immediately take into account when laying out the blocks that different heights of the walls are needed. And a gable roof has another advantage: there is attic space where you can store things, dry brooms, and it also helps retain heat in the room.
The roof of a bathhouse made of cinder blocks is in general no different from the roofs of other buildings. But we should still remember one feature of constructing roofs in cinder concrete buildings. It will be very difficult to secure a massive Mauerlat here, so it would be more rational to do without it and just use transverse floor beams. Beams can be embedded under them in advance when laying blocks, or corresponding grooves can be cut out in already built walls. The rafter legs find a fulcrum in them. Thus, we immediately form a cornice overhang. In addition, it is very easy to hem the ceiling on the beams, as well as install thermal insulation between them and lay the floor of the attic.
Cost of the bath
How inexpensive a cinder block bathhouse is - the price of the materials will speak for itself. Calculating the cost of construction is not so difficult: almost everything you need is done with your own hands. The main thing in the calculations is not to forget about the factors that significantly affect the final cost of construction. First of all, you need to consider:
- adequate foundation parameters;
- the total cost of cinder blocks, plaster, insulation, wall finishing;
- roof roofing materials costs.
The necessary communications should also be taken into account.
What's included in the estimate?
Insulation Glass wool 50 mm thick. Cost 1 m² (Isover) ≈ 670-800 rub. Floor Edged (unfolded) board 40×150 mm. Cost 1 piece ≈ 350-400 rub. Internal and external finishing. Lining. Cost 1 m² (spruce) ≈ 210-350 rub. Rafters Beam 50 × 50 mm and 50 × 100 mm. Cost 1 piece ≈ 45-75 rubles. Foundation According to the selected type. Cost of 1 l.m. (tape) ≈ 3000-3500 rubles. Window 2 pcs. Cost 1 piece ≈ 2000-2500 rubles. Roofing Painted metal. Cost 1 m² ≈ 250-300 rubles. Doors 1 external and 1 to the steam room. Cost 1 piece ≈ 3500-4000 rubles. Lathing Board 15 0× 25 mm. Cost of 1 piece ≈ 120-150 rubles. Ceiling Edged or tongue-and-groove board 30–50 mm. Cost of 1 piece ≈ 250-300 rubles. Today, the layout of a 5 × 3 m bathhouse made of cinder block will cost much less than a log one. The cost of expanded clay concrete blocks from a large manufacturer will be 21–23 thousand rubles for masonry in half a block and 42–46 thousand rubles for masonry in a block, respectively. If you plan to resort to the help of a construction company, then the cost of services is also calculated separately. Standard list of works for laying a bathhouse made of expanded clay concrete:
- excavation;
- sand cushion with thrombosis;
- production of piles;
- concrete cleaning;
- foundation waterproofing;
- masonry of wall blocks;
- laying partitions;
- installation of jumpers;
- installation of wooden covering;
- roof - metal tiles;
- installation of pediments;
- installation of cornices;
- installation of a drainage system;
- insulation of the facade in three layers;
- covering the facade with metal siding;
- installation of slopes;
- window installation;
- door installation.
The total cost of these services to a construction company will be about 170–180 thousand rubles. This amount does not include materials for laying the foundation, external and internal cladding, the cost of the stove, windows, doors, furniture and equipment, as well as communications. The costs for them depend entirely on the desires and budget of the developer.
Sources
- https://StrojDvor.ru/krupnye-konstrukcii/kak-postroit-banyu-iz-shlakobloka-vnutrennyaya-otdelka/
- https://probani.guru/podgotovkastoitelstvo/iz-shlakobloka/
- https://openoblokah.ru/postroiki/banja/39-banya-iz-shlakobloka-svoimi-rukami
- https://stroyudom.su/banya/bania-iz-shlakobloka-plusy-i-minysy.html
- https://2proraba.com/banya/banya-iz-shlakobloka.html
- https://mr-build.ru/newteplo/bana-iz-slakobloka-vnutrennaa-otdelka.html
- https://stroim-domik.org/stroitelstvo/banya/iz-shlakoblokov
- https://kblok.ru/banya-iz-shlakoblokov
Published: 02/19/2021