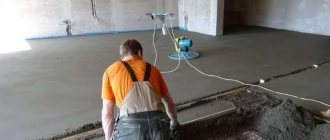
Life is full of examples when something grandiose, monumental holds or works thanks to small details that non-specialists are unlikely to know about. For example, in construction, when pouring screed, a technological gap is needed. Which of the home craftsmen knew about this before they climbed onto the World Wide Web in search of appropriate instructions. That's right - units.
And why should they know - they are not professional builders. Although the “pros” often screw up: either they will forget about the problem, or they will deliberately ignore it in order to speed up the work. And those who knew previously used wooden slats or pieces of reinforcement (then removed), pieces of linoleum or bubble polyethylene from packaging to maintain the distance between the main wall and the screed. Manufacturers of building materials knew firsthand about the constantly emerging difficulties. The problem was solved simply: they began to produce a special damper tape for floor screed.
The editors of the StroyGuru portal decided to help all those who carry out repair and construction work at home with their own hands: tell what damper tape is, why it is needed, what varieties can be found on sale, how to choose the right one and attach it to the wall. Let's talk about manufacturers and prices.
What is it and why is it needed
Hardened cement-sand mortar has one unpleasant property - it expands under the influence of temperature and humidity. The screed also has it. It “breathes” both in height and width. In this case, the linear dimensions in length/width vary within 0.5 mm per 1 m2, but not more than 1.0 cm in total.
But even an expansion of 2-3 mm is enough for the screed to either collapse itself or damage the wall. A layer of material that can dampen (extinguish) the breathing of cement stone saves from the destructive consequences.
The builders forgot about the damper tape.
Definition
The word damper came into the Russian language from Germany. There “Dämpfer” - muffler, shock absorber, from the verb “dämpfen” - to muffle. Therefore, in a general sense, a damper device is understood as anything capable of preventing vibrations that occur in machines, devices, systems or structures during their operation.
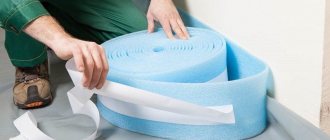
Taken in a narrow sense, a damper tape (sometimes called edge or compensation tape) is a specially made strip of elastic material that can compensate for the linear expansion of concrete and other building materials under the influence of moisture and temperature.
If this definition is translated into a simple language understandable to a non-specialist, then the tape should be understood as a voluminous, plastic material that can compress when the screed expands and recover when its size decreases, while constantly maintaining some gap between the wall and the expanding cement stone.
Functions
The main task of the damper tape is to ensure free expansion of the screed. Those. A plastic strip of material several millimeters thick, fixed along the perimeter of the walls, creates a technological compensation gap that allows maintaining the integrity of the surface layer of the poured base for the finishing floor covering.
In addition to the main function, there are a number of auxiliary tasks that are no less important for apartment owners:
- creation in certain areas of a restrictive barrier for the solution, a kind of formwork;
- organization of additional hydro- and thermal protection at the joints between the floor and walls;
- strengthening sound insulation in the most vulnerable areas of the house that transmit structural noise;
- absorption of microvibration of walls due to mechanisms operating in the building, such as forced ventilation or an elevator - are not transmitted to the floor, but through it to a person;
- In some cases, leveling the walls and the base of the floor, at the joints between them, under the screed.
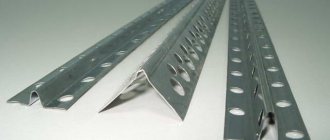
It is a mistake to think that the compensation layer is needed solely for the screed. The increased popularity of plasterboard walls and partitions has shown that gypsum plasterboard also expands and is destroyed without a special strip under the guide profile. This strip is called profile damper tape.
What is it for?
Since there is no mention of damper tape in SNiP, we can only talk about what this polyethylene strip is needed for as a recommendation. Therefore, the use of a compensator is desirable:
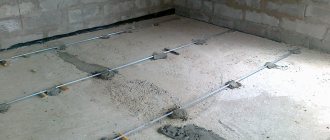
- when pouring cement-sand screed, wet and semi-dry;
- when filling expanded clay to level the floor (dry screed);
- when heating floor coverings made of tiles, porcelain stoneware, laminate, linoleum using water and cable “warm floor” systems;
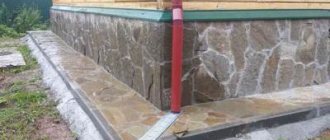
- creating blind areas outside the building.
In large rooms, the compensating gap along the walls is not enough. It is placed in the middle of the screed at certain intervals using a T-shaped strip of polyethylene foam. You also need a damper tape for the self-leveling floor. Don't forget about the tape for the drywall profile.
Application of compensation edge material
Do you need a damper tape for the screed? Definitely yes. But is it necessary for a self-leveling floor? Its “work” is related to the design features of the floating floor; as for the self-leveling or leveling mass, they belong to the contact types of subfloor leveling. That is why the use of a compensator in such conditions is not at all necessary.
In addition to its main function, the expansion compensator also acts as a restraining barrier for the spreading solution.
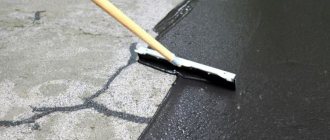
It is also used for external work when constructing a blind area. With sharp temperature fluctuations, the soil underneath begins to swell, and cracks and crevices form on the concrete over time. Therefore, a damper tape is placed in the expansion joint at the junction of the blind area and the walls. The same applies to sedimentary seams running across the blind area. The material compacts and fills excess gaps. It absorbs all kinds of vibrations, thereby compensating for vibrations.
What is it made from?
Ideally, the damper edge tape should have the following characteristics:
- have a low thermal conductivity coefficient;
- have good plasticity, allowing volume to be restored after compression, which, however, is not important. After all, after the screed has set, the damper can be removed;
- do not be afraid of moisture, do not absorb it, so as not to create a favorable environment for the growth of mold and mildew;
- be light and easy to use.
All these qualities are fully manifested in tapes made of foamed polyethylene, which can be chemically cross-linked (PPE or HPPE) and non-cross-linked (NPE). Both materials have similar technical and operational indicators, which affects prices. They are almost equal.
On sale you can find tape made from densely woven polyester fibers, as well as from foamed synthetic rubber. The tape is sold in rolls of 10, 15, 20, 30, 50 and 100 m in length. It can be in the range of 3-10 mm in thickness, 8-15 cm in width. The widest, 150 mm, is a damper tape for warm floor.
Drilling and drilling holes for ventilation
It is quite difficult to make a hole for ventilation in concrete, brick, stone or monolithic structures using classical methods, especially if the wall thickness is more than 30 cm. Standard methods of circular drilling followed by crushing solid material with a chisel or hammer drill are impractical, since the size of the hole is much larger, and the structure itself suffers from excessive vibration.
Today, for the manufacture of exhaust ducts and ventilation installations, it is more reasonable to use the diamond drilling technique. With its help, it is possible to cut smooth, neat holes in any hard surface, including wood or reinforced concrete. This procedure is carried out with specialized equipment (cutters with diamond bits), which quickly and with a minimum amount of dust and noise cuts through walls 50 centimeters or more thick.
Cost of drilling holes for ventilation
The cost of drilling a hole for ventilation depends on two factors:
- The material from which the ceiling is made.
- Partition thickness.
Prices for such a service are 20-40% higher than for classic drilling, but the investment immediately pays off due to the speed of work, the absence of dust and the ease of subsequent surface finishing. In addition, this procedure often has no alternative. For example, it is often simply impossible to break through a channel in the foundation using conventional methods, or it will take several days.
| Thickness(cm) | Price for 1 cm diamond drilling | |
| Brick | Concrete (rebar up to 12 mm, FBS, panel) | |
| 42-92 | 28 | 30 |
| 102-122 | 30 | 35 |
| 132-142 | 35 | 40 |
| 152-162 | 40 | 45 |
| 182 | 43 | 50 |
| 200 | 45 | 56 |
| 225 | 50 | 70 |
| 250 | 60 | 84 |
| 300 | 80 | 98 |
| 325 | 90 | 106 |
| 350 | 100 | 112 |
| 400 | 110 | 126 |
| 450 | 125 | 140 |
| 500 | 160 | 170 |
Increasing coefficients. The complexity and/or labor intensity of the work being carried out is taken into account.
| With increased reinforcement (reinforcement thickness above 12mm), a coefficient is introduced | 1.2 |
| When drilling at a height above 1.8 m, a coefficient is introduced | 1.2 |
| When drilling at an angle, a coefficient is entered | 1.2 |
| For a thickness of more than 40 cm, a coefficient is entered | 1.2 |
| When drilling at temperatures below +5C, a coefficient is introduced | 1.4 |
| If there is no water at the facility, a coefficient is introduced | 1.5 |
| For high density concrete (grade M500 and higher), a coefficient is introduced | 1.5 |
| When working at night, a coefficient is introduced | 2.0 |
Depending on the volume and conditions of work, discounts may be provided.
The minimum cost of an order for work is 3,000 rubles.
Advantages of Diamond Drilling for Air Vents
Using this procedure, you can drill a hole for ventilation, for laying engineering systems, pipes, electrical cables, communications, for installing special equipment, air conditioners, kitchen hoods, and fences. It is carried out according to the following algorithm:
- Appropriate measurements and markings are made.
- The cutter is mounted on the wall using anchors or special fasteners.
- The material is cut with a diamond crown of the appropriate diameter to a specified depth.
- Upon completion of the work, construction waste is removed and the facility is handed over to the customer.
The use of diamond cutting is allowed in both residential and commercial or industrial premises. It has the following advantages:
- Impactless drilling. Partitions do not suffer from excessive vibration, plaster does not crumble, and cracks do not appear.
- Low noise level, no dust. During the cutting process, a stream of water is supplied to the working area, which lubricates the surface and binds dust. Excess dirt and dust is removed with an industrial vacuum cleaner, which avoids contamination in the room (you don’t even have to take out the furniture).
- High cutting speed. When drilling classic brick or concrete, the cutter cuts approximately 40 mm in 60 seconds. It will take only 15 minutes to make a through channel in a 60 cm thick partition.
- Strict adherence to specified dimensions, smooth edges. The hole made will have the required diameter, the adjacent planes will not be destroyed.
- Possibility of creating channels at specified angles to the plane.
Is it possible to do without it?
Some experts argue that expansion tape is only needed for floating screeds. If the CPR is poured directly onto a rigid base, for example, in a garage on a concrete floor slab, then you can do without a damper tape. It is not needed for self-leveling floors with a thin layer of self-leveling mixture.
Let's try to figure out whether a damping strip is needed in the listed cases. Let's start with the screed. Let's not theorize, but refer to accumulated experience. There is no need to go far - look at what is happening (or was happening) with the screed in houses built in the 80s of the last century: CPR was poured directly onto the floor slabs without a damper tape (it began to be widely used in the late 90s). After a few years, the layer of mortar crumbled, in most cases in the heating area. Fortunately, there is linoleum on top, which is not critical for the floor covering.
The argument about thin self-leveling floors is also unclear. For thick people it is necessary, for thin people it is not. Where is the logic? After all, linear expansion in length/width does not depend on the thickness of the concrete. It is always equal to 0.1 mm per 1 m of length when the temperature increases by 1oC. Let us especially emphasize - at +1oС.
Where you really don't need a damper tape:
- frame houses. The walls there are not concrete or brick, and the screeds do not provide resistance to linear expansion;
- The thermal insulation is made with rolled materials extending onto the walls to the thickness of the CPS filling - they act as a shock absorber.
Conclusion: damper tape is always needed for hard walls. The owner of a house or apartment can refuse the compensation gap only at his own peril and risk.
As for the damper tape for the profile under plasterboard, in the bathroom when installing a false wall (box), it is required. When installing interior walls, it is advisable to lay. But nothing bad will happen if the owners refuse to use the compensator strip.
Three solutions for soundproofing the ceiling
Soundproofing the ceiling will make the apartment quieter and relations with neighbors more pleasant. Let's figure out how to do this project independently, quickly and on a budget.
Airborne and impact noise enters the apartment through the ceiling. Airborne noise is music, conversations, barking dogs and children's songs. Stomping, jumping, and hitting balls are impact noises. Soundproofing the ceiling reduces airborne noise levels. But only soundproofing the floor in the apartment above will protect you from impact. It is impossible to control the repairs of your neighbors, so in this article we will give tips on how to reduce the level of airborne noise using ceiling soundproofing.
What kind of ceiling sound insulation is there?
Soundproofing projects vary in effectiveness, thickness, installation complexity and price. A solution for soundproofing the ceiling is chosen at the beginning of the renovation, because this is the first stage of finishing work. The choice depends on your plans for soundproofing walls and floors, your budget and the expected level of noise reduction.
Is it possible to replace it with something?
To save money, the damper tape can be replaced. Suitable for this:
- wooden slats;
- strip of plywood;
- trimmings of linoleum and polymer materials;
- Styrofoam;
- wooden strip wrapped in plastic film - allows you to remove the strip. Without film, wood is difficult to remove. In most cases, it remains and takes on the pressure of the screed.
There is a lot of criticism of these materials from experts. But it is baseless. After all, the damper can simply be removed and the gap closed with a plinth.
At what height to trim
In general, the damper tape is needed for the screed, so you can safely cut it to the edge with the concrete slab. But the finishing materials laid on it also have thermal expansion. They are mounted with this in mind - leaving an empty space between the edge and the wall. This gap is usually 1 cm in size. So if you have a 10 mm thick edge installed, it does not need to be trimmed. In this case, the required technological gap will be maintained automatically.
The buffer tape for floor screed must be continuous
So, the damper tape can be cut flush with the concrete slab, or at the level of the finished floor, or not cut. What is not allowed is for it to be below the concrete level.
Advantages and disadvantages
The damper tape has a number of significant advantages:
- durability - the service life is comparable to the service life of the screed;
- elasticity - volume and geometric dimensions are restored when the load is removed;
- good thermal insulation properties - thermal conductivity coefficient no more than 0.035 W/(m*K);
- ability to cut off structural noise;
- environmental safety - does not emit harmful substances when heated, is not an allergen;
- the material does not rot or decompose;
- low moisture absorption - picks up no more than 2% water per day;
- simple fastening;
- affordable price.
Among the disadvantages is flammability.
Briefly about the main thing
Damper tape is an important detail when installing a subfloor. The material is glued around the perimeter of the room and protects the screed from cracking or swelling due to thermal expansion or contraction. The thickness of the tape is selected depending on the insulation of the room, and the length is determined by the total perimeter of all internal walls. The height of the product depends on the thickness of the subfloor structure being installed.
Ready-made damper tape in a room with a mounted screed
Before installing the product, the consumer has the opportunity to choose a standard, self-adhesive tape, or a product with an edge skirt. If there is no ready-made material on sale, it can be obtained by cutting simple foam foam intended for installing a substrate under the finished floor.
Classification of damper tapes
Damper tape can be classified according to two criteria:
- method of fastening;
- according to release form.
Mounting method. According to the method of fastening to the wall, there is a simple (sometimes called standard) tape and self-adhesive. Simple tapes can be fastened with all available means: hot-melt adhesive, double-sided tape, staples, self-tapping screws, piles of cement mortar. The “self-adhesive” has a strip of glue in the middle, covered with a film.
According to the form. There are 4 types of tape based on shape:
- regular;
- with a “skirt” (basque);
- L-shaped or with a notch in the middle;
- T-shaped.
Regular strip. Conventional tape is a single strip of polyethylene foam. It can be standard or self-adhesive, different in width and height. Widely used in private construction: attached vertically to walls, pipes, columns, partitions.
Ribbon with peplum. The damper consists of two parts: a regular tape and a glued bottom, a “skirt,” made of polyethylene film 3-10 cm wide. The purpose of the basque is additional waterproofing of the joints between the base of the floor and the wall and preventing the solution from flowing under the bottom of the tape.
It is used when pouring screed in the bathroom and bathhouse (prevents water leakage near the walls) and installing cable “warm floors”. From the purpose it is already clear that the dense part is attached to the wall, and the plastic film is laid on the floor. It can be with or without an adhesive strip.
L-shaped. On a regular tape, only wider, manufacturers make a cut, which allows the strip to be bent. The wider part of the strip should be attached to the wall, the shorter part should be laid on the base of the floor, similar to a strip with a peplum. Prevents the CPR from getting under the lower edge of the damper.
T-shaped. The use of T-shaped expansion joints in private construction is limited. This is an inter-circuit damper tape that divides a large screed into parts when it is necessary to relieve stress in the concrete in the middle of the floor. Laying is carried out with a pouring area of more than 40 m2.
DIY strip laying
The damper tape is laid around the entire perimeter of the room between the screed and the wall.
First, the surface is treated with a primer. Then, when it dries, glue the damper its width to the base of the wall.
If the edge tape is self-adhesive, then it is simply glued to the wall, removing the backing. The strip with the skirt is folded onto the floor so that the solution cannot get into the cracks. If the edge tape does not have an adhesive composition, then glue it to liquid nails and screw it with self-tapping screws. Sometimes damper tape is attached to the wall with small nails, a construction stapler, glue, or double-sided tape. You can press it with a solution. The strip must be installed above the level of the floor screed.
When the flooring is ready, it is not removed, but only the excess is cut off. If skirting boards are installed, it is not necessary to cut off the excess. When installing a water or electric heated floor, the damper tape must be laid between the heating element and the vapor barrier layer. Sometimes the strip can be placed under a vapor barrier. The damper must also be installed around the perimeter in the heated floor system and only then proceed to the doors.
You should use a long strip rather than save money by folding the damper from several overlapping cut strips. Such poor quality work can lead to problems during system operation. After installation, the tape must be smoothed, pressing carefully to eliminate minor defects. This must be done not with your hands, but with a construction roller, following the installation rules so that solvents do not get on the tape and deteriorate its technical characteristics.
How to attach damper tape
There are 5 types of damper tape:
- Regular edging.
This is a simple strip of polyethylene foam that compensates for concrete expansion. There is no adhesive composition on it;
- Self-adhesive tape.
There is an adhesive strip on its reverse side. It is smaller in size and covered with a backing. The backing is removed and the tape is applied to the wall with the adhesive side. This is very convenient, because when pouring a concrete screed, it fits tightly to the wall and does not move. The adhesive composition under the protective film has high adhesion. The strip quickly and firmly sticks to any building material: wood, plaster, concrete;
- Edge tape with skirt.
The skirt is a piece of durable oilcloth material extending from the polyethylene part. When the damper tape is fixed to the wall, it covers the angle between the floor and the wall, thus sealing it. The width of the skirt varies from 3 to 10 cm. Such damper tapes are found both regular and self-adhesive;
- L-shaped damper tapes consist of 2 parts - a wide and a narrow part. The wide part is attached to the wall, the narrow part to the floor. Such strips are bent at right angles. In order to better lay such a tape, there are cuts on the fold. A skirt can be attached to the L-shaped edge band. Such a damper can be ordinary, without glue, and an adhesive composition can also be located on each of the parts. Such an edge tape best protects the wall from the screed and prevents the mortar from getting into the cracks between the foundation and the wall;
- There are T-shaped tapes.
They are used for heated floors, for long walls (if the wall is longer than 80m), as well as for screeding a large area (more than 40 square meters) as an expansion joint.
What are the sizes of edge tape?
Damper tape is sold in rolls from 10 to 100 m, width from 50 to 150 mm.
The thickness also varies. It varies from 0.1 mm to 1 cm. The best thickness is considered to be 5mm. At the same time, they say that the thicker the screed, the thicker the edge tape should be.
In order to quickly and conveniently remove the excess part when laying the strip, longitudinal notches are made every 4-6mm. By pulling the edge, you can tear off part of the tape along the entire length.
How to determine the required dimensions of the damper strip?
To buy a tape of a certain width, you need to calculate it. To do this, find the sum of the thickness of the rough fill and the finishing layer of the floor covering. To this amount you need to add a few cm1-1.5 for reserve.
The length is determined by the perimeter of the room. Increases are made for columns, partitions and a small reserve just in case. The thickness depends on the height of the screed.
How to choose a damper tape
- The damper strip must be inspected. If there is mechanical damage on it, then it may be of poor quality and will not have a compensating effect on the screed, which will lead to its destruction, and then damage to the floor covering.
- The tape must be tightly twisted, otherwise the adhesive composition may come away from the wall during installation. Poorly glued tape will lead to destruction of the screed.
- You need to pay attention to the appearance of the tape, eliminating any signs of low-quality goods: stains, defects.
- It is best to choose a damper with a cutting ruler in order to quickly remove its excess after work.
- Self-adhesive tape will save your time and secure the material more reliably. But such tape is more expensive.
Only by carefully choosing a product can you avoid troubles: destruction of the floor covering.
How to replace damper tape
Sometimes, wanting to save money on a factory damper tape, they use alternative options. Some try to make a strip on their own, using materials such as polystyrene foam, isolon, folgoizol. But all these materials do not have all the properties of foamed polyethylene. Poor-quality damper tape can lead to the appearance of microcracks in the screed and reduce the service life of the floor covering.
Do you need a damper tape for a self-leveling floor?
When installing self-leveling floors, additional tools and materials are used. One such device is a damper tape. It protects the floor surface from cracks and prevents its destruction.
The purpose of the tape when installing a self-leveling floor is to isolate it from walls or different rooms in an apartment where there are no thresholds. It is easy to install. Unwinding the roll, glue the tape around the perimeter of the room. Then we start pouring the self-leveling floor. Sometimes builders do not install the tape; as a result of the deformation processes of the building and temperature changes, pressure from the screed on the walls may occur. But since the walls are harder than the self-leveling floor and screed, cracks begin to form on it, which expand over time and lead to the destruction of concrete.
Sometimes, when installing self-leveling floors in different rooms that are not separated by a threshold, damper tapes are used. In the passage space, a damper joint is made from tape, which compensates for the expansion of the concrete screed. After the self-leveling floor dries, small cracks appear above the damper joints, which should be covered with sealant if the floor is made of polymer, or with mortar if a self-leveling concrete mixture is used. In this case, the damper joint saves the self-leveling floors from destruction.
Recommendations for selection
Damper tape is an ideal object for counterfeiting. A student can print (download and then print on a color printer) the insert. Cutting the tape itself from the roll backing is just as easy. Roll it up and seal it in cellophane - no problem. Therefore, when shopping for goods, you need to study some nuances.
- While at home, you need to decide on the width and thickness of the tape, as well as its appearance.
- The tape must be in undamaged packaging, box (packed by European manufacturers) or film. This will protect you from many troubles.
- If the packaging is damaged, the following steps should be taken:
- ask to see a certificate of conformity;
- check the density of the bay, especially a large one - they could rewind ten meters;
- make sure the strip is intact, and if there is a skirt, then that too. If there is damage, even at a discount, it is better to refuse the purchase.
- The self-adhesive tape should not have partial peeling of the protective strip - the glue has lost its properties.
- The thickness should be the same along the entire length, which is clearly visible on both sides of the bay.
- The cutting line must be perfect. Irregularities indicate a fake.
- Dirt on the surface is not allowed.
- Preference should be given to trusted manufacturers.
General concepts
The constituent material is foamed polyethylene, the structure is homogeneous.
Characteristics of the material itself:
- not susceptible to rotting and fungi;
- does not change under the influence of ultraviolet radiation;
- easy to install.
The classic factory product has the following dimensions:
- height – 150 mm;
- thickness up to 8 mm,
- skein length from 10 to 20 m.
Usually done in grey, blue or white colors.
For ease of use, it is divided into 10 mm sections, which makes it easy to remove excess parts after filling the floor of an apartment or house.
But is a damper tape needed for a self-leveling floor? To reliably answer this question, let’s consider its functions.
Functions
The use of edge tape is very widespread in construction.
We will consider its use only in the installation of poured floors.
Attaching the tape yourself
- Increases the strength and reliability of the floor surface.
- Seals joints, stopping moisture from entering. It is not subject to rotting itself.
- Reduces thermal conductivity due to its closed cellular structure. Thanks to this, you can significantly save on heating costs.
- Seals gaps. This also increases the sound insulation of the room.
- Compensates for the pressure of the concrete layer on the walls during inevitable expansion after it is poured. This allows you to avoid the appearance of cracks, and taking into account the characteristics of self-leveling floors in an apartment or house, such deformations are simply catastrophic.
Edge tape will help prevent this.
To summarize, we can safely say that damping tape for self-leveling floors can significantly reduce costs and ensure the safe functionality of a self-leveling coating.
Criterias of choice
Today, manufacturers offer many options for edge tape to choose from. They are distinguished by size, price, specific properties, strength, etc.
To successfully navigate this sea of choice, let's turn to the criteria for choosing such a product:
- Deformations. If the tape has mechanical damage, then do not buy it under any circumstances. It will not be able to compensate for concrete pressure, and the quality of other functions will be in great doubt. As a result, due to such a defect, your entire floor covering may become unusable.
- Rolling density. If the deformation tape for self-leveling floor has peeled edges in the roll or sag, this may indicate a violation of the adhesive surface. As a result, you will not be able to fit it tightly around the entire perimeter, which will significantly limit its usefulness.
Tightly folded roll of damper tape
- Appearance. Check before purchasing for stains and any defects. All this may also indicate its unsuitability.
Also, when choosing a tape, you may be tempted to purchase a cheaper substitute in the form of isolon, penofol, or, a very critical option, slats wrapped in fabric.
But it may turn out that this time the miser will pay not twice, but even three times or even four times. All these replacement materials do not have the full range of advantages of edge tape and can lead to a sad outcome. You should not try to save money in this case.
For example, isolon with penofol will not be able to provide sound insulation, and slats are susceptible to fungi and mold. And in other qualities they are significantly inferior.
Popular options and prices
The list (not rating) of the most popular brands of damper tape includes:
- Kermi is a German company. Produces tape for “warm floors” 160 mm wide and 8 mm thick. It is wound into coils 25 m long. The price per roll starts from 500 rubles;
- Oventrop is another representative of Germany. It supplies the building materials market with L-shaped tape coated with glue (“self-adhesive”), 12-15 cm wide and 10 mm thick. It is wound into rolls of 25 and 50 m. You can buy the cheapest one for 20 rubles/m .;
- "Upolon" - to introduce Swedish industry. Produces universal, self-adhesive tape 10 mm thick and 150 mm wide. Sold in coils 50 m long at a price of 7,100 rubles. per roll;
- "Energofloor" is a brand of damper tape with a skirt. Supplied in length - 11 m, width - 10-15 cm, thickness - 10 mm at a price of 860 rubles. per roll;
- "Tilit Super" is a Russian manufacturer of peplum tape at a price of 1 m from 35 rubles. and more.
- "Teploflex";
- "Knauf" FE;
- "Valtec" etc.
Materials, types, types
The polyethylene from which the damper tape is made can be uncrosslinked or crosslinked. Unstitched is cheaper, but less elastic, the walls can burst under significant load. Sewn is many times more expensive, but also more reliable. This explains the significant price difference that can be found for material of the same length/width/thickness. The type of material is indicated in the specifications. Also, the price depends on the density. This characteristic is not always indicated, but an indirect sign of higher density is greater mass. You just need to take into account the size of the tape.
T-shaped damper tape for organizing expansion and intercontour seams
There are two types of damper tape for screeds: edge and intercircuit T-shaped. The edge one is the one that rolls along the wall. Intercontour is used when constructing expansion joints in screeds - with a large floor area (more than 6 meters in length). It is more convenient to install it in a doorway; this material is used to separate the screed in the area of action of different heating circuits for water heated floors.
Types of edge (edge) damper tape
There are three types of tape:
- Standard. It's just a strip of polyethylene foam.
- With self-adhesive base. An adhesive composition is applied to one side, protected with wax paper. During installation, the paper is removed and the material is pressed against the wall. Due to the adhesive composition, it is fixed.
- With a skirt. Damper tape with a polyethylene outlet on one side. The width of the outlet is from three to ten centimeters. During installation, the skirt is laid out on the floor. This material also reduces the likelihood of leaks at the junction of the wall and floor, which is important.
The waterproofing is placed on the walls and fastened, then the damper tape is unrolled and attached
If waterproofing is spread on the floor, it is usually applied to the walls and secured there. The damper tape is laid in front of the waterproofing (as viewed from the center of the room). It turns out to be a double layer of material to some height, but this is not a problem.
How to mount it correctly
The work of laying a damper layer between the wall and the screed is not difficult. It is performed in several stages.
1. The surface of the wall and the base of the floor are cleaned of dust and dirt - otherwise the glue will lose adhesion to the wall material. This step is especially important if you need to secure the tape outside the building, along the base. After this, degreasing is carried out. 2. The compensation strip is attached to the wall. Here the correct order of operations is as follows:
- laying starts from the corner. Conducted from left to right. The roll is laid on the floor with an adhesive strip to the wall and unwound. In this case, you need to go into the adjacent wall by about 50 mm so that at the end you get an overlap. You can start from a corner without entering the adjacent wall, but then you must also complete it by entering the already laid damper. Naturally, the splicing must be done overlapping;
- the roll needs to be unwound as you pass the perimeter - the tape will lie flat, without sagging or twisting. The protective film from the adhesive strip is also removed slowly - you can contaminate the adhesive layer with an awkward movement;
The protective tape is removed as the perimeter is passed.
- the tape is laid continuously without tension;
- in the corners the “skirt” is not cut, as some experts advise, but is laid in a triangle. This solves the problem of acute and obtuse angles;
- as you pass the perimeter, you need to roll the tape to the wall with a roller, and level the plastic film of the “skirt” so that there are no folds under which the solution can get;
- To attach regular tape, you can use double-sided tape, hot glue, liquid nails, masking tape (the damper is glued to the wall with its top edge) or piles of mortar. It is undesirable to use self-tapping screws and staples - they will interfere with the thickness of the tape. If they are still used, then the fasteners must be installed above the screed, at the level of the floor covering;
- all pipes, columns and partitions in the room are also covered with a compensation strip.
3. The tape is cut, but only after the tie has set. If the height is insignificant, the operation can be ignored - everything will be covered by the baseboard. By the way, some manufacturers make cuts at the top. In this case, it is enough to pull the protruding part and the excess will come off without a knife.
In conclusion, laying damper tape around the perimeter of the walls avoids the destruction of the screed. The work is simple. You can do it yourself. Experience shows that it is more convenient to work together: one rolls out and glues the tape, the second compresses it with a roller and straightens the plastic film of the skirt.
Installation of compensation tape
As mentioned above, nothing complicated is expected in installing the damper strip. The work is carried out in stages, at a positive base temperature, in the following order:
- Before attaching the tape to the wall, it is necessary to clean the surface of dirt, and it is also recommended to pre-treat this area with an antifungal primer and dry it well. Treatment is especially important when the tape is installed against the external wall of a building. And in rooms with high humidity, this measure will always be beneficial.
Beginning of tape fixation
- The tape is laid from the corner of the room. During installation, the strip is gradually unwound from the roll - this will reduce confusion.
- If a material with a self-adhesive strip is used, then the protective film backing is removed from it as the tape is fixed to the wall.
Removing the protective backing from the adhesive strip during the installation of the compensation film. Take your time with this, don’t remove too much - in the heat of work, you can ruin a significant piece of tape with an awkward movement.
- In places where it is necessary to connect two pieces of tape, they are overlapped by 100÷150 mm.
Installation of tape in corner areas
- When installing the tape in the corners of the room, you must be especially careful, since the corners do not always correspond to 90 degrees, and the tape must fit tightly to the surface of the walls. If there is a basque on the tape, then it is laid overlapping in the corner.
Peplum material straightens out
- When using tape with a “skirt,” the polyethylene is carefully leveled on the floor after securing the foam part of the tape to the wall.
Cutting the ribbon
- Cutting the compensation material is done using a sharp construction or stationery knife.
- If a “warm floor” system is installed under the screed, then the tape with the peplum is installed before foil-coated insulation or thermal insulation mats for laying water floor pipes are laid on the floors.
The compensation tape is glued to the entire lower surface of the walls, including the thickness of the wall in the doorway.
- To better fix the tape on the wall, after installing it, it is recommended to walk over it with a roller, which will more reliably press the material to the surface.
- When installing tape with a “skirt”, part of the material laid on the floor must be completely covered with the screed solution.
- After the screed has hardened and gained primary strength, allowing walking on it, the excess tape protruding from above can be cut off flush with the concrete surface.
- If you plan to lay a hard decorative covering on top of the screed, then the excess tape can be removed after its installation, before installing the skirting boards
- The excess is cut off carefully with a sharp knife or simply torn off if the tape is separated by cuts, as mentioned above.
If you purchased a tape without an adhesive layer, it can be fixed on the wall with double-sided tape or with one of the thick, quick-drying adhesives, applying it dotted or striped to the back side of the material. Another option is to temporarily secure the polyethylene foam to the wall using masking tape. The tape is glued to the wall along the top line. After the screed presses the material to the wall and the solution hardens, the tape can be removed.
But it is not advisable to attach the compensation tape with screws or staples, since the layer becomes leaky. When pouring, water from the liquid mortar can begin to escape through these holes, disrupting the normal water-cement ratio and reducing the quality of the resulting screed. It’s better to just lean the edge tape against the wall, pressing it with heaps of mortar.