Fireplace glass is not only a beautiful accessory, but also a very convenient device that makes it possible to expand the capabilities of the fireplace. But equipping an old fireplace with such glass is often quite difficult - on the one hand, not every glass is suitable for installation, and on the other hand, not every glazier can boast of the ability to work with such material. But, as you know, there are no hopeless situations, and if the desire to make a glass door for your fireplace is so great, you can find a way out of this situation.
Stages of work
The first thing to do is cut out the corner. And then give the desired shape to the structure. In order to carry out this operation, you need to lay the corner on a flat surface, check the correctness of all connections, and then weld all the necessary parts. After finishing the work, you need to inspect the door again for correctness and compliance with the form.
Then you need to mark the inner contour of the frame on a sheet of metal. After finishing the markings and receiving all the measurements, you need to increase them slightly and leave a small allowance on each side. Taking these marks into account, it is necessary to cut out the part using a metal grinder. Since the door is planned with glass, it is necessary to have a piece of heat-resistant material that will be mounted.
Using the same tool, glass is cut to the required dimensions. Next, you need to weld the curtains to the frame. After this, you need to grab them to the common door frame. When this operation is completed, you need to make sure that nothing interferes with the opening and closing of the door. If this condition is met, then final welding can begin. The door handle is attached last.
How to evenly and correctly weld hinges on a door, gate, etc.
Friends, I welcome you again to our channel. If you decide to learn manual arc welding on your own, then here are hundreds of articles that will help you in this difficult, but very interesting and necessary task!
Today we will discuss a topic that everyone who has picked up a welding holder cannot do without, because sooner or later they will still have to deal with it - how to weld the hinges evenly and correctly.
I will demonstrate this technology using the example of setting and welding hinges for a metal door.
I always start welding hinges this way: first of all, I disassemble the hinges into 2 parts, and with a marker I make a note on the part of the hinge, which in everyday speech is called mom.
I do this so that during the work process I don’t have to disassemble the hinge every time and look where each part is, and without this there is no other way to weld it incorrectly, and the door will turn out to be permanent, and redo it later. So this is a very important little thing.
here are 3 photos - scroll through here 3 photos - scroll through
We need the hinges to be strictly in the same planes after welding, so we make a temporary guide for them with a profile pipe fixed with clamps to the door.
By the way, I always try to move the hinges away from the metal sheet of the door by at least 5-10 mm, so we will press the corrugated pipe along the marks made taking into account these numbers, but we will start from the edge of the corner of the door frame.
here are 2 photos - scroll through here 2 photos - scroll through
Then we mark the distances from the top and bottom of the door leaf, here we will weld the hinges, it should be the same from the bottom and top - although there are no standards here, but keep the size at least 250 mm.
Next is another important detail. You should never weld hinges without a gap to the frame of a door, gate, etc., otherwise they will rub against it a lot during operation. Therefore, we make a gap - I try to make a gap approximately equal to the thickness of the door leaf sheet, here it was 1.5 mm, so before tacking the hinge, I put it on a cutting disc from a grinder with a thickness of 1.6 mm.
here are 3 photos - scroll through here 3 photos - scroll through
Now we make potholders, we make potholders strictly at the ends of the loops. When we tack, we try to press the loop tightly, otherwise, without pressure, the welding tack will pull it to the side, and the alignment will be disrupted. We loosen the pressure of the loop 5 seconds after both end tacks - not earlier. Yes, we press the hinge not only to the door frame, but also to the guide pipe, then everything will turn out fine!
here are 5 photos - scroll through here 5 photos - scroll through
After tacking the loops at the ends, we unscrew the clamps from the corrugated pipe, and place this pipe on the hinges to visually assess their horizontal plane - if anything is broken, we correct it with a hammer, but usually, if you press normally during the tack process, then everything will be smooth!
Now we need platforms made of thick metal - I prefer to saw them with a grinder from a corner, leaving one wall approximately the size of half the thickness of the loop. With these platforms we will weld the moving part of the hinge, the mother, to the door leaf.
Many people at this stage already weld the pads to the hinges and door leaf, but I still do a little work to make this welded connection as strong as possible.
here are 6 pictures - scroll through here 6 pictures - scroll through
I take and outline the area with a marking pencil, then make marks approximately at the level of the centers (middles) of the door frame profile. Then, using these marks, I make a weld point—I burn through a sheet of metal with an electrode, and weld this sheet to the door frame itself. Then I use a grinder to clean this weld point to zero.
It’s just that the welds will pass here, and they will firmly connect the hinge through the platform not only with the sheet metal of the door, but also with the door frame itself - in short, with this method, everything will be securely welded, and nothing will ever bounce off!
Door specifics
If you intend to make a door with glass inserts, you should first of all decide on its style
It is important that it matches the overall decoration of the room and the specifics in your particular case. So, for example, in small rooms it makes sense to make a double-leaf insert or a rising one to save space.
Both of these options are ideal for a corner fireplace.
The main point that should not be forgotten is the selection of glass. It must have a heat resistance of at least 800 degrees - it is to this temperature that the flame usually flares up.
The prepared glass is inserted into the metal frame of the door itself, and that, in turn, is attached with hinges to the outer frame, which is fixedly fixed in the opening of the firebox. Wherein:
- a seal is installed on the inside to prevent smoke from entering the room;
- At the bottom of the outer frame, holes are made with adjustable plugs for air access to the firebox;
- Keep in mind that metal tends to expand greatly when heated, so the gap between the transparent insert and the frame is not made too large;
- When starting production, remember that the glass cannot be fixed tightly, because during installation it will need to be removed from the door;
- strips of fiberglass are inserted into the frame to seal it.
Preparation, list of tools
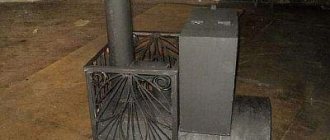
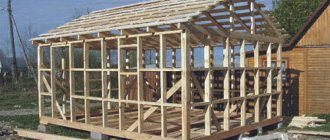
Before starting work, you need to determine and mark the place that the new stove will occupy.
The chimney pipe should be no closer than 15 cm from the roof rafters.
If you are doing masonry for the first time, professional stove makers advise you to practice in advance by making a model of the future stove from prepared bricks. Naturally, without a solution. This minimizes possible risks during real masonry, allowing you to learn from your mistakes, which can still be corrected in the layout.
The stove foundation requires preliminary waterproofing; its area must exceed the area of the stove.
When laying a new row, you need to control the absolute verticality of the walls.
To build a brick kiln, the following tools are needed:
- plumb line;
- trowel;
- roulette;
- putty knife;
- Bulgarian;
- knitting wire;
- building level;
- metal strips, corners;
- containers for cement and clay mortar.
What you need to prepare
The tools we will need are:
- electric drill or hammer drill;
- angle grinder;
- a hammer weighing up to a kilogram;
- welding machine and electrodes;
- roulette.
The following materials are needed:
- steel corner of the width that suits you;
- metal strip;
- hinges (turned eccentric);
- bolt;
- handle for opening.
You will determine the exact dimensions yourself and adjust the above drawing to fit them.
Advantages and disadvantages
The operation of fireplaces with glass has advantages and disadvantages. Let's look at the positive qualities.
- Economy and compactness. A small firebox can provide sufficient heating while consuming a minimal amount of fuel.
- Environmental friendliness. The glass fireplace system provides control over the combustion of wood, as well as re-burning of unused fuel. The release of toxic gas is minimal.
- Small dimensions of the heating device, which does not affect the quality of protection from the cold.
- Easy to use. You do not need to have special knowledge and skills to use glass fireplaces (the system is simplified as much as possible).
- Beautiful appearance. This fireplace looks impressive in any interior.
Fireplaces with glass have disadvantages.
Wholesale trade
About glass for fireplaces, protective screens for fireplaces
The combustion chamber of a fireplace poses a certain threat to the room due to the large number of sparks, embers emitted by cracking wood and hot ash. It is inconvenient to close the opening with a steel or cast iron damper; in addition, all the beauty of the flame disappears and heat transfer decreases.
Therefore, modern fireboxes use glass for the fireplace, which is strong enough not to shatter when closed, and heat-resistant to withstand the heat of the flame.
FIREPLACE GLASS DOOR CONSTRUCTION
There is currently no alternative to using glass valves:
- Doors for fireplaces made of heat-resistant glass do not expand or deform from heat, like cast iron or steel, thanks to this it is possible to obtain minimal gaps and a high quality seal between the frame and the edge of the door;
- Fireproof glass for fireplaces does not burn or oxidize and retains its original appearance throughout its entire service life;
- The main thing is that a fireplace door with glass allows you not only to enjoy the play of fire, it is the only possible way to control the combustion process so that the flame does not turn into smoldering with the formation of carbon monoxide.
For a small country house or cottage, a cast iron fireplace with glass is most often chosen. In addition to the beautiful appearance, this choice has a purely practical advantage - heat-resistant glass for the fireplace ensures faster and more uniform heating of the room. The champion in terms of heating efficiency is a round fireplace with glass, which is capable of heating and simultaneously lighting the room.
MAIN VARIETIES OF HEAT-RESISTANT GLASS
- Quartz glass options are among the most heat-resistant and refractory;
- Borosilicate glasses;
- Multilayer glass sheets coated with cerium oxide.
Material
Metal (often stainless steel or cast iron) is used as the basis for the fire door for a stove with glass. According to the characteristics of experienced craftsmen, cast iron is more preferable: it is distinguished by durability, it is not afraid of high temperatures, it is easy to clean, and it is quite durable. Stainless steel will become very hot when the stove is fired; it is not intended for open fire and will soon warp.
From glass
Glass doors are available in single or double door versions. One oven door usually has a large window to view the fire. There is no difference in functionality. A lot depends on taste here. In two-door ovens, the design is close to ancient forms. It is possible to look at the fire through 1 large glass or 2 small ones. Much will depend on the preferences of buyers and the interior of the room. Advantages of a stove door with glass:
- Glass can withstand the influence of elevated temperatures for a long period of time - this positively distinguishes it from devices made of steel. It is superior in fire resistance to cast iron.
- Fireproof special glass for stoves and fireplaces is approximately 0.4 cm thick and can withstand temperatures up to 2000 degrees.
- Compact dimensions and low weight.
- The main advantage of a glass oven door is the ability to look at the flame. Such an option will outweigh any disadvantages, forcing stove users to purchase stove doors made of a similar material, despite the short period of use and high price compared to solid metal doors.
Flaws:
- The creation of glass doors for a furnace is considered to be a more labor-intensive process than production from a solid sheet. To avoid cracks during use, a little space is left when installing with a seal. The doors will trap sparks from the fire, preventing them from entering the room. Glass inserts are designed so that air blows over the material, preventing soot from lingering on it. Otherwise, the glass will be smoked.
- Fragility of the material. Fire-resistant glass sometimes cracks with minor impacts.
- The price of a device with glass inserts is higher than one made of solid material.
- Glass door ovens are much less efficient than cast iron ovens because heat dissipates through the glass. The larger the material, the less efficient the stove is at heating the room.
Important! Often a stove door with glass is combined with a metal device. In such situations, the frame is made of steel and the door is made of glass. We suggest you familiarize yourself with Clay mortar for laying a stove: how to prepare it, where to get clay, how to make the composition, clay mortar, how to dilute it correctly
We suggest you familiarize yourself with Clay mortar for laying a stove: how to prepare it, where to get clay, how to make the composition, clay mortar, how to dilute it correctly
This category involves doors made entirely of metal. The installation process is quite simple and does not have any complications. The products retain heat well and are distinguished by increased fire safety. When the need arises, it is possible to make them yourself with minimal expense. Key advantages of metal products:
- Reasonable price. Compared to a stage on a glass device, it is much smaller, which is why it has a certain prevalence.
- Durability and reliability of such devices. With proper care (regular anti-corrosion treatment using paints that are classified as fire-resistant), they will last a long period of time without causing discomfort to the user.
Important! Despite the fact that such doors have their own consumer, the demand on the market is quite low, since they do not provide the opportunity to look into the flame
Cast iron door
Main advantages:
- Excellent interaction with elevated temperatures.
- Durability and reliability. The cast iron fireplace vent door can withstand any load.
- Beautiful models can be easily created from cast iron.
All this optimally finds its own application in this area; many firebox doors are made directly from cast iron.
Installation
The complexity of installing a product is directly related to its design and model. To install the door yourself, you need a set of special devices and tools.
You will need:
- angle grinder;
- cutting disc;
- sealing cord;
- impact drill or hammer drill;
- set of drills;
- screwdriver;
- self-tapping screws;
- permanent marker;
- heat-resistant oven mixture.
To perform installation, you need to perform a number of sequential actions:
- Attach the door to the fireplace opening. It is necessary to ensure that the body of the product matches the design of the fireplace. Using a permanent marker, make marks on the surface of the firebox through the mounting holes in the body. Carefully remove the product.
- To make grooves in brickwork, you will need a grinder with a diamond wheel. This job requires a lot of attention and additional equipment. You will need special glasses to protect your eyes and a respirator to protect your respiratory system. After cutting out the grooves, you need to use a chisel and a hammer to break off pieces of brick.
- Using a hammer drill or impact drill, you need to make holes along the marked marks for mounting the product body. Try the frame on and make sure the holes in the frame and the brickwork line up.
- Heat-resistant oven solution must be diluted according to the manufacturer's instructions. Soak the asbestos sealing cord in the oven mixture. Wrap it tightly around the frame frame. Insert the prepared product into the structure by tapping it with a rubber hammer. If any gaps remain, it is necessary to fill them with asbestos cord and level them with a heat-resistant oven mixture.
- Screw the frame to the fireplace.
- After the solution has dried, insert the glass into the door.
- The control fire can be carried out after 3-4 days.
If the door is matched to the fireplace under construction, problems with selection and installation can usually be avoided. It is much more difficult to add a door to an already finished fireplace. In such cases
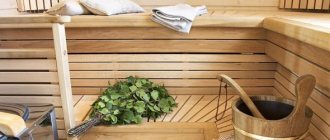
Fireplaces are becoming increasingly popular again. People install them if there is a technical and financial opportunity. The fireplace has a number of advantages over other heating systems:
- Efficiency.
- Aesthetic appearance. Looking at a blazing fire through a glass door never gets old.
- Making a fireplace with your own hands with the appropriate construction skills is a very real thing.
The topic of today's material is not about arranging a fireplace as such, but about how to make heat-resistant glass with your own hands in order to equip a door in it.
How to secure the door in a brick oven
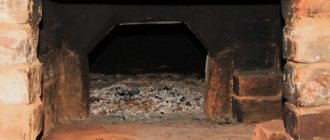
The furnace firebox is one of its main elements, designed for burning fuel materials.
Any firebox must provide an influx of oxygen to maintain the fire, complete combustion of fuel, release of flue gases and removal of ash.
The design of the firebox is determined depending on the type of stove and the type of fuel.
ontakte
Odnoklassniki
How to fold a stove firebox with your own hands
The furnace firebox consists of a ashpit (ash pan) with a door, a grate and a combustion chamber (firebox) with a door.
Dimensions are determined based on the volume of firewood for simultaneous loading. The width of the combustion chamber is equal to its door or slightly wider on both sides.
The height of the firebox should facilitate complete combustion of fuel, which is achieved by having free space in the chamber after loading firewood. Recommended height 80-100 cm.
Reference. The depth of the furnace firebox must accommodate the length of the combustible material; there are no other restrictions.
The combustion chamber is connected to the ash pan via a grate. The latter is designed to supply air during combustion and collect ash. When installing the grate, it must be buried below the level of the fire door to prevent burning coals from falling onto the floor.
The firebox must have bevels in the direction of the grate to move the ash into the ash pit. The gap between the masonry and the grate must be at least 5 mm to prevent rupture of the brick as a result of the difference in expansion of the brick material and metal at high temperatures.
Design safety
Violation of stove masonry technology at any stage of construction can lead to danger when using the firebox. The main mistake can be incorrect laying of the foundation.
The main signs of malfunctions that occur when the foundation is laid incorrectly:
- The roof of the firebox is destroyed.
- The doors fall out.
- Burning coal spills out.
- The brickwork is cracking right through the entire area of the stove.
- Chimneys become unusable.
It is impossible to heat the stove in this condition - there is a high risk of fire and poisoning of people from flue gases. Damage caused by an unsuitable foundation cannot be corrected. You will have to disassemble the entire stove and rebuild all the elements.
Rate this article:
Average rating: 3 out of: 2 readers.
ontakte
Features of such products
Thanks to a high level of temperature resistance and no less strength, glass for fireplaces helps to realize most of the stylistic ideas and plans of designers.
However, there is one significant drawback of such products, and it lies in the large weight of the structure. But even here, craftsmen tried to find a way out, and therefore, if you make a product to order, combining the amount of glass and metal in the right proportions, the structure can be equipped with special lifting mechanisms. They are quite easy to use and do not make much noise, which is a significant advantage.
Factory-made fireplace door
As for closed-type fireplaces, their main feature is the firebox doors; it is in them that heat-resistant glass is built. Depending on the direction in design and stylistic idea, it will act as the main decorative element of the entire structure.
However, precisely because glass is installed in the door, more heat is retained inside the fireplace, draft improves, and there is no chance that a coal or roast will fall out. Open types of products cannot boast of such advantages.
Installing the oven door
Preparation includes the following necessary steps:
- Before installation itself, it is necessary to inspect in detail the door itself and the mounting frame (de facto, we take the fact that the door is already made to the required dimensions). Cracks and distortions of the door and frame are unacceptable; its plane must be flat and fit tightly not only in the area of the lock, but also over the entire area of contact with the frame;
- If an unsatisfactory condition is detected, the door is replaced or, if possible, the defects are eliminated;
- The door itself should move freely in the fastening elements. It should be easy to close and open;
- If the stove is made only for coal, then a hole of 13 mm is drilled in the door. in diameter. This hole will be an outlet for gases generated during the combustion of anthracite.
The door is exposed to the greatest impact during oven operation. It carries mechanical loads, as well as increased thermal loads. To ensure that the damper lasts as long as possible, the following instructions for each mounting option must be followed.
On nichrome wire
Nichrome has proven itself to be an excellent solution to this issue due to its increased resistance to heat and at the same time maintaining its ductility in the form of a wire. This mount is guaranteed to last 20 years. How to secure the door to a brick stove:
- The frame and door are a single hinged structure. A wire is attached to the frame and threaded through special holes. They are not difficult to make; it is enough to drill them with a diameter of no more than 5 mm.
- The wire is threaded through the holes, and the free ends are fixed in the masonry between the bricks.
Installing the combustion door on nichrome wire
The main disadvantage of this method is that the wire must be kept taut and gradually embedded into the seam between the bricks. The length of the wire is one and a half to two bricks. The whole process is very labor intensive.
On a stainless steel sheet structure
Installing the combustion door of a brick oven using this method is the most common. The frame is a structure that is identical to the door in geometric dimensions, but the frame plates have special collars. They are made from a corner, one side of which fits into the distance between the bricks, into the masonry. Next, everything is coated with the solution.
- In order to protect the brick from calcination from the metal corner, a layer of silicon thermal insulation is installed between them. This protects the masonry and seam from overheating and also softens the expansion of the metal when heated, which can harm the entire masonry.
- To best attach the slopes of the corners between the masonry, it is better to use self-tapping screws. Two holes are drilled coaxially in the corner and brick, and a self-tapping screw is screwed into them.
Installation diagram
What does it look like in the oven?
The method of how to correctly install the door into the oven on a profile corner can be combined with the first one - on a wire, in which case the fastener will be both reliable and durable.
For self-tapping screws or bolts
This method has its place, but among stove makers it is the least common and reliable. The fact is that the design of the frame and door itself is very heavy, especially if it is made of cast iron. This method is applicable to the question of how to secure a door in a stove for the chimney, and not for the firebox.
- Holes are drilled from the front in the frame and brickwork;
- The frame is attached to an anchor at the location where the door is installed.
General installation diagram
Installation on anchors
Checking and finishing
The door and masonry should have a small buffer, since heating the frame in contact with the brick will lead to its bending, as well as damage to the screws - they can bend and come out of the screw-in point. In this case, the door will mutually move away from the masonry.
How to make glass at home with your own hands
To make glass at home, you will need a special furnace that provides heating to high temperatures. At home, they use a muffle, electric or pot stove, as well as a charcoal roaster.
Special glasses can be melted in an electric, pot or muffle furnace.
The second option is simpler, but unsafe, since when heated to hypermaximum temperatures, the grill itself may melt. We will tell you how to cook glass in a special oven.
- Prepare a fireproof crucible (melting pot).
- Pour sand, soda and lime into the crucible, and impurities should occupy no more than 30% of the composition.
- Place the crucible in the oven and melt the composition at the highest possible temperature (1500-1700⁰C).
- Once the components are melted, pour the liquid alloy into the casting molds.
- The last stage is firing in a kiln cooled to 400-600⁰C. This will make the glass product hard and durable.
The crucible must withstand the exceptionally high temperature that is reached in the furnace. This is how you can prepare glass at home if you have special equipment.
Making homemade door hinges: why you need a responsible approach
Self-made loop
Why choose homemade ones?
Many people refuse industrially manufactured fittings in favor of homemade ones for several reasons. Such products:
- Withstands significant loads. What is relevant for garage doors and solid doors;
- They have the required size. If the parameters of those manufactured in industrial conditions are standardized, then when producing in-house, the size that is required is chosen;
- They have a high level of reliability, since the fittings produced for themselves have a high level of strength compared to those produced in the factory. You can always choose a material with high mechanical properties and greater thickness.
We make loops with our own hands
The process of making loops is simple. In order for the fittings to turn out to be of high quality, you must be able to perform various types of work on your own.
Preparing tools and materials
To make high-quality accessories at home, prepare the appropriate tools, materials and equipment. You must have the following tools and equipment:
- Tape measure or other measuring tool. Sometimes you can get by with a regular ruler, but in this case it must fully meet regulatory requirements;
- A marker that writes on metal. Instead of a marker, you can use chalk;
- A hacksaw with a blade for metal. Those who know how to use a grinder can use this equipment if it is available;
- File;
- Hammer;
- A welding machine with suitable technical characteristics, as well as personal protective equipment necessary for welding work.
- Metal plate 2-3 mm thick;
- Pipe section;
- Steel rod. Its diameter is consistent with the internal diameter of the pipe section. Select a rod so that it fits inside the pipe with a slight interference fit. It is better to discard a rod whose size is smaller than the internal dimensions of the pipe.
When choosing a material, pay attention to its characteristics. The plate, pipes and rod must withstand the applied operating load.
Manufacturing sequence
Initially, two sections of pipe are sawed off. The total length depends on the size of the door leaf. So if it is 11 cm, you need to prepare the first piece of pipe 5 cm long. Before cutting the pipe of the required size, carefully apply markings. You will also need a piece of pipe whose length is 1 cm longer, i.e. – 6 cm. As a result, the total length is 11 cm.
After sawing, burrs often form on the metal surface, which can cause injury during installation work. To prevent this from happening, remove defects with a file. Wear gloves to avoid damaging your hands. Perform processing on both sides.
Once the tubes are ready, the rod is prepared. Its length is equal to the total length of the pipes, that is, 11 cm. To do this, markings are applied to the surface of the rod and a saw is made. The cutting line must be perpendicular to the nominal axis of the rod.
After cutting the rod and pipes to size, they are connected together. To do this, a rod is pressed into the sleeve. Once the sleeves are in place, the plates are prepared. Their size is consistent with the dimensions of the door and the dimensions of the manufactured hinges. There should be two such plates, and they have the same length. This concludes the preparatory stage. Moving on to welding work.
After making sure that the rod has taken the desired position inside the sleeve, the ends of both tubes are welded. This prevents the rod from moving inside the pipe during operation.
The plates are then welded to the sleeves. They are positioned perpendicular to the conventional axis of the sleeves. To do this, the plates are first grabbed, and then, after making sure of their correct spatial arrangement, they are finally welded.
Decoration
To make the manufactured hinges look beautiful, they are painted or galvanized. Both of these options allow you to give the surface a beautiful appearance, as well as protect it from external negative influences. To do this, the thickness of the applied coating must be sufficient for specific operating conditions.
After decoration, the fittings look almost the same as those sold by official manufacturers. In this case, you can always choose the color of the product that you require. So, if you can find fittings on sale, as a rule, black, then hinges made in-house can be painted in any suitable color.
Ready-made accessories
Installation of hinges
After the fittings are completely ready, they are installed. To do this, one plate is screwed to the sash, the second to the door leaf. The fastening is done so that the plate with the upper sleeve is screwed to the door, and the second part to the vertical post of the box. During the installation process, the manufactured loop is assembled into a complete product.
Installation of hinges
To prevent jamming during operation, lubricant is added between the mating surfaces. The amount of lubricant should be sufficient so that the pin rotates easily inside the sleeves.
Installed fittings
Other options
Not everyone can boast of having a welding machine at home. For others, such products turn out to be an expensive option, which is a pity to install on a light door. In this case, the necessary fittings are made from scrap materials. Which option is suitable depends on the size of the door leaf and the material of the door leaf.
To do this, prepare a conveyor belt and metal plates. Their thickness can be relatively small. You can take metal whose thickness is not much greater than the thickness of the sheets that are used in the manufacture of cans. To fasten the fittings, prepare nails 4–5 cm long.
Installation of hinges is carried out by placing the panel in the doorway. Leave one centimeter between the vertical post and the door leaf on the side where the hinges will be located. Having fixed the position of the door, nail the hinges. To do this, first place a conveyor belt and metal plates on top. In this case, the conveyor belt acts as a flexible element that ensures the opening and closing of the sash.
Such fittings are suitable for lightweight doors that are installed at the entrance to a chicken coop or a place where rabbits are kept. Their distinctive feature is the absence of creaking during operation, as well as the ability to operate without lubrication.
Thus, anyone can make loops on their own. Such fittings are suitable for garage doors and entrance doors. If you approach the manufacturing process responsibly, you can make your home a real fortress. High-quality and durable fittings can withstand external loads and at the same time have an aesthetically attractive appearance.
Types of fireplace doors
Product classification depends on what material the doors are made of. There are several types with their own positive and negative qualities, features of operation and installation.
Glass doors for fireplace
A fireplace door with glass is an excellent solution that suits different interior styles. Fireplace heat-resistant glass is resistant to high temperatures and has increased strength. The thermal expansion of the material is insignificant - the coefficient is 30 times less when compared with ordinary glass. Due to their high heat transfer, they are able to withstand heating up to +1000 degrees Celsius, without cracking.
After 30 minutes of operation of the fireplace, the heating of the glass will be within +50-250 degrees Celsius. For hardened products, the temperature reaches up to +500 degrees.
Heat-resistant glass is made from special raw materials using special equipment, practically without the use of foreign impurities. The material is resistant to fire thanks to a special hardening technology; in addition, it is chemically treated and thermally polished.
Where is heat-resistant glass used?
Heat-resistant glass allows you to be close to fire without fear of flying sparks.
Fireplace
Heat-resistant glass for the fireplace keeps the fire open and increases safety of use.
Oven
Transparent oven and microwave doors allow you to maintain the temperature and monitor the cooking process.
Hob
Uniform distribution of heating of the hob.
Production
Fire-resistant glass in doors and partitions reduces the likelihood of a fire occurring and spreading.
Decor and other functions of the fireplace door
Against the backdrop of the disadvantages of an open firebox, a fireplace door is simply a wonderful salvation from all of the listed disadvantages. Even though the flame is hidden behind the glass door of the firebox, you can still admire it through the clear glass. Everyone knows about the decorative functions of closed fireboxes, so let’s immediately move on to technical issues.
A closed firebox allows you to install a water circuit in the fireplace, and these are prerequisites for the full use of the fireplace as a heat-producing device, and the main one.
Thanks to the special door design, it is possible to use slow burning technology. By regulating the air supply, we achieve better fuel combustion and, therefore, an increase in efficiency. By installing protection, you can be calm about safety, even if children are playing in the room.
Classic fireplace design
What to look for when choosing a glass door?
Despite the fact that glass began to be used for the manufacture of stove doors relatively recently, it is already very popular. The fact is that such a door will easily protect residents from open flames and acrid smoke, but, at the same time, will allow them to admire the flames.
In order for a product to maintain its functionality over a long period, it must meet very high requirements and standards. The degree of hardening rightfully deserves special attention. The fact is that weakly tempered glass will simply burst when exposed to strong heat.
It is worth noting that fire-resistant glass can be used for flooring near the fireplace, as shown in the photo below. The fact is that it is practically not subject to various mechanical damages.
To prevent the door from heating up too much as a result of exposure to fire, it is necessary to make a small hole in it. This will slightly increase the draft and turn the flame in the opposite direction.
Installation of fireplace doors
If you have chosen the fireplace door you like, you can begin the process of installing it. If you decide to install it yourself, first of all, you should make sure you have all the necessary tools, namely:
- - cordless screwdriver;
- — impact drill or hammer drill;
- - drill;
- - marker for marking.
The predominant number of products are presented already assembled. The frame material is usually steel or aluminum alloy. Do not forget that aluminum products are made of 4 parts. This fact simultaneously simplifies and complicates the installation process. While such a product can be installed in any fireplace, uneven walls of the firebox can create serious problems during installation. If the doors are made of steel, they are much easier to install due to their integrity.
As for glass products, they require special attention. First of all, you should temporarily remove the glass from the frame and install the frame itself, aligning it with the plane of the fireplace. Using special brackets, a marker and an impact drill, you need to drill holes at the mounting points.
If after test fitting all the holes match, the product can be fixed with screws using a screwdriver. At this point, the main part of the work is completed and all that remains is to install the fireproof glass for the fireplace in its rightful place.
Types of glass door designs
So, we figured out which glass you can choose for your fireplace. It remains to clarify the existing design options.
The door itself consists of a frame made of cast iron or steel material into which fire-resistant glass is inserted. From the outside, handles and locking devices made of materials that cannot be heated or wrapped with heat insulators are hung on the doors.
Frames can be tinted or painted with fire-resistant paints. Note that the percentage of glass to metal can vary within a free range.
According to the options for attaching hinged overhangs to portals, products can be divided into the following types:
- with a vertical arrangement - used for hinged or folding doors;
- with horizontal placement - made according to the principle of an opening window transom.
Door with glass for a fireplace
Also, a fireplace door with glass can, like a guillotine, be lowered and raised, or moved to the sides (the latter option is rare).
Products can be grouped according to certain characteristics, which include:
- total number of sections;
- type of closing and opening doors.
Step-by-step instructions with photos for laying a stove
Different stove makers have their own masonry technologies and their own secrets that come with years of experience. Here is information about a fairly simple way to create a stove-fireplace for heating a two-story house; the process will not seem extremely difficult even to novice stove makers.
Foundation laying
The base course of brickwork will serve as the foundation. It is done with any brick; some stove makers even fill this level with crushed stone.
When laying the base row, cement mortar is used.
The foundation is completely filled with mortar, the layer is leveled.
Construction of the furnace body
The first row of stoves is marked. The horizontal line from which they start when marking is the wall of the room.
A grate is placed where the fireplace is planned to be placed. From this row, the bricks are already laid on the kiln mortar.
An important stage of work is the scrupulous alignment of each new row by level.
Laying the second row. The stove wall, located closest to the wall of the room, is reinforced with additional bricks to increase fire safety.
The place where the chimney will be located in the 2nd row remains empty, the rest of the stove is laid completely. A door is installed through which the owners will clean out the ash.
The door is installed on the solution and leveled. For a more reliable fixation, it is secured with wire, which must be laid between the bricks.
Next, the next 3 rows are placed. Then a brick stop for the grate is installed - 2 rows of 1/4 bricks are placed on the sides.
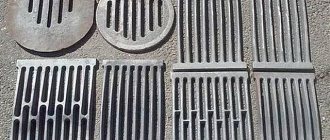
The grate is laid not on a simple brick, but on a refractory brick. To ensure that it lies at the same level as the bricks, holes are cut in the fireclay bricks.
The size of the brick can be easily adjusted - the excess is measured and carefully cut off.
The large door is mounted next to the installed grille.
The large oven door is similarly secured using wire fasteners.
The first row of fireboxes is placed exactly above the fireplace, it is reinforced with metal corners and a strip or thick tin. So that the masonry can lie on them, it is cut using a grinder, then the slots are adjusted manually to the desired size.
The next brick row is laid.
A fireplace grate is laid on the fire-resistant brick along with the brick row.
The door is fixed, the brick is strictly adjusted to it.
The firebox of the new stove and fireplace is ready.
Fire-resistant fireclay bricks are placed above the stove firebox.
The stove body is built.
Creating a chimney
The space left for the chimney is divided into wells. The design requires reinforcement with metal plates.
Brick chimney wells are laid.
Soot cleaners are mounted above the firebox roof.
The wells are divided again, the first rows of walls should be reinforced with strips of metal.
After strengthening, the ceiling of the furnace body is erected. The space associated with the chimney remains empty.
The body cornice is laid out, then the chimneys are laid.
The final stage of work on the first floor. The stove is located at the bottom left, the smoke inside the chimneys moves in a spiral and comes out at the top left. The final separation of the wells is covered with a tin sheet. In order to compensate for the pressure inside the fireplace stove, 2 brick rows are laid on the tin.
There are two chimneys stretching to the second floor of the house - from the fireplace and the stove itself, they are separated from each other. Each chimney requires the installation of a separate damper.
Floor level of the second floor. Waterproofing is installed here, the chimney is again reinforced with metal corners. To save money and avoid building a heating stove on the second floor, the chimney of the stove under construction is again divided. The smoke will snake through it, managing to warm up the room. In order for the chimney to warm up much faster, it is laid in the area of the second floor with a thickness of 1/4 or 1/2 brick.
A hole for the stove chimney is carefully cut out in the roof.
Before placing the chimney on the roof, it is reinforced with metal corners.
If the chimney is located in close proximity to the roof ridge, it must be laid out at least 0.5 meters above the ridge. If further, then the height of the chimney is allowed equal to the height of the ridge, but not lower. In this case, the wind increases the stove draft, lifting the smoke upward.
Even a small stove in the house means coziness and comfort. Larger stoves require increased skill and additional materials, but the principle of their construction is similar to the method described above.
rmnt.ru
19.02.17