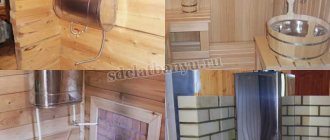
The most difficult part of building a bathhouse is installing the chimney. People who do not have the relevant experience prefer to order ready-made chimneys for sauna stoves; fortunately, there are many different variations of such products on the modern market.
Nevertheless, a pipe for a bathhouse can be made and installed independently; there is nothing complicated about it, the main thing is to correctly decide on the material and act in accordance with the instructions presented below.
Pipes for baths have a lot of classifications. For example, depending on the location, they can be external and internal. The first ones are mounted outdoors, which frees up a considerable amount of space and partially eliminates the possibility of getting burns.
Such pipes for a bathhouse also have a significant drawback: you will literally heat the street.
Chimney pipes for baths located indoors should be installed especially carefully, following all the rules. Installation of a chimney in a bathhouse, carried out with the slightest violations, can cause serious consequences: from fire to suffocation.
No less common is the classification based on the materials from which chimneys for bathhouses are made. It includes the following types of chimney ducts:
- brick;
- modular made of stainless steel, having one or two circuits;
- corrugated;
- ceramic;
- polymer, etc.
All types of bathhouse chimneys are described below. In addition, there is a lot of useful information that will certainly facilitate the installation of structures.
Types of chimneys and requirements for them
The chimney for a sauna stove must meet a number of requirements. The slightest discrepancy can cause weak traction. Therefore, when installing a chimney in a bathhouse, you should pay attention to the following factors:
- The front side of the pipe must not be damaged. This may result in excessive condensation.
- The inner surface should be smooth. Various irregularities will contribute to the rapid accumulation of soot and burning.
- The chimney in the bathhouse is arranged with your own hands or with the involvement of specialists not only in the vertical, but also in the horizontal plane. Thanks to this, heat literally does not fly out into the chimney, and each horizontal component of the chimney duct should not have a length exceeding 1000 mm. Otherwise, the traction will be weak.
- Chimneys for sauna stoves installed through ceilings must be equipped with fire-resistant structures. For example, steel and ceramic chimneys are placed in special boxes.
- When deciding how to install a pipe in a bathhouse - through the ceiling or wall, you should not least think about the diameter of the pipe. It directly depends on the power of the furnace and, as a rule, varies from 100 to 350 mm.
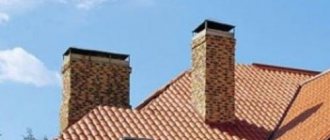
- The part of the chimney duct located outside the building must be made of strong, durable materials that can resist aggressive environmental influences (rain, wind, snow, etc.). This applies to a greater extent to pipes installed outdoors. In such a situation, the pipe in the bathhouse through the ceiling and roof has more advantages, because only a small part of it is located outside the room.
We should not forget about the size of the chimney duct. For people who bought a stove produced at a factory, such a question is not so acute. After all, it already has an entrance for connecting the chimney duct. Thus, pipes of a smaller diameter cannot be used, and a larger diameter does not make sense, because this is an additional cost for the gearbox.
If the stove is homemade, then you can use an arbitrary pipe diameter, varying within the values indicated above. High accuracy is not important here, as are complex mathematical calculations. Leave them to the specialists who design channels for the removal of combustion products in huge buildings.
This also applies to the height of the pipe. The main rule for its installation is that its outer part must exceed the highest point of the roof by at least a meter. Thus, having decided to make a chimney yourself, you do not need to go deep into calculations.
Having familiarized yourself with the basic requirements, you should think about how to remove the pipe in the bathhouse. There are three ways to install a chimney:
- On the foundation of a building or ceiling. The first method is ideal for people building a bathhouse from scratch, the second for those who decide to convert a room into a steam room.
- Above the stove. This chimney is suitable for owners of metal stoves.
- On the facade of the building, that is, through the wall.
Which chimney is better for a bath? Everyone must answer this question independently, comparing goals and means. The information presented in this article will certainly help you make the right choice.
Chimney made of steel pipe
Exiting a pipe through the roof of a bathhouse is a rather labor-intensive process, so the first thing you should consider is the option of installing a chimney through the wall. Any person can easily cope with such a task, even without relevant experience. To carry out the work you will need:
- three elbows of different sizes, which directly depend on the location of the stove (if the stove is located near a wall, then elbows of the following sizes are suitable: 200x1200 mm, 160x1200 mm and 160x100 mm);
- tee with plug;
- fungus that must be protected from water and debris entering the chimney.
Having stocked up with all the necessary materials, you should begin installing the chimney in the bathhouse with your own hands, the step-by-step guide is as follows:
- The first step is to carry out preparatory work. There is no need for pipes to pass through the ceiling in the bathhouse, so preparation is reduced to drilling the wall. Taking into account the parameters of the taken pipes, the hole diameter should be 160 mm.
- Next you need to connect all the knees. Typically self-tapping screws are used for these purposes.
- A fungus is installed at the top of the structure.
This type of installation of a chimney in a bathhouse is usually resorted to if the structure is temporary. Therefore, most people are interested in how to make a chimney in bathhouses through the ceiling.
This is the right approach to solving the problem, because pipes laid along the street do not help warm up the room as quickly as possible. An alternative could be chimneys in a bathhouse through the wall, containing materials in their design that help retain heat.
Stainless steel chimney ducts with heat preservation systems in their design
The most popular is the pipe for a sauna stove, which helps retain heat and has a cavity in its design filled with heat-insulating materials. Such chimneys for a bathhouse eliminate the possibility of burns and fires to a greater extent than saving heat.
Thus, installing pipes in a bathhouse eliminates the need to use additional fire-fighting materials when laying through wooden walls.
If the main task is to retain heat, then you can use a chimney for a water-cooled bath. The use of such systems has many advantages:
- Firstly, chimneys for stoves in bathhouses become completely safe in terms of the possibility of ignition upon contact with flammable materials. In other words, there is no need to use fireproofing materials at the point where the pipe comes into contact with the wall.
- Secondly, the possibility of getting a burn is eliminated.
- Thirdly, the pipe for the stove in the bathhouse serves as a heating element, which eliminates the need to install a boiler.
Chimney pipes for baths made of stainless steel are a cheaper option. Their installation does not require special experience or additional knowledge, so installation can be carried out by anyone who knows how to hold construction tools in their hands. The main thing is to take all precautions.
Chimneys made of ceramic materials
When talking about ceramic chimney ducts, ceramic pipes should be mentioned first. Their installation requires much less effort than the installation of brick structures, while cutting the roof is greatly simplified.
Ceramic pipes as a chimney have many advantages:
- they are able to withstand high temperatures;
- ceramic pipes are not afraid of corrosion;
- the smooth internal surface significantly reduces the possibility of soot and burning accumulation, so cleaning is required infrequently;
- Ceramic pipes are highly non-thermal conductive. Thanks to this, the heat does not escape into the street, and the possibility of getting burned is completely excluded.
Do not forget that installing a ceramic pipe does not require large-scale dismantling of the ceiling and roof. You just need to drill a hole for the pipe.
Chimney made of corrugated pipe
A corrugated pipe is often an integral part of chimneys for baths. In most cases, they replace the elbows connecting the horizontal and vertical pipes of the chimney duct. Thanks to this approach, you can save a lot of space.
Sauna stoves equipped with a chimney made entirely of corrugated material are a rarity. Despite the ease of installation, such chimneys have many disadvantages:
- Lack of necessary thermal insulation characteristics. Leaning against a corrugated pipe can cause burns. With prolonged exposure to temperatures above 900 degrees, the material begins to deteriorate.
- Corrugated pipes are easily susceptible to corrosion, which, coupled with high humidity in the steam room, leads to their rapid failure.
Only a temporary chimney can be made from a corrugated pipe. In this case, it is necessary to properly protect the ceiling-passage assembly from fire, otherwise the occurrence of a fire will only be a matter of time. This also applies to other places where the chimney comes into contact with flammable materials.
Types of ceiling penetrations
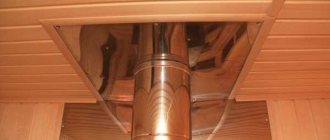
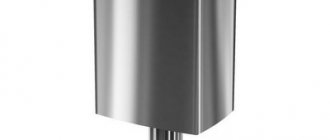
The chimney through the ceiling and roof of the bathhouse passes through protected openings. One of the main conditions for the safety of people in a heated building is heating the roof, ceiling and walls structures near the pipe to a temperature not exceeding 50 °C. Fire safety requirements for the installation of chimneys are set out in SP 7.13130.2013. Heating, ventilation and air conditioning. Fire safety requirements.
To pass the pipe from the bathhouse through the ceiling or roof structure, a through-ceiling assembly is installed - a prefabricated box with flanges. Insulation is placed between the flanges. The box insulates the surrounding structures from the heated surface of the pipe. You can make it yourself, it's not very difficult.
For the speed and convenience of passing pipes through the roof and ceiling, the industry produces ready-made passage units. They are round and square. As a rule, these units are made of stainless steel with a heat insulator, sometimes mineralite - cement boards with fiber fiber (mineral, cellulose). Previously, asbestos-cement slabs (flat slate) were used, but asbestos is carcinogenic, and their use indoors is prohibited by sanitary standards. This is still not a roof or a fence, the asbestos dust from which is washed off by rain and carried away by the wind. Sometimes there are pass-through units made of galvanized steel, but in humid bath air they will quickly rust, so they are used only as a last resort.
Mineral wool is mainly used as insulation (thermal insulator), but expanded clay, clay, and a mixture of clay and expanded clay are allowed. Mineral wool has a very significant drawback - when wet, it becomes thermally conductive (due to water), and after drying it does not completely restore its thermal insulation properties.
If the flange or body of the passage unit is made of steel, and the ceiling structures include flammable elements (wood, foam), then a layer of mineral wool must be laid between the structures and the steel elements. Otherwise, the structures may char or even burn.
What material to choose for chimney installation
The choice of material for installing a chimney depends on many criteria. In this process, you should take into account everything: from what kind of ceiling-passage assembly you want to make, to the type of stove. Ideally, a chimney for a bathhouse should meet the following requirements:
- Promote full combustion of fuel.
- Ensure high-quality heating of the furnace walls. In other words, heat should not escape into the pipe.
- There should be good traction. It is ensured by proper selection of the pipe diameter and the absence of horizontal parts of the chimney more than a meter long.
In addition, the chimney should be easy to maintain. Any chimney requires cleaning over time, so during installation you should assemble a structure that will not complicate this process.
What is it and what is it for?
Most heating devices in the bathhouse operate on solid fuel, the combustion of which produces carbon monoxide, steam and finely crushed solids.
To remove fuel combustion products from the room and provide draft for the stove, a chimney is needed - a vertical channel, round or rectangular in cross-section, facing the street. Not only the cleanliness of indoor air, but also fuel consumption and ensuring fire safety in the bathhouse depend on the quality of its execution.
Installation of a chimney for a metal and brick stove
Installing a pipe without connecting it to the furnace is a fairly simple process that anyone can handle. It is much more difficult to ensure that the chimney pipe is correctly connected to the stove. Correct installation looks like this:
- First you need to install supports that have gaps, because the chimney expands when heated. An asbestos structure would be an excellent support for a chimney. This material is resistant to high temperatures.
- If the chimney opening of the stove is located in close proximity to the wall or the duct will not exit through the wall, then the use of supporting structures is not required.
- The junction of the pipe and the stove must be perfectly finished. This eliminates the possibility of cracks and, as a result, smoke entering the room.
Next, installing the pipe in the bathhouse involves installing the remaining components. How to properly install the remaining components is described above.
When thinking about how to make a pipe, some bathhouse owners do not know whether a chimney valve is needed. If you decide to assemble and install a chimney in a bathhouse with your own hands, then installing the valve will greatly complicate the process. If you buy a ready-made chimney, you can choose a model with a damper.
As a rule, this element of the smoke exhaust system is designed to retain heat after the fuel burns out; there is no such need in a bathhouse. If the valve plays an important aesthetic role for you, then you can make a passage in the pipe or use an additional bend.
Is it possible to install a sandwich chimney in a bathhouse with your own hands?
The use of this design allows you to prevent and protect the room from possible fires. Thanks to the insulation, the heating temperature of the pipe usually does not rise. There is a certain sequence that accompanies proper self-assembly. Strict compliance with the rules and recommendations of the manufacturer, guaranteeing the uninterrupted operation of the chimney system.
Traditional chimney
A classic chimney is a combustion product removal system made of brick.
This refers to the passage of a pipe through the ceiling of the bathhouse. It is called classic due to the fact that in the past exactly such smoke exhaust channels were built. If you are interested in a diagram of a brick chimney, then it can easily be found on the Internet, on numerous resources dedicated to construction. The diagram can also be found in specialized literature.
The advantages of installing such a chimney are as follows: low cost, durability and increased performance characteristics. Bricks can withstand both high and low temperatures. The rules for installing a brick chimney are quite complex:
- The first rule involves fire protection. It is provided with a high level of fire safety. When asking the question: “How to properly make a brick chimney and take into account the fire safety rules?”, you should remember that the minimum distance between the chimney duct and the wall must be at least 380 mm. In areas where the chimney passes through the ceilings, special extensions are created.
- The draft directly depends not only on what diameter of the chimney pipe is chosen. This indicator also depends on the height of the structure. Maximum draft and, as a result, heat transfer can be achieved if the pipe height is five meters.
- Fire safety directly depends on the thickness of the chimney walls. The thinner the wall, the more reliable and safe it is. The minimum thickness should be 100 mm. Thus, if the diameter of the pipe is large, then combined with a thick wall you can get a rather voluminous structure.
Based on the above, it becomes clear: before choosing a brick chimney, you should think carefully. Installing it may be too much for you.
Think about it, maybe it makes sense to make a chimney through a wall or ceiling using the above methods.
Installation features
When installing a chimney, there are several nuances that must be taken into account during the work:
- the first horizontal link should have a slight slope from the stove, which will protect the device from condensation;
- There are two ways to remove the smoke exhaust duct through the wall: raise part of the pipe to the ceiling and at this level bring it outside, or place the exit point of the duct to the street at the level of the stove inlet pipe. The second method is more preferable, which involves the use of a smaller number of shaped parts (only one rotary elbow);
- the entire chimney structure must be assembled from pipes identical in technical characteristics;
- in the area of passage through the wall, the pipe must be solid, without joints;
- the joints of sections and shaped elements should be coated with heat-resistant sealant before assembling the system, and after installation they should be additionally secured using special wide clamps;
- A protective umbrella must be installed on top of the pipe.
Rules for laying a brick chimney
Laying should begin at the top of the stove. A pre-installed pipe is installed on the stove. Brick laying is carried out as in the construction of walls, but there are a number of nuances:
- In order for the stove to provide heat properly and for the smoke to escape through the channels, you need to carefully monitor the level of the structure. You need to use a measuring device after each laid row.
- When building a brick chimney, just like a stove, it is necessary to use not the standard solution, which includes cement and sand, but add clay to the mixture. The proportions of the solution are: 2: 5: 1.
- The thickness of the solution layer should vary from 5 to 10 mm. An indicator equal to a centimeter is critical. If you exceed it, the masonry will collapse quite quickly;
- The joints between bricks must be carefully sealed. If this procedure is neglected, sparks may enter the room.
- Installation should be made exclusively from whole bricks. The use of quarters and halves may lead to the need to increase the solution consumption, which is unacceptable.
From the above, the following conclusion should be drawn: a brick chimney has a lot of undoubted advantages, but its installation is complicated by many factors. Therefore, it is unlikely that you will be able to install it yourself without having the appropriate experience.
Common mistakes
Possible errors when installing a pipe on a stove in a bathhouse are associated with non-compliance with installation technology:
- the pipe must be assembled “by smoke” and not “by condensate”;
- use materials not permitted by the Code of Rules;
- do not comply with the recommended number of turns or their maximum angle;
- do not insulate the structure;
- They do not make thermal protection for combustible walls, and do not use grooves for floors.
Chimneys made from sandwich pipes, assembled in compliance with the technology, are safe for health and cannot cause fires. Chimneys made from such elements are comparable in cost to other options, but last longer, have an attractive appearance, and are assembled in the shortest possible time.
Roof chimney trim
If the idea of installing a chimney in a bathhouse through a wall does not suit you, then carefully study the types of roof trims. This procedure is an integral part when installing a chimney made of steel pipes and other materials through the roof.
Cutting the chimney is a mandatory procedure. It guarantees safety, warmth and dryness in the room, so during installation you need to use any cutting method.
To choose the type of cutting, you should decide on a number of factors on which it directly depends. At the same time, you can decide how to insulate the pipe in the bathhouse. Factors influencing cutting are:
- the material from which the chimney is made;
- roof type;
- type of roof, etc.
Having made a pipe in a bathhouse through a roof made of sandwich panels, you need to use a metal cone attached to the apron at a slight angle for cutting. This type of cutting is suitable for a chimney in a wood-burning stove. Other solid materials can also be used as fuel
Arrangement of a chimney in a bathhouse through the ceiling and slate roof involves the use of a lead apron. Thanks to its plasticity, it easily takes on the desired shape. Such work must be carried out immediately after installing the roofing material in its place. The pros and cons of using a lead apron are: reliable fit, ease of installation, against low melting point.
Round pipes and corrugated metal roofing are prerequisites for the use of polymer-based penetrations with a metal frame. The installation instructions for cutting are quite simple:
- in the cap, consisting of polymers, it is necessary to make a slot in size corresponding to the outer diameter of the pipe;
- Next you need to put the product on the pipe;
- the base sheet easily bends to the shape of the roof.
This type of cutting guarantees complete tightness of penetration through the roof.
Rules for installing a chimney pipe
The health and life of your family and friends depend on the fire safety of chimneys and the complete removal of flue gases - carbon dioxide, carbon monoxide, toxic substances, smoke, soot. Therefore, when installing chimneys, you must strictly follow the rules for their installation. These rules are defined by regulatory documentation - SP 7.13130.2013.
The main rules when installing chimneys for a bathhouse:
- Maintain distances to the nearest structures - walls, ceiling structures, roof.
- Sufficient but not excessively high chimney height.
- To determine the cross-section of the internal chimney channel and its height, calculations are necessary.
- Durable fastening to the walls and ceilings of the bathhouse.
- Reliable sealing, good insulation during installation.
- Protecting hot structures from possible contact and burns: this is especially important for a bathhouse with its small size.
- Assembly of modules for condensate. Sandwich pipe elements are appearing, designed for simultaneous assembly of smoke and condensate.
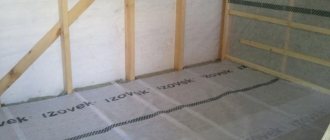
The distance from pipes to combustible structures - wooden rafters, lathing, bitumen materials - must be at least 130 mm, from uninsulated ceramic pipes - 250 mm. The passage unit must be at least 70 mm greater than the thickness of the ceiling structure. The steel structures of the passage unit must be separated from the ceiling structures by non-combustible materials - slabs of mineral wool, mineralite.
Standards for clearances from pipes to walls
SP 7.13130.2013 determines the minimum size of setbacks - the distances between the outer surface of the chimney and the walls. If structures are made of flammable materials, then the offset should be from 260 to 500 mm. If non-combustible or combustible materials are covered with plaster, reinforced with metal mesh, heat-insulating non-combustible materials - from 200 to 380 mm.
The amount of indentation depends on the thermal insulation of the chimney (thickness of the brick wall or insulating layer). Before installing a stove with a pipe for a bath, you need a drawing indicating the exact dimensions of the pipe and the distances to the structures.
How to check the draft in the chimney of a sauna stove
The presence of draft in the chimney can be checked in the simplest ways - by deflecting the flame of a candle or match brought to the air intake window of a gas water heater or stove. With normal draft, it is directed into the unit. Before checking, you need to fully open the gate or damper.
The draft is checked by the deflection of the flame of a match or candle
A strip of napkin or toilet paper is also suitable for checking the presence and direction of traction based on the degree of its deviation from the vertical. This method can be recommended when monitoring a gas unit; it is safe even if there is gas inside the device. The draft in coaxial chimneys is not controlled, so it occurs only when fuel burns, and its strength depends on the intensity of combustion.
Adjusting draft in a gas furnace
Signs of abnormal draft in the furnace are a change in the color of the flame and some other signs:
- The appearance of a burning smell or unburned gas indicates that the draft has collapsed and the occurrence of reverse air movement in the chimney.
- A color change to red indicates incomplete combustion of the fuel due to insufficient oxygen in the air. You will need to adjust the thrust in the direction of increasing it.
- The white flame of the burner and the hum of air in the chimney indicate excessive draft in the chimney, which must be reduced by positioning the damper or turning the damper of the internal regulator.
The reason for the change in draft in the chimney may be weather conditions, in particular, changes in the strength and direction of the wind. In this case, the chimney is simply pinched by the force of the wind. Such phenomena can be eliminated by installing a weather vane deflector on the head of the chimney, which rotates in the wind and, due to its design, creates a vacuum above the chimney, improving draft.
The draft can be dramatically increased by special electrically driven devices installed on the chimney and forcibly creating a vacuum.
Photo gallery: methods of adjusting draft in the chimney of a sauna stove
You can regulate the draft using a homemade damper
Torsion stabilizer automatically adjusts the cross-section of the chimney channel depending on the draft force
Traction stabilizers can have different designs Device for automatic traction adjustment
Automatic devices adjust traction depending on the readings of special sensors
How to clean soot from a chimney
Cleaning the deposits inside the pipe is the most unpleasant, but, unfortunately, inevitable moment during the operation of heating units. For certain types of furnaces it is produced more often or less often. Stainless steel chimneys of gas furnaces need to be cleaned least often, but this work is performed with special tools using cleaning agents that soften the soot layer. Cleaning agents for such chimneys must be gentle on the mirror-like inner surface of the pipes in order to preserve their most important quality - minimal retention of condensate inside the pipes.
The chimney can be cleaned in two ways:
- From above - in this case, ruffs or hedgehogs with a load are used. They are moved down the chimney to ensure complete removal of carbon deposits. In this case, the stove must be carefully covered with a wet cloth so that soot does not fall into the room.
- From below - the pipe is penetrated through the firebox, the tool is fixed on a flexible shaft. With this method, the brushes are given rotation. This is often done using a drive, such as an electric drill.
Cleaning is done mechanically from top to bottom with a soft ball-shaped brush. If the walls of the wall pipes are severely clogged with soot, you can dismantle them and clean each section separately.
Photo gallery: means for cleaning chimneys from soot
Do not use a wire brush to clean stainless steel pipes.
A plastic brush cleans the chimney without damaging its surface
A homemade tool made from scrap materials allows you to quickly clean the chimney
To carry out the work yourself, you can buy a ready-made set of tools for cleaning chimneys of any shape.
Video: cleaning the chimney of a sauna stove from soot
Installation of a finished chimney for a bath
Naturally, there are also ready-made chimneys. They are easier to install and require significantly less time. In this case, it is also important to do everything as correctly and efficiently as possible; you should be especially careful if you do all the work without anyone’s help.
Whatever the chimney is, it is installed so that it protrudes beyond the building by exactly half a meter. At the junction of the roof and the pipe, you will need to make an “otter”, thanks to which precipitation will not get inside.
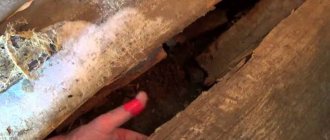
It is worth noting that the appearance of soot on the walls after some time indicates poor installation of the chimney. In this case, it will be necessary to identify any gaps that have appeared and eliminate them as soon as possible.
Maintenance and cleaning
Over time, the walls of any type of chimney become covered with a coating of soot, which reduces the size of the passage, which leads to a decrease in draft in the stove. There is another danger - when heated, soot can ignite, leading to a fire. Therefore, the pipe must be cleaned regularly.
There are several ways to clean a sauna chimney:
- mechanical cleaning. It is performed using a special rod, preferably a collapsible one with brushes. This is a rather labor-intensive, and most importantly, dirty method. Therefore, before starting work, it is necessary to empty the bathhouse of things, and cover the surface of the walls, ceiling and floor with sheets of plastic film;
- using chemicals. A special product called “Chimney Sweeper log” is placed in the stove, which creates good draft and intense heat during combustion. The soot will burn off and come out through the chimney as ash. This method is mainly used for preventive purposes to increase the time interval between mechanical cleanings.
Features of operation of a sauna chimney
The use of gas thermal units for heating a bathhouse is the best option in terms of chimney maintenance. There are several reasons for this:
- The temperature of furnace gases in the chimney does not exceed 150 oC. With normal thermal insulation, especially when using double-wall sandwich pipes, the temperature difference will be insignificant. The dew point (condensation temperature) is located above the end of the chimney. In this case, the amount of condensate inside the pipe is reduced to a minimum.
- When burning gaseous fuel, there are very few solid particles in the smoke, therefore, little soot is formed.
- The level of automation of modern heating units makes it possible to establish the optimal fuel combustion mode, in which the most complete combustion occurs.
- Sauna stoves are turned on periodically, as a rule, no more than once a week, which increases the turnaround time.
Therefore, the main chimney maintenance operations are timely draining of condensate from the storage tank and periodic inspection of the condition of the chimney twice a year - before the start of the heating season and after its end. Cleaning the chimney from soot is carried out as necessary and not after every inspection.
A wire brush is a reliable tool that allows you to clean your chimney efficiently.
Kinds
Options for chimney designs are selected depending on the material used to build the bathhouse. All elements of the device can be purchased ready-made or built independently. Until recently, the main material of the chimney was brick. It has ideal characteristics, durability, and fire safety.
To build a brick pipe, special knowledge and skills are required. This option is not suitable for every bath. Without a lack of practical experience in laying a brick pipe, it is almost impossible to build a proper chimney. The brick structure has characteristic rough areas, which cause soot deposits in the chimney, which leads to rapid clogging of the structure. In addition, soot deposits can lead to sparks when lighting the stove, which is unsafe.
Modern craftsmen often choose a stainless steel chimney for a sauna stove. The main advantage of such a device is quick installation. In addition, metal chimneys are free of problems that can arise in a brick stove structure. Stainless steel chimneys are often of sandwich construction. A straight iron chimney for a bathhouse is easy to install with your own hands.
The inner part of the steel pipe has a smooth surface. Missing edges and roughness contribute to better smoke removal from the stove. But with temperature changes, condensation appears on the steel pipe. When the pipe is closed with thermal insulation, this phenomenon does not occur. It is worth remembering this effect when organizing the arrangement of the structure with your own hands.
Another type of chimney for sauna stoves is ceramic. This design is fire resistant and reliable. Modern ceramic pipes are suitable for solid fuel boilers, as well as devices operating on liquid fuel.
The main differences between these structures and other types:
- universal system (possibility of selecting different diameters);
- ease of chimney processing even with a side passage;
- water and vapor tightness (availability for stoves with heaters);
- mechanical strength.
Varieties of ceramic, metal models and brick products imply the mandatory presence in the designs of a base, a container for accumulating condensate, and a tee for cleaning and inspection.
What we need:
- The actual chimney. For safety reasons, we use ready-made, manufacturer-tested products made from stainless steel pipes AISI 430, AISI 439, AISI 304, AISI 316, AISI 321. Such chimneys are resistant to corrosion from condensate and can withstand severe temperature loads.
Attention!It is unacceptable to use asbestos concrete pipes and aceite pipes in sauna stoves, since they cannot withstand the temperatures of the exhaust gases. These pipes are the cause of the fire! They crack due to temperature.
- Basalt wool. This is a non-flammable mineral insulation for lining a chimney pipe. Its use is a must! Otherwise, again, the fire hazard increases or at least serious problems with condensation accumulation arise.
- Brick. Any one can be used.
- Masonry mortar. It is better to take special ready-made mixtures for laying stoves or ready-made cement-based masonry mixtures.
Advice:
When buying a ready-made steel chimney, pay attention to the fact that its diameter matches the outlet from the sauna stove. Narrowing the diameter is very dangerous!