What to hammer in: nails, screws or staples?
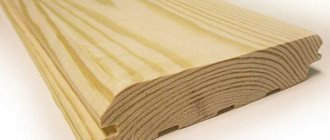
The lining itself is a board with a certain profile, which must have a tongue-and-groove locking connection. It is attached to the wall or ceiling using nails, screws or staples. The tools and material required to hammer in the lining in the bathhouse are as follows:
- nails, screws, staples;
- hammer, screwdriver, hardware gun;
- a mallet or a piece of clapboard for knocking a tenon into a groove;
- building level.
What nails should I take for the lining in the bathhouse? It is desirable that these are finishing nails 30-40 mm long, with an anti-corrosion coating. It’s worth taking coated screws (their length is the same, by the way). Regarding the length, you should proceed from the thickness of the board (if in a groove, then only the walls of the groove), plus you need to punch through the block to which the board is attached at least to the middle.
The staples should be the same size, although there are comrades who nail 14-mm staples with a construction stapler through a clamp, but this is rather an exception. To properly line a bathhouse with clapboard, it is better to use long staples and shoot them at an angle of 45 degrees (approximately).
Of course, it is tempting to wonder which of these methods is better. There cannot be a definite answer to this, because everything depends on the experience of a particular person. And if it is not there, then the easiest thing to do is to shoot the staples using a pneumatic gun. True, it is not cheap, and few people would agree to buy it for a one-time job. Other methods are a little more difficult to implement.
The influence of laying direction on the ratio of the geometric dimensions of the room
Sometimes you want to change the proportions of a room, for example, make it higher/lower or shorter/longer. For large rooms it is possible to install an additional interior partition. In other cases, the required visual effect can be achieved by nailing the boards in a certain sequence.
What are the ultimate possibilities for changing the direction of laying panels? You can “raise” the ceiling if you take the vertical direction of installation of the panels, and make the room lower if you lay the lining horizontally. It is important to adhere to the chosen laying direction along the entire perimeter of the room, since its arbitrary change (for example, one of the walls is sheathed vertically and the other horizontally) does not produce an aesthetically consistent impression, although it can sometimes be justified by purely pragmatic considerations. For example, an abundance of openings, when vertical installation involves less material consumption than horizontal installation.
The external impression of a longer wall is usually created by one whose design contains a significant number of horizontal lines. Thus, it is quite possible to “lengthen” the wall if you nail the material to it horizontally. Of course, the final decision can only be made after careful analysis:
- ratio of free surfaces of the walls of the room;
- relative position of door and window openings;
- the predominant direction of natural light in the room.
The last factor deserves special attention. If the room faces the south or southeast, then the sun's rays come in during the first half of the day. If in such a room you nail the panels horizontally, then as a result you can successfully get rid of the unpleasant effect of shadows in the gaps between adjacent lining boards. Accordingly, for rooms facing opposite sides of the world, a similar result can be achieved by sheathing the walls vertically.
Finally, the vertical direction of laying allows you to mask the connecting elements of the board, which are located in its end part. If you nail the material horizontally, then all the connecting parts will be visible.
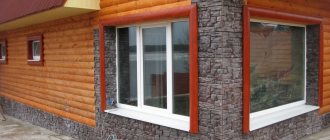
Features of finishing a brick bath
A brick bathhouse in terms of the features of wall cladding with clapboard is no different from if the external walls were built from any other material. It is necessary to begin work, moving from the corner farthest from the entrance. In the dampest room, it is better to avoid using nails, as they are prone to corrosion when exposed to vapors.
A brick bathhouse is usually lined from the inside with clamps, which are good because they do not damage the lining. If you have not yet started construction, then it is best to make a dressing room no larger than 150 x 250 cm. This way you will not only eliminate drafts and the creation of a cold space, but also save on lining, which will be used for finishing brick walls.
The premises should be insulated; mineral wool or polystyrene foam are excellent for this. The first is fixed using wooden slats, but for foam plastic special fastenings must be provided. Brick walls should be finished from bottom to top. This also applies to work on the floor, walls, and ceiling. Experts recommend abandoning products in “quarter” and “rabbet”. The most recommended lamellas are those with tongue-and-groove profiles.
Such finishing on brick walls will not move over time, and the density of the joints will not be disrupted, which is especially important for a material that transmits heat so easily
How to lay lining: curved walls, vertically or horizontally
In modern interiors, the theme of “correct geometry” is popular among designers and decorators. The main point of the teaching is to achieve the most correct interior from a geometric point of view. Even the meaning of European-quality renovation rests on obtaining even parts of the room: walls, floor, ceiling. In our buildings, the walls have been uneven since the beginning of construction. Sometimes it seems as if they were erecting a building with their eyes closed: numerous waves, voids on the surface that are not always easy to remove. So, if you are trying to ensure that your apartment meets at least some standards, then quickly start leveling the walls.
What is lining lumber?
“Lining” is a special cladding material belonging to the class of lumber. It consists of specially prepared boards, which are assembled into a single panel structure using a tongue and groove connection.
There are relatively few requirements when finishing a wooden bathhouse with clapboard: if you are doing the exterior finishing, then the weather must be dry (preferably before its final processing - painting, or impregnation with protective compounds, however - if it is an autoclaved board, then all this is not important - it is resistant to dampness, but it is not advisable for it to get behind the “lining” itself to the log house or the insulation laid there - mineral slabs or mats), but if the finishing occurs inside (for example, in winter) - then in cold weather the room itself should already be heated and be well ventilated so that there is no excess moisture during installation
Stage 1. Selecting wood for “lining” (cladding the bathhouse with clapboard)
If in the living quarters of a wooden house the walls and ceiling are often finished with coniferous species (spruce, larch, pine, cedar, etc.), then for the interior decoration of the bathhouse with “lining” only hardwood is used (this is important, since at elevated temperatures in the steam room and the dressing room or furnace room - pine or other coniferous wood begins to “cry resin”, which is unacceptable). Hardwoods are convenient because they do not contain a large amount of resins, and some of them also smell pleasant and have a beautiful texture
Here we will look at them in more detail.
Wood species - oak
Oak is rarely used for interior decoration of baths, as its wood darkens due to humidity. Oak is rightfully the wood of that legendary highest quality, which is used in the manufacture of very strong, durable, very dense and beautiful boards for the interior decoration of bathhouses. It often finds its application in the manufacture of wooden bath furniture of excellent quality, surprisingly strong and at the same time durable.
Wood species - ash
Ash is one of the most valuable species of deciduous tree. It practically does not split, is quite elastic, very dense and in its basic properties is very similar to oak wood. The texture of this wood itself is very expressive (bright), and the wood fibers are a beautiful grayish color, with a slight pink or yellow tint. Rarely used for baths.
Wood species - birch
Being easy to process, birch itself is practically not used when finishing the steam room and other wet rooms of the bathhouse, since it very quickly deteriorates (rots) with constant exposure to the humid and hot air of the steam room.
Wood species - alder
Alder is perfect for decorating a steam room; its pinkish “cognac” color only becomes more beautiful over time. Good alder is not cheap, just like good cognac.
Wood species - linden
Linden is ideal for a steam room, because... It does not heat up to such a temperature that you can get burned. Linden has a pleasant smell. Its disadvantage is that over time it “gets dirty”, traces of drips and stains appear, but the wood itself does not darken and remains yellow. Linden is better suited for a dry steam sauna (“Finnish steam room”).
Wood species - aspen
Aspen is often used in bathhouses because of its affordable price, it has a bitter odor, and over time the wood darkens and “silver.” As wood for a steam room, it can be even better than linden in terms of the fact that aspen is less dense than linden and therefore heats up even less than linden. Aspen behaves well in a traditional Russian bathhouse with wet steam.
Wood species - larch
A bathhouse is sometimes lined with larch based on its natural resistance to decay, but this is not the best choice. Due to its density, it does not have thermal insulation properties, gets very hot and easily splits.
Wood species - pine
Pine is a coniferous tree, has resin pockets, may turn blue over time, but it is cheap and available. Initially light yellow, the color becomes dark yellow over time.
Wood species - spruce
It has smaller knots than pine, is more loose, and has larger resin pockets than pine with more abundant secretions. The color is almost white and does not change for a long time. Spruce has an affordable price and is therefore also used in baths.
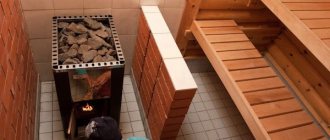
What are the conditions of the steam room casing?
As you know, in a steam room the highest air temperature is in the upper part. The closer to the ceiling, the higher the temperature of the steam. With proper ventilation arrangement, fresh air enters the steam room from the outside from below, which, rising upward, is heated to the desired steam temperature. The heated steam, circulating through the steam room, falls down. Along the way it gives off its heat and, having reached the lowest level, has the lowest temperature.
At the same time, its relative humidity undergoes the opposite changes, that is, the higher it is, the lower the humidity. Thus, unfavorable conditions for wooden structures and elements are created in the lower part of the steam room.
These are important conditions that should not be neglected when finishing a bath. After all, the wooden parts located at the bottom of the steam room will experience increased exposure to wet steam both during and after steaming. And this cannot but affect their service life due to wood rotting.
How to attach the insulation
To understand how to glue penoplex to the wall, check out all the possible options for the products. There are several ways to attach insulation. For example, using:
- polyurethane foam;
- cement mixture;
- disc dowels;
- polymer-bitumen mastic;
- "liquid nails"
Let's look at each method of installing penoplex in more detail and find out how to glue penoplex to a concrete wall, wooden surface or other materials.
Mastic
Bitumen-polymer mastic is recognized as one of the most practical and cheapest materials. Most often it is used to insulate the basements of buildings with constant high humidity.
Also, bitumen-polymer mastic is suitable for rooms with reagents that corrode other mixtures. Penoplex will be securely attached even when exposed to adverse factors.
The adhesive mixture is supplied in the form of tubes and is inserted into a special sealant gun. You can buy one at a building materials store. After installing the tube, you must apply the composition to the center and along the perimeter of the penoplex, as well as into the grooves. It remains to press the insulation sheet for a short time. Complete drying occurs in one hour.
Dry mixes
Reliable and simple option. The use of a dry mixture allows you to quickly and without hassle fix the insulation on a wall made of brick or concrete. To prepare the solution for use, dilute the powder in water according to the instructions. Now mix the mixture using a mixer attachment for a regular construction drill. Set the minimum speed.
Apply the solution using a notched trowel. Don't forget to fill the grooves; you can also do this with a spatula. Press the penoplex lubricated with the mixture onto the surface for one minute.
Adhesive foam
The ideal solution specifically for smooth stone surfaces. Since the adhesive mixture has high adhesion, even smooth insulation will be perfectly fixed to concrete surfaces and will not move over time. The foam is applied strictly along the perimeter of the slab; to enhance adhesion, it can also be applied to the center. It is enough to press Penoplex tightly for thirty seconds, with an average setting time of about twenty minutes.
You will be able to carry out further work with the insulation (for example, grouting) in two hours.
Disc dowels
The use of dowels is relevant for rooms with an uneven facade or large areas. To secure the insulation to the dowels, you will need a drill, a hammer drill and a hammer. So, how to properly attach penoplex using dowels?
Using a hammer drill, you must drill holes; each ready-made one has a recess in the base of about fifty millimeters.
Fill these holes with regular mounting foam, then place and hammer a disc dowel into them. Fungi should not protrude above the stove. One slab of penoplex will require about five pieces. One dowel can be used to fasten adjacent sheets of insulation.
Liquid Nails
The most expensive fasteners for penoplex. If the wall is already well primed and leveled, you can try attaching the insulation to so-called “liquid nails”. The glue is applied using sealant (or a glue gun) in the center and along the perimeter of the foam sheet. Now press the insulation against the wall for a few seconds.
But such an adhesive composition has a fairly high cost. Therefore, the method is suitable only for small insulation areas.
Polyurethane foam
An equally popular option for attaching foam sheets. Apply the foam using a gun, then hold the sheet until it fully adheres to the surface. But do not forget that the composition expands and breaks down over time, so this method is not recommended when installing insulation outside the house.
Self-tapping screws
Suitable for rooms with wooden walls. It’s great if the sheathing was previously installed. Each screw head is reinforced with washers, which increases strength and protects against subsequent destruction.
When several methods are combined (for example, using bitumen and dowels), the tightness and wear resistance of the insulation increases significantly.
Headlining
Installation of the panels begins on the side of the ceiling farthest from the entrance.
The first bar is set along the cord line. Carefully checking the position of the first panel will ensure that all subsequent planks are parallel. If parallelism is not maintained, then leave a gap in the corner. During further covering, the gap will be closed with a ceiling plinth.
To fasten the panels, pneumatic tools are used. Clips and staples are used as fastening elements.
The operation and maintenance of such a tool is quite simple. The staples are inserted into a special compartment. The compartment lid snaps tightly into place and the device is ready for use. Under the influence of air, the impact mechanism pushes the staple out at high speed. This allows for increased installation speed and high fastening strength.
Panel installation work is carried out in pairs. One person holds the panel in a fixed position. Another person sews on the paneling.
If one person is working, it is convenient to use special racks for fixing the lining to the ceiling. These devices are made of metal. They have the ability to be adjusted in height. The upper end of the stand has a tip with a soft nozzle to protect the surface of the slats when fixing.
In the absence of such devices, use self-made racks from 50x50 mm bars. The length of the racks is 1-2 cm greater than the height of the room. The increased length will allow you to create the necessary stop for reliable fixation of the panel.
Using a finishing tool with a wooden or rubber tip, the boards are leveled and aligned with the cord. To avoid accidental displacement, one end of the bar is secured with a bracket. Further installation of elements is carried out to the opposite wall. Light tapping ensures that the panels fit snugly against each other. A tight connection is determined by the dull sound when struck by a hammer.
If the fit is loose, the lining is pressed against the sheathing. The panel is moved using a chisel. The tip of the tool is recessed into the lathing. With a smooth hand movement, the elements are moved until they are completely connected.
More significant irregularities are eliminated using a clamp. To do this, attach the device to the sheathing strip, tighten the fixing screws or lever mechanism. A wooden wedge is driven between the clamp and the board. The wedge is driven in until the panel is completely adjacent to the previously sewn strips. The sewing of uneven elements is carried out with two staples on each batten of the sheathing.
The parallelism of the boards is determined using a tape measure. Measurements are taken at each end of the laid panels. You can choose the frequency of checking yourself.
When joining a ceiling to a wall, a situation often arises when it is impossible to install a panel with a standard width. In this case, the last plank is cut lengthwise using a circular saw. The junction of the lining with the wall is covered with a ceiling plinth.
Ways to fasten the lining
The installation of the lining is the same and does not depend on the chosen method of fastening: with a vertical arrangement of the boards, they start from one of the corners, moving to the right or left - as is convenient for you. The first board is positioned so that the groove faces outward. The tenon of the next plank is inserted into it. It can be the other way around - there is not much difference here. The main thing is verticality, which is checked several times: during the initial installation of the plank and as it is secured. To check the vertical position, you can use a regular construction bubble level.
When the paneling is horizontal, bathhouse construction experts say that the tenon should be directed upward: this way, moisture that condenses on the boards or drops of water that fall on it rolls onto the floor and does not remain in the groove. It is recommended to start from the ceiling.
When installing lining on the walls of a bathhouse or sauna, do not forget to leave a gap of 2-3 cm at the ceiling and at the floor. It is necessary for better ventilation and compensation for thermal expansion, and the gap will be closed with a plinth, which is still nailed at the top and bottom, and special corners are used in the corners. If you do not leave a gap, then most likely the lining will “swell.”
To achieve a tight connection of the lining strips with each other, after connecting them, a small piece of lining is inserted into the groove of the last board, which is tapped with a hammer, achieving an almost complete absence of gaps (do not forget to check the verticality of the plank after this procedure and, if necessary, correct its direction with several blows in the right place).
Clamps for wooden lining
The first and last boards, regardless of the choice of fastening method, are nailed with small-headed nails; if necessary, they are recessed completely using a hammer.
Now let’s talk about how to attach the planks. There are two main options:
- Using nails/screws
- Using clamps - clamps/holders that have a hole for nails or staples and a holder tongue that is fixed to the tongue of the lining, holding it.
You can fasten the lining with equal success using nails with a small head (usually finishing nails) and using clamps. Both methods have their supporters. In any case, the plank is fixed first in the middle (to the middle plank of the sheathing), then along the edges (top/bottom or right/left), after which the horizontal/verticality of the plank is checked again. If everything is fine, attach the lining to the intermediate strips of the sheathing.
How to fix boards correctly?
Depending on the chosen option for cladding the bathhouse with clapboards, work begins in different ways: either from the corner (vertical cladding) or from the ceiling (horizontal method). And in this case, the master has a choice: several installation methods are possible. All of them are not difficult.
- Through - with finishing nails or self-tapping screws. To minimize the risk of the board splitting, first drill holes for the fasteners with a slightly smaller diameter than theirs. The first lining is pierced right through to the sheathing, burying the head into the wood. Then the remaining lamellas are attached using the tongue-and-groove system. The disadvantage of this method is the rapid formation of rust due to high temperature and humidity.
- Through fixation with finishing pin. The material for such fasteners is stainless steel, and the method is used to fasten the lining to the concrete walls of the bathhouse. First, holes are drilled in the base, the panels are secured with a thin pin, its protruding part is cut off flush, and then sanded.
- Concealed fastening through a tenon. This option is suitable for lining that has a fairly wide shelf. In this case, the geometry of the product makes it possible to hide the cap between the groove of the first and the tenon of the second board. This fastening is very reliable, the surface remains perfect, but this operation requires skill from the master.
- Concealed paneling through the groove. Here the hole is drilled at an angle of 45°, and its diameter is larger than that of the hardware head. This work is not so simple, since the slightest inaccuracy will not allow the two lamellas to be properly connected. Such cladding may end up with uneven joints or protruding edges. The best fasteners for this method are self-tapping screws that do not require drilling.
- Use of clamps. This installation option is reliable and fast, so it is used to fix the lining on any bath surface: both on the walls and on the ceiling. The second lamella is inserted into the groove of the first one, a bracket is put on its opposite edge, which is attached to the sheathing with a nail or self-tapping screw, then the remaining clamps are attached to the edges. Then the next element is fixed in the same way. The main thing here is the correct choice of the clasp number. The station wagon is suitable for Euro products and Shtil lining.
The choice of method for a bath depends entirely on the skills of the master: for those who have little experience, it is best to stick to the simplest option, which eliminates irreparable mistakes - fastening with clamps.
Methods for installing lining in a bathhouse
Regarding fastening methods, there are several different options:
- Horizontal
. In this case, the frame bars are mounted vertically on the wall, and the planks themselves are perpendicular to them. That is, horizontally. - Vertical
. The method is the opposite of the previous one. The frame slats are installed horizontally, and the lining is attached to them in vertical rows. - Diagonal
. The frame consists of wooden planks inclined in one direction, and the lining, accordingly, is mounted with a slope in the opposite direction.
On a note! The ideal mounting option for a bathhouse is vertical or diagonal. In this case, water from evaporation will not accumulate between the slats, but will flow freely. The speed of work and the final appearance of the room directly depend on how convenient the method of attaching the planks is chosen.
There are 4 most common options:
- End-to-end method
. Most often used for shelves and seats. Since the self-tapping screw is screwed directly into the strip in this case, a hole remains on the surface, which significantly worsens the appearance of the coating. - Fastening with a clamp
. The most convenient and primitive. This method is the easiest way to produce high-quality aesthetic installation. Since the clamps are mounted to the frame bars, it is possible to dismantle the lining without damaging the planks. - Fastening by direct driving a nail into a tenon
. Not suitable for every type of lining. The nail is driven at a 90-degree angle into the tenon, which fits tightly to the sheathing. There is always a small risk of marriage, but it is insignificant in comparison with the next type. - Driving a nail obliquely into a countersunk hole
. The most difficult method, requiring considerable skill and effort. It is used less often than others, because it often leads to marriage.
When can I start finishing with clapboard?
It is known that the structures of any new building are subject to various kinds of movements for some time associated with settlement of foundations, compaction of joints, and drying out of materials. This means that deformation changes occur in the geometry of individual elements and, accordingly, the entire building as a whole. Similar processes are clearly manifested in buildings made from raw wood. After all, a one-story box can become 10 cm or more lower in a year or two. Shrinking wood creates enormous stresses that can disrupt the integrity of communications, warp window and door openings, and spoil the finish. Therefore, if you have a log house or a bathhouse made of other lumber, which also gives a certain shrinkage, a logical question arises - when can you start lining the interior with clapboard?
Following the traditional approach, after assembling the main enclosing structures, finishing begins no earlier than six months later. This is the period of the most intense shrinkage of wall wood materials with natural humidity. Of course, a lot depends on weather and climatic conditions, the initial humidity of the forest and other things. Therefore, the wait for the log house to be ready for finishing can take a year or a year and a half. But even if you have a building made of chamber-drying timber or even brick or aerated concrete, it should be allowed to stand for at least 2-3 months, so that the clapboard lining of the bathhouse does not develop waves or cracks under the influence of sedimentary deformations
What to do when there is no desire or opportunity to wait for the end of such dynamic processes? For example, if a bathhouse complex is being built as the only housing on a small plot. Today's professional craftsmen have increasingly begun to resort to “floating” frame technology. However, finishing the inside of a bathhouse with clapboard is quite easy to do with your own hands.
Features of installing a “floating” frame
The essence of the “floating” method is that the fastening points of the wall sheathing beams are made with the possibility of vertical displacement of the cladding structure without violating its integrity. To do this, use one of several available methods. For example, brackets with longitudinal slots are used to hold frame guides. Or through cuts (200 mm) are made in the vertical beams, through which the sheathing elements are attached to the wall with anchor pins.
The cuts are additionally processed with a milling cutter to ensure that the stud nuts are flush. The lower part of the beam can be rigidly attached to the floor (preferably by providing a ventilation gap), but its upper part and clapboard cladding are made below the ceiling by the predicted amount of shrinkage reduction in the height of the room.
On the ceiling, the frame is mounted on brackets of any type. The main thing is not to connect the plane of the ceiling and the walls. This installation condition also applies to corner joints of cladding on different walls. That is, after finishing the finishing work, small compensation gaps should remain in all corners of the room, which are covered with vertical or horizontal skirting boards.
Otherwise, the lining for a bathhouse on a “floating” frame is installed according to the same principles as on a regular rigid one. You can read more about this in the article “How to fasten lining: methods and types of fastening.”
Calculate the area of the internal lining
For example, let’s take a 3x3 meter bathhouse with a ceiling height of 2.5 meters. Sheathing will be done on all walls and ceiling; the floor is not taken into account in the calculations.
Suppose there are two rooms in the bathhouse - a 2x3 meter steam room and a 1x3 meter hallway. We calculate the area of the steam room lining.
We calculate the area of the hallway paneling.
The total cladding area will be 31+23=54 square meters. From this figure you should subtract the area of window and door openings, and then add a 15% supply of material for trimming.
The price of lining is indicated per square or linear meters, less often - cubic meters.
Cost and dimensions of ordinary wooden lining
An example of the cost per cubic meter of lining of different classes
You can calculate the difference in price if you find out how many lining strips are needed to cover the inner surface of the bathhouse.
The most popular profile size is as follows:
The following tables will help you find out how many square meters of material are in one cubic meter, calculate the number of packages (1 package = 10 lining panels) and determine the cost of covering the room.
Calculation of the amount of lining
Calculation and cost of lining
Prices for lining
The need for material and tools for the work
If for plastic lining the selection process consists only of determining the most favorable color and texture of PVC panels, then with wooden lining the situation is more complicated. As you know, two types of material are produced:
- eurolining, which has ventilation and drainage recesses;
- ordinary.
The regular one, in turn, is produced in several classes - Extra, A, B and C. It is clear that the Extra class lining will have the best quality, but is it worth using it to decorate a steam room - a room that will be used from time to time? Material of class B (up to three knots per linear meter is allowed) and even C (the presence of possible through holes in this case is not critical, since, with proper ventilation of the room, dampness will not spread inside, causing rotting of the material) is also quite suitable.
To properly line a steam room with clapboard, you will need the following tools and materials:
- screwdriver,
- hammer,
- galvanized or anodized fasteners (nails, self-tapping screws, screws),
- blunted core,
- sanding paper.
In addition to the lining itself, you will also need a heat insulator for the ceiling in the steam room. Finishing with foil or, in a cheaper option, two layers of polyethylene film is more often used. It is advisable to use only high-density polyethylene.
Foil as a heat insulator under the lining
Finishing with foil will require more conditions to ensure safety when an electric boiler is used for heating, as well as when protecting the room from lightning strikes. After all, foil is a conductive material. The same safety measures must be taken with regard to the electrical insulation of lamps that may be placed in the steam room. By the way, all electrical fittings and wiring must be completely ready before covering the room with clapboard.
Fastening the lining with clamps
The first board is installed in the same way as when installing lining using nails. It's all about how it is fixed. Clamps are put on the tenon, which are attached to the sheathing using nails/staples/screws. There are three holes for fasteners, but you choose whether to use all or only two (it is dangerous to fasten the paneling in a bathhouse with one nail/screw - it can tear it out). Nails or screws are supplied with the clamps. If you are going to “mount” it on self-tapping screws, it is better to have a screwdriver - this will speed up the process significantly.
You can also use a construction stapler to attach the clamps, but you also need to know how to use it. It all depends on how hard you pull the trigger. If you press weakly, the staple will not completely enter the wood; you will have to either shoot another staple, or “finish off” this one with a hammer.
Fastening the lining with clamps
In any case, the fixation scheme is no different from fastening with nails: first fasten the clamp in the middle, then along the edges, and, after checking the vertical/horizontal installation, to all other intermediate lathing strips.
If the last plank does not become completely, it is cut to the required size, inserted and secured with nails: in the corners and above/below, planks, corners or plinths are still filled, which will perfectly decorate the nails.
Euro or regular
In almost any category of molded products you can see offers with the prefix “euro”. The difference is that such lumber has one, two or three longitudinal grooves on the back side. They come in different widths and depths. The main purpose of this groove is better ventilation. From the point of view of the bathhouse and wooden ceilings, this is exactly what you need. So the conclusion here is clear: if possible, buy eurolining or euroboard.
It is important to check the geometry of the lumber
There is one point. The price of lumber with the prefix “euro” is higher. This is partly due to more complex processing (additional milling of ventilation ducts), and partly to the higher quality of the wood. This is where you need to look. Firstly, on the geometry: everything must be smooth, and the geometry must be observed throughout the entire length of the molded product. Secondly, for the absence or presence of knots: euro materials should not have them at all. Sometimes a knot is allowed, but not black, but brown and not cracked. Then it’s at least partly Eurolining and Euroboard.
How to protect the lining and frame from moisture
When choosing products to ensure moisture resistance, you must remember: the high temperature conditions of the steam room do not allow the use of any “chemicals”. During the evaporation process, harmful substances will be released. Therefore, for this room you can only use:
- natural oils, such as flaxseed;
- wax;
- drying oil;
- antiseptics followed by coating with ship varnish.
The following compositions have similar properties: Eurotex Saura, Usadba (U409). As for varnish mixtures, they are chosen to be water-based:
- Acrylic. When heated, they emit an unpleasant odor; they are used only for the dressing room.
- Alkyd. They protect against high humidity and hot steam, but have an unpleasant odor.
- Water-based. They are odorless and do not emit harmful substances when heated; they can be used in a steam room.
- Polyurethane. They protect wood from fading and are used for interior and exterior surfaces.
- Acrylic-polyurethane. They prevent the development of mold and fungi and give the wood a pleasant shine.
The choice of means for impregnation depends on the capabilities of the owner. But in the steam room it is better to avoid all and any chemicals. Natural flax, lavender, and rose oils will require a lot of consumption, but will not lead to dire consequences. And to prevent rotting, you need to inspect the lining once every 6-8 months and treat the affected areas with antiseptics. In this case, a deep impregnation composition intended specifically for steam rooms, baths, and saunas is suitable.
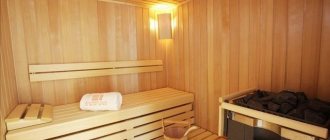
Design ideas and examples
Interior decoration of a bathhouse, professional project. You can build something like this yourself, you just need to carefully study modern design trends.
This photo shows the interior of a rustic-style bathhouse.
Scandinavian style can be realized if you use white lining. If desired, the material can be painted.
This interior uses modern finishing materials. Choose any appropriate design options for your bathhouse. The style of the room can be successfully emphasized with small accessories and attractive details.
Features of fixing lining to the ceiling
We looked at what clapboard-lined walls look like, but how to sheathe ceilings correctly? Attaching the planks to the ceiling follows the same pattern as for vertical surfaces. Self-tapping screws and a screwdriver are very helpful here; sometimes small nails are used.
If the sheathing for the panels is made of wood, it is mounted in the same way as for the wall. However, it is better to leave the distance between the bars large. When a metal frame is planned, special hangers are installed, and the guide profile is fixed to them.
Advice! To finish the ceiling, get a second person to help. The work is not difficult, but it is quite difficult to hold the panels correctly and fasten them yourself.
Application
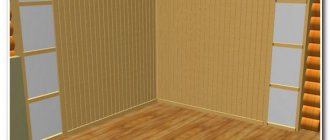
More and more residents of private houses are choosing the interior of walls made of lining inside the house. This is explained not only by the comfort and magnificent beauty of the interior, which are achieved through the use of wood, but also due to the presence of certain properties that the lining has.
Among them:
- Excellent sound insulation;
- The surface does not require further leveling;
- A wonderful aroma of wood that will appeal to all residents;
- Biological features and high environmental friendliness of the tree;
- Various methods of laying the lining, as well as its different widths and other basic parameters of the panels, allow you to visually change the proportions of the space.
Let's say a few words about the properties of lining to change space:
Preparation of load-bearing surfaces
Preparation of surfaces includes their leveling and, if desired, additional insulation. There is no need to level each individual beam, only level those to which the wooden batten will be attached.
The slats, by the way, can arrive horizontally or vertically. Accordingly, the lining in such cases will be mounted vertically or horizontally.
Video - Installation of lining
It is better to check the evenness of the walls using a rope stretched in the corners of the bathhouse, or a flat, long wooden slat. It is advisable to use a rope, it is more accurate and faster. Stretch the rope as close to the floor and ceiling as possible, and use a flat rod to check the distance from the wall surfaces to the rope. If large bulges are found, they will have to be cut down; the depressions will be leveled out during the installation of the sheathing. And not all of them, but only those where the slats will need to be attached.
Which is better, vertical or horizontal finishing of the steam room
To give a logical explanation for this issue, we will first consider the option of finishing a steam room with a vertical lining arrangement, and then assume that the wall cladding is horizontal. After that, we will draw conclusions about which is better.
Vertical arrangement of the lining
When the lining is positioned vertically, it heats up unevenly. So, in the lower part adjacent to the floor, its heating temperature will have the lowest value, and near the ceiling - the highest. In this case, the air humidity at the bottom will be the highest.
It is not difficult to imagine what will happen if you repeatedly heat and cool a sufficiently long wooden element. This is its unpredictable deformation: bending along a plane, propeller-like, warping and other changes in the original shape.
Installation of lining
We have already noted above that clapboard boards can be mounted on the wall both horizontally and vertically. Each option has its own nuances, determined by the specifics of use in a particular room.
Vertical arrangement
- visually increases the height of the room;
- expands its upper and lower boundaries;
- recommended for use in bath rooms, as it promotes optimal air circulation.
Fixation method
:
finishing nails, clamps, decorative screws
.
Installation nuances:
- fixation should begin from the corner;
- after the board is level, it is nailed, and the head is bitten off with a side cutter; if clamps are used, then they are nailed to the frame, and the other part into the groove of the board;
- when fixing the lining on the wall, check every 5-10 boards to ensure that the levelness is maintained; a corded plumb line is ideal for this;
- the last lining is adjusted to the desired size using a hacksaw.
Horizontal arrangement
- increases the width of the room;
- suitable for high rooms;
- emphasizes the visual volume of the room.
Fixation method:
finishing nails, clamps, self-tapping screws
.
Installation nuances:
- Fixation should begin from the ceiling and gradually go down;
- check the evenness of the landing every ten boards;
- the last board is cut to the required size using a hacksaw;
- all fragments are knocked close to each other with a hammer;
- the joint between the wall and the floor can be covered with a beautiful plinth.
Informative video on the features of installing lining:
https://youtube.com/watch?v=cQIXzEroi_k
The final stage of finishing
After installing the lining, its surface must be carefully treated. Experienced builders and users care about the beauty of the premises and strive to create an environmentally friendly microclimate inside the steam room. To do this, choose water- and wax-based compositions and stains as finishing treatments for the steam compartment.
Impregnation of wood with the resulting solution provides additional protection from moisture. In the steam room, the lining is covered in one layer, in other rooms - in two. In the washing room, varnish is also used to cover the cladding material, which allows you to preserve the original appearance of the wood. This treatment will increase the safety of the panels.
When applying the coating, the formation of unevenness and drops and contamination of the undried area are unacceptable. To avoid this, you need to use clean brushes and carefully apply the composition to the surface to be coated.
To give the bathhouse a complete look, lamps specially designed for such a room are installed in the ceiling. For safety, they are covered with gratings made from the remains of lining. Valves are installed on the ventilation holes.
Useful tips
And finally, a few tips that will ensure the reliability, durability and aesthetic appeal of wood cladding:
- Before installation, it is advisable to treat all wooden surfaces, including sheathing, with antiseptic impregnation, especially if clapboard is used to finish a wet room or external walls. This will prevent the spread of mold.
- When finishing interior spaces, materials must be kept in them for two to three days for acclimatization.
- The lined surface can be painted, coated with oil, wax, varnish, or stain. Pre-priming will reduce the consumption of varnish or paint.
Material selection
Work begins after installation and testing of the functionality of all engineering systems. Before covering it is necessary:
- Determine the type and volume of materials;
- Make a list of necessary tools;
- Perform heat and vapor barrier;
- Install the sheathing.
Previously, edged boards from various types of wood were used for interior cladding. The lack of necessary equipment and technology sharply reduced the range and quality of manufactured products. New production technologies have made it possible to increase the range and quality of modern lumber.
The main material for covering modern bathhouses is lining. The lining is a thin edged board with a special profile.
What is the purpose of foil?
To achieve effective energy saving in a bathhouse, you will need to not only insulate it, but also use reflective material in the form of a special foil film. Masters claim that it helps return up to 95% of the heat into the room.
The result is that fuel for the stove is saved and the duration of the fire is reduced.
For baths, aluminum foil with a thickness of 30–300 microns is used. It is used in combination with other insulation or is already fixed as its top layer.
Therefore, before covering, they first attach insulating material to the walls and ceiling, thanks to which the heat does not escape beyond the bathhouse. An insulated steam room heats up faster and retains heat longer.
The following are the advantages of foil:
- It acts as a vapor barrier and blocks the access of moisture to the insulation. The generated steam remains on the walls of the steam room.
- Its service life exceeds 50 years. Wooden elements will begin to rot faster than the foil layer will deteriorate.
- Excellent sound insulation. Foil can absorb up to 70% of all sounds and noise.
- Fireproof raw materials. Does not burn. It will become an obstacle to the spread of fire.
- Bathrooms warm up faster and take longer to cool down.
- If you fix the insulation with a foil layer, then the foil will prevent it from falling off.
Among the disadvantages, the following should be noted:
When there is a difference in temperature outside and indoors, condensation appears on the surface of the material. It is important to leave a gap for ventilation before covering. If this is not done, the resulting condensate will begin to be absorbed into the sheathing, which will lead to rotting of the lining. Foil has poor throughput
As users say, she is not breathing. Therefore, the rooms must have good ventilation, both forced and natural (windows, doors). Aluminum particles accumulate in the lungs, causing various respiratory diseases. But if you use the sauna periodically, the risk of harm to health is minimal.
Preparing for work
Sheathing the ceiling in a bathhouse should be done only after calculations have been made and the ceilings have been secured. The false ceiling in the bathhouse is the most common. It is a “layer cake” that is mounted on pre-installed joists. The basis is made up of tongue-and-groove boards fixed directly to the ceilings, followed by a heat-insulating layer followed by a vapor barrier. So how to properly hem the ceiling in a bathhouse?
The listed building materials are quite sufficient to ensure that the optimal temperature in the bathhouse is maintained for a long time. An additional room can be created from the attic by simply laying a layer of boards on top of the thermal insulation. They can be fixed to the same beams - the protective layer usually does not exceed them.
Before starting work, it is necessary to measure the room and add 5% to the result obtained.
It is worth paying attention to the symmetry of the ceiling. If it is not ideal, you need to decide which wall the sheathing, cut at an angle, will be attached to.
Usually this is done near the darkest wall so that it is not too noticeable. The rough ceiling in the bathhouse and the filing must be installed taking into account all the necessary requirements.
Information. A false ceiling can be made not only from tongue-and-groove boards, but also from wooden panels.
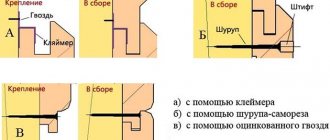
Option 1 - using finishing nails
This lining fastener is traditional and has been used for several decades. For this work we will need special nails with a reduced head. The length should be such that 2/3 of the nail fits into the sheathing of the lining.
Most often, products with a length of 30 to 40 mm are used. The price of 100 grams is 40-50 rubles, so this is also the cheapest method of fastening.
Finishing nails - the most budget-friendly solution
Let's figure out how the lining is attached in this case:
The first installation option is fastening into a groove, that is, into a recess on one of the sides; in this case, the nail is driven in at an angle of 45 degrees and covered with the next element. A diagram of this technology is shown below.
This is what the groove mount looks like
You can also fix elements through a tenon. Below is shown how to properly fasten the lining with nails in this case. Here the nail is also covered by the next element, ensuring the perfect appearance of the finish.
This method is even simpler, but it is suitable for materials with a wide tenon
Having chosen the option that you will use, you can get to work. Before attaching the lining to the wall, it is necessary to cut the elements to the required length so that there are gaps of several mm to compensate for the deformation of the material due to temperature changes.
- STEP 1: The first element in the corner on one side is fixed through the top; anyway, the corner is covered with a plinth or other decorative element.
- STEP 2: From the second side, a nail is driven into the tenon or groove; this is done very carefully so as not to split the material or damage it. This way you can finish walls and ceilings quickly and reliably.
Remember that when fastening into a groove, the nails are located at an angle
Preliminary work with the ceiling
It is very important before making a lining ceiling to prepare it correctly. First, you need to remove a layer of old plaster from the ceiling surface and clean the surface from dirt so that it is as smooth as possible. Next, we proceed to marking the ceiling for the frame
In this case, it is worth deciding on the direction of the lining strips. In the process of further laying the lining on the ceiling, it is advisable to place it so that there are as few end joints as possible.
Next, we proceed to marking the ceiling for the frame. In this case, it is worth deciding on the direction of the lining strips. In the process of further laying the lining on the ceiling, it is advisable to place it so that there are as few end joints as possible.
Since wooden elements are susceptible not only to moisture, but also to mold, they must be coated with an antiseptic before installation.
In private houses, the ceiling should be pre-insulated. A layer of thermal insulation is laid between the profile posts, mounted with an indentation of 50-60 cm. If we are talking about an apartment, then additional thermal insulation is not needed.
Next, we find a level for attaching the sheathing. Having decided on the direction of the slats, we mark the ceiling
Please note that the lining is fixed perpendicular to the sheathing beams. If desired, it can be placed at right angles to the walls or diagonally.
Retaining brackets are fixed to the ceiling with equal intervals between them. Then wooden slats are laid on the brackets, leveling them using small wedges.
In order for eurolining ceilings to be beautiful, the lathing must be installed very carefully and perfectly level.
The maximum step between fasteners is 50 cm. If eurolining is used, then the step must be halved.
Its final appearance and durability depend on how carefully you pay attention to the preliminary preparation of the ceiling.
Preparatory work for wall cladding
Before quickly sheathing the inside of the bathhouse with aluminum foil and wooden clapboard, it is necessary to insulate the walls. Before laying the insulation, install the counter-lattice and sheathing. A layer of vapor barrier is laid on top of the insulation.
Thermal insulation device
The best material for insulating baths is basalt wool. This material has good thermal insulation and a high degree of fire resistance. Basalt wool does not rot. This type of insulation does not burn and does not emit harmful substances. Basalt can withstand temperatures up to 1500° C.
Experts recommend using Rockwool brand “Light Butts” mineral wool. The mineral wool of this company is of high quality, increased density and affordable price.
To cut basalt wool sheets, large, sharp knives with a high-quality blade are used. When cutting, the knife blade is held at an angle of 30-45° to the surface of the blade. When tilted, the blades dull much more slowly.
The width of the canvas is taken to be 2 cm greater than the distance between the vertical posts of the sheathing. The increased width helps to fix the blades in a constant position.
Thermal insulation sheets are laid in 3 layers with overlapping joints. The amount of overlap is equal to half the length of the canvas.
All layers are laid in height within one span of the sheathing. The laying direction is from floor to ceiling. They move to another span after laying all the layers of the previous span.
Laying the first layer begins from the floor. First, the whole canvas is laid. After laying all the canvases of the first layer, the second layer is laid.
Laying the second layer also begins from the bottom. For overlapping joints, the length of the first web of the second layer is taken equal to half the length of the standard web.
At intersections with obstacles, elements of the required shapes and sizes are cut out.
Before covering the bathhouse with clapboard, care should be taken to protect the walls from dampness and rotting. Therefore, after installing thermal insulation, they begin to install the vapor barrier material.
Vapor barrier device
The vapor barrier layer is designed to protect walls from condensation and increase the heat-reflecting properties of the insulation.
The work of laying vapor barriers is the most critical when constructing bathhouses. The efficiency of steam use depends on the quality of vapor barrier work.
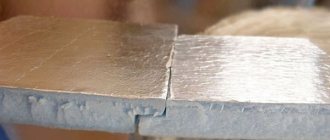
Aluminum foil with a thickness of 50-80 microns is used as a vapor barrier. Attaching the foil begins from the corner of the room in the direction from bottom to top.
Vapor barrier sheets are sewn with metal nails or staples to the vertical posts of insulation cells. To attach the foil, use a pneumatic gun or a special construction stapler.
The foil is laid with an overlap of 2-3 cm of vertical seams. All seams are taped with aluminum adhesive tape.
In places of transition from the walls to the floor and ceiling, the foil is laid with an overlap of 5-10 cm in each direction. The free ends are sewn to the ceiling and floor with nails or tacks.
At the junctions of walls and ceilings, gaps often appear in the foil. To eliminate these gaps, use foil corners. To make such a corner, a piece of foil is placed on the corner of a table or chair.
The resulting shape is carefully beaten with a light object to soften the foil. Broken corners are glued with aluminum adhesive tape
The manufactured corner is inserted into the corner and carefully taped.
After completing the work, check the quality of the vapor barrier installation. Any damage found is covered with adhesive tape.
After installing the vapor barrier, the installation of the counter-lattice begins.
Counter-lattice device
The counter-lattice serves as the basis for the main sheathing. Designed to ensure air exchange in the space between the foil layer and the lining.
To construct the counter-lattice, wooden blocks with a cross-section of 20x20 mm are used. The bars are nailed to the vertical posts of the insulation cells. The distance between the slats is taken to be 400-500 mm. Installation of counter-lattice slats is carried out according to level and plumb.
When installing a counter-lattice, a hole with a diameter of 80-100 mm is drilled in the ceiling for the exhaust duct pipe. A sealing cap (valve) is inserted into the hole. During bath procedures, the hole is closed. To ventilate the bath after washing procedures, the hole is opened.
Periodic ventilation prevents the appearance of dampness and rotting of the lining. To ensure air exchange, a gap of at least 2 cm is provided between the lower end of the lining and the floor.
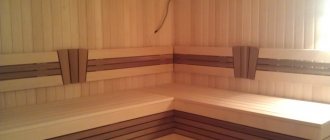
Nuances of the interior decoration of the steam room
Naturally, before starting this stage, you need to already know how to line the inside of the bathhouse, as well as purchase all the necessary materials. The most used and recommended method of fastening the lining is flush fastening.
Before you begin finishing work, you need to prepare the material that will be used to finish the steam room. Before attaching it to the walls, the lining must undergo acclimatization in the room in which it will be used.
The floor in the steam room must be higher than the floor level in other rooms. The shelves are installed above the heater by about 10 cm. Benches and shelves should not have sharp corners. Only natural materials should be used inside the steam room.
It is very important to choose what kind of wood to cover the steam room with, since not all types of wood are suitable for this. You should also take into account all the finishing features of the most important room of the bathhouse, which determines whether the procedures taken will be useful.
Work procedure
Wooden lining can be used to decorate living rooms of almost any design style, either completely or partially, see fig. In the latter case, lining can be an effective means of zoning a room, top left in Fig.
Living rooms decorated with clapboard
The walls are finished with clapboards in the following order:
- Preparing the building: if the walls are porous or cold (they conduct heat well) - insulation and waterproofing from the outside. Possibly also external decorative cladding. Neglecting this point will bring all efforts to create beauty inside to nothing;
- Choice of material – wood species, profile and width of the lining boards;
- Choice of cladding scheme: horizontal, vertical, diagonal, shaped;
- Preparation of the internal base surface - leveling, vapor/water insulation;
- Installation of sheathing under the cladding;
- Wall covering with clapboard, using standard or simplified technology. In terms of strength and decorative qualities of the cladding, they are equivalent, the differences are different, see below;
- Applying a protective coating to the casing;
- Installation of sockets, lamps and other devices built into the wall;
- Applying skirting boards to expansion gaps, corners of window slopes and door quarters.
The first stage – calculation and purchase of material
To work we need a very simple set of materials:
- Wooden block.
- Fasteners See article nails or clamper.
- Insulation (if necessary).
The block is the main material that we will use
But in order to calculate the required quantity of all components, you should know several important features:
- FEATURE 1: step of frame location. The optimal distance between the sheathing elements is from 40 to 60 cm. If the lining is thin, then it is better to place the bars more often, this will give the structure additional rigidity. The distance may be different if the length of the walls does not allow maintaining the same pitch of the elements.
- FEATURE 2: If there are openings, a block must be secured around the perimeter. If we are talking about doorways, then it is better to mount two racks at a time to strengthen the system. It is advisable to mount guides at the top and bottom.
It is important to strengthen the openings well
FEATURE 3: when using insulation, the thickness of the block must be no less than the thickness of the heat-insulating material
The most commonly used option is 50x50 mm or 50x40 mm.
FEATURE 4: When purchasing material, pay attention to its moisture content. It should be no more than 15%
Raw elements may become deformed or crack when dry, so they should not be used.
- FEATURE 5: the insulation is calculated based on the area on which it will be mounted;
- FEATURE 6: fasteners are selected based on the type of base. For concrete and brick, quick installation dowels are needed; for wood, self-tapping screws or nails are used.
The length of the dowels depends on the thickness of the bar
Finishing of the washing room: wood or PVC?
In the washing room, the air temperature is, of course, lower than in the steam room, but the humidity is much higher. That is why ordinary lining is rarely used as a finishing material - only if a special hood is installed on the ceiling. And usually it is moisture-resistant larch. Thus, ordinary wooden lining can be used inside the washing compartment of a bathhouse - if you think carefully about how to treat it. This is necessary to prevent mold from multiplying and black spots and insects from appearing. Basically, bath attendants today use a colorless water-based antifungal agent for these purposes.
But plastic PVC lining, effectively imitating wood, fits perfectly. It is easy to attach, easy to clean and lasts quite a long time. Why not use the same one in a steam room? No plastic is designed for the extreme temperatures that occur in it, but in the washing room it does not deform and does not release any harmful volatile substances into the air.
Plastic lining is also much cheaper than wooden
It is only important to make a vapor barrier and ventilation gaps in the washing room: a lathing is attached, a plastic film is placed on top of it, then there are slats and then there is lining on them
How to prepare a frame for mounting material
The video in this article will show you how to nail the lining and how best to position it on the surface.
The direction of the panels can be:
- Vertical. In this case, the boards are placed in the direction from floor to ceiling, the room visually becomes narrower and higher.
- Horizontal. The slats are placed from one wall to another, the room looks wider, but lower.
- At an angle or diagonally. This is a more complex method of laying material, and also with increased consumption.
- Combined. A combination of the first three methods in any variant.
With a perfectly flat wooden surface, the lining can be nailed directly to the wall, which is very rare. In other cases, the lathing is made from planed pine slats with a cross-section of 20x40 millimeters (see Lathing for lining according to all the rules), with a pitch of elements up to 50 centimeters.
Tip: Before installation, all wooden parts should be treated with an antiseptic.
The further procedure for installing the frame is as follows:
- The first rail is installed vertically in the corner of the room, its position is controlled by a plumb line. To install screws, plastic dowels and wooden spacers are used.
- Similarly, another rail is mounted in the opposite corner.
- At the top and bottom of the wall, two cords are stretched between the bars to facilitate installation of the panel at the top and bottom.
- Horizontal elements are fixed: one under the ceiling, and the other closer to the floor, their position is controlled by a cord.
- In increments of 50 centimeters, the remaining slats are installed horizontally.
Advice. To check the correct installation of parts, a cord or rule, which is a flat wooden block, is used, stretched between the outer slats, resting it on horizontal panels located at the top and bottom of the structure.
When the lining is placed horizontally, the slats for the sheathing are installed vertically. For diagonal laying - to the lining at a right angle.
Laminated panels for wall decoration
If it is necessary to decorate walls, it is usually customary to consider, first of all, either the option of painting or wallpapering, or covering with materials specially created for this purpose - PVC panels, MDF or clapboard. Each of these coatings has pros and cons. However, using laminate is often a better solution.
Benefits of use
This material has the following characteristics, the combination of which gives it an advantage over other methods of cladding wall surfaces:
- the simplicity of the installation technology allows you to install the laminate on the wall yourself;
- is an environmentally friendly material;
- high wear resistance guarantees preservation of operational properties and decorative qualities for several decades;
- has antistatic properties and attracts little dust;
- easy to clean with any cleaning products;
- It is distinguished by a wide variety of colors, patterns and surface textures, making it possible to create a unique apartment design.
Flaws
This coating has few disadvantages:
- intolerance to high humidity, which causes swelling of the panels, which often leads to the appearance of cracks on the outer surface;
- susceptibility to temperature fluctuations, which sometimes causes delamination and deformation of the material;
- Laying laminate flooring will cost more than wallpapering, whitewashing or painting a wall.
Where you can’t cover walls with laminated panels
The sensitivity of this material to water and temperature makes it unsuitable for wall coverings where there is high humidity or where water splashes onto the wall. This category includes, for example, bathrooms and kitchens. The best applications for this coating are bedrooms, halls, hallways and corridors.
But even here it is recommended to be careful and not sheathe walls near heating radiators