Despite the fact that in some articles on our website we also touch on the question of how the lining in a bathhouse is attached, the reader sometimes needs to quickly get an answer to a practical question, so we decided to include various options for attaching lining in a bathhouse in a separate material. Let's look at the types and methods one by one, and finally we'll arrange a vote in which anyone who has personal experience with this lumber can take part, and this way the majority opinion will be seen.
Choosing wooden lining for a bath
For the steam room, choose lining with a low content of natural resins - deciduous wood.
Not every lining is suitable for lining a steam room and sauna. It is also better to choose only certain types of wood for the washing room. There are no restrictions for finishing the dressing room or guest room.
In the steam room and sauna, the air temperature reaches a high value - 80–110°C. The wood must retain its qualities at this temperature and not get too hot, otherwise the shelves will be impossible to use. In the steam room and washing room, the humidity is also high, so only species that are resistant to water and steam are suitable for finishing.
Only wood that is resistant to rot and mold is allowed. It is impossible to treat the material in the steam room with paints or varnishes, and oil and wax are not good protectors of wood.
The following breeds meet these requirements:
- linden – resistant to water and steam and has a wonderful smell;
- aspen - does not succumb to mold and only becomes harder over time;
- cedar is a soft, plastic wood that has pronounced antiseptic properties;
- birch - used only for saunas;
- oak is absolutely resistant to water and steam, but expensive.
You cannot use coniferous wood to decorate a sauna or steam room. It contains a lot of resins and under the influence of temperature the latter is released on the surface. Walls and shelves become dirty, sticky, and resin, unlike wood, heats up much more.
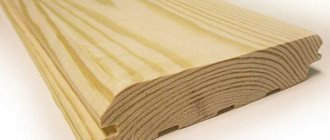
The difference between regular and eurolining
Eurolining differs from the usual one, first of all, in its configuration. The groove is deeper, the ridge is higher, which ensures a stronger and tighter joining of the lamellas. Ventilation gutters are cut into the surface of the elements, so after installation it does not suffer from changes in humidity and temperature. Thanks to these qualities, eurolining can be considered the best option for a bathhouse.
Useful tips
And finally, a few tips that will ensure the reliability, durability and aesthetic appeal of wood cladding:
- Before installation, it is advisable to treat all wooden surfaces, including sheathing, with antiseptic impregnation, especially if clapboard is used to finish a wet room or external walls. This will prevent the spread of mold.
- When finishing interior spaces, materials must be kept in them for two to three days for acclimatization.
- The lined surface can be painted, coated with oil, wax, varnish, or stain. Pre-priming will reduce the consumption of varnish or paint.
Preparing walls for cladding
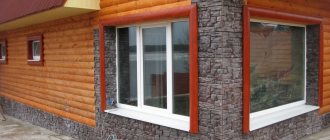
Cladding with clapboard on stone wool and penofol on the sheathing
In order to properly attach linden or aspen clapboard in a bathhouse, you need to carry out preparatory work. Installation of finishing is the last stage of work.
- They start by cleaning the walls and marking for the sheathing. For eurolining, calm or American lining, take a wooden, well-dried beam with a cross-section of 2*5 cm. For a block house, a more massive option is needed - with a cross-section of 5*5 cm. The distance between the slats is 40–50 cm.
- There is a gap of 10–15 mm between the edge of the sheathing beam and the floor. It is needed for ventilation.
- Reinforcing bars are placed on the frame. Shelves are mounted on them.
- The pitch is determined not so much by the configuration of the lining as by the width of the insulation sheet. The standard size of mineral wool is 60–70 cm. It is easy to lay it in the resulting cells. For foam boards, the pitch can be increased.
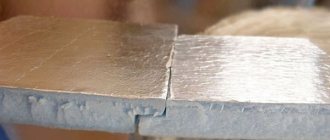
- The material is insulated with a foil coating. The latter protects the frame and insulation from the action of water and steam and reflects heat back into the room. Attach the coating with the shiny side facing inward.
- The gap is covered with a wooden plinth.
When covering the walls and ceiling of a steam room or washing room, you cannot use a metal profile. Its coefficient of thermal expansion is very different from that of wood. This leads to deformation of the lining and walls.
Dimensions
Fasteners are available in several types, which depend on the thickness of the groove into which the bracket is to be attached. The sizes of clamps for lining are as follows:
- No. 1 – used for fastening PVC lining and panels 5 mm thick;
- No. 2 – used for panels 8 mm thick made of PVC or MDF;
- No. 3 – purchased for installation of eurolining and wall panels made of chipboard;
- No. 4 – mainly used for fastening eurolining;
- No. 5 – used for installation of clapboard boards;
- No. 6 – recommended for indoor block houses.
The ease of installation work and the reliability of the structure as a whole depend on how correctly the size of the metal plates is selected.
Options for fixing the lining
Fastening lining to clamps
You can fasten euro-lining or other profiles in a bathhouse in different ways.
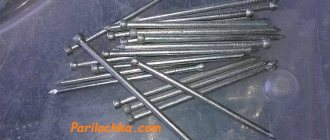
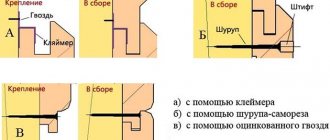
- Through fastening with nails or screws with masking is the simplest option. For fastening, holes are pre-made in the lamellas so that the lining does not crack during installation. During installation, a nail or self-tapping screw is inserted into the hole and pressed flush with the surface. The fastener passes through the body of the lamella and damages it. The disadvantage of this method is the high risk of burns if the user accidentally touches the almost invisible caps.
- A hidden connection with self-tapping screws involves masking the fasteners. In this case, the self-tapping screw is completely recessed into the material, and the head is covered with a wooden cap. After installation, the ends of the plugs are ground level with the surface. Since the metal is covered with wood, there is no risk of burns.
- You can also nail the slats through the groove with nails. But unlike self-tapping screws, they are buried into the material at an angle of 30–45 degrees so that the head is recessed flush with the tenon. In this case, the spike of the next lamella completely covers the nail.
- Hidden fastening with clamps is the safest. In this case, clamps are put on the tenon, and nails or staples are driven through them. The tree is damaged minimally.
The method is chosen depending on the budget and further intentions. Fastening with nails through the lamella does not require any additional effort. However, the material here is damaged irreversibly; the lining cannot be reused.
Installation using clamps does not damage the material at all, since the fasteners go through the device directly to the frame.
Application specifics
Carrying out work using lining clamps is not at all difficult, so this operation can be easily handled not only by a professional builder, but also by a person who has never previously engaged in this type of activity.
It is very easy to calculate the number of metal plates that will be needed for fastening.
For every square meter of surface you will need about 20 pieces. Therefore, for example, in order to cover walls with a total area of 40 square meters, you need to purchase about 800 pieces.
Installation methods
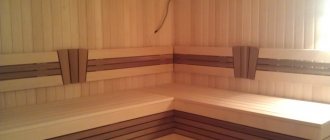
Vertical and horizontal fastening of the lining
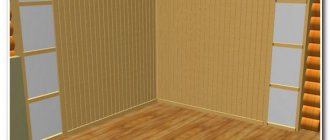
The material consists of long, narrow lamellas. Their location on the wall greatly influences visual perception. The following methods are used in the bath.
- Horizontal - visually expands the room, but makes it slightly lower. Quite suitable for large steam rooms. In addition, this position of the lamellas prevents drying out and deformation of the wood.
- Vertical - visually raises the ceiling, so it is used more often. However, from a practical point of view, the method is less profitable. The boards in the lower and upper parts are subject to different thermal loads, which leads to deformation.
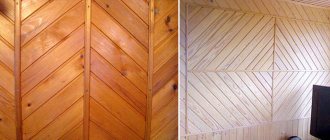
The diagonal placement method is rare. It looks beautiful, but requires a lot of material consumption and maintenance.
Preparatory work
Almost always, construction work begins with preparation. Our case will not be an exception. The lining, which will be mounted on the walls in the bathhouse, needs to be treated, because this room is operated in conditions of high humidity. Using protective impregnation will allow you not to worry about the appearance of mold and signs of rot. It is also necessary to use water-repellent agents and protection from high temperatures.
While the lining is drying and preparing for further use, it is necessary to work on the walls. They must be smooth, clean and primed. Waterproofing in the form of a film is installed on the dried walls. If necessary, we lay power cables.
Headlining
To improve the appearance, the lining must also be mounted on the ceiling.
Installation on the ceiling is somewhat more difficult due to the need to work together. You can do it yourself. In this case, racks are purchased or made from 5*5 cm timber, with which the lamella to be secured is supported.
Since there is no danger of getting burned here, you can attach it using the simplest method and not worry about camouflage. But it is important to level the boards. This is done using a hammer with a rubber or wooden tip. The lamellas should fit snugly against each other, while the hammer makes a dull sound.
When installing the last slat, it has to be trimmed, since a standard width slat does not fit into the left cavity. This is done with a circular saw. The joint is covered with a ceiling plinth.
How to cover a doorway with clapboard
Doors and doorways are also lined with lining.
Slopes can also be sealed with the material. The lamellas are attached to wooden blocks located perpendicular to the direction of installation. Which method is better - vertical or horizontal - determines the amount of remaining material and its quality. It is easier to collect the required number of fragments from short scraps, but finishing will take more time.
- For vertical installation, install slats starting from the door frame. The board is pressed into the frame with a groove and nailed with finishing nails. The next lamella is inserted with a tenon into the groove and fixed in the chosen way.
- When laying horizontally, a starting profile is placed on the frame, and the installation itself begins from the bottom. First, the fragments are secured in the groove of the starting bar, and then among themselves.
To mask the gap between the sheathing of the slope and the wall, use a wooden corner. It is mounted on nails or even glue.
Calculation of material quantity
When choosing lining, you need to understand the amount of finishing material you will need. As a rule, the cost of wooden slats is indicated in square meters (less often in cubic meters). However, a basic mathematical calculation will not work in this case, since the quadrature will be influenced by parameters such as the length of the lamellas, the height of the floors in the house, and the dimensions of door and window openings.
There are two ways to help calculate the amount of lining.
- Intuitive. Following this method, you should calculate the perimeter of the surface area that you plan to finish with lamellas. From here you need to calculate the dimensions of the openings. Add 10-30% for waste to the result. This method of calculation is simple, but not the most accurate.
- Mathematical. This method of calculation is more scrupulous. To do this, you need to count the lamellas individually, taking into account their length and width, as well as the dimensions of the openings. To calculate, divide the surface length parameter by the width of the lamella. This way you can determine the required number of linings. As a result of all calculations, it will be possible to obtain a fairly accurate value. In this case, no more than 10% can be left for waste.
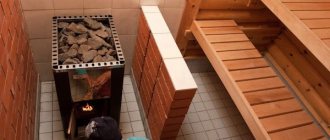
Installation of lining near the sauna heater
The stove in the steam room is installed near one of the walls. Since a cast iron or steel product gets very hot, there are other requirements for finishing.
Directly next to the heater, the wall is covered with clapboard in the usual way. The stones accumulate heat, so they don’t get too hot. The risk of fire here is low.
The area around the firebox along the perimeter of the 3 walls of the housing is sealed with metal, mineralite or asbestos sheets. These materials are not flammable and even if coal gets from the firebox onto the floor, they do not allow a fire to start.
Useful tips
And finally, a few tips that will ensure the reliability, durability and aesthetic appeal of wood cladding:
Before installation, it is advisable to treat all wooden surfaces, including sheathing, with antiseptic impregnation, especially if clapboard is used to finish a wet room or external walls. This will prevent the spread of mold.
When finishing interior spaces, materials must be kept in them for two to three days for acclimatization.
The lined surface can be painted, coated with oil, wax, varnish, or stain. Pre-priming will reduce the consumption of varnish or paint.