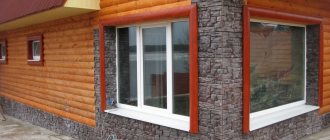
A feature of modern sauna stoves is their heating temperature, which can reach 400 degrees. An important indicator of the efficiency of the furnace is instant heating of the body and maximum heat transfer.
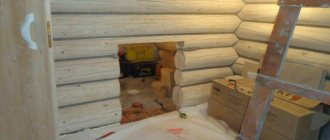
The entire heating process is accompanied by the release of infrared radiation, which is distributed on surfaces adjacent to the furnace. Under the influence of high temperatures, the wooden structure of the bathhouse can char or ignite.
This is why it is so important to ensure that wooden surfaces are reliably insulated from the heat of the stove. A protective screen and casing made of fire-resistant materials are suitable for this.
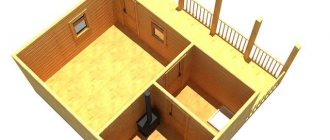
What types of stoves can be used in a sauna?
Today, the choice of steamer is extremely diverse: you can buy a stove and make it yourself, or buy it and modify it, but there are a lot of options. Let's reduce them to several main types. Ovens are:
- brick;
- metal (including with brick lining);
- electric.
Brick kilns
Traditional stoves for the Russian “white” bath are brick. They have a number of advantages, since there is a direct connection between such a stove and the requirements of a Russian bath.
In particular, a brick oven provides uniform heating, and most importantly, light steam, that is, formed at a high temperature, from which the steamer does not have breathing problems, as from heavy low-temperature steam.
But a brick oven also has its drawbacks. Built entirely of brick, it will be heavy, expensive and will require some skill in maintenance (! inexpensive stove options are presented in a separate article). You need to decide at the design stage, because there will be costs for a separate foundation for it.
Heaters in brick kilns come in all types:
- flow-through, where stones are washed by fire;
- blind, where the stone is separated by a solid sheet of metal from the fire;
- open - with stones on the surface;
- closed - with a door covering the heater compartment;
- bell-type - a type of closed blind with more efficient heating.
Metal furnaces
A very common option because it is more budget-friendly compared to a solid brick stove. The material used is either cast iron or steel - both of different grades.
IMPORTANT! A metal stove without a surround will overheat the room. This is good for a sauna, but not for a Russian bath.
The fact is that metal heats up quickly, and stones heat up slowly. And always during heating, most of the heat is released into the room. Bare metal will give off too much heat to the room, which should not heat above 40-60 degrees. And the stone must heat up to 400 degrees to produce light steam. This creates a big contradiction: in order to heat the stone to produce good steam, you will have to greatly overheat the bathhouse.
The solution to this problem is usually to install a brick lining around a metal stove. This redistributes the heat released during combustion, the brick accumulates it and releases it more softly and for a long time than metal.
On the other hand, they are suitable for saunas, where the air temperature is higher and the steam is much less.
The disadvantages of this type of stoves include the fact that they not only heat up quickly, but also cool down quickly. Therefore, the bath procedure has to be interrupted in order to heat the stove again.
The cost of a metal stove will be lower than a brick one also because it does not require such a solid foundation. A foundation is sometimes necessary, but it can be shallow, and in some cases they are generally limited to a layer of refractories under the stove and that’s it.
There are a lot of varieties of metal stoves - both homemade and factory-made. One of them is worth mentioning separately.
Electric heaters
Electric stoves were originally created for saunas. But then models appeared that are capable of working in Russian bath mode. Those who decide to opt for an electric stove should find out whether the selected model has one or two modes. However, there is a simple criterion:
IMPORTANT! Models with a load of stones of 20-40 kilograms are intended exclusively for saunas; you simply cannot pour a lot of water on them. Models for Russian baths begin with a load of stones of 60 kilograms. Electric heaters are usually bought by those who expect to get quick results with a minimum of effort
There is no need to cook firewood or wait for the stove to heat up (! The corresponding section is dedicated to wood stoves). It all comes down solely to electricity costs (well, electric heaters themselves cost a lot). The second advantage of these stoves is that they are quite compact, and up to a certain weight they can also be mounted on the wall, freeing up space in the steam room. Floor models allow free rearrangement - they are not connected to chimneys and foundations
Electric heaters are usually bought by those who expect to get quick results with a minimum of effort. There is no need to cook firewood or wait for the stove to heat up (! The corresponding section is dedicated to wood stoves). It all comes down solely to electricity costs (well, electric heaters themselves cost a lot). The second advantage of these stoves is that they are quite compact, and up to a certain weight they can also be mounted on the wall, freeing up space in the steam room. Floor models allow free rearrangement - they are not connected to chimneys and foundations.
How to make a screen for a sauna stove - options and solutions from an expert
In a home bath there is always some possibility of a burn from careless handling of the stove. This is a fairly serious danger - the operating temperature of the sauna stove is very high. However, this problem can be solved very easily by installing protective screens for sauna stoves, which will be discussed in this article.
The screen for a sauna stove simultaneously functions as a fence and protection. The fact is that the fire-resistant shield is mounted in those areas where contact is possible between the walls of the steam room, various objects located in the room, and the stove itself. It is worth noting that the protective fence does not block the passage of heat into the steam room, but only protects the stove from contact.
Shielding walls near which stoves are installed
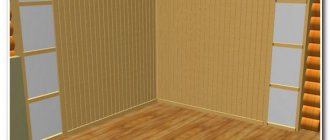
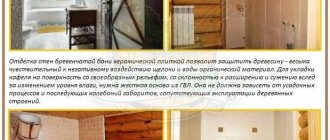
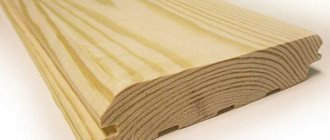
Usually the decoration of bath walls is wooden. It is susceptible to fire and charring. Various heat-resistant materials are used as thermal insulation lining.
Reliable layered cladding with a slight aesthetic effect
If the aesthetics of the cladding is of secondary importance, you can save money and use a combination of metal and heat insulator. First, an insulator is attached to the walls, and a metal sheet is mounted on top. As a starting layer you can use:
- mineralite slabs are fire-resistant panels designed specifically for creating protective screens in saunas and baths;
- basalt cardboard - retaining heat and protecting from fire, it also plays the role of a sound insulator;
- basalt wool is a material characterized by a high degree of fire resistance and hygroscopicity.
Alternatively, you can use asbestos sheets. But they are not environmentally friendly - when heated, they release substances hazardous to health.
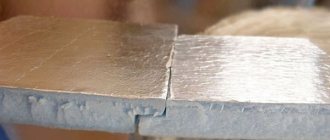
Figure 3. Simple thermal lining
The next layer is a sheet of metal. It is better to use stainless steel. An alternative is galvanizing. It is desirable that the sheets are smooth and shiny. The mirror surface reflects infrared rays from the walls. The latter return to the steam room, but having lost their “rigidity” and becoming noticeably safer for humans.
An example of such a protective finish:
- ventilation gap – up to 3 cm;
- heat insulator – up to 2 cm;
- a metal sheet.
In this case, the distance between the insulated wall and the stove is at least 40 cm. To ensure thermal gaps, the insulation is mounted using ceramic bushings.
Figure 4. Layout of thermal insulation elements
Decorative protective cladding
The use of a combination of thermal insulation and metal meets functional needs, but not aesthetic ones. In an expensive bath interior, such a combination is unacceptable. In this case, the role of the crowning layer is played by heat-resistant ceramic tiles.
Suitable ceramics for finishing:
- porcelain stoneware; the most durable and dense option; the material is also called artificial stone - there are many types that can imitate wood, stone, metal, etc.;
- clinker; a popular oven option, characterized by high density and a variety of shades;
- terracotta tiles; similar to clinker, but less durable; Available in both matte and enameled formats;
- tiles; ceramics, which in the past were most often used to decorate stoves by wealthy bathhouse owners; the main feature of the tile is the box-shaped back part, due to which high heat transfer is formed;
- soapchlorite; rock slabs; characterized by greenish and grayish tints.
Figure 5. Ceramic thermal protection
Heat-resistant ceramics are laid on heat-resistant tile adhesive. But even here you can’t do without insulation. If you cover a wooden wall directly with slabs, the latter will receive a significant “portion” of heat, and this is fraught with, at a minimum, charring. Therefore, ceramics is the final layer, under which any of the already known thermal materials are mounted. To the insulators described above, you can add fireproof plasterboard and glass-magnesium sheet. Both options protect well from the negative effects of high temperatures, and LSU is also moisture resistant.
Finishing the stove with tiles
You can give the stove an attractive look by finishing it with tiles. There are special tiles for stoves that are heat-resistant, but they cost a lot. There are special tiles, but they are laid during the construction of the stove (they cost even more). For the most part, ordinary ceramic tiles are used for stove cladding. If it is of normal quality and laid correctly, nothing happens to it. There are two restrictions:
- use tiles of small formats, as it has been noticed that they hold up better;
- do not use gypsum-based tiles - they greatly reduce heat transfer.
Furnaces are plastered for lining mainly with cement compounds. When clay dries, it shrinks very much, which is why the tiles inevitably fall off. Moreover, it is recommended to use the same composition for plastering and gluing tiles - this guarantees good adhesion.
A few more technological points that relate to laying tiles near furnace castings and other metal elements. The gap between the edges of the tile and the metal should be about 5 mm. This gap should be left empty, without mortar. It is subsequently laid with asbestos cord, and covered with tile adhesive on top, and grouted. This way, when heated, the metal will not tear or squeeze out the tile.
Example of tiling a stove door
First technology: with pre-plaster
Craftsmen who finish brick stoves advise first plastering the stove. After the plaster has dried, you can glue the tiles using a special heat-resistant adhesive. If you adhere to this technology, then the preparatory stage will be exactly the same as for plastering (described above):
- unstitch the seams by 1 cm;
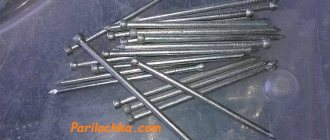
- nail/weave a mesh;
- we wet the oven;
- Apply and level the plaster.
After the plaster has dried, the tiles are glued using conventional technology. Some craftsmen place the tiles on a heated stove, others - on a warm one. There are styling options without heating. The technology is no different from conventional finishing work, the only difference is that the seams are made larger - from 3 mm and they try to leave them unfilled.
An example of tiling a stove
To maintain the seams, the same crosses are used. They are then filled with gypsum grout, which is more elastic and less prone to cracking. In this case, the seams compensate for thermal expansion.
Technology two - straight to glue
If the surface of the stove is initially smooth, but the appearance of the bricks is disappointing, you can try gluing the tiles directly onto the brick. Only it must be clean, without any dirt or dust. Take heat-resistant glue for lining stoves or fireplaces (there are such). Dilute strictly according to the instructions, also according to the instructions, apply the composition to the tiles and glue it to the brick.
There is one trick: if the tile format is such that it overlaps several bricks, the glue should be on only one of them. The rest remain empty. The solutions have a high degree of adhesion and hold well even in this situation. And this method allows you to bypass the different magnitudes of thermal expansion of different materials (the seams expand more, which is why tiles glued to two bricks can tear). But this furnace lining technique has a disadvantage: voids filled with air do not conduct heat well, and heat transfer drops significantly. In this case, there is one way out: buy tiles the size of a brick. It is difficult to find the required sizes, but some craftsmen cut smaller ones from large-format ones, with the required dimensions.
Find or cut tiles to fit bricks
There is a technology that combines the two described above. The stove is lined with masonry mesh with 50*50 mm, wire diameter 0.5-1 mm. They nail the mesh with staples - powerful ones from a construction gun, or using finishing nails. The mesh should fit tightly. The tiles are laid on this base without prior plastering. The disadvantage of this technology is the high consumption of expensive glue.
Tile adhesive on stove
What tile adhesive can be used in this technology? The following heat-resistant brands performed normally:
- Plitonite VT;
- Retainer;
- Emelya glue, suitable even for finishing with torn stone;
- Ceresit 17;
- Fireproof;
Torn stone glued to Emelya glue
Protective non-combustible wall coverings
If there is no need to carry out work to protect walls using screens, in this case, you will still need to reliably protect the surfaces from exposure to high temperatures.
You can use classic mineral wool or use mineralite slabs. We get a reduction in the distance from the wall to the stove in the house, without the risk of fire and deformation of building materials.
Minerite
Installation of reflective trim
This is one of the main methods of protecting surfaces from high temperatures. To do this, you can use a sheet of thin cold-rolled metal with its glossy surface or buy more expensive stainless steel sheets with a mirrored face. This heat-reflecting protection allows you to quickly heat the room without wasting firewood and reliably protects the walls and ceiling from deformation.
First, the sheathing strips are secured. The bars should be selected taking into account the thickness of the insulating material. A thermal insulation layer is embedded in the spaces between the sheathing parts. On top of it, sheets of reflective sheathing are attached to wood or metal screws (this depends on the material of the bars).
Using this method of protection, you can reduce the distance from the stove to the wall to 380 mm.
Protecting walls from the heat of the stove can be used as decorative decoration for premises.
Examples:
Photo 1
Photo 2
Installation of sheathing with cladding
This method will require increased costs for the purchase of materials, but will also make your home cozy and beautiful. Porcelain stoneware or expensive tiles can be used as cladding, it all depends on the capabilities of the owner of the house.
Work on the protection and decorative finishing of walls is carried out in several stages, the result is a kind of cake:
a ventilation gap is made on top of the wall, 20-30 mm thick; then a layer of thermal insulation is laid and fire-resistant drywall is attached on top of it; a layer of decorative finishing is laid on fire-resistant glue or mastic using beacons to ensure an equal gap between the rows
It is important not to use large tiles. Such parts are more susceptible to deformation, unlike small tiles.
Using this method, you can reliably isolate the stove from the wall and make a gap of 150 mm between them.
Example
Insulation methods
There are several techniques that allow you to reliably insulate wooden structures from the heat of the stove. Some of them involve a fairly large amount of work, while others are much simpler.
- Creating a protective box from brick or stone.
- Installation of a special industrially manufactured screen.
- Creating a protective structure with your own hands from non-combustible materials.
The construction of a box made of brick or stone will require the most time - it will be necessary to lay out several walls that will protect the wood from heat. In addition, this protection option requires a gap between the wood and the brickwork from 5 to 15 centimeters. There should be about 10 centimeters between the casing being built and the walls of the stove. All this eats up useful space and requires some mason skills to work on.
Factory screens are installed quite simply and are not that expensive. They could be an ideal solution if they did not require even larger technological gaps between different surfaces. Therefore, such finishing of the wall near the stove is possible only in a fairly spacious bathhouse. If you need to save space, it is better to look for another solution that allows you to reduce all the gaps from wooden partitions.
The third option allows you to reduce distances to 15 centimeters, which is already more acceptable
At the same time, this method allows you to create the most beautiful design, which is important. However, there will be a lot of work and the costs in this option may be much higher than in the previous ones. In addition, this insulation method requires a more detailed consideration due to the features of the assembled structure
In addition, this insulation method requires a more detailed consideration due to the characteristics of the assembled structure.
Protective screens near (around) the stove
Protective screens are insulation panels that cover the side surfaces of the furnace and reduce the intensity of thermal radiation. Screens can be metal or brick. As a rule, they are used for metal furnaces.
Method #1 - metal screens
The most common protective screens are factory-made steel or cast iron sheets. They are installed around the stove, at a distance of 1-5 cm from the walls of the firebox. Depending on the need to insulate one side or another of the furnace, you can purchase side or front (front) screens. Many metal furnaces are initially manufactured with protective screens in the form of a protective casing.
Protective screens make it possible to reduce the temperature of external metal surfaces to 80-100°C and, accordingly, reduce the fireproof distance to 50 cm. The total distance from the firebox to the wall (including a gap of 1-5 cm) will be 51-55 cm.
Installing protective screens is not difficult. Thanks to the presence of legs, metal panels are easily bolted to the floor.
Method #2 - brick screens
A brick screen can cover all the side surfaces of a metal furnace, representing its outer cladding. Then the stove will be in a casing made of brickwork. In another case, a brick screen is a wall separating the stove and the flammable surface.
To lay the protective screen, solid fireclay bricks are used. The binder is cement or clay mortar. It is recommended to use half a brick (thickness 120 mm). But, if there is a lack of material, it is possible to make a wall of a quarter of a brick (60 mm thick), although in this case the thermal insulation properties of the screen will be reduced by half.
Small openings (sometimes with fire doors) are left at the bottom of the shield for air convection between the brick wall and the stove.
The brick walls of the screen must end at least 20 cm above the top surface of the oven. Sometimes the masonry goes all the way to the ceiling.
The brick screen is not installed flush against the walls of the stove, the optimal distance is 5-15 cm. The acceptable distance from the brickwork to the flammable wall is 5-15 cm. Thus, the use of a brick screen allows you to reduce the distance from the stove to the wooden wall to 22-42 cm (stove - ventilation gap 5-15 cm - brick 12 cm - ventilation gap 5-15 cm - wall).
Internal impregnations
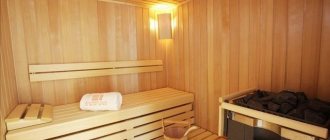
The main reason for using special impregnations in baths and saunas is increased levels of humidity and temperature, which can cause destruction of wooden ceilings, walls and shelves.
When choosing an impregnating material suitable for these purposes, the main attention is paid to the quality of the composition, after application of which the wood should not lose the ability to “breathe” freely. You should also distinguish between the types of compounds used to protect shelves and benches from similar materials used when treating walls and ceilings in a bathhouse
You should also distinguish between the types of compounds used to protect shelves and benches from similar materials used when treating walls and ceilings in a bathhouse.
Impregnation for shelves
The protective agents used to treat shelves, based on their effect on the color of the wood, are divided into colorless and colored. The first includes impregnations of various compositions, bleaching mixtures, varnishes and waxes. Varnishes for the protective coating of shelves in saunas and baths must be subject to strict selection, during which special brands that release toxic substances when heated are eliminated.
Typically, for benches and shelves in a bathhouse, water-based compounds are used that penetrate well into the wood structure.
Colored coatings are used in cases where darkening of previously treated areas is observed. In this case, only the tarnished parts of the surfaces are subject to coating, but if desired, they can be completely treated.
As for specific samples of protective material, acrylic varnishes from these or “Belinka” are suitable for treating baths and saunas. All of them are made on a natural basis and have a large selection of color shades.
Protective coatings for walls and ceilings
Impregnations intended to protect walls and flows in the bathhouse must have an organic base and have water-repellent properties.
Modern processing agents have universal properties and are able to protect surfaces from moisture and thermal heating, as well as from the destructive effects of fungi and insects.
Depending on their base, all known types of protective impregnations are divided into water-based and oil-based preparations. Complex (combined) compositions, produced in the form of paints and varnishes, are also very popular, providing protection for the finishing materials of the bathhouse from moisture fumes and microorganisms.
Some of them have additional features such as fire resistance and the ability to repel dirt.
Application of protective screens
Screens are shields made of brick or metal that protect walls from intense thermal radiation. Similar protection is used when installing metal stoves.
- Metal screens are made from steel or cast iron sheets, these
Advice! When purchasing a metal sauna stove, you should give preference to a model equipped with a metal casing. Its cost is not much higher, but the issues of wall insulation are eliminated.
Additional frontal or front shielding, which is located on the walls depending on the location of the stove, will not hurt. The protection guarantees the wood from overheating, reducing the temperature by 100 degrees or more, and provides the opportunity to save space in the steam room. A stove protected by a casing can be installed at a distance of 50-55cm from the wall.
Installation of screens is simple. The casing, equipped with legs, is secured to the floor by side or front screens - with galvanized nails or self-tapping screws.
- Brick screens are masonry used to cover the stove with
on all sides, the same casing, only made of brick. Another method is to lay half a brick between the firebox and a wall made of solid fireclay bricks laid on a solution of clay and cement. The width of the wall should be 120mm, although there is an opinion that it is permissible to put 60mm in a quarter of a brick, but it should be remembered that in this case the thermal insulation value is reduced by exactly half. It is recommended to raise the height of the masonry 20-30 cm above the surface of the firebox, but if you raise it to the ceiling, it will not be worse.
The screen should be placed at a distance of 10-15cm from the wall, 5-15cm from the stove, that is, the space saving is 30-40cm
Important! Functional openings for heat exchange should be made at the bottom of the masonry. Protective screens are effective, they reduce the temperature to a level acceptable when using high-temperature fuel units
The same function is performed by wall cladding made of non-combustible materials.
Protective screens are effective; they reduce the temperature to a level acceptable when using high-temperature fuel units. The same function is performed by wall cladding made of non-combustible materials.
When is this required?
There are times when there is no need to protect walls. If the stove is located at a safe distance from the wall from a fire safety point of view, the installation of protective screens and other measures can be neglected. The distance from the walls that is required to reduce the heat from the source varies:
- A stove laid in a quarter of a brick should be located no closer than 35-40 cm from the wall;
- A metal stove without lining should be placed a meter away and no closer;
- A metal one with a lined furnace can be installed 70-75cm from the wall.
However, not every steam room has the opportunity to fulfill these requirements, due to the small area. The layout of steam rooms with an area of 6-8 m² can hardly accommodate the necessary set of items for the steaming procedure. Therefore, the need to insulate walls with special sheathing is relevant.
Features and types
The design of the protective device should cover the side of the furnace, thereby reducing the risk of wall heating and thermal radiation. If the surface is very hot, the radiation can cause serious burns to humans. The screens will be divided into two types - and.
Metal
– are factory-made sheets made of cast iron or steel.
They can be lateral or frontal. Installation is carried out around the stove, leaving from 1 to 5 cm from the firebox. Also, in modern models of metal furnaces, protective devices can be installed during the production process in the form of a casing. Such protection can reduce the safe distance to the wall to half of the required distance by reducing the temperature to 100 degrees. Installation of the protective screen is quite easy: the structure is secured by the legs to the floor with bolts
. This device does not take up much space and looks beautiful.
Brick
– can cover the furnace from all sides, and even serve as an external cladding.
Alternatively, the thermal protective sheet can be laid only on those sides where the stove is dangerously close to the wall. When working, you should use solid fireclay bricks (120 mm masonry); if there is a shortage of it, you can fold the screen into a quarter of a brick (60 mm), but in this case the efficiency will be significantly lower
. Cement or clay mortars can be used as a solution. It will also be a good and less troublesome option. Modern materials – these can easily include clinker or terracotta tiles, as well as stone. Such materials will pay off more expensively, but for use in a home or steam room they are an excellent option for combining decor and protection.
Subtleties of installing thermal protection
When installing a protective screen, small gaps should be left between the stove and the screen. This will allow air to circulate freely. If there is a need to enhance thermal insulation, then mineral wool can be laid between the wall and the screen.
When attaching the screen to the wall, use a flange; to complete the installation, you can remove the resulting gap; it must be covered with a decorative strip.
To improve air exchange, you can install the bottom holes of the screen
so that they can take in cold air.
It should also be noted that for brick heaters, if they are installed at a safe distance, a thermal protection screen may not be needed at all, since brick retains heat well.
When installed, the thermal protection will also release the heat it received from the stove, so for a wood-burning stove, when using a brick screen, you can get additional heat transfer due to the properties of the brick - it remains heated for a long time and gives off soft heat. Metal “competitors” heat up quickly and give off heat more intensely, but cool down faster.
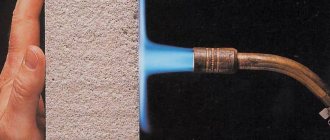
Fire safety rules for the operation of stoves in bathhouses or wooden houses require the installation of a fire-resistant wall. This is due to the fact that strong heat comes from the furnace body, which can heat up to 400 o C. It spreads throughout the room, but primarily hits the walls located in the immediate vicinity of the building.
If the walls are made of wood, then their charring begins. Wood loses moisture very quickly, and under such conditions the risk of fire increases several times. Fire walls will be a reliable way to insulate wood from heat and guarantee fire safety.
Additional aspects
It is worth understanding that not all situations require a protective screen at all. For example, for brick kilns with an initially protected firebox, fences are not required. If the screen needs to be installed, then red ceramic materials are selected for it, capable of withstanding severe temperature changes and exposure to moisture.
Often, a bathhouse screen made of stainless steel loses much of its visual quality over time. To ensure their normal decorative properties, it is necessary to periodically wipe the metal with special cleaning compounds.
Conclusion
A DIY sauna stove screen is an important sauna structure that can prevent accidental burns and balance the operation of the stove. By implementing one of the proposed schemes, you can achieve a combination of protection efficiency, good functionality of the stove and good visual qualities of the entire system.
Shielding walls near which stoves are installed
Usually the decoration of bath walls is wooden. It is susceptible to fire and charring. Various heat-resistant materials are used as thermal insulation lining.
Reliable layered cladding with a slight aesthetic effect
If the aesthetics of the cladding is of secondary importance, you can save money and use a combination of metal and heat insulator. First, an insulator is attached to the walls, and a metal sheet is mounted on top. As a starting layer you can use:
- mineralite slabs are fire-resistant panels designed specifically for creating protective screens in saunas and baths;
- basalt cardboard - retaining heat and protecting from fire, it also plays the role of a sound insulator;
- basalt wool is a material characterized by a high degree of fire resistance and hygroscopicity.
Alternatively, you can use asbestos sheets. But they are not environmentally friendly - when heated, they release substances hazardous to health.
Figure 3. Simple thermal lining
The next layer is a sheet of metal. It is better to use stainless steel. An alternative is galvanizing. It is desirable that the sheets are smooth and shiny. The mirror surface reflects infrared rays from the walls. The latter return to the steam room, but having lost their “rigidity” and becoming noticeably safer for humans.
An example of such a protective finish:
- ventilation gap – up to 3 cm;
- heat insulator – up to 2 cm;
- a metal sheet.
In this case, the distance between the insulated wall and the stove is at least 40 cm. To ensure thermal gaps, the insulation is mounted using ceramic bushings.
Figure 4. Layout of thermal insulation elements
Decorative protective cladding
The use of a combination of thermal insulation and metal meets functional needs, but not aesthetic ones. In an expensive bath interior, such a combination is unacceptable. In this case, the role of the crowning layer is played by heat-resistant ceramic tiles.
Suitable ceramics for finishing:
- porcelain stoneware; the most durable and dense option; the material is also called artificial stone - there are many types that can imitate wood, stone, metal, etc.;
- clinker; a popular oven option, characterized by high density and a variety of shades;
- terracotta tiles; similar to clinker, but less durable; Available in both matte and enameled formats;
- tiles; ceramics, which in the past were most often used to decorate stoves by wealthy bathhouse owners; the main feature of the tile is the box-shaped back part, due to which high heat transfer is formed;
- soapchlorite; rock slabs; characterized by greenish and grayish tints.
Figure 5. Ceramic thermal protection
Heat-resistant ceramics are laid on heat-resistant tile adhesive. But even here you can’t do without insulation. If you cover a wooden wall directly with slabs, the latter will receive a significant “portion” of heat, and this is fraught with, at a minimum, charring. Therefore, ceramics is the final layer, under which any of the already known thermal materials are mounted. To the insulators described above, you can add fireproof plasterboard and glass-magnesium sheet. Both options protect well from the negative effects of high temperatures, and LSU is also moisture resistant.
Unusual options for decorating walls in the bathroom
An unusual option is to use other tiles (Himalayan salt and mosaic) in addition to the usual ceramic. An excellent solution for finishing the wall in the bathroom is the use of mosaics. Ceramic mosaic tiles, like tiles, are laid only on a flat surface. In addition to this type, there is a mosaic made from a flexible base, due to which it can be laid on an uneven surface. This mosaic finish is made of glass or ceramics. Glass has a large selection of both shape and color and is made on a mesh base. Oh, here is a ceramic mosaic finish that is glued onto paper. But the only thing worth remembering when working with mosaics is that you won’t be able to correct the curvature of the walls and the mosaic will repeat all the irregularities. Therefore, you should use a rotband mixture to level the surface.
Another option for decorating bathroom walls is to use Himalayan salt tiles. It is used to create a modern apartment design. The Himalayan salt finish will provide a healthy microclimate due to its beneficial properties. Such salts also have antiseptic properties.
A good effect is obtained from tiling with Himalayan salt, covering all the walls in the bathroom with it. Himalayan salt tiles have pleasant warm tones with a translucent matte texture.
Himalayan salt tiles on bathroom walls
Some people wonder about the possibility of gluing tiles to wallpaper. But professionals will answer unequivocally that no. Firstly, due to the fact that the glue on which the wallpaper was glued may lose its adhesive properties. Secondly, the tiles are very heavy, compared to how much the wallpaper weighs - they can fall off. You should refrain from laying tiles on wallpaper if you want to get a high-quality result.
Finally, it should be noted that ceramic tiles are the most common option for finishing bathroom walls. The main thing to consider before gluing tiles with your own hands is the wall material. If the wall is insulated with additional material, or leveled with a rotband mixture, then this should be taken into account before finishing the surface with tiles. Indeed, depending on the base, be it wood, foam plastic, OSB, gypsum board, mineralite, concrete or aerated concrete, you should adhere to the installation technology. The quality of the work performed and durability depend on this. But it is better to refuse installation on wallpaper or paint. If you want to make your bathroom interior modern using eco-friendly materials, then you should use Himalayan salt tiles or mirror tiles.
- How to prepare a wall for bathroom tiles
- Renovating a combined bath and toilet
- How to disassemble ceramic tiles
Protective wall coverings
To provide thermal protection for the walls of the bathhouse, special linings made of fire-resistant materials are provided. They prevent overheating of surfaces and reduce the likelihood of a fire in the room.
Reflective trims
This option for protecting bath walls consists of metal sheets and a heat-resistant layer of thermal insulation. First, a heat-insulating layer is attached, and a sheet of metal with a polished surface is mounted on top of it.
It is non-combustible insulation that ensures effective reflection of thermal energy from wooden surfaces, reducing their heating.
The following is used as a thermal insulation layer:
- Basalt wool. An environmentally friendly and safe material, characterized by high thermal insulation, hygroscopic and fire-resistant characteristics.
- Cardboard boards made of basalt fiber. A material characterized by good sound and heat insulation properties. In addition, it is resistant to fire and rotting.
- Asbestos cardboard boards. A material that is wear-resistant, impact-resistant and fire-resistant.
- Minerite panels. A popular fireproof material that provides structures with reliable protection from overheating and possible ignition.
To fasten such cladding, ceramic bushings that are resistant to heat are used. If there is a minimum safe distance from the walls of the bathhouse to the casing, a double layer of thermal insulation is installed.
Cladding with facing surface
If it is necessary to comply with the general style of the room, decorative finishing can be used for protective cladding.
The most common finishing materials for thermal sheathing:
- Terracotta (tiles). Wear-resistant material made from natural clay rock by firing. It is characterized by high wear resistance, durability, practicality and resistance to high temperatures. Terracotta is available matte and glazed.
- Clinker (tiles). The refractory material is made from clay and has a high density. Externally it resembles a brick for cladding.
- Tiles (tiles). A modern material, the front surface of which is represented by a textured pattern, ornament or texture.
- Soapstone chlorite. A pure rock that has a characteristic shade of gray or green. The material is characterized by impact resistance, wear resistance, heat resistance, durability and low hygroscopicity.
- Porcelain tiles. Impact-resistant and heat-resistant facing material. The textured surface of the tile allows you to imitate other natural materials - stone, wood, brick.
Installation of fire-resistant cladding in the steam room is carried out on a thermal insulation base using special heat-resistant solutions. The finished cladding has the following form: wooden surface – technological gap (3 cm) – fire-resistant base – facing tiles.
The following materials can be used as a fireproof base:
- Heat-resistant plasterboard panels with the addition of fiberglass. They are resistant to deformation, damage and high temperatures.
- Glass-magnesium panels based on glass fibers and a magnesium component. They have sound and heat insulation characteristics, are resistant to rotting, high moisture and temperature changes.
- Boards based on cement and natural mineralite fiber. This base is resistant to fire, rotting and high moisture.
Any heat-resistant panels for walls must have a minimum technological gap to ensure ventilation and reduce the thermal effect on wooden surfaces. Practical cladding will allow you to decorate the walls of the steam room in the same style.
Where was asbestos used?
During its heyday, this mineral substance was widely used in various types of production, in the automotive industry, shipbuilding, aircraft construction and, of course, in construction. To this day, we can find this substance in old residential buildings, where it was used in pipe insulation elements, ceiling and floor coverings, paints and finishing materials, as a cement additive and in the manufacture of roofing slates. This material was actively used in the construction of bathhouses on personal plots. Summer residents did not suspect that when asbestos is heated, the harm to health increases several times.
It was used in the production of consumer goods - heaters, household utensils, cosmetics, and even in the manufacture of children's crayons. At that time, it never occurred to anyone how dangerous small particles of asbestos could be.
The health damage resulting from exposure to this mineral was felt primarily by those people who participated in the production process.
Covering bathhouse walls with non-combustible insulating materials
To prevent the walls from overheating, you can use materials with increased thermal insulation properties and inertness to high temperatures. Two types of materials are used:
- reflective;
- fireproof with lining.
The first type includes materials for wall cladding, consisting of thermal insulation with fire-resistant properties and a metal covering in the form of a sheet.
Insulating walls with reflective sheathing
A protective cake with reflective materials is done this way. First, the thermal insulation is attached using ceramic bushings directly to the wooden walls, then it is sewn up with a stainless steel sheet.
Advice! It is better not to use galvanized metal, since heating may release heavy metals harmful to the human body.
Stainless steel with a polished surface reflects the heat flow inside the steam room, reducing heat loss. In this case, reflected heat is more useful than direct heat. For thermal insulation use:
- basalt cardboard or cotton wool, the only material with increased hygroscopicity, non-flammable, environmentally friendly;
- asbestos cardboard, which reliably protects against flames and has a long service life;
- mineralite, an artificial material made specifically for these purposes.
Protective sheathing requires ventilation gaps of 2 cm from the wall to the insulation, 2 cm from the insulation to the steel sheet. If it is necessary to install the stove as close to the wall as possible, make a double skin of non-combustible insulation, use ceramic bushings to maintain gaps of 2-3 cm and sew them up with a steel sheet.
Basic requirements for refractory materials
There are at least a dozen points and places where heat-resistant protection is required in a modern bathhouse. The shortest list for installing fireproof and fireproof cladding looks something like this:
- Furnace base and box;
- The walls of the bathhouse around the stove or heater;
- Chimney, passage unit through the ceiling;
- An area on the floor in front of the ash pan and the furnace firebox;
- Screens and tunnels in wooden walls, if the stove in the bathhouse is loaded from an adjacent room or even from the street;
- Elements for fastening the chimney inside the bathhouse.
In any case, the materials used for fire protection equipment must have fire-resistant qualities and withstand prolonged heating without changing their physical and chemical characteristics. Heat-resistant bath material used to protect wooden walls from infrared radiation must withstand heating up to 400°C without releasing decomposition products and without interacting with oxygen and water vapor in the air.
Heat-resistant mineral fiber material
Heat-resistant materials in the bathhouse are used to backfill the thermal insulation of the chimney and arrange screens around the stove body. With good heating, the screen and the outer surface of the stove can heat up to almost 1000°C.
Fireproof silicon fiber mat
The third type, fireproof materials for a bath made of sintered metal oxides, are used for laying out parts and structural elements of the furnace, as well as for the construction of floor heating, if part of the flue gases in the building are discharged through channels made of refractory clay in the underground.
Advice! Refractory bricks, canvas or granular backfill cannot be selected, as they say, by eye. Most of them have their own shelf life, which depends on storage and operating conditions.