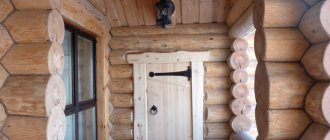
Replacing interior doors always leaves behind a damaged doorway. Previously, it was sealed with plaster mortars, and then painted or wallpapered. Today they have abandoned this practice and started using extras. Their installation does not require special knowledge or expensive tools and is completed quickly. The result of this work: very beautifully decorated walls around the door frame.
Even a professional in his field will not be able to perform even a simple technological operation without knowledge of its features. The same goes for extras. Therefore, for beginners, let’s talk about how to properly install extensions on an interior door.
Characteristics of the door panel
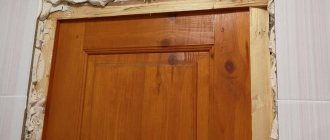
First you need to understand what extensions for interior doors are. This is an element of framing the slopes of the doorway, which allows you to do without leveling them with plaster and forms a single ensemble with the door and platbands. That is, if the thickness of the walls in the opening is greater than the thickness of the installation box, then the remaining open plane is decorated with extensions - straight rectangular planks.
The advantages of this design method:
- ease of installation and a minimum of time to bring the opening to a clean state;
- aesthetic appeal;
- the ability to design all interior transitions in the same style by selecting decorative strips to match the color of the doors;
- the mechanical strength of slopes and their resistance to damage, in contrast to those plastered and painted or covered with wallpaper;
- increasing noise insulation between rooms by filling the cavities behind the extensions with insulating materials.
Extensions can also be used to trim openings without doors Source autogear.ru
What is a telescopic box?
This device consists of several strips connected into a single whole.
Reference! That’s why the box is called “telescopic”; this definition applies to objects consisting of several parts.
The peculiarity of this design is that the main components of the box do not move, they are fastened into a single figure, allowing you to create a dense mechanism. It is because of this design that all parts can be easily adjusted, and in the end the user gets a perfect isosceles rectangle.
Telescopic boxes are usually divided into two main classes:
- when the design is a single mechanism;
- when the mechanism is represented by two connecting elements.
These are the basic definitions that can be said in relation to the telescopic box.
What are they?
The door extension does not have a wide variety of shapes, sizes and design features. And yet it can be classified according to at least two criteria: material of manufacture and profile shape.
Materials
These products are made from the same materials as door leaves. This is mainly solid wood, MDF and chipboard:
- Wooden extensions can be uncoated, painted or varnished. The former are cheaper and can be finished to your liking. The latter, as a rule, are sold together with door leaves and frames and have a texture and color similar to them.
- Slats made of wood-like materials are always finished with artificial or natural veneer, lamination, and paint. And they are also produced to match the main products.
Veneered MDF panels Source images.ua.prom.st
For reference! Extensions for entrance doors are made from the same materials, but of greater thickness, since they have to withstand more serious loads in the form of random mechanical impacts, and work in more difficult temperature conditions. But they try not to use chipboard, since it is not resistant to moisture and is quite fragile.
Profiles
If you look at the cross section, you can also find differences. There are two types of them: simple and type-setting (or telescopic):
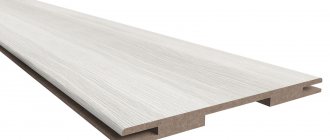
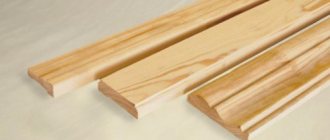
- Simple ones have a rectangular cross-section and are a regular flat plank with or without a decorative coating on the front side. Their standard thickness is 10-16 mm, the width varies from 30 to 200 mm from different manufacturers, and the length corresponds to the height of the door frame - from 1900 to 2300 mm. Sometimes simple extensions are produced with an unfinished end edge.
- Telescopic extension for a door: what it is can be understood if you know how wall panels or lining boards are connected to each other. It always has a groove on one long end, and the same groove, straight edge or ridge on the other.
Extensions: with edge, without edge and telescopic Source vseprodveri.ru
Since typesetting products are more functional, we will tell you more about them. They do not differ in length and thickness from simple ones, but on the edge they may have additional slats that form a groove. The width can be 90, 100, 120, 130, 150 and 170 mm. By combining these dimensions, a panel of the required width is assembled. You can slightly change the size by tightly moving or pushing apart the extensions - this can be done by long ridges or connecting strips that are inserted into opposing grooves.
Note! Such extensions can only be installed in boxes with a groove cut at the factory and framed with L-shaped platbands.
This is what the frame of the opening with assembled telescopic molding looks like Source satkastroymaterialy.rf
Installation features
Before installing the door extensions, you need to select them. At the same time, paying attention to the following points:
- compliance with the material of the canvas. If it is made of solid wood, then it is better to make decorative elements from the same material. If they are veneered or made of MDF, the wood in the opening will look unnatural;
- color and texture. It is most logical to purchase both the door and all the accompanying elements at once. As a rule, they are always in stock in the store. For uncoated wooden products, select a suitable paintwork;
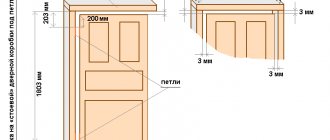
- size. First of all, you need to look at the width of the extension so that it covers all the free space of the opening. For example, if there is 160 mm from the box to the wall, then take simple strips 200 mm wide and cut off the excess.
When measuring the thickness of the opening that needs to be lined, do this on all sides - on the sides and on top. Moreover, in each plane at least 3 measurements should be taken at different levels. They may differ due to the unevenness of the walls. In this case, they focus on the maximum value.
Attention! If the box has grooves for mounting telescopic extensions, their depth must be taken into account.
How to take measurements correctly
To do this you will need a tape measure with a retractable mechanism.
If the old door is being replaced, measurements can be taken in two ways:
- measure the removed canvas (height and width), and then buy according to ready-made data;
- start taking measurements after removing the old box.
Doorway measurements Source evimso.com
In a new house, openings usually initially have standard dimensions, which are indicated on the plan. But just in case, it is better to measure the height and width of the opening. To determine the required horizontal parameters of the canvas, you need from the obtained numbers:
- subtract the width of the box x 2
- add 5 mm for installing hinges and free opening.
When calculating the height, the vertical of the opening is measured, from it you need to subtract the height of the threshold (if there is one) and the opening gap from 2.5 to 4 cm.
Measurement parameters Source goodlinez.ru
The data obtained is compared with standard door sizes. If the difference is small, the width and height of the opening can be reduced with additional additions. If the results differ significantly from standard norms, then you can do different things:
- narrow or widen the doorway;
- order the production of doors according to existing standards.
Before deciding on such drastic measures, it is better to invite a specialist to take measurements and voice his conclusions.
Video description
This video shows how to take correct measurements and install the frame:
Installation can begin after the foam has dried around the already installed door frame.
See also: Catalog of companies that specialize in the sale, installation and finishing of windows and doors
Installation of simple extensions
A corner for access can be selected on the door frame; it must be completely cleared of foam and debris. If there is no recess, the foam behind the block is cut to a depth of 1-2 cm, making a groove of the same width in it.
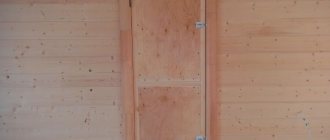
Installing extensions on interior doors is done as follows:
- Adjust the planks to size, starting from the top, cutting them to length and width if necessary. The edge that goes behind the box is cut in width, and the bottom end that touches the floor is cut in length. The joint between the vertical and horizontal strips should be smooth, at an angle of 90 degrees;
- all elements are inserted into the opening in the designed position, laying the top panel on the side panels and inserting the cut edges into the prepared recesses;
- the parts are wedged, achieving a tight fit to the box along the entire length;
- again with a level they check the correct position of the extensions;
- The space between the walls of the opening and the cladding is carefully filled with polyurethane foam with a small coefficient of expansion when hardening.
Filling voids with polyurethane foam Source gid-str.ru
It is better to foam a few points first, and when the product sets, fill the remaining voids with it. To prevent the foam from pushing the panels inward during the polymerization process and deforming them, it is advisable to install spacers between the parallel planes.
If the door is installed in the opening of a wooden wall or a wooden frame is pre-made in the opening, the extensions can simply be screwed on with self-tapping screws, after drilling them and countersinking the holes for the caps. After installation is completed, these holes are closed with matching plastic plugs.
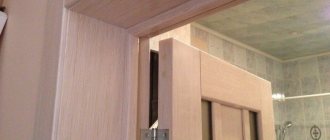
Installation of platbands
After the extensions are installed and the mounting foam has dried, the trims are attached.
The length of the vertical casing is calculated taking into account the width of the horizontal
A miter box will help you cut the casing at an angle of exactly 45 degrees.
Marking is best done on site
The ends of the platband are filed in a mirror image
It is advisable to bite off the heads of the nails. So they will be almost invisible
If self-tapping screws are used instead of nails, then first drill a hole into which the head will sink. Then they are screwed in and the caps are closed with special plastic plugs.
At the bottom, the platbands reach the floor. No gap is left for the baseboard.
The plinth is only adjacent to the platband
Installation in non-standard situations
If there is no groove in the box, and the opening is very deep and cannot be covered with a simple addition, you can choose any of the options below:
- Use the telescopic system by placing the first plank behind the box, wedging it and fixing it with polyurethane foam, as is the case with simple extensions. After the foam has dried, add a second row, foam it, and again wait until it dries completely. And so on until the opening closes.
- Shields of the required width are assembled from the extensions, fastening them on the reverse side with transverse slats or overlays every 40-50 cm.
Shield of two additional parts Source i.ytimg.com