Miscellaneous
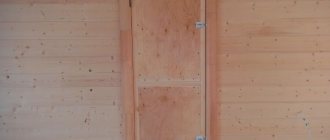
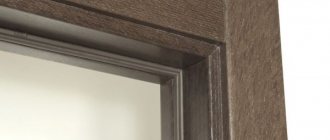
The decorative covering of a door deteriorates over time and loses its attractiveness. If the old paint is cracked and peeling in places, it is recommended to remove the old coating before applying a new coat. But it also happens that the surface has only lost its shine, has become dull, or spots have appeared on it, but the layer itself lies smoothly and has retained its integrity. In such cases, there is no point in carrying out work to remove the old coating. It will not be possible to qualitatively remove the old layer of paint that has retained its strength. It is difficult to remove. As a result, you can only damage the doors or get a surface whose quality is much lower than the original version.
Features of painting over an old layer
At first glance, painting a wooden door over an old layer seems like a trivial matter: just go ahead and paint it.
Painting the door
But in fact, in order to paint a wooden door and get a surface that will be no worse in quality than factory painting, learn a few rules:
- The surface of the door, regardless of its condition, must be carefully prepared. Against the background of the old paint, cracks and potholes are invisible, but after applying a new layer they will appear and ruin all your efforts.
- The right choice of material for painting an interior door. It’s not just a matter of proper selection of color, surface texture or the strength of the film formed. It is important to consider the compatibility of materials. Many paints are not compatible with each other, and if chosen incorrectly, the old coating may curl or bulge when it comes into contact with the new material.
- Decide on the correct paint application technique. For doors with a complex structure, it is possible to obtain a smooth and neat surface with proper selection and combination of painting techniques and painting tools.
The last rule, common to all cases of working with paint, is to strictly follow the instructions for applying the selected paint material.
Theory of preparation for painting a car body
Short and to the point. Preparation for painting is the most important stage of body painting work, on which the final result depends 70 percent. Any preparation for painting must begin with disassembling the car, “cleaning” it of all external small details and parts - moldings, panels, grilles, door handles, etc. This is a mandatory and indisputable point for high-quality painting; very often there are a lot of chips around the handle, the paint peels off, etc. Therefore, such elements must be removed.
It is also very important what materials the car was painted with the previous time, because when painting, the solvent can lift the old coating, resulting in a defect that the painter calls, excuse the expression, “smarzh*pa.” What to do, whether or not to wash off the old paint from the car body? In order to determine whether or not to remove the old paint, you need to conduct a test - wet a rag with a solvent, preferably Acrylov or, in extreme cases, 650, and place it on the surface for a couple of minutes. If the paint remains intact, then you can safely paint and not worry. If the paint wrinkles, then it is necessary to remove the old coating or cover the surface with an insulating primer. We’ll talk about soils in more detail in a special post.
Please note that everything written above and below relates to preparing the surface for acrylic and alkyd! Under metallic everything is a little different.
I also want to say a few words about the fact that many car enthusiasts who want to paint their car want to use a variety of paint removers. They can only be used on new cars and never on older cars that have been repainted several times. This is because you will wash away all the putty and primer that made the surface even and smooth and subsequently get a large amount of unnecessary work. Conclusion: I highly recommend it.
But let's move on directly to the preparation for painting. You have dismantled all the elements that cannot be dismantled and covered them with masking tape and masking paper. It is also worth paying close attention to masking; if you plan to carry out welding, it is necessary to protect glass and plastic parts, both external and interior.
If the solvent test gives a negative result, then all preparation comes down to the following points:
- Removing rust and paint blisters
- Welding (if required), cleaning it
- Straightening
- Puttying both welding areas and other surface irregularities
- Sanding putty
- Sanding old paint
- Surface degreasing
- Primer of the repaired surface
- Grinding the soil
- Surface degreasing
- Painting
Well, now everything is in order. The first step is to remove rust; this can be done conveniently with P100 sandpaper or a metal brush on a grinder. It is important to note that rust must be removed until it shines, this is very important, it can ensure the quality of your repair. It is recommended to coat heavily rusted parts with a reactive, acidic primer, which disarms rust. It is also necessary to clean down to bare metal those places where the paint has risen or swelled; holes are often found under the bulges.
The next step was welding; here we take nothing complicated and cook it. I can only say that when welding single holes with a point, there is a high probability that the part may behave as in the case in my example below.
Straightening. Any preparation for painting involves leveling the surface; straightening is the primer for a smooth and beautiful surface.
Puttying is a preparation step that helps achieve a final, smooth surface. Puttying well is a skill that comes with experience. So let's practice.
You can grind the putty in two ways - by hand using a sander (if you don’t have experience, I recommend it) and with a grinding machine. Why don't I recommend it? With the help of a machine you can do everything quickly and... not beautifully. In order to use the machine, you need to have experience; without experience, you can dig large holes, which will then be quite difficult to level. It is more difficult to wipe off the excess manually, but the quality is higher. I know experienced people who work manually. So we decide. As for the gradations of abrasive, the first sandpaper is P120, then 240 and 360. Why are such transitions needed? In order to reduce the risk and reduce it to a minimum.
By sanding old paint I meant matting the surface. Matting is grinding with a fine abrasive - 240-360 or red, gray Scotchbrite, the main purpose of which is to create risks on the surface being repaired. This will allow the next layers of coating to adhere well. If the old coating was painted with terrible shagreen, drips, it all needs to be leveled to zero, because the next layers will copy the surface underneath them.
It is also important to degrease the surface; this must be done with a special liquid - anti-silicone, and not a solvent. There are two advantages here: the first is the degreasing itself, and the second is the removal of fine dust from the surface.
Surface priming is a step that allows you to increase adhesion between the old coating and the new one, as well as isolate the old coating from the aggressive new one.
It is necessary to grind the soil to obtain a smooth surface, I do this with 500-600 abrasive using water, this gives a very good effect, the surface turns out to be very smooth.
Painting is an important stage, here's how:))
Which paint to choose
First, decide what paints are used to apply to the door:
- Alkyd enamels. This is the most affordable option. Film strength is average. The advantages include a large range of colors and compatibility with MDF, fiberboard and wood. The main disadvantage is the long drying time and the characteristic pungent odor. Among materials of this type there are a large number of glossy coatings.
- Acrylic enamels. This type of paint is a water dispersion of acrylates. The main advantage over other compositions is the absence of odor and quick drying. In addition, the color palette, represented by hundreds of colors, allows you to create unique shades yourself. To protect the surface, it is additionally coated with parquet transparent varnish.
- Oil-based tinting paints are great for transforming interior and entrance doors. Absorbing into the wood texture they give it a unique shade. The only condition for their use is wood, without any coating.
Variety of paints and varnishes
- Nitro enamels. They dry quickly, but at the same time the volatile, caustic solvent evaporates, which can cause poor health and even poisoning. If you take precautions and use personal protective equipment when working, then this option deserves attention. After the solvent has completely evaporated, the coating becomes safe. It is considered a high-quality and fast method of painting.
- Colored varnishes, glazes. These materials are used for painting varnished door panels. Used in cases where there are no significant cracks or chips on the base. To fully restore the varnished surface, the old varnish must be removed, or you can refuse to re-varnish and paint over the interior doors after puttying.
Types of paints for interior doors
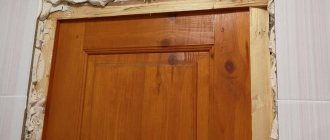
You can paint wooden doors with varnish to preserve the texture.
Paints and varnishes decorate the door leaf and protect it from high humidity and rotting. The service life of the frame and sash increases, the door gets a new beautiful look. If the interior block is in good technical condition, painting the door leaf yourself can be easily done using various wood compounds.
Before work, prepare the surface, putty cracks and chips, then clean it with sandpaper. The primer serves to bind the area to be painted with the paint layer.
Enamels form an outer layer that gives the surface:
- shine;
- smoothness;
- color;
- resistance to environmental influences;
- additional strength;
- chemical resistance.
Varnishes favorably highlight the wood texture or form a transparent layer on the surface for additional shine.
Water-based glossy paint
The main types that are used for interior openings:
- water-based paints;
- moisture-resistant compounds;
- glaze coatings;
- varnishes.
When choosing, take into account the material of the canvas, the presence of old coatings, and the color of the existing paint. Sometimes you need to apply the composition several times to cover and recolor a rich color, especially if you use light colors. Paint and varnish materials are applied 2–3 times, with each layer allowed to dry. Sometimes it needs to be sanded further before applying the next one.
Water-based
This variety refers to water-dispersion paint compositions. It is an emulsion suspension consisting of small polymer particles, water and coloring pigments. Emulsion grains act as the basis of the mixture, but are in an undissolved state.
Emulsions used for production:
- acrylic;
- latex;
- silicate moisture resistant;
- silicate with the inclusion of minerals;
- hydrophobic polyvinyl acetate.
Latex paint is resistant to detergents.
The properties and qualities of water-based groups depend on the components in the composition. This paint for wooden doors applies smoothly to various surfaces, except for those doors that have a glossy coating applied previously. It is good to use for printing stencils when decoratively repainting canvases.
Qualities of water-based paints:
- low resistance to moisture, used for door leaves in living rooms where it is dry;
- easy to pigment, so different colors and shades are obtained from a white base;
- protect fabrics from ultraviolet radiation;
- have an antifungal effect;
- do not crack or fade over time and form a durable film.
Water-dispersed materials dry quickly, do not have a strong odor, and you can paint interior doors made of wood, plastic, MDF, plywood, and chipboard. Aqueous polymer emulsions are demanding for transportation and storage.
Moisture resistant
Acrylic paint is suitable for interior and exterior work.
To repaint doors in the house, colorful materials are used that form a protective film against surface moisture. These water-based compositions are used for linens in bathrooms, saunas, and kitchens. The resulting coating is vapor permeable. A matte, even layer hides small defects.
Polyacrylates (butyl, ethyl and methyl acrylates), resins and copolymers are added to the paint composition to obtain a durable film. Antiseptic modifiers prevent acrylic paint from changing color in high humidity conditions. The white base is colored using dyes for the water-dispersion group.
Properties of acrylic moisture-resistant paint:
- good adhesion to the door surface;
- continuous coating (high hiding power);
- environmentally friendly product;
- beautiful appearance;
- economical consumption;
- long period of operation.
Acrylic compounds are diluted with water, but after the film hardens they become moisture resistant. The surface is also difficult to abrade. Door paint is quick-drying and almost odorless. Such surfaces do not fade from ultraviolet rays. The disadvantages include considerable cost compared to ordinary water-based paint.
Before use, acrylic compounds are stirred well and the base is prepared. Fresh wood is impregnated with soil to secure the surface. The first layer is applied with diluted paint, the second is applied without dilution.
Glazing
Glaze paint is used to cover doors that have not previously been coated with any compositions.
Compounds are often used to paint a wooden door that has not previously been coated with paints and varnishes. The mixture includes modified and alkyd resins and oils. Glazing preserves the original appearance of the fiber pattern for a long time and increases the service life of the product. They use colorful materials to impart a natural shine, darken the natural color and reduce the surface texture.
Glazing compounds have the following effect:
- protect from the negative effects of the surrounding space;
- protect from UV rays;
- prevent the development of fungus and mold on the surface;
- decorating the plane.
Paints do not react to temperature fluctuations or high humidity. For balcony doors, such quality as frost resistance is important. Glaze is transparent, the background can be seen through it, so before use, check the result in a small area. Drying time is from 12 to 24 hours depending on temperature and humidity.
They take products for interior work to paint interior doors. The paints contain harmless components without a strong odor. External products contain synthetic substances, so they are not used indoors.
Glazing differs in the way it is painted, resulting in a rich surface color with smooth transitions. They use a different palette of dyes and apply several layers. Before applying the second and other layers, wait until the previous one has completely dried.
Lucky
The use of varnish with resins protects wooden doors from moisture.
The compositions are produced on the basis of resins; they can be synthetic or natural. Mastics are diluted with solvents, for example, acetone, ethanol, hydrocarbons, essential oils, water. Semi-liquid compositions, when dry, form a transparent film that resists abrasion, moisture, and ultraviolet radiation.
Varnishes on the surface of the canvas harden with the evaporation of a soluble substance or during an oxidative polymerization reaction.
Depending on the method of film formation, they are divided into types:
- thermosetting;
- thermoplastic.
There are solvent-free varnishes on sale; they are viscous due to oligomers, which harden when catalysts or hardeners are added.
Glossy, matte and colored compositions are used. The texture of the wood or the background of the painted canvas is visible under the varnish, so a door that has no defects on the surface is varnished.
Varnish treatment is accompanied by a pungent odor that lingers in the room for quite a long time.
Modern colored varnishes preserve the original structure of the wood and give it an original shade. Colored compounds are not used for painted surfaces, since the original color will unnaturally change. There are many colors of varnishes, some are pastel, others have a sharp and contrasting shade. Such products are more suitable for natural wood, but they can also be used to paint doors made of chipboard, MDF, and planks.
Material Compatibility
It is not so easy to understand the modern variety of materials. Chemical compositions for the uninitiated person are a secret behind seven locks, and when buying a material to apply to old paint, many rely on luck, hoping that the old layer will not react in any way to contact with the new chemical. There are some recommendations according to which you should select the material depending on what the door is painted with.
Variety of colors
Therefore, before you go for paint, you need to clarify what the canvas is painted with.
- Epoxy and polyurethane compounds contain aggressive solvents. Cyclohexanone or xylene are capable of destroying materials that are reversible polymers obtained by natural curing (nitrocellulose, vinyl, copolymer-vinyl chloride compounds). Simply put, epoxy or polyurethane paint will destroy the coating made with nitro paints.
- Epoxy and polyurethane materials are applied only over the same compositions or primers, maintaining drying intervals for each layer.
- Silicate compounds are generally not applied over any other types of paints.
- Alkyd paints are not aggressive and can be safely applied over any material.
- Copolymer-vinyl chloride compounds and compounds based on chlorine rubber are applied only over acrylic, epoxy, and silicate materials.
Important! To update the door, it is better to use paint of the same type as the previous layer.
Compatibility table
Despite the recommendations of the material compatibility table, it is better to use an experimental test: apply the new material to a small area of the canvas and see the reaction.
Features of working with different surfaces
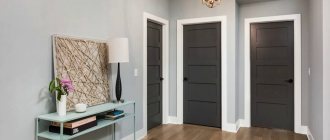
If the old door looks good, but the coating has only faded and worn out, then it can be quickly updated by such an event as painting the door without removing the previous layer. The tactics of work will depend on the type of coating available:
Painted doors
This option will cause the least amount of trouble with preparation and has every chance of getting a high-quality surface. To paint interior doors with your own hands, just thoroughly wash the surface of the door to remove dirt and grease stains, and fill all cracks and gaps with putty. It is better to take automotive epoxy paints with a hardener. Such putties do not shrink when dry, and all defects can be repaired in one go.
After the putty has dried, the surface is sanded with fine (120 grit) sandpaper. It is better to use a vibrating sander on large flat surfaces (counters, panels). The main task when working with a painted door is high-quality painting, which is achieved by applying several uniform layers of material. The duration of the work will directly depend on the time it takes for the next painted layer of the door to completely dry.
Old painted door
Lacquered doors
If you decide to renew the varnish surface by applying a new layer, it should be taken into account that all defects will remain visible.
Important! Secondary varnishing rarely gives the expected results. As a rule, the surface should be close to ideal. If you don’t want to tinker with the old coating, then it’s better to paint varnished interior doors that have lost their appearance or coat them with a tinted glaze.
The main difficulty in this situation is selecting putty to match the base material. But the wooden surface is not monochromatic in nature. Even if you spend a lot of time and use several shades of putty, you will still end up with stains on the canvas.
How to Paint Other Types of Doors
How to paint a laminated door
The first stage is surface preparation. It is cleaned of dirt and unevenness, and then puttied. Then the coating is matted with fine sandpaper and wiped with white spirit. The paint is coated in several layers and waited for it to dry completely.
How to paint a dermantine door
There are special water-based paints for restoring dermantine and leatherette. As an option, you can use a primer with high adhesion, onto which any paint with a high content of plasticizers can be applied.
How to paint a plastic door
For plastic, water-dispersion and acrylic paints are used. The surface is wiped with a special cleaning liquid or hot water to remove dirt. Then the door is treated with fine sandpaper and wiped dry with a napkin. It is best to apply the paint with a spray gun, as it does not leave streaks.
How to stain pressboard doors
The canvas is covered with a layer of stain. Excess of the latter is removed with a rag. The structure of the wood appears through the stain, which is very similar to natural wood. When the stain dries, the door is opened with varnish. In appearance, such a door is no different from the one made from solid wood.
What color to paint the door frames in the kitchen
Designers advise choosing bright, rich colors for the kitchen that give a good mood. Delicate pastel shades and traditional white are also suitable. Contrasting doors look good: the canvas is bright in color and the jambs are neutral, or vice versa.
How to paint interior doors in an interesting way
A safe option is to paint the door moldings in a contrasting color. Geometric compositions made from different colors look original. Stencil patterns, vertical stripes, and circles typical of the pop art style look good. Acrylic, an odorless paint for interior doors, is well suited for this.
How to paint interior doors white
If you don’t know what paint to paint interior doors, choose white - it’s a win-win option. The door is pre-primed and dried. Start painting from the ends or recesses (if there are any). Apply a minimal amount of paint to the brush. The accumulated paint in the corners of the panels is removed with a sponge.
How to paint a door antique
The painting technology is no different from painting a regular door, with the exception of the materials used - stain, patina, special waxes and clear varnishes
An important condition when painting is that the wood texture should be clearly visible.
So, important conditions when painting a door are careful preparation of its surface and the choice of high-quality paints and varnishes. A bright palette, special aging effects, unusual design solutions - all this will turn the door leaf into a real work of art!
Door painting technologies
The quality of the door coating depends on the tool, application method and professional skills of the craftsman.
Tools
Door painting is done using the following tools:
- Brushes. It is not recommended to paint the entire canvas with just one brush. If you lack experience, the surface will end up with streaks. It will not be possible to apply a thin, even layer of paint with a brush. But without this tool it will not be possible to paint hard-to-reach places, corners, layout patterns or panel margins. Therefore, when painting canvases with a complex configuration, first work with a brush, painting over problem areas.
- Roller. Repainting panel interior doors is done with just a roller. The roller bobbin must be fur, polyamide or polyacrylic. These materials are resistant to most aggressive solvents.
Important! For painting work on door restoration, foam rollers are not used.
Working with a brush
- Compressor (spray gun). A spray bottle will allow you to get an even, thin layer. The result is a perfectly smooth coating. The process of applying paint is much faster than manually.
Related tools you can’t do without:
- gloves;
- paint tray;
- rags;
- masking tape;
- sandpaper;
- putty knife;
- and what you have at your disposal: stools on which you will place the canvas, or sawhorses.
In addition to paint and varnish, prepare putty, primer and solvent.
Features of painting interior doors with your own hands
Old varnish can be removed with a sander.
When using a brush, paint in one direction to hide lint marks as much as possible. This method is almost never used due to the sloppy final result. A roller is used more often because it rolls out the paint evenly and leaves no marks. For paints based on acetone, white spirit and solvent, you cannot use a foam nozzle, as the surface will become unusable after several rollings.
There is an option to use a spray gun if the house has several doors to be painted. It is not profitable to rent expensive equipment for one unit.
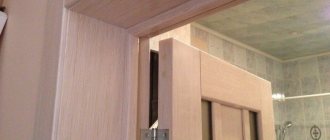
If the canvas is covered with veneer, it is better not to destroy its integrity during preparation. For cleaning, use a soft rag or brush, and hard-to-reach areas are treated with fine sandpaper. Dust is removed with a brush.
Before painting, clean the floor in the room with a vacuum cleaner or carefully sweep it with a broom, then wipe it with a wet cloth so that dust particles do not settle on the painted surface.
Painting schemes
First, a little theory. The interior door can be panel or panel. Depending on this, the execution scheme and the order of staining will depend.
If it is a panel-type canvas, then painting is carried out in 3 stages:
- Coloring begins from the upper corner in the transverse direction. The movement of the brush goes from left to right.
- the second layer of paint is applied in the longitudinal direction.
- the third layer is similar to the first.
Please note that three layers cannot be applied at once; after each coating, time must pass for the composition to dry.
For work, it is better to use a roller, as the brush may leave streaks.
If it is a paneled door, then first all the recesses are painted with a brush, and then the rest of the panel, but with a roller.
Stages of work
All work can be written in the form of the following algorithm:
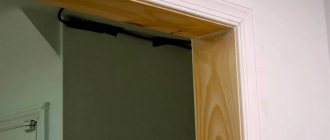
- It is better to remove the door and twist the fittings. If there is no such possibility (or desire), then handles, hinges, locks and glass are sealed with film and masking tape. It will be difficult to remove the paint. The tape must be removed before the paint dries.
- Washing and drying the door surface.
- Removing peeling areas, filling defects, sanding. Each layer is sanded after complete drying.
- Selecting the type of paint material.
- Applying a primer (paint diluted with the same type of solvent). This will improve adhesion and reduce the likelihood of bleed through putty areas.
- Applying the required number of layers of paint or varnish.
Useful tips for beginners
For ease of work and control over dipping the tool into paint, use a paint tray.
After purchasing the brushes, it is recommended to comb them out a little and soak them in water for a while. Firstly, this will prevent fallen hairs from reaching the surface, and secondly, it will soften the stubble before work.
It is more convenient to paint the canvas if it is located in a horizontal position. This way you won’t get unsightly streaks if there is too much paint in the corners and sides of the door leaf. Many people use specially prepared sawhorses for convenience, or take the easier route and place the door on 4 stools.
Protection of fittings from smudging. This is not a whim, but a reasonable step. It is advisable to twist it and put it aside for the duration of the work, but an option to protect it is also suitable, for which it is recommended to use masking tape.
Drips resulting from painting can be easily removed if you use a sponge, and then hide its traces by going over the area with a roller.
While the painted canvas is drying, make sure that no accidental dust gets on it or that a stray midge does not stick to it. To do this, it is better to do coloring in a special workshop.
Video on how to properly paint entrance blocks in a house or apartment:
You can update interior or entrance doors in different ways. Painting without removing the old layer is the easiest and fastest method, which home craftsmen most often resort to. The result of the work: a beautiful door without much effort!
Voted over 169 times, average rating 4.6
Comments
Ira 01/30/202015:56 It’s better not to paint interior doors. the paint will stink for a long time
Grade
Add a comment Cancel reply
We recommend reading
Miscellaneous Interesting glass decoupage technique, DIY door decoration Do you want to update the decor of your favorite room, but don’t want to start again...
Miscellaneous Recommendations from professionals on choosing a door frame for interior doors To install a door, you will need to choose the right door…
Miscellaneous Main distinctive characteristics of moldings for interior doors Manufacturers offer door designs of standard sizes, ...
Miscellaneous What is the purpose of installing brushes on interior doors? To make using the interior door convenient and not separate...
Painting chips around the edges
Often the paintwork chips off at the ends of the doors, causing the metal base to begin to rust. If in general the paintwork on the door looks good, then there is no need to paint it completely, it is enough to deal with the chips and prevent the further spread of corrosion. This operation is quite simple and is performed in this order:
- Wash and dry the car, drive it into the garage.
- Using a utility knife, remove any loose paint from around the chips, then smooth out the protruding edges with P150 sandpaper, followed by P1500 sandpaper.
- Treat the cleaned areas with a rust converter and wait the time indicated on the package.
- Cover the area to be treated with tape on both sides, thoroughly degrease and apply primer.
- After hardening, remove the tape and use sandpaper to get rid of the clear boundary between the primer and the old coating. Reapply the adhesive tape 3-5 mm further.
- Degrease the surface again and apply spray paint, applying it on both sides. After drying for 10 minutes, apply a second coat and then apply varnish twice.
Chips and swelling of the coating on the door frames
Advice. When working with sandpaper, water the area being treated with water, do not rub it dry. Also make sure that no sand gets under the skin, otherwise deep scratches will appear.
If during the work you grab a thin strip on the front side of the door, then polishing will not be necessary. Otherwise, you will have to polish the door, which will be discussed later.
The procedure for eliminating minor scratches and other defects in the photo
The peeling coating is removed with a knife Treatment with sandpaper The area to be painted must be covered with masking tape Applying primer from a can After priming, the tape must be re-glued a few mm further Applying paint with a spray can After painting and varnishing, all that remains is to remove the tape