All wall finishing work is completed by installing trim on the doors. If they were dismantled on purpose, there are no problems - they are installed in the reverse order. If the repair work was accompanied by the replacement of the door block, then very often the question arises about how to install trim on the door with your own hands.
At first glance, nothing complicated. However, in the process of work, moments arise when knowledge of the nuances cannot be avoided.
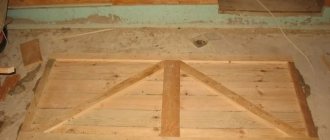
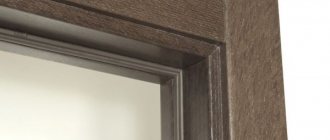
It is unlikely that anyone will agree to live for a long time in an apartment with such doors.
Below we will consider what material and what shape of trims to buy, as well as how to install them correctly - advice from professionals will help you do the work yourself quickly and beautifully.
Why are platbands needed?
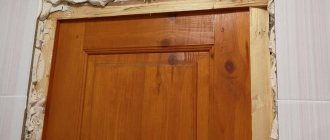
After installing the doors, gaps remain between the frame and the wall, in which fasteners and foam are visible. Previously, the remaining open openings were plastered and then painted or covered with wallpaper, but now they are hidden under extensions (you can see how to do this in the material “Installing extensions on interior doors with your own hands”) and platbands.
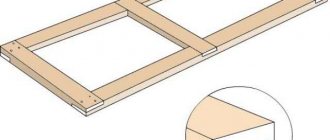
The platband is a strip installed on the wall along the perimeter of the doorway on both sides of the door frame. Based on the above definition, it can be argued that the platband is one of the door elements that closes the gap between the wall and the door block for aesthetic purposes. Consequently, the appearance of both the wall near the opening and the door itself depends on the quality of its installation.
Properly installed platbands allow:
- visually align the door frame if errors were made during their installation that led to loss of verticality;
- beautifully hide the gap and hangers between the wall and the edge of the frame of the door block;
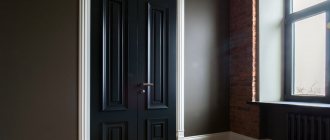
It is not only functional, but also very beautiful.
- serve as one of the interior elements that emphasizes the chosen style of room design (curly trims are installed, for example, Doriot, Greco, etc.);
- hide various wires and cables.
Different colors of the door leaf and trim allow you to turn the original ideas of designers into reality.
Simply put, the interior door, being part of the space in which the family lives, along with other elements of the room (floor, walls, ceiling, etc.) creates coziness and comfort. Therefore, special attention should be paid to the selection and installation of platbands.
Fastening planks with adhesive compounds
This method of fixing the frame of doorways greatly depends on the quality of the adhesive composition. Fastening with “liquid nails” has both advantages and disadvantages.
pros
- The advantage of this method is aesthetics, because after installation the fastening remains invisible.
- Can be used for elements made of any material - wood, MDF, plastic or metal.
Minuses
- If the wall surface where the elements are installed is uneven, fastening with “liquid nails” should not be done, since a loose connection can cause a loss of adhesion and the platband will fall off.
- If it is necessary to dismantle the frame, the planks installed with glue may break.
Rice. 7. Glue installation
To install platbands, you need to apply a layer of adhesive compound to the back side of the plank using a mounting gun, and then simply press it against the wall. The setting time of the glue depends on its composition and manufacturer and is usually indicated on the label.
Required materials and tools
To cover the door frame, you will naturally need platbands and one of the types of fasteners: nails, screws or glue. In addition, you need the following tools:
- screwdriver with drill and bit - necessary when working with self-tapping screws;
- hammer or pneumatic hammer for driving nails;
- jigsaw or hand saw for wood;
- miter box - for cutting corners with a hand saw;
- roulette;
- chisel;
- construction square;
- construction pencil;
- wax pencil when attaching platbands to nails or screws.
Without these tools, it will not be possible to install platbands.
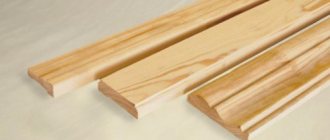
Kinds
Despite the unique versatility of the product, the telescopic casing has 2 types of design: a standard product and an extended type. Standard products include platbands with one corner. Such designs can increase the width of the door frame by no more than 2 cm.
Expanded-type platbands can increase the size of the door frame by up to 15 cm. They are additionally equipped with an extension strip that has a special groove for the corner platband.
Thus, both versions of the product cope perfectly with their functional tasks. The main difference between them is the presence of an additional element and the principle of purpose of the device.
Preparatory work
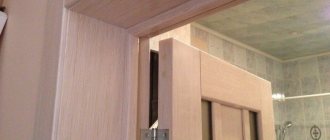
When installing platbands from the extension side, as a rule, no problems arise. But on the side of the door frame, carpenters quite often encounter a situation where the door block is either slightly recessed into the opening or protrudes outward. In this case, it is necessary to carry out work to hide these shortcomings.
The box is recessed
If the structure of the door block is recessed into the opening, and there is no way to correct the mistake by adding more, a thick platband is taken and an undercut is made in the wall under it. The work order is as follows:
- the platband is attached to the box;
- the line of the platband is marked on the wall;
- using a grinder with a cutting wheel for concrete or brick, an incision is made into the wall along the drawn line;
- use a chisel and hammer to knock out a recess for the platband - no need to be afraid to make the cut deeper or go beyond the line;
- a small amount of cement mortar is made (it is better to use ready-made putty);
- the knocked-out recess is lightly covered with mortar and the casing is immediately applied, as tightly as possible. Excess mortar that appears is removed first with a trowel or spatula, and then with a rag or rag;
- The casing is removed, and the solution is given time to set.
To prevent the solution from sticking to the back of the plank, it is first moistened with water.
The platbands will look strange if the box is slightly recessed into the opening.
The box protrudes
If the box protrudes beyond the wall, a plane and wooden trim will help. The technology is simple: the size of the box is marked on the back side, after which a quarter is selected from the back side of the casing using a plane. You need to work slowly, constantly monitoring the process of selecting a recess for the box.
Docking methods
There are 3 mounting methods.
Docking at an angle of 45˚
During installation, it is impossible to do without trimming the areas where the individual parts of the kit are connected. Trimming at an angle of 45˚ is most often used. It is ideal for any type of finishing, successfully hiding areas of cuts .
Joining at an angle of 45˚ hides areas of cuts
Docking at an angle of 90˚
The platbands are connected at an angle of 90 degrees. The top trim board is placed between the right and left sides.
Docking at an angle of 90˚
Docking at 90˚ with imitation jumper
This installation method is used to create an unusual interior design.
Great for historical simulation
Installation instructions for platbands
When the materials have been purchased and the tools are at hand, all that remains is to figure out how to properly install platbands on interior doors.
All construction work begins with adjusting the material to size. This also applies to platbands. There are two ways to connect the vertical strips to the top casing. Let's look in detail at how the strips for each of them are measured and cut.
At an angle of 90
The rectangular connection of platbands can be of several types, and therefore measurements are taken in different ways.
Vertical. The connection of the planks with a vertical seam involves the placement of a horizontal platband between the side posts. In this case, the work is performed in the following sequence:
- on the side of the hinges, at a distance of 3-4 mm from them, a platband is applied to the door (the indentation is necessary for the doors to open freely) and at the top, on the inside, the line of the strip is marked;
The platband should not interfere with the operation of the hinges.
- a similar operation is carried out with the platband and on the side of the handle. In this case, one of the trims must be marked - they may have different heights due to the uneven floor;
- The top strip is applied to the door frame and brought to a horizontal position. If there is a visual distortion, adjustments are made in such a way as to hide the existing defect as much as possible;
- taking the drawn vertical lines as a guide, the length of the upper casing is noted;
When the platbands are connected vertically, the side strip is attached last.
- a mark is made along the top of the plank, close to the edge, which necessarily intersects the previously placed vertical lines;
- side trims are applied to the door one by one to determine their length - marks are placed opposite the drawn crosses on the slats;
For reference: in the absence of an urgent need to obtain precisely fitted joints, the width of the casing and the amount of offset from the hinges are added to the vertically installed bar from the lower level of the horizontal beam of the box.
- on the surface of the planks, cut lines are marked with a pencil using a construction square;
Construction square to help.
- Using a jigsaw or a handsaw (preferably using a miter box), the platbands are cut to size.
Horizontal simple. With a horizontal connecting seam, the upper casing is first applied to the door frame. After finding its specific installation location along the bottom edge, horizontal lines are drawn from both ends that will show the length of the side trims.
After this, the length of the vertically located strips is determined by analogy with the previous example. Experienced carpenters determine the size of the top platband after attaching the side ones - a perfect match is guaranteed: a horizontal platband is laid on the fixed strips. Marking its length is not difficult.
A line is drawn defining the height of one of the side trims.
Horizontal with an overlap. In some cases, designers suggest installing the top trim with slightly protruding edges. In this case, the top strip is laid on the already installed side trims, as in the previous case, and then the cutting lines are marked.
At an angle of 45
It is somewhat more difficult to join semicircular and figured platbands - you will have to cut the ends at an angle of 45o. Note that this is the most common way to join the trim at the top of the door, allowing you not only to hide the cracks, but also to get a beautifully designed opening. The technological operation consists of several steps:
Step 1. The length of the left and right trim is determined. To do this, on the side of the hinges, with an indent of 3-4 mm, a platband is applied to the box. The lowest point of the cut is marked. It is located above the door opening by an indent.
Step 2. The length of the second casing is determined in the same way.
Step 3. Platbands are placed on stools or a table. The lower control lines are drawn along the marks. After this, the platband lengthens to its width. The upper control line is drawn along the second mark.
By connecting the opposite corners of the marks, we get a cutting line at an angle of 45o.
Step 4. The trims are cut at an angle of 45o. If sawing is done with a hand saw, then the bar is attached to the miter box so that one of the marks is opposite the slot at 45o. If you have a jigsaw at hand, mark the place of the cut with a pencil - the upper and lower marks are connected diagonally.
Without a miter box it is very difficult to get an angle of 45o.
Step 5. Side trims are installed.
Step 6. The top strip is placed on the platbands so that its bottom coincides with the beginning of the cut of the ends of the side strips.
After installing the side trims, the dimensions of the top strip are determined.
Step 7. The corners at the top bar are cut.
Step 8. The joints are sealed with acrylic or silicone sealant and then painted with a corrector.
The sized planks are attached in several ways.
On nails
The most common method of attaching cash to a door is with finishing nails. They are hardly noticeable on the surface of the planks, do not require work experience, and are easily removed from the box along with the trim. For work, use nails with a flattened head, about 40-60 mm long, and 1.5 mm in diameter. The color of such nails may be different, since they are coated with one of the following metals:
- zinc;
- copper;
- chrome;
- brass;
- bronze.
If desired, the finishing nails can be matched as closely as possible in color to the trim.
You can hammer in with a simple hammer or a pneumatic tool. The step between the fastenings is about 50 cm.
The most reliable tool is a hammer.
If you can’t buy finishing nails, you can use regular ones. In this case, they are not hammered in completely, leaving the opportunity to bite off the caps with a side cutter. After removing the heads, the nails are driven in completely.
Of course, it’s more convenient to work with a pneumatic gun, but a simple hammer will do the job just as well.
In most cases, nail heads are inconspicuous and do not require masking. If you need to hide traces of fastening, then use a wax pencil.
For self-tapping screws
Fastening with screws completely follows the instructions for fastening with nails:
- platbands are cut to size;
- are applied to the box (side), after which the places for screwing in the screws are marked on them;
- holes are drilled (the drill is taken 1 mm thinner);
- side strips are attached;
- Using the same technology, the top cash is attracted to the box;
- the heads of the hardware are masked with a wax pencil, veneer or film.
It is better to hide the traces of fastening.
Attention: with a vertical seam of 90o, it is necessary to attach the platbands in a slightly different order: the side strip, then the top, the process is completed by side trim again.
For liquid nails
Fastening with glue also does not cause problems. The MDF planks adjusted to size are turned upside down. Liquid nails are applied to them with a snake along the entire length, without gaps. To fix the platbands, they are pressed tightly against the box and held in this position for several minutes - the specific time is indicated on the packaging.
Liquid nails are not applied to the entire surface, but in a small strip.
Fastening PVC strips
Plastic panels can be installed with glue, which is not the best solution, but can be assembled using a special profile. The operating procedure is as follows:
- the planks are cut to size;
The corner connection of PVC trims is modest, but tasteful.
- A profile is cut to the size of the box. May be a little shorter;
- then the profile is cut in half at an angle of 45o, after which it is screwed to the box with self-tapping screws. The connection at the top should be 45o. That is why such a cut was made. Naturally, the connection in the middle of the beam should be rectangular;
- The planks, cut at an angle of 45o, are connected in the side fittings and then snapped into the profile.
PVC strips are attached to this profile.
This is what the side fittings for the corner of the plastic trim look like.
Installation of platbands on the front door
Installation of platbands on the front door is carried out in the same way. There aren't even any nuances.
How to choose the angle of the joint?
This moment is greatly influenced by the shaped relief on the front side. You can fasten cash in two materials: a flat strip without any gaps, using a right angle, or take a capital. In this case, horizontal or vertical directions are used. Before installation, all saw cuts must be painted or tinted with varnish. Also, the corners should be smooth, that is, treated from roughness of the saw.
To install relief panels with a rounded surface, a standard angle cut of 45 º is used. In this case, it is necessary to precisely control the angle, otherwise there is a chance of getting gaps.
Nuances of the work
Every job has its secrets. Here are some tips from professionals.
How to join the platband to the baseboard
The platband is installed close to the floor. The length of the plinth is adjusted to it. The plastic baseboard has a beautiful cap at the end. Wooden ones are processed: the end adjacent to the baseboard is beveled at an angle of 45o.
I wonder who would like this connection between the casing and the baseboard.
How to trim the platband
When working with a jigsaw, all cutting lines must be very clearly drawn. If you only have a hand saw, then it is advisable to have a miter box on hand. Another important point concerns the width of the cut. It can eat 3 mm from the length of the platbands. Therefore, when applying markings, the easiest way is to raise it by 1.5 mm, and cut exactly along the line.
For a jigsaw, the cutting line must be well drawn.
How to align the plane of the platband with the wall
When installing a door block, it is not always possible to achieve the same plane of the wall and frame. In this case, preparatory work is carried out to eliminate the defect, as discussed above.
A few more tips
Finally, here are some more tips.
- Platbands are installed after finishing the walls.
- Significant wall defects are well hidden under wide, about 12 cm, platbands.
- Errors when joining platbands at an angle of 45o can be eliminated with putty, tinted after drying with a corrector to match the tone of the panels.
To eliminate the gap you will have to work hard: first putty and then paint over it with a corrector.
- Visible gaps between the platband and the frame are sealed with acrylic sealant, and then tinted to match the materials with a corrector.
The main problem when installing platbands is not the technological process, it is simple, but the correct choice of strips in color, width and shape of the front surface.
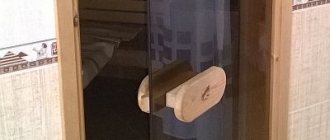
Fastening the planks to mounting studs
A similar method of fixing platbands was invented relatively recently. Mounting spikes in professional jargon are called “beaks” and their use has the following features:
- A metal fastening element is fixed to the back side of the element using small self-tapping screws that do not cut right through the body of the bar.
- The extension or box, in turn, has grooves for installation.
- The craftsman carefully presses the part with the “beaks” against these indentations until a characteristic click is heard.
Rice. 9. Fixation with “beaks”
With such a connection, dismantling while maintaining the integrity of the elements is practically impossible, since the wedge of the fastener always breaks the groove in which it is fixed.
Design Features
When planning how to sheathe the front door opening, it is useful to take into account the recommendations of the Guardian designers:
- Decorative elements must be selected in the same style as the decorative panel.
- You can choose the color of the decorative elements the same as the panel, or give preference to a shade that will highlight it.
- The general style of the interior of the room may impose its own requirements on those elements that are placed on the inside of the door.
- Non-standard openings require special attention. You can adjust certain elements to their size on the spot (trimming). But not every decor option will be possible if the size of the opening is too different from the standard.
Benefits of integrated solutions
, caring for the convenience of customers, offers an integrated approach to the design of a doorway. You can buy platbands for metal doors in the form of a ready-made kit. For example:
- Set No. 5 includes 2 platbands with a length of 2200 mm and 1 – 1200 mm. This set is suitable for doors with dimensions of 2100 mm by 980 mm.
- Set No. 9 contains 2 strips of 2300 mm and 1 of 1300 mm, and set No. 10 contains 2 of the same strips plus 1 of 1900 mm.
- Set No. 7 (2 x 2000 mm plus plinth block 200 mm) and kit No. 8 (2 x 2100 cm plus plinth block 200 mm).
The range of products allows you to order all the components for the front door and its frame. Experts will warn you against mistakes when choosing individual elements and suggest the right solution. By ordering the service of installing an entrance door with platbands, trims and other elements to our craftsmen, you will be confident in the result.
We will be glad if our review helps you choose not only high-quality and beautiful doors, but also a successful frame for them.
Solving basic problems
When talking about the front door, most consumers immediately imagine the door leaf itself. The importance of the remaining elements of the structure is realized during its direct operation. The design of the door opening involves solving the following problems:
- Close the technological gaps that formed during the installation process.
- Provide sound insulation. If a powerful canvas with internal and external decorative panels is designed to hide from prying ears what is happening in your apartment, then the presence of even small gaps during installation will make your private life open to strangers.
- Improve heat conservation. Correct installation of platbands on metal doors will help maintain warmth and comfort.
- Emphasize the unity of style in accordance with the overall design project of the room. The decor of additional elements developed by Guardian specialists allows you to choose suitable solutions.
- Achieve harmony in the decoration of doors through the correct choice of shades of color and texture of the material.
- Achieve organic and complete visual perception of the entire structure when creating doorway decor.
Platbands on metal doors and other decorative elements are installed on the outside of the door (facade of the building, entrance) and the inside (hallway, vestibule).
Finishing nails
Wooden and MDF trims are easier and better to fasten with nails with flat heads. Then, if necessary, they can be easily dismantled. And so that the platbands do not dismantle by themselves and hold tightly, the nail should be driven into the door frame at least 20 - 25 mm. It is better to make the distance between the nails the same. To simplify the task, you can pre-drill through holes in the lantern. At the end, so that the nails do not disturb the appearance, they can be painted over with a wax pencil.
You can also drive nails into the door frame first. Then use pliers to remove their caps. The length of the visible part of the nail without the head should not be greater than the thickness of the strip. Next, having placed the platband against the nails, a wooden beam wrapped in fabric is applied to the plank at the location of these nails, and with a few light blows of a hammer the plank is pressed onto the nail.
How to measure the width of additional beams
The walls have a certain width. This indicator is important for sound insulation, heat conservation and other parameters. When installing a door, the width of the wall plays another role: the possibility of using a standard frame depends on it. If the depth of the box is less than the width of the wall, install additional timber. His job is to compensate for the difference.
It is important that the colors and shades of paints, tinting, timber films can be matched to match the decorative panels in accordance with the catalog.
Guardian production is constantly evolving. New technologies are being successfully introduced and the range of products is expanding in accordance with customer needs. Considering the frequent need for additional timber, special starting profiles for its convenient fastening have been introduced into mass production. They are designed for additional timber with a thickness of 16 mm. Such profiles are installed on the box during installation in accordance with the attached diagram.
You can order this product directly with the door, or separately.
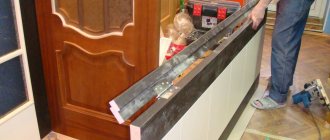
What will be needed to install slopes?
To install MDF slopes you will need the following tools:
Photo 1. Set of tools for installing slopes
- 1 – miter saw;
- 2 – roulette;
- 3 – pencil;
- 4 – angle;
- 5 – knife;
- 6 – hammer;
- 7 – masking tape;
- 8 – fastening elements;
- 9 – screwdriver;
- 10 – polyurethane foam;
- 11 – drill.