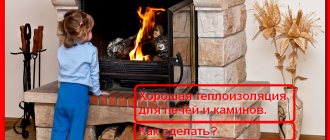
Finishing the stove with tiles
You can give the stove an attractive look by finishing it with tiles. There are special tiles for stoves that are heat-resistant, but they cost a lot. There are special tiles, but they are laid during the construction of the stove (they cost even more). For the most part, ordinary ceramic tiles are used for stove cladding. If it is of normal quality and laid correctly, nothing happens to it. There are two restrictions:
- use tiles of small formats, as it has been noticed that they hold up better;
- do not use gypsum-based tiles - they greatly reduce heat transfer.
A few more technological points that relate to laying tiles near furnace castings and other metal elements. The gap between the edges of the tile and the metal should be about 5 mm. This gap should be left empty, without mortar. It is subsequently laid with asbestos cord, and covered with tile adhesive on top, and grouted. This way, when heated, the metal will not tear or squeeze out the tile.
Example of tiling a stove door
Craftsmen who finish brick stoves advise first plastering the stove. After the plaster has dried, you can glue the tiles using a special heat-resistant adhesive. If you adhere to this technology, then the preparatory stage will be exactly the same as for plastering (described above):
- unstitch the seams by 1 cm;
- nail/weave a mesh;
- we wet the oven;
- Apply and level the plaster.
After the plaster has dried, the tiles are glued using conventional technology. Some craftsmen place the tiles on a heated stove, others - on a warm one. There are styling options without heating. The technology is no different from conventional finishing work, the only difference is that the seams are made larger - from 3 mm and they try to leave them unfilled.
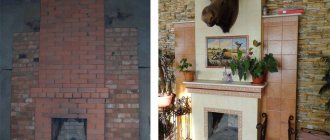
An example of tiling a stove
To maintain the seams, the same crosses are used. They are then filled with gypsum grout, which is more elastic and less prone to cracking. In this case, the seams compensate for thermal expansion.
There is one trick: if the tile format is such that it overlaps several bricks, the glue should be on only one of them. The rest remain empty. The solutions have a high degree of adhesion and hold well even in this situation. And this method allows you to bypass the different magnitudes of thermal expansion of different materials (the seams expand more, which is why tiles glued to two bricks can tear).
But this furnace lining technique has a disadvantage: voids filled with air do not conduct heat well, and heat transfer drops significantly. In this case, there is one way out: buy tiles the size of a brick. It is difficult to find the required sizes, but some craftsmen cut smaller ones from large-format ones, with the required dimensions.
Find or cut tiles to fit bricks
There is a technology that combines the two described above. The stove is lined with masonry mesh with 50*50 mm, wire diameter 0.5-1 mm. They nail the mesh with staples - powerful ones from a construction gun, or using finishing nails. The mesh should fit tightly. The tiles are laid on this base without prior plastering. The disadvantage of this technology is the high consumption of expensive glue.
What tile adhesive can be used in this technology? The following heat-resistant brands performed normally:
- Plitonite VT;
- Retainer;
- Emelya glue, suitable even for finishing with torn stone;
- Ceresit 17;
- Fireproof;
Torn stone glued to Emelya glue
Fiberglass mesh for plaster as additional reinforcement
In order for the mortar to remain on the stove as firmly as possible in the future, it is not enough to use reinforcing additives in the form of straw or tow. When finishing, you should also use a special fiberglass mesh. This material can be purchased today in almost any construction supermarket.
Fiberglass plaster mesh is very inexpensive - about 30 rubles per 1 m2. When used on a stove, the finish lasts much longer. Instead of fiberglass, you can use metal mesh to reinforce the solution.
Selecting heat-resistant paint
Heat-resistant paint can be applied both to a metal or brick surface, and to the preparatory layer of putty or plaster. The use of paint protects the surface from corrosion and helps give the equipment an aesthetic appearance. The paint for the stove must have sufficient elasticity so as not to crack when heated and cooled, there should be no changes in color, burning, or fading due to high temperatures.
Important! Paints for stoves cannot be made based on oils, which release toxic substances when heated, so mixtures are made based on acrylic, epoxy, and silicone. The consistency of the paint should be uniform and applied evenly
Sometimes spray guns and ready-made aerosols are used - in this case, the consistency of the composition is more liquid (for example, this is how heat-resistant enamel is applied)
The consistency of the paint should be uniform and applied evenly. Sometimes spray guns and ready-made aerosols are used - in this case, the consistency of the composition is more liquid (for example, this is how heat-resistant enamel is applied).
Well-known manufacturers of thermal paints, photos
- "Tikkurila". Finnish manufacturer, presents a line of paints of varying heat resistance (up to 1000 degrees).
Photo 2. A can of heat-resistant black paint. Manufacturer: Finnish.
- "Certa". Various types of heat-resistant anti-corrosion paints and varnishes are produced. Withstands heating up to 650 degrees.
Photo 3. Three cans of heat-resistant enamel that can withstand heating up to 650 degrees. .
- “New-Tone” is available in cans and is suitable for processing metal parts of the stove (doors, chimney). Withstands heat up to 800 degrees.
Photo 4. Two cans of heat-resistant paint in black and gold. .
A layer of paint must be applied to a surface prepared in strict accordance with the manufacturer’s instructions; it is usually cleaned of dirt and dust and degreased. It is also recommended to preheat the oven (this will help dry the surface of the walls before painting).
Plastering technology
Well, the preparatory measures have been completed and the tools are ready. Now let's see how to plaster a stove. To prevent the applied mixture from cracking and crumbling, this work must be done correctly. Plastering is usually carried out in several stages. The surface of the oven is first wetted with clean warm water. You can moisten it with a regular broom. Then the following are executed:
- spraying solution;
- padding;
- cover.
What kind of brick is needed for laying a stove - the right choice of material
Ceramic bricks are widely used for the construction of heating stoves in individual residential buildings.
The construction industry produces a wide range of bricks for laying furnaces, but which one to choose from the proposed range? Before we consider this issue, you need to understand the fact that two types of bricks are used for laying the stove - this is a simple ceramic brick, but with certain characteristics, which is used for laying the external elements of the stove, chimneys, and fireproof or fireclay brick, which is used for furnace firebox masonry.
Kiln bricks must meet the following technical requirements:
- Resistant to high temperatures and open flames.
- The ability to accumulate heat and retain it for a long time.
- Sufficient mechanical strength.
- Resistant to significant temperature fluctuations.
Solid fuel stoves are built from ceramic bricks that meet the requirements of GOST 390-96. This standard came into force on July 1, 1997 and establishes the technical conditions that these products must comply with in shape and size. The regulatory document also defines the requirements for the use of products depending on the maximum ambient temperature.
Ceramic bricks intended for the construction of thermal units are subject to more stringent requirements than other building materials. In the firebox of furnaces, the flame temperature can exceed 1000 °C; therefore, its walls are subjected to significant thermal loads. The thermophysical parameters of the material used must be higher than the specified value.
During the operation of the furnaces, they are regularly cooled in some cases to negative temperatures. In this case, the brick is exposed to a significant temperature difference in the external environment, which leads to thermal expansion followed by compression.
The product must have a sufficient strength margin to successfully withstand this phenomenon and avoid deformation and destruction.
The brick used for laying stoves must have sufficiently high thermal conductivity and the ability to accumulate heat.
This allows you to maintain a comfortable thermal regime for a long time.
As we said earlier, a certain type of ceramic brick is used to lay the furnace; now we will look at what main characteristics this brick should have.
Brand by density. The first thing you need to look at when choosing ceramic bricks for a stove is the density grade. The grade of ceramic brick by density is established in accordance with the requirements of GOST 530-2012.
To designate it, an alphanumeric encoding is used, consisting of the letter “M” and a number from 25 to 1000. Please note that this indicator does not indicate the quality of the brick, but only shows its density when pressed. This indicator is important because the denser the brick, the slower it heats up, and therefore the slower it cools.
The fact that the brick will cool slowly is of course good, because
This indicator is important because the denser the brick, the slower it heats up, and therefore the slower it cools. The fact that the brick will cool slowly is of course good, because...
the oven will give off heat for a longer time. But it is more difficult to heat a stove made of too dense bricks, especially when it has completely cooled down.
Balance is important here, so for laying the furnace, bricks with a density not lower than M-150 and not higher than M-250 are used.
Frost resistance. Frost resistance of a product is defined as the ability to withstand a certain number of heating and cooling cycles. This indicator is denoted by the Latin letter F with the addition of a number from 25 to 300. The frost resistance indicator of ceramic bricks is important when constructing external elements of a heating furnace, such as chimneys.
The thing is that this integral part of the furnace is in very harsh conditions of constant temperature changes. This has a huge impact on the brick used to lay the pipe. For the construction of such structures, it is best to use ceramic bricks with frost resistance from F75 to F100.
Thermal conductivity. The thermal conductivity of ceramic bricks will depend on its density and for products used for laying furnaces it should be in the range from 0.59 to 0.72 W/(m×°C).
Fullness. For laying the stove, only solid ceramic bricks are used.
Ceramic stove brick.
Application
The main elements of buildings/structures that are currently being processed/coated with various types/types of fire-retardant plasters are metal structures.
This is due to the fact that it is very attractive for architects/designers, as well as builders, to construct frames, floor trusses/coverings of buildings, various structures from hangars to stadiums using curtain wall panels. This is due to the short construction time, cost reduction compared to the construction of buildings made of reinforced concrete structures, but this in no way eliminates the issue of the need to ensure the fire resistance of buildings; which is achieved by using OS both when protecting load-bearing elements and when installing fire partitions.
Fire retardant plaster for metal structures comes in various types/types. The requirements for them are set out in the following documents: SP 2.13130.2012, NPB 236-97, GOST R 53295-2009.
Fire protection of wooden building structures, very popular back in Soviet times, is now a thing of the past. This is due to the fact that such a coating on wood is short-lived due to poor adhesion, warping, cracking of the protective layer of plaster when humidity/temperature changes; as well as the emergence of more effective materials, processing/application methods - impregnating compositions, structural fire protection with layers of plasterboard over a metal frame using non-combustible filling. For example, fire-retardant basalt material.
Even fire protection standards for wood: NPB 251-98, GOST R 53292-2009 do not consider plaster as a protective composition. In practice, this is usually protection with plasterboard and/or surface impregnation of load-bearing wooden structures, for example, rafters, roof sheathing, attic floor structures.
Another material, or rather, a group of insulation materials for thermal protection of external walls of buildings is extruded polystyrene foam, expanded polystyrene foam, penoplex, which differ little in terms of flammability; because when exposed to fire, they easily depolymerize, melt, flowing down the wall, even if, through the efforts of the manufacturers, they are assigned category G1 or the proud name “fire-resistant”.
Although the use of plaster mortars has the main goal of protecting the multi-layer “pie” of the external walls of modern buildings of “economical” construction from atmospheric influences; but at the same time, a fire-retardant function is also performed, which prevents the flammable insulation from igniting, even if the fire, intense thermal effects cannot be dealt with by the fire-prevention gap between the buildings.
Reinforced concrete. Manufacturers of fire-retardant plasters and other similar coatings mainly write a lot about the fire protection of this monumental, absolutely non-combustible material, most of the finished products from which meet the requirements of all fire safety standards/rules, referring to SP 28.13330.2012, which talks about the protection of building structures from corrosion. In practice, designers, builders and fire department specialists do not have the problem of using fire protection for reinforced concrete elements of buildings very often if they are of small cross-section and mass.
How to protect materials, watch the video
How to plaster: choose a fireproof mortar
The main requirements for mixtures used for finishing home stoves and fireplaces include heat resistance, the ability to withstand temperature changes, high elasticity and resistance to cracking. Conventional solutions used in construction are not suitable here. The following types of heat-resistant mixtures are used for plastering stoves and fireplaces:
- clay-lime:
- cement-clay:
- clay-gypsum;
- mixed using several binders.
Manufacturers introduce different types of plasticizers into these mixtures, as well as moisture-retaining additives, with the help of which the rate of hardening of the solution is regulated. It is more convenient to work with them, since they set more slowly.
As a rule, two types of refractory compounds are produced. The first is used for rough primary finishing. It can be applied in a thick layer up to 10 mm. The second type of mixture is used only for final leveling of the surface. This layer is thinner, up to 3 mm. Finely dispersed components are introduced into the composition of the finishing solution, which makes it possible to obtain a perfectly flat and smooth surface, which can later be painted or covered with decorative plaster.
Terracotta mixture is popular among ready-made heat-resistant plasters for stoves. It consists of kaolin fireclay dust and functional additives. Withstands temperatures up to +400°C.
Work is carried out from +5°С to +35°С. Add 250 ml of water per 1 kg of plaster, mix, and let the solution sit for 15 minutes. After repeated mixing, the solution is used for 60 minutes. Apply a layer of up to 10 mm at a time, the mixture consumption will be 10 kg/m2. If you need to apply a second layer, you need to wait for the previous one to dry completely. In this case, ventilation should be natural, accelerated drying is not allowed to prevent the plaster from cracking.
Technique for proper application of plaster.
To make the plaster for stoves and fireplaces stronger, craftsmen add asbestos fiber or asbestos. This should not be done: this material is considered toxic, which means it has no place in the room.
Let's start applying the plaster. Start from the top row and gradually work your way down. Wet each area with water, then apply the solution, first thinner, then thicker, trying to ensure that the thickness of each layer does not exceed 0.5 cm. Grab the mixture successively from bottom to top with a trowel, and then finally level with a fine grater. As a result, the surface should be flat and smooth, without depressions, protrusions and grooves. If everything turned out exactly like this, it means that the plastering of the Russian stove with your own hands was done correctly.
Difficulty may arise with the design of the corners of the stove. To make the task easier, you need to fold metal or wooden slats in the shape of the letter L and thus level the plaster. The main thing is that the edges of the slats are not jagged. When the plaster is applied to the entire corner, the slats should be fixed and left for a while until the solution sets. Then they are removed and the surface is smoothed with a grater.
If you don’t want to figure out how to prepare a solution for plastering a stove yourself, or already in the process you see that something went wrong, it is better to buy a ready-made mixture.
Types of mixtures for stoves
Mortar for stove masonry and plaster can be industrially produced, it can be purchased in specialized stores, or it can also be made with your own hands.
Industrial mixtures
This mixture for the stove and fireplace is a high-temperature composition that is combined with water until a homogeneous mass is formed. The volume of water is usually indicated in the instructions. In addition to the usual ingredients (cement and sand), components are added to the composition that increase heat resistance.
The advantages of using industrial mixtures for masonry and plaster of stoves and fireplaces are:
- Composition tested by experience and time. Manufacturers experimentally identify the most stable proportions and create the best recipes.
- Hard to reach components. The specific substances added to the mixture are sometimes difficult to find in stores, and purchasing them in small quantities is too expensive.
- Multifunctionality. In many cases, the compositions can be used for laying stoves and for lining them.
- Attractive view. Not a practical criterion, but also important.
Stove makers recommend high-quality refractory mixtures from the following domestic brands: TERRACOT, Makarov Stove House, Pechnik, Scanex, SPO.
The main disadvantage of industrial compounds is their cost. For this reason, making the solution yourself turns out to be more rational and economical.
Homemade mixtures
Depending on the operating conditions of the stove or fireplace, as well as on the purpose, the mixtures are:
- clay,
- cement,
- calcareous.
Homemade fireproof mixtures for laying a stove must include clay and sand. To increase plasticity, lime milk is added, and asbestos is used as a reinforcing substance. Depending on the needs of the stove owner, other components are added to the composition.
The disadvantages of such solutions are:
- Insufficient strength. As you know, clay has a low level of resistance to mechanical stress; for this reason, a solution based on it is suitable only for masonry, but not for finishing work, in particular, plaster. In addition, the composition of the clay itself is also different, which ultimately can affect the result.
- Unattractive appearance. For stoves and fireplaces located in residential premises, where the aesthetic aspect of the result is important, it is better to use the purchased mixture for plastering. For utility rooms where the appearance of the stove does not play a key role, you can use a clay-based solution.
Purchased heat-resistant mixtures
Ready-made stove plaster can also be used for finishing. There are many varieties of such mixtures. But the most popular are “Pechnik” and “Terracotta”. The advantage of such plasters in comparison with those prepared by hand is a high degree of heat resistance. “Pechnik” and “Terracotta” are able to withstand temperatures up to 200 degrees.
Whatever mixture is used for plastering the stove, purchased or homemade, there is no need to prepare a large amount of it at once. The volume of a single serving should not exceed 8-10 liters. In any case, the solution needs to be developed in a maximum of 2-2.5 hours.
Choosing a ready-made mixture and how to make it yourself
The process of plastering stoves and fireplaces itself already has its own characteristics and certain rules. The main difference from classic wall plaster still lies in the composition of the finishing material. Conventional cement-sand mortar is not suitable for these tasks.
It must be taken into account that the surface of even a well-built stove or fireplace can heat up to temperatures of up to 100 degrees, in some places even higher. Any materials are subject to thermal deformation, including those used to construct stoves. As a result, ordinary cement mortar cracks quite quickly due to deformation and crumbles due to overheating and an overdried state.
Basic requirements for mortar for plastering stoves and fireplaces:
- elasticity of the solution in the hardened state for the entire service life;
- heat resistance;
- strength and wear resistance.
These conditions are partially fulfilled by classic solutions for self-preparation. They do not use cement or have less of it than in conventional mortar. The main binder is clay. In addition, lime or asbestos is used. The latter is dangerous to use for lining stoves and fireplaces due to its toxicity, especially when exposed to high temperatures. The table contains recipes for solutions that you can prepare yourself.
| Solution/material | Sand | Clay | Cement | Lime | Asbestos |
| Clay-cement | 2 | 1 | 1 | 0,1 | |
| Clay lime | 2 | 1 | 1 | 0,1 | |
| Clay | 2,5 | 1 | 0,2 |
The volume fractions of each component are indicated. Before mixing with the other components, the clay must soak and gain moisture for 24 hours. To do this, fill it with water in a separate container and stir it periodically, about once every three to four hours. Before use, the already diluted clay is mixed with a mixer until smooth. It is advisable to then exclude all large solid inclusions that have not dissolved or crushed.
Examples of ready-made mixtures and materials used for plastering stoves and fireplaces
The construction industry also offers many options for heat-resistant mortars that better meet the above requirements. Due to the exact proportion of the binder of the filler and additional additives, the solution is more practical and convenient to apply; after hardening, it is more durable and stronger.
Coping with thermal deformations is quite difficult, because even the highest quality mixtures are not able to withstand them for a long time, especially if the fireplace is used occasionally. For reliability, the solution must be reinforced. To do this, you can resort to two solutions:
- reinforcing fibers in the solution,
- embedded reinforcing elements (mesh, wire).
It is impossible to accurately indicate which type of reinforcement will be preferable. However, for finishing complex-shaped surfaces and small areas, such as those found when finishing fireplaces, it is better to give preference to fiber additives in the solution itself. Mesh and wire are more difficult to fit to a surface of complex shape, with protrusions and transitions in height and depth. If the walls of the oven are smooth and extensive, then the mesh is naturally better.
Ideally, even at the stage of laying and erecting the furnace, a wire is laid into the brickwork, to which the mesh can subsequently be screwed. This will create reliable contact without the use of screws or, especially, dowels, which are simply not appropriate in the design of the stove.
Self-preparation of the solution
Heat-resistant plaster can be prepared from the following materials:
- cement is used to increase the strength and adhesion of the mortar, you need to take a little of it;
- clay is the main ingredient responsible for thermal conductivity, it should be relatively dry and non-greasy;
- sand is used to increase strength;
- lime acts as a plasticizer; it is prepared in advance;
- fiberglass or asbestos is used if it is necessary to achieve high strength with thick layers.
Heat-resistant plaster is mixed in different proportions . The simplest and most effective DIY preparations are:
- For 2 parts sand take 1 part clay and 0.2 parts asbestos;
- 2 parts sand, 1 part lime, 1 part clay, 0.1 part asbestos;
- 2 parts sand, 1 part clay, 1 part cement and 0.1 parts asbestos.
Valera
The voice of the construction guru
Ask a Question
When preparing the mixture, you first need to grind the clay and add water to it. Leave to infuse for 24 hours, then drain off the remaining liquid. After adding the remaining ingredients, mix thoroughly using a construction mixer. If the plaster is too dry, add water. The finished product is passed through a sieve.
Preparation of a mixture for plastering fireplaces and stoves
When using factory-made plaster with the preparation of the solution, no questions should arise. The manufacturer always provides detailed instructions on the packaging. Usually the dry mixture is simply diluted with water and kneaded with a construction mixer.
The factory-made plaster mixture is mixed with a mixer before use.
When you make your own heat-resistant plaster for stoves and fireplaces, first each component included in its composition is sifted through a sieve to remove solid impurities. The second important condition is the correct choice of the main binder and calculation of proportions. For plaster, fireclay and ordinary clay are used. It is distinguished by its fat content. The higher the indicator, the more sand is added.
The consistency of the solution resembles thick sour cream
Advice! Experienced stove makers add a little salt to the clay solution, which will prevent insects from settling.
The clay must be soaked for a day before mixing. It is better if the process lasts two days. During this time, all solid lumps will dissolve. Sand is added sifted and always dry.
This important condition will help maintain the correct proportions. Lime is the most commonly chosen additive
The substance is a kind of plasticizer. With lime, the viscosity of the solution and adhesion to brick increases. If cement is also selected as an additive, then the M-400 grade is used. This plaster will begin to harden on the stove or fireplace after 4 hours. Full setting will occur after 12 hours. The plaster will gain its final strength in a month.
Tools and devices necessary for work.
Stock up on all your equipment in advance. The plastering of the brick oven was not interrupted due to the lack of tools, materials and equipment.
- It is convenient to mix and scoop up the solution and remove excess accumulations with a bayonet shovel.
- You need to stock up on a ladle and scoop up the mixture. The optimal capacity of the bucket is 1 liter.
- It is more convenient to apply and level the solution using trowels. You need several of them. They can be either the same or different in width and length.
- To align corners and slopes, you may need a large or small rule. The tool is an aluminum strip with a rubber coating. If the stove or fireplace is small, replace the rule with a slate with smooth edges.
- You will also need a level and plumb line.
General characteristics of heat-resistant adhesives for ovens
The main factor that determines the name of these materials is operation in high temperature conditions, sometimes in direct contact with fire. When used at high temperatures, heat-resistant adhesive must not only resist destruction, but also maintain its functionality.
General requirements for adhesives intended for furnace construction:
- sufficient resistance to high temperatures for a specific purpose;
- safety – absence of harmful emissions into the air;
- sufficient adhesion with high elasticity of the hardened mixture - to effectively neutralize temperature deformations of the furnace materials;
- ease of installation - optimal consistency, durability and curing time.
How to properly plaster corners
To make the stove look neat, carefully leveling the surface of the plaster is not enough. In addition, you will need to decorate the corners beautifully. To make them as neat as possible, it is worth using leveling slats. After the solution has dried, they should simply be removed. Instead of slats, you can also take an aluminum profile designed for attaching drywall. It is fixed to the stove using mortar and plastered flush. Of course, both the slats and the profile should be set using a building level.
Making your own heat-resistant tile adhesive
To decorate with decorative tiles no thicker than ordinary tiles, use clay, cement and river sand in a ratio of 1:1:3
It is important to choose the right components
Particular attention is paid to clay, with which some difficulties may arise. It is checked as follows:
- Twist between palms into a tourniquet.
- Wrap the resulting tourniquet around a cylindrical object.
- The condition of the clay is assessed by the cracks formed. If only the top layer of the rope breaks, then the clay is oily and you need to add sand to it. The composition is considered normal if the breaks are evenly distributed along the entire length of the tourniquet and amount to 1/3-1/4 of its thickness. Deeper breaks (from ½ thickness) indicate that the clay is thin and needs a thickener.
The fattener is prepared independently:
- cut off the polyethylene canister;
- cover 1/5 of it with finely ground clay;
- pour water, mix;
- waiting for sediment to form;
- pour off half of the supernatant;
- the sediment is allowed to settle and used as a thickener.
Clay, cement and river sand are mixed dry, filled with water and kneaded by hand. The resulting solution should be of uniform consistency and normal viscosity (the mark from raking the correctly prepared composition does not tear or float). Add 200 g sodium chloride. The glue is ready for use.
Preparing the room for plastering a brick oven
In fact, even a home craftsman who has no experience in similar work can properly plaster a brick oven. It is important to pay close attention to the process and use high-quality materials, then the stove will retain its presentable appearance for a long time.
Before plastering the stove, you need to prepare the room. To do this, you need to make room for work - all unnecessary items need to be removed from the room. Furniture should also be removed from the room if possible. If this cannot be done, then you need to cover it with a thick cloth. To protect windows, walls and floors from debris, dust and damage, these surfaces should be covered with polyethylene.
Warp finishing
Sometimes old age, damage or unscrupulous work of builders can cause distortions in the walls of the stove. You can fix this this way:
- focusing on the building level, set up beacons for alignment;
- heat the stove so that it is warm;
- moisten the slanting wall with a roller or brush;
- the surface is primed and left to dry;
- the first layer of plaster is applied using the “spray” method so that the mixture covers all the seams;
- after the first layer has dried, apply the second - it should protrude about 1 cm above the beacons. Start work from the bottom, leveling the rule every half meter of the layer;
- the wet solution is polished with grout;
- To level the corners, use a special corner spatula.
Application of mesh
The use of this mesh in cladding allows not only to level and hide surface defects, but also makes the plaster coating more uniform and durable. To plaster the stove, you need:
- install the mesh near the work surface at a distance of no more than 2.5 cm;
- “spray” apply the plaster and wait for it to harden;
- cover everything with the next leveling layer;
- rub out;
- decorate.
Light plaster
The need for such work usually arises if the stove has no obvious defects or distortions, but needs cosmetic repairs. Plaster it like this:
- guide elements are fixed on a previously prepared surface so that the coating is uniform;
- apply the solution from bottom to top with a wide spatula, which is immediately leveled using the rule;
- the corners of the structure are plastered with an angle spatula;
- the result is neatly erased.
Decorative heat-resistant plaster. How to cook it yourself?
In order to hide unevenness, plaster is used to prepare the surface for painting. Its decorative varieties can be used as independent decoration.
Carefully! A special feature of plaster for fireplaces and stoves is its constant exposure to heat. This eliminates the possibility of using conventional cement mortar - when exposed to heat, cement expands and cracks, and also releases toxic substances
For plastering heating appliances, it is preferable to use the following solutions:
- based on clay and lime;
- based on clay and sandstone;
- based on lime and gypsum.
Clay is the most popular material for making mortar due to its high thermal conductivity. To create clay-based plaster, mix clay soaked in water with sand in a 1:2 ratio. The composition should be of medium thickness, mix well, but be plastic. To improve the properties of the solution, asbestos and lime are added to it; in some cases, the addition of cement is allowed.
Photo 1. The process of plastering a brick stove using clay mortar. You can cook it yourself.
To quickly check the quality and plasticity of the knead, a rope with a diameter of 1-2 cm is rolled out of it, after which it is wound on a suitable stick (about 5 cm in diameter). If the tourniquet does not break, if it can be pulled out a little, the consistency of the solution is good. You can form small balls or cakes and dry them in the sun or using a heating device - a properly mixed solution will not crack.
Well-known manufacturers of plaster mixtures
The modern market offers many varieties of ready-made dry mixtures for plastering stoves:
- "Terracotta". The mixture consists of dry clay, fireclay dust, and binding elements. It is distinguished by its plasticity and strength, retains its properties when heated to 200 degrees, and is environmentally friendly.
- "Plitonite". It contains an additive in the form of strength-enhancing fibers, can withstand heating temperatures up to 400 degrees, and is suitable for preparation for painting and finishing.
- "Stove maker". In addition to clay, the composition includes lime and asbestos, gypsum, and mineral additives. The mixture is elastic and amazingly durable after drying; this plaster retains its properties even at temperatures up to 600 degrees. Its disadvantage is additives that cannot be called environmentally friendly.
The use of ready-made mixtures allows you to significantly save time on work and get a high-quality result.
Date: September 25, 2022
The final stage is decoration.
You don’t have to create any difficulties for yourself and buy ready-made paint, the main thing is that it is designed specifically for fireplaces and stoves. Water-based dyes are suitable. If you cover the stove with one color, it will have a neat appearance. Do you want something sophisticated? Choose several colors that go well together and paint them. This work must be done before the surface is completely dry, that is, the plaster should be a little damp.
However, in the villages they don’t think about what can be used to paint the stove after plastering, but simply apply lime milk, add table salt to it, mix and apply the resulting solution to the plastered surface. The lime composition has a distinct advantage: after drying, it does not stain hands and objects.
An alternative option is to finish the surface with smooth or embossed decorative plaster.
How to cover up cracks?
You can cover the stove with a purchased mixture or a solution you prepare yourself. Further about the features of the options.
Sand-clay mixture
Putty made of clay and sand is the most accessible and inexpensive option. Scheme for preparing the mixture:
- you need to take clay and fill it with water in a ratio of 1:3; after this you need to leave the mixture for at least a day;
- The clay should be thoroughly mixed, adding liquid from time to time; after kneading, strain with a fine-mesh sieve and tincture again (several hours);
- after the next infusion, you need to drain the water and make sure that the mass has a creamy consistency;
- you need to mix clay and sand - first in equal proportions.
Readiness is determined using an object used to mix the solution. If too much clay sticks to it, add a little sand. As a result, the ratio of components can be from 1:1 to 1:2.5. The composition can be considered ready when a small amount of the viscous component remains on the stick.
This recipe is approximate as clays can vary greatly. It is best to rely not on a stick with stuck clay, but on the result of experiments. Experienced craftsmen make grout with different compositions. After this, several different types of cakes are dried in a place free from sun and wind. Those pieces that are not cracked are dropped from a meter height. “Surviving” flatbreads demonstrate the optimal ratio of components.
Fireclay putty
Bag of fireclay clay
A slightly more expensive, but also more effective option. Fireclay clay is very heat-resistant and durable. Most often, fireclay is used for stove repairs. The material is sold by construction stores. Before sealing the structure, purchased clay is infused in water for a couple of days.
Oven adhesive
If you need the best option, use a special mixture for ovens. The solution consists of fire-resistant cement and fireclay powder. There are two main types of glue you can buy in supermarkets - viscous and hard. If you are looking for something to cover up small cracks on the stove, purchase the first type. Solid mixtures are used for plastering.
The main advantage of factory materials is the optimal ratio of components and very thorough mixing. It is impossible to achieve such quality at home. In addition, there is no need to waste time preparing grout. Another advantage of ready-made compositions is quick setting.
An alternative option is oven grout.
Factory solutions are good for everyone, except for the price. There is another opportunity to save money - use putty prepared according to the following recipe:
- the clay is broken into small lumps and infused in water for about 12 hours;
- sand is added to the mixture of water and clay, after which the components are thoroughly mixed;
- during the mixing process, crushed straw is added to the composition from time to time, which reinforces the solution;
- After the mixture becomes homogeneous, salt is added to it (about a pack).
The ratio of sand and clay is 1:4. You need about 10-15 kg of straw per bucket of clay. It is easy to see that this is a modified version of the sand-clay mixture described above.
Popular brands of plaster mixtures
The most popular plaster compositions for the construction of stoves and fireplace installations are the following brands:
- PC400 W oven;
- Typhoon Master;
- Kalina Master;
- Terracotta;
- Stove maker, etc.
Heat-resistant ready-made plaster (thermal plaster) for stoves and fireplaces
When purchasing heat-resistant plaster compositions, it is important to consider the following nuances:
- established limit of operating temperature conditions;
- environmental friendliness of ingredients;
- hardening time;
- moisture resistance;
- resistance to sudden temperature changes;
- purpose of mixtures (for interior or exterior decoration);
- integrity of packaging, production date, etc.
PC400 W oven
The heat-resistant plaster material Osnovit PECHFORM PC400 W is used to treat areas near the hob, side walls of the fireplace, and stove. Permissible operating temperature is up to +400°C. After treatment with the mixture, no additional puttying of the base is required. When using shaped spatulas and rollers, you can make a relief base. The material is universal and is intended for interior and exterior decoration.
The composition is used to treat surfaces made of the following materials:
- concrete;
- composite slabs;
- limestone;
- bricks.
The mixture has an adhesion level of 0.5 MPa, the maximum fraction size is 0.315 mm. The frost resistance of the plaster is 35 cycles of freezing and thawing. The thickness of 1 application layer is 2-15 mm, mass consumption for a 10 mm layer is 12-13 kg per 1 m². Compressive strength reaches 5 MPa.
The mass is applied at a temperature in the range of +5…+35°C. The diluted solution is suitable for application within 2 hours. Coloring is allowed after 2 weeks.
Typhoon Master
The heat-resistant plaster mixture is produced by a domestic enterprise and is used for finishing chimneys, barbecues, and barbecue structures made of brick. The material is based on fireclay clay. The composition is universal and is used for interior and exterior decoration. The mixture is heat-resistant, withstands high humidity, plastic, and easy to apply. Material is consumed at the rate of 1.6-1.8 kg per 1 m².
Kalina Master
Fireproof plaster material is characterized by high strength, because... contains Portland cement. The coating can withstand changes in temperature conditions, surface heating, and is resistant to mechanical damage. When applied, the solution hardens quickly and has good adhesion properties.
Pechnik
Heat-resistant plaster for stoves and fireplaces of the Pechnik brand contains fireproof fireclay clay, cement powder, gypsum, and modifying polymer additives. The material is used for laying stoves and finishing them, repairing old structures, and hardens quickly. The mixture is easy to apply, does not deform when the device shrinks, can withstand heat, and the fire resistance parameter reaches 6000.
Heat-resistant adhesives
To fix tiles when finishing stoves, it is recommended to use adhesive bases with heat-resistant characteristics. Materials must have good adhesion, withstand high humidity and mechanical damage. Heat-resistant adhesives and mastics are produced by Pechnik, Hercules, etc.
Terracotta
Reinforced heat-resistant adhesive is used in finishing stoves, barbecue areas, baths and other heated surfaces with natural stone. ceramic tiles or facing bricks. The material contains kaolin fireclay dust, chemical additives, and astringent components.
The adhesive base has high adhesion characteristics to the surface, withstands heating up to +400°C, and is resistant to high air humidity. The glue is used for finishing surfaces made of aerated concrete blocks and fireclay bricks. The optimal layer thickness is up to 8 mm; the composition can be adjusted within 15 minutes.
Dry powder is diluted with water in a ratio of 1 kg per 260 ml. The material can also be used for leveling chips and adjusting brickwork. The optimal application thickness is up to 1 cm.
Mixture for plastering the Hercules stove
The composition is heat-resistant, used for finishing furnace structures and devices that heat up. The mixture is optimal as an adhesive base for fixing decorative ceramic tiles. The manufacturer offers the material in packages of 5-25 kg. The coating can withstand temperatures ranging from -50...+1200 °C. The adhesive is used for fixing low-porosity tiles and glazed tiles with increased bending strength.