Regardless of the quality of the floor slab, before installing a clean floor made of decorative materials in a residential or public space, a leveling screed is required. This design allows you to achieve a horizontal, flat surface, compensates for deflections and unevenness of the floor slab, and also acts as a rigid base for porcelain tiles, parquet, laminate, linoleum and other types of coatings. However, if 20 - 30 years ago, when finishing premises, a wet screed made of cement-sand mortar was used, today professionals are increasingly using modern dry compounds, which also have both pros and cons.
Dry screed in the apartment
What is dry screed?
Dry screed is a high-tech modern solution that allows you to construct a subfloor for laying the finishing coating, bypassing significant labor costs, loss of time and wet processes. This type of rough finishing of the floor slab is distinguished by the following technological and functional features:
- Almost completely eliminates the use of water.
- It can consist not only of binders with filler, but also simply of bulk materials - fine expanded clay, expanded vermiculite or foamed materials of natural origin, covered with a hard gypsum fiber or asbestos cement board for pressing and compaction.
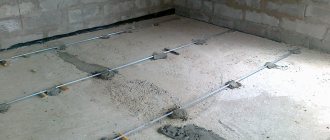
Backfilling with dry materials
- When using a cement-sand mixture, the substance is prepared in a special mixing device.
- In addition to the main components, it may contain anti-freeze, noise-absorbing, heat-insulating and other additives to expand the areas of application of the material.
Use of dry screed in public buildings
Dry screed can be created either using special injection equipment or manually, since the process does not require adherence to a strict recipe, on which the strength of the finished coating depends.
Advantages of dry screed
Dry screed, installed in residential or office premises, has a number of advantages over other technologies for installing a leveling subfloor intended for laying the finishing coating:
- Depending on the type of material used, the density of the finished structure may vary, but at the same time, the mass of the screed is several times lower than wet or semi-dry analogues. This property allows you to reduce the constant load on the floor slab.
Basic aggregate with low mass
- The production technology does not involve long-term kneading of the raw material, as well as its smoothing, time spent on moisture evaporation and hardening of the finished structure. In this regard, all work on installing a dry screed for a typical apartment with an area of 50 m2 is completed within 1 - 2 working days.
Speed of work
- A screed device of this type is not accompanied by increased contamination and the formation of dust, which settles on surfaces and causes allergic reactions or irritation of the respiratory tract.
- When installing a screed, there is no need to rent expensive equipment for mixing and supplying moistened material to the installation horizon.
Manual construction
- After the device, if there are errors, you can easily adjust the surface level, set the desired slope, and also ensure that defects are corrected without dismantling work.
- The finished structure not only serves as a reliable and level base. The porous material absorbs most vibration loads and provides an increased level of sound and heat insulation.
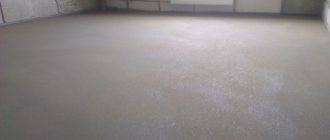
Finished coating
If dismantling is necessary, such material can be completely removed without destruction. If the integrity of the aggregate is maintained and there is no moisture, the backfill can be reused.
Installation secrets
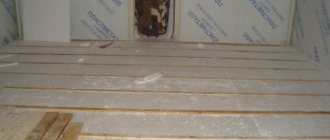
Some craftsmen do without beacons and levels. However, only extensive installation experience will allow you to use your eye. Beginners should pay special attention to markings. GVP slabs are laid on the aggregate and only after that the remains of the edge strip along the entire length are cut off. If the edge tape is not self-adhesive, then use double-sided tape. The rule can be replaced by any flat strip or part of the profile. Before the final adjustment, compact it using improvised means.
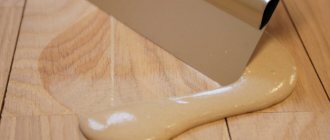
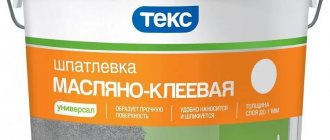
Water is dangerous for expanded clay, so liquid correctors are excluded during installation. To adjust the height, use construction putty. However, it must dry well and harden. Any finishing coating is laid on GVP sheets: laminate, parquet, linoleum, porcelain stoneware. The decorative plinth should only be glued to the wall, and the bottom strip of the plinth should not be coated with glue. You can use the new floor immediately, without waiting for shrinkage and without limiting the load capacity.
Disadvantages of dry screed
In addition to the obvious advantages, residential owners and professional installers highlight a number of disadvantages of this design for leveling the floor surface:
- If the material is not compacted well enough, but is covered with a hard sheet, hum, echo and squeaks may occur during use of the floor, which will lead to significant inconvenience.
Voids under the screed
- Considering that bulk materials are not interconnected in any way, despite the presence of a rigid structure that distributes loads, after several years of intensive use, the surface may settle and tilt. This defect will lead to significant problems if the final floor covering is made of ceramic tiles, since the material itself or the seams between the piece elements can crack.
Drawdown of the screed
Taking into account the shortcomings, the period of flawless operation of such a coating without the need for major repairs does not exceed 10 - 15 years with intensive use. If the functional purpose of the room involves constant dynamic loads, the operational period will be no more than 5 - 7 years.
Types of dry backfill
Dry screed is one of the most environmentally friendly ways to construct a subfloor. To fill the space between the beacons, natural materials are used without polymer additives that contain toxins and irritate the respiratory tract. Most often, the following type of materials is used for backfilling:
- Small expanded clay. This material should not be confused with classic expanded clay, which is sold by machines for the construction industry. Expanded clay for dry screeding is usually sold in bags of 15–25 kg, and its fraction does not exceed 5–7 mm.
Considering that expanded clay is a natural material based on clay pre-baked in a kiln, it does not have any foreign impurities and can be used in rooms with any functional purpose.
Small expanded clay
- Expanded perlite. It is obtained artificially and is a product of volcanic activity. To prepare such a backfill, dense volcanic rock, previously crushed into fractions, is heat treated.
Expanded perlite
- Expanded vermiculite. A natural material resulting from irreversible processes occurring during the weathering of mica. It has a layered structure and low volumetric weight. Widely used in the construction industry when installing fireproof insulation in enclosing structures.
Expanded vermiculite
- Crushed slag. It is a by-product of metallurgical production. It is obtained by sudden cooling of hot liquid slag. As a result of such processing, the material crumbles into small dusty particles that have low density and increased porosity, which makes it possible to use it as sound insulation.
Crushed slag
- Pumice. Just like perlite, it is a product of volcanic activity. Has the structure of a sponge. It is obtained by hardening molten rocks containing a large amount of volcanic gases, which explains the porous structure of the material.
Pumice
From the description it is clear that any material used to construct a dry screed has a small volume and an increased porosity coefficient. These properties make it possible not only to reduce the load on the floor slab when installing a subfloor, but also to use the material as a sound and heat insulating layer.
Material calculation
To calculate the volume of consumables, you will need the following data:
- room area;
- backfill layer thickness;
- type of materials.
If the room has a complex shape, then you can divide the surface into sections and calculate their area separately, and then add them up. The waterproofing film is calculated taking into account an overlap of 15 cm, a bend on each wall - 10 cm. As a rule, the length of the film sleeve is 1.5 m, and when cut - 3 m. It is important to understand how the waterproofing will be laid - across or along. Only after understanding all the features can you calculate the consumption.
For example, a room has an area of 20 sq.m. It is planned to fill in 15 cm of expanded clay. The required volume of filler is 20*0.15 = 1 cubic meter. For backfilling, we take the popular “Knauf Kompevit”, packaged in 50 liters and weighing 30 kg.
1 cu. a meter is 1000 liters. Thus, 20 bags will be required for repairs. It is recommended to have a small reserve, since the practical consumption is greater than calculated due to the error.
The area of one Knauf GVL is 0.75 sq.m. For a room of 20 sq. meters you will need 15 sheets.
Floor elements
As mentioned above, after backfilling, the dry screed, brought to the desired level, is covered with protective gypsum fiber boards or asbestos cement sheets. Such elements are produced by the construction company Knauf, called “floor elements” and are distinguished by the following features and advantages:
- On the edge of each of these elements there is a special locking connection based on the groove and tongue principle. This makes it possible to create a continuous structure that will not cause local vertical movement when part of the backfill settles due to operational loads over time.
Shelf element
- The shift of the lamellas at the point where the groove is formed is 50 mm. This design allows not only to join the panels together, but also leaves enough space for fixing them with self-tapping screws.
Element lamellas
- Two types of floor element dimensions are widely available – 120 x 60 cm and 150 x 50 cm. This allows the owner of the premises to minimize the cutting of elements when laying them in the floor structure.
Panels
- The constant thickness of the sheets of 20 mm allows for the smooth mating of any elements, regardless of their linear dimensions.
Sheet thickness
- The panels can be easily cut using a standard grinder with an abrasive disc, or a circular saw with a fine tooth.
Cutting panels
Despite the fact that the floor elements include gypsum binder, they are moisture-resistant materials and do not swell or collapse when exposed to small amounts of water vapor.
Recommendations for selection
Despite all its positive qualities, in practice you may encounter some difficulties when choosing the optimal coating model. To avoid possible complications during the installation process, you must familiarize yourself with the recommendations of specialists.
Since the GVL slab will be attached to the floor, heat loss through the joints should be avoided. To do this, choose a model with a mounting groove. With its help, you can avoid laying two layers of material, as is necessary when installing plywood or OSB.
Another important indicator is the flooring material. To ensure sufficient rigidity, the base must be uniform. In this case, the load will be evenly distributed. Therefore, you can choose models up to 0.5 cm thick. But it all depends on the degree of maximum mechanical pressure on the material.
When choosing, you need to pay attention to the following nuances:
- The condition of the edges is smooth, without defects;
- Package. If the sheets are stored indoors, they may not be packaged. But during long-term storage, condensation may accumulate inside;
- Cost and sizes.
The last factor directly affects the cost. Currently, manufacturers make products with a width of 500, 1000 and 1200 mm. The thickness can be 10, 12.5, 15, 18 and 20 mm. The length varies from 500 to 3000 mm. Standard gypsum fiber sheets have an affordable price, which is determined by their dimensions.
On a note
The average price for a sheet of size 1200*2500*10 from the manufacturer Knauff is 1625 rubles.
Tools required for dry screed installation
The dry screed device does not require complex technological processes. All the tools that may be needed to obtain a high-quality result are sold in every hardware store and include the following required set:
- Tool for marking the future construction of the subfloor:
- The screed must be made strictly on a horizontal surface. Before installing it, it is necessary to assign an elevation relative to the floor slab. This is done using a laser level.
Laser level
- To determine the exact thickness of the structure, the required distance from the projection of the laser beam on the wall is measured using a tape measure or ruler.
Laser roulette
- To record measurements, you will need a construction pencil with a soft graphite lead.
Construction pencil
- The surface mark will be better visible if you stretch a string along the wall along the entire perimeter of the premises.
- Upon completion of the work, it is necessary to inspect the horizontal surface of the floor elements. This work is performed using a bubble building level of 50 cm or more in length.
Nylon lace
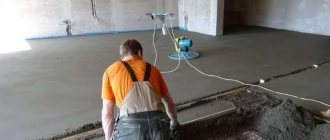
- Backfill smoothing tool:
- Immediately after emptying the container with the filling material, the dry mass is smoothed over the surface of the slab with a rake or a special tool with a wooden board on a long handle, reminiscent of a mop.
Smoothing equipment
- After filling the screed with any material described above, it is necessary to level the surface of the structure. Considering that the subfloor is laid along beacons, leveling should be done using an aluminum rule. The length of the product must ensure simultaneous contact of the edge of the tool with the ribs of 2 adjacent beacons.
Aluminum rule
- If there is a notch during smoothing, additional bulk material is added with a trowel.
Master OK
- If expanded clay or other bulk material is delivered from a point of sale without factory packaging, then it should be transported to the installation horizon in a stretcher, construction wheelbarrow or galvanized metal bucket. Accordingly, filling the container is done using a shovel.
Manual construction stretcher
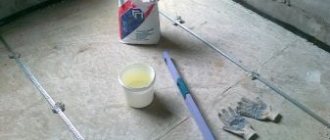
- Equipment for fixing floor elements:
- To fix the slats together, you will need a mounting gun for sealant or other adhesive.
Mounting gun
- After installing the horizon, each panel is fastened together with self-tapping screws, which are tightened using a screwdriver. The tool must be equipped with a function to limit the force on the fastener to avoid its local destruction.
Screwdriver
- To prevent the self-tapping screw from splitting the thin structure of the lamella when tightening it, before installing it, guide holes should be drilled along the entire perimeter of the edge of the floor element. This procedure is carried out using a drill on which a thin drill is installed.
Electric drill
All tools used to install a dry screed must be of high quality and in good working order. If the equipment has already been used, it must be washed, removing the remnants of old materials.
Dry screed care
In order for the screed to serve for a long time and not have to be replaced or repaired, it is necessary to comply with the standard requirements for its care:
- The finished floor must be hydrophobized to prevent moisture from penetrating into the screed.
Hydrophobization of finishing coating seams
- When using the coating, strong impact loads should be avoided.
Impact damage
- When performing wet cleaning, do not leave a large amount of liquid on the floor surface.
Wet cleaning
Otherwise, dry screed is absolutely universal and will not cause big problems for the owner of an apartment or private house during long-term use in standard living conditions.
Where is it used?
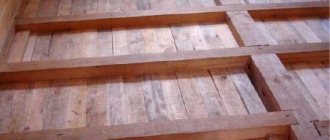
For housing - everywhere, but especially where the load-bearing load of the floors should be minimized. It can be laid on almost any base, be it solid or monolithic reinforced concrete, slabs, wooden floors built on joists and other options.
However, use is not allowed on sites where a slight slope is required, as well as in places where vibration and shock are expected. It is not particularly practical to install dry screed in small areas (storage rooms, toilets, etc.).
Briefly about the main thing
Dry screed is a high-tech replacement for the standard wet subfloor construction. Installation of the surface eliminates any wet processes and does not require hardening time after installation. Only natural materials with low density are used as backfill, which eliminates the negative impact on human health. The filling is carried out along the beacons, after which it is covered with durable material that distributes the load from the weight of the finished floor. During installation, you should separate the subfloor from the wall structure along the entire perimeter of the room, and, upon completion of laying the protective panels, fix them using self-tapping screws.