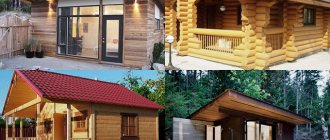
Features of the decorative lining of the stove
High-quality finishing of a sauna stove must meet basic operational requirements: withstand high humidity, temperature changes, ensure durability and safety of the surface. The lined stove should quickly heat the bath rooms and create a comfortable microclimate inside.
Lining a stove in a bathhouse has a number of advantages, including the following:
- fast and uniform heating of rooms;
- heat accumulation for a long time;
- minimal risk of getting burned from a heated oven;
- the air does not dry out;
- simplicity and accessibility of maintenance of finished cladding;
- attractive appearance of heating equipment;
- resistance to mechanical damage and deformation.
Stove selection criteria
With a remote firebox, firewood can be placed from the next room
Before purchasing a cast iron sauna stove, you need to study the criteria for choosing a heating design:
- The calculated heating area - performance is indicated in the performance characteristics of the product. The parameter depends on the dimensions of the stove.
- Firebox type – standard or remote. The location of the firewood depends on its design.
- Heat retention period - the characteristic shows how many hours a heated oven will maintain a high temperature.
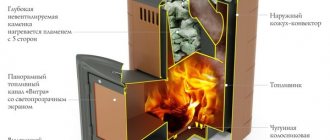
- The device of the heater is open or closed. This choice depends on the personal preferences of the future owner. There is no fundamental difference, both designs work great.
- Type of firebox door - the design can be solid and with a screen made of heat-resistant glass.
- Wall thickness is a standard value of 10 mm. The thicker the walls, the more durable the product.
- Type of fuel – the wood-burning cast iron sauna stove is especially popular, but there are gas or combined models.
Additional characteristics include the possibility of installing a water tank.
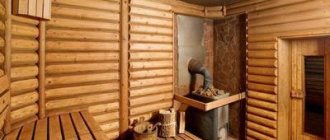
Types of stove lining
In addition to the fact that the stove is the main heating equipment, it also performs an aesthetic function.
The cladding of the sauna stove is made using practical and durable decorative materials:
- ceramic tiles;
- refractory bricks;
- artificial and natural stone;
- decorative plaster;
- tiles;
- frame made of metal plates.
All materials are distinguished by high performance characteristics and installation features.
Ceramic tiles - elegance and durability
The best material for lining a sauna stove is ceramic tiles. It is easy to install, affordable and durable.
The following types of tiles are used for facing work:
- Clinker room. It is made from red clay with the addition of fireclay, melting agent and dye.
- Majolica. Material with a pressed base, covered with a protective glaze layer. This type of tile is distinguished by its rich color scheme, decorative patterns and ornaments.
- Terracotta. A facing material whose performance characteristics are similar to majolica. Important differences are the porous structure and the absence of a protective glaze. Terracotta is characterized by durability, increased strength and resistance to mechanical damage. This type of tile is made in a round shape.
- Marble. This material is distinguished by its increased wear resistance, practicality and ease of installation, and is devoid of almost all disadvantages.
When choosing this type of finishing, stove owners ask themselves the important question of which tiles are best for covering heating equipment. Experts believe that the best option is a material that has a minimum coefficient of thermal expansion and a dense structure - clinker tiles.
Firebrick: reliability and safety
Decorating a sauna stove with brick is the simplest and most budget-friendly option for owners who decide to do the cladding themselves.
The material has a number of advantages:
- fast and safe heating;
- accumulation and maintenance of heat for a long time;
- resistance to high moisture;
- low cost and ease of installation.
Work on lining the stove in a bathhouse with bricks consists of arranging a reliable decorative screen around the entire perimeter of the equipment. To increase aesthetics and attractiveness, it is allowed to combine materials of different colors.
To fill the joints, it is recommended to use grout that is resistant to high moisture and temperature changes.
Artificial and natural stone: exquisite nobility
The main advantage of cladding with decorative stone is the creation of a noble and attractive appearance. High strength, durability, environmental friendliness, resistance to high temperatures, a variety of color palettes and textures allow the material to be used for finishing bath rooms.
The following types of stones are used for facing work:
Decorative stones can withstand an unlimited amount of heating; they accumulate thermal energy well and maintain a given temperature for a long time. In addition, this material is resistant to acids and alkalis.
In terms of their performance characteristics, artificial elements are not inferior to natural stones. With their help, you can qualitatively line a stove in a steam room or a fireplace in your home.
The technology for laying stones is simple and therefore does not require additional preparation. Non-standard shapes of elements can cause some difficulties during the fitting process, so before installation it is recommended to lay out the material on a flat base. The stones are numbered and fixed on the surface of the furnace using an adhesive composition.
Decorative plaster: simplicity and accessibility
A simple option for lining a Russian stove is plastering the surfaces. Over time, the decorative and protective properties of the plaster composition decrease, which will require frequent renewal of the cladding.
Important! Decorative plaster is used only for brick stoves and is not suitable for metal devices.
Plastering a stove in a bathhouse is simple; all work is performed in the following order:
- the surface is cleaned of dust, debris and remains of the connecting solution;
- the seams are cleared to a depth of 10 mm;
- Before the cladding begins, the oven warms up;
- a mesh of metal rods is installed on the surface with wire fixation;
- the surface is moistened and a primary layer of plaster mixture is applied;
- After the plaster has hardened, a second layer is applied.
The thickness of each subsequent layer does not exceed 6 mm. The plaster solution is applied using a trowel and leveled over the surface with a spatula. When plastering the surface, it is necessary to avoid the appearance of defects - air bubbles and sagging.
After hardening, the top layer is thoroughly cleaned until a smooth surface is obtained.
Tiles: originality and practicality
The use of tiles is an ancient method of cladding stove equipment for a bath. Tiles are tiles made from pottery plastic clay by firing in a kiln at a temperature of more than 1000 degrees. On the back of the tile there are pumps designed to fix the material on any surface. Tiles are presented in several categories:
- with a smooth surface;
- majolica;
- with glazed surface;
- with a relief surface.
Tiles are distinguished by high performance characteristics - durability, practicality, strength and high heat transfer.
The work of tiling should be entrusted to professionals who will do a good job of installing the material on the surface of the stoves.
Metal frame: accessibility and safety
A sauna stove can be lined with a metal frame, which is installed on top of the device and covered with protective shields. The steel frame provides reliable protection for the furnace portal and an optimal level of heating of the air in the room.
This type of cladding has the following advantages:
- accumulates released thermal energy;
- quickly heats the air and walls in the room;
- It is distinguished by its affordable price and ease of installation.
A serious drawback of such cladding is the likelihood of burns upon direct contact with the surface. Therefore, experts do not recommend installing metal frames for stoves in bathhouses in order to avoid possible injuries.
A competent choice of decorative material for cladding and adherence to the technological process will ensure the correct operation of the sauna stove and the creation of a comfortable microclimate in the premises.
Step-by-step operating instructions + photos
Before you begin construction work on lining a metal stove in a bathhouse with bricks, you need to stock up on all the necessary tools and materials.
Materials needed for laying the stove.
- Red solid ceramic brick (M-150.)
- Masonry mortar (sand, red oven clay).
- Foundation material (cement, crushed stone, sand).
- Ruberoid.
- Boards for creating formwork.
- Reinforcing mesh.
Tools needed for laying a stove.
- Building level.
- Shovel
- Construction marker.
- Measuring tape (roulette).
- Construction plumb.
- Trowel.
- Goniometer.
Before starting work, you also need to decide on the location of the metal furnace.
It can be placed in the very corner of the bathhouse. This will reduce your brick consumption. Or you can install a metal stove on a brick base, raising it 50-60 cm above the floor.
If the stove is installed in a bathhouse from scratch, it is necessary to take care not only of building the foundation, but also of reliable protection of the wooden floors.
To increase the fire safety of the room, it is necessary to line the wooden ceiling (walls, floor) next to which the stove is located with basalt slabs. In this case, the height of the slabs should exceed the size of the structure by 40-50 cm.
The wall near the stove should be lined with basalt slabs
For secure fastening, use self-tapping screws.
Step 1. We build a foundation for the stove.
The foundation for the stove is the most important stage of construction work, on which the strength and durability of the entire structure depends. If, at the stage of building a bathhouse, you have already paid great attention to the construction of the foundation for the stove, then for cladding you will not need to additionally build another foundation.
Stove base
If you are not sure of the strength of the old foundation, then it is better to spend time and build a new one, because the weight of the structure, after cladding, will increase significantly.
Important! Under no circumstances should the foundation for the stove be connected to the main foundation of the bathhouse. When the structure shrinks or other phenomena occur, the base of the furnace should not be deformed.
If the mass of the stove together with the brickwork does not exceed 700 kg, then a separate foundation need not be erected.
If a metal stove was already functioning in the bathhouse, then it must be dismantled before starting work.
Marking the foundation for the stove. Example
- Once you have decided on the location of the stove, mark a rectangle on the floor with a construction marker along which you want to cut the boards. Keep in mind that the size of the foundation should exceed the size of the stove by 10-15 cm on each side.
Scheme of pouring the foundation for the furnace
- We cut out the boards and move them to the sides.
- Now dig a pit 40 cm deep. Use a bayonet shovel for this work.
- We build wooden formwork, which serves as a frame that forms the foundation. For formwork, you can use plywood boards, old floors that you have on the farm. Measure the length and width of the hole you dug and cut the boards to this size. We connect the boards and lay them inside the hole.
- Now we proceed to waterproofing the foundation.
Waterproofing with roofing felt
This is the most important component of the work when constructing a foundation. If frozen, moisture-saturated soil comes into direct contact with the concrete base of the furnace, the foundation may collapse over time.
- After the formwork is firmly installed and waterproofed, we add a cushion whose task is to retain moisture. At the bottom of the pit we pour medium-fraction crushed stone and sand (approximately 10-15 cm).
- We fill the foundation with cement mortar and lay the reinforcing mesh on top. Don't forget to check with a building level how level the foundation is. If necessary, correct the error.
- We take a technological break, waiting until the foundation completely hardens. This may take 2-3 weeks. Take your time and do not start facing work ahead of schedule, as a damp foundation will not provide adequate strength.
Step 2. Making the base for the stove.
- After you have made sure that the foundation has completely hardened, you need to lay out the base in one layer of brick.
- Check the levelness of the masonry with a building level.
- We create waterproofing of the base with roofing felt.
- We lay an iron sheet on top, which should exceed the size of the brickwork by 10 cm around the perimeter.
- We place a metal stove on top and once again carefully check the horizon with a level. So that after completing the work you do not have to clean the oven from the solution, wrap it in polyethylene.
Wrap the oven in polyethylene
Step 3. Prepare the solution.
The ideal solution for lining a metal furnace is a mixture of clay and cement. There is no exact proportion; the focus here is rather on consistency. In appearance it should resemble thick sour cream, without lumps or stones.
Kiln makers advise taking equal amounts of clay and cement, adding about 30% river sand.
The solution for lining a sauna stove is prepared more simply than for conventional stove laying. The main condition is to achieve a homogeneous mass.
Mixing the masonry mortar
- To do this, stir the dry mixture in a separate metal container and add water. Add water gradually, otherwise it will be very difficult to get rid of lumps.
Clay mortar, masonry, checking the mixture
- Stir the mixture with a construction mixer or a drill with an attachment until it has a homogeneous consistency.
- Let the solution thicken - 30-40 minutes. If you are not sure that you can complete all the construction work in one go, then do not prepare the entire solution at once. Do only as much as you need to lay the brick. It becomes thick quite quickly and will be difficult to work with. If for some reason you have a large amount of the previous solution left, then it is better to dilute it not with water, but with sand and water.
To test how good the masonry mortar is, take a small amount of the mixture and apply it to the brick with a trowel.
Apply mortar to brick
The mortar should not slip or flow from the brick. If the consistency is not enough, you can add a small amount of sand to the mixture.
Step 4. Preparing the brick for cladding.
Measure out the amount of brick you will need for the first stage of work. Take a portion of red ceramic brick, clean it well and soak it in water for 12 hours.
Soak the brick in water
This is necessary so that it does not absorb moisture and mortar during laying.
If you are using old brick, clean it well before laying.
Step 5. Furnace lining.
There are several masonry options: solid well or lattice. The lattice version looks more decorative, but due to the large number of holes, the efficiency of the heat shield is significantly reduced.
Lattice masonry
If the stove body is round, then the masonry must be done in exact accordance with the shape of the stove. This, of course, will require much more effort and skill, but the ordering technique itself will not change.
The distance between the metal body of the stove and the stone should be at least 4-5 cm, and there is no need to make any jumpers or place spacers between the two materials. When heated, the metal will expand, which in turn will put pressure on the brick, or the stove body itself may be damaged.
Brick-lined stove
Here it is very important to calculate the optimal distance between the brick wall and the metal body of the stove. If you make it too small, the brick will quickly deteriorate and crack. If you make it large, it will prevent the oven from heating properly and the steam room will not have the required temperature.
The average oven size is 13-15 rows. It is better to divide the work into 2 stages. On the first day, lay 7-8 rows and leave overnight. On the second day, check the shrinkage of the structure and complete the remaining rows.
The thickness of the laying is made to the floor of a brick. This will be enough for the stove to accumulate heat and quickly warm up the room.
Furnace lining process
Laying bricks for the purpose of lining a metal stove is no different from laying a conventional stove.
- We start each row from a corner, and after laying it, we check it horizontally with a building level. To accurately maintain the angle of the masonry, use a protractor or plumb line.
- Using a trowel, carefully apply the mortar to the brick and immediately remove excess mixture. Be careful not to leave any solution on the inside of the heat shield. Otherwise, it will dry out, and this will reduce air circulation inside the structure.
- Lay reinforcing mesh on the second row to add rigidity to the structure. And tie the 2-1 and 3rd rows together with wire.
- The second row involves air gaps through which hot air will escape out. It will be enough to simply leave two gaps of ½ brick for this. Repeat this on rows 6 and 8. You should not make too many of these ventilation holes, as this may reduce the effectiveness of the heat shield. Two at the bottom and at the top will be enough.
- We lay out the third row in the same way as the first, but follow the checkerboard order. Maintain a 5 mm seam.
- Depending on which row you will have the hole for the firebox door and vent on, we lay the row on a metal corner. To add rigidity to the structure, it would not be amiss to strengthen this row by tying it with metal wire. Take into account the movement of the firebox door, which in no case should touch the walls when opening.
- The last row can be made arbitrarily, decorated with a ladder or simply sprinkled with stones.
Some people prefer to finish the brickwork at the slab level where the coals are located. This allows you to admire the hot coals, and some cover the smoke exhaust pipe with masonry.
This does not change the order, so choose the most optimal option for yourself.
Step 6. First firing of the furnace.
After you have laid a stone well around a metal stove, it is very important to prepare it for further use.
Kindling the stove
There is no need to immediately set the maximum temperature. Perform 2-3 test fires, using a minimum amount of wood and not raising the stove to maximum temperature.
This will allow the solution to dry well and the stove will serve you for a long time, and the bathhouse will delight you with a good temperature and a cozy atmosphere.
Using tiles
The tiles on the stove in the bathhouse are afraid of thermal expansion, therefore, when performing work, it is important to carefully follow the technological process. The lining of the stove in the bathhouse does not tolerate negligence.
Typically, 7 types of tiles are used for cladding:
- Terracotta is a tile that has not been glazed. It consists of terracotta clay and fireclay, which are mixed in a certain ratio. Such tiles have been known for several centuries. A correctly implemented technological process greatly influences the final quality of the material. This tile can be easily recognized by its characteristic red tint.
- Clinker tiles - clay is the main raw material. The material is obtained by pressing, then it is fired at a temperature of +1200 0 C. The crystal lattice of the clay changes and the tile acquires the properties of ceramics.
- Majolica is very difficult to produce. Previously, only manual labor was used for drawing. Now there are industrial designs. The glaze on the tile is obtained by firing. Properties resemble terracotta tiles.
- Tiles are the most preferred option due to the air gap between the tiles and the oven wall. This layer works as an additional heat insulator, allowing the stove to retain heat near itself even longer.
- Porcelain tiles can also be used for lining a stove. Marble chips added during the production of porcelain stoneware give the material unique decorative properties and high strength. Due to this, porcelain tiles are rapidly gaining popularity.
- Fireclay is able to withstand direct exposure to fire. Fireclay is pressed into blanks and fired at a temperature of +1300 0 C.
- Tile - only a material with a high heat resistance coefficient can withstand temperature loads.
Instructions
Do-it-yourself tiling of a sauna stove is done as follows:
- It is necessary to properly prepare the surface. All traces of old finishes must be removed from the wall. Each seam should be selected at 10-15 mm.
- We dilute a deep penetration primer and add marble chips to it. Carefully prime the surface. Do not forget that the primer must dry (at least 24 hours).
- We stretch and fix the metal mesh using dowels. Such reinforcement will significantly increase the strength of the structure.
- The tiles should not be laid on an uneven surface. We level the wall with plaster. We recommend using stove mortar that is specifically designed for plastering stoves. The plaster must be allowed to dry for 48 hours.
- Apply the facing adhesive evenly to the entire surface of the tile. Carefully cover the surface of the stove and press lightly. The tiles can be leveled in about 10 minutes. Then the glue will set. We check the correctness of the masonry using a level. The glue layer should not exceed 1 cm. To make the seams even, we use special crosses. The thickness of the seam is 2-3 mm.
- When the glue dries, we grout the joints.
Basic rules for working with tiles
Since tile is one of the most popular materials for cladding a stove (not counting brick and plaster), I will dwell a little more on the nuances of working with this material.
- Prepare the surface. Clean the walls of the heater from dust and dirt. Deepen the seams between the bricks by 5-10 mm. Wipe the entire surface of the oven with a damp cloth.
- Mount the frame. To prevent the finish from cracking due to sudden changes in temperature and due to the unequal linear expansion index of brick and tile, it is better to install a frame in the form of metal corners. The corners are quite thin, so they will not protrude beyond the masonry. Complete the preparatory stage by attaching a metal mesh to the walls with snipes.
- Plastering. Before applying the plaster, you need to light the stove so that its walls warm up to about 50 degrees. Moisten the hot surface generously with water, and then apply the plaster solution over the metal mesh from top to bottom.
- Tiling. Proceed with this stage only after the plaster has completely dried. Moreover, start finishing from the bottom corner. Grind the seams after the adhesive has completely dried.
For a double-circuit oven with uniform heating, you can use any finishing material and any solution. But if you have a single-circuit heating structure with uneven heating, you need to choose the solution wisely. A strong cement composition is not always suitable, since the solution can tear the cladding due to movement in the brickwork. Weak cement will not work either, since the tiles simply will not stick to it. The optimal solution is silicone sealant, which retains mobility and at the same time holds the cladding well.
After grouting, clean the tiles from dust and adhesive residues. Cover the tiled walls with heat-resistant impregnation.
If the oven gets very hot, you will most likely have problems with the cladding. This is due to the fact that brick walls and tiles have different rates of linear expansion when heated. This will eventually cause the facing layer to separate. Moreover, neither expensive adhesives, nor wrapping the heater with mesh, nor additional frames will help solve the problem.
There are several key tasks in arranging a bathhouse. The main one is the installation of the stove. The comfortable atmosphere in the room and the effectiveness of the bath procedure depend on how quickly this object heats up. Both cold and overheating can have a negative impact on the health of the owners. You can line an iron stove in a bathhouse with bricks to preserve heat.
Finishing the stove with bricks
Traditionally, the stove lining is made with brick. This material is also suitable for wooden walls near the stove. It is an additional heat accumulator.
The following types of bricks are used for cladding the stove:
- ordinary ceramic brick (solid);
- refractory fireclay brick.
It is not recommended to use silicate and hollow bricks. It will not hold heat well and will collapse. Fireclay brick is preferable to use, but it is more expensive.
Instructions
- The laying is done using a mortar specially designed for ovens. It will ensure optimal structural strength.
- The foundation design must be designed to withstand such a load. Otherwise, you will have to make a separate foundation.
- The masonry is done in half a brick. The brick is placed on the bed. We start laying from the corner, bandaging 1/3.
- For heat exchange, ventilation holes must be provided in the masonry.
- Between the rows we reinforce the masonry with mesh.
- After completing the masonry, we perform jointing.
Examples of brick lining a stove in a bathhouse in the photo:
Stone
Decorative stone will fit well into a modern interior. Finishing the stove in the bathhouse with decorative stone will give it a finished look and will serve as an additional heat accumulator.
Kinds
The stone for cladding a sauna stove can be natural or artificial. Both types can be used when lining a sauna stove with stone.
- Natural stone - serpentinite, jadeite - has been used since ancient times when deciding how to decorate a stove in a bathhouse. It is very durable and holds the temperature well in the steam room.
- Artificial stone is, in fact, the same tile that repeats the pattern of natural stone in a steam room. The main advantage of this material is its low weight, which allows you to line the stove without an additional foundation. Artificial stone is cheaper. Therefore, it is becoming increasingly popular in the steam room.
Instructions
Finishing a sauna stove with stone is done in the same way as tiling. The glue should be applied evenly to the surface of the stone and to the wall. The thickness of the layer is 1-2 cm. If, as a result of cladding, a certain pattern should be obtained, you first need to make markings, number the necessary stones and only then proceed to cladding.
Examples of stove finishing with stone in the photo:
Photo 1
Photo 2
Photo 3
Photo 4
Do-it-yourself finishing of a metal stove in a bathhouse with bricks and tiles
There is no bathhouse without a stove, so it must be included in any project. Usually they install a wood-burning stove, which can work as a heater to generate steam in the steam room. The boiler only copes with the heating function, but does not produce steam. If there is little firewood in the region, then they install the lowest-power heater, and compensate for the lack of heat with a boiler.
The sauna stove can be either ready-made or built independently from brick. In any case, finishing of the stove in the bathhouse is necessary. It is required as it protects wooden walls from overheating. You can finish either the stove or the walls, or both. The stove cannot be used without finishing, except in very rare cases when the stove is located in the middle of the room.
Cladding rules and complexity
If the basic rules of cladding are violated, difficulties may arise. The creation of the first row is considered the most problematic. It must be checked for height. For corners, you should choose metal corners, as their plastic counterparts can cause deformation. For complete gluing it will take from 24 to 36 hours, since a break should be taken after every fifth row. The correctness of gluing is checked after each row. And after finishing the cladding, the seams are carefully rubbed down.
Finishing the stove in the bathhouse with various materials
The finishing around the stove in the bathhouse can only be made from safe fire-resistant materials. The most common one is brick, but this is not necessary. Other materials are also suitable:
- Red stove brick, decorative facing brick;
- Tiles, ceramic products for decorating fireplaces;
- Natural stone: various slabs and tiles made from it;
- Decorative plasters (applied only with a thick fire-retardant layer);
- Steel fire-retardant finish (requires good design work).
As you can see, the choice of materials is quite large. Brick is reliable and practical. The rest of the materials are taken either because of the design, or when the budget for bricks is not enough, but another fire-retardant material is already available. We will consider the finishing of each type of material in more detail.
Quality and safety
Quality depends not only on the skill of the builder. It is important to take care of the preparation of materials and tools, as well as personal safety. All work should be carried out in special protective clothing. Special attention should be paid to protecting the skin of the face and hands from mixtures. For this you will need special glasses and construction gloves. They will avoid not only contamination, but also possible allergic reactions.
Cladding stoves with artificial stone is a modern solution for a private home, affordable. You can do it yourself and not spend a lot of time on it. If you follow the rules of work, the result will please the eye for decades.
Benefits of brick
This solution can be seen in almost any bathhouse. The brick finish protects the wall from overheating. Very often this protection is made even more powerful and extended to the floor. Finishing the stove in a bathhouse with brick performs both a protective and decorative function. For it, the same type of brick is taken as for the rest of the stove, or another facing brick of the required appearance is additionally purchased.
The rules for brickwork for walls, the stove and the protective portal around the stove are general.
Strict adherence to row levels and neat and thin seams are necessary.
On the walls and in the oven, bricks are laid with overlapping seams. If the portal is laid out in one layer, then it is not at all necessary to comply with this requirement. This is why you can often see protective portals where bricks are stacked on top of each other.
The horizontal row is checked by level. Covering the wall with bricks is plumb. For a corner stove, three planes are laid out with bricks, two on the walls and one on the floor.
For a stove near the wall, there are only two, of which one is located on the floor, and the second is on one wall. Brick, even if it is laid in one layer, has good thermal insulation ability. Its masonry is carried out directly on wooden walls and floors without other fire-retardant insulation.
It is advisable to lay out the horizontal part of the portal in one row between the foundation of the furnace and the subsequent masonry next to it. This advice should only be followed with brick sauna stoves. It is not suitable for metal ones.
In baths, thick fireproof cardboard, mineralite or basalt wool are most often used. There are also basalt cardboard and other materials that are a variation of the previous ones. Minerite is the most preferred. These are ready-made boards specially designed for thermal protection in areas around stoves.
More about protective screens
They are used to protect the surfaces closest to the heating unit from the harmful effects of emitted infrared radiation, reducing the spread of infrared waves.
They are panels, sheet or built (depending on the material used) around the entire perimeter, in a corner or in some part of the room. There can be two types.
Made of metal
They are made of steel or cast iron, fixed around the heating device, with the required clearances. Small distances are necessary to maintain proper air convection. To ensure the possibility of adjustment, they are not fixed rigidly - with bolts on the floor.
There are 2 types of them:
- frontal - exposed to direct infrared radiation coming from the firebox;
- lateral - perceive already reflected infrared waves.
They become even more effective after painting with a fire-resistant composition.
Made of brick
Such protection is laid out after you have equipped the portal for the stove in the bathhouse - in half a brick (fireclay, hollow, fireproof), with technological gaps measuring 6 cm or more and with air ducts in the lower part, located at a distance of over 25 mm from each other.
The erected screen should rise 25-30 cm above the firebox, then it will fully reveal all its advantages, namely:
- stability in conditions of high humidity and temperature;
- low thermal conductivity, and hence the risk of injury - accidental burns are practically excluded;
- transfer of soft heat from the heating unit;
- long-term preservation (accumulation) of heat.
Ceramic tile
Ceramic tiles have the same fire resistance as brick.
At the same time, she simply has an incomparably greater variety of appearances.
Now, instead of tiles, almost all manufacturers have mastered the technology of semi-dry pressing, which allows you to create any designs and textures on the surface of the tiles.
This material received the trade name “Porcelain stoneware”, although it does not contain granite. Finishing a stove in a steam room with tiles has its advantages, and the main one is the variety of design solutions. Unlike brick, tiles can be any color.
The side of the old tile had a size of 10-15 cm. With modern porcelain tiles, the side length can reach 40 cm. The longer the side, the more accurate the coating. It has fewer seams, but the complexity of installation increases significantly. Porcelain tiles should be laid by specialists.
This requires a lot of experience. If the tiles are small, you can do the tiling yourself. There are no particular difficulties here. Laying is carried out using a conventional solution on a sheet of heat insulation. It is better to use a special solution based on a dry construction mixture for the appropriate purpose.
Natural stone is as fire resistant as brick. It is equally suitable for finishing a stove, but its appearance is much more decorative.
The finishing of the stove is carried out not with raw stone, but with finished products made from it. These are tiles or special stone elements for finishing fireplaces.
Classic types of stone are used: marble, granite, but in a bathhouse they may be inappropriate in design and expensive. In this case, they are replaced by cheaper sandstone and slate stone. Slate stone is often cut into flat pieces, so its price is very low.
Finishing the stove in a bathhouse with decorative stone begins with the selection of material. Untreated stone is cheaper, but its surface in a bathhouse can quickly become dirty.
The part of the portal that is laid out on the floor is especially susceptible to contamination.
Despite the fact that untreated stone looks beautiful, it is recommended to use a polished and honed version for a steam room.
Tiles are a classic solution for finishing stoves. They have cheap production technology and very reliable installation. The external surface, finished with tiles, looks like high-quality, thick tiles.
This appearance will be achieved only if you use tiles without a pattern on the front surface. They do not produce a special decorative effect, since they do not differ much from the usual tiles. The only benefit is in the strength of the fastening, which is why other tiles with a three-dimensional pattern on the front side are more popular.
Tiles are laid in the same way as tiles, but require a significant thickness of the finishing layer. If a portal for a sauna stove is made from them, then part of the wall and floor is covered with tiles. They don’t have to be used on the floor if the stove foundation is raised above the floor by one or two brick rows.
If the tiles have holes for wire, then it must be used.
The diameter of the rods is selected according to the instructions. Larger diameter means higher strength, but the complexity of installation increases.
On average, tiles are the same thickness as one brick.
They can just as well be used to create the same protective layer.
Oven screen options
It is recommended to line the sauna stove with half a brick; this is the best option. If the screen is made as thick as a brick, it will take a long time to heat up. In addition, a foundation will have to be built for such masonry. If you resort to a quarter-brick design, the bathhouse room will warm up quickly, but the radiation will be harsh. Regardless of the thickness of the masonry, the distance between the surface of the metal stove and the wall varies in the range of up to 10 cm.
The screens can be a solid structure with ventilation windows, while the chimney is often also made of brick. Another solution is possible: to cover only certain elements of the furnace.
As for decor, there are many different options. The neatly executed masonry itself looks quite beautiful. The color of the red brick contributes to the design of the stove structure. At the owner's request, the bath stove can be faced with porcelain stoneware, decorative brick, natural stone, and tiles. The choice is a matter of taste and the costs planned for these purposes.
Decorative plaster
Plaster for stoves began to be used relatively recently. Indeed, a good stove does not need to be plastered. It is made either of high-quality brick, which in itself looks decorative, or of metal, which also does not need plaster.
In this case, we are not talking about plastering the stove itself, but about creating a protective separating layer of plaster between the walls and the stove. Plaster is quite suitable here.
Finishing the walls in the bathhouse around the stove with decorative plaster is especially often done when the stove is not placed in a steam room.
In this case, the requirements for moisture resistance are much lower.
Disadvantages of cast iron stoves
The main disadvantage of the unit is its high cost, which not every person can afford.
In addition, it is important to choose the model wisely so as not to make a mistake with the quality of the alloy. And, unfortunately, it can be different
Many experienced stove makers do not trust Russian cast iron, considering it to be of lower quality. But Swedish-made stoves with solid cast iron fireboxes are called the standard of strength. In these models, the doors are adjusted manually without the use of a seal. At the same time, the level of work of the craftsmen is so high that in the end the oven chamber is completely sealed.
If you do not make gross mistakes during operation, such a boiler will never burst, despite temperature changes. The same cannot be said about low-quality cast iron, which is terribly afraid of temperature changes, when in two adjacent places the temperature difference is more than 80 degrees. And such an incident can easily happen if, for example, cold water is accidentally spilled on the stove, which happens in a bathhouse. Therefore, many Russian leading manufacturers of bath equipment do not make cast iron stoves. And those companies that do create sauna boilers from cast iron strongly recommend that buyers of their products treat it very carefully.
Steel case
Steel is also a fire-resistant material. It cannot be left untreated, as it will instantly rust in a bathhouse. When finishing the space around the stove with steel, you need to keep in mind that unlike brick, tiles and stone, steel does not insulate heat at all.
A protective portal around the stove made only of steel will be completely pointless, since it will not be able to fulfill its main task - to protect wooden walls from overheating. In order for this function to be fulfilled, it is necessary to provide a good heat-insulating layer of another material, and then cover it with a facing steel sheet.
This heat-insulating separation layer is created from mineralite. Other fire retardant insulation materials can also be used. Simple mineral wool is not suitable, since after getting wet once it shrinks in volume, and this defect cannot be corrected by anything.
The insulation near the stove should not get wet. You need to take care of its waterproofing. Moreover, this waterproofing should only be on the side of the cold wall, but not on the side of the stove.
Steel has a metallic luster. This effect can be used to greatly increase the efficiency of the portal.
If made from uncoated polished stainless steel, it will act as an infrared reflector.
A similar element can very often be seen in electric fireplaces, heating stoves and any other heating devices.
The main difficulty of this solution is the need to use only stainless steel. Compared to ordinary steel, it costs 10 times more, but the total thickness of the sheets for the reflective screen can be small.
Stainless steel perfectly withstands any humidity. It can even be placed in rooms such as a steam room in a bathhouse; the decoration around the stove will be compact and with a modern design. In a steam room, all interior elements are usually made only from wood. Stainless steel would be appropriate next to a metal stove-stove.
Restoring air exchange
In your case, the chimney is clean, the doors are fitted, but doesn’t that make it any easier? Then why does the stove smoke? Possible reasons can be found below:
- The pipe does not have a protective cap. In windy weather, blowing occurs. Wait until the disaster ends and take measures to install a life-saving “cap”.
- The cause of smoke from the stove door or ash pan may be a branchy tree hanging over the chimney. The obstacle prevents the outflow of air, gusts of wind are reflected into the pipe. A reverse draft appears, the smoke does not go up, but into the room. Exit: remove branches in the near-pipe space. By the way, try the method if you are puzzled by finding an answer to the question of why a new stove smokes. Possible reasons are on the surface, you just need to analyze the situation and inspect the area: is there a high wall nearby? This is also a risk factor in terms of air backflow. It is not necessary to destroy the barrier or cut down all the surrounding trees - protect the pipe with a cap.
- The roof ridge is located above the chimney. This interferes with normal air exchange. Extend the pipe and everything will go as usual.
- The masonry was destroyed by bad weather (it’s not in vain that evil winds, heavy rains, and severe frosts try their best). The wind blows through the crack. Air pockets form. The craving is broken. In this state of affairs, urgent repairs are needed.
Fire protection system in the partition
To achieve maximum heating efficiency in a bathhouse, it is advisable to place the stove in a partition. In this case, it will heat the partition, and not the outer wall or corner, which is much more rational and profitable, since firewood or gas will be well saved.
The partition in the bathhouse near the stove should be well protected. All the same methods are suitable for this as for the usual placement of the furnace. You can use all the techniques described above (brick, tile, metal) both for the outer wall and for the partition.
A brick partition in a bathhouse near the stove will be the most convenient option. It should be noted that brick partitions are often found in wooden bathhouses. Basically, they are made there for design reasons because of the beautiful facing bricks, but the option with a stove is much more functional.
The result is a highly efficient bathhouse for heating; the partition-stove in it is located in the center of the building and does not lose heat. In this case, the portal around the furnace is made lighter. For its construction, it is appropriate to use the same brick as for the rest of the partition. In this case, you will not need to purchase additional materials. If the design requires it, you can use any other option.
Construction of the foundation
The strength of the structure and how long it will last depends on the foundation. It also happens that the old foundation fully meets the requirements. But if this is not the case, it is better to spend time and effort building a new structure. It should be taken into account that its weight after finishing work will increase significantly. Under no circumstances should you connect the foundation for the furnace to the main foundation of the building. The base should not be subject to deformation.
If the total mass of the furnace with brickwork is no more than 700 kg, no foundation is required. If there is an old metal stove in the room, it will need to be dismantled. After determining the location of the object, draw a rectangle along the floor surface with a marker. Boards are cut according to its contours. They need to be put aside for a while and work on arranging a pit 40 cm deep. For this you will need a bayonet shovel. Form the formwork necessary for the foundation.
Floor boards and pieces of plywood are suitable here. They must be connected and placed inside the recess. After this, waterproofing is started. This is one of the most important stages in the work. In the presence of wet and soaked soil, the foundation will be constantly exposed to adverse effects and will sooner or later collapse.
As soon as the formwork is waterproofed and fixed, a cushion is installed. It will retain moisture. Pour medium-fraction crushed stone and sand onto the surface of the pit, pour in cement mortar and lay a metal mesh. Level with building level. Next, the foundation is left to cool. This process may take up to 3 weeks.
Fire safety requirements
When installing any sauna stove, it is necessary to strictly comply with fire safety requirements, since the walls of the device heat up to fairly high temperatures during its operation. In order to ensure maximum safety and not have problems with regulatory organizations, it is recommended to install the stove in accordance with the provisions prescribed in SNiP 41-01-2003 (Chapter 6.6).
- The first thing that needs to be done is to equip a reliable foundation for the main structure of the stove, which will be adjacent to the wall dividing the room. The foundation should be covered with heat-resistant material and then with metal sheet. Asbestos sheets were previously used as heat-resistant insulation. Today on sale you can find panels of pressed mineral wool, which is less dangerous from an environmental point of view, sheets of foam glass or EZHKAKH (heat-resistant structural mica plastic).
- It is also necessary to provide a metal flooring in front of the combustion door, which will prevent the wooden floor from catching fire and simplify debris removal. The size of the pre-furnace sheet must be at least 400×800 mm.
- If the partition between the steam room and the dressing room is wooden, then the opening through which the fuel channel will pass must be separated from the wood by brick or stone masonry. The distance between the stove and wooden walls should be 400÷450 mm.
In the version shown, the owner chose to fill the opening with bricks
- Provided that an opening is installed along the end part of the wall through which the combustion channel will pass, a gasket made of heat-insulating material (mineral basalt wool or cement-fiber sheet) with a thickness of 40÷50 mm, the distance between the part of the wall built from combustible material and the outer wall oven can be reduced to 250 mm. If thicker thermal insulation material is installed, the safe distance can be 125 mm.
- The distance between the ceiling of the bathhouse and the surface of the stove should not be less than 1200 mm.
- The distance from the edge of the combustion door to the nearest door must be at least 1250 mm.
- If you purchased a non-factory-made stove, or the device is independently made from sheet metal, then it is best to cover it with brick. Thus, it is possible to protect the structure of the bathhouse from fire, and people taking water procedures from burns. Factory products, as a rule, are made with double walls, between which thermal insulation material is laid or convection channels pass through.
Ventilation windows for convection of air leaving and entering the oven
This is an important option that allows you to stabilize the air flows “washing” the furnace and improve the uniformity of heat transfer. If it is round (stove), then the ideology of ventilation ducts is preserved. Try to arrange them symmetrically, on three sides (conditionally), with two windows at the top and bottom, as it would be approximately in a rectangular masonry.
Classic option: two windows in the second row from the top and the second row from the bottom. So, on each side. The lower openings will provide suction of cold air, and the upper ones will provide the release of heated air. In addition, circulation will have a beneficial effect on the metal of the furnace.
Nuances you need to know when starting cladding
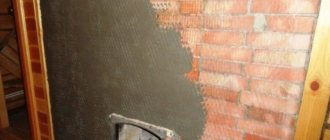
In general, the laying of bricks for cladding in terms of technology is no different from the laying of stove walls. However, when deciding to line a cast-iron or iron stove with brick, pay attention to the important points listed below.
- every 4th row of facing masonry with wire or steel strip. The firebox opening (including the opening of the remote firebox) is reinforced with a metal corner.
- During the DIY cladding process, you will need a heat insulator. Asbestos or basalt cardboard can be used as it.
- Review all purchased bricks for defects (chips, cracks, etc.). Take the time to lay out the material on the floor, adjusting brick to brick so that the pins touch with the smallest possible gap. Follow the same order when you lay the bricks on the mortar.
- The masonry mortar must match the chosen type of brick. However, there is no need to rack your brains here. Usually, when purchasing building materials, you will immediately be offered a dry mixture, which you only need to dilute with water according to the instructions.
- Watch the thickness of the seams, do not make them too wide. The thinner the seams, the better thermal conductivity the lining will have.
- Be sure to check the verticality of the corners with a plumb line, as well as the horizontality of the rows with a level.
How to determine the required thermal power of a sauna stove?
A potbelly stove has a simple design and operating principle; installing a stove with your own hands, although difficult, is a possible process. During installation, follow the manufacturer’s recommendations, as well as fire and safety rules:
- The stove is installed no closer than 1 m from flammable surfaces made or lined with wood. The walls near the stove are insulated. The surface is covered with heat-insulating material, after which it is sheathed with a metal sheet. From the firebox door to the opposite wall or partition, leave a distance of at least 1.25 m.
- The base for the stove must be strong and non-flammable. The optimal solution is floors lined with ceramic tiles. If this is not possible or the potbelly stove is mounted on a wooden floor, make a cement pad.
- The chimney pipe is installed using fire breaks. When passing through the roof and floor slabs, cuttings are made with a mandatory insert of heat-insulating material.
For the stove to operate, a stable draft is required. The installation of the pipe should ensure stable traction characteristics.
Separate requirements stipulate how to position the stove in the bathhouse, depending on the layout of the room.
The location of the stove is important, determining the efficiency of heating the steam room. You will need to make a project with clearly marked ventilation ducts, sun beds, and sinks. The location of the stove should ensure comfortable and uniform heating of the room and reduce the cost of connecting the water supply and chimney.
Installation of a potbelly stove in a wooden bathhouse is carried out according to the following rules:
- The stove is installed opposite the front door.
- Fire distances to adjacent walls are maintained.
- Be sure to protect the ceiling where the pipe is installed. To properly start the chimney, you need to take into account that the horizontal sections should not be more than 3 linear meters, 2 corner couplings. The head of the pipe must rise above the level of the flat roof by at least 0.5 m.
- It is recommended that the storage container be located not far from the washing area, within 2-3 meters.
The metal, while heating the furnace, becomes red-hot. To prevent burns from accidentally touching the steel, the stove is lined. Any refractory material with good heat transfer is suitable for performing the work.
Facing is performed in several ways:
- Fireclay brick, specially designed for cladding and construction of furnaces. Has good accumulating properties. After heating, a brick made of fireclay clay takes a long time to cool down and gives off heat. The disadvantage of the solution is the unsightly appearance of fireclay. The lined stove is subsequently lined with ceramic tiles or stone.
- Red brick - both hollow and solid versions are suitable. The use of facing or facade building materials is not allowed, since when heated, its surface begins to delaminate.
To line a metal stove with bricks, use ready-made or self-made clay mortar. For tiling, special adhesives are used.
Each firebox increases the strength of the masonry. But the first 1-2 furnaces are not carried out at full capacity. Convection wells are provided in the brickwork to improve the circulation of heated and cold air communicating with the furnace.
Using a potbelly stove with a water heating tank has several advantages. The work is based on the heating of convection currents, which allows you to quickly and evenly warm up the steam room. At the same time, during the fire, the water for washing is heated.
The thickness of the furnace metal is at least 4-5 mm. Experience shows that with intensive use of a potbelly stove with a tank for heating water, the stove will last at least 5-7 years, after which it will require partial repairs or replacement.
Another advantage is the following design feature. The wood-burning stove is a Canadian-type potbelly stove, uses the principle of long combustion, and continues to operate on one load for 4-6 hours. One kindling of the stove will last for the whole day.
It is convenient to heat a bathhouse with a potbelly stove, since heat begins to flow into the steam room almost immediately. It will take about an hour to fully warm up the steam room.
A wood-burning stove for a bathhouse has several disadvantages that must be kept in mind during operation. The body gets very hot during combustion, which is especially noticeable in the door area. It is not recommended to overheat the stove; this can lead to deformation and sagging of the fire door.
In general, a potbelly stove is a good option for those who are looking for a universal stove that can create the microclimate of a sauna and Russian bath, after simply switching the levers and dampers.
The capriciousness of the cast iron stove design is associated with low mechanical strength, a tendency to punctures and the development of hidden cracks. A bathhouse, and especially a steam room, is a combination of a hot surface of stones, metal and water. Steel can withstand contrasting temperature changes in the heater relatively painlessly, brick does not like it, and cast iron stoves are catastrophically afraid.
Therefore, during installation you will need to solve several main problems:
- Correctly install the cast iron stove body on the foundation;
- Provide protection from water getting on the hot surfaces of the cast iron stove;
- Install the chimney pipe without loading the cast iron outlet pipe of the stove.
With its own weight of 150-200 kg, the cast iron body puts significant pressure on the wooden floors in the steam room. Therefore, when installing the stove, you will need to either make a concrete or pile foundation, or equalize the load on the logs so that the weight of the structure with the loaded heater is distributed over at least three beams.
Theoretical calculations show that with normal and correct production of the floor with a lag pitch of 60 cm, the strength of the underground beams is quite enough to install a stove even with a brick screen 10 stones high. To equalize the load, when installing under the legs of the housing, you will need to lay a clay-asbestos screed with a thickness of at least 5 cm.
The installation of cast iron in the steam room of the bath will need to be done according to a free scheme. This means that the supports of the cast iron body remain loose and can slide along the steel sheet when heated.
The furnace body is extremely sensitive to improper distribution of vertical load. Most often, a skew in the distribution of weight on the supports occurs when the chimney pipes are installed incorrectly.
Another mistake during installation is an attempt to compensate for the pressure on the body from the weight of the chimney pipes by transferring part of the force to the firebox tunnel. In this installation option, the tunnel body acts as an additional support, which is strictly unacceptable. The firebox in the tunnel must have a certain gap, sometimes air, but better filled with basalt wool. Otherwise, under the weight of the chimney pipes after heating, the firebox will be damaged or simply chipped.
When installing chimney pipes, it is important to prevent the load from the weight of the chimney outlet channels from being transferred to the outlet pipe of the housing. Therefore, when lateral exhaust of combustion products occurs, the chimney pipes are not suspended from the ceiling beam. The structure rests on a rigid support in the area where the outlet from the chamber connects with the rotary elbow of the chimney.
Beam fastening of chimney pipes is carried out in the form of a sliding clamp. In this case, experts recommend using cast iron flue pipes for the lower part of the chimney. Unlike steel pipes, they are much more durable and do not create bending forces and vertical loads, like brick or ceramic chimney options.
The vertical outlet from the cast iron body is unloaded in a similar way, using an additional support and a rotary elbow.
If the installation is carried out taking into account the basic recommendations, the service life of a good quality cast iron stove can easily reach 30-40 years. But often a cast iron structure is mistakenly considered to be very durable and reliable in any, even the most barbaric, manner.
In a steam room, especially if the heating circuit has an open heater design, it is almost impossible to prevent water flows from reaching the hot cast iron body past the stones. As a result, the firebox or outlet pipe may burst as a result of thermal shock. In addition to complete destruction or splitting, cracks may form through which some carbon monoxide begins to penetrate into the steam room.
Manufacturers of cast iron stoves are well aware of the shortcomings of their products, so in most cases they will offer you a bath heater made of cast iron, with a special lining or screens made of chromed steel. More expensive models may have lining made of chalcopyrite or jadeite, which protects the cast iron from water and improves the appearance of the structure.
Therefore, when installing simple structures, even imported ones, it is considered more appropriate to cover them with a thin screen, ¼ brick thick.
A cast-iron stove, covered with brickwork, with a firebox placed in the dressing room, turns out to be much more convenient and practical than a steel or brick one. Installing protection and maintaining thermal clearances allow the body to work in a bathhouse for decades without problems.
Sauna stoves with an external fuel channel can be made of cast iron or steel. The design of this device differs from a conventional furnace for heating a bath precisely in the presence of a remote firebox, which can be removable - in heavy cast iron versions of products, or have an integral structure - in steel models. Thanks to this configuration of the stove, the combustion chamber door is moved into the room adjacent to the steam room or even outside.
Moving the furnace firebox into the dressing room provides many advantages during operation:
- When the stove is fired, two rooms are heated at once - the steam room and the dressing room.
- It becomes possible to add firewood, constantly supporting the combustion process while the steam room is in use.
- Since there will be no need to open and close the firebox door from the steam room side, the stove can be protected with a safety barrier (brick screen), which will eliminate the risk of burn injuries during water procedures.
- Garbage, which is often brought into the room along with firewood, will not get into the steam room.
- It becomes possible to place a niche next to the firebox for drying firewood, which, of course, cannot be done in a steam room.
- It ensures that clean air is maintained in the steam room, since when the door is opened to add firewood, gaseous products of wood combustion can enter the room in small quantities.
- The absence of a firebox door in a steam room will significantly save the free space of the room, and so, as a rule, it will not be too voluminous. Therefore, it becomes possible to install the heating device in a convenient location on the wall dividing the room.