Traditional and modern technological materials for finishing a bathhouse compete in some places, and complement each other in others.
Where the budget allows, we no longer make insulation from clay and leaves, but on the other hand, the bathhouse limits us to the use of a variety of plastics and their derivatives, at least where the temperature is high. In general, it is very interesting to apply bath specifics to the entire range of commercially available finishing materials.
Features of finishing the bath
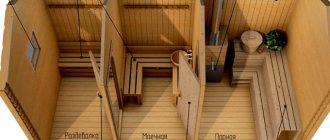
A real bathhouse is a complex complex that includes:
- Steam room;
- Waiting room;
- Luggage storage.
If there is a lack of space, the first two rooms are combined into one space, but if there are no problems with the size of the building, they will equip a separate recreation room, a swimming pool and even a terrace.
But at the same time, the decoration of the bathroom in the interior must meet several requirements:
- A Turkish bath requires resistance to hot steam and long-term heat retention;
- The laundry room must be provided with an anti-slip surface, but this requirement applies to all rooms;
- It is important that a comfortable environment is created in all rooms, including to protect visitors from burns.
An important role will be played by the aesthetic properties of finishing materials, as well as:
- Easy to clean;
- Environmental friendliness;
- Duration.
Wood copes best with these tasks, although a bathroom or dressing room can be finished with other materials, such as tiles.
It should be borne in mind that a bathhouse made of beautiful rounded logs also needs interior finishing, which will increase the service life of the building.
Choosing what to paint the outside of the bathhouse with
In that article we talked about what paints are suitable for painting the inside of bath rooms. Here…
Materials for a bath, Materials for a bath inside, Materials for finishing a bath, Painting, Impregnations · 09/23/2018 · 2
Basic principles and stages of steam room equipment
If the bathroom structure has already been erected, the rooms have been distributed and the area of each of them is known, then based on this data you can begin to create a project. It would be better to make several options for a specific room, so that you can choose between three or four interiors.
Having determined the most optimal option, it will be possible, based on the size of the room, to calculate the amount of construction and finishing materials required for finishing the walls of the steam room, organizing shelves, steam, hydro- and thermal insulation of the wall.
In addition, you will have to immediately decide on the lighting system. It should be safe and bright enough to create a relaxing atmosphere in a dark steam room.
All construction and finishing work is carried out in a certain sequence, which should not be disturbed, otherwise it is possible that all work will have to be redone.
- The first step is to install all electrical wiring. At the planned installation points of the luminaires, the wires are passed through the entire insulation and waterproofing system, as well as through the lining.
- The next step is to lathe the walls and ceiling and attach the first layer of vapor barrier material.
- Then the location for installing the stove is determined - it will be finished using a special technology a little later.
- In addition, the location of the ventilation system is noted, and an opening for the chimney is prepared in the wall or ceiling.
- The next step is to install insulation between the turning strips. Typically, mineral wool or basalt are chosen for the bathroom, which react less than others to high temperatures and humidity.
- In addition, a second layer of vapor barrier membrane is stretched over the insulation.
- Aluminum foil is attached over it or one of the other reflective materials is selected.
- Then the place for installing the stove is prepared - the base and walls.
- The rest of the floor is covered with ceramic tiles or, if desired, wood flooring.
- The next step is to install the door frame and the door itself.
- In addition, the steam room is lined with wooden boards: first the ceiling, then the walls.
- Then shelves and other plumbing elements are installed, and lamps are installed.
For sauna and steam bath: is there a difference?
In our country, people don’t always distinguish a bathhouse from a sauna, let alone talk about any specific materials.
In fact, there may not be , because the operating conditions are approximately the same, only in one case the humidity will be higher, in the other - the temperature.
Of course, we are talking about a steam room. It is different in Russian and Finnish baths only in design. And the materials used are the same: wood, stone, glass, metal.
Of course, the Finns set the fashion for what a sauna looks like. Therefore, saunas often look more modern than Russian baths. This is achieved precisely through certain finishing elements and materials.
What are these elements? Well, firstly, the use of paints and varnishes in the sauna becomes acceptable . This is quite progressive, considering that lovers of Russian baths are suspicious and negative about any “chemistry” in the steam room. And among the Finns, wood can be coated with acrylic varnish in any shade. This brings variety to the way their sauna interiors look.
Secondly, it is already customary that the door to the sauna is made of a material such as heat-resistant glass (see about them here).
Thirdly, the design is more modern - it is extremely simple, revealing the beauty of natural materials, as well as the geometric shapes. The lighting is also modern, actively using new technologies - fiber optics, for example, not to mention LEDs.
Fourthly, brick and stone in a sauna can well be used as a finishing material, because the classic Finnish stove is an ordinary iron one, without casings, with an upper heater, which quickly heats the steam room, even if part of the room is decorated with brick and stone. However, it is worth noting that these materials for finishing bath walls serve as protection against fires and at the same time serve as decoration.
Competent interior decoration
Decorating a steam room in a bathroom with your own hands involves several important missions, which are as follows:
- waterproofing and thermal insulation of the room was carried out;
- the service life of the premises is significantly extended;
- a therapeutic effect is provided that promotes the release of aromatic compounds when wood is exposed to high temperatures;
- visitors are protected from burns upon contact with walls;
- performs a decorative and aesthetic function.
Ceiling
Even before finishing the ceiling, it must be protected from exposure to hot steam. For example, a construction membrane or aluminum foil.
Important! The foil should not have an additional layer in the form of foamed polypropylene or mineral wool, since such products emit toxic substances at high temperatures.
Tools and Supplies
The construction and arrangement of any structure requires the use of reliable tools. The quality of fastening materials is of particular importance when building a bathroom, because the durability of the finish depends on it.
List of tools and consumables:
- mechanical stapler with staples;
- roulette;
- pencil;
- building level;
- nail;
- self-tapping screws with anti-corrosion coating;
- screwdriver;
- hammer;
- hacksaw.
Tools must be prepared in advance, and fasteners must be purchased in reserve. This allows you to securely fasten all materials and elements.
Is lathing necessary?
Installing lathing is a smart option for interior design.
There are no standard options, popular sizes are 50x50, sometimes the step is 70x70.
The sheathing is often made from wood, but some craftsmen also use metal, which should be treated with a moisture-resistant compound.
Wood lathing is easily secured with nails or self-tapping screws made of copper or brass.
Materials for finishing the steam room
Linden copes best with homework. This wood retains all its pleasant properties, despite the not entirely comfortable climate. An additional advantage of this option for arranging a steam room is the light aroma that appears when heated.
The downside will be the fragility of the material - over time, insects crawl into it, and it itself begins to rot.
- Aspen is becoming the second most popular facing material. It is strong and durable, easily tolerates high humidity and temperature, and has no cracks through which steam drips. Disadvantages include knotty wood, drops of resin that can burn, and susceptibility to rot.
- Larch retains heat perfectly, is not afraid of moisture, and only strengthens over time. But this strength also has a drawback - the material is very difficult to process, so you need to stock up on high-quality tools.
- Cedar is very similar in its characteristics to larch, and also gives a pleasant aroma, but the price of such a design can hardly be called budget.
- Birch will not be a very suitable option for finishing a Turkish bath. It dries a lot, absorbs moisture well and decomposes quickly.
- Pine is practically not used, with the exception of bathrooms or changing rooms. Does not like high temperatures, distortions and cracks. In addition, pine too actively releases resins, which in high concentrations can be harmful to humans.
Particular attention is paid to the finishing of surfaces around the stove. To prevent fire use:
- Smooth stainless steel or profiled sheets;
- Red brick;
- Specialized kaolin clay tiles;
- Special heat-resistant sheets made of mineral components glued with cement.
It is better to cover the entire wall from floor to ceiling with similar materials, but if there is a shortage of funds, you can protect the vertical surfaces from the floor at the beginning of the pipe.
Selection of material
Before insulating a steam room in a bathroom, you need to choose the right material. It is customary to use natural wood for finishing. Thanks to its structure, it provides good microcirculation of moist air.
The steam bath in the bathtub is decorated with wood due to its positive characteristics:
- material hygiene;
- in natural wood there are no toxins that can penetrate into the air when the temperature rises, unlike artificial materials;
- hypoallergenicity promotes easy interaction with the skin;
- a Russian bathhouse lined with high-quality types of wood has a long service life;
- a wide range of colors allows you to choose the most beneficial shade for the owner without the use of additional dyes;
- the structure of the fibers promotes the absorption and removal of moisture.
Pine is not one of the most popular materials for a steam room, since its structure contains a large amount of natural resins, and when the temperature rises, the coating begins to release this sticky aromatic substance on the surface.
It is worth considering the amount of moisture in the parts. It is necessary to select high-quality dried wood, because if it is poorly dried, then large cracks can appear on the walls. And if the decorative finish is too dry, then during operation it will absorb excess moisture and swell. This will lead to external deformation of the coating, and small waves will form.
The surface of the wood cannot be treated with stains or paints. It is also prohibited to use painted surfaces, as these substances evaporate when heated. Only the use of special impregnations is allowed.
What materials cannot be used
Only solid wood is suitable for finishing a bathroom
All other building materials for finishing the steam room are unsuitable for various reasons:
- wooden materials such as MDF, chipboard - do not withstand such strong changes in temperature and humidity, quickly swell and deform;
- plastic panels of any kind - they cannot withstand such high temperatures, especially when it comes to a sauna;
- tiles - they get very hot, there is a risk of burns, but it is acceptable to use tiles to cover the floor;
- stone cladding - it takes too long to heat up and takes a long time to cool down; this option is suitable for a hammam, but not for a steam room.
any modification of these materials is prohibited.
What materials are suitable for insulating the ceiling in a bathhouse?
Particular attention should be paid to the insulation of the ceiling surface. The ceiling transmits significantly more heat than the walls. To do this, you need to insulate it to avoid loss of warm air. And this is where many self-taught people make a huge mistake - they lay sheets of foam plastic over the final ceiling finish. This is a gross mistake , which, one way or another, will play a cruel joke on visitors. Polystyrene foam is a gas-filled plastic made from... petroleum. Let's remember what we read earlier.
The only
more or less safe solution for ceiling insulation may be mineral wool . It uses limestone, dolomite and basalt, which are natural components. This is a durable material characterized by fire resistance and hygroscopicity. But still, natural fillers from straw mixtures will be the best solution, although they will require more effort during their installation. Decorating the ceiling can be done with the same lining as on the walls.
Finishing the bathhouse inside: photos and stages of work
With the help of lining, the external cladding and finishing of the bathhouse is carried out inside. Wall cladding with clapboard looks very attractive. In this case, the boards allow you to level the surface.
You can do siding yourself
The installation technology is simple. The lining is placed in a Turkish bath to adapt to the internal microclimate. Then uneven surfaces are leveled with lathing.
When carrying out plating, it is worth stocking up on suitable tools in advance.
Cracks and joints must be sealed well. Turning is carried out with special tapes. They are mounted at a distance of half a meter from the surface. If the walls are smooth, there is no need to install the sheathing.
Floor finishing
The process of organizing the hall is as follows. The first step is to mount the logs. They are made from 200x200 mm timber. A board is placed on top - edged or corrugated, with a system of prickly grooves. When heated strongly, coniferous wood releases resin. Therefore, it is best to choose hardwood lumber other than oak. The optimal choice is larch. Small gaps are left between the joints, useful for ventilation and drainage of excess water. This is especially important for the bathroom.
The floor of the steam room must be raised 15-20 cm from the main level. This is done to avoid unnecessary heat loss.
To protect the boards from fungus, they are treated with antibacterial compounds. To prevent swelling, coat with primer. It is possible to install a drain and make the floor slightly inclined towards the drain.
For a brick bath floor, matte or wavy tiles are perfect.
Features of floor finishing
Most often, finishing work begins with the floor covering. The interior finishing of the bathroom floor, a photo of which can be viewed on the website, must be protected from unnecessary drafts. Tiles or strips can be used as coverings.
There can be interesting design solutions in floor finishing
The subfloor is made of clay or concrete. In this case, it is important to consider a system for draining water from the room.
Rough coating requires additional time for the material to polymerize
The floor can be cork, road or fiber.
Cork can diversify the chosen interior
The installation process under wood is simple. The logs are mounted and then the boards are laid. A variant of a corrugated board is used for the lid. In this case, the thickness of the wood should be about 30 cm. The wood is pre-treated with antiseptic agents and agents against fungal growth.
Wooden boards are attached to brick foundations
Another popular finish is tile. For this, a screed is made. The tiles are attached with special glue. A moisture-resistant solution is used to process the seams. To prevent slipping on wet surfaces, you need to install wooden gratings.
In the steam room, the floors can be made of non-slip tiles, and in the relaxation room - with an ordinary board
It is important to properly finish the sink floors. They should be on two levels. The lower one is made of concrete, which will resist water flows. This creates a special slope and surface drainage. The level at the top should be lathed. To create it, coniferous species are taken. Gaps are left between the boards through which water must pass.
Helpful information! To ensure better water drainage, it is necessary to make floors with a slight slope.
An interesting solution - installing heated floors in the bathroom
Methods for installing heated floors in a bathhouse
Modern construction assumes maximum comfort for one person, even when installing bathroom complexes. After all, this is not only an opportunity to steam, but also to relax. The need for heated floors arose when they began to be made of concrete, since their service life is 3 times longer than that of wood.
It is possible to install both water and electric floors. Water pipes require preliminary pipe routing and their connection to heating equipment. This is not always possible. Therefore, more often the choice is made in favor of the second system.
Electric floors are safe in the bath complex. The system is mounted in a screed. First you need to prepare the concrete base. During installation, it is important to avoid mistakes that cannot be corrected later. Therefore, the work needs to be transferred to specialists.
You can make warm floors yourself by installing additional thermal insulation from the following materials:
- mineral wool;
- expanded clay;
- heard;
- soap.
To do this, you will need to pour 2 layers of concrete, between which thermal insulation should be laid.
Finishing the bathhouse inside with clapboard
They will help you check the process of finishing the bathroom inside the photo with the sequence of stages of installation work.
The choice of finishing materials depends on the size of the room and the planned design option
The inner liner does not use standard nails, which will eat away rust stains.
Tiles are considered one of the best solutions in terms of ergonomics
The covering is cut out taking into account the height of the bath and then mounted on the prepared grate. For finishing, specially treated wood is used that is resistant to sudden changes in humidity and temperature.
The bathroom can be decorated with various materials and at the same time choose an unusual design
It is worth using a level during installation. The frame system and upholstery are treated with antiseptics. The material is installed from the corner. Special staples and nails are used for fastening. The coating can also be used to decorate the ceiling. In this case, the material should contain a small amount of resins. Otherwise, the hot drops may burn your skin. The area around the stove is decorated with materials that are not prone to combustion. This could be tile or brick.
Before covering the walls, turning is carried out
The interior does not need to be painted or varnished, as these coatings do not allow steam to pass through. There should be a gap of 20-30 mm between the upholstery material and the frame. In some cases, ceramics can be used. This material does not absorb moisture and does not break. Since this type of floor is cold, you can lay a wooden floor on top.
Useful tips! It is better to use a lime coating. Pine or spruce are not suitable for this room.
Combined materials are often used for wall decoration
Selection and calculation of material
Larch cladding is the best solution for arranging a Turkish bath or laundry room. Under the influence of time and humidity, the wood hardens, which makes the interior finish more durable. When choosing a coating, you need to pay attention to the following features:
- the coating for finishing the steam room, laundry room must be marked “Top Grade” or “Class A”. This material is free of large knots, has a homogeneous structure, a uniform surface;
- wooden elements should not have signs of rotting, cracks, or deformations. The smooth, tight lid is easy to install and has an aesthetic appearance;
- For finishing you will need not only lining, but also materials for insulation from steam and heat. Finishing is done only after installing these layers;
- The thickness of the board must be at least 12.5 mm, the top of 8 mm corresponds to the depth of the groove. Material humidity - no more than 12%;
- high-quality material has a flat and smooth surface.
It is also important to correctly calculate the amount of material. Cladding is often calculated in square meters. In this case, its quantity is equal to the area of the working surfaces. This figure must be increased by 5%, since material damage is possible during operation, so the coating is purchased with a reserve.
The liner must have one groove and tenon size along its entire length
For work you will need thin bars or slats. If the thermal insulation of the bathroom was carried out from the outside, then only the installation of a vapor barrier and finishing is carried out inside. Therefore, it is necessary to purchase a vapor barrier film that provides internal comfort. Otherwise, the insulation is done from the inside, and for the lathe you will need insulation, waterproofing film and rods.
Step-by-step instructions for interior finishing of a bath
Wall finishing is done after installing heat and vapor barrier. To do this, you need to attach vertical or horizontal bars to the wall, the distance to which is equal to the width of the insulation used. The waterproofing film is secured over the racks with staples, then the insulation is attached to the staples or glue. Next, a vapor barrier layer is attached to protect the supporting structures from condensation.
Thermal insulation can be carried out from the inside or outside of the tank
Lining the walls of the container from the inside involves the following steps:
Planks are fixed to the top of the vapor barrier film, the distance between which should be 50 cm. A gap of 3 cm should be left between the vertical planks of the frame and the ceiling, and the same distance should be left from the floor. This is necessary for the structure to shrink.
When finishing any wooden house, it is necessary to leave a gap when installing vertical slats
The slats are attached to a wooden surface without internal insulation with self-tapping screws, and on a brick base with dowels. In this case, it is important to check the verticality of the slats in a plumb line and check the plane with the strings stretched between the outer rods. Clamps are installed on the back side of the sheathing panel, after which the panel is fixed to the sheathing using nails.
Elements are fixed with clamps
Next, one sheet is assembled from the lining, inserting one element into the groove of the other. A clamp is attached to the back wall of each panel, with which the cladding is attached to the sheathing. You can also fasten the parts simply with nails, deepening their heads into the wood. The gap between the fasteners is approximately 60 cm. It is important to connect the parts tightly, but leave a gap of about 2 mm, since wood swells from moisture.
You can use nails to secure the upholstery
A revolution when covering walls with clapboard is necessary for walls made of any material. The grilles allow you to create a ventilation space, and the vapor barrier film ensures moisture removal. This preserves the quality of the supporting structures and the appearance of the finish. The ceiling is sheathed with clapboard using the same technology, having previously glued a vapor barrier film.
Insulation and waterproofing of steam room
Finishing a bathroom with your own hands involves insulating the room before finishing.
Most often used:
- Cheap mineral wool;
- More stable basalt wool;
- Expensive, but high-quality cork agglomerate. Does not rot, lasts a long time, repels insects and bacteria, does not cause allergies.
Expanded clay or sand is used to insulate the floor.
To preserve the walls and floors in the room, waterproofing is used. It is laid on top of the insulation and consists of aluminum foil or its modern analogue - a vapor barrier film.
How to insulate and insulate walls?
The steam room must first be isolated. In some cases, mineral wool is used, which is laid on the lathing. If the bathroom is built of stone or concrete, you can do without insulation. It is important to properly waterproof the structure. Aluminum foil or even a vapor barrier film is best suited for such purposes.
Thermal insulation is made of mineral wool
Wall insulation is carried out taking into account some recommendations:
- When cutting the insulation, it is necessary to leave a margin of 5 mm. This will ensure high-quality fastening of the material;
- When installing a vapor barrier material, it is necessary to maintain the integrity of the membrane and install it overlapping. In this case, the joints are fixed with mounting tape;
- When working in small spaces, you can use thermal insulation panels, which are convenient to install even for one person.
The use of insulation shifts the dew point to the wall surface and prevents destruction
If the bathroom is brick, the thickness of the insulation can be about 10 cm. If the wall is wooden more than 20 cm, they cannot be insulated. After finishing, it is necessary to equip the room with original furniture and decorative items.
Bathroom interior design depends on the preferences and tastes of the owners
Selection of material for thermal insulation
To ensure high-quality thermal insulation of a bathroom made of logs or bricks and avoid the formation of condensation, it is recommended to use the following materials:
- mineral foil is one of the most effective insulation materials in the mid-price category. Of all types of cotton wool, basalt is most suitable for heating baths. It has minimal thermal conductivity and high strength. The material is produced in the form of plates or rolls with a thickness of 5 to 10 cm, equipped with a layer of film. To install it, you need to build a frame of wooden boards;
- Penotherm is a base made of foamed polypropylene, on which a layer of film is applied.
Significantly speeds up the process of heating the steam room to the required temperature, retains heat for a long time. The material is safe for humans as it does not contain toxic substances. It was specially developed for thermal insulation of bathrooms, so it is not afraid of the heat of the steam room. It is stapled directly to the wall and then secured with a finishing purlin.
Wall and ceiling finishing
Chipboard, linoleum and other chemical industry products should not be used for cladding the walls of wet rooms - showers and steam rooms. Natural wood should reign here. For walls, tongue-and-groove cladding or panels made of cedar, linden, aspen, larch, and abacha are suitable. It is unacceptable to cover the surfaces of the steam room with paint or varnish: their vapors, when heated, can lead to toxic poisoning.
In the washing area, the walls can be lined with inexpensive or tiled pine paneling. In a brick bathroom, installing tiles will not cause any difficulties, but in a wooden one you will need to make a base from sheets of moisture-resistant plywood, plasterboard or OSB.
Slats made of cedar, linden, and aspen are suitable for finishing the ceiling.
Finishing a steam room in a bathhouse
It should be borne in mind that finishing a steam room in a bathtub is not only about creating an aesthetic appearance for the room, but also about ensuring practical qualities. The pleasant smell of wood and high air temperature help create a comfortable atmosphere in a Turkish bath or Turkish bath. What should be the finishing of a steam room in a bathhouse, how to do it yourself and how to treat the steam room after the procedures - all this is in our article.
Steam room design
The interior of the steam room should ensure the comfort and safety of visitors. The presence of elements, straight and rounded lines of its filling will certainly make the room as comfortable and ergonomic as possible.
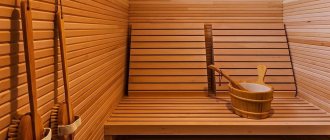
The main space is reserved for shelves. To make them, narrow wooden planks are used, which are stuffed at a certain pitch. Slots are necessary for proper air circulation and quick drying of wet boards. In addition, empty spaces make the design more elegant, light and airy.
Lighting is best organized using small recessed or pendant lamps with soft and diffused light. Lampshades made from wooden slats are ideal for decorating a room.
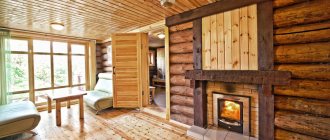
The stove is an indispensable element of the Turkish bath. There are many options for its design and location. The choice and placement of a heater depends on the size of the room, its configuration and the location of functional areas. If the stove is intended to heat two adjacent rooms, it must be placed between them. In a bathroom with a polygonal grill, the stove is installed in the center, and the chimney is vented through the center of the roof.
The decoration of the steam room will become more impressive if you alternate slats from different types of wood. Aspen inserts become even darker over time, so the wood mosaic will become more contrasting and expressive. Inserts made of brick, glass or marble, placed in hard-to-reach places, perfectly complement the interior.
Shelves in the bathhouse: photos inside, design tips
Decorating a bathhouse in the interior with your own hands also means decorating shelves and benches; it’s hard to imagine a bathhouse without them; you can sit or even lie down on them to properly relax. They are usually made in a round shape because this is the most convenient and safe.
It is important that shelves, beds and benches are strong and do not wobble or creak. Soft wood, always without resin, is suitable for their manufacture.
First, you need to nail down special posts made of timber, then boards or clapboards are attached to them with wooden nails or pegs; there should be a distance between them so that water does not stagnate on the benches and the wood does not dry out. Quicker.
The shelves in the bathtub are arranged in a stepped design, which allows for efficient use of space. The standard shelf size is 2m by 0.6-0.9m.
Construction of frame baths
Recently, frames have become often used for the construction of baths. The advantages of this choice include:
- Light weight structure, which allows installation on a light base.
- High speed of construction. Construction will take no more than 3 weeks, which is 3 times faster than using timber or brick.
- Excellent level of thermal insulation.
- Construction is possible at any time of the year.
- The surfaces allow air to pass through perfectly, resulting in an excellent microclimate in the bathhouse.
- Environmental safety of materials.
Frame bathhouse Source karkas-dom64.ru
This solution also has its drawbacks. These include:
- Within 2 years, quite strong shrinkage occurs. On average, it is 10 cm. To reduce this figure, you will need to use chamber drying materials.
- Additional costs for insulation and cladding. The frame itself is not very expensive, but the interior and exterior decoration will require investment.
- Difficulty in choosing insulation. You will need to use materials that are not afraid of fire and moisture.
Frame structures will allow you to save a lot of money, while they can provide acceptable quality of construction.
Design of a small dressing room inside a bathhouse
Visitors to the bathhouse or sauna come here first. Here they also rest between races. And in this space you can implement several interior ideas.
- A small room should not be overloaded with functions. Especially if there is a separate seating area. You can limit yourself to an area for changing clothes and storing things with hangers.
- If it is combined with a recreation room, it makes sense to place a dining area with a table, chairs and benches. A TV is often installed here. Such a dressing room should be well insulated.
And
Features of wood cladding
I wonder how to line the inside of a bathhouse cheaply. Wood comes first, but it has a number of features:
- many types;
- inexpensive fasteners are suitable;
- Possibility of using glue.
Finishing the inside of a bathhouse using wood assumes that the master is familiar with the material. It is important to know about expansion, mechanical properties. Practice shows that lining the inside of a bathhouse can take longer if the percentage for defects is not calculated.
Many people are interested in how to line a bathhouse from the inside in order to spend a minimum of time on work. In terms of ease of processing, coniferous species are valued.
View this post on Instagram
Publication from Sib-Stroi-Comfort (@sib_stroi_komfort)
Steam room materials
The internal appearance of the bathhouse largely depends on the steam room. It is worth evaluating all the options, but the following are in greatest demand:
- Finnish spruce;
- pine;
- beech.
The steam room must be prepared and a film is laid in front of the main layers. Alder, aspen and beech are suitable as the main insulation. You can additionally consider cedar, but it is now rising in price.
Even professionals are interested in how to line a bathhouse in order to save as much as possible. In this regard, linden comes first.
If we look at pine in more detail, it has the following features:
- strength;
— durability;
- heat retention.
In terms of moisture, the indicators are at the level of oak. Impregnated material will last about 10 years. Over time, pine does not lose color. As for the smell, it changes.
Characteristics:
— bending up to 80 MPa;
— density 450 kg per cubic meter.
Pine has average compression performance. The fibers hold up well during sudden temperature changes. If you take a board, the tensile strength is 90 MPa.
Builders are familiar with the need to handle clapboard carefully. If workpieces of small thickness are used, there is a high probability of chipping. For example, you need to divide the lining, and for this it makes sense to take a file with fine teeth.
View this post on Instagram
Publication from Upholstering SAUNA IN KAZAN (@kluchksaune)
Washing material
If you are curious about how to line the inside of a bathhouse, the following is considered for the washing room:
- fake diamond;
- pine panels;
- hemlock.
If the steam room is easy to cover with thin sheets of aspen, then you can approach the washing room in an original way. PVC panels and even ceramics are valued. It’s interesting how to line the inside of a bathhouse in addition to the above methods. Here, planken acts as an alternative.
Material for the rest room
I'm always curious about how to line the inside of a bathhouse cheaply and beautifully. For the rest room, the following methods come first:
- brick;
— lining;
- siding.
The inside of the bathhouse is decorated in the same style. For example, lining and brick practically do not go together. If you take siding, PVC panels will do. When considering a bathhouse, the finishing must be calculated in advance.
Lining does not require a large percentage of inventory. Some are interested in how to line the inside of a bathhouse so as not to attract help. It is easier to choose a brick from the above methods.
Next, we take into account what the craftsman uses to line the inside of the bathhouse. First on the list is lining of different types.
The process of covering walls with clapboard step-by-step instructions
If previously the question of how to line the inside of the dressing room inexpensively was of interest, now it’s worth considering the process itself.
Instructions:
- Preparation;
- the basis;
- covering the inside of the bathhouse with the first layer;
- isolation.
Wall cladding in a bathhouse begins with preparation, since the surface must be cleaned.
View this post on Instagram
Publication from Rinat Salimullin (@rinat_spa)
Arranging a shower room
A bathroom with a walk-in shower is an innovation inherent in the modern bathroom, demonstrating how you can hide from prying eyes. It is advisable to tiled the room, adding colorful elements to the design, such as mosaics and stained glass. A special requirement for the floor covering is that it must have a rough texture. The range of laundry equipment is quite large. Installation of a shower, jacuzzi, swimming pool is allowed.
Installation of a shower cabin
If you build according to the model of your ancestors, then huge tubs of water installed on top will look more harmonious. Of course, the height of such a self-made soul must exceed the height of an adult. To take a “shower” you need to pull a rope, after which you will be treated to an invigorating waterfall.
Huge water tanks
It’s good if the shower room is equipped with shelves and cabinets for storing clean towels, felt hats, sheets, brooms and other accessories, without which a steam room is not a steam room.
The walls inside the shower can be painted or wood, but in this case the tiles will be functional. Ceramic walls prevent mold and mildew and are easy to clean and disinfect.
Floor
There are special requirements for floor finishing, as it must be not only comfortable, but also safe.
- Smooth tiles or linoleum can cause injury. A wet floor from such products will turn into a skating rink. In addition, when heated, linoleum releases unpleasant odors and harmful substances.
- A classic and popular option is a wooden floor, which does not require special coatings and respects the overall composition of the room.
- Not all wood is suitable for flooring. For example, oak becomes stronger when wet, but the surface will be too slippery.
The floor can also be made of concrete - this is a strong and durable option. You can lay tiles on top, but not smooth and glossy, but embossed. Concrete floors should be laid with a slight slope to drain water.
Wooden grates can be placed on top of the tiles - this increases the safety of movement on a wet surface and makes it possible not to walk on a cold floor.
Photo of the perfect interior decoration of the bathhouse
Shelves
Perhaps the most important thing in the decoration of the steam room is that people sit on the shelves, making direct tactile contact with unprotected skin.
Therefore, the shelves should be:
- Not very hot;
- Retains heat for a long time;
- Made from environmentally friendly material;
- Not slippery, not rough, without damage;
- Easy to clean.
Traditionally, the shelves in the steam room are made of wood, which must be thoroughly cleaned and all knots and nicks removed.
It is advisable to make shelves without sharp corners to avoid the risk of injury.
