The choice of stoves for baths today is very wide. The industry produces heaters for every taste and color. You can choose a ready-made stove for installation in a bathhouse in accordance with the required heating output depending on the volume of the steam room and choose the desired heating method - from electric stoves to gas and wood-burning heaters. Previously, we have already published reviews of modern stoves Teplodar, Ermak, Harvia, Termofor. But many true lovers of Russian steam prefer laying a brick stove with their own hands to a ready-made solution.
And this is no coincidence. After all, brick stoves have the following advantages: - brick stoves have a large heat capacity and retain heat for a long time; — capable of heating 2-3 adjacent rooms; — heated brick does not give off the smell of scale and overheated metal; — a brick oven helps against many diseases; — the surface of a brick stove does not heat up as much as that of a metal stove. But in order for the stove to serve for a long time, you need not only to correctly select the brick material from which it will be built, and find drawings of the order for laying the stove, but also to correctly prepare the masonry mortar on which the bricks will be laid. Let's figure out what the composition of the mortar for the stove masonry depends on, how to choose the right components and how to mix them correctly so that the stove lasts for many years and delights with its warmth.
How to check the quality of clay for oven mortar?
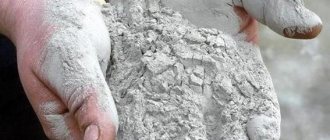
The quality of the clay that will be used in the mortar for laying the furnace can be checked in several ways. Dilute about half a liter of clay with a small amount of water and knead thoroughly with your hands until the clay stops sticking. After this, roll a ball with a diameter of 5 cm from the clay and make a cake with a diameter of 10 cm from it. Leave the cake to dry for 2-3 days. If during this time cracks appear on the cake, it means the clay is “oily”. If there are no cracks, the clay is normal and you can prepare a solution.
Additionally: how to line an iron stove in a bathhouse with stone
Here we see two options:
- or you line it with brick, and then put decorative tiles made of natural stone on top - this will simultaneously increase the heat capacity of the casing, increase the heating time, and also change the design of your stove;
- or you should purchase one of the ready-made stone casings for stoves, which are cut in workshops to fit any model, as well as from any available stone. The most popular are casings made of soapstone (soapstone is softer, magnesite is better in this regard) and coils. However, you can find interesting options from other rocks.
For more information on using stones for lining, see this article.
Furnace solution proportions
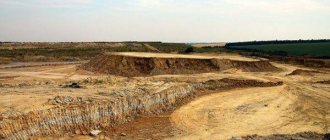
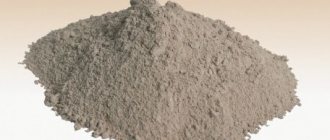
To prepare masonry mortar, you will need high-quality, clean clay without including stones, plant debris and pieces of the soil layer. Dry clay should have a uniform composition and color. To prepare the solution you need to prepare: - a container (tub, tank) with a volume of 20-30 liters; — measuring bucket with a volume of 0.9-1 l; — 10-15 liters of water; - clay; — construction mixer; - sand. The most common ratio of clay to sand is from 1:1 to 1:3. Water will be needed from ¼ to 1/3 of the volume of clay.
Sequence of work on furnace lining
The brick structure must have a reliable foundation, so the process of lining the furnace begins with the construction of a solid or columnar foundation. If you have a wooden floor in your bathhouse, you should also take care of fire safety. To do this, a metal sheet is laid in the area where the firebox door is located, covering it with asbestos material on top. Further work is carried out in the following order:
- make a base that is one or two rows of masonry;
- a stove is mounted on the base;
- lay the first row of bricks, along which the entire structure is installed;
- gradually lay out the next rows of the screen, leaving special holes at the bottom and top for air circulation, and install additional elements along the way;
- make a brick chimney or install a metal pipe.
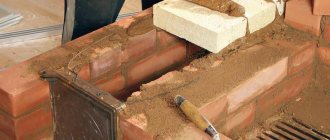
When carrying out work, we must not forget about the following nuances:
- For lining the furnace, use a brick, previously soaked for 30 - 40 minutes in water;
- seams between bricks should not exceed 5 mm.
Otherwise, everything is the same as in ordinary masonry: checking the corners with a plumb line, and the evenness of each row with a level. Strict adherence to technology is the key to the quality of the future design.
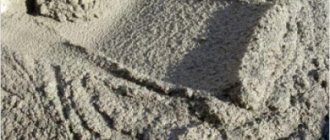
Preparation of furnace solution
After everything necessary is prepared, you can proceed directly to preparing the solution. First you need to prepare the clay. To do this, pour 27-30 kg of dry clay into a bucket, add 10-15 liters of water and thoroughly knead the solution using a construction mixer until a homogeneous consistency is obtained and leave for about a day. Even better - for 2-3 days or even a week. During this time, the clay will “ripen”.
The sand used to prepare the stove solution must first be carefully sifted through a metal sieve with a mesh of 1.5x1.5 mm to exclude possible inclusions of small pebbles, organic residues, pieces of soil or dried plants.
The amount of sand added to the clay depends on the “fat content” of the clay itself. The “fattier” the clay, the more sand will be required to create the required proportion; the “leaner” the clay, the less sand needs to be added to prepare the masonry stove mortar. Too “fat” clay leads to cracking of the solution. Too “skinny” - to the flowability of the dried solution, which easily crumbles under any external influence.
The quality of the resulting solution is checked before starting masonry.
Creating a foundation before covering an iron stove in a bathhouse with bricks
The problem is that the story begins long before the stove in the bathhouse is lined. And it begins with a calculation , without which you will not be able to correctly estimate the weight of the stove together with the screen, and therefore, you will either waste your money on the foundation, or, conversely, underestimate the weight and ruin, at a minimum, the floor.
Calculation after which a decision is made on the choice of base
You need to collect the following information:
- dimensions (length, width, height) and weight of the future or existing stove (manufacturers usually post similar information on their websites);
- mass of stones, in ovens with a closed and/or open heater (also indicated by the manufacturer);
- hot water tank (!about stoves with a tank here) - if it is assumed, then its weight and the volume of water it can hold (1 l = 1 kg).
Next, you will have to figure out what kind of brick you will use - red fireproof or fireclay. Since a discussion of the types of bricks awaits you below, here we will indicate the size of only ordinary red refractory brick, which, by the way, is the leader when choosing to cut an iron stove in a bathhouse with facing bricks.
So, the dimensions and weight of one standard brick are 250 mm in length, 120 m in width, 65 mm in height, weight 4 kg.
Now estimate how many bricks will be needed for 1 row if you place them along the walls of the stove with a minimum gap of 5 cm between the stove and the screen?
There are different screens - on four sides, on three, on two - choose your option, focusing on the height of the stove, and calculate how many rows will fit.
By the way! Do not forget that the brick in the masonry can also be laid in different ways (1/2, quarter and other options), and this will affect the base area.
By multiplying the number of rows by the number of bricks in a row, you will get the total amount of the required material, as well as its mass , multiplying the result by 4.
Add the mass of the screen with the mass of the oven, stones, tank, water in the tank. Add 20% as a safety margin.
If the mass is less than 700 kg , you can safely make the base directly on the floor boards. Otherwise, you will have to build a separate foundation from the sauna stove.
Foundation on foundation
Let's start with the more difficult one. You have calculated everything and it turns out that without a foundation there is no way. The task is easier if you are at the construction stage, otherwise you may have to dismantle the stove, the old base, or part of the floor.
IMPORTANT! You know the dimensions of the foundation by area from the calculations made above. This is a platform formed by bricks on the sides of the stove. Add 10-15 cm to it on all sides.
Start digging a hole. If the soil can withstand it (say, if when calculating the foundation for the bathhouse, it turned out to be shallow, then there is no need to deepen the stove too much), make the depth half a meter and fill it 3/5 with a mixture of sand and gravel, or just crushed stones.
Keep in mind! Not only should the stove and bath foundations not touch each other, it is recommended that the distance between them be at least 5 cm.
On top of the cushion, a screed is usually made from a 1:4 cement-sand solution.
Waterproofing and formwork are placed on top of the screed and a concrete foundation is poured, possibly reinforced, 20 cm high. It will be below floor level.
Note! When drying concrete, it must be frequently sprayed with water to prevent it from cracking.
The concrete is again waterproofed , after which foundation bricks - fireproof red or fireclay, which are placed on a clay mortar . Height - 1-4 rows. Do not forget to check the horizontal level at each stage.
After that, install your device and begin to build a brick screen for a metal stove in the bathhouse.
Floor base
It is easier to cover a metal stove in a bathhouse with bricks if the base is made directly on the floor. However, you need to take into account the structure of the floor and first calculate whether specific lumber will withstand the upcoming load.
ESSENTIAL! In an old bathhouse, a mandatory procedure will be to open the floors and check the beams and joists for rot and other damage. Replacing the damaged one is inevitable due to the increasing load.
Let's start with the fact that the stove does not press on the floor pointwise, but approximately evenly, because it stands on a brick base. This means that we must add the weight of the foundation bricks to the previously calculated total for the stove and screen, and then divide by the area occupied by the latter, measured in square meters. As a result, we get the load per square meter of floor surface under the stove.
In the table below you will find the parameters of beams (width, height, thickness) that will withstand the specified maximum load - 150, 250, 350, 450 kg per square.
If yours don't fit, don't worry - beams can be reinforced with channels, steel strips or rods, as well as wood overlays.
If the beams are located at a distance of a meter or more, craftsmen advise placing an additional beam between them. For example, pine with a section of 100x150 mm.
The next thing to worry about is lags . There are also maximum loads for them. Look for the values in the table below.
If there are no color marks, then the values are not close to the tensile strength. Green color is an acceptable, but already limiting value . Red - unacceptable !
Joists are easier to replace than beams.
So, having completed the preparatory work with the floor, you are ready to begin creating the foundation. To do this, markings are made on the floor with an allowance from the screen of 10-15 cm. If any side or sides of the stove are not covered by the screen, then the allowance is made from the stove itself.
Do not forget that fire safety rules require protecting the space in front of the firebox, preventing sparks from touching flammable material. You can either extend the refractory half a meter in front of the firebox, or put a metal pre-furnace sheet there.
After marking, a sheet of refractory material - the material of your choice: asbestos, ceramic fiber or another option. The edges are secured to the floor using self-tapping screws.
asbestos cardboard (asbestos cardboard)
The next layer is the base bricks, the height of which can be, for example, 20 cm. Use only solid refractory bricks - red or fireclay. The solution is clay or with a small addition of cement . Alternatively, you can buy masonry mixture .
Most often they are limited to two rows of masonry . Excess solution is removed without waiting for it to dry. Evenness is also checked immediately using a level - this should not be neglected.
After such lengthy preparations, we are already close to the story of how to line an iron stove in a bathhouse.
How to check the quality of the stove solution?
You can check the quality and plasticity of the mortar by eye in the following simple way - a small amount of mortar hangs on an inverted trowel without coming off, and slides off the trowel, tilted at an angle of 45 degrees, with the clearly audible creaking of sand on metal.
You can also check the quality of the resulting solution using a ball, which needs to be rolled out of the solution and thrown onto the floor. If the ball crumbles, the solution contains little clay and a lot of sand. If it doesn’t crumble, but is covered all over with cracks, that’s better, but there’s still a lot of sand. If there are no cracks, the solution is normal and can be used.
Heat-resistant, heat-resistant, fire-resistant - what's the difference?
Beginner stove makers often experience some difficulties associated with a correct understanding of terminology. Regarding mortars for stove masonry, the greatest confusion arises with the concepts of heat resistance, heat resistance and fire resistance of the material. These parameters are fundamental in the furnace business, so we will now try to clarify their meaning and clarify the understanding of this issue.
Heat-resistant is a material that can withstand heating to high temperatures. At the same time, during its subsequent cooling, the structure and chemical composition are preserved and no irreversible changes in shape occur. In addition, heat-resistant materials in a heated state are still able to withstand the original specified physical overloads without the risk of possible destruction.
The main property of heat-resistant materials is resistance to temperature, provided that the original mechanical properties are maintained. Heat-resistant substances and compounds have an order of magnitude lower thermal expansion index than heat-resistant ones. Such materials are used in the construction of not only furnaces, but also mechanical devices operating in extreme temperature conditions, while being subjected to powerful dynamic effects.
Finally, fire-resistant materials are heat-resistant or heat-resistant compounds that, among other things, calmly withstand the action of chemically active (often aggressive) substances contained in gaseous substances. Specifically in the case of stove masonry, this may be smoke or products of thermal decomposition of fuel.
All solutions and materials used in the construction of furnaces must be heat-resistant and fire-resistant. This requirement applies even to those elements that, during normal operation of the stove, do not heat up by more than four hundred degrees. No standard building mixture meets these parameters.
Do I need to soak brick before laying?
Despite the fact that solid stove bricks have relatively low water absorption, when laying it is better to ensure against uneven shrinkage of the seams, which can occur when bricks absorb water from the mortar. Therefore, before laying out the next row of bricks, they should be pre-soaked.
When soaking bricks, various types of efflorescence may appear, so before you start laying wet bricks, try soaking 1-2 bricks from the batch and dry them completely. If, after drying, no white or colored stains appear on the surface, the bricks can be wetted. If they appear, you should not wet the brick. It is better to lay such bricks dry.
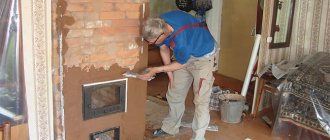
Reasons to line the stove in a bathhouse with bricks
Metal sauna stoves lined with brick
The decision must be made carefully, so we will name the reasons why an iron stove is lined with bricks in a bathhouse.
Unfortunately, the metal stove itself is a source of not only rapid heat, but also hard infrared radiation, which burns the skin from a distance, without contact with the object . In addition, a rapid increase in temperature in the bathhouse leads to dry air , and this is a big obstacle to creating the correct bathhouse microclimate. The third significant reason is that the metal not only heats up quickly, but also cools down quickly, and in a bathhouse this leads to excessive consumption of firewood and unnecessary movements.
Brick is an artificial stone , and therefore it takes longer to heat up than metal and gives off heat much longer. to eliminate the main disadvantages of a metal stove relatively cheaply (compared to natural stone) : make the radiation softer, warm up longer, but without drying out the air, increase the efficiency of the stove by retaining heat from wood burned in the stove longer.
Ready-made mixtures and solutions for laying stoves
If you do not have the opportunity to order quarry sand of the required fraction and buy clay suitable for laying a furnace, then you can try using the wide range of mixtures produced today. Good reviews can be found on the Internet about mixtures from the Borovichevsky plant based on red clay. This mixture is infused for about 3 hours, after which you can use the resulting solution for masonry. Also on sale today, more and more often, for laying stoves, they buy the clay-chamotte mixture “Terracotta”, which has good reviews and good quality of the resulting solution:
Useful video
The first video will be useful for those who have never laid a brick themselves.
A video about how to get a Russian bathhouse by lining a metal stove with brick yourself and cheaply
In the following video, Teklar demonstrates the principle and procedure for lining its own furnace with an external firebox.
*** Well, now you are fully armed with the knowledge of how, why and what you can line an iron stove in a bathhouse with. We can only wish you success and easy steam!
From disks
Are you a car enthusiast? You probably have some worn out old car wheels lying around. Don’t rush to throw them away - they are perfect for making a stove. Especially if you don't want to bother with pipes. In order to make a stove from disks for a bathhouse, it is best to choose wheels from trucks:
- larger diameter;
- thicker metal.
Accordingly, such an improvised stove will last much longer and will be able to withstand very serious loads. But if you only have wheels from a car, you won’t be able to use them to make a reliable stove for a full-fledged steam room. Detailed manufacturing instructions are in the next video.
Kinds
Portals for furnace equipment in a bathhouse are classified depending on various factors. By form:
- arched structures;
- rectangular or square portals.
According to the material:
Brick, natural or artificial stone. Most often, these materials are used for decorative framing. They are suitable for lovers of the classics. They look impressive in baths made of wood. The best option is red brick or clinker. Often the metal elements of stoves are decorated using artificial or natural stone. Tree. Since this material is flammable, it cannot be used as a base for a portal. Wood is suitable only for decorative purposes. At the same time, it must be impregnated with a protective composition against fire. Ceramic tile. A finishing material, the appearance of which is chosen depending on the wishes of the owner. Experienced builders do not recommend using large tiles. Drywall, metal. Sometimes the decorative design of furnace equipment is made from these materials
It is important to choose drywall that is resistant to high temperatures. The frame is made of metal.
What materials should I use?
Before starting construction work, it is always recommended to think through a plan and describe in detail where and what materials are best used. For example, when finishing, decorative stone or fire-resistant tiles may be suitable, while lining the stove with brick or soapstone.
Red brick is the most optimal solution. It is ideal for creating a heat shield. It is also recommended to consider solid stone, but unlike solid stone, its heat retention properties are much poorer.
Sand-lime brick, in turn, is distinguished by its durability. It is also used for cladding residential buildings. Resistant to almost any weather conditions.
Lime material is suitable only for those temperature conditions that are suitable for the operation of a sauna stove. Additionally, high humidity should be taken into account, which can subsequently lead to destruction of the material.
Fireclay stone exhibits resistance to different temperature conditions. Constant temperature changes do not pose a threat to it and have good heat capacity. Since the appearance of such material leaves much to be desired, it is worth immediately thinking about how the structure will be decorated with finishing, for example, for these purposes you can take porcelain stoneware.