To build a fireplace or stove, classic red brick is most often used; its main advantages are durability, reliability, sufficient density, high heat capacity and fire safety. When performing installation work, a special mortar for laying furnaces is used, which is based on special components. The stability and strength of the entire structure depend on how conscientiously and in what proportion they are mixed. Most often, when constructing furnaces, solutions based on clay, cement or lime are used. The last two materials are a more preferable choice if the master has started building a pedestal for the chimney: cement and lime are more durable and resistant to cracks. To ensure that the future structure is stable, solutions for furnaces are prepared in precise proportions, guaranteeing the required plasticity and optimal density.
Important points
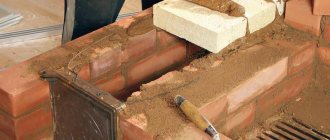
The construction of the furnace takes place in several stages, each of which has its own mortar recipe. First, a foundation is made; work on it requires a reliable concrete solution, which is based on cement. After this, the laying of the furnace itself begins; as a rule, refractory bricks are taken for it, and here you cannot do without masonry mortar. Work on a chimney has its own characteristics: the priority is resistance not to high temperatures, but to atmospheric changes, because its installation is carried out not only indoors. The final stage is coating the oven with a plaster solution, the composition also differs from the previously used mixtures.
Of all the stages listed, the greatest attention should be paid to preparing the mortar for the stove masonry. It must meet the following conditions:
- High heat resistance , expressed in the ability to withstand the influence of open flames and maintain a flat surface even under high temperatures.
- Even heat-resistant bricks adhere well to each other , ensuring a minimum seam thickness.
The most commonly used stove mixtures are clay-based, which have been used by stove makers for several centuries. Other stages of furnace construction are characterized by the use of lime-based solutions, as well as mixed ones - with the addition of cement or cement-sand to lime.
Those who want to prepare a solution for stove masonry with their own hands cannot do without such devices as:
- construction mixer;
- pallet or other similar shaped container;
- measuring bucket;
- shovel;
- sieve;
- putty knife;
- Master OK;
- thermometer;
- scales;
- trowel.
What solutions are used when laying individual brick oven elements?
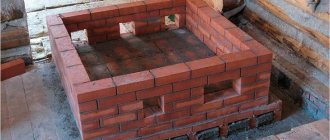
The choice of solution for work must be carried out depending on which part of the stove it will be used for laying. Using the diagram below, we will consider each of them in detail.
General structural diagram of a standard furnace masonry
- The reinforced concrete base of the furnace foundation, which is also called the pillow or root. It is manufactured using standard technology, however, in order to avoid unpleasant consequences, it must be physically separated from the foundation of the house itself. The need to comply with this condition is explained by differences in the degree of shrinkage of the building and the furnace in it.
- Waterproofing layer. To create it, roofing material is perfect, which needs to be laid on top of the foundation in several layers.
- Actually, the stove foundation itself. Since it is not exposed to powerful thermal effects, it does not require the use of particularly heat-resistant mixtures when laying. At the same time, the reliability of the entire structure depends on the quality of assembly of this furnace element. There are cases when, due to errors in laying the foundation, it was necessary to completely disassemble the stove and redo it in a new way. Complex, three- or more-component cement-lime mixtures are used for work. Well, red solid brick is best suited here as the main building material.
For the manufacture of compact stoves or stoves with a large base area (for example, a Russian stove), you can also use a regular lime mixture.
- A layer of thermal insulation with a fire protection area. It is made from a mineral cardboard or asbestos sheet, on which a sheet of iron is placed on top, covering the entire structure with a finishing layer of felt cloth soaked in so-called clay milk (this is a solution of very thinly diluted clay; we will describe how to prepare it below).
- A heat exchanger that accumulates the energy released during the combustion of wood. It is one of the main parts of the so-called furnace body. During kindling, it rarely heats up above six hundred degrees, but is subject to very active influence from the smoke and other gaseous substances released during combustion. It is not uncommon for destructive acid condensate to settle on the inner surface of heat-storing masonry. The brick used here is special: stove type, M150 grade, solid red ceramic. The bricks are fastened together with a simple one-component clay solution. It should be noted that the term “simple” refers only to the composition of the building mixture. Its preparation is a rather labor-intensive process, the features of which we will consider below.
- The hot part of the stove body is also called the combustion chamber. It is subject to moderate chemical influence from gases, but heats up to very high temperatures, up to 1200 degrees. For masonry, so-called fireclay bricks and fireproof clay-fireclay mortar are used.
- The source of the chimney. It is made from the same brick and fastened with the same mortar specified in point No. 5, since this element of the furnace is subject to similar temperature and chemical influences as the heat-accumulating part of its body.
- "Fluffing" of the stove chimney. Its task is to create a flexible mechanical connection connecting the ceiling and the chimney itself. Allows you to avoid a situation where ceiling subsidence is possible. The fluff can be repaired separately; it does not require complete disassembly of the entire structure. The bricks used for masonry are standard stove bricks, and lime-type mortar is ideal for laying this part of the stove.
- A fireproof cutting is a special metal box filled with a non-flammable heat-insulating substance.
- Chimney pipe. This element is susceptible to wind and precipitation. It heats up weakly, so the pipe is laid from standard red brick. However, for greater reliability and heat resistance, they use lime mortar.
- Fluffing the chimney pipe (11). It is made from the same materials that are used when laying the main part of the pipe.
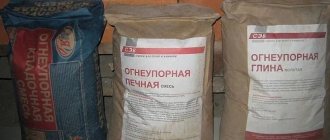
Clay mixtures by type and consistency
To prepare it, you need to take clay, red or white, combine it with sand and then add water. It is very important to use only high quality components for the mixture: for example, only calibrated sand is suitable. To clean it from fine gravel and various plant impurities, use a sieve. The same is done with clay, achieving its homogeneity. As a rule, the following proportions are used: 1 part sand and clay, or 2 parts sand and 1 clay. The water in the solution should be approximately ¼ of the amount of clay.
The main criterion for the finished mortar is
its level of fat content , which determines the elasticity and astringent properties of the mixture, and therefore the reliability of the future structure.
It is also worth paying attention to the purity of the water used: it is better if there are fewer minerals in it. Otherwise, stains may appear through the plaster in the future, which will be caused by sufficient mineralization of the liquid. The finished mortar for the stove should be moderately greasy: too soft will lead to the fact that the finished masonry may crack; a thin mortar will not provide the structure with sufficient reliability. The ideal mortar for laying a brick stove is sufficiently elastic , guaranteeing the stability of the structure after drying.
Types of mortars for furnace masonry and their main properties
Having read the previous paragraph of the article, you may have noticed that for laying different components of the furnace, it is recommended to use your own type of mortar that is most suitable for the job. Let's look at each of them in more detail.
Clay mortar for laying a furnace: pros and cons
Clay mortar is the cheapest building material. It can usually be obtained and prepared at home yourself. We will consider this process in detail later, since the preparation of the constituent components itself is quite labor-intensive and requires separate instructions. The strength of the clay mortar, as well as its heat resistance, is average. The composition is able to withstand temperatures up to 1100 degrees Celsius without consequences. As for fire resistance, here clay has practically no equal: it does not ignite, and only hydrofluoric and fluoric-antimonous acid can dissolve it. It also has absolute gas density indicators. A stove built on clay mortar can be easily reassembled, since the mixture moistened with water will become limp again. In addition, such material is suitable for work for an almost unlimited period of time: a container with a solution covered with a damp cloth will not dry out even after a couple of months. On the other hand, this is also its disadvantage: clay is completely unsuitable for masonry outside.
Appearance of clay mortar
How to make clay mortar for laying a stove: video instructions
Lime and cement-lime mixtures: are they used for laying stoves?
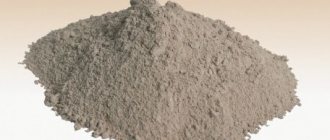
Mortar
In any case, it will cost more than clay. To prepare it, you will have to purchase special lime dough or lump quicklime. It should be noted that quicklime will allow you to save money, but later this will come back to haunt you with serious labor costs: preparing a solution from “boiling lime” is a scrupulous process, because you need to extinguish every last particle. If quicklime is present in the mixture, the masonry seam may then rupture. The mortar itself has reduced heat resistance and fire resistance. It is able to withstand inactive flue gases with a temperature of less than five hundred degrees. Compared to the clay mixture, it has a lower gas density. On the other hand, lime mortar does not absorb atmospheric moisture, so you can work with it outdoors. The finished mixture is suitable for use for a relatively short period of time (relative to clay): it can be used in the oven from one to three days after mixing.
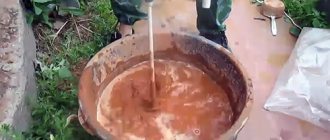
This is what the lime slaking process looks like
Cement-lime mortar
Costs more than regular limestone. However, this is partially offset by its increased strength. On the other hand, the heat resistance here is approximately two times lower: the cement-lime mixture will withstand temperatures only up to 250 degrees without consequences. The gas density index of the solution is low. In most cases, it is used to construct a furnace foundation. It dries quite quickly, so it remains suitable for use only within an hour after preparation.
Appearance of cement-lime mortar
Clay-chamotte and cement-chamotte mortars
Clay-fireclay mortar
It has all the properties of a regular clay mixture, but is more heat-resistant (its maximum operating temperature reaches 1300 Celsius). This material, naturally, is more expensive than clay, since for its preparation it is necessary to purchase special fireclay sand. Clay-fireclay mortars, for the most part, are used to construct a furnace firebox.
Cement-chamotte mortar
It is quite expensive because it requires the use of high-quality components. The strength of the mixture is equal to that of cement-lime, while its heat resistance is similar to that of clay-fireclay mortar. On the other hand, it has average fire resistance. However, it is quite enough for laying the furnace part of the furnace. The shelf life of the finished cement-chamotte mortar is about forty minutes. It should also be noted that the components are not mixed manually !
Appearance of cement-chamotte mortar
The names of multicomponent mixtures for masonry are usually compiled in such a way that the name of the strongest binder comes first. In this case, the percentage of its content in the solution may be the smallest. For example, there is 10-15 times less cement in a cement-lime mixture than lime.
Two terms used above require separate explanation: “gas tightness” and “fireclay”. Let's understand their meaning.
The term " gas tightness " refers to the ability of a material to allow gaseous substances to pass through. If the solution has a high gas density, then it will not allow particles to pass out and, due to diffusion, they will not get inside the heated room. It should be noted that gas density and hygroscopicity are not mutually exclusive concepts. Water vapor molecules are smaller and more mobile than smoke particles. A good quality solution must combine both qualities, both gas density and hygroscopicity, in optimal proportions. The stove must “breathe” and, at the same time, not let smoke inside. It is these requirements that are key to the formulation of stove building mixtures.
As for the second concept under consideration, “ fireclay ” is a special fireproof and heat-resistant material. It is produced by deep firing of a mixture of special clay (the so-called “high alumina”), zirconium compounds, garnet crystals and some other components. Deep firing differs from ordinary firing in that it involves continued heating of the substance even after the complete release of all crystallization water from it, up to sintering and the formation of lumps.
This is what fireclay clay looks like
Optimal fat content of clay
To check the fat content of this main component of the masonry mortar, there is an elementary way. You need to take 0.5 liters of clay and mix it with water until the consistency becomes like stiff dough. Then the resulting mass must be thoroughly kneaded and formed into a ball with a diameter of 4–5 cm. When it dries, it must be placed between two planks and squeezed.
If as a result the ball cracks when squeezed halfway, its fat content is high, which means the mixture does not have enough sand. If it disintegrates almost immediately, you need to add clay. In the event that cracks appear when the ball is compressed by a third, the composition of the oven mixture is selected ideally.
To ensure the reliability of the future furnace, the clay solution for laying it must be prepared from thoroughly cleaned components and have normal or high fat content.
The obvious advantage of the solution, the ingredients of which are carefully selected and dosed, is that the masonry will have a neat appearance due to the thin seam. In addition, a stove mixture of normal fat content will provide the structure with sufficient reliability and durability. True, such a solution still has one drawback: such a solution is not resistant to environmental humidity.
Terminology
Sand art uses only three terms to name the solution. It is heat resistant in nature. Those. a solution that can withstand fairly high temperatures. When the oven cools, this mixture does not crack and remains in its original form.
Heat-resistant solution refers to a mass that can withstand temperature fluctuations. It is characterized by a smaller amount of thermal deformation compared to the first option.
The refractory solution took away the advantages of the two above substances. At the same time, the appearance of the stove remains the original design, despite the passage of smoke through the chimney and firebox. Based on this, we can draw a conclusion about the solution that is most suitable for laying a stove. Namely, about the heat-resistant and fire-resistant mixture.
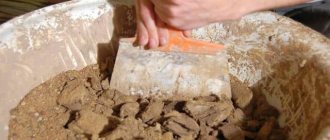
Clay mortar: mixing technology
You need to start by leaving the clay, cleared of impurities, in water for about a day. Then you need to add a little more liquid to it, achieving homogeneity of the mass. The consistency of the mixture for stoves and fireplaces should be similar to thick sour cream. After straining, you need to add sand until the oven mixture becomes viscous. To give the solution strength, you cannot do without cement and salt. The required quantity of these components is 700–750 g and 200 g per bucket, respectively.
Adhesive for tiling stoves - manufacturers
Mari (brands) are popular among professionals and ordinary users:
Ceresit CM 16 Ceresit CM 16 Elastic tile adhesive “Flex” (Ukraine, under German license, 600 rub./pack). Ceresit Flex is designed for installation on complex deformable substrates, as well as using the tile-on-tile method.
Glue “Terracotta” Reinforced heat-resistant glue “Terracotta” (Russia, 550 RUR/pack). Used for cladding with natural stone and terracotta ceramic tiles. Chamotte kaolin dust added to the adhesive solution makes it possible to perform cladding without lining the furnace and obtain an identical result. Operating temperature up to 250 °C. Glue SCANMIX FireSCANMIX Fire (Finland, 600 RUR/pack) has a high softening temperature – 1,200 °C. Scanmix is indispensable for lining furnace outlets and solid fuel stoves. The solution is intended for laying and repairing stoves, as well as for laying tiles on simple surfaces.
Plitonit SuperFireplace Plitonit SuperFireplace (Russia, 455 RUR/pack) allows you to lay the mortar in a thin layer due to the presence of fine-grained fillers. Permissible temperature of use is up to 1,200 °C.
Tile adhesive Ivsil TermixIvsil Termix (Russia, 460 RUR/pack). Highly elastic adhesive. Operating temperature up to 250 °C, which allows it to be used on stove surfaces away from the firebox and on fireplaces with a closed firebox. Ivsil Thermix adhesive is intended for durable substrates.
Tile adhesive “Pechnik”Glue “Pechnik” (Belarus, 260 RUR/20 kg). Maximum operating temperature up to 250 degrees Celsius.
Glue for stove tiles Bergauf KERAMIK TERMOBergauf KERAMIK TERMO (Yunis, Russia, 450 RUR/pack). Bergauf Ceramic Thermo glue is used for simple surfaces with heating temperatures up to + 180 °C.
Glue SILTEK T-84SILTEK T-84 (Ukraine, 360 RUR/pack). Siltek adhesive is used for cladding surfaces exposed to temperature changes within the range of – 30°C – +150°C.
Mortar for stove masonry according to all the rules
As already noted, its ideal consistency should correspond to the thickness of sour cream. If you use oily clay for it, then you need to add 2 parts of sand to 1 part; if it’s normal, the proportion should be equal.
Before starting to lay the stove, it is necessary to check the quality of the resulting stove mixture. To do this, you will need to fasten 2 bricks with mortar, wait about 5 minutes, and then lift the top brick. If the structure does not fall apart after several lifts, the mortar for laying a brick stove is ideal. If this did not happen and the adhesion quickly disintegrated, most likely, lean (non-greasy) clay was used to prepare the solution.
Experienced stove makers also advise increasing the strength of the solution by adding table salt to it (150 g is enough for 10 kg of clay). You can also add M400 cement: 1 kg for the same volume of clay.
When the stage of work on the chimney begins, it would be better to replace the clay mortar with lime-sand mortar: it is more resistant to moisture. To prepare it you need to take 3 parts sand and 1 part lime dough. Alternatively, use 1 part quicklime and 3 parts water.
How to prepare a mixture for laying the firebox
How to make fireproof mortar for a stove so that the stove lasts a long time? To lay the firebox, use plastic white clay, which can be yellowish or gray. The role of filler is performed by fireclay sand. It is made from broken fireclay bricks, which are then crushed by crushing. It brings the solution to a higher level of resistance to high temperatures. This sand is used instead of the usual sand to prepare solutions intended for combustion chambers, which are laid out of fireclay bricks.
To reduce the cost, you can take fireclay sand mixed with ordinary quartz sand in equal proportions. The mixture will still retain its fireproof properties.
Plastic clay does not need additional testing. It is kneaded in clean, soft water. To facilitate the kneading procedure, construction mixers are used.
If you know what solution to lay the stove on and how to get cheap building material, you can save a lot when building a sauna stove.
Cement as a base for mortar
To build a furnace foundation, the solution must be selected in such a way as to ensure reliability and stability of the structure, and cement is best suited for these purposes . This mixture is also suitable for the construction of that part of the chimney that will rise above the roof. The composition of the solution is cement, sand and water. Most often, the proportions used are: 1 part M300 or M400 cement and 3 parts sand. The components must be mixed well and diluted with water until the consistency of sour cream. The resulting mixture for laying stoves should be moveable, but not flow off the bayonet of the shovel if it is located at an angle of 45 degrees.
For the foundation and bottom of the combustion chamber, you will need a stove mixture with good heat resistance. Here is its composition: for 1 part of portlant cement M300 or M400 take 0.3–0.5 parts of fireclay sand and 2 each of finely sifted sand and crushed stone (gravel is also suitable).
Stove plaster is an excellent solution
After the furnace laying is completed, sometimes it becomes necessary to plaster the surface of the furnace and line it. A reasonable question arises: what composition of the solution is suitable for plastering the stove? The composition of the mortar for laying the stove and its plaster differ from each other. The best option is to use a more durable mortar with the addition of lime and asbestos.
Plastered stove
The proportions of such solutions are as follows:
- Clay - 1 part
- Sand - 2 parts
- Asbestos - 0.1 parts
- Lime - 1 part
There is another composition using cement:
- Clay - 1 part
- Cement - 1 part
- Sand - 2 parts
- Asbestos - 0.1 part
A plaster solution with the addition of gypsum:
- Sand - 1 part
- Gypsum - 1 part
- Lime - 2 parts
- Asbestos - 0.2 parts
Plaster - preparing the solution
The mortar for plastering a brick oven is prepared as follows:
- All components are sifted through a sieve . Next, the required proportions are measured. All measured components are thoroughly mixed without adding water.
- Water is poured into a separate bowl and clay or lime is added. The resulting composition should resemble thick milk .
- “Milk” is added to the dry mixture and a solution is mixed, the consistency of which resembles thick sour cream .
Our information: the finished solution using gypsum must be used within 5 - 7 minutes.
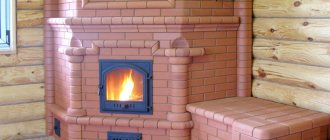
Ceramic cladding - how to do it right?
After laying, you can finish the stove. Many people will prefer to use ceramic tiles for finishing.
Stove lined with ceramic tiles
For laying ceramic tiles, simple cement mortar is usually used. But cement mortar has one drawback: it does not tolerate high temperatures. Clay oven mortar is also not entirely suitable here due to its low adhesive ability ; the tiles will not adhere well to it. Therefore, the mortar for laying tiles on the stove must be prepared on a clay-cement base. The composition of the solution is as follows:
- Clay - 1 part
- Cement - 1 part
- Sand - 2 parts
Clutch - solution to the problem
How to make sure that the tiles stay firmly in place ? If you planned to cover it with ceramic tiles before starting to lay the stove, when laying it, leave a gap in the seam on the outside of the masonry, 5 - 10 mm deep . This way you will achieve good adhesion of the mortar to the walls of the oven and, accordingly, good adhesion of the tiles. If the idea of using tiles for lining the stove came to your mind after its construction was completed, do not despair. Just stitch the seams to this depth. This can be done using a sharpened metal pin.
Grooving the seam
Furnace solution
Or, as it is also called, for the body of the furnace. Which is represented by red brick masonry. For example, brand M 150. It is in the body of the stove that the firebox is located. The body can withstand temperatures of more than +600 C.
But, as practice has shown, the temperature there is less than the indicated figure. But the influence of carbon monoxide and acid sludge is greater. Therefore, clay mortar is chosen for laying the body of the furnace.
As for the firebox, the temperature there is higher than + 1200 C. Therefore, to create it, they use a solution of clay and fireclay, which has a fire-resistant effect.
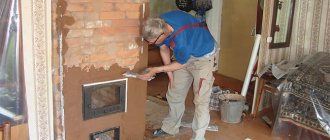
How to coat a stove with clay
The choice of how to seal the stove so as not to crack depends on what mixture you decide to use. But first you need to clean the bricks from the plaster and the layer of finishing material. They are then treated with a solution.
If you decide to use a clay mixture, then you need to follow the instructions on how to properly coat the stove with clay:
- The prepared solution is stirred one more time.
- They check its quality. To do this, roll the mixture into a ball and if it starts to crack, then add water.
- Before coating the stove with clay to prevent it from cracking, the damaged areas are moistened with water.
- The cracks are filled with the solution.
- Then the oven can be plastered.
- Despite the fact that the repair of the brick kiln is completed, you should not rush to heat the unit, since the solution must dry completely.
If you carry out repair work in full accordance with the instructions on how to coat the stove with fireclay clay to eliminate cracks, then you can forget about them for a long time.