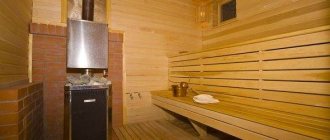
Shower floors are a centuries-old drainage system that was traditionally installed in Russian bathhouses. It is easy to implement, cheap and effective. The shower floor in the bathhouse is made from high-quality waterproof wood that does not absorb moisture. Larch is best suited for this. The durability of the bathhouse and its elements made of wood is achieved by treating it with protective antiseptic impregnations. The gaps between the boards should not exceed 5-6 mm. The subfloor is waterproofed, and the drain is diverted outside the building.
Shower floor in a bathhouse on a strip foundation
In the case of a strip foundation, the lags are laid on the pillars in the same way. The difficulty arises with the organization of water drainage. The strip foundation forms a trough. In some places, ventilation holes are provided in the tape - vents. However, they are not enough for ideal ventilation of the underground space if drainage is organized. In bathhouses with strip foundations, it is advisable to divert water outside the log house.
A concrete screed is made under the pouring floor. A complex design option is based on maintaining a slope from all 4 walls to the center of the floor. At this point there is a drain hole through which water is discharged through a pipeline outside the bathhouse.
A simpler option also involves installing a screed under the pouring floor of the bathhouse, but the slope is made only towards one wall. It is better to direct the slope to where the stove will be located. In this place, the floor warms up better and moisture evaporates faster. The second advantage of one slope is that there is no need to lay a drainage pipeline. In the section of the tape where the slope is made, a hole is punched a couple of centimeters below the level of the screed. A piece of pipe is inserted into the window to drain water, and the gaps are filled with foam or sealed with mortar. If the vents coincide in level with the screed, then water drainage can also be organized through them.
Attention! The slope of the screed towards one wall is maintained at the rate of 1 cm/1 linear. m
Design features
How to make a leak-proof floor in a bathhouse? Its typical design includes the formation of a subfloor and a sealed floor covering with holes in the direction of which a slope is formed sufficient for gravity flow of the bottom along the surface. If the soil under the building is sufficiently hydroscopic, the groundwater is deep, the bathhouse is not overused, and the environmental situation allows it, then the waste liquid is discharged from the underground directly into the ground. But even in this case, a sand and gravel bed should be laid to filter the water.
In case of hard, clay or rocky soil, trays are installed under the floor that receive water and send it for disposal into storage or filter wells. The main condition: in the subfield, i.e. between the floor covering and the ground, water should not stagnate. It is also necessary to prevent the formation of condensation on the lower surface of the floor. For this purpose, reliable ventilation of the underground space is ensured.
https://youtube.com/watch?v=Hj3NZy__kl4
When installing floors in different bath rooms, the following unwritten rule is usually followed. The floor in the washing compartment is formed below the floor level (8-9 cm) in the dressing room and rest room, to prevent flowing water from entering these compartments. In the steam room, on the contrary, the floor structure is raised slightly (up to 10 cm) to retain heat.
Wood floor construction (leaky)
Leaky floors are very simple in design. It won't be difficult for you to make them. We lay floor beams on the foundation, through roofing felt or similar waterproofing material. We install them strictly along the horizon, using a rope, hydraulic level or laser level. The best types of wood are coniferous species. The best option would be larch: it is not afraid of moisture and mold, and is well impregnated with resin. If it is not available, you can use pine or spruce.
Floor beams
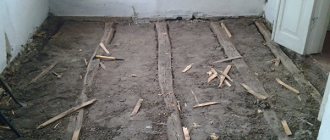
Floor beams: Be sure to treat the beams with an antiseptic. Don't be lazy to do this twice, especially at the ends. The length of these beams should be such that there is a ventilation gap of 2-3 cm between the wall and this beam. Support beams are the basis of the floor, so their size should not be small. Beam with a section of 100 by 150 mm. - that's it. Where is 150 mm. - this is the height. Such a beam will hold the floor well, although it is recommended to place posts under the middle. They can be made from brick or concrete. Don't forget to make a sand and gravel compacted bedding underneath them.
Another option for beams under the floor: the use of a metal channel. This is what I usually do. I take the 16th channel (height 160 mm), drill holes and fix a wooden beam in it with self-tapping screws. Naturally, the cross-section of the timber is not as large as in the first option. After this, I secure this channel using anchors or welding (depending on the foundation). You no longer worry about whether the beams will rot or not.
Soil under the bathhouse: Okay, we've sorted out the floor beams, now let's look at the soil under the bathhouse. What is it like, does it pass water well or not? If it's good, then there's no problem. Just pour a gravel cushion of 20 centimeters. It will act as a kind of filter and all the water through it will go into the ground.
If the soil under the bathhouse is clayey, then we proceed as follows. We dig a kind of gutter and take it outside the bathhouse into a drainage hole or septic tank. We also fill it with a gravel cushion on top. That's it, we have prepared the soil for draining.
By the way, try to make sure that the distance between the ground and the underside of the beams is at least 30 centimeters. A ventilation gap is required here so that the floors below are ventilated. Let's move on to the next stage... Installation of a wooden floor is carried out in an elementary way: we take a planed edged board 30 mm thick, cut it to size (2-3 cm at a time, do not bring it to the wall) and lay it on the beams, having previously treated it with moisture protection. The boards can be screwed in several places with self-tapping screws. Leave gaps of 5 mm between the boards. The water will drain through them. That's why they call leaky floors because water flows through them.
Such floors have one big drawback - they cannot be insulated, which means they are very cold. There is no way to use them in winter, especially in Siberia or the North of the country, your feet will simply freeze. To prevent such bad cases from happening, other types of wooden floors are used - those that do not leak. Let's take a closer look at them.
How to make: instructions
These instructions depend on what type of foundation you have. If you are making a poured floor, it will be attached to the foundation.
Let's assume that you have a strip foundation. Then there are two options: either lay the logs directly on the tape, or first place the strapping beam on the tape, and the logs are attached to it. But to lay the strapping beam, you must first provide for the installation of anchors directly into the concrete of the strip that has not yet hardened. The timber is placed on anchors and tightened with bolts.
If the foundation is piled or columnar, then it is connected by a grillage, which can be wooden or metal. In both cases, the logs will be attached to the grillage in approximately the same way (taking into account the grillage material) in the previous option.
ADVICE! It is clear that boards are placed on the joists with a gap of, say, 1 cm. But do not forget that you need to leave a gap between the boards and the wall, and its value is 1-1.5 cm.
How to make a concrete screed and drain. You will have to start by creating a drainage system or digging a trench through which water will be discharged either into a septic tank or into a drainage field.
The drainage system under the floor is a sand bed, on top of which gravel is poured. However, on clay soils this will not help much.
If the water is to be drained, then you first need to completely remove the soil layer from the ground, pour 10 cm of sand, then gravel.
Under the future drain you need to make a pit - a concrete tank into which used water will flow and leave through the pipe.
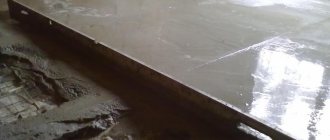
The simplest drainage scheme with a pouring floor
The sand and gravel cushion is covered with a layer of waterproofing (roofing felt, for example). Then there is a layer of insulation (often polystyrene foam), on which a reinforcing mesh is laid. Everything is filled with concrete.
A slope is made on top of the rough screed, which converges towards the pit.
This option is suitable for owners of bathhouses with a strip or columnar foundation.
The technology does not change if you decide to make a waterproofed (dry) floor covered with ceramic tiles.
Selection of sewer pipes
Choosing the diameter of the pipe depending on the level of the slope A correctly made slope at the base of the drain does not yet guarantee the rapid evacuation of water masses from the room. In this matter, the choice of sewer pipes is not the least important. Since the bathhouse uses a non-pressure liquid discharge system, it is advisable to use the following pipes to install the hydraulic apparatus:
- The minimum diameter of the pipe should be 50-60 mm, and the thickness of its walls should be at least 3-4 mm;
- It is advisable to assemble the external pipeline from PVC materials, since they are more frost-resistant;
- During the installation process, pipes are laid in the soil at a level that is below the freezing point.
Laying joists and waterproofing
Brick supports measuring 250x250 mm are built on a concrete or sand pad with a pitch of 800-1000 mm. The pillars are plastered and covered with two layers of roofing felt.
It is advisable to use solid wood to make logs. They are mounted horizontally on supports using metal channels, to which the wooden elements are attached with self-tapping screws. The entire structure is covered with bitumen or liquid rubber to protect it from moisture.
Important! The distance from the waterproofing flooring to the bottom of the leaking floor structure must be at least 300 mm!
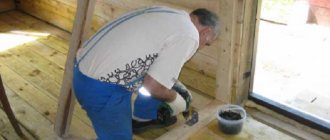
To protect the floor structure from the destructive effects of moisture and alkali from soap, the entire underground is covered from the inside with molten bitumen - during the cleaning process, all contaminants can be easily removed from it with a stream of water from a hose.
Important! A stove foundation for a bathhouse is constructed only after laying the logs to bring its top to the level of the finished floor.
Available materials for building a drainage pit
The choice of suitable material for the construction of a drainage pit under a bathhouse depends on the design features of the structure, the volume of wastewater and the financial capabilities of the owner of the site.
Barrel pits
Tanks can be constructed from barrels, metal and plastic, of various sizes. Such a system involves the use of one or two drainage containers:
- One container. The bottom of the prepared pit is covered with a drainage mixture of crushed stone and gravel, then a plastic container without a bottom and with a perforated surface is lowered into it. The distance between the barrel and the pit is filled with drainage. A waste pipe is connected to the barrel at an angle. Some of the liquid will flow through the drainage holes into the soil for further cleaning.
- Two containers. Such a system involves the use of two barrels, with the first being installed 25 cm above the second. The containers are connected to each other by an overflow pipe. The wastewater enters the first container, in which foreign impurities and solid waste settle. Next, the purified liquid is poured into a second tank, to which perforated pipes are connected for drainage. Drainage elements are installed in trenches filled with drainage material and a dense layer of soil.
Brick pits
To construct drainage pits, ceramic bricks are used, the masonry of which is carried out with small gaps - they ensure the drainage of wastewater into the drainage pad and soil. The operating principle of such a drainage system is no different from the previous one, the difference lies in the material used. The distance between the brick reservoir and the earthen base is filled with drainage material designed to clean the wastewater and distribute it around the perimeter of the pit.
A brick pit is considered more durable and practical compared to a structure made from plastic barrels.
Concrete pits
Given the technical equipment and financial capabilities, it is possible to build a drainage pit from concrete rings with a perforated surface, which are mounted in a prepared pit. After the installation of the rings is completed, the bottom of the structure is covered with a drainage cushion of gravel and crushed stone.
In the case when the depth of the pit is at least 2 meters and the bottom of the tank is concreted, such a structure can be used both for drainage of wastewater from a bathhouse and for sewerage of a residential building.
Tire pits
Cesspools made from used tires are designed to drain liquid waste, so they are well suited for the needs of a bathhouse.
The arrangement of a drainage system when installing tires can be carried out in various ways, including lateral perforation of the walls, maintaining a technological gap between the installed slopes, cutting off the outer walls while maintaining the internal structure of the tires.
This is the simplest and most popular option for organizing drainage under a bathhouse, according to which the work can be done with your own hands.
Installation methods
Pouring the concrete base in a bathhouse is done in different ways. The choice of method depends on the characteristics of the soil on the site, the qualifications, experience and knowledge of the master, and the financial capabilities of the owner. Experts know how to fill the floor in a bathhouse with a slope, under the drain, so that there are no difficulties during operation. They will ensure the formation of a surface with the correct geometry, ensuring timely removal of moisture under the influence of gravity. The amount of slope is regulated by regulatory requirements.
Installation directly on the ground
Installation work begins with the excavation of a certain volume of soil. To do this, a layer is removed from the area where the base is to be formed, the average thickness of which is 40 - 50 cm. After this, a sand and gravel cushion is arranged, the thickness of which can reach 60 cm. The filled layer of sand and gravel is carefully compacted to ensure sufficient density and foundation strength. Pouring the solution begins after complete and thorough preparation of the base, ensuring its compliance with regulatory requirements.
The screed is poured in 1 - 2 layers depending on the desired thickness. Work is being carried out on waterproofing and insulating the concrete base due to its high thermal conductivity.
One of the options for installing a bath floorSource logvinov.net
Filling along logs
This method of installing a concrete screed is suitable for those who plan to use the bathhouse all year round or the site is located in a region with a fairly harsh climate. The technology for performing the work is somewhat different. It is possible to create a ventilated underground without installing an additional ventilation system in the screed itself. To carry out installation work, additional financial influence will be required. The finished coating will be quite durable and reliable.
To make logs, a beam with a side of 10–20 cm is used. It is placed on the base, forming a kind of wooden mesh, the cell size of which is selected individually. Subfloor boards are laid on top. After installing thermal and waterproofing, the concrete mixture is poured. A metal mesh is used to reinforce the concrete base.
The finished structure will not have a drainage hole. The outflow of water will be carried out into a special pit designed to collect it, and a drain, which will allow moisture to be removed outside the building. Thanks to the ventilated basement space, you can eliminate the need for a pillow.
Logs create a ventilated facadeSource vanna-prosto.ru
Wooden floor
A wooden floor in a bathhouse is chosen primarily for steam rooms with small dimensions. In fact, when the bathhouse consists of two rooms: the dressing room and, in fact, the steam room itself.
In this case, such a solution is less expensive than installing a concrete floor. Moreover, aesthetically, a bathhouse floor made from natural materials looks better than concrete.
There are two types of wooden floors:
- leaking,
- leak-proof.
Leaking floors allow water to flow into the cracks between the laid boards and go directly into the ground under the bathhouse. This method is easier to implement and does not require the construction of additional sewer lines.
The advantages include the following:
- low level of costs for the construction of such a floor,
- less time-consuming compared to non-leaking floors,
- higher degree of resistance to rotting and contamination,
- ventilates better and dries faster.
There are not many disadvantages, the main one is that the floor is cold and the surface temperature of the flooring rarely exceeds 30 degrees Celsius. Basically, this flooring is best used in the southern regions.
Non-leakage floors are more complex; in them, water flows into special holes on the surface and enters a water collector, through which it leaves the steam room through a drainpipe
Unlike leaking ones, the decision to use a non-leaking option will allow you to build a heated floor in the bathhouse, which is important for the northern regions
The advantages of this type of floor are:
- as stated earlier, having the effect of a “warm floor”,
- lower heat transfer compared to leaking.
The following properties stand out among the disadvantages of this design:
- difficult drying after taking bath procedures,
- greater susceptibility to rotting and bacterial growth,
- a more complex device that requires more material for construction.
The wooden floor in the bathhouse primarily attracts the eye with its aesthetic component; it is absolutely environmentally friendly and safe. This combination of properties will pleasantly please those who choose this type of coating. However, it should be remembered that wood is less resistant to high temperature and moisture, so the correct bathhouse floor should not only be attractive in terms of appearance, but also reliability. For this reason, a wooden floor is inferior to a concrete floor. In any case, until the bathhouse is built, installing the floor is one of the main design tasks.
It is preferable to use boards made from coniferous trees, for example, fir, spruce, pine or larch. They contain resin, which will allow the wood to be better preserved under the influence of high temperatures, and also release essential oils that will be a pleasant addition to couples procedures. It is strictly not recommended to use oak boards as flooring, since they are very slippery and less suitable for the role of covering.
How to insulate
The floor is insulated during the construction stage, but this is already understandable. There is no way to insulate a torrential one with water draining under the bathhouse, but with the rest it’s already better.
Usually the insulation is placed on a layer of waterproofing (do not forget that it must be sealed and extend onto the walls). This can be polystyrene foam, expanded clay, or any other insulation material that can be poured on top with concrete and it will not lose its thermal insulation properties.
Also, for insulation, it is worth taking measures to seal the underground space - there should be no cracks or holes
But at the same time, if not necessary, then it is very desirable to have vents in the base, which should be closed during procedures, but in general are an important part of ventilation
There is another option for how to insulate the floor in a steam room. A concrete screed or a clay castle is not always made. Therefore, the insulation can also be placed on boards that are attached to the bottom of the logs. That is, the logs are first attached to the foundation frame or grillage, then the cranial bars are nailed, boards are attached to them, a water barrier in the form of a film is placed on them, for example, and the space between the logs is filled with insulation .
It would be worth putting another layer of water barrier on top of the insulation, because water can penetrate from above. Next is the subfloor, and whitewash on top of it. At the same time, we must not forget about the slopes leading to drainage. This option is shown in the picture above. It goes without saying that the drain pipe is brought directly to the level of the finished floor, and the entire wastewater drainage system is done during the laying of the foundation (if it is strip) or later (if it is columnar or pile).
Here's another option in the video below.
Well, the surest way to make walking on the floor comfortable in any frost is to install electric heating. Most often this is done if the owner is laying ceramic tiles.
More detailed material about floor insulation in a bathhouse is here.
Construction process of pouring floors
Organization of underground space
This is the most important thing in poured floors, take my word for it. It is imperative to ensure a quick outflow of used water into the sewer system so that the subfloor dries quickly, if possible. Otherwise you will get rot, mold, fungi and other “delights” that have no place in the bathhouse. I did this: I removed the fertile layer inside the log house, poured clay into it, and then a gravel-sand cushion, spilled it with water, and trampled it down. At the same time, the surface sloped towards the wall with a drain below. Then it was time for waterproofing. I used roofing felt - I laid it in one layer on the surface of the subfloor, and I tarred the seams with hot bitumen. In theory, the subfloor has already been waterproofed. The water will go down the drain without being absorbed into the soil, but the surface of the subfloor will remain wet. And this, again, will lead to dampness and fungal growth.
The subfloor must dry completely, and this requires ventilation, that is, a constant flow of fresh air to the space under the bathhouse. My log house stands on a strip foundation, so I initially provided for the presence of holes in it - vents. Through them, air penetrates perfectly into the “basement”. The vents should almost always be kept open, closed only when heating and steaming in the bathhouse. Otherwise, all the hot air will safely go outside.
Installation of posts to secure the joists
The height of the underground space, from the ground (covered with roofing felt) to the wooden planks of the pouring floor, should ideally be 200-300 mm. Thus, the logs of the wooden floor should not lie directly on the roofing material, but should be raised. This is done by laying them on posts. I installed columns with a height of 270 - 300 mm from brick, placing them in increments of 80 - 100 cm. After this, the bricks were completely plastered with ordinary cement mortar.
Waterproofing
I covered all surfaces of the underground space (columns, surface of the subfloor) with hot bitumen. The result is a smooth surface to which leaves, soap flakes and other bath waste do not cling. The purpose of this action was to provide additional waterproofing and ensure the rapid flushing of all kinds of bath waste into the sewer system, so that nothing remained under the floor.
Attaching joists to posts
I used metal channels as joists and covered them with bitumen - it seems to me that they will not be demolished. In general, beams made of hard wood, for example, larch, are traditionally used for lags. They must also be covered with bitumen, otherwise they will rot after a couple of weeks of use.
Metal logs will last longer than wooden ones
Creating a boardwalk
For the boardwalk, I used 40 mm thick larch boards. They were previously planed on both sides so that drops of water would not stagnate on the fibers.
Plank flooring pouring floor
I laid the boards on the joists with the convex side up (they were slightly warped when drying) with gaps of 5-6 mm. Several floorboards above the drain and near the opposite wall are removable. This solution allows me to lift the boards after washing and clear the subfloor and drain of debris. Additionally, dry the space under the floor so that the floor can last longer.
The boards closest to the wall are removable; they can be placed on edge while drying and cleaning the subfloor.
Practical advice
Three good tips will help you get rid of dubious myths and simplify the installation of a pouring floor in a bathhouse:
- There is an opinion that it is better not to nail down a poured floor board. After visiting the bathhouse, they are placed on their edges for better drying. The mistake is that, according to the law of ventilation, the amount of air leaving the room depends on the size of the supply and exhaust openings. Boards placed on edge increase the inlet gaps of the pouring floor. However, the outlet of the vents remains the same. The boards will not dry faster, since the dampness remains inside the bathhouse, and the worries will only increase with their re-installation.
- Removable panels in the bathhouse are also not the best flooring option. Drying of the wood will be uneven. If the ventilation inside the bathhouse is poorly adjusted, the raised flood floor panels will again attract dampness. The work is useless and time-consuming. It is optimal to organize effective ventilation under the floor in the bathhouse.
- A smoothly sanded board is needed only for the front side of the pouring floor, so as not to pick up splinters. On the back side, sanding will not help with better moisture rejection. Wood absorbs moisture equally with a rough and smooth surface. Excessive sanding reduces the thickness of the boards, which reduces the strength and service life of the poured bath floor.
Good ventilation in the bathhouse, as well as high-quality impregnation of wooden elements, are responsible for the durability of the pouring floor.
The video shows an example of arranging a floor in a bathhouse:
Protecting the floor from rotting
Protective impregnations for wooden floors are produced on an organic and chemical basis. Inside the dressing room or designated rest room, the temperature does not rise above + 27 °C. Floors can be treated with any synthetic impregnation. Inside the steam room and washing room there is a combination of high temperature and steam. Chemical fumes will be harmful to health. The floors in these rooms are treated with organic-based impregnations.
There are antiseptic impregnations based on fungicides. They protect wood well from fungus, but are toxic. Impregnations in the bathhouse are used only if the wooden surface is to be additionally painted.
Finishing
Even before starting work, you should prepare the final coating, that is, thoroughly dry all the boards. If you neglect this stage, then during the operation of the bathhouse the risk of floor deformation increases many times over. It is necessary to dry the boards as long as possible. If this is not possible, then it is better to give preference to thin timber. Of course, it can withstand a much smaller load, but this disadvantage can be compensated for by securing an additional layer of transverse joists. As practice shows, the tendency to swelling and deformation in boards less than 2.5 cm thick is almost invisible.
In the vast majority of cases, linden lining is used for covering the floor in steam rooms. This material can withstand temperature fluctuations, it retains its technical and operational properties for a long time, does not rot or change color. Over time, a dark coating appears on the surface, but this can be removed by sanding.
The advantages of linden lining also include the reduced heat capacity of the material; such a floor does not overheat, so the likelihood of a burn upon contact with the skin is minimized.
Aspen is similar to linden in its characteristics, so it is also used for finishing the finished floor in a steam room. In addition, this material is much cheaper. The only negative is reduced resistance to water and darkening of the surface with use. For this reason, aspen paneling is usually used to cover the floors of dry steam saunas.
Aspen is pleasant to the touch, it does not overheat, so there is no risk of burning your feet in such a room.
The best facing material for the floor in the steam room is considered to be cedar board. This is due to the fact that its structure consists of thin shortened fibers - thanks to this, the board does not change its original shape even with frequent contact with water. Cedar wood has an increased concentration of oleoresin; when heated, such boards begin to release phytoncides that have healing properties. In addition, cedar does not require any additional antimicrobial treatment, so this board can be used in its natural form.
When arranging the floor, it is necessary to take into account the overall style of the room. Each type of wood has its own shade; dark and light varieties, pink and mahogany species are conventionally distinguished
Less commonly, bottle caps and tiles are used to finish the floor in steam rooms; the latter can be used to lay out a relaxation area or dressing room, since in the steam room and washing area the tiles become slippery under the influence of water.
FAQ
Is it possible to paint a wooden floor in a bathhouse with paint or varnish so that the wood does not darken?
This should not be done for the reason that under the influence of high temperatures harmful fumes will be formed, which have a negative effect on the body. It is enough to dry the floor well and treat it with antiseptics.
What to do if there is an unpleasant smell coming from under the wooden floor?
Definitely disassemble, look for the cause, dry the boards, treat the drainage system.
Do I need to dry the linden boards additionally before laying the floor?
Yes, the wood should be dry, but not overdried. Let the boards rest in the room where the laying will take place for at least a day.
Is it possible to use plasticizers to make the screed harden faster in a bath? Will it provoke the release of toxic substances when heated?
Plasticizers are actually used to speed up the hardening of concrete, and they can be used in a bathhouse without fear.
Tile is much cheaper than floor tiles. Can it be used in a bath?
It is possible, but tiles become very slippery in high humidity conditions, so you need to walk on them in rubber slippers.
In conclusion, it is worth noting that the choice in favor of one or another material for organizing the floor in a bathhouse should be made as objectively as possible, taking into account all the advantages and disadvantages. Naturally, everyone wants to do it once and for a long time, but this does not apply to wood flooring. Concrete, in turn, quickly cools down and warms up quickly, and the costs of installing such a floor will be much higher.
Technologies for constructing a wooden foundation
When installing a plank floor, one of two technologies is selected. The first involves the construction of a leaky floor, in which, when laying, gaps are specially left through which water flows. Sometimes, instead of cracks in the boards, round holes are drilled in places where water accumulates. The main disadvantage of such a floor in a bathhouse is that it is always cold, especially in winter. Therefore, experts recommend laying such a floor in a bathhouse built only in warm regions.
In areas with harsh climates, it is better to use the second technology, which allows you to install a non-leaky wooden floor, while organizing the outflow of water through a pit through a sewer pipe into a well located outside the bathhouse. With this design, the floor surface is constructed at a slight slope of 10 degrees. This slope allows water to flow down to the ladder, along which it rushes into a pit connected to a cesspool or septic tank by a wide pipe produced for the installation of sewer networks. The diameter of the pipe should be 150 or 200 mm. This cross-section will provide greater wastewater throughput per unit time.
Arrangement of a leak-proof floor involves the construction of a “rough” floor, as well as hydro- and thermal insulation work. It is the installation of the bath floor using this technology that allows you to achieve a comfortable surface temperature, allowing you to enjoy all bath procedures
How to make a floor depending on the soil?
Work begins with preparing the foundation, the construction technology of which depends on the chosen method of draining water from the washing compartment of the bathhouse. When installing a leaky floor, the drain can be organized in two versions, depending on the type of soil under the bathhouse:
- If the soil on which the bathhouse is placed is sandy, then a 25-centimeter layer of crushed stone is poured under the floor to drain the wastewater. This drainage ensures rapid absorption of water into the soil, thereby preventing it from stagnating under the coating. Organizing timely drainage of waste water slows down the process of rotting of the boards and joists on which they are packed.
- If the soil is clayey and does not have good absorbency, then drainage is more difficult to arrange. You have to build a clay castle, build a pit and lay a pipe that drains water from it into a septic tank, which is periodically pumped out by a sewage disposal machine. To construct a clay castle, the surface is covered with a 10-centimeter layer of crushed stone, on top of which a layer of clay 15 cm thick is laid. In this case, the clay layer is given a slope, the value of which should not be less than 10 degrees. Naturally, the slope is made towards the pit, which is constructed in the form of a square pit, the walls of which are also coated with clay. A pipe is installed in one of them.
Crushed stone drainage under leaking floors
Water drainage devices for clay soils
Laying joists and flooring
The lags are laid on support chairs, which can be made of brick with the obligatory construction of a monolithic concrete platform for each of them. At the same time, they dig a hole, the depth of which should be about 40 cm. The length and width are determined by the size of the support chair, adding 5 cm on all sides. Sand (10 cm) is poured onto the bottom, spilled with water and compacted. This is followed by a layer of crushed stone (15 cm), which is also carefully compacted. Next, formwork is arranged, into which two layers of concrete are poured, between which a piece of masonry mesh is laid. All supports must be at the same level. When the concrete has set and gained the required degree of strength, waterproofing work is carried out. In this case, a layer of molten petroleum bitumen is applied, on top of which roofing felt is laid.
For a leaking floor, the joists are laid at the same level, but for a non-leaking flooring, it is necessary to create a 10-degree slope using notches in wooden blocks, which increase as they approach the pit.
In the first case, the floor is laid from edged boards, and in the second - tongue and groove boards. Moreover, first they build a subfloor, which is covered with glassine, and expanded clay is poured on top of this insulating material, which acts as a heat insulator. Waterproofing material is also laid on top of the expanded clay.
Arrangement of the underground
Installing a leak-proof floor on a columnar foundation
If you decide to make a leaky floor, then regardless of the foundation design (on stilts, strip or slab), you need to take care of the underground in case of construction on soils with sandy loam, clay or loam. Such foundations do not absorb water, so it is necessary to dig a hole outside the foundation.
If the bathhouse on stilts or a strip foundation is located on sandy or sandy loam soils, the pit can be made directly under the structure. Typically, you will need to construct a hole with a depth of at least 40 cm. Its bottom is filled with a mixture of crushed stone and sand to a height of at least 25 cm. The crushed stone filler will break up the flow of water well, and the sand, being a good filter, will absorb and remove moisture into the soil.
Sometimes, instead of a hole under the floors of the bathhouse where washing will take place, you can install a special tray. Water will flow into it and be discharged through pipes into a drain, septic tank, pit or sewer system.
The importance of the bath part called “drain”
The Russian bathhouse is a very extreme place. Temperature changes up to 150, especially in deep winter. High humidity and very serious temperature contrasts - up to 150. The only source of thermal heating. Fire hazard. Streams of water on the floor in the steam room and washing room. That’s why a well-made floor, and a well-made drain in the floor, is so important. It doesn’t even matter critically whether there is water supply in the bathhouse or not. In extreme cases, the barrel can be trained by hand. But the drain should function perfectly.
Principles of good drainage
- The drain must cope with any flow of water, especially in the washing room, and especially if a bucket with a chain is used.
- The drain must have a good water seal so that the smell from the sewer does not penetrate into the bathhouse.
- The drainage along with the pipes to the pit or septic tank must be designed in such a way that it never freezes in winter.
- The drain should be easily accessible in case of need for repairs: if the floors are cracked and there is a single drain below, then the boards should be easily removable; if the ladder is visible, then the ladder itself should be easily removable.
- The drain must be durable, so the pipes and the structure itself must be made of durable materials and parts.
Method of application
Important: before starting the process, the floor must be well dried;
Protective agents are applied in layers. Be sure to carefully process cuts, edges and damaged areas.
Important: processing and drying is carried out at warm temperatures and low humidity;
If your boards have already begun to be chewed by wood bugs, then disinfect them with special means before applying water-repellent impregnation.
Important: when processing, do not limit yourself to the gnawed holes, cover the area in and around them. Advice: carefully read and follow the instructions given by the manufacturer!
Advice: carefully read and follow the instructions given by the manufacturer!
It’s a shame if the purchased product and the time spent on its use go down the drain; because of simple laziness, you read the text on the package.
Remember, a good (in terms of the manufacturer and correct use) antiseptic can increase the “vitality” of the wooden floor of your bathhouse, up to 10 years.
Anecdote about gender. “A good walk is when you wake up on the floor and see that you’ve been circled with chalk.”
Dear reader, the topic that I tried to open up is quite relevant and has different points of view. One thing is unshakable - the bathhouse makes us forget or distract ourselves from everyday worries, gray work days, the electrified atmosphere of offices and family troubles
This means you should pay attention to your favorite leisure time.
Subscribe, read and introduce your friends to the blog. We sincerely try to make it alive and relevant. Good luck!
Wisdom Quote: To be a hero also means to fight against the all-powerful fate.
Installation of floor skirting boards
Moldings for finishing a bath
The profile of the skirting boards does not matter, choose which one you like best. Skirting boards are nailed with nails 30÷40 millimeters long, the specific values depend on its thickness and width.
The shape of the plinth and the cutter for its manufacture
Prices for different types of skirting boards
plinth
Step 1. Take measurements of the steam room around the perimeter. Skirting boards have a standard length of two meters, and most paired ones are wider and longer. This means that the moldings will have to be joined. If in ordinary rooms uneven joints can be sealed with wood putty or colored sealant, then in a bathhouse this method of eliminating errors cannot be used; the putty will quickly fall off. Try to make the joints of the skirting boards in inconspicuous places: behind the stove, near containers with water, under a shelf, etc. Of course, be very careful when cutting the skirting boards; the tool must be sharp and in good working order.
Wooden plinth and heat-treated abasha strip
Step 2. Check the corners of the bath, they should all be exactly 90°. File the end of the baseboard at a 45° angle. For even cutting, use a factory-made miter box or make the device yourself.
How to cut a floor plinth
We recommend cutting with a hacksaw - the cut area is much smoother. Always apply the left plinth to the miter box on the left, and the right one on the right, to the side away from you. Otherwise, instead of an external corner, you will get an internal one and vice versa. If you rarely work with a chair, we advise you to write on its sides where to install the left and right ceiling and floor plinths on the outer and inner corners.
The photo shows the joining of skirting boards in the inner corner of the room
Video - How to join skirting boards
It is somewhat more difficult to cut the baseboard if the angle of the steam room is different from straight. If you do not have enough experience, we advise you to try cutting any slats for the first time. Install them in the right place so that they rest against the walls. Use a pencil to mark where the slats intersect.
Example of plinth markings
From these marks, draw straight lines to the corners, make a cut along the lines. Check what you got. Everything is correct - excellent, repeat the same operations with the baseboard. A large gap has appeared in the gley - think about where you made the mistake, repeat all the operations again, taking into account the error. This does not take much time and will save expensive material.
Accurate joining of skirting boards is very important
Step 3. Start nailing the baseboard from the corner of the bathhouse, step back 2-3 centimeters from the cut point, nail the nails at an angle at a distance of 30-40 centimeters.
Step 4. Using the same method, nail the baseboard on all sides of the steam room. Check their position and, if necessary, remove burrs or lint with sandpaper. If there is a noticeable difference in height at the joints, then first remove them with a sharp chisel, and then correct them with sandpaper.
Installation of wooden plinth in a bathhouse
That's all. In Russian baths, as a rule, the floors are not varnished or painted, but if you really want to, apply a topcoat. Just keep in mind that no matter how durable coatings you use, they will still peel off - the operating conditions are too harsh.
Now let's look at how to make pouring floors in bathhouses on a strip foundation.
Stage 6: Cladding
Cladding work is an important part of creating the exterior of the future bathhouse. Despite the fact that the structure, lined with OSB boards, is completely ready for use, the appearance is still far from perfect. Today there are many materials for cladding rooms. Let's look at the most popular of them.
Lining
This is what the lining looks like
For baths, decorative or imitation lining is usually used. This is the cheapest and most accessible material, characterized by average strength and reliability characteristics.
It is recommended to place the boards horizontally, having previously laid a layer of waterproofing, for which you can use glassine. The sheets must be fastened with an overlap to prevent moisture from getting under the cracks. Often the seams are additionally taped on the inside - this increases protection from precipitation. After attaching the lining, it is coated with decorative varnish or paint to avoid cracks and rotting.
Find out how to arrange an artificial pond in your garden in this article.
Thermal panels
This is a modern material, representing a three-layer construction with insulation; usually mineral wool or polystyrene foam is used for this purpose. The outer surface can have different textures, colors and shapes. It is usually made of artificial stone, clinker or porcelain stoneware; glazed tiles are often used.
The panels have mutual grooves, so they not only form a monolithic pattern, but also provide reliable protection for the building from humidity, sun and other unfavorable climatic conditions. They are resistant to mold and microbial activity. Typically, the outer layers are made of porcelain stoneware, a highly durable material suitable for use in the interiors and exteriors of buildings.
Facing brick
Inexpensive but high-quality material with which you can decorate a bathhouse in any area. Facing bricks are made from high-grade clay, which ensures good strength and resistance to damage and temperature changes. Depending on the manufacturing technology, it can be ceramic, silicate or clinker. If you follow the installation rules, as well as adding an additional layer of insulation, you can increase the thermal insulation properties of the building. The material is easy to use; no auxiliary tools are required for work.
Vinyl siding
One of the lightest and most common materials for cladding residential and commercial premises. Externally it looks like an ordinary board for cladding buildings, but does not lose its appearance for 20 years. Withstands temperature changes, washes well with plain water, and is not affected by fungus and mold. There is a wide variety of vinyl siding colors, so the bathhouse will complement the main building on the site. Easy to install, low cost.
Beautiful zoning of the territory near a private house is described here.
Block house
It is a planed board made in the form of a profiled or rounded beam. Used for both exterior and interior decoration. It is made mainly from coniferous wood, but you can find models from aspen or linden. Allows you to create the illusion that the bathhouse is built from timber.
Shower floors for baths on columnar or pile foundations
Quite common foundations for Russian baths satisfy most developers in terms of cost and performance characteristics. And for flooring and wooden structures, underground spaces are an ideal option. Provide the maximum possible natural ventilation, reduce the likelihood of developing fungal diseases of wood, etc.
We recommend building a bathhouse at higher elevations
Step 1. Calculation of quantities and preparation of materials. Measure the length and width of the steam room, find out its area. For covering, use edged boards 35÷40 mm thick, buy them with a small margin. In addition to the boards, you will need a plinth and nails approximately 100 mm long.
Soak the boards with an antiseptic. Impregnate only dry lumber; carry out work in a shaded place and in calm weather. You need to soak it at least twice.
Antiseptic impregnation of boards
Floor beams or joists also need to be treated.
The timber is soaked in antiseptic
It is advisable to lay the floors on beams; if they were not installed during the construction of the log house, they will have to be laid on joists. To do this, you need to do preparatory work.
Mark the locations of the posts for the logs; the distance between them is selected depending on the size of the logs. In most cases, 50x100 mm boards are used for joists; the distance between the posts in this case should be ≈80 centimeters. If the perimeter of the steam room is not a multiple of the distance between the columns, then it should be slightly reduced or increased so that the distance between all the logs is the same.
Dig holes for the posts. Depth approximately 60 centimeters, size 40x40 centimeters. Be sure to pour sand 15-20 centimeters thick onto the bottom and compact it. The sand will ensure that the posts are positioned at the same horizontal level, regardless of soil swelling in winter.
For the middle zone of our country, this is not very important; in a week under a fallow land, the ground is unlikely to freeze to such a depth. But in the northern regions, a sand cushion must be poured.
Make columns from concrete blocks or monolithic concrete.
Never use red bricks, they are very susceptible to moisture.
Using a hydraulic level, mark the floor zero, use these marks to set the outermost columns
The height can be leveled with a cement-sand mortar with an increased amount of cement. Stretch the rope between the finished outer posts and check again that it is horizontal. Use the rope to adjust the height of all remaining posts.
At least two layers of roofing felt must be placed between the joists and posts. After 10-14 days the logs can be laid. The ends of the logs are fixed to the crowns of the log house with metal corners and self-tapping screws.
An example of correct installation of logs on posts
Prices for roofing material
roofing felt
Step 2: Cut all boards to size.
Cutting boards
To avoid deformation, the length of the boards should be 1÷1.5 cm less than the size of the steam room. Before cutting the boards, check the dimensions of the bath; if the width of the room at the corners is not the same, then you will have to adjust each board separately. It is better to cut with a hand-held electric saw. Before working with any electric tool, check its serviceability and the condition of the cutting element.
Schemes for laying floor boards
Step 3. The distance between the boards should be within one to one and a half millimeters; this width of the cracks is sufficient for rapid drainage of water, and small gaps minimize the negative impact of possible drafts. By the way, you should not be afraid of them; a large number of cracks throughout the entire area of the room do not allow too high a speed of air movement through them.
Laying floor boards
It is highly advisable to make the cracks the same throughout the entire floor; for this you should use a template. We recommend using ordinary wooden rulers for these purposes. They are perfect in thickness, and the corners of the boards will not be damaged. Place the rulers vertically along the edges of the board being nailed; after fixing the first ruler, they are removed and installed between the next ones.
Place a ruler or other template between the floor boards during installation.
Start laying the boards from the threshold; as a rule, there is a shelf on the opposite wall, under which you can hide an uneven floorboard.
Step 4: Nail. You need at least two nails for each board; they should be nailed along the edges and only at a slight angle. In this position, the nail passes through several annual rings, which minimizes the risk of cracking of the lumber.
Hammering nails
If the last board does not fit the rail, measure the exact dimensions and saw off the excess part. That's all with the boards, you can move on to the baseboards.
Can I use a terrace board for a bathhouse?
It is believed that the most reliable bath floor is reinforced concrete. Its obvious advantages are its strength and the fact that it is not flammable, and it is cheap to install.
But still, a cement floor has one very significant drawback - it is very uncomfortable. No matter what they try to cover such a floor with, most often it is slippery to wash on, and still cold.
So, is it possible to use a terrace board in a bathhouse?
Perhaps the most suitable option for a floor in a bathhouse is wood. Yes, it’s not easy to take care of it, sometimes you even have to re-cover it. But it is the most comfortable and therefore worth the effort.
The most convenient and at the same time comfortable for laying parquet in a steam room can be called decking. The floorboards are laid next to each other with gaps, allowing water to drain during washing.
Terrace boards are often used in open areas, but they are most susceptible to changes in temperature and humidity, which is why they are ideal for a sauna. Manufacturers advise in this case to use decking made of larch, oak, ash, beech or cedar. You can also use WPC, where wood sawdust and polymer mass are mixed:
- the composition is dominated by polyethylene, this option is considered the most budget-friendly;
- the composition contains propylene, also an option for saving;
- plastic predominates, the most durable option from WPC.
Installation of terrace boards in a bathhouse
Before installation, WPC boards should be placed in a bathhouse for a couple of days in order to acclimatize them. And to prevent them from becoming deformed in the future, they should be lubricated with wax. There is no need to lay the decking directly on the floor; there must be logs made of timber between it and the floor. This will provide ventilation and drainage. The optimal gap between the boards is 1 cm.
When installing in a sauna, it is imperative to use boards with an anti-slip “velvet” finish. These are boards with a finely corrugated surface - the most ideal option when you need to step on a wet floor with bare feet.
During installation, you need to install the decking on the logs. The peculiarity of the design is that on the side of each board there are grooves with which you can fix elements on the joists. Brackets are also used for this. And thanks to the fastening fittings, the boards will be at the same distance from each other, with identical gaps.
Which material should you choose?
If you want to use decking for installation in a bathhouse made of natural wood, then you should think carefully about what kind of wood you should choose.
On top of all the advantages when laying terrace boards in a bathhouse, it is worth noting that when used they make them environmentally friendly and hygienic. It’s so convenient when the water between the boards flows into the drain itself. Another advantage of decking is that it is very easy to disassemble and dismantle.
Materials
According to experts, it is best to make the base of the floor from concrete, especially if you want to build a permanent building made of brick or stone, with several rooms, which will be used throughout the whole year. The concrete floor must be supplemented with a water drainage system and provided with waterproofing. This design is strong and durable; it is not afraid of water, steam, or temperature changes. Concrete floors can be used for up to 45 years without additional repairs.
However, there are certain disadvantages. Firstly, they are cold, so they have to be insulated with an additional coating, for example, tiled or self-leveling. Secondly, concrete floors require significant investments, both financial and labor. Concrete floors can be poured in three stages.
If you are building a small bathhouse that is used only during the summer season, then it makes sense to choose a wooden floor. It is quickly and easily built from environmentally friendly materials (preferably larch boards), looks very attractive and creates a unique atmosphere in the steam room of an old Russian bathhouse.
When installing wooden floors, it is recommended to choose coniferous trees - fir, larch, pine and others. Since such wood contains a large amount of resin, it will be less susceptible to humidity, and the released essential oils will have a positive effect on the health of those taking water procedures. It is worth adding that coniferous floorboards, when moistened, will not become slippery, which means they will prevent falls.
Wooden structures are divided into leaking and non-leaking. The pouring floor does not have insulation, so it is suitable for bathhouses located in the southern regions, or for options used exclusively in the warm season.
The leak-proof floor is constructed from two layers of boards. The upper one, which will go on top, is preferably constructed from pine or hardwood boards, and the lower, dry one can be equipped with insulation.
The logs are installed on the foundation beam in the case of a columnar foundation, or on the edge in a situation with a strip foundation. Contact points are insulated with roofing felt coated with bitumen, Eurobitumen or similar waterproofing material.
Wood floors should not be painted or treated with chemical solutions. This is unlikely to add durability, but it will deprive the boards of the ability to breathe and fill the steam room with a unique pine aroma. The most acceptable solution would be to thoroughly sand the boards before starting construction. You can also cover the floor with a heat-resistant water-based varnish that can withstand up to 120 degrees. The elastic coating prevents moisture, steam and dirt from penetrating the boards.
The two-layer composition is applied to the sanded and disinfected coating using a paint brush. The entire procedure is carried out in a ventilated room at a temperature of 5–30 degrees. Only after the varnish has dried after 2-3 hours is it possible to begin laying the floor covering.
results
As a result, my bathhouse always has warm and dry floors. And also - light steam and quick heating of all surfaces.
The climate in the bathhouse is as follows:
- With the doors closed and the furnace fired, the temperature on the shelf rises to 45°C in 10-15 minutes (provided that the bathhouse is slightly warmed up with the doors open to a temperature on the shelf of 25°C).
- After an hour of bathing procedures, the temperature on the shelf is about 60°C, the floorboards heat up to 50°C. The floor becomes pleasantly warm, almost hot, as do the walls with the shelf.
- The floor in the steam room dries almost instantly, and in the sink area - in a few hours.
- It is easy to breathe in the steam room, as there is an influx of fresh air (which is immediately heated by the stove) through the ventilation duct.
- There is no need for frequent ventilation.
- No musty smell.
- You feel that the air is drier than in the old Russian baths, but, of course, not to the same extent as in the sauna. It’s easy to increase the humidity – you just need to add water to the heater.
There are also some shortcomings, but they are minor, at least for me. Firstly, the efficiency of the bathhouse is somewhat reduced, since fresh air is constantly heated, and the heated portion is discharged onto the street. Secondly, various soaps and shampoos become very hot on a hot floor. You need to look for another place for them or take them outside the steam room during particularly intense steaming.
In general, I like my bathhouse. Warming up in the shortest possible time, fresh air, warm, dry floors. The problem of mustiness, rotting floorboards and cold floors is completely solved.
Rot protection
To prevent boards from rotting in a wet bath, experts advise treating them with a special water-based varnish with increased heat resistance. Such a coating can withstand heating of more than 100 degrees, thereby providing the structure with effective protection from heated steam, humidity and various types of dirt. The protective varnish must be applied to the plank base with a brush in at least 3-4 layers. All work must be carried out in a ventilated room with an air heating level ranging from 4 to 25 degrees.
In addition, you can find all kinds of natural-based impregnations on sale. As a rule, they have a shorter exposure period and require regular renewal.
What if the length of the screw pile is not enough?
Situations in construction are different, as well as the topography of the areas where houses and baths are being built. Despite the fact that six-meter screw piles can be purchased, this length is sometimes not enough (for example, in areas with peat soil, where the point of dense soil can be very deep). In this case, they use a technology that has been proven over the years for safe building of piles using couplings.
The installation sequence is as follows:
a part of the pile with a screw is screwed in manually or mechanically; a section with an installation hole is cut off from the screwed-in pile; the paintwork is cleaned (if the work is done in winter, warm up the area to be painted with a burner); The coupling is being prepared. A piece up to 20 cm long is cut from a pipe with a slightly larger diameter than the pile. Sections and paint deposits are sanded with a grinder; the coupling is put on the top edge of the pile; a welded connection of two elements is made
The seam must be of the highest quality - this is important; Welding
a pipe for extension is inserted inside the coupling. Stripping paint and welding are done in the same way; multi-layer waterproofing is performed - the welds and the coupling itself are painted with anti-corrosion compounds in several layers, after which they are wrapped with roofing felt or rubber; Next, the composite pile is screwed in to the required depth, as well as operations for cutting off the area with the mounting hole, installing the head, etc.
Composite screw piles
As practice has shown, composite piles up to 15-25 meters long perform their intended function perfectly. But if it is simply impossible to find the “bottom” in the ground, it makes sense to install ordinary six-meter piles, screwing them into the ground until they stop, and then install the formwork and pour the concrete strip. This option is called “hanging piles” and is often used on swampy, floating soils, where the classic strip foundation slowly sinks and the piles sag without holding the building.