Floor installation is one of the most important tasks that future owners face when building a house. The floor design may vary. 2 possible options:
- floor on wooden beams; floor on joists.
Scheme of a wooden floor by joists
Most often, preference is given to flooring with joists, as it is easier to lay. However, constructing a floor using wooden beams has a number of advantages over constructing a floor using joists. Beams are an important functional element of the structure of a wooden house.
If the floor spreads along them, then the house acquires additional stability, since the beams are built into the load-bearing walls. However, this is the only drawback of such a floor arrangement. By means of beams built into the frame, any mechanical impact on the floor is reflected on the load-bearing walls.
In addition, the advantages of installing a floor on beams include low material costs, since there is no need to make a lower floor under the floor, as well as the low weight of the material used. Moreover, if you build a frame for the floor that does not have points of contact with the walls of the house, then the only drawback of this design will be eliminated.
Installation of interfloor wooden floors
The floor of the second floor with wooden beams looks slightly different than the structure on the first floor
In this case, it is very important not to insulate, but to soundproof the ceiling so that sounds and footsteps are not heard in the rooms on the ground floor
The cross-section of the beams between the 1st and second floors depends on the span being covered:
- for a span of 2.2 m, beams with a section of 75 by 100 mm are used;
- for a span of 3.2 m, elements with a height of 0.2 m and a width of 0.125 m are taken, but in some cases products with a cross-section of 100x75 mm are suitable;
- for a five-meter span, beams with a section of 225x150 mm are used.
The pitch of the beams is selected depending on the thickness of the floorboard according to the scheme described above.
When installing an interfloor floor, the floor pie along wooden beams looks like this (from bottom to top):
- first comes the ceiling of the first floor from gypsum plasterboard;
- lathing for fastening drywall;
- floor beams;
- vapor barrier layer;
- sound insulation made of mineral wool;
- solid wood finish finish.
Do not forget to treat all wooden elements with compounds to protect against rotting and burning before laying.
Installation of interfloor ceilings
Work on the installation of interfloor ceilings is carried out in the following order:
- The beams are laid during the construction phase of the house. Elements are stacked with a certain step. The method of fastening depends on the material of the walls. When laid on brick, concrete walls or enclosing structures made of foam concrete blocks, the beams are isolated from the walls by means of two layers of roofing felt. This way they will be reliably protected from moisture and rot. If there is a need for this, work is carried out to strengthen the second floor joists.
- Next, a wooden sheathing is fixed to the underside of the beams to secure the ceiling of the first floor. For the lathing, a beam with a cross-section of 5x5 cm is used. It is fastened in increments of 50 cm. The ceiling of the underlying floor is hemmed along the wooden frame.
- A vapor barrier material is placed in the space between the beams and stapled to the wooden elements.
- Next, a sound insulator is placed in the gaps between the beams. Soundproofing the floor in a wooden house should be effective and lightweight so as not to overload the floor. A mineral wool board is ideal for these purposes.
- After this, they begin laying the floor boards.
Methods for fixing floor boards to the floor
Since the solid board is laid on the joists or beams of the interfloor floor, the following methods of fixing it are suitable:
- using clamps (special clamps);
- on screws or nails.
Fastening with nails is performed as follows:
- The first element is laid along the wall. The tenon element is directed towards the wall.
- To fix it, a nail is carefully driven into the groove in the place where the board rests on the joist or beam. The fastening element is driven in at an angle of 45°. The head of the fastener should not stick out in the groove. It is recessed deep into the body of the board so that it does not interfere with the installation of the tenon of the next floorboard.
- The next element is inserted with a tenon into the groove of the previous one. Fixation with nails is performed in the same way.
- The last board is cut to the required width and nailed to the joists through the face surface. The location for installing the fasteners is chosen as close to the wall as possible so that after installing the baseboard, the nail head is completely hidden.
Fastening with self-tapping screws or wood screws is carried out in the same way. Fixation using clamps allows you to avoid damaging the body of the board. The fastener is inserted into the groove of the floorboard, and its lower part is screwed to the joist with a self-tapping screw. The last board in the room is trimmed and nailed through the face in the same way as described above.
Floor installation
After all the necessary materials have been purchased and all preparations have been completed, you can begin construction work directly. The construction of interfloor slabs can be divided into several main stages.
Installation of beams
The part of the beam inserted into the wall is wrapped in three layers of waterproofing material
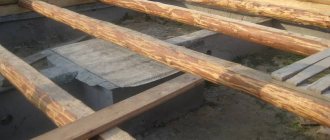
The installation of load-bearing beams is most often carried out during the construction of the walls of the building. Before laying the load-bearing beams, their surface is treated with all necessary impregnations.
Then their ends are cut at an angle of 60° and the part that will be walled up in the wall is wrapped in 2-3 layers of rolled waterproofing.
The ends of the beams are usually also coated with waterproofing compounds, but some experts advise leaving them open to allow the moisture contained in the wood to freely escape.
The depth of the beams inserted deep into the wall should be at least 15 cm. The laying step of the beams is usually taken at 0.6 m, but depending on the expected load on the floors, as well as on the thickness of the beam section, this figure can be reduced or increased.
The choice of interval between beams is also influenced by the technical characteristics of the material used for the finished floor.
If the top flooring is supposed to be made of inch boards, plywood or chipboard, then the distance between the beams should not exceed half a meter, otherwise the floors will sag when walking. For more information about installing beams, watch this video:
Floor joists must lie in the same plane
The installation of load-bearing beams begins from the two outer walls, while the beams should be located at a distance of 5 - 10 cm. After installing the two outer beams, we install the rest, observing the required interval.
When laying beams, special attention should be paid to the horizontal slope: all floor beams must lie in the same plane. To do this, place an edged board between the two outer beams, or pull the twine tightly
If the base on which the beams are laid is uneven, then mortgages should be installed under the ends of the beams to level the horizontal level. For mortgages, a material is used that is resistant to rotting and physical stress - metal plates, pieces of tile, etc.
It is not recommended to use wooden wedges to adjust the level of beams, as they can rot quite quickly, which will cause individual floor beams to lower and bend the floor line.
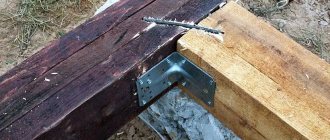
The load-bearing beams are attached to the wall using anchor bolts and steel corners.
Fastening the support bars
After all the floor beams have been exposed, bars with a cross section of 5 x 6 cm (the so-called “cranial” bars) are attached to them. They serve as a support for laying the subfloor and are attached along the entire length of the supporting beam, on both sides.
They should be nailed in such a way that their lower part is flush with the lower part of the beams.
Installation of subfloor
Most often, the subfloor is made from inch boards
To construct a subfloor, edged boards are taken and laid across the beams on support bars. Since the distance between the beams usually does not exceed 0.6 - 0.8 m, then an inch or thirty board is quite suitable for subfloors: the pressure on them will be limited only by the weight of the insulation.
You can also use a trimmed slab for these purposes. You can also combine the subfloors of the second floor with the finished ceilings of the first floor or basement. In this case, the edged boards are hemmed from below, from the side of the first floor to the beams. For more information about the draft field, watch this video:
Thermal insulation flooring
After installing the subfloors, compartments are formed between the beams, which, if necessary, can be filled with thermal insulation materials.
To do this, a hydro- or vapor barrier (roofing felt, isospan, etc.) is laid on top of the subfloor boards, and then mineral wool, polystyrene foam, slag with sawdust, etc. are laid.
In this case, the entire space between the bars must be densely filled. We fill the gaps between the beams and the foam sheets with sealant.
It is also advisable to lay waterproofing on top of the insulation, which will protect it from moisture leaks from above.
Finish flooring
The final stage will be laying the finished floors, which are attached on top of the load-bearing beams using self-tapping screws or nails.
To do this, the material (boards, OSB, plywood) is cut so that their joint falls in the middle of the beam. The finished floor is the basis for the finishing coating - laminate, linoleum, parquet.
Installation of floor joists in a wooden house
How to make a floor from wood cuts
Attaching balusters to the floor
Subfloor under tiles
The technology of how to properly make the subfloor of a wooden house for laying tiles has its own characteristics if a board is chosen for the flooring.
Tiles in a wooden house in some rooms are simply necessary due to the nature of their use Source et.aviarydecor.com
Unlike wood, ceramic tiles do not change their linear dimensions with changes in humidity levels. Moreover, wood reacts differently to such differences in the directions along and across the fibers. And to compensate for these changes, a “damper” layer must be laid on top of the boards.
Plywood or moisture-resistant plasterboard is chosen as the top layer of the leveling part of the subfloor. Although plywood is made of wood, it does not change its linear dimensions due to its multi-layer structure with multi-directional arrangement of fibers in each layer. But we must take into account that both materials are subject to deformation during prolonged contact with water or when used in a room with a “wet” regime. And in such areas, before laying the tiles, you need to make another waterproofing layer.
Installation of a wooden floor on the first floor in a house
The pitch of the logs for floorboards depends on the size of the span of the room and the thickness of the solid boards used. The cross-section of the timber also depends on these characteristics. The smaller the thickness of the floorboard, the smaller the distance:
- for a run-up with a thickness of 0.02 m, the step is 30 cm (used for two and three meter spans, section 0.11x0.06 m or 0.5x0.08 m);
- for floorboards with a height of 24-30 mm, the pitch is taken equal to 40-50 cm (used for four and five meter spans, a section with a height of 180 mm, a width of 0.1 m or 0.2x0.15 m);
- a coating with a thickness of 35-40 mm requires laying logs in increments of 60 cm to 0.7 m (suitable for a span of 6 m, beam cross-section 0.22x0.18 m);
- boards 45-50 mm - lag pitch 80-100 cm (layed over a span of more than 6 m, cross-section 22x18 cm).
The floor plan of the first floor on wooden beams looks like this:
- wooden beams (logs) can rest on the edges of the concrete base of the house or rest on posts;
- a subfloor is attached to the lower edge of the joists;
- then follows a layer of waterproofing;
- above it in the construction of the pie there is material for thermal insulation;
- there is a vapor barrier film on top of the insulation;
- then wooden flooring made of boards.
Laying the floor on joists
We figured out what a floor pie looks like in a wooden house. Now it’s the turn to tell how the plank floor is laid along the joists. Our step-by-step instructions:
- Regardless of what the timber is laid on (on a concrete base or on brick pillars), waterproofing consisting of two layers of roofing material must be laid underneath it.
- Next, they begin to install the two outer logs at opposite walls. They are leveled. A cord is pulled between them, along which intermediate logs are aligned and installed. We attach the beam to the base using anchors.
- The easiest way to construct a subfloor is to attach cranial (support) bars to the bottom of the side edges of the joists. To do this, take a beam with a cross-section of 0.05x0.05 m and screw it with self-tapping screws to the sides of the lag below.
- Now it's time to lay the subfloor. To do this, we lay a 0.025 m thick board, plywood or OSB on the cranial bars and screw them to the bars with self-tapping screws.
- The resulting structure in cross-section has the shape of the letter “W”. Now it’s time to lay a layer of waterproofing material. Usually, special waterproof membranes are used for this, which are laid on the subfloor, going around the joists. The strips are laid out with an overlap of 150 mm. All joints are taped with tape.
- When arranging the floor in a wooden house, a heat-insulating layer (on the first floor) and sound-proofing material (on the second floor) are used. To do this, insulation boards are placed in the gaps between the joists. Mineral wool boards, basalt wool, polystyrene foam, expanded polystyrene, etc. are suitable for these purposes. Usually, several layers of insulation are laid to the height of the log.
- After this, a vapor barrier is spread over the entire surface. As a rule, special vapor barrier membranes are used, but ordinary polyethylene film is also suitable. The material is laid with an overlap, and the joints are taped.
- Next, you can attach the plank floor. But it is laid with the selected finishing floor covering or used as a finished floor.
How to calculate the amount of wood for a floor?
To correctly calculate the amount of wood for a plank floor, use the following example. Let's assume that we need to cover the floor in a room with an area of 30 m² with a floorboard with a thickness of 5 cm. We carry out the calculation in this order:
- For such a board thickness, we take the lag step equal to 1 m. We convert the thickness of one element into meters 5 cm = 0.05 m.
- Based on the area of the room and the thickness of the board, we find the volume of lumber that we need: 30 sq. m. multiply by 0.05 m and get 1.5 cubes.
- If you know the dimensions of the board, you can count the number of floorboards. Let's assume that the dimensions of one element are: length 2 m, width 13 cm (0.13 m), and height 5 cm (0.05 m). We find its volume: multiply 2 meters by 0.05 meters and 0.13 meters, we get 0.013 cubic meters. We divide the total amount of lumber by the volume of one element and get the number of boards: 1.5 cubes: 0.013 cubes = 115 floorboards.
Similarly, you can calculate the amount of other lumber for flooring - log beams, skull beams, subfloor boards. Knowing the price per cube of lumber, you can easily determine the cost of the quantity of boards you require.
Beam arrangement
In order for the floor to be of high quality and last a long time, you should decide on the number of beams.
To do this, you can use special programs, but developers take a different path, relying on standard approaches:
- A timber with a section of 150x150 mm or 200x200 mm is selected.
- The beams are located at a distance of 0.6 m from each other.
As a rule, pine is chosen as the most inexpensive and accessible construction wood. Depending on whether the building is brick or wooden, the floor beams are fastened. In a brick house they are embedded in the brickwork. In a wooden structure, they are laid on a wooden base and secured with metal brackets.
This process requires a special approach, which may be based on certain rules:
- All wooden structures, including beams, should be treated with antiseptics and fireproof materials.
- Do not coat any wooden structures with resin as this may cause condensation.
- The first beam should be installed at a distance of 5 cm from the wall and no more.
As mentioned above, installation of floor beams is carried out depending on the structural features of the building.
The floors on the second floor of a private house are arranged as follows. First you need to attach the bars on all sides of the beams. The bars are fastened in such a way that when laying the boards they are flush with the beams. The fastening must be reliable, since you will have to walk on the floor.
The ceiling is completely sewn up from the bottom, which will subsequently serve as the ceiling of the first floor. The boards are fitted very tightly so that there are no gaps. After this, the upper side of the lining is covered with a layer of waterproofing or ordinary clay-sand mortar.
Its advantage is that this mixture does not burn, so it is ideal for such purposes. The solution is applied in a thin layer, after which you need to give it time to dry. As an option, you can lay roofing felt. Such technological operations increase the service life of the insulation.
The floor of the second floor in a wooden house must be warm, and for this purpose thermal insulation should be laid between the beams.
The following can be used as insulation:
- ordinary slag, which is poured into the spaces between the beams;
- mineral wool;
- Styrofoam;
- expanded clay or sawdust.
In most cases, mineral wool is used due to its low cost, lightness and ease of installation. This material is placed between the beams, very tightly, so that there are no gaps, especially since working with mineral wool allows it to be compacted. This will allow you to obtain a high-quality thermal insulation coating, without all kinds of cold bridges.
Finally, the surface can be covered with a vapor barrier, although this is not necessary if there are financial difficulties.
As an option, you can use polystyrene foam, but you should remember that it has positive flammability, despite its unique thermal insulation characteristics.
If we talk about materials such as sawdust, expanded clay or slag, these are bulk materials and it is not so easy to bring them to the second floor in sufficient quantities.
Once the insulation has been installed, production of the final flooring on the second floor can begin. This is done using the same technology as the previous sewing of the space between the beams. But then the boards were attached from below, and now it needs to be done from above. The main thing is that the subfloor is flush with the beams.
There is another option for finishing the floor on beams. To do this, logs are attached on top of the beams and in a direction perpendicular to the direction of the beams. In this case, a ventilated space is obtained, which has a positive effect on the durability of the structure.
In addition, this approach allows you to install a floating floor, which can reduce the noise level several times.
A regular board or chipboard sheets are attached on top of the logs. In this case, gaps should be provided between the floor and walls. In any case, the installation of the floor can be completed with finishing, which can be linoleum, parquet or laminate.
The conclusion suggests itself: the option of a heated floor on the second floor of your house is the best choice. As a rule, this is additional comfort and coziness.
Kinds
The most common option for a subfloor in a frame or wooden house (or “black”) is to create a durable flooring supported by beams. But for the first floor it is also possible when the logs are installed on a reinforced concrete slab floor on a strip foundation, on a shallow foundation slab or on a concrete floor on the ground. The last three options are not fundamentally different from each other, although in all cases the methods of fastening and leveling the logs horizontally are different.
Since the concrete base itself is strong and reliable, it can be considered as the “underlying” part of the floor of the lower floor (according to the regulatory terminology SNiP 2.03.13-88). In this case, it remains to equip only the “leveling” part (wet, dry or prefabricated screed) and the “intermediate” part (heat, vapor and waterproofing). And lay the finishing coating over the leveling part.
Concrete floors laid on the ground are another common option Source remontik.org
The subfloor is only part of the wooden floor. It is made from edged boards and sheets of moisture-resistant wood materials. The thickness of the flooring (board or sheet) and the layout of the logs have a “direct” relationship: less thickness means less interval between runs.
Important! If we are talking about boards, then when laying diagonally (for example, in rooms with complex geometry), the pitch of the lag should be even smaller. Moreover, the angle between the board and the purlin must be greater than 45°.
Wood flooring is the top layer of the cake. Layer by layer the entire structure looks like this:
- Lining . It does not affect the load-bearing properties of the ceiling, but acts as a support for insulating materials.
The thickness of the lining must be sufficient to support the weight of the insulation Source doma-na-veka.ru
- Waterproofing . Membrane type materials are used. They do not allow water to pass through, but allow water vapor to erode from the insulation, which then exits through the vents in the basement (plinth) of the foundation.
- Thermal insulation . Usually these are mineral wool mats, which, unlike polystyrene foam, are non-flammable materials.
- Vapor barrier . There are three types in total. Films with limited vapor permeability that maintain a “balance” between moisture transfer from the room into the insulation and from the insulation to the outside. Vapor-tight films are a vapor barrier that almost completely excludes the penetration of warm air with water vapor into the insulation. Foil materials (reflex films) are a vapor barrier that returns some of the heat back into the room. All three types, as befits a vapor barrier, have waterproof properties that protect the insulation from above, from the side of the room, from water ingress.
- Flooring.
A multilayer sheet of plywood for the subfloor will withstand heavy loads Source yug-energo.ru
See also: Catalog of companies that specialize in the design and construction of turnkey country houses.
Various solutions are used to secure beams to walls made of timber or logs.
The first is to deepen the end parts by at least 70 mm into the grooves cut in the walls (sometimes the groove is filled with insulating material to prevent creaking). Dovetail joints, etc. are also practiced. If fastening a beam involves cutting its ends, then it is worth keeping in mind: according to SNiP 11-25-80 WOODEN STRUCTURES, cutting no more than 1/4 of the height of the beam is permissible. Unfortunately, the ends are often cut into half a tree, significantly reducing the cross-section of the beam, which causes extensive cracks to form in the cutting area, reducing the rigidity of the support, which shortens the service life of the building.
Another connection method is using special supports made of galvanized steel (clamps, brackets, corners, etc.). Their advantage is manufacturability and speed of installation. There are supports with open and hidden fastening. The latter are used when beams should be visible in the interior (an example of such fasteners is a T-shaped plate with a long arm that fits into a groove made at the end of the beam). The beam is fixed to the support with metal screws, and the support itself is attached to the wall with metal screws or large-section cap screws.
The beams are fixed to the walls and spliced end-to-end with steel angles and plates, which are secured with self-tapping screws | The section and spacing of the beams are selected based primarily on the span length and the expected load on the floor |
A number of experts are critical of the use of such supports when securing beams to enclosing walls. Indeed, according to the above SNiPs, metal elements used in conditions under which condensation is possible must be separated from the wood by a waterproofing layer. Meanwhile, in the case of connecting the floor beam to the enclosing wall, the metal fasteners of the supports may end up in the dew point zone. According to experts, this will result in the appearance of dark stripes on the surface of the wood in the area of such fasteners.
The end parts of the beams are recessed into grooves cut into the walls | Securing a steel beam support to the wall using cap screws |
When using steel supports to connect floor beams to walls indoors (where there is no danger of condensation), such a problem does not arise. In stone (brick, foam concrete, etc.) enclosing walls, to secure a wooden beam, a so-called nest is created at the stage of their construction, into which the beam is inserted.
Open Mounted Supports | Open Mounted Supports |
The depth of installation of the support is at least 150 mm. The end of the beam is carefully treated with antiseptic compounds and cut at an angle so that its end is not saturated with moisture. Moreover, to separate the wood from the stone, the end of the beam is wrapped in waterproofing material (most often two layers of roofing felt or glassine), leaving the end open so that there are no obstacles to the free removal of water vapor from the wood. The beam is usually laid on an antiseptic wooden beam, fixed in a socket on top of the waterproofing layer, mechanically fixed to it.
To secure a wooden beam, a special nest is created in the stone wall at the stage of its construction.
According to the requirements of the above-mentioned SNiPs, solid embedding of wooden structures into stone walls is not allowed, which means that the nest must be ventilated. In addition, to prevent the appearance of cold bridges in the wall, it should be filled with heat-insulating material (for example, tow), without creating obstacles to air movement.
| Side view | View from above |
| Option for supporting a wooden beam on a brick wall: 1. Wooden box 2. Thermal insulation 3. Wooden beam 4. Wrapping the end of the beam with waterproofing 5. Metal anchor 6. Waterproofing |
Strengthening methods
Using steel plates you can strengthen beams
Steel auxiliary materials
Steel plates fixed on different sides of the beam will help strengthen wooden beams. Steel tools must be treated with a solution that prevents corrosion, otherwise they will not last long.
Carbon fiber
The material, also called carbon fiber, is a modern technology in the construction world and is actively used during beam ceiling reconstructions. It comes in the form of plates, ribbons or threads.
This plastic material is applied in several layers to a wood surface, ensuring ease of work and reliable quality, which makes it quite popular.
Prostheses made of wood or metal in the end areas
Due to variable temperatures, beams in the area of the load-bearing wall are significantly weakened. It is necessary to make the main timber beam stronger to prevent negative consequences in the future, as well as to avoid repeated reconstruction in the near future.
To do this, additional prostheses made of metal or wood are attached to the edges of the wooden base, which are placed in the brick recess of the wall, thereby providing reliable protection for the central beam.
Installation of prostheses for a rotten floor beam
Supports for load-bearing beams
This method involves placing additional support structures under the load-bearing ceiling beams to distribute the load evenly.
Construction materials
rough floor covering the following materials:
- Edged softwood boards GOST 24454.
- Waterproof fiberboard sheets GOST 10632.
- Gypsum fiber board GOST 51829.
- Softwood plywood GOST 3916.2.
- Hardwood plywood GOST 3916.1.
- Bakelized plywood GOST 11539.
It is possible to use OSB and other wood boards with a low formaldehyde content no higher than E0 or E1. You can calculate the required thickness of the selected material using the table.
Table of calculations of structural materials most often used to cover subfloors.
The data from the table will help you accurately calculate the distance between the joists and will facilitate the selection of the required material when calculating the floor structure.
The main advantages and disadvantages of wooden floors
There is a stereotype in the minds of citizens that precast concrete panels are the only possible solution for any building. It is not difficult to overcome it.
It is enough to list the advantages of wooden beam floors:
- Minimum cost (1 m3 of timber is several times cheaper than 1 m3 of hollow-core panels);
- The load on the walls is 2-3 times less than from the panels. This allows you to significantly reduce the consumption of reinforcement and concrete when constructing the foundation;
- On short spans (up to 4 meters), wooden beams can be laid manually using simple devices (a winch or a lifting block). Installing heavy slabs without a powerful crane is an unrealistic task;
- Low labor intensity and high speed of work (compared to pouring a monolithic reinforced concrete floor);
- Environmental friendliness (concrete uses granite gravel, the background radiation of which can significantly exceed the norm).
As you know, there are no advantages without disadvantages. Wood floors have few of them:
- Increased deformability. It manifests itself in the effect of vibration when walking and the formation of cracks at the junction of plasterboard partitions;
- Low fire resistance (without special impregnation);
- Relatively short length (does not exceed 6 meters). For reinforced concrete panels it reaches 7.2 meters.
Among the disadvantages of these structures, some authors of feature articles include the formation of cracks in the ceiling plaster and poor insulation of impact noise. However, with a competent approach to installation, these two problems can be solved simply and reliably. To do this, a series of less thick beams are laid below the load-bearing beams, specially designed for lining the ceiling (plasterboard, OSB, lining, board).
Step-by-step instructions for building a floor
For example, we will take a complex option - a floor insulated with mineral wool. Floor beams made of 50x200 mm boards; according to calculations, such elements fully withstand planned loads and have a safety margin of approximately 40%. The reserve is required for all critical architectural elements of buildings; the ceiling is included in the list of such structures. For vapor barrier, modern membrane coatings and a subfloor made of 20 mm thick edged boards will be used.
Modern materials are used for work
Practical advice. In order to reduce the cost of construction, you can use OSB or plywood boards, used boards of the same thickness or various substandard sections for the subfloor. The decision should be made taking into account personal financial capabilities and the type of finishing flooring.
Wood that will be used for work
Step 1. Lay the floor beams on the load-bearing walls. We have already said that in order to reduce the force on deflection, they should be laid along the width of the room, and not along the length. Be sure to wrap the ends of the beams with roofing felt, there must be at least two layers. It is recommended to soak the boards themselves at least twice with an antiseptic. The specific brand does not matter, they all cope with their tasks quite effectively, except for obvious counterfeit products. The distance between the beams corresponds to the width of the mineral wool sheets. Standard materials have a width of 60 cm, which means the distance along the axes of the beams is also 60 cm. Thus, a clean niche with a width of 55 cm is obtained, this allows you to tightly insert the mineral wool and eliminate the appearance of cracks. Gaps are undesirable not only because they cause heat loss. There is another problem - condensation is constantly present in these places, the wood gets wet and begins to rot. There is no point in talking about the negative consequences of such a process.
The installation of load-bearing beams is most often carried out during the construction of the walls of the building
Be sure to wrap the ends of the beams with roofing felt
Options for fixing floor beams to wooden walls
There are quite a few ways; experienced builders make the final decision on site. Beginners can be recommended to use one of the listed methods.
Laying in recesses is convenient because each element is located in its place, which is prepared in advance
The beam support is open, a specialized fastening for the construction of wooden floors, serves as a connecting element when connecting load-bearing beams
Step 2. Fix the vapor barrier to the lower planes of the beams with a stapler. The overlap is at least ten centimeters; all joints must be sealed with tape. We have already mentioned that it will not be possible to make the protection completely sealed; moisture will find cracks in any case. But this does not mean that it is unnecessary to take measures to minimize this process.
Construction of wooden interfloor ceiling
Step 3. Nail slats or boards to the bottom of the beams. The finishing of the finished ceiling will be fixed to them; the base must be strong. Thermal insulation material is laid on top of the slats. In our case, this is mineral wool, make sure that it fits tightly to the edges of the niche.
Practical advice. The thickness of the insulation is recommended to be at least ten centimeters. It is much more efficient to lay not one layer of insulation of this thickness, but two five centimeters each. Due to this, it is possible to shift the joints and completely eliminate the possibility of cold bridges appearing.
The photo shows the floor pie of the second floor
It is very important that the mineral wool does not get wet; if the house does not have a roof, then it must be protected with film. Wet material cannot dry on its own in a niche; it must be removed to dry. And this is not only unplanned loss of time, but also a large amount of unproductive waste. During dismantling, wet cotton wool breaks easily; some sheets must be completely replaced with new ones. As a rule, no one plans for such losses and does not take them into account when calculating the amount of insulation. As a result, a repeat visit to the hardware store is required.
Mineral wool is protected with a film
Step 4. Lay waterproofing on top of the insulation. We have already mentioned that for these purposes you need to use only a special innovative membrane; it allows steam to pass through and retains water. The membrane is also laid with an overlap and fixed with a stapler.
The membrane is fixed with a stapler
The joints are taped
Step 5. Lay the subfloor. Laminate was chosen as the finishing coating, and a solid base is required for it. Nail the boards tightly, but there is no need to specially tighten them with wedges. Gaps of no more than one centimeter are allowed. At least two nails must be driven into each board on each side, otherwise they will certainly bend during use. This is a very undesirable phenomenon, especially for laminate flooring - the light coating lifts, and extremely unpleasant squeaks appear when walking.
Subfloor boards are nailed
It is not easy to eliminate them; you need to completely remove the laminate, level the subfloor boards and re-lay the covering. As practice shows, it is much more profitable, both economically and time-wise, to strictly follow the recommended technologies than to then eliminate defects.
The subfloor on the second floor is ready, construction of the façade walls can continue. Finishing the coating is allowed only after finishing the installation of the roof, finishing the ceiling and walls.
Prices for floor boards
Video - Insulation of wooden floors
Video - Laying floors on wooden beams on the second floor
Source
Interfloor pie on wooden beams
The overlap between floors plays the role of both the ceiling of the lower and the floor of the upper floor. The sound and vapor barrier between rooms and its reliability depend on how correctly the interfloor pie is constructed. The structure may be based on reinforced concrete slabs, monolithic concrete pouring, or wooden beams.
Wooden floors have their own disadvantages - they are flammable, can rot or be attacked by insects, and therefore require special additional treatment. But they also have significant advantages - they can be installed without a construction crane or other special equipment almost anywhere, and the ceiling itself is light and quite economical.
Types of structures for wooden floors
The design of the floor will depend on its length and maximum load requirements. The ceiling of the second floor can be arranged on wooden beams, ribs, or combine both beams and ribs in one structure.
The traditional beam floor is still considered the most reliable, but it is also the most expensive in terms of cost of materials. A floor span of 6 to 15 m is allowed. If the second floor is intended for residential premises, then the cross-section of the beams must be at least 150 mm.
Overlapping on ribs with a pitch of 30-60 cm is well suited for a frame house with a span of up to 5 m, and in the case of I-beams - up to 12 m. Wood products of rectangular cross-section are used as ribs. In order to ensure proper rigidity, steel tapes are added to the structure, which are used to bind them in the form of binding ties.
The beam-ribbed design allows you to increase the permissible span to 15 m. In this case, the beams are laid with a large step and reinforced with ribs installed perpendicular to them. For mating, metal clamps, mounting brackets and threaded fasteners are used.
In such a system, the consumption of wood materials is less, so this design seems more attractive economically. But in this case, the amount of fasteners and installation materials, as well as the labor involved, increases, so it is difficult to say that such a design will be cheaper.
Floor insulation
Important nuances to consider before starting work:
- The distance from the chimney to the nearest beam should be at least 40 cm to ensure fire safety.
- The wood must be absolutely dry. Otherwise, it must be left on a stand in a dry and ventilated place for six months.
- All beams must be treated with antiseptic protective materials against fungi, rot and insects.
The wooden floor pie between floors includes 6 layers:
- Beams are laid or ribs are attached, depending on the chosen design.
- Next, boards are placed on the side of the ceiling of the lower floor. This rough finish of the ceiling becomes the basis for further laying out the layers of the “pie”.
- The next layer is heat and sound insulation - this can be mineral wool, expanded clay, slag, sand or foam, and so on.
- After it, a waterproofing material is laid, the role of which can be performed by dense polyethylene or rolled rubber.
- The rough and finished floors are rolled along wooden beams (if this design is chosen).
- A layer of vapor barrier is laid on the ceiling side with the shiny side facing out.
- After which you can finish the ceiling with the selected materials.
https://youtube.com/watch?v=e6okGLsNQoY
Plate
If a wooden house stands on a slab (foundation or ceiling on a brick plinth), then the floor of the first floor is equipped with a screed. In this case, the same technologies are used as in stone houses.
On a solid base, logs can even be installed on point adjustable supports Source pinterest.it
Even for installing a wooden subfloor, there is a choice among a wider list of methods:
- installing joists on supports on a concrete base without fixing them to the base and load-bearing walls (floating floor);
- installation of logs on adjustable supports;
- installation of adjustable plywood.
Selecting material for interfloor slabs
There are 3 types of floors for houses of different heights:
- basement (basement, lower);
- attic (upper);
- interfloor.
Any of them consists of 2 structural elements: supports (beams) and sheathing (flooring). Depending on the purpose of wooden floors, different materials are used for their construction. Since they all consist of wood, installation work can be done with your own hands, without involving complex lifting equipment.
Wooden floors can only be built if the span between the structural elements of the building is no more than 8 m.
Beam selection criteria
The following materials are used as supporting elements:
- solid timber;
- knocked down boards;
- debarked logs.
The standard section of beams is 150/150 mm or 20/150 mm for timber, 140/240 or 5/20 mm for boards. You can use laminated veneer lumber. In terms of bending strength, it is not inferior to a solid one, and often exceeds it. Any material chosen for the installation of wooden floors must be well dried and free from defects in the form of cracks, knots and wormholes.
Logs are selected by tapping them with the butt of an axe. The tree should produce a clear and ringing sound. It is recommended to use coniferous wood, as they bend much better than hardwood. The length of the beams must be such that it is possible to place the support in the sockets in the walls intended for this purpose.
Requirements for wooden floors
- the structure must be durable and flawlessly withstand the expected loads;
- all floor elements in a wooden house must be designed for a service life that corresponds to the planned period of operation of the building;
- interfloor ceilings must provide for the presence of heat and sound insulation components.
Calculation of expected load
Before starting work, calculations are performed that help determine the required cross-section of beams, the pitch between them, and the amount of lumber. For this purpose, they either use special programs or focus on standard indicators. They are:
- For flights whose width does not exceed 2200 mm, beams with a section of 75x100 mm are used.
- For spans of 3200 mm - a section of 100x175 mm or 125x200 mm.
- For spans with a width of 500 mm - beams with a section of 50x225 mm.
The supports are laid in increments of at least 60 cm. If the beams are of a large cross-section, the distance between them is increased to 1 m. Installation of the floor begins from one of the short walls of the house. The beams (logs) should be laid perpendicular to the long walls.
Floor insulation
Wooden and concrete floors always need to be insulated using different materials and heating methods. For greater effect, many builders try to apply additional layers of thermal insulation, which will fill the space between the rows of subfloor and finished floor.
Among the current materials used are polyurethane, mineral wool, and among natural methods you can find sawdust and shavings, dry leaves, and so on. When using any floor insulating material, it is recommended to leave a gap of approximately 15 or 20mm for air exchange.
Calculation of the floor structure in a wooden house
It is on how correctly the expected load is calculated that you can create a high-quality, reliable structure that will perform its main functions and last for a very long time.
Most often, beams in a room are laid in the direction of the shortest wall. This makes it possible to keep the span to a minimum. The pitch between the beams will depend primarily on the size of the section. On average this size is 1 meter. Making the distance smaller is not worth it, as this will only increase the consumption of material and the complexity of the work.
Floor beam installation diagram.
It is better to give preference to beams with a large cross-section rather than making a floor with a small pitch and weak overlap.
The main dimensions of beams for a certain span size:
- 2200 mm span – section 75*100 mm;
- 3200 mm span – section 100*175 mm or 125*200 mm;
- 500 mm span – section 150*225 mm.
If the ceiling is made between the first floor and the attic, then the step between the material should be the same, but the cross-section of the beams can be chosen much smaller. This is due to the fact that the loads in the attic will be significantly less than on a full floor.
Construction requirements for wooden floors
In order to install a durable and safe wooden floor between the 1st and 2nd floors with your own hands, you must strictly comply with the technical requirements for them.
Thermal insulation layer
Thermal insulation of the floor will improve the temperature in the room on the second floor
If a wooden floor separates the upper and lower rooms with a temperature difference between them of more than 10°C, it will be necessary to construct a thermal insulation layer.
This is necessary, for example, when arranging floors between the first floor and the subfloor, basement, or between the first/second floor and an uninsulated attic.
Beam strength
Beams and floors must withstand up to 180 kg/sq.m load
When constructing the floor of the second floor on wooden beams, special attention should be paid to the strength of the supporting structures. The safety of the building depends on how strong the wooden floor beams are.
According to building standards for wooden low-rise buildings, the maximum load on the first floor floors should not exceed 210 kg per sq.m. pressure on the wooden floor of the second floor is no more than 180 kg/sq.m. and for attics and attics this figure should be less than 105 kg/sq.m.
Maximum deflection
In addition, building regulations also impose requirements on the deflection values of wooden floor beams. According to SNiP, this coefficient should not exceed 1 to 250. That is, the maximum deflection of wooden load-bearing structures during operation should be less than 4 mm per meter of beam length.
According to this standard, the deflection of a beam structure 4 m long in the center should not be more than 1.6 cm (4 m. 250 = 0.016 m). If it is planned to place massive furniture and household appliances in the room, tile flooring, etc. then the requirements for structural rigidity increase to 1 in 400.
That is, the deflection should not exceed 2.5 mm per meter. For non-residential attics and attics, a higher deflection coefficient is allowed - 1 to 200 (5 mm per 1 meter).
Soundproofing
Fifty-millimeter mineral wool will not only insulate the floor, but will also become a good sound insulator
According to building regulations, the sound insulation threshold for interfloor ceilings of residential buildings should be 50 dB.
To meet this requirement, it will be sufficient to cover the floor of the second floor under the finishing coating with mineral wool 50 mm thick.
Length of supporting beams
The length of the beam should be no more than 5 m
The maximum permissible free sag length of wooden beams should not exceed 5 m for interfloor and 6 m for attic floors. If the design length of the room is more than 5 m, it will be necessary to install additional support under the load-bearing beam. The fact is that the optimal length of a load-bearing wooden structure is 4 m.
With a further increase in its length, the rigidity and strength of the supporting structure sharply decreases and the requirements for the thickness of the beam section increase disproportionately. So, in order for the deflection indicators for an 8 m beam to “fit” into SNiP standards, its thickness should be about 40 cm. For example: the same deflection indicator is shown by a 4 m beam with a cross section of only 15 x 15 cm.
Wood is a material quite vulnerable to external influences, primarily dampness and fire, therefore, before proceeding with the construction of load-bearing structures, all wooden elements must be treated with antiseptic materials and fire retardants.
Floor pie on concrete base
The concrete base can be laid on the ground. There are practically no contraindications for installing such a floor - neither the seismicity of the area, nor the height of the groundwater, nor the level of freezing matters.
The layers of the pie are arranged in the following order.
Concrete base level, marking
Step 1. Clearing the site of the fertile layer of soil, leveling and compacting the soil.
The photo shows soil compaction
Step 2. Backfilling - sand and crushed stone. First, sand is poured out in a layer of 8 cm; you can use any sand. The layer is also compacted. The crushed stone must have a fraction of at least 30-50 mm, the height of the bedding must be 7-10 cm. The crushed stone layer must be leveled. It doesn't have to be compacted.
Tips for improving the waterproofing performance of a concrete floor
Step 3. A rough concrete screed is made on top of the poured layers. The height of the mortar layer is 5-7 cm. You can make a reinforced screed. To do this, before pouring, a reinforcing mesh is laid on the crushed stone.
Scheme of installing a concrete floor on the ground. A concrete base is poured on top of the gravel-sand mixture
Pouring a concrete floor on the ground
Step 4. Waterproofing is laid on the screed. To do this, use roofing material or film. The strips are laid overlapping and secured with construction tape. The waterproofing material should extend 20-25 cm onto the walls.
Step 5. The slabs or strips of thermal insulation are laid end-to-end, they must be pressed tightly against each other.
The photo shows the installation of insulation over an insulating film
Recommendation for insulating a concrete floor
Step 6. The film is again spread over the insulating layer. Double protection of the thermal insulation layer from moisture penetration from below and from above will prevent its premature deterioration.
Lay the film with an overlap of up to 15 cm and seal the joints with tape
Step 7. The next layer is a reinforced finishing screed. For final and perfect leveling of the floor, beacons are set. The screed mortar is made from fine - 5-10 mm - crushed stone and river sand. Reinforced with wire mesh with 3-4 mm rods, layer thickness - 7-10 cm.
Reinforced screed
Video - Penoplex screed
Step 8. A finished floor made of boards is laid on the finishing screed.
Construction of a wooden floor when laid on a concrete base
Step 9. The floor covering can be anything.
On such a floor pie you can safely install interior walls in the house. That is why reinforcement must be done with a mesh and not with separate reinforcement.
Features of a concrete floor
- You need to start making a floor pie no earlier than the walls of the house are built.
- The concrete screed must be poured at once, otherwise the floor will be of poor quality.
- During the week after pouring, it must be constantly shed with water to avoid the formation of microcracks.
- Full operation is possible no earlier than two weeks after filling.
What else to consider
After calculating the floor beams and purchasing all the necessary materials, you can begin the actual installation of the structure. However, before this, it is advisable to carry out a number of preparatory measures.
Wood is a relatively short-lived material. Over time, due to dampness, paving beams and boards may begin to rot. To delay this process for as long as possible, before assembling the floor, all lumber should be treated with a special antiseptic. Such compositions usually also protect the tree from fungal infection.
In addition, timber and boards must be coated with a product that reduces the risk of fire. In the event of a fire, the material treated in this way will, of course, be damaged. However, timber and boards treated with such compounds do not burn, but smolder. Consequently, residents will have more time to leave the house in the event of a fire.
It is also a good idea to treat the boards and beams with insect repellent before assembling the floor. Grinder bugs can cause a lot of trouble for home owners in the future.
Best answers
NV-StroyTerminal:
Pirilax-Lux For external and internal work, risk areas. For harsh conditions (swampy areas, southern subtropical regions, Far North). Has two-level antiseptic protection. Destroys mold and wood-staining fungi, algae and prevents their reappearance. Protects against wood-boring beetles and termites.
Anna Grushevskaya:
for prophylaxis, antiseptics, but already damaged areas should be replaced, the grinder cannot be removed
3:
lime
Dimon Rumyantsev:
Senezh antiseptic
Alexander Senin:
how scary it is... but since it’s antiseptics. There are a lot of them right now. from everything. And if you want it to last forever. then treat it with bitumen. will last forever. I saw a house 160 years old. the logs were like new. The sleepers are also being processed. They lie on the street for just as long.
Alex:
superarch /materialy/lnyanoe-maslo-dlya-drevesinyi
