Due to regular temperature changes of large amplitude, the operation of the furnace sooner or later fails. Any owner can repair a brick stove with his own hands, having basic technical knowledge and skillful hands.
The main thing is to do this in a timely manner, then you will avoid troubles and fires.
Typically, repair work is divided into three types:
- troubleshooting minor problems
- Medium troubleshooting
- elimination of serious defects (overhaul).
Detection of knockout bricks
Quite often, before repairing a brick kiln, it is necessary to determine whether there are knock-out bricks that can cause a malfunction of the entire structure. To find them, you need to do the following:
- first you need to carefully inspect all smoke ducts of the structure;
- usually the knockout bricks protrude a couple of millimeters and are easy to see;
- After this place has been found, you should carefully remove all the mortar around it, and then remove the brick. If there is open access to the channel, then the bricks can be easily removed. If not, then only a professional master can help;
- if the removed element is intact and has no cracks or other defects, then it is necessary to prepare fresh mortar and install the brick in its place.
Why are fallen bricks so dangerous? This is the first sign of destruction of the chimney and the stove itself, so it is not enough to simply put all the elements in place, you need to additionally carefully inspect the structure, and then plan a major repair. If this is not done, then the structure may simply not survive the next heating season. In addition, such a stove, which is already collapsing, is very dangerous and is not recommended to be used.
Chimney cleaning
If the stove itself is in good condition, but does not work efficiently, we will begin repairing it ourselves by cleaning the chimney ducts. To do this, you need to open special doors in the stove design. If they are not there, then bulges on the brickwork should be visible, which indicate the location of the knockout bricks. It is necessary to clear these places of plaster, if any, and carefully remove the bricks.
This will open the internal passage of the chimney, which needs to be cleaned. Using a brush, broom and dustpan, the soot must be collected and thrown away. Here you can check the traction. To do this, you need to light a piece of paper and bring it to the cleaned hole, the smoke should quickly go up.
Metal brush
If necessary, do it yourself by cleaning the chimney from the roof. It happens that a broken brick clogs the passage of the chimney channel, and then it must be pushed from above with a long stick or weight tied to a chain or rope. And below, remove all the remains and debris in those revisions mentioned above.
You can also clean the chimney using aspen firewood. This is the case if the chimney is only clogged with soot, and there are no pieces of brick there. When burning, aspen produces a very high temperature, and the soot can burn out.
Features when repairing the firebox
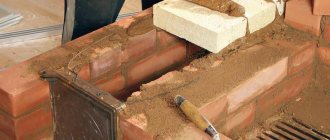
Most often, the firebox is damaged when it is made of ordinary red brick, rather than fireclay. The brick delaminates and falls off in plates. How to repair a brick stove in this case? There is no point in covering and reinforcing red brick; it still crumbles from high temperatures. Since it is impossible to reduce the temperature level in the firebox, additional lining must be made to reduce the effect of temperature on the walls.
The internal lining of the firebox is made using the following materials:
- Cast iron. It will last a long time. But there is one trick: you need to leave a gap between the wall and the cast iron. To do this, they lay corrugated cardboard, which will burn immediately during the first fire and will burn out, but the gap will remain.
- Steel. For that. To repair with steel. It is also necessary to make a gap. But the steel will still burn out quite quickly, especially if the repair is carried out in a sauna stove.
- Fireclay brick SHA-6 (“fly”). It is capable of serving without splitting under prolonged loads of extreme temperatures. A gap of 1 cm is left between this brick and the wall using basalt cardboard. The solution is taken the same as when laying fireclay. After repairing the stove using a firebox lining, the rate of heating of the room will be reduced, but the temperature inside the firebox will be higher. Combustible gases burn out completely.
- Fireclay brick. You can repair a damaged firebox using ordinary fireclay bricks placed on edge. True, it will reduce the combustion space; the gap between it and the wall will also have to be maintained.
- Vermiculite boards. Such slabs are environmentally friendly, do not emit harmful fumes, are made entirely of natural material, and are highly fire resistant.
- Superizol (calcium silicate). When the question arises of how to repair a furnace firebox with your own hands, it is worth considering this safe material of mineral nature. It can easily warm up to 1000 degrees.
How to cover up cracks: stages of work
When the solution is ready, you can begin to cover up the defects.
The steps for repairing cracks are as follows:
- preheat the oven (until warm, not hot);
- the cracks are widened;
- thoroughly cleaned from dust and dirt;
- be sure to moisten with plenty of water;
- cover with the prepared solution.
Further heating is possible only after the solution has completely dried. But this should be done at most halfway through the fuel load. After the fuel has burned in the “light” mode, you can heat the stove as usual.
Attention: it is better not to simply cover the cracks in the brickwork with mortar, but to first lay them with asbestos cord. When working with asbestos, you must use a protective mask.
Thus, to learn how to repair a brick stove with your own hands, you must study the procedure and composition of the solution.
You need to know this
Before you start sealing the seams, you need to prepare them: remove residual clay, rinse thoroughly with water using a brush, then prime with heat-resistant glue (50% solution is suitable). When grouting joints, you need to ensure that the repair mixture fills the joints completely, leaving no voids. If a gap is too large in the masonry, in addition to the mixture, you also need to place a ceramic cord into it. Due to its physical properties, it not only withstands open fire, but also very high temperatures - over 1000 degrees.
Ceramic cord is often counterfeited, so before purchasing it, you need to hold a lit match or lighter to it to evaluate the heat resistance of the product. The cord is placed in the masonry seams around the perimeter of the cast iron slab, using heat-resistant glue for fixation.
To protect stove parts that do not need repair, they must be covered with masking tape.
Common mistakes
There are many nuances and difficulties in installing a stove. This process is not as simple as it might seem at first glance. Everything must be done correctly so that there are no accidents during operation.
In the bathhouse, the stove is heated very hot, and there are wooden elements and a high temperature, so for safety you need to observe the insulation as correctly as possible. All connections and installation must be done correctly and efficiently. This work is difficult, responsible and dangerous. Therefore, it is not easy to cope with such a matter alone.
When purchasing a stove in a store, they always offer installation, but some people want to do everything themselves, so they make many mistakes.
With a small area, some build baths close to other buildings, which makes a big mistake. To protect against accidents, the pipe at the bathhouse should be higher than all other buildings, and a grate should be installed on top to extinguish sparks.
Remember, repairs must be carried out in accordance with all safety regulations.
Types of faults and their repair
Let's look at the most common cases when furnace repair is simply necessary:
- The appearance of smoke and carbon monoxide in the room. Smoke in brickwork can be attributed to minor repairs. In order to “patch up” the stove, use rich red clay or a special mixture that is sold in construction stores. It is necessary to coat the oven when it has cooled down to allow the clay to dry evenly.
- A crack on one of the furnace walls. This situation can be corrected by rebuilding the entire furnace structure. Furnace repair should begin with dismantling the upper part of the structure. After you have disassembled the top, look at the base: if it is not cracked and has a smooth structure, does not bend, without changes, then you can leave it. For temporary use, secure the stove with a metal belt and seal the gap with mortar. Just remember that such a belt cannot be adjacent closely, as the metal may burst when heated.
- No traction. The case is rare and is explained by a bend or the appearance of cracks in the chimney pipe. The pipe must be moved slightly at an incline. If you have 2 stoves with one pipe for removing soot, then you need to make a “bridge”.
Please note: good draft is ensured by proper construction of the stove, as well as compliance with all construction standards.
- The fire in the new stove goes out. This phenomenon indicates that the oven is not properly dried. It is necessary to open all the doors and ventilate it. Then you should begin gradually calcining the stove, increasing the temperature and the amount of firewood.
- The brick inside the firebox cracked. This indicates that the brick in the combustion chamber was heated unevenly or that there was a sharp temperature difference. Correct the situation by sealing the chips with a clay solution and then drying thoroughly.
- A door or other metal part has broken off. As a rule, metal parts are “fitted” into the furnace structure with pins, even at the construction stage, and it is almost impossible to get them with minimal losses. The door can only be replaced by completely disassembling the oven (use a respirator to protect yourself from dust getting into your respiratory tract).
The costs for repairing a furnace include the following items:
- dismantling the old stove;
- purchase of new bricks, metal parts (if it is impossible to use old ones);
- acquisition of all related tools (construction level, tape measure, small hammer, trowel for laying mortar, trough for mixing mortar);
- delivery and unloading of construction materials.
Repairing an old
stove with your own hands is much cheaper than building a new one, because you will save on paying a specialist.
It is important to know: you need to take care of good lighting in advance. Use a table lamp or spotlight, as well as an extension cord
You will have to change position often and move a lot. It is best if the light passes at a slightly angle - this way you will see all the irregularities along the base of the masonry.
Any stove can be remodeled and made more functional - it all depends on your wishes.
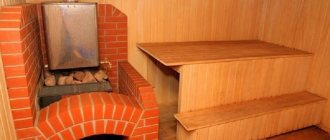
The ideal option is a small baby stove with a hob and a combination of a heating system with a stove bench, or you can also make a fireplace stove.
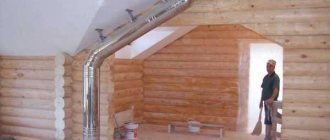
A wood-burning stove can be made both in a private wooden house and in a bathhouse. Sometimes a compact muffle stove is used to heat a bathhouse, designed to heat a small room. It does not have a special decorative appearance, but the walls hold the temperature well for a long time.
Please note: before choosing bricks, be sure to check that the seller has quality certificates. Carefully inspect the product for defects: smooth edges, uniform texture, absence of lumps and humps, ringing sound when tapped - all this indicates the excellent quality of the raw materials from which it is made.
Watch the video in which an experienced master shares his own experience in repairing a brick stove:
Step-by-step instructions for remodeling
You need to draw up a diagram, which is better to order from a specialist. The specialist will carry out calculations to avoid errors and rework. It will be immediately established what materials and tools are needed for the work.
You will need fire-resistant bricks for the firebox and heat-resistant blocks. The material can be found in a hardware store, on the market, or ordered delivery through a reliable company.
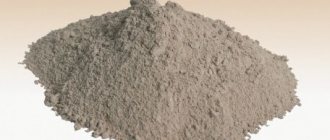
For masonry you will need dry cement mortar, clay, a construction mixer, and a drill attachment.
The solution requires a large container and clean water. The mixture is applied with a trowel.
In order for the fireplace to be level, it is necessary to constantly monitor the installation using a building level, usually a plumb line.
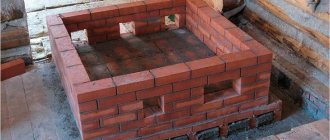
The first fireplace row is placed on waterproofing with markings applied, applying the mortar downwards. After laying out, according to the rules of order, you need to lay the second tier with a shift of half, a third, a quarter of the brick. To make the rows even, the blocks must be cut evenly with a grinder.
The order of brickwork involves placing the bricks of each next row above the joint of the blocks of the previous tier.
Clay in the solution prevents the destruction of the structure; a mixture of sand and cement does not tolerate such loads. In combination with clay, a heat-resistant effect can be achieved.
To form a combustion chamber, you will need a dense sheet of refractory metal on which subsequent rows will be laid.
A frame is immediately installed under the future door, which is fixed with fire-resistant wire.
What composition is used to seal cracks in a furnace?
Thermal expansion in brick kilns often leads to splits at the joints with steel structures. Local overheating, and sometimes errors during the construction of the furnace, also contribute to their appearance. It happens that the solution does not pour out, the smoke does not come out, but you still need to seal the cracks. No one can guarantee that at some point smoke won’t come out of them. And when the stove smokes, being in the room is not only unpleasant, but also unsafe. Do-it-yourself routine repairs of brick stoves will save money for large-scale reconstruction of the heating structure in the future.
It is easiest to repair small defects, up to 0.5 cm
To answer the question of how to cover up the cracks in a stove, you need to pay attention to mixtures from the category that is usually used when laying stoves: only clay and sand, or clay and sand with the addition of cement.
There are many options for ready-made solutions on the market. They are accompanied by detailed instructions and recommendations from the manufacturers. Experienced stove makers solve the question of how to cover cracks in a brick stove simply: you need to use the same solution for repairs as for laying. But most often the composition is unknown, since old structures usually have to be repaired.
If the splits are deeper and wider, then crushed fireclay and aluminous (aluminate) cement are added to the solution for repairing a brick furnace. This cement hardens very quickly; the raw materials for its production are limestone and rocks containing aluminum oxides. Crushed fireclay will give the solution thermal and chemical resistance. A finely ground additive for masonry furnace structures will solve the problem if it is not possible to find aluminous cement, and Portland cement is used instead. Ground fireclay plays the role of a “reinforcing mesh”, thereby preventing the appearance of fresh cracks.
Video description
Oven for frying. How to put terracotta on glue.
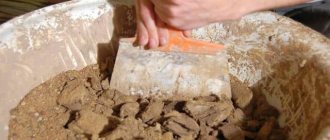
On a note! In order not to make a mistake with the choice of grout, it is better to use ordinary clay, but first it should be checked for fat content. They do it this way: take five parts of clay and mix each of them with sand in different proportions, diluting with water. Then they make a bun from each mixture and throw it on the ground. The one that crashed is the fattest. Accordingly, the composition is ideal for sealing furnaces.
Recommendations from experts
The main task of the paint is to create an attractive appearance for the brick and protect the surface. No matter how high-quality the product is, over time cracks appear on the painted layers. This is a common decomposition reaction of the substance, but the period can be increased if the painting is carried out correctly and you take into account the advice of experts:
The correct choice of what paint to paint the brick stove in the house is the main point that will eliminate minor nuances in the future. You should not buy cheap products. Such savings will require double costs in the future.
One of the ways to dilute paint in a separate containerSource sdelalremont.ru
If the paint is too thick, then it must be diluted only with a solvent. The density of the fresh substance should be kefir mass. This composition will not require dilution and will not spread during application. To increase the strength of the mixture at home, it is recommended to add 40-50 g of table salt per jar.
It is important to first dilute it in warm liquid. If there are old layers of paint or lime on the stove, they should be removed. The limescale composition can be easily removed with water, and soft sandpaper can be used to remove paint. When purchasing brushes, you should not save money on them.
It is better to buy a wide tool with natural bristles. When purchasing them, you should check them and touch the fibers. They should be soft but elastic. If you decide to use a roller, it should be made of foam rubber or short-pile fur. Many paint manufacturers write on the packaging that it is enough to apply one coat of paint, but experts advise working in three stages. First, a “rough” layer is applied, then the main one, and only after that the finishing layer.
Applying the first layerSource gidpokraske.ru
- Do not mix several types of enamels. It is prohibited to apply paint and varnish without first preparing the surface.
- Before buying paint, it is better to calculate the oven area to find out how much dye to purchase. This will save money.
After completing the work, it is better to close the room for a day and, if possible, not enter there. After 24 hours, you can already go into the room to check the condition of the stove and open the windows for ventilation.
When choosing what to coat a brick oven with and with what tools, pay attention to all types of paints in cans or bottles, except those in aerosol cans. The composition sprayed with their help lies unevenly on the surface of the oven, and additional layers will lead to differences in shade.
Result of painting after applying the third layerSource centr-terrasnoi-doski.ru
Preparation, list of tools
Before starting work, you need to determine and mark the place that the new stove will occupy.
The chimney pipe should be no closer than 15 cm from the roof rafters.
If you are doing masonry for the first time, professional stove makers advise you to practice in advance by making a model of the future stove from prepared bricks. Naturally, without a solution. This minimizes possible risks during real masonry, allowing you to learn from your mistakes, which can still be corrected in the layout.
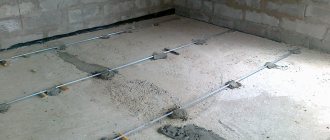
The stove foundation requires preliminary waterproofing; its area must exceed the area of the stove.
When laying a new row, you need to control the absolute verticality of the walls.
To build a brick kiln, the following tools are needed:
- plumb line;
- trowel;
- roulette;
- putty knife;
- Bulgarian;
- knitting wire;
- building level;
- metal strips, corners;
- containers for cement and clay mortar.
Serious problems
Sometimes the damage to the brickwork is so serious that in order to restore the functionality of the heating system, individual parts will have to be completely replaced. Most often, craftsmen have to change the lining of the firebox, which consists of fireclay bricks.
If there are serious faults, you should entrust the repair to specialists
If the damage is not global in nature, then you can cope with the task directly through the firebox window. For restoration you need to use a fireproof mixture. All defective areas are carefully covered with it.
In case of serious damage, some of the bricks will have to be replaced. This must be done in the following sequence:
- Prepare the repair mixture in advance.
- Soak and remove the old mortar in the area where the brick will be replaced.
- Remove damaged lining elements.
- Thoroughly clean the vacated areas, moisten them with water and lubricate them with the repair mixture.
- Install new fireclay bricks and carefully seal the seams with refractory mortar.
When replacing individual lining elements, you need to ensure that the new brick is homogeneous with the old one. Otherwise, due to the difference in thermal expansion, the destruction of the furnace protection will continue.
It is possible to completely replace fireclay bricks in a firebox only by completely disassembling the wall. This is a difficult job that should not be performed without experience, as there is a risk of serious damage to the underlying masonry.
Serious repairs also include repairing the chimney and switching the brick stove to a different type of fuel. In the first case, you will have to go through the masonry and re-plaster it. In the second, you will need to completely redo the firebox.
Get rid of excess
First you need to dismantle the firebox, the design of which has serious errors. It is important to consider that when working in a residential building, you need to remove or cover objects with a layer of polyethylene. After dismantling the slab, it became clear that about 80% of the bricks were unusable.
The chimney cleaning channel is located at the bottom, and the smoke exhaust channel is located at the top. During work, you need to place the firebox so that the pipe is not located on the side, but is directed towards the device for burning fuel.
The next step is to remove the pipe door located at the bottom of the oven. Chimney hoods must be cleaned.
It is necessary to get rid of the casing - the covering of the channel in the upper part of the furnace. The master’s task in this case is to reduce the number of bends in the pipe. Their cleaning is impossible due to the lack of a hatch. The wear and tear of such a place is associated with a large amount of soot, which accumulates in the chimney channel and hardens over time. The impossibility of the cleaning process only makes the situation worse. The opened canal casing resembles a blood vessel clogged with cholesterol. The smoke exit is provided only by a narrow gap, as a result of which it rises high above the firebox. The casing must be dismantled in such a way that the old masonry meets the new one.
This is the most vulnerable area of the furnace: the junction of the two channels becomes an area of accumulation of soot, which is drawn there by turbulence, which over time leads to blocking of the main smoke channel. The way out of this impasse must be found after it has been disassembled and cleaned.
To remove the furnace view it is necessary to disassemble the masonry located above the casing.
Typical questions when repairing a stove yourself
How to seal cracks?
To begin, the cracks need to be cleared to a depth of 20-40 mm and all old mortar removed. After this, the cleaned surface must be moistened with plenty of water. To clean cracks, you need to add salt and asbestos powder in small portions to the clay solution, then carefully rub all the holes with the resulting mixture.
Before laying a new brick, the cracked one must be removed from the seat and the place for the mortar must be cleared. The new brick must match the dimensions, otherwise after a while it will also need to be changed. The masonry site and the new brick must be moistened with plenty of water, then spread with a clay solution and put in place.
Most cracks occur near the stove door. In order to compensate for the expansion of cast iron fittings, a sealant is used - a ceramic heat-resistant cord. Feel free to check its quality in the store to avoid counterfeiting.
The area around the fittings must be cleared and washed with a mixture of water and heat-resistant glue (1:1). After this, you need to lay the cord around the perimeter and treat it with a solution, adding a small amount of heat-resistant glue or cement to it in advance.
If you have problems finding such a cord, you can replace it with basalt or felt.
Elimination of serious defects
Sometimes the damage to a brick kiln is so serious that it is necessary to restore it to full functionality, replace or improve the broken parts.
We replace the lining.
Lining is nothing more than protecting the surface of the furnace from various mechanical and thermal damage. In our case, this is the use of fireclay bricks.
If the firebox lining is damaged, it must be replaced.
Simple work can be done through the firebox door. To do this, it is enough to restore the damaged areas with a clay mortar or a factory-made fireproof mixture.
Partial replacement of bricks is carried out in the following sequence:
- prepare the mortar that was used during construction;
- soak and clear the old mortar in the required area;
- remove an element that has been damaged;
- insert a new brick into the empty space and cover it well.
For these manipulations, a ready-made refractory mortar can also be used - Chamotte Mortar, which consists of chamotte and refractory clay. Then the seams of the furnace will be able to withstand more than 1700 degrees.
Complete replacement of the lining is carried out only after dismantling the wall. The main masonry should not be affected.
Sequencing:
- disassemble the wall from the hearth to the ash hole; do not touch the oven ribs;
- remove remaining crushed stone;
- lay out a new lining of fireclay bricks so that it does not tie with the material of the stove body. Maintain a seam thickness of no more than two millimeters.
- if the oven is large, lay the brick flat. If small or medium - on the edge.
This may require plastering the masonry or even rebuilding it in case of destruction.
We switch the stove to another type of fuel.
The basic method is to line the firebox walls with fireclay bricks using fireproof mortar. Install slopes on the sides of the firebox. During the heating process, hot coals will fall down along them and close the grate.
Cracks
Before you start filling up the cracks, you need to understand the reasons for their appearance. The cobwebs that appear on the surface of the brick, which are shallow but spoil the appearance, will require a new coating. Cracks in cast elements may indicate the need for restoration work. Large and deep cracks inside and outside are a reason to think about possible flaws in the design and pouring of the foundation. Consultation with a specialist will be warranted.
Individual gaps between slabs, doors and masonry can be easily eliminated using basalt cardboard. Lubricated with heat-resistant mastic, it perfectly covers cracks.
Reasons for appearance
The appearance of cracks in the stove mass is often attributed to the cold in the room and infrequent heating, which is not entirely true. In fact, the main reason is the coefficient of thermal expansion. Each material has its own, and large differences in values lead to deformation of brick, mortar, and masonry.
It is easy to prevent such defects by choosing the right masonry mixture. For red brick, use a mortar based on red clay; for fireclay stone, use fire-resistant mixtures with it.
The second common case is the natural shrinkage of the clay mixture, which usually appears in the first year of operation. Whatever additives are added to the solution, volume fluctuations after the fastening composition has dried cannot be reduced to zero. The minimum value is 6%, the figure is small, but such a difference between the original sizes is enough to cause cracking.
How to seal cracks (choice of mixture)
To reconstruct individual areas, choose a mixture based on the clay that was used to make the bricks. This can be a ready-made packaged product or prepared independently. The purchased option saves time on completing the work; the main thing is to carefully follow the instructions on the packaging.
If you decide to make the restoration composition with your own hands, keep in mind that the thickening agent for fireclay mortar will be fireclay grain, while for clay mortar it will be sand. To improve the adhesion of the mixture, add regular salt; 1 kg per 12 liter bucket will be enough. The viscosity of the mixture should be medium so that the drying surface does not crack again.
Introducing reinforcing components into the coating will give the future patch strength; use a mixture of soaked asbestos for this. It is prepared simply; a sheet of material is soaked in water for about 15 minutes, turning into a liquid substance. Add no more than 2 liters per bucket of putty.
If you are not afraid of experiments, try making a restoration composition using the old method:
- crushed clay and wood ash in equal proportions;
- a quarter of table salt;
- water.
The doughy putty hardens quickly when the oven heats up. The composition is unusual in the absence of a sand component, but the resulting strength is good.
How to cover up
If you need to patch small cracks, then dismantling the masonry is not required. The stove should be heated, then the seams between the bricks will expand. We get rid of the old solution and apply the patch to a previously dust-free and moistened area. The composition is laid into the seam with a trowel and compacted with the edge of the tool.
If new cracks appear during the drying process, grease until the surface hardens without the appearance of cracks.
Characteristics
The designs of all stoves, unlike most fireplaces, require the mandatory closing of the hearth. The furnace door for the stove has several functions:
- protects the room from open fire;
- ensures heat transfer from burning fuel to rooms;
- prevents sparks from entering the room;
- increases the efficiency of the combustion process;
- decorates the structure as a whole.
All elements of furnaces must be fire-resistant, mechanically strong, and prevent the occurrence of fires.
Conventional doors for the combustion chamber allow air to pass through because they are not sealed tightly with a regular handle. Compacted types have a clamping mechanism, which reduces the amount of air entering the interior.
An eye-pleasing feature of some doors is a glass insert mounted in the center; it does not perform any important functions, but it makes it possible to enjoy the sight of a burning fireplace, which many owners really like.
What to do if cravings worsen?
Good stable draft is necessary to maintain the correct combustion mode, which requires the supply of the required amount of oxygen to the firebox and the unhindered removal of combustion products - smoke, soot, soot, as well as gases formed during the combustion of fuel.
During the construction of the furnace, gas ducts (chimneys) of the required size are installed, capable of passing the amount of smoke that is generated during the combustion of fuel. But, over time, a thick layer of soot accumulates on the walls of the flues, which reduces the cross-section of the chimney and prevents the free passage of exhaust flue gases, creating additional resistance to their movement.
As a rule, the appearance of a large amount of soot is associated with the use of firewood containing a large amount of resinous substances, which do not have time to burn completely and fall out on the walls in the form of layers of soot. Damp firewood also produces a large amount of soot.
To improve draft in this case, cleaning the pipe that removes smoke from the firebox will help. You can read how to do this in the article “How to clean a bathhouse chimney.” Also, the draft may be disrupted due to leaks in the stove lining, cracks in the walls and in the masonry of the chimney. Moreover, destruction of the masonry can occur not only within the heated room, but also outside the building - if the pipe masonry on the roof cracks and collapses, the draft will also be disrupted. How to eliminate cracks that appear, read below.
See the problem
When inspecting the furnace, the following facts may be revealed:
- The device does not have an additional blower, the so-called letnik, which enhances the stove draft when it is lit.
- Changing the location of the blower: instead of the lower part of the firebox (under the door), it is located at the end of the stove.
It is worth noting that such problems always negatively affect the flow of oxygen and the efficiency of the furnace, which significantly worsens its combustion.
In addition, there may be no additional hood above the hob, and the heating of the room is less on the side where another wall is located. These errors also need to be corrected.
The second disadvantage is the location of the view relative to the smoke channel going up. From an ergonomic point of view, this valve cannot be positioned horizontally all the time. This leads to disruption of its operation or, as stove makers aptly put it, to “tears of the stove.” The fact is that in winter, especially during frosts, a lot of condensate accumulates in the equipment, which, mixing with soot, turns into a solution of high concentration carbonic acid, which leads to the gradual destruction of the masonry.
How to prevent cracks in your cooktop
In heating and cooking stove designs, the “sore spot” is the cast iron hob. Cracks in the panel themselves do not interfere with the operation of the stove. If it is folded correctly, it has good traction and cracks do not cause any inconvenience. But - for the time being. If the design of the stove is broken or there are errors in the masonry, then carbon monoxide can leak through these cracks. And this is a big threat to the lives of people who are in the room.
As a rule, high-quality cast iron panels almost never crack. But it's better to be safe.
In order to prevent cracks from appearing on the panel, the first heating of the stove with a new hob is done carefully, warmed up slowly, without loading the entire firebox. To distribute heat evenly over the panel, pour a thick layer of sand on it, or lay out a brick
Remove the sand or remove the brick from the panel only after it has completely cooled. A uniformly loaded panel will “sit down” without distortions, which means there will be no “stress” cracks in it.
Replacing the pre-furnace sheet
Sometimes, torn spots appear on the fire-resistant metal sheets attached to the floor in front of the furnace firebox, causing some inconvenience during cleaning. They also increase the risk of fire if the stove is located in a gazebo or similar structure that has a wooden floor.
In this situation, you do not need to wait until the sheet is completely soaked, but you should tear it off and remove the nails from the floor. Then you need to put in its place a sheet of asbestos or felt soaked in a clay solution. Then lay a new sheet of roofing steel on top and secure it with nails.
Fireproof cuttings (as a rule, these are metal sheets on the walls near the stove, although there is also a narrow brick strip).
In principle, the repair of these elements is similar to pre-furnace sheets. Typically, cuttings fail due to settlement of structures and various mechanical shocks. The reason may also be due to initially poor quality materials or installation. The cutting thickness is determined by the size of the oven.
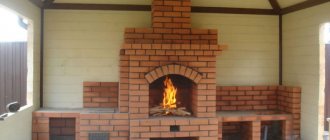
Russian stove on the street
Both the construction of a Russian stove outside the home and its operation have their own peculiarities. They are caused by more aggressive effects of atmospheric phenomena during the combustion process and during long winter downtimes. A stove left in the cold for at least a few days without use will warm up unevenly from the sun's rays. And masonry joints are saturated with atmospheric moisture.
When melting for the first time after a break, you need to use a small amount of wood chips. The gases coming out of the pipe should become transparent, which takes an average of one and a half to two hours. After this, you can lay regular firewood.
With barbecue
The primitive design of a stationary outdoor barbecue involves an open brick box on one side with a chimney tapering upward. This option is closer not to a Russian stove, but to an English fireplace.
To build a more labor-intensive but effective Russian-style outdoor fireplace, you will need much more brick. The diagram for laying a Russian stove on the street with your own hands is shown in the figure:
Layout of a Russian stove on the street with your own hands
This device performs the functions of an ordinary hearth structure equipped with a grill for cooking over coals.
In the gazebo under the canopy
For the construction of a stove in non-permanent wooden buildings (verandas, gazebos, covered terraces), fire safety requirements become relevant. A non-combustible belt must be created around the masonry: at least 30 cm from the walls and 60 cm from the door. A heat-resistant material is suitable for this - sheet asbestos cardboard with a thickness of over 4 mm. The top should be sheathed with roofing iron.
Bread baking oven
The construction of a wood-burning baking oven can have a simplified design. Many of the requirements for a traditional hearth are optional for this type of stove.
The most important requirements:
- the combustion chamber is large enough to fit a tray with molds inside;
- a pronounced spherical arch so that thermal radiation is focused in the center of the furnace and maintains the desired temperature.
Placing a bread oven outside allows you to not lay out the outlet channels very carefully. After all, the threat of carbon monoxide poisoning in the fresh air is much less than indoors.
How to build outdoors
The main feature of designing an outdoor stove is the need to provide protection from atmospheric moisture. You will need to build a reliable canopy. A rafter structure is erected for it on wooden or metal poles. You can arrange a power system by welding metal. The main requirement: the ability of the canopy to support both its own weight in windy weather and the snow load in winter.
Rework
Before drawing up a project for a future fireplace, check the condition of the chimney. The smoke exhaust system bears most of the responsibility for safety.
Check the condition of the stove and foundation. If violations are detected, it will be necessary to redo it from scratch, especially if the foundation was damaged.
It is easier to convert the structure into a decorative device.
The chimney pipe must meet basic requirements. For example, the height of the pipe used can be at least 7 m. The cross-section of the material is 13 - 25 cm, the depth of the firebox is from 0.5 m.
The combustion chamber is lined with fireproof, fireclay bricks, which will not deteriorate from direct contact with fire.
During laying, channels are created that allow air to pass along the door, which will prevent the accumulation of soot.
After all the rough work has been completed, you can begin finishing.
An example of converting a stove into a fireplace design with a heat shield:
Installation
You can install the stove door yourself:
- The material used can be found in any store, construction or hardware store. Purchase costs are quite low.
- The user will not need to pay extra to create the design.
- The metal is characterized by increased strength and long-term operation, so the created structure can last for a long time.
- Increased heat transfer. A metal door can easily cope with heat retention, due to the self-regulation of air supply inside the oven. The user can control combustion and heating.
These arguments should be enough to get started. First of all, you need to create a drawing of the future product. Its main purpose will be accuracy; the process of creating
In addition, it is important to prepare your tools. You don't need a lot of tools for this kind of work.
You need welding, a grinder and a cleaning wheel, a hammer and a drill. You should also use sheet metal, a corner, a door handle and a latch.
Securing the door
Door installation:
Before directly installing the door for the sauna stove, you need to check how easily it opens. When a part is tight and difficult to open, it should be developed
In addition, it is necessary to emphasize that before installing the oven door, it is important to install a grate under it
- Next, the user needs to attach special plates and wires to the door and install it on the solution.
- Then the plates or ends of the iron wire are placed on the inner walls of the furnace firebox.
- Then you need to put the remaining ends on 2 bricks. Afterwards they should be secured on top with 1 or 2 bricks.