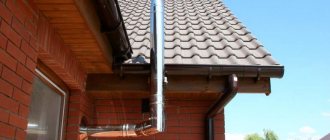
The roof trim of the chimney is a prerequisite for its safe operation and a guarantee of warmth and dryness in the house.
Ideal chimney roof trim
Errors when venting a chimney through the roof usually lead to leaks, rotting and destruction of wooden roof structures, and improper fastening of the chimney itself can cause a fire. By following the technology described in our article, you will be able to figure out this issue and, if necessary, install the chimney roof trim yourself.
Chimney installation rules
If the house has a stove, then a chimney is also needed. Although instead of a stove there may be a special tank running on gas. In any case, the house is heated somehow, and combustion products need to be removed. There are several options for removing the pipe through the roof, related to determining the location. It is planned when a house project is being developed. The location is considered relative to the ridge of the roof - a horizontal edge that is located where two slopes meet. The pipe can be installed:
- directly in the ridge;
- at a distance from the ridge.
The first and second options have their pros and cons. On the one hand, it is easier to install a chimney in a ridge. But this is for someone who deals with this particular issue. But for arranging a rafter system, this is more difficult, because you will have to make a gap in the horizontal beam. On the other hand, when the pipe is in the ridge, this guarantees good traction. And the possibility of leakage under it is reduced to a minimum here. But still, most often the chimney is moved relative to the ridge.
Chimney offset relative to the roof ridge Source katlavan.ru
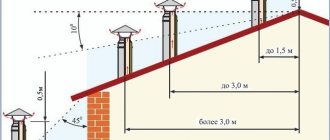
In this case, the following building regulations must be observed:
- If the chimney on the roof is installed at a distance of no more than 1.5 m from the ridge, then the pipe should be 0.5 m higher than it.
- When installed at a distance of 1.5 m to 3 m from the ridge, it is made on the same level with it.
- When the pipe is more than 3 m from the ridge, it can be lower than it, but no more than 10°.
The best option for locating the pipe relative to the ridge is not far from it. If you make the chimney much lower, the risk of damage from falling snow increases.
To ensure good traction, you must adhere to certain standards for placing the chimney relative to the roof ridge Source rekvartira.ru
There is a place where it is generally not recommended to install a pipe - the valley. This is the internal angle that two slopes of a complex roof form when connected. There is always an increased load on it, since precipitation flows there and snow is retained. With such an installation, the possibility of waterproofing damage is very high. This means that there will be leaks.
Laying cuttings and indentation device
An important fact for the attention of owners of buildings with stove heating and heat-generating units using various types of fuel on their balance sheet is that from 2022 anyone can carry out such work; since the license permits of the Ministry of Emergency Situations for these types of services related to fire-hazardous equipment have been cancelled.
But it would be naive to entrust such an important task not to enterprises specializing in furnace work, but to home-grown “masters” who flaunt old professional terms like fluff, meaning fire cutting, who usually have very vague ideas about the requirements of fire safety standards, which often leads to sad consequences for both overly economical and unacceptably gullible customers.
Protecting the roof from heat coming from the pipe
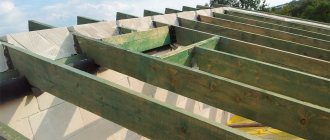
When organizing a pipe passage through the roof, it is important to insulate the roof from it. After all, the pipe gets very hot, which increases the fire hazard. The roof is protected using a separate box, the beams and rafters of which are located taking into account the requirements of SNiP. The minimum distance standard from the chimney to the load-bearing beams and rafters is from 130 to 250 mm. The inside of the box is filled with some material that does not burn. For example, it could be basalt or stone wool.
The chimney in no case directly touches the roofing Source barmanlive.ru
Further organization of the pipe outlet depends on what shape it is and what it is made of. The shape of the chimney can be made either as a regular square or round, or in the form of a rectangle or oval. And pipes can be brick, metal, asbestos-cement or ceramic. The material from which the roof is made is also taken into account. This can be slate, metal tiles, corrugated sheets, ondulin, roofing felt or bitumen shingles. Each case has its own characteristics.
Fire requirements
According to SNIP, the chimney and ventilation ducts must be checked and cleaned:
- Before the start of the heating season - chimneys in which boilers and heating devices operate seasonally.
- At least once a quarter - combined and brick chimneys.
- At least once a year - asbestos-cement chimneys and channels, pottery, made of heat-resistant concrete .
The initial inspection of gas boiler chimneys should cover the following points:
- correct use of materials is carried out in accordance with the requirements of DBN V.2.5–20;
- presence of clogged channels;
- checking partitions that serve as protection for combustible structures;
- How separated are the ventilation and smoke ducts;
- how serviceable and correctly positioned the head is;
- checking the presence of normal draft, this parameter depends on the correctness of the construction, in particular, the height and cross-section of the pipe have an influence (see How to improve draft).
Installation of a round pipe
Often in construction a circular chimney section is used. To pass a round pipe through the roof and seal it tightly, special flexible adapters are used. They are made from heat-resistant polymer with elastic properties. In appearance, such an adapter looks like a funnel, at the base of which there can be a circle or a square. The base is called an apron, it is made in the form of wide fields. Since the material is elastic, it easily takes on different configurations. Therefore it has a wide range of applications. Such adapters can be used on roofs with any covering and slope angle.
Exit of a round pipe through an ondulin roof Source nashaotdelka.ru
The main thing is to choose an adapter that will match the diameter of the pipe. Although there are universal options for such products. They are made in the form of a stepped pyramid. To adjust their size to the pipe, the excess is simply cut off with scissors. Elastic adapters are attached to the roof using bolts or metal studs. They are installed in holes on the flange, which presses the adapter to the roof. The space between the flange and the roof surface is lubricated with a sealant that can withstand temperature changes.
Universal adapter for passing a round pipe through the roof Source pinterest.it
How to prepare a product before cutting an edge for welding
Preparatory work can be divided into several types:
- Manual > - this method of straightening is used to attach slabs using a hammer.
- Mechanical - this type of preparation is used to eliminate folds, unevenness and warping (distortion of shape) by rolling on the right rollers.
- Marking - used during repairs, to correct curved seams when it is necessary to drill holes.
- Thermal – used to increase elasticity and regulate the internal structure of the metal, for which metal products are heated in advance.
It is also important to prepare the edge itself. Preparation varies:
- With cutting: one side is chamfered, and, if necessary, the other, often from both products. Or they do an angular bevel.
- There is no cutting: to do this, you need to thoroughly clean the surface and lay it at the required distance.
- Beading: Pointed sides are smoothed out.
When the entire range of preparation work has been completed, they proceed directly to cutting the edges of the pipes before welding. It is possible to distinguish one-sided cutting of pipes for welding and double-sided (since bevels of more complex shapes must be welded on both the front and back sides of the part).
Features of a sandwich chimney
A type of round pipe is a sandwich chimney. It consists of two pipes of different diameters, between which there is a heat-resistant thermal insulation material. They are made of stainless steel. The sandwich chimney is in great demand because it provides stable draft, does not heat up, is easy to install and looks beautiful in appearance.
The passage through the roof of a sandwich chimney can also be done using an elastic adapter. However, it may not be in harmony with its mirror surface. In this case, a metal adapter is used, the material of which is also stainless steel. It is not flexible, so you must take into account the diameter of the pipe and the angle of the roof slope.
Passage through metal tiles
Metal tiles are sheets of steel, copper or aluminum, which are coated with a polymer layer. In appearance they resemble natural tiles, which are folded in even rows. This roofing material is very popular. If a round pipe is to be passed through the metal tile, flexible adapters are used, which we have already described. When using a square or rectangular brick pipe, a different method of installation is used. It is as follows:
- The connecting unit is being manufactured. It consists of two aprons - internal (main) and external (decorative). The material of manufacture is thin aluminum sheet or tin.
- Before the metal tiles are laid, an internal apron is installed on the sheathing. These are 4 strips located on 4 sides of the pipe. They simultaneously extend under the metal tile (no less than 250 mm) and onto the pipe (no less than 150 mm).
- The apron elements are installed in a groove - a groove that is cut along the perimeter of the pipe to a depth of 10 to 15 mm. The groove is cleaned and filled with fire-resistant sealant.
To install an apron, you need to make a special groove in the pipe Source experttrub.ru
- The apron is attached to the pipe using heat-resistant dowels. The joints between the four planks are soldered. On the slats that are located on the sides, sides are made, the purpose of which is to drain water down.
- The lower part of the apron is installed on the so-called tie - a sheet of metal with sides. This ensures water drainage from the chimney to the bottom of the roof. The width of the tie should be greater than that of the pipe by at least 0.5 m on both sides. Its length depends on the distance from the pipe to the edge of the roof.
- After installing the tie and interior apron, the metal tiles are laid.
- An external apron is installed on top. It is usually a corrugated sheet of lead or aluminum. There is a decorative strip in its upper part. It is attached to the pipe using self-tapping screws. The attachment point is slightly higher than parts of the inner apron. Before fixing the decorative strips, the fastening points are coated with sealant. To attach the corrugated sheet, its back side is provided with a self-adhesive coating.
Finished chimney pipe passed through a metal tile Source tproekt.com
What thermal insulator to use
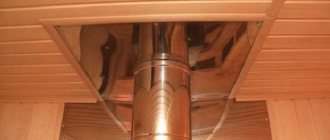
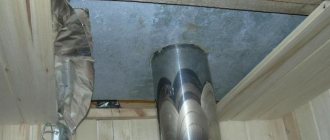
After the device is fixed to the ceiling, they go up to the attic or second floor and fill the gap between the outer wall of the pipe and the beams with heat insulator.
Basalt wool can be used as thermal insulation. But be sure to check that the operating temperature range should be greater than 600°C.
You can use mineral wool or clay to insulate the pipe.
Some people think this option is not the best. Firstly, during production, resins are used as a binder, which release formaldehyde when heated. Secondly, condensation sometimes runs through the pipe. And mineral wool (and basalt wool too) lose their heat-shielding properties when wet. And when they dry, they are only partially restored. So this option is really not the best.
The penetration is also covered with expanded clay of medium and fine fractions. This is a natural material that is relatively light in weight. Even if it gets wet, it then dries and restores its properties. When wet, the thermal conductivity increases slightly, but it is already worse for expanded clay than for mineral wool.
In the past, sand was often used. The option is not bad in all respects, except for one detail: it gradually wakes up through the cracks. Refilling the sandbox is not difficult, but constant sand on the stove is annoying.
If we talk about natural heat insulators, then you can use clay. It is diluted to a paste-like state and the entire gap is covered. Sometimes expanded clay is used as a filler.
One of the heat insulators is expanded clay
Here is a review of the use of clay when passing a bath pipe:
“Clay rules in cutting! I dismantled the chimney in my bathhouse. Or rather, I took apart what was left: there was a lot of snow, and when it melted, it blew off the entire top. Once you change the top, you need to look at the bottom: the pipe has been standing for 7 years. So here it is. There is zero burning inside, and there is no burnout of the pipe either. Condition: as soon as installed. My penetration is lined around the perimeter with basalt wool, and then everything is covered with clay. This is definitely the best option."
Not everyone recommends using insulation in the passage unit. There is an opinion that it is better to leave the gap unfilled: this way it will be possible to avoid overheating and burning out of this section of the pipe - it will cool better due to air blowing. This may be true, but the radiation from the heated pipe will dry out the nearby wood, and in this case the temperature of spontaneous combustion is significantly reduced - to +50°C.
As you can see, the pipe burned out
There are several ways to avoid overheating. The first, and most rational, is to use the heat that flies out into the pipe and heats it to extreme temperatures for your own needs. There are three options:
One way to avoid overheating is to place stones on the pipe
- Make a water jacket on the metal chimney and use hot water for showering or heating. The system is not so simple; it also requires a remote tank, as well as pipe connections, cold water supply, etc. But temperatures above the water jacket will not be nearly as high, and the pipe will not burn out.
- You can also heat water, but it’s easier: install a samovar-type tank. Hot water is also provided, the chimney does not overheat and is protected. But there are some nuances here: do not let it boil, drain the heated one in time, add the cold one. And doing this is not entirely convenient, since the tank is located quite high: above the stove on a pipe.
- Adapt a net for stones. The water will have to be heated in a different way, but the advantage here is this: after the procedure is completed, the stones dry the bath. Here, too, difficulties may arise: the weight of the stones is considerable, it is unlikely that you can do without support, unless you use the factory version (on the right in the figure). In a homemade version, a structure will be needed to redistribute the mass.
When using any of these methods, the pipe temperatures in the ceiling passage are significantly reduced. The likelihood of burning becomes very small. That's not all. There is a way - simply cool with air. To do this, another one of larger diameter is put on the heat-insulated pipe. A grate is made at the bottom and top through which air enters/exits. For a steam room this is not an option - it will draw out all the steam, but for a washing room it can be used. The method is especially good in the attic and when passing through the roof.
Installing a chimney through corrugated sheeting
Corrugated sheeting is a sheet of metal produced by cold rolling and then profiled. Mainly made of steel, but can be made of copper and aluminum. The sheet has ribs of oval, square, trapezoidal or polygonal shape. A special coating is made on top, which gives it anti-corrosion properties. Corrugated sheeting is often used as a roofing material.
To pass the chimney through the roof, in the case of a square or rectangular pipe, a device in the form of two aprons and a tie is used. The method is the same as for a metal roof. Installing round pipes in corrugated sheeting is not recommended, because it is difficult to cut the correct circular section into it. But if you still make a round chimney, the pipe is insulated using a universal elastic adapter.
Accessories for running round pipes Source metalsteel.com.pl
Kinds
To understand the material, it is worth clarifying some definitions:
- Furnaces are devices designed for the complete combustion of various types of solid materials for heating the premises of objects, such as locally assembled installations from fire-resistant materials - bricks, fire-resistant concrete, fire-retardant pastes, non-flammable mastics; or in the factory from metal alloys.
- Fireplaces are types of stoves, characterized by a larger area of open combustion openings and the absence of smoke circulation.
- A chimney or chimney is a shaft of rectangular or circular cross-section, necessary to create an upward draft of heated smoke products of the combustion process and discharge them into the atmosphere.
The smoke channel or pipe can be of several types:
- mounted, resting on the ceilings of construction sites;
- wall, passing inside the main walls;
- indigenous, resting on the foundations of buildings, floors, next to the heating unit.
Retreat
- open;
- closed.
Fire retreat
Cuttings
- to combustible structures of a construction site;
- to structures protected with wet plaster over a metal mesh and other fire-resistant materials.
Combustible materials in the ceiling can also be protected with fire-retardant plasters and fire-resistant (fireproof) plasterboard.
Fire cutting
Passage through ondulin
Ondulin looks like regular slate, but its material is completely different. This is compressed cellulose, which is treated with bitumen impregnation. It comes in a variety of colors, is water resistant, but burns quite well. Therefore, when a passage through the roof is organized, maximum attention is paid to filling it with fire-resistant materials. The hole for the pipe in the ondulin is made large. To insulate the junction of the roof and the chimney, an apron is used, which is placed under the roof. In this case, elastic self-adhesive tape “Onduflesh” is used, made of bitumen with an aluminum insert.
Brick pipe passed through ondulin Source seaside-home.ru
Steel apron
To finish the chimney, aprons made of galvanized steel are used. They can later be painted in the desired shade. The configuration of this element may vary. There are ready-made aprons of different sizes on sale.
How is the apron installed?
- The edges of the waterproofing membrane and thermal insulation that were damaged when the pipe was brought to the roof must be secured to the chimney with construction tape.
- To install the wall profile, the pipe is grooved along the entire perimeter (before this, markings should be applied). The upper part of the strip is inserted into the recess and fixed with a high-temperature resistant sealant.
- The first layer of the apron is placed under the profiled covering and fixed with roofing screws.
- The second layer of the protective device is mounted on a profiled sheet with an overlap of 10...15 cm.
Installation diagram of a steel apron All joints are treated with sealant.
The protective apron should be fixed using special self-tapping screws with a rubber seal. If such hardware is not available, you can use homemade rubber gaskets that fit under the fastener heads.
Handmade metal apron
For those who have skills in working with tools and metal, the best option for an apron may be a self-made design.
Table. Tools necessary for the manufacture and installation of an apron.
| № | Tool | Illustration |
| 1 | Screwdriver | |
| 2 | Metal scissors | |
| 3 | Envelope forming pliers (heron) | |
| 4 | Tongs (45 degrees) | |
| 5 | Manual bender (sheet bender) | |
| 6 | Kiyanka |
In addition, you should prepare sheets of metal (smooth) of suitable size and roofing screws.
The task is to make an apron from sheet metal for this chimney.
We will make an apron for this chimney
Step 1. Measurements are taken. This point must be taken with great responsibility, since the functionality of the design depends on it. The height of the apron must be at least 15...20 cm.
Step 2. The four components of the apron are prepared. To bend the sheet, you need a bender. This handheld device replaces a bending machine.
To bend a sheet you need a bender
Metal cutting is done with scissors.
Metal trimming
You will need four blanks:
rear end;
The back part of the edge must be slightly bent so that snow does not fall between the apron and the roofing.
two sidewalls with stiffening ribs;
Sidewalls with stiffening ribs The sidewalls should also have bends.
Fold on the side
front end.
Front It has a more open angle.
Step 3. The rear element is mounted first.
Rear element installation
The part is pressed tightly against the chimney and fixed.
Step 4. The sides are folded into an envelope. This ensures that there are no cuts on the apron. All folds of the envelope are tightly tapped with a mallet.
The sides are folded into an envelope
After the envelope is formed, a semicircle is cut out on the sides (on the side that will be in contact with the back panel).
A semicircle is cut out
A smoothly smoothed transition will also avoid cuts. After processing, the sidewalls look like this.
Sidewalls after processing
Step 5. The sides are pressed tightly against the pipe and screwed to the roof. Self-tapping screws should be fixed on the protrusion of the corrugated sheet.
Step 6. The protruding part of the back part is cut to the size of the side panel, taking into account a small margin. It is necessary for the subsequent bending of the rear element onto the side.
The protruding part of the rear part must be trimmed with a margin
Step 7. The back wall is folded over the protrusion of the side panel. This ensures a tight connection between the two parts. The seam is tapped carefully.
The seam is tapped
The same procedure is carried out with the second sidewall.
Step 8. The front element is installed in place and fixed with self-tapping screws to the chimney and corrugated sheet. This apron piece also has envelope folded side edges. They are also cut in a semicircle.
Fixing the front element
The sides (protruding beyond the chimney) are cut in a semicircle 1...2 cm higher than the front part, after which they are folded onto the walls of the front part, creating a lock. The result was a completely sealed chimney lining.
Sealed chimney liner
The only weak point of this design is the connection of the top of the slats to the pipe. Moisture penetration may occur in these areas. To eliminate this problem, the joints must be treated with sealant.
Installation of a chimney in a soft roof
Soft roofing is a flammable material, so it is important here that there is a gap of 13 to 25 mm between the pipe and the covering. The passage of the chimney through the roof is organized depending on its shape - flat or pitched. The material from which the pipe is made also plays a role. If the roof is flat, consisting of a concrete slab and the pipe is not made of brick, the passage is made as follows:
- Around the pipe at a distance of about 15 cm along the perimeter, everything is removed, right down to the concrete.
- The formwork is being installed.
- Concrete is poured so that a side is formed, the height of which is 15 cm.
- The roofing covering is applied to the walls.
- Where the roofing material connects to the side, a metal strip is installed. Fastening is done using dowels.
- An ebb tide is installed on the side.
If the pipe is brick, there is no concrete side. In this case, roofing material is placed on it and a metal apron is installed on top. A groove is made in the wall of the pipe (depth 1.5 cm), into which the edge of the apron is inserted.
When passing a pipe through a soft roof, many nuances must be taken into account Source teplospec.com
The junction is filled with sealant. In the case of a pitched roof, waterproofing is carried out as on other coverings, that is, using aprons (for square and rectangular pipes), as well as flexible or metal adapters (for round ones).
What it is
During combustion, strong heating occurs on the outer surfaces of not only the walls of the furnace body, boiler, but also the structures of the flue that discharge hot flue gases into the atmosphere.
Fire-resistant cutting is an increase in the width of the walls of the housings of heating units - stoves, fireplaces, boilers or chimneys, ducts in places/areas of direct contact with building structures of objects made of flammable, low-combustible materials.
Fire-resistant retreat is the space, the distance between the outer surfaces of the walls of the housings of furnace units, heating equipment or smoke ducts and unprotected or protected from constant heating, ignition walls, partitions made of combustible, low-combustible building materials.
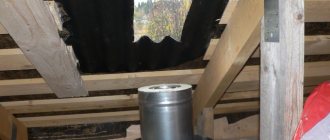
Installing a chimney in a finished roof
If the chimney is not installed at the construction stage of the house, but in a finished roof, the following is done:
- There is a place for output taking into account the requirements of SNiP. This should be the space between the cross beam and the rafters.
- A box is made of beams, the cross-section of which is equal to the cross-section of the rafters. The box is made such that the width of its sides is 0.5 m greater than the diameter of the pipe.
- A hole is cut in the roof equal to the perimeter of the box. To comply with it, through holes are drilled from the inside in the corners of the box.
- The roofing material is bent outward, a pipe is inserted into the hole and secured.
- The box is sealed with fire-resistant material for thermal insulation.
- The junction of the pipe and the roof is sealed. The flange (adapter) is being installed.
The pipe must be routed only through an adapter Source rinnipool.ru
Final works
Cutting a chimney pipe on the ceiling or roof with your own hands is finished. All that remains is to dry the oven. But before that, we check the draft in the pipe. To do this, we bring the torch to the open door of the firebox; if the flame draws inward, the draft is normal. If there is insufficient ventilation, you will need to remove construction debris from the pipes and only then proceed to the next stage of the final.
We put no more than 3 kg of firewood in the firebox and set fire to it. During the first burning of wood, grease, dirt and paint materials will burn off from the surfaces of the stove, and moisture will be removed from the bricks. Therefore, we recommend opening windows and doors.
After the surfaces have cooled, we dry the stove a second time and check all the joints and the chimney itself for leaks and that there are no leaks of gases into the room. We eliminate possible malfunctions and only after the final check can we begin to operate the furnaces.
Only by qualitatively completing the main stages of work and carefully checking the finished chimney, you will be able to protect your home from fires and inhale the fragrant smell of burning wood, and not carbon monoxide pouring out of the cracks of the chimney.
