Dry construction and finishing mixtures make it possible to obtain masonry and plaster mortars with additional installation and performance properties. Most often, moisture- and frost-resistant materials, heat-resistant materials, with accelerated hardening and a number of others are in demand.
Ceresit brand products consist of a range of materials that meet all the requirements of modern construction technologies. In particular, dry mixes have proven themselves positively from the very beginning of sales in domestic markets.
The correct choice of materials according to their purpose and performance characteristics allows you to implement complex projects with significant savings in costs and working time.
The offered assortment includes a wide selection of primers, grouts for tile coverings, and adhesive compositions that have excellent adhesion to mineral and organic substrates.
- A stable demand has formed for the deep penetration primer Ceresit ST17. Developers and homeowners planning to carry out thermal insulation and finishing façade work are offered to purchase the material.
- A vapor-permeable acrylic primer with deep penetration increases the density of the top layer of concrete walls and improves adhesion to adhesive, paint and plaster coatings.
Ceresit grout for tile joints is presented in several types, which differ from similar materials in increased strength, moisture resistance, a wide selection of colors and stability of operating parameters throughout the entire service life of the tile cladding.
Caramel-colored Ceresit grout and its analogues with other colors can be used with equal success for interior and exterior finishing work, on vertical and horizontal surfaces in a wide range of temperature changes.
Characteristics of Ceresit products
To eliminate deviations on the wall surface, there are solutions ST 24 and ST 29.
Optimal conditions for their use:
- the surface and ambient air temperature should be 5-30°;
- the base should not be heated by direct rays of the sun;
- the weather outside should be without precipitation or wind;
- the surface must be cleaned of dirt and grease;
- treat the surface with ST 17 primer mixture.
Plaster for leveling walls
The procedure for working with compositions is as follows:
- add dry material to water at a temperature of 15-20° according to the instructions and mix with a mixer;
- apply the solution to the base with a wide spatula;
- after 10-20 minutes, smooth the layer with a plastic trowel;
- after 3 days you can continue finishing work;
- After a week you can paint the surface.
Ceresit ST 24 is applied in a layer 3-30 mm thick, Ceresit ST 29 - 2-20 mm.
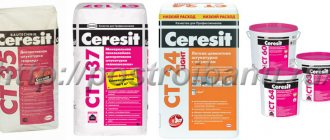
There are decorative ceresit plasters. These are: Dekor Plus, ST 35, ST 137. Before using them, it is recommended to treat the base with ST 16 or ST 17 primer. Ready-made plaster solutions are applied to the walls, creating textures: “fur coat”, “pebble” and “bark beetle”. Different furrows are created using pebbles of different sizes that are part of the “bark beetle”. A “fur coat” is obtained by passing a short-haired roller over fresh mortar. You can paint the finished surface after 3 days (with silicate dyes) and after a week (with silicone paints). Dekor Plus is suitable for such work.
Decorative plaster
Composition ST 35 is intended for any coating. When using the “winter” modification, there is no need to prime the base.
ST 137 is designed to create a grainy texture on the surface.
ST 63 is an acrylic-based decorative plaster. It contains pebbles that give structure to the surface. The ST 64 composition also contains pebbles, but their sizes are smaller, not exceeding 2 mm. In all other respects the compositions are exactly the same.
ST 72 is a ready-to-use plaster. It can become a base for tinting. The plaster layer is resistant to mold and has great durability. It can be applied in rooms with high humidity, outdoors. This decorative plaster is available in different grain sizes. The composition is very easy to use.
ST 73 is a plaster with a grain size of 2 mm. With its help you can create a “bark beetle” texture.
Finished plaster
ST 77 has 12 different colors, the number of fractions is 4. The binder composition is acrylic.
Using silicone-silicate plaster ST 174, a “pebble” structure is created. The grains have sizes of 1.5 and 2 mm.
ST 175 - plaster for creating a “bark beetle” texture. The product is ready for use. It can be tinted at the request of the consumer.
Mostly plaster is produced in bags of 25 kg.
Instructions for grouting tile joints
- You can begin work only after the tile adhesive has completely hardened (see drying time on the packaging). If laying took place on a regular cement-sand mixture, then this period should be at least 7 days.
- The edges of the tiles must be cleaned of any remaining adhesive, grease, or dust. For better adhesion, it is recommended to moisten them with a damp sponge.
- If you are filling in old siding, the old mixture must be completely removed from the joints. They must be equal in depth and width.
- If the tile is not covered with glaze, you need to first test whether the pigments from the grout will color its surface.
Preparing the mixture
- To stir the cement-based dry mixture, it is best to use water at a temperature of 15-20 degrees. Measure out the required amount of water (but do not overdo it, otherwise the technical characteristics of the grout will deteriorate) and while stirring, gradually pour the dry mixture into it. You should get a homogeneous solution without lumps.
- If you are preparing a small amount of the mixture, this can be done manually, but for large volumes it is more convenient to stir it with a drill or a mixer with an attachment at 400-800 rpm.
- After this, it is important to wait 5 minutes for the mixture to ripen and mix it again. You now have 60 minutes to use it.
Applying grout
In order not to stain the embossed tile, it is sealed with a protective film and masking tape.
- Using a rubber spatula, apply the grout to the tiles and spread it over the surface, rubbing it into the joints in a cross motion. Then collect the excess and repeat the operation.
- After 5-10 minutes, the mixture will harden a little, and it will need to be wiped with a damp, clean sponge. But if the sponge is too wet, the color of the seams may then differ.
- When the grout is completely dry (after 24 hours), you will need to wipe the tiles again with a dry soft cloth. It should not be subjected to stress or wetness earlier than 24 hours after application.
- Work must be performed at temperatures from +5 to +30 degrees (up to +40 when working with silicone grout), and a relative air humidity of less than 80%.
- If you are using several bags of dry mix, make sure they are from the same batch, or pre-mix them to get one tone.
Wash the grout with a sponge and warm water
We wash away stains after 24 hours with a damp cloth or felt glove.
Be sure to protect your skin and eyes when working; the grout contains cement, which when diluted with water gives an alkaline reaction.
After removing the protective film, the decor remained clean
Sealing decorative masonry joints:
- Application of the mixture is done using a mounting gun or a cone-shaped bag with a hole. In this case, it is better to start work from the top of the walls and move down.
- After filling the masonry joints, they need to be smoothed with a narrow spatula or rubber jointer. First of all, vertical seams are smoothed, and then horizontal ones.
- The excess is removed with a spatula when the mixture has hardened a little.
Application of silicone grout
- It is recommended to cover the adjacent surfaces to the seam with masking tape.
- A polymer strand must first be inserted into the expansion joints.
- Cut off the tip of the cartridge, leaving a thread, and screw the tip to it. Then you will need to cut off part of the tip so that the size of the hole is equal to the width of the seam.
- Insert the cartridge into the special gun and fill the seam evenly.
- No later than 15 minutes after application, you need to moisten the sealant with soapy water and smooth it with a damp spatula, removing excess. After this, the masking tape can be removed.
- The thickness of the grout should be approximately half the width of the joint.
- If you need to remove fresh silicone grout, you can do this with alcohol or acetone. Hardened - only mechanically.
When silicone grout hardens, acetic acid is released into the air, so you need to ensure good ventilation and immediately leave the room after completing the work.
Applying epoxy grout
Colored two-component epoxy grout
Ceresit CE 79 grout consists of two components, which are sold in one package. To prepare the mixture, you need to completely pour the hardener (component B) into the epoxy resin (component A) and mix thoroughly with a mixer at 400 rpm. The mixture can be used within 90 minutes after preparation.
Filling the seams with a spatula:
The joints must be filled completely and without gaps using a special spatula for epoxy grout. Using the same spatula, you need to remove excess, using diagonal movements in relation to the seams.
Filling seams using a mounting gun:
The finished mixture must be loaded into a cartridge for a gun and through a tip with a hole of a suitable diameter, evenly squeeze it into the seams. Excess is removed with an epoxy grout spatula.
Tile fixing:
If the cladding is used in rooms with high chemical or hydraulic load (swimming pools, garages), the base must first be treated with epoxy waterproofing.
The finished mixture must be applied to the base using a notched trowel (the size of the teeth is selected depending on the format of the tile).
Surface cleaning:
- Fresh epoxy grout residues can only be removed with a soft and slightly damp sponge. Using circular movements, you must first turn it into an emulsion, and then remove this mass.
- 3-6 hours (but no more) after application, you need to remove the remaining plaque on the tiles with a soft, clean and damp sponge.
- To simplify the cleaning process, you can use special compounds for removing epoxy grout (for example, Litonet, Sopro, Mapei Keraproxy and others).
- The tool must be cleaned with a brush under running warm water. Hardened grout can only be removed mechanically.
- A day after application, you can walk on the epoxy grout, and after a week it will be completely ready for protection from mechanical and chemical loads.
Application of hydrophobic antifungal impregnation for seams
Water repellent for tiles from Ceresit
- If the seams are affected by fungus, they must be removed with a wire brush before applying Ceresit CT 10. After this, the dust is removed and the joints are treated with a fungicidal (antifungal) preparation CT
- The seams must be completely filled with grout. If necessary, they need to be repaired, but impregnation can only be applied a week after applying the grout.
- To protect adjacent surfaces, they can be covered with masking tape.
- Shake the impregnation thoroughly before use.
- Apply the sealant to the joints using a brush.
- If the entire surface is being treated, it can be poured and then evenly distributed with a rubber spatula or a short-nap roller.
- After 5-15 minutes, excess impregnation must be removed and the surface wiped with a damp cloth.
- Fresh stains can be easily removed with water, but dried stains can only be removed with a solvent.
Tools and materials for work
To work with Ceresit materials you may need:
- plastic and steel grater;
- grater;
- putty knife;
- level;
- falcon;
- plaster trowel;
- hatchet;
- scoop;
- plaster trowel;
- corner leveler;
- ironer;
- plaster spatula;
- rule.
Necessary tools for applying plaster
Materials you will need:
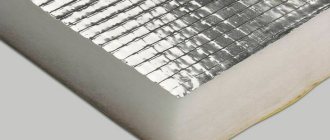
- insulation material;
- glue;
- reinforcing mesh;
- dowels with wide caps;
- waterproofing material;
- putty;
- primer composition;
- base profile;
- facade paint;
- brush.
Primer for decorative plasters
Decorative plastering cannot be carried out without prior priming. It is rational to use a primer of the same TM under the Ceresit plaster layer. For these purposes, the primer Ceresit ct 16 is produced. This material is used for processing various mineral bases: cement, lime, concrete, gypsum, oil, paints and varnishes.
Primer st 16 improves the quality of adhesion of the base to the finishing material. There are also positive aspects: moisture resistance, vapor permeability, environmental friendliness.
The primer is a water-dispersion mixture of acrylic polymers, pigments and mineral substances are added to it. The consistency of the material is thick, roughness is achieved by adding quartz chips.
Priming work should be carried out at a temperature not lower than +5 degrees, air humidity not more than 80%.
Checking the quality of the primer layer: a spatula is carried out along the layer from the edge side; if there is no trace, the work was carried out in compliance with technological requirements.
Facade plaster Ceresit
Factories for the production of decorative plaster Ceresit are located in many countries, including Russia, which indicates the demand for the material and, accordingly, the high quality of the products. In addition, the technology for producing facade mixtures is slightly different from analogues.
Ceresite consists of high-tech constituent substances that provide the material with appropriate qualities. A large range of products will help you decide on the choice of material. The material is presented by the manufacturer in different texture options, with different compositions (depending on the purpose).
Variety of colors and textures
Advantages
C eresit is widespread precisely because of its positive characteristics:
- high elasticity (the material contains components that enhance the elasticity and viscosity of the material);
- ease of application (standard application with a spatula does not differ from similar work with other mixtures);
- creates an impact-resistant coating (mechanical stability guaranteed by the manufacturer);
- resistance to fading (even the colored mixture does not fade when exposed to ultraviolet rays);
- the material is durable (performance properties last for more than 30 years);
- environmental friendliness (plaster does not contain harmful substances);
- moisture resistance (the coating repels water and prevents its penetration into the surface);
- resistance to pollution;
- resistance to temperature changes;
- variety of colors and shades.
In addition, the material has good adhesive properties, which allows it to be used on different surfaces. Classification according to use in cold and warm seasons also helps with selection, especially when performing work in the cold season.
Flaws
No technical shortcomings were found in this mixture: the material has established itself as a quality product. If we can call the high price (compared to analogues) a disadvantage, then this is the only thing that does not always suit the buyer. The price is consistent with the quality, so if you pay a little more, you can feel complete satisfaction from the quality of the product.
Selection and comparison of glue
When choosing a composition from Ceresit, it is important to focus on the working conditions, where they are carried out, at what temperature and humidity. The material of cladding and coating is considered. Some universal products have similarities; they can be used for different purposes, but you still need to carefully study the characteristics and instructions.
Ceresit competes with several other well-known tile adhesive companies. In particular, these are Knauf, Yunis and Kiilto. The first manufacturer produces glue in the form of ready-made pastes, so they do not need to be diluted before use. Knauf products are suitable for mineral materials and ceramics.
Manufacturer Eunice specializes in professional adhesives that have a long pot life. Plasticizers are added to the mixture. The Kiilto company produces high-quality glue for uneven surfaces. Adhesives have excellent ductility. Kiilto glue is used to level coatings.
Types of Ceresit plaster
High-quality Ceresit coatings are classified according to their composition:
- silicone. Designed for finishing. The composition prevents the appearance of fungi, masks small cracks, and is suitable for use in expensive mixtures;
- acrylic. They are able to hide defects on the surface, are not vapor-tight, have a smooth texture, and have increased strength indicators;
- cement. Due to the presence of cement in the mixture, this coating is durable, breathable, elastic, and easy to apply;
- silicate. The main component of the mixture is silicate resin. These mixtures are elastic, especially durable, and are most often used for interior work (in rooms with high humidity), as well as for exterior work;
- mineral. Used for external coating of facades.
In addition, Ceresit compositions are made for subsequent painting or for finishing coating without painting.
Facade mixtures are divided into “winter” (they can be worked with at temperatures below 0°C) and “summer” (for work in hot weather).
Ceresit glue consumption
You should not rush to buy extra bags of Ceresite, as in this case, repairs can be very expensive. To avoid unnecessary expenses, it is necessary to measure the length and width of the floor, calculating it using the formula for calculating the area: area A multiplied by B.
The adhesive consumption is also affected by the size and type of tile, surface structure and base material. If the surface is not smooth, then the glue consumption increases.
- The more porous the structure of the base, the more glue it will absorb.
- The average consumption of Ceresit adhesives does not differ much from each other, it ranges from two to six kilograms per square meter.
- The qualifications of the master also directly affect the amount of material consumed, so it is best to hire professionals to lay tiles.
- Glue consumption increases significantly if it is applied not only to the tile, but also to the surface.
Installation of thermal insulation boards.
If the façade needs insulation, install thermal insulation boards. You can use hard mineral wool or polystyrene foam.
It is recommended to use ST 84 polyurethane adhesive or Ceresit ST brand compositions (85 or 190) as an adhesive mixture.
How to apply the adhesive mixture correctly:
- on mineral wool slabs - over the entire surface, in a continuous, thin layer;
- slabs of expanded polystyrene are coated with glue around the perimeter, retreating 2 cm from the edge, and the width of the strip should be 6 cm, and the thickness - 2 cm. The glue is applied to the rest of the surface of the slab in patches of the same thickness, with a diameter of 10 cm. It is enough to apply to one slab from 5 to 8 “patch”.
As soon as the glue is applied, immediately attach the slab to the wall and press down so that it fits well over the entire surface.
Coat and lay the remaining slabs in the same way. First lay the first horizontal row, starting from the base, checking that the surface does not deviate from the vertical. Then lay the remaining slabs in order.
When the process is complete, wait for the glue to dry, then sand the surface with coarse sandpaper, securing it to a holder for convenience. A special manual machine is suitable for this work. For reliability, reinforce the slabs with disc dowels.
Important! If you start sanding the slabs immediately after installation, while the glue is still wet, they may move.
Choosing Ceresit grout color
When starting to choose a shade, everyone can show their imagination and choose the product they like.
Still, here are some generally accepted recommendations from tile laying experts:
- Using white grout is acceptable in most cases. If you don't know what color to choose, just go with white.
- Traditionally, darker shades are used for flooring, since keeping light-colored joints perfectly clean will be problematic.
- Light seams create a more complete picture and the design of the room looks unified, while dark seams, on the contrary, make the space fragmented.
The rule that light shades expand space also works with grout. For cramped bathrooms, this is an important factor, so light tiles with light grout will help solve this problem, at least visually.
What is pebble plaster?
To create a surface with a shallow relief, pebble plaster Ceresit ST 77 series with the required grain size is used. This is an aqueous solution made on the basis of silicate and silicone polymers, to which coloring pigments, mineral fillers and marble chips are added. This plaster is available in several versions, including “Winter” - for use in the cold season.
Application area.
Pebble plaster is used to create a thin-layer decorative coating on external and internal walls and architectural elements. The finish is similar in appearance to stone chips, it is not damaged by fungus and mold, does not crumble, is resistant to moisture, but allows air to pass through well, i.e. the walls “breathe”. The coating can be painted. This mixture can be used to plaster concrete, drywall, gypsum, cement-sand bases, chipboard, putty and plastered surfaces.
Important! You should work with latex gloves and safety glasses. Mix plaster only in stainless steel containers. If work was carried out inside, the room must be well ventilated.
When finishing the walls outside, choose the time so that the applied mixture dries without being exposed to direct sunlight, precipitation, or dampness.
User manual
After laying the tiles, it is necessary to take a technological pause. The specific time depends on the glue or cement-sand mixture used. For the latter, the holding period is 7 days. After this time, you can proceed to preparing and filling the seams.
The quality of the result is directly affected by the presence of moisture, grease, cement and other contaminants on the tiles and edges. All this must be wiped off the cladding before grouting. It is recommended to wet the edges of the tiles using a damp cloth or sponge.
How to breed
Ceresit CE 40 grout must be diluted in water at a temperature of 15-200C. It is necessary to strictly follow the recommended proportions, alternately mixing the dry mixture with liquid. If there is little mixture, then manual mixing is allowed. To create large solutions, it is recommended to use a construction mixer or drill with a special attachment. The optimal number of revolutions is 400-800 per minute.
The video shows the dilution of Ceresit se 40 grout:
The result should be a homogeneous mass without lumps, which should be left for 5 minutes. After this, the solution must be mixed again. To achieve a one-color result on tiles, it is best to use grout from the same batch.
How good is the grout manufacturer Prospector and where should such building material be used?
Information from the article will help you understand what is the grout consumption per m2 of tiles.
You may also be interested in learning what Ceresit se 33 grout is.
Important: after preparing the solution, it must be used within 2 hours.
How to apply to tiles
To apply the grout, you will need a rubber spatula, which should be used to grab a small amount of the mixture from the container. When filling the joints, it is necessary to collect excess mixture from the tiles and apply it to the unfilled areas. Work with the grout evenly, using medium effort to fill.
After wiping all the seams, you need to wait 15 minutes and wipe the surface with a damp sponge. Excessive moisture can cause a difference in grout tone, so be sure to wring out the sponge well.
The video shows the use of Ceresit se 40 grout:
Having filled the seams and wiped them, all that remains is to remove the dried plaque, which must be done no later than 8 hours from the moment of grouting. The same period for the technological passage. You can walk on the tiles a day after filling. During this time, you need to protect the grout from drying out, moisture, wind, sunlight and mechanical damage. Moisture penetration is allowed no earlier than 7 days after application.
Important: if the tiles are located outdoors or in conditions with an open source of water, then it is necessary to cover them for 7 days until the solution completely sets.
Classification of plasters
The well-known Henkel concern is famous for its high quality products and the variety of materials presented in its catalogs. Series of plasters produced by a well-known manufacturer include all popular types from different price categories:
- Elite silicone modifications, which are supplied in a special sealed container. Their purpose is a thin-layer finishing finish. This type combines vapor permeability and immunity to the development of fungi. The silicone base is elastic, masks small cracks when applied, and is stable in use. Belongs to a fairly high price category.
- Acrylic compounds form a thin, smooth or textured surface and hide minor defects. But they do not have special vapor permeability. A full-color palette will add a special flavor to any room or building facade. Sold in closed plastic containers.
- Silicate pastes are durable and flexible. They are intended for decorating external walls, as well as rooms with an unstable microclimate - for example, loggias, bathrooms, kitchens and storage rooms.
- Cement-based compositions are affordable and reliable. Presented in the form of dry mixtures of prepared cement and sifted sand or white cement with purified lime. Suitable for both interior and facade work.
How to use dry mixes?
The instructions printed on the paper bag in which the dry mixture is packaged and sold will help you correctly prepare the Ceresit CR65 waterproofing composition. The main requirement when combining a one-component composition with water is strict adherence to proportions. To apply the mixture to a vertical or horizontal surface, use a brush, roller, spatula or paint sprayer.
The prepared mixture is applied to a surface cleaned of dust, dirt, paint and plaster residues. Before starting work, the walls are moistened with water to create a better absorbent effect and adhesion. Treatment with the composition should be carried out very carefully to exclude any possibility of moisture penetration that has a detrimental effect on building structures.
Brands of material and the advisability of their use
Ceresite is distinguished by a special variety of compositions. To choose the right mixture, you should think through the work in advance and imagine the final result.
The universal version Cerecit Dekor Plus goes on sale in powder form. Excellent insulating properties, impact resistance, resistance to temperature changes, long-term exposure to heat or cold allow this type to be used both for facades and interior work. The project is produced in different textures: “bark beetle”, “fur coat”, and other decorative varieties with pebble inclusions are available to a wide range of buyers. The dried surface can be perfectly tinted with silicate or acrylic paints.
Decorative grade CT 72/CT 73 is produced in a ready-to-use solution, but is subject to subsequent painting. Indispensable for interior work.
To quickly eliminate cracks and chips, craftsmen choose ceresit CH 83. The mixture can be applied in a fairly thick layer: up to 30 mm per pass. It is better to entrust the leveling of any bases for the upcoming finishing to the ST 29 brand - this type will perfectly “cope” with smaller defects of walls and ceilings.
Ceresit CT 77 has a wide color palette. Used as facade finishing or covering for problem areas - for example, with high humidity.
The ST 35 variation is considered thin-layer and is available in two types with granule inclusions of 2.5 or 3.5 mm. You can purchase a white version or a colored one.
Pebble decorative fine-grained plaster ST 137 forms a surface in the form of densely spaced structural inclusions. Involves finishing coloring.
Mosaic queen ST 77 has a palette of 38 colors. It is used as a façade finish because it adheres well to any building material. The polymer coating is wear-resistant and impervious to atmospheric changes, inert to precipitation of any kind. This option can also be used as an interior option.
How to calculate grout consumption
To get the correct grout consumption number. You need to use a simple formula. The width of the surface to be processed is added to its length. The result obtained must be divided by the resulting product of these quantities. The result obtained is multiplied by the thickness of the tile and the width of the seam. The final number will show the composition consumption per kg/m.
Manufacturers also indicate on the packaging the average consumption of each type of mixture. You can simply take them as an approximate consumption figure.
A faster way is to use a calculator, which can be found on the Internet. It has sections where you need to enter information about the thickness of the layer and the surface area that will be processed. The answer is the total mass, and even the number of bags that is needed is prescribed.
Manufacturers indicate on the packaging the average consumption of each type of mixture.
Ceresit grouts have good characteristics, they are moisture resistant and of high quality. The variety of types makes it possible to use them in different rooms and under different conditions. The permissibility of use outside the building further expands the scope of their use. Craftsmen have long appreciated their elasticity and ease of use. That is why today they are so popular and in demand. They are easy to work with and the process is easy for a novice to handle, and the coating will be well protected and the finish will last a long time.
Working with Ceresit plaster
The principles of finishing walls with different types of plasters from a German manufacturer are close to the general rules for working with similar materials. Beginners are advised to study the attached instructions and try applying the compositions on a rough surface. This will give you the opportunity to “feel” the solution.
Facade and interior finishing begins only after cleaning the working surface from the old coating, degreasing the wall and applying a layer of primer. Textured types of ceresit plaster do not require a perfectly flat original wall, since they perfectly mask individual non-global defects. If there are significant cracks, you should first use mixtures based on cement or gypsum.
To ensure that the decorative coating does not differ in structure and tone, it is wiser to immediately purchase the required quantity of goods from one batch. And for each wall you should make a separate batch or use the entire solution on the day of preparation - this recommendation does not apply to ready-made compositions in sealed containers.
The thickness of each layer should not normally exceed the size of the structural inclusion by 1.5 times. The texture is formed only after the solution dries and stops sticking to the hand or tool. Typically, simple patterns are created using multidirectional movements with light pressure with a plastic or wooden grater. For example, with a circular swing you will get the popular “lamb”.
Experts recommend choosing components for multi-stage work from the line of one manufacturer. If the priority is decorative plaster of the Ceresit brand, then other consumables should be selected from this series, since they remain the most compatible.
Therefore, professionals often give preference to the European quality of Henkel products: in the list of products produced by the concern, you can find everything you need for design and finishing work.
Details about each type of adhesive
Each Ceresit product has a marking that indicates the characteristics of the composition. Let's take a closer look at each adhesive from the Ceresit CM line and some others .
CM 9 Plus
This composition is one of the most imperfect. Prepared on a cement base. It is resistant to moisture, but has low resistance to low temperatures. Therefore it should not be used for external work.
Hardening of CM 9 occurs in 3 days, which is a very long time in comparison with other representatives. The glue does not provide high-quality adhesion. Suitable for small tiles and small-caliber terracotta. Used for artificial stone, less often for brick.
Key properties of the adhesive:
- Used in conditions from 5 to 35 degrees.
- Withstands no more than 40 frosts.
- Hardening at a humidity of 60% occurs in 2-3 days.
Use glue only for non-deformable surfaces made of concrete and cement. When working with it, the humidity should not be more than 80%, otherwise the viability of the glue decreases significantly.
CM 11 Plus
CM 11 is available for brick, lime, concrete, cement. It is used not only in residential buildings, but also in industrial facilities. It is characterized by increased adhesion, resistance to moisture, low temperatures, and frost.
Reference! Due to its good properties, CM 11 glue is the most popular of the line.
CM 11 Plus has improved characteristics. It has a low moisture absorption rate - no more than 3%. It can also be used everywhere – inside and outside. It can withstand up to 100 freezing cycles. Dries relatively quickly - up to 36 hours.
The elastic composition is made for floors with light loads. It is not recommended for use in high-traffic areas and public institutions.
SM 12 porcelain stoneware
Ceresit CM 12 adhesive for porcelain stoneware is suitable for large floor tiles. To be used indoors.
Main characteristics:
- Increased plasticity - fluid-plastic mass.
- Resistant to liquids.
- Increased level of grip.
- High-tech.
- Prevention of void formation.
- Suitable exclusively for interior cladding.
- Safety.
SM 14
Tiled Ceresit CM 14 – adhesive for porcelain tiles and ceramic surfaces. Equally good for both external work and interior finishing. A good option for an insulated floor.
Reference! The reinforcing fibers in the composition give the glue increased strength and elasticity. This combination improves the quality of fixation and increases impact resistance.
Characteristics of the adhesive composition:
- Low exposure to frost and moisture.
- Consistency that does not allow the composition to slide off vertical surfaces.
- For external and internal decoration.
- Ecologically pure.
- Compatible with Ceresit mastic and CP 65 insulation system.
- Can be used for heated floors.
CM 14 Extra is suitable for any type of tile, stone, porcelain stoneware on walls and floors. Also for non-deformable simple surfaces (such as concrete and cement).
SM 16
CM 16 is an adhesive of elastic consistency for any type of tile, outside and inside. Combines with ceramics, stone, porcelain stoneware, clinker.
Main features of CM 16:
- Resistance to deformation and improved elasticity.
- Safety.
- Application on deformable surfaces.
- Use for heated floors, in swimming pools, balconies, terraces.
- Compatible with insulating materials Ceresit 51, 65, 166.
- Application for internal and external works.
- Frost resistance, resistance to liquids.
- Increased adhesion to natural stone, porcelain stoneware, clinker.
- Suitable for fiberboard and chipboard.
SM 17
Ceresit CM 17 tile adhesive is highly elastic. Suitable for interior and exterior decoration. Often recommended for complex deformable surfaces.
Characteristics:
- Resistance to deformation, increased elasticity.
- Safety.
- Suitable for indoor and outdoor use.
- Application for large-caliber tiles.
- Pairs well with heated floors
- Suitable for lining swimming pools.
- Used with Ceresit waterproofing.
Reference! The scope of use of CM 17 is extensive. The adhesive is suitable for old substrates, concrete, plasterboard, gypsum board, elastic and hard surfaces, gypsum, chipboard, anhydrite substrates.
The improved composition CM 17 Super Flex is used for clinker, porcelain stoneware, ceramics, artificial and natural stone. Suitable for external and internal cladding. After fixation, position adjustment is possible within half an hour. The adhesive can be used for swimming pools and insulated floors. Complete hardening within 12 hours.
SM 115
White composition for mosaic, glass, marble - SM 115. Prepared for non-deforming coatings. Suitable for stone, light limestone.
Features of the adhesive composition:
- Increased resistance to moisture and frost.
- Prevents fading and staining.
- Resistant to dripping from walls.
- Suitable for finishing inside and outside.
- Application for insulated floors.
Reference! If an elasticizer is added to the composition during mixing, the scope of use expands. This glue is used for swimming pools, old cladding, drywall and other surfaces that are subject to deformation changes.
SM 117
Ceresit CM 117 adhesive is made specifically for facade tiles. Suitable for porcelain tiles and stone. Designed for different types of mineral tiles.
Key features of SM 117 glue:
- Stability on vertical surfaces.
- Safety.
- Increased level of adhesion.
- Frost resistance, resistance to liquids.
- The mixture is elastic.
- Suitable for finishing outdoors and indoors.
CT 84
Polyurethane adhesive Ceresit CT 84 is used for thermal insulation. Designed for extruded and molded polystyrene foam for mineral coatings. It has increased adhesion to brick, concrete, and plaster.
Properties of polyurethane adhesive Ceresit CT 84:
- Reduced work time due to the absence of technological interruptions.
- Economical consumption.
- Simplicity and ease of use.
- Resistant to moisture.
- Possibility of finishing at high humidity and low temperature.
- No freons.
- High thermal insulation properties.
- Increased adhesion to polystyrene foam and mineral surfaces.
Scope of application
Ceresit ct-24 plaster for cellular concrete is used for:
- creating a layer for finishing;
- getting rid of uneven surfaces;
- eliminating defects (chips, cracks, etc.);
- reconstruction of previous layers.
With the help of this finishing mixture they solve a rather narrow problem. It is applicable exclusively to cellular concrete. But this is more of a plus than a disadvantage, because its specialized purpose, subject to instructions, guarantees the quality of work.
Ceresit CT 24. Plaster for cellular concrete
Ceresit CT 24. Plaster for cellular concrete
Cement mixture for repair, plastering and thin-layer leveling of cellular concrete (layer thickness 3-30 mm)
Properties
- has high adhesion to cellular concrete;
- vapor permeable;
- weatherproof;
- flexible and easy to use;
- suitable for mechanized application;
- suitable for indoor and outdoor use;
- environmentally friendly.
Application area
Plaster mixture CT 24 is intended for repair, leveling and plastering of cellular concrete bases (foam and aerated concrete, foam and gas silicate) on walls inside and outside buildings, both with manual and mechanized application. Can be used to fill sinks, chips and other defects in cellular and lightweight concrete, repair old plasters and masonry, etc. In one pass, the mixture can be applied in a layer thickness from 3 to 30 mm.
by product
Technical specifications
- The composition of this plaster includes: cement, mineral fillers, organic modifiers.
- It is used at temperatures from 5 to 30°C, operational values - from -50 to 70°C.
- It is stipulated that the finished mixture can be used for 120 minutes.
- The water consumption for preparing the mixture is five and a half to six liters per factory package of 25 kilos.
- The thickness of the applied layer is 3-30 millimeters.
- The frost resistance of already hardened plaster is at least a hundred cycles.
- Dry plaster consumption is approximately 1.3 kg/m2 per millimeter of layer thickness.
Return to contents