Hello, dear readers of Sam Samych’s blog, today we will talk about the most optimal roofing option - a pitched roof for a bathhouse. In the last article we discussed the issues of insulating the ceiling of a bathhouse, and also calculated the optimal height of the ceiling of a bathhouse; if you haven’t read it, I recommend that you read it.
Shed roof - pros and cons
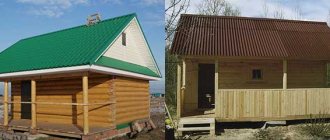
I came to the conclusion that a pitched roof is the best option for small and medium-sized bathhouses. Despite the many advantages, I chose a gable roof for my bathhouse. I’ll tell you why I decided this at the end of the article.
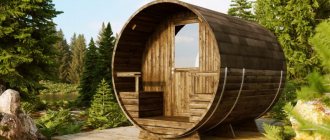
An example of a bathhouse with one slope
In the meantime, the positive aspects of a pitched roof:
- Simplicity . A quick and easy installation method. There is no need to invent anything, the difference in heights is explained by the different heights of the walls.
- Weight . A pitched roof has significantly less weight, therefore, it does not require the construction of powerful load-bearing walls and complex rafter fastenings.
- Price . One of the most budget-friendly roofing options, it requires significantly less building materials.
- Materials . Almost any type of roofing covering is suitable for installing a pitched roof, and you can choose the most optimal option.
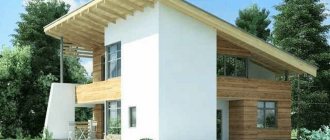
- Convenience . Are you planning a sauna under the same roof as your home? A pitched roof is the most practical option.
Stage I. Design
So, let's move on to design. Of all existing roofs, the lean-to roof has the simplest design. This is where the builder’s eye rests: everything is simple and clear, like the sky above your head. Whether you create a project for a pitched roof of a house yourself, or hire a specialist, the following points should be considered in it:
- General sketch of a building with a roof.
- Carrying out separate viewing points of such a roof: in front, behind the house and on the sides.
- Full calculation of complex loads from snow, the weight of the rafter system and roofing.
- Drawing up sections of all important individual sections of the roof.
- A detailed diagram of the important components of the roof and the junction of the roofing covering to the rafter system.
- Description of all difficult places, especially the junction of the rafter system with load-bearing floors and walls.
- Scheme of drainage and snow clearers (or electrical cable).
Moreover, as practice shows, the main role in the final cost of the roof is played not so much by the footage, but by the presence of special elements: valleys, ridges, end strips and the like. This is why a pitched roof is beneficial in this regard as well.
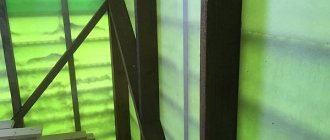
Construction of a pitched roof
The roof design itself is simple and unpretentious. To give a slope to the roof, two opposite walls are made different in height. Sometimes, if the walls have already been erected and are of the same height, you can raise one of the walls to the required level using special wooden racks. This option is suitable for both a frame bath and a log house.
As I already said, a pitched roof can be made with or without an attic. Naturally, a full-fledged attic will not work there, because... the optimal slope is 20-30 percent, and this circumstance significantly reduces the size of the attic. If an attic is not planned, then the pitched roof serves not only as the roof, but also as the ceiling of the bathhouse. From which it follows that the roof should be properly insulated, steam- and waterproofed.
Roofing in detail
If an attic is planned, then standard measures are taken to insulate the roof, a slightly higher slope is taken for the roof, which allows us to increase the usable space of the attic. Special timber guides are laid on the walls, which will serve as the basis for the future ceiling. How to make and insulate a ceiling in a bathhouse, read the link.
The optimal roof slope is 20-30%. This angle will prevent snow from caking on the roof surface.
When constructing the roof, special wooden guides (rafters) are used, which are laid on the walls of the bathhouse in increments of 0.5 - 1 meter. In turn, a sheathing is nailed to the rafters, onto which the roofing material is directly laid.
Before you start building a roof, you need to know a few nuances:
- Important! If there is no plan to install an attic in the bathhouse, then the roof can become the ceiling of the bathhouse, but only under one condition - the length of the roof should not be more than 4 meters. If the length of the roof is longer, then it is necessary to install horizontal guides made of timber, on which the roof of the bathhouse will rest in the middle. This is due to the excessive weight of the roof and without additional supports the roof will sag and become deformed. Can you imagine if 400 mm of snow falls on your roof? Without additional supports, your roof will fold down the center like a house of cards. From this we can conclude that if the length of the roof is more than 4 meters, then the installation of internal vertical supports is mandatory, which already implies the creation of an attic.
- For roofing, it is best to use light types of materials: ondulin, roofing felt, soft tiles. Heavy types of roofing such as slate or sheet metal are least suitable.
- If you are making an attic, then it is more rational to insulate the ceiling of the bathhouse. If you are planning a bathhouse without an attic, then the roof is insulated.
- Be sure to devote time to the article - “a chimney in a bathhouse through the ceiling”
Here are the main points you should know. Let's move on to construction technology.
Stage IV. Interior and exterior finishing
As for the insulation of such a bathhouse, if there is an attic in the pitched roof, then lay the insulation in it directly over the ceiling. Both ordinary glass wool and modern ecowool are suitable for this purpose. Insulate the walls and ceiling according to the traditional scheme:
If you have built a good, durable sauna, but it doesn’t look much like a Russian steam room, don’t despair. Today, many types of finishing are practiced, the most “Russian” of which is slab:
That's all the trouble!
DIY roof installation
Before we begin construction, we need to prepare the necessary materials. The basis of the entire structure is made of wooden beams and roofing material. Let's look at what building materials we need for construction.
Preparation
- Mauerlat . First, let's figure out what kind of animal this is? Mauerlat is the basis of the roofing system, or rather its lowest part, which lies along the perimeter of the walls. It is to the Mauerlat that the timber, called rafters, is attached. For these purposes, a coniferous timber beam with a cross-section of 15×15 or more centimeters is best suited. The tree should be pre-treated with a special antiseptic or roofing mastic.
- Rafters .
This is exactly the part of the roof on which the roofing material will be laid. It is important to remember that the entire weight of the roofing material will fall on the rafters, as well as the weight of what will fall on this roofing material