How to knit brooms for a bath
Greetings to all lovers of a real Russian bath!
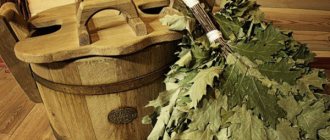
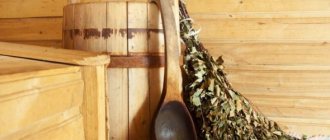
True connoisseurs of hot steam simply cannot imagine a bathhouse without a broom. For them he is a source of cheerfulness, good mood, and in some cases an excellent healer. This is all true.
But, in order for the steam season not to stop, but to last all year round, you need to take care in advance of preparing the most necessary bath accessory. As they say, prepare your sleigh in the summer. We'll talk about how to cook and how to knit brooms for a bath below. It would seem, what is smart here? But, as Dunno said: every task requires learning...
Preparation of twigs
After harvesting the raw materials, you do not need to immediately start knitting brooms. Armfuls of cut branches need to be sorted out and prepared. First, you should carefully review the branches for possible defects. Put everything that is too thick and “liquid” aside, since such raw materials are not suitable for a good broom.
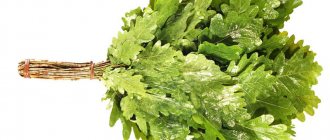
Leave only branches with dense leaves so that their length is approximately the same and is in the range of 45-75 cm. This is the most standard and comfortable length.
Let the branches lie for a while in a special room so that they wilt.
The place should be ventilated and without direct sunlight. The next step will be to distribute all the branches along the length. When determining the length of a broom, it is best to focus on the height of the steamer and the dimensions of the steam room, in particular, the height from the floor to the ceiling.
From each branch you need to clean off a third of the shoots and leaves, exposing the butt. The ideal ratio would be: 2 dm of bare branches (per handle) and 4 dm for the fluffy part. This is also necessary for better preservation of the broom during use. If you do everything according to the rules, then one broom can be used from three to five trips to the bathhouse, since it will not disintegrate quickly.
Keep in mind that each person will have a different handle size, taking into account the bath mitt. It is optimal if its length is twice the width of your palm; usually the length is 15-18 cm. Therefore, you need to pick off the leaves based on the size of your palm.
Conclusion
The steam should be light and the broom should be fragrant!
Having steamed to your heart's content in the sauna for the rest of the day, you feel a surge of vigor, health and strength. And if the broom was also knitted with your own hands, with due diligence and accuracy, then the bath procedures will be a real pleasure! The video in this article is ready to share information on these issues, watch it!
Did you like the article? Subscribe to our Yandex.Zen channel
How to fold twigs for tying
The number of branches your broom will consist of depends on your preferences: thick but heavy, or light but “liquid”. Think about the handle of the broom; it should be comfortable to hold with your hand.
A fluffy broom with a thick handle will require approximately 20-25 stems. The ideal width of the broom crown will be 35-40 cm.
You need to start forming a broom from the middle. Thicker branches are used on it. This is the frame. Begin laying thinner branches next to the thick ones.
The following rules apply here:
- The bend of the branches should be directed towards the inside of the broom.
- Also, the leaf should have a matte surface towards the center, and a smooth and shiny surface should look outwards. Thus, the front side will be directed towards the middle, and the back side will touch the body.
- The collection of brooms occurs in a circle. It is necessary to form a “crown” by turning the work and evenly placing the branches with a shift.
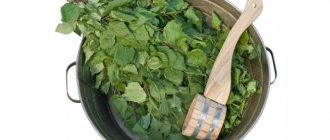
- It will be great if you put different herbs in the middle of the broom. It could be chamomile, wormwood, St. John's wort, mint, etc. Sometimes they add branches of currants and juniper.
- It is better if the broom contains a couple of twigs in the shape of a fork. This will make it stronger.
When laying the twigs, they need to be turned over and shaken from time to time so that they lie evenly.
You can fold a broom into different shapes:
fan or fan
bouquet
drops
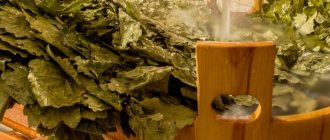
A broom-fan is more suitable for pumping steam towards the body. With its help, the steam will seem to envelop the entire body, creating a pleasant sensation. Drop brooms or bouquets are perfect for whipping.
According to seasoned bath attendants, you first need to make a couple of test brooms to evaluate their quality. This is the only way to determine the maturity of foliage and begin mass harvesting.
Drying technology
In order for the bundles for the bath to serve for a long time, it is necessary to choose the right time for harvesting birch brooms, tie them properly, and dry them properly. In practice, several simple methods of drying such products are used, each of them requires the implementation of almost the same rules.
Article on the topic: Why does a corrugated fence rust?
Products made from birch branches are dried exclusively in the open air; the place chosen for drying should be dark, protected from the sun and strong drafts. Under the influence of ultraviolet radiation, leaves lose their elasticity, shape, and rich color. A ventilated attic is good for drying. It is recommended to hang the bundles with a handle from the base and place them on a horizontal plane.
Frequent turning of fragrant birch brooms guarantees their high-quality drying. At first, the products are laid out at a distance; over time, they can be placed more densely. This arrangement ensures proper air exchange.
If the bundles are dried in the attic, they are carefully hung from the logs and left in this position until completely dry. The roof ensures uniform drying of the foliage and preserves the shape of the bunches.
If you follow the technology, the bundles of birch twigs will turn out dense, fragrant, and the foliage will retain its rich dark green color.
Interesting fact! Sometimes birch brooms for a bath are dried with unusual honey - in sheaves of well-dried hay. As a result of using this method, the shape of the products and their consumer characteristics are preserved as much as possible.
How to tie twigs into a broom
The method of tying branches to obtain a bath broom is an important point.
How well you tie the broom depends on:
- comfort of using a broom while visiting the steam room;
- your safety;
- ensuring its strength and shape stability.
The type of broom and its purpose influences the choice of knitting method.
Single knitting method
This is the simplest and fastest method.
Small brooms are made with one strapping belt, more often when they are used immediately, fresh. This method is suitable for herbal, small massage whisks, which are used when steaming with two hands, or they are planned to be used once. The knot must be reliable to ensure the strength of the ligament.
It should also allow it to be tightened additionally during long-term storage, if the branches have dried out, lost volume, and the handle has become weakened.
Double
This is the most common method with two strapping belts. It will make the broom structure durable and the handle comfortable and rigid.
The top and bottom nodes may differ. This method also includes cross knitting.
It's done like this:
- The first tying is done at the bottom, without tightening the collected branches too much;
- The resulting beam is divided into two halves;
- Rotate one part relative to the other by 360°.
As a result, the strapping will self-tighten and securely fasten the branches.
Keep in mind that if the first tie is tight, you will physically not be able to twist half of the bundle, or you will break the branches.
The top harness is made using a simple tightening knot. It should also have the possibility of additional tightening during long-term storage of the broom. Brooms for repeated use (oak, birch) are knitted using the cross method. This broom does not weaken even if it is used intensively and many times.
Double tying a broom can also be done with simple knots. Simply apply two ordinary tightening knots in any order: at the butt (at a distance of 3-4 cm from the end) and at the beginning of the foliage.
Triple
The need for an additional belt between the top and bottom arises when the broom handle is thick. In this way, it will decrease in diameter using a simple tightening knot.
Full winding method
Sometimes there is a need to completely wrap the broom handle. A simple knot is tightened, and then the twine is lowered in turns along the entire handle.
This method has its advantages:
- the broom turns out to be very strong;
- lies comfortably in the hand;
- it is difficult for them to get hurt;
- leaves in this place do not need to be removed;
- if the broom is coniferous, then its handle will not prick.
Expert opinion
Lovkachev Boris Petrovich
Bath master who knows everything about steaming
Please note that you do not need to wrap the handle too often to allow the branches to dry under the turns of the winding.
There are several other ways to knit a broom. They are associated with the use of various types of knots, which have the ability to tighten the rope after the handle has decreased in diameter as a result of drying. The ends of the branches are trimmed so that they are neat and do not stick out in different directions.
It is better to tie ready-made bath brooms in pairs for easy hanging to dry.
Brooms for a bath: we prepare, knit, store, steam
In our culture, a bathhouse and a broom are not just inextricably linked - they have long been parts of one whole. We say “brooms” - we mean “bath brooms”. According to experts, two million dollars worth of brooms are sold every year in Moscow alone. What makes people whip their bodies with a bunch of flexible rods with leaves - after all, you can just sit on a shelf, warm up the bones, and breathe in the steam? Why is there no real pleasure or real benefit from a bath without a broom? And how to choose or knit a really good broom yourself, which will allow you to fully experience all the joys of a bath?
- What are the benefits of a bath broom
- Broom harvesting time
- How to cut branches
- How to tie a broom
- Dry rather than dry
- Storage methods
- How to steam with a broom correctly
- How to choose a broom
Article on the topic: How to cook rice in a water bath
The best way to connect branches
For knitting bath brooms, the use of synthetics and potentially hazardous materials is not advisable.
Do not tie brooms together with wire or metal tape. In a steam room, the metal becomes hot and can burn your palms even through gloves. In addition, it is easy to get hurt with such a winding.
Synthetic ropes behave in unpredictable ways. Usually they start to slip when wet. Therefore, the best option would be natural cotton thick twine or hemp rope.
It is convenient to use a gauze bandage for these purposes. It can be wound in several layers, and thereby adjust the thickness of the handle.
Some people use clamps or a cambric for tying seedlings. Clamps can be plastic or metal. They tighten the handle perfectly and hold tightly. They are easy to tighten after drying. To prevent them from rubbing or burning the palm, the handle is then wrapped in cotton cloth.
Method number 1. Half an hour
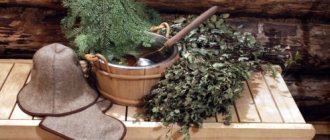
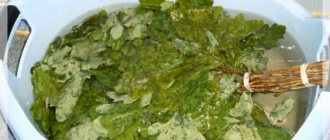
So, let's move directly to the steaming methods. The first method is used some time before bath procedures.
First, you need to dip the broom into a bucket of heated water and leave it there for 25 minutes. After this time, add hot water to the container, cover it with something and wait no more than ten minutes.
Then you can take out the steamed broom, shake off excess water and begin the procedures.
How thick should the handle be?
When shaping the handle of a bath broom, trust your feelings. The dimensions should fit your hand. It's better to make it a little flat. This way it fits more comfortably in your hand.
If the handle is thick, your fingers will quickly get tired, as they will have to squeeze it tighter, and even your hand may get pinched. If the handle is too thin, it will slip out and you will get calluses. Its diameter is usually 3-5 cm.
Questions and answers
What should you do if you need a thin broom, but the handle is too thin to fit in your palm?
You can make the handle thicker by wrapping a strip of strong cotton fabric around it and tying it tightly with twine.
Do I need to wither birch branches before knitting them and for how long?
It is recommended to keep the prepared branches in the shade before mating, but no more than a day.
When winding the string around the handle, it is physically difficult to do it tightly. Are there any devices that make this work easier?
Yes. When knitting, a simple tool at hand is often used. This is a wooden spear on which a rope is wound. The first harness is made on the broom handle, then the spear is put on it, and the next turns are made by rotating this spear.
What length is best to make a broom?
For soaring, it is better to make long brooms, and in the shape of a fan. And it’s better to whip yourself short, so that they don’t interfere with your friend.
How did our ancestors knit brooms?
Previously, branches were tied into brooms with the same birch branches, but with thin and flexible branches. Such brooms were not afraid of shrinkage, since the winding decreased in size along with them.
Is it possible to trim the branches sticking out of the broom?
If a branch accidentally does not lie flat and sticks out higher than all the others, then it is better to pull it up from below rather than cut it.
What do you use to cut off the end of a broom handle?
After the broom is tied, the ends of the rods are carefully cut off strictly at an angle of 90 degrees. This can be done with large garden shears or an axe. Also, using pruning shears, remove all protruding remnants of twigs from the handle so that it is smooth. Since the handle can be used to massage the feet and knee joints.
Method number 5. Standard
This method is used several hours before visiting the steam room. The broom should be immersed in a previously prepared container with warm water and left for half an hour. At this time, it must be turned over periodically so that the leaves can be saturated with moisture.
After this, the bundle must be removed and immersed again in the container with the handle down. So you need to keep it in the water for another ten minutes, and then boldly go to the steam room.