Electrical wiring installation
In a steam room, the wire insulation must withstand up to +170°C
. Before you make a steam room with your own hands, you need to remember that due to humidity and high air heating, certain fire safety requirements are imposed on the wiring. In the steam room, the wire insulation must withstand up to +170°C.
Cable brands used:
- flexible stranded copper wire of the PRKA, PVKV, RKGM, PRKS categories;
- multi-wire and single flexible wire PMTC (works up to +200°C);
- imported wire OLFLEX HEAT 205 (can withstand up to +200°C).
In steam rooms and saunas, wiring cables in iron pipes and shells is not allowed; hidden wiring in safety hoses and ducts is recommended. When the wiring is open, asbestos is placed under the cable so that 10 cm of lining material peeks out on both sides.
Plug-type sockets, switches, and distribution boxes should not be installed in wet steam rooms. The lamps are mounted in protective housings from moisture, protection class IP24, they cannot be placed on the ceiling, but only on the wall.
GOST requirements for power supply to baths
According to the updated standards DBN V.2.5-2003, DNAOP 0.00-1.32-01, wiring is permissible only with three-core copper wires (phase, zero protective, zero working). Two-wire ones are allowed to be used for switches. Such requirements apply to single-phase wiring connections.
The list of zones is as follows:
- It is unacceptable to lay electrical wiring or install any equipment in the first zone. In this place a stove is being erected, a sink and a shower are being installed.
- In the second zone, you can lay a cable, but it is heat-resistant.
- The third and fourth zones are suitable for laying cables whose insulation can withstand temperatures of +170 degrees.
According to statistics, when using PUNP wires, the risk of fire increases by 65%.
According to fire safety rules, it is prohibited to install sockets in the steam room. Switches are mounted in the dressing room or rest room.
Preparatory work
In order to begin installation work, you need to prepare all the necessary materials and tools. These are cables of a certain cross-section, metal hose, sockets, switches, electrical tape. You should also prepare tools for electrical work. If the bathhouse was built on a stone or concrete foundation, then putty should also be prepared.
It is very important to choose the right cable. To determine the correct cross-section, determine the load for which the electrical wiring in the bathhouse will be designed
The rules recommend using a cable with a cross-section of 1.5 mm2 for a current of 19 Amps; for a current of 70 A, a cross-section of 10 mm2 is suitable.
You can also use the following formula: maximum possible load kW / voltage V
When making calculations, it is important to take into account all devices. As for the choice of metal hose, preference should be given to a more flexible option
The wall thickness must be at least 2 mm.
Cable selection
The requirement for temperature resistance of cable insulation was indicated above. But this is only for products laid around the steam room. All other cables or wires passing through the dressing room may not have such qualities.
The permissible core material for cables is copper. The use of aluminum in domestic buildings is allowed only if its cross-section is equal to or greater than 16 mm2. An exception is possible only for engineering equipment, which includes:
- air heaters;
- fans;
- air conditioners;
- pumps.
But even in this case, the cross-section of the aluminum core should not be less than 2.5 mm2.
But the minimum cross-section for copper cables used in domestic premises should not be less than 1.5 mm2 for lighting networks, and 2.5 mm2 for socket groups. What it should actually be is calculated based on the load current. Change is only possible for the better.
For single-phase consumers (lamps, sockets, exhaust fans, etc.), the number of cores in the cable should be three. If the lamp is controlled by a two-key switch, 4 wires are used.
The purpose of the cores in a three-core cable: phase, neutral and protective conductor. A blue core is always used as a neutral wire, and a yellow-green wire is used as a protective wire. For phase, what is left is usually white or brown. It is prohibited to use the blue or yellow-green conductors for any other purpose.
Three-core cable core colors
The same applies to five-core cables used to connect three-phase loads.
Purpose of cores in a five-core cable
Even if the socket does not have a grounding contact, and the lamp is enclosed in a plastic case that does not have a terminal for connecting grounding, a three-wire cable must still be laid to them.
How to hang a lampshade
Fixed installation lamp
Bath lamp with wooden shade
Classic bath lamp
There are so many lighting lamps that it is unrealistic to consider the connection of each of them. We will only talk about general universal rules.
Step 1: Turn off the network power. If the shield is located far away, be sure to hang a warning sign on it
This is very important, power supply switching on by mistake by third parties has happened more than once
Turn off the power to the sauna
Step 2. Study the lamp's instructions. If it is not there, disassemble the lampshade, find on the body the place where the power cables enter and where the body is fixed. We hope that the switch is connected correctly and the phase is connected through it.
Fastening and cable entry point
Mounting the lamp
Step 3. Attach the lamp to the wall or ceiling, before inserting the wires into the mounting holes on the body. Check the serviceability of the cartridge with a tester. Sometimes the pins are not attached in good faith; the contacts will overheat and burn out over time. Tighten all the clamps; if the terminals are riveted, touch them, they should not wobble.
Step 4. Strip the ends of the wires to a length of approximately 5 mm; if the cable is multi-core, tin the ends or at least twist them tightly. Insert into terminal blocks and tighten.
Step 5. Screw in the light bulb, check the wiring for a short circuit. Everything is normal - put the decorative lamp in place and turn on the power.
Fixed luminaires
Pay attention to the strength of the attachment of the lampshade to the supporting surface. If the lampshade is plastic, be sure to follow the recommended maximum wattage of the incandescent light bulb
For energy-saving lamps, completely closed shades cannot be used - they must be constantly cooled with fresh air.
Ventilated lampshade for a bath - diagram
Wooden grille for lamp
Air supply to the electricity bath
The wiring in the bathhouse is connected from the home distribution panel. The cable is laid underground or pulled through the air, which is much simpler. In this case, the following rules must be observed.
Electricity is laid over roads at least 6 m, and over areas where pedestrians pass - from 3.5 m or more.
Air entry into the building is made at a height of at least 2.7 m. For this, insulated wires of the SIP series with a cross-section of at least 16 mm2 are used. They do not require a support cable. Its role is played by the neutral wire, which can be with or without insulation. The wires are mounted on brackets with anchor clamps. They are difficult to insert into the shield due to their high rigidity. Therefore, outside the building, the wires are connected to a copper cable of the VVGng or NUM type. It is introduced into the house through a metal pipe inclined to the street by 5-10. The input cable cores are connected to the SIP using sealed piercing clamps.
Placement of electrical equipment
Now that the basic principles of placing electrical equipment in a bathhouse are known, you can begin to develop a project. The final result depends on how well everything is thought out in advance.
You won’t have to think twice about electrical equipment in the steam room. Only lamps and, if necessary, temperature sensors can be installed there. All that remains is to select these same lamps in accordance with the requirements indicated above.
The number of sockets in the dressing room depends on personal wishes: you will need to decide what electrical appliances you will use there. There are many options, some of them approach the relaxation process so thoroughly that they can’t even do without a TV. Moreover, they want to be able to charge mobile phones.
The minimum possible number of consumers in the dressing room is electric lighting and an outlet.
Now we determine the exact location of sockets, lamps and switches. Let us remind you: all switches are located in the dressing room. Modern rules allow their installation at a height of no more than 1 m, while the distance to the door or window opening must be at least 10 cm.
Permissible distances to sockets and switches
Sockets can be installed at a height of 30 cm from the floor or more. But there’s no need to be shallow here. If you plan to quickly connect electrical appliances to an outlet, you need to provide better access to it. Therefore, under the table it is worth hiding only those sockets into which stationary electrical appliances are connected, for example, a TV or radio.
The socket for the boiler can generally be installed higher so that its power cord does not dangle under your feet. But at the same time, a space of 20 cm to the ceiling must be left free from electrical wiring, with the exception of lighting.
Selecting materials for wiring in the bathhouse
The choice of the type of wiring in the bathhouse depends on the room in which it will be installed:
- For rooms with high temperature and humidity (steam room), special heat-resistant wiring is used. A design feature of such wiring is the insulation of a stranded or solid core that is resistant to the effects of hot air saturated with water vapor.
- For rooms with normal temperature conditions, electrical wiring that is not resistant to high temperatures is used.
On a note. The cross-section of the electrical wiring used is calculated taking into account the maximum power of the load connected to it. Using cheap wiring with a small cross-section to connect high-power electrical appliances is fraught with overheating, melting of the insulation and a high risk of fire in wooden structures.
Underground input
This method is the most reliable, but there are cases when it is not entirely appropriate. It all depends on where the bathhouse will be located and whether it will be possible to dig a trench to it.
Let's first look at all the advantages of underground input:
- A cable laid in the ground will not be exposed to strong winds, precipitation, or sudden temperature changes throughout its entire service life.
- If a short circuit occurs and an electric arc occurs, underground cable entry ensures that property and people will not be harmed.
Air entry does not provide such a guarantee; a fire may spread to a wooden building. So fire safety is the most important advantage of laying the inlet in the ground.
- An important factor is that the architectural style and appearance of the site are not disturbed. All communications are hidden in the ground, no cables or wires spoil the overall picture.
- If you do not live in a country house permanently, then there is a possibility of theft. Unfortunately, this fact is still possible; there are skilled people who steal wires and cables laid over the air. It’s unlikely that anyone will decide to dig an underground connection. This is another important advantage.
However, this method also has its drawbacks. You will have to dig a trench. If you do it yourself, you will spend a lot of time and effort; if you start hiring people, considerable financial costs will follow. In addition, in order to carry out excavation work, you will need coordination with various organizations that may have communications running through the territory of your site (electrical cables, water or gas pipes, communication lines).
And one more important nuance. The earth is also an environment that is not entirely prosperous, one might even say aggressive. Due to the chemical composition of the soil, corrosion processes may occur, as a result of which the cable sheath will become unusable. Tree roots, microorganisms and rodents living in the ground can have a negative impact, and groundwater can also have a negative impact. So be sure, before making a cable entry into the bathhouse, lay it not directly in a dug trench, but first in a plastic or metal pipe.
The best option for underground input would be a VBBShV cable with a cross-section of 10-16 mm2. It is not cheap, the price is about 200 rubles per meter, but it is durable and reliable. The four copper cores, in addition to being in an insulating sheath, also have a steel braid.
Dig a trench to a depth of at least 0.7 m, add a 10 cm layer of sand to the bottom. When you lay the pipe with the cable, also cover it with a sand layer on top, and only then fill it with soil.
Stages of installing electric lighting in a bathhouse
It is not difficult to make grounding; to do this, you just need to drive a metal pin into the ground to a depth of at least one meter and connect a grounding wire to it.
Grounding diagram in a bathhouse
What needs to be grounded in baths
The specific depth depends on the physical characteristics of the soil and the overall power of the devices used.
Grounding parameters
The grounding is checked with a special device, a megohmmeter. By the way, it is also used when checking the insulation and reliability of cable connections in distribution boxes. Such a device is quite expensive, but you don’t need it. All the same, permission to connect the bathhouse will be given by an official representative of the energy networks; ask him and he will call the wiring and grounding.
Megaohmmeter
Now you can directly deal with electrical wiring in the bathhouse.
Step 1. Draw a plan of the bathhouse premises and the approximate location of lighting fixtures, sockets and switches in it. If you plan to use electric heaters, boilers, or household appliances, think about their placement. Don't rush to make a final decision, consider several options. Keep in mind that the entrance panel must be located in the locker room, vestibule or rest room. It is strictly forbidden to place switches and sockets in the steam room. On the plan, mark not only sockets, switches and lighting fixtures, but also the locations of the wiring.
Wiring in the bathhouse
Step 2. Indicate the locations of line transitions from one room to another. At the same time, keep in mind safety zones and provide the necessary methods for protecting lines from mechanical damage.
Step 3. Calculate the total power of all electrical energy consumers. We strongly recommend increasing the received power by at least one and a half times and based on this figure make further calculations. No one can predict what devices you will want to install in your bathhouse in a year or two; the wiring must withstand an unexpected increase in power. It is much cheaper to pay a little more for electrical cables up front than to redo all the wiring later. Depending on the power, cables and safety fittings are selected.
Bath grounding circuit
The bathhouse is a facility with increased electrical hazard, so having its own re-grounding circuit is highly desirable. Its resistance is not standardized, so you can do without complex calculations.
If your house, from which the bathhouse is powered, does not itself have a grounding loop, the question becomes even more pressing.
The simplest grounding loop can be made from three steel pipes or angles 2-3 meters long, hammered into a triangle at a distance of 2-3 m from each other. Before this, you need to dig a trench around the perimeter of this triangle with a depth of 0.5 m.
Building re-grounding circuit diagram
The pipes are almost completely clogged in the corners and connected to each other with a steel strip. The connection is made by welding, the seams are painted to protect against corrosion. All other parts located in the ground should not be painted.
A contact lead from the same strip is drawn from the circuit to the wall of the building. A bolt is welded to it to secure the grounding conductor. The conductor itself, yellow-green in color, with a cross-section of at least 10 mm2, connects the PE bus of the bathhouse panel to the circuit. The connection point is protected from corrosion; the use of a special box is allowed.
Output from the ground loop
The steel strip, starting from the point where it exits the ground, is painted black or alternating yellow-green stripes.
Laying wiring
In baths and saunas, two methods of wiring are used:
- Openings - with this method, wires are laid along the surface of the walls, placing them in cable channels or PVC corrugation;
- Hidden - with this method, the wires are pulled into a corrugation, which is then laid under the walls.
In these installation methods, there must be a non-flammable material between the cable and a wall made of combustible material - a polyvinyl chloride box or corrugated pipe. When wires pass through wooden partitions, they are passed into steel sleeves pre-installed in them.
Important! According to the requirements of GOST R 50571.12-96 and paragraph 7.1.40. PEU-7, in a bathhouse or sauna, laying electrical wiring in metal pipes or corrugation is prohibited
It is also unacceptable to use an electrical cable that has an outer metal sheath.
The hidden wiring method is more preferable, since the box or corrugation does not spoil the interior of the room; protected by the finishing, they are not exposed to moisture and temperature. The disadvantage of hidden wiring is the risk of it being generated when drilling holes in the trim. To avoid this, experts advise that while laying the cable, take detailed photographs, measure the distance between it and the ceiling, wall, drawing up a wiring diagram based on these operations.
Useful tips
Creating electrics in a bathhouse with your own hands is a rather difficult task. It is necessary to select the right materials, create a suitable circuit, and correctly calculate the power of all household appliances. When working, it is recommended to follow the tips below:
- Choose materials for saunas and steam rooms with heat-resistant insulation.
- If the section of the line is a trunk line, checkpoints with a minimum cross-section of 16 sq.m. are used.
- Sockets and switches are mounted on a metal plate.
- Fire-resistant insulation must be laid under sections of lines.
- Tubes for installation must be corrugated flexible PVC plastic.
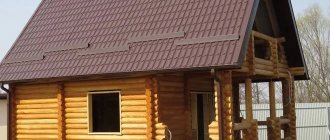
- If the bathhouse is made of logs, timber or clapboard, it is better to treat it with an antiseptic to increase its water-repellent properties.
Lighting elements
Now let’s look at the components of each lamp, because inside the same model you can put lamps of different types, and surround the outside with a lampshade, which will make the sauna more comfortable and stylistically uniform.
Lamps
The following types are allowed in the sauna steam room:
- incandescent lamps;
- LED;
- halogens.
ATTENTION! Please note that we are only talking about lamps, so we will not mention LED strips and fiber optics, although they can also be installed in the steam room.
Incandescent lamps
Ordinary lamps, known since time immemorial when the entire country was electrified.
The only limitation that should be taken into account concerns power - it is not recommended to use more than 60 W in the steam room, but there are no restrictions on the number of light bulbs. However, there are two unpleasant aspects associated with them:
- Firstly, they are quite fragile, break easily, and burst easily if cold (relative to their own temperature) water gets on the flask when it is heated.
- Secondly, they are connected to a 220 V network, so if there is a problem, a person can be killed by such a current. Moreover, in a bathhouse, where it is humid and water conducts electricity very well. True, there is an option: installing 36-volt ones through a transformer, many people practice it.
To protect against the first - lampshades, nets and lampshades. From the second - RCD.
LED bulbs
LEDs can be in the form of lamps and in the form of strips. Here we will consider only lamps. More complete material can be found at this link.
The sockets are different, but the E27 socket is typical for bath lighting - this is a medium threaded socket with a diameter of 27 mm, which is suitable for incandescent lamps, and for LED lamps (if they are designed for 220 V), and for halogen lamps.
BY THE WAY! LEDs are still installed in the bathhouse not so much for the sake of reducing energy consumption, but because they are powered from a low-voltage network, most often 12 V (24 and 36 V are also possible).
For LED light bulbs that are powered from a 220 V network, you can also install an RCD. And for 12-volt ones, connect either a step-down transformer (see article on electricians in a bathhouse) or a switching power supply.
IMPORTANT! The power supply should preferably have galvanic isolation, which will not allow 220 V to flow into the circuit in the event of a failure. The transformer and power supply are installed outside the steam room
The transformer and power supply are installed outside the steam room.
And now the most important thing: you can put LED lamps in a sauna, but they will not last long, because for them the temperature is already above 65 degrees on the crystal. Just imagine that the crystal itself gets very hot during operation, so heat removal is needed, which is unattainable in an overheated sauna.
So you either need to place the strips somewhere lower, as a backlight, or abandon the idea of LEDs altogether, and use regular incandescent or halogen light bulbs closer to the ceiling.
Halogen
These bulbs tolerate high temperatures well, but are not without their drawbacks. In particular, this concerns their service life. Interestingly, LEDs do not respond to the number of times they are turned on, while for halogen ones, each turn on reduces their service life.
In principle, you can find both 220 V and 12 V halogen ones on sale, but the latter have a different base from the standard E27, and in general they are not intended for insertion into conventional structures with lampshades.
Switchboard
Switchboard in the dressing room
When choosing an installation location, you must follow the following rules:
- There should be a free approach to the switchboard.
- The place should be well ventilated.
- Shields should not be placed in fire hazardous areas - it is better in the dressing room or rest room.
- Availability of an introductory circuit breaker and separate switches for electricity consumption devices.
It is important to choose the right machine for input. It is selected taking into account the total load from all equipment and light sources. The resulting total power must be divided by the voltage (220 V), and the machine must be selected based on the calculated current value. You should not take a switch with a rating that is too high - there is a risk of missing voltage surges.
There is a difference in a bathhouse and a steam room
We have already said above that the wiring in the steam room differs in a number of important points from the electrical wiring in the bathhouse.
ADVICE! It will be easiest for those bathhouse owners who already included the wiring in the construction project. Because this is the only way compliance with standards will not be a matter of chance.
In the steam room
Electrical wiring in the steam room: no wires
In an ideal steam room there are no wires - they go from the outside, and go inside exclusively to connect the lamps.
The question arises: is it necessary to use more expensive heat-resistant wires for electrical wiring in the steam room of a bathhouse? For those who have no way out and have to conduct wiring inside the walls of the steam room - yes, definitely. If you follow the rules - only through the wall to the lamp, then it is a matter of ease of replacing the wire.
The fact is that simple PVC insulation will inevitably collapse over time in the area that is exposed to high temperatures. This is usually at the wire entrance to the lamp. Therefore, it is recommended to make this area heat-resistant.
In a steam room with an electric oven
The electric furnace is used only in the sauna (because we question the ability of electric furnaces without a steam generator to create a Russian bath mode).
Power calculations are usually done in a simplified manner, based on the cubic capacity of the room, based on the ratio of 1-1.5 kilowatts per cubic meter. Therefore, it is enough for you to proceed from one or one and a half volume of the steam room. Let's assume that a pair room of 1.8*1.4*2.1 (DSHV) is given. Its volume is 5.3 cubic meters. Consequently, the furnace power is from 5 to 8 kW. And this is still a small steam room!
It is clear that such a power plant is not installed on a regular outlet (here the current strength is 23-36 A, and a regular outlet can withstand 10-16 A). The wire is led outside and connected to a power outlet (they come in different capacities).
Heat-resistant wires of the required cross-section are included with the stove itself, so you just need to take them out and connect them.
BY THE WAY! A grounding plug requires a ground connection to the outlet, this is not new, is it?
But there are also grounding requirements associated with an electric furnace. Ideally, you make a grounding loop during the construction process, covering the perimeter with a metal tape, which is welded to the mesh on the floor, and then connecting it to the grounding in the panel.
Dividing the steam room into zones
The electrical wiring in the steam room will be in different conditions depending on its location. The hottest areas are under the ceiling and near the stove. The only thing that remains unchanged in the steam room is the presence of moisture and splashes of water.
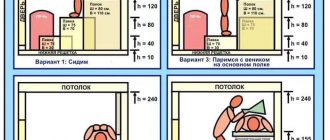
In order to formulate clear requirements for electrical equipment in the steam room and its placement, it is divided into 4 zones.
Zone No. 1 is a place to place devices for heating water. They may be electrified, but in any case there should not be any other electrical equipment there. The zone is limited to a horizontal distance of 0.5 m from the furnace body. Its upper edge is determined by the lower border of zone No. 4.
Zone No. 2 - equipment can be placed in it without restrictions on the effects of temperature. It starts from the floor of the steam room and ends at a height of 0.5 m above it.
Zone No. 3 already requires that electrical equipment located within its boundaries be heat-resistant. Cable insulation must be designed for a temperature of at least 170˚C, everything else - at least 125˚C.
Zone No. 4 is intended only for the installation of control devices for the operation of electric furnaces, that is, temperature sensors. Its boundaries are 0.3 m from the ceiling level. All space remaining from zones No. 1, 2 and 4 belongs to zone No. 3.
If an electric heater is used to heat the water in the steam room, then a sensor must be installed in zone No. 4 that turns off the heating when the temperature in it exceeds 140˚C. Of course, this value can be adjusted downward depending on the wishes of those being washed. But you cannot increase the shutdown threshold value of 140˚C.
Plug sockets should not be installed in any of the steam room zones , no matter how much temperature protection they have. Lamps can be placed in zones No. 2 and No. 3, but traditionally, on the ceiling, this will no longer work - zone No. 4 does not allow this.
Installation of sockets and switches
Sockets are installed in the rest room, bathroom, veranda and dressing room. It is prohibited to place sockets in the steam room, shower and washing area.
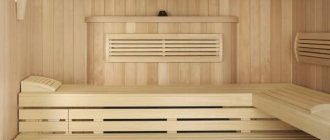
In the steam room and washing department - in the steam room, lamps are installed at 3 points: above the entrance door and in two corners. In the washing compartment, 2 lighting fixtures are mounted along the center line of the ceiling. Lamps used in these rooms must have glass shades, a ceramic or metal base, and a silicone gasket sealing them. Their protection class must be at least IP44. The lighting in the steam room is connected using a flexible cable that has a silicone insulating layer that covers each of its conductive cores.
Steam room lighting
Important! In order to prevent the scattering of fragments, the lamp shades installed in steam rooms are placed in a metal mesh frame
- In the rest room and dressing room, ordinary lamps are installed that have low protection from moisture and high temperatures.
- Ordinary street lamps are installed on the veranda.
In the lamps of the steam room and washing room, simple incandescent lamps with a power of up to 40 W are installed. More powerful 60-watt lamps are used in the rest room, dressing room and on the veranda.
Installation of lighting system
Also, when the heat-resistant wire for the sauna is laid, you can begin installing lighting fixtures. It is unacceptable to use standard lamps and light bulbs for the same reason as with an energy cable. Increased importance and temperature will lead to rapid failure of these elements.
The luminaires used must be sealed so that moisture and steam entering do not increase the risk of short circuiting and, as a result, fire. Also, if the lamp is heated unevenly, if steam gets under the lampshade, it may burst, which can lead to injury to visitors (read: “Which lamps for saunas and baths are the most practical and safe”).
When installing the lighting system, it is necessary to take into account that the lighting of the steam rooms should not be too bright. Usually matte lampshades with screwed-in 60-watt light bulbs are used.
Options for placing lamps in the bathhouse
If all the advice described above is mandatory, then specific locations for placing lamps are only advisory.
Room Recommendations for the location of lamps
Steam room
One of the smallest sauna rooms, in most cases one lamp is enough. Place it in such places as not to accidentally damage it during water procedures. It is prohibited to install lamps close to a stove or chimney. We strongly recommend protecting the lamp with a decorative wooden fence - this eliminates the possibility of burns to the limbs. It goes without saying that the degree of protection of the housing must correspond to the operating conditions
The switch should be mounted at the entrance to the steam room from the outside; it is convenient to place it right next to the door.
Shower room
The lighting should be brighter, the lamp should be placed at such a distance so that jets of water from the shower do not fall on them.
Waiting room
The placement is arbitrary, the main attention should be paid to the design of the room. As a rule, sockets are installed here to connect various electric heating devices.
Restroom
There are no special security restrictions here.
Where you like or where the designer suggests - install it there. The sizes, types of light bulbs and their power depend only on the wishes of the bathhouse owner.
What voltage to choose for lamps
State standards do not prohibit connecting lamps in all rooms of the bathhouse to a voltage of 220 V, but you can find recommendations to install 36 V or 12 V step-down transformers for them. The following can be said about this. If the electrical wiring has high-quality RCDs (equipment protection devices), the grounding system meets the requirements of the PUE - safety is guaranteed. And if you also make a PUP (potential equalization system), then not even the most strict inspector will be able to find violations.
Step-down transformer 220/36 volts
Not convinced or are you terrified of high voltage? No problem, purchase and install any step-down transformer for lighting. Just keep in mind that it is quite difficult to find lamps rated for 12 V or 36 V on sale, and if they exist, their design characteristics are very far from perfect.
Fashion trends in bath lighting
LED lights
The effect of a starry sky is created in the sauna
To give the bathhouse individual exclusivity, decorative lighting is often used. For steam rooms, fiber optic devices are used. The lighting device itself is located outside the steam room; light is supplied to the room by optical fibers. The pleasure is very expensive, but the beauty is worth it. Such lighting can be installed anywhere, from the ceiling to the floor. LEDs do not take up much space; they can be used to create various shapes and ornaments.
Briefly about the main thing
Installation of electrical wiring is carried out in accordance with the requirements of the PUE (section “for saunas and wet rooms”). It is necessary to select a cable for the sauna that meets all regulatory requirements and lay it correctly in compliance with safety standards.
Sockets, switches, temperature control equipment are selected based on operating conditions. It is necessary to ensure that all devices are current and load compatible and that IP requirements are met.
When performing installation work, you must follow the order of actions and coordinate them with the process of installing cladding or finishing the premises.
Laying a power line over the air
This is a fairly economical option. If the distance from the shield to the building is more than 25 meters, then an intermediate support is installed. Laying can be done on porcelain insulators or using stretching.
It is important that the cable is at the correct height during installation. For example, if installation is carried out above the roadway, then it is allowed to install it no lower than six meters above the ground surface
If the cable is laid over a sidewalk or any other non-traversable road, then the permissible height is not lower than 3.5 meters. The cable is connected to the bathhouse itself at a height of at least 2.75 m.
For ordinary installation over the air, a self-supporting insulated cable or self-supporting insulated cable is used. Its service life is 25 years. These products are designated as follows: SIP-3, SIP-2A, SIP-4. They are equipped with special weatherproof insulating material. The disadvantage of this cable: due to its features, this option is difficult to connect to the circuit breaker.
As for the cable itself, it is introduced into the room through a wooden wall or a metal sleeve. The cross-section of the power cable must be at least 16 square meters. mm - it can withstand current up to 63 A. If the connection is single-phase, then the maximum will be 14 kW of power. When the connection is three-phase, then the cable can withstand 42 kW. This power is more than enough for baths. Another disadvantage this cable has is that it is difficult to bend.
SIP is made of aluminum wire, and it is unacceptable to conduct it through attics.
That is why communications of another type are introduced directly into the room - NYM, VVG or NG. The cross-section of these cables ranges from 10 square meters. mm. For connection, it is necessary to use sealed connectors, and the SIP cable is secured to special anchor tensioners.
What to choose from existing offers
The market for accessories and equipment for steam rooms and baths is oversaturated with offers of heat-resistant and heat-resistant cable products. The cheapest and easiest to install is RKGM or its analogue SIF. The wire is quite simple to install and at the same time inexpensive, the price does not exceed 40-50 cents per meter, however, sales occur mainly in coils of 100 m.
For work inside the bathhouse, heat-resistant wires of Russian production PMTK, PRKS, PVKV are also used. Olflex Heat, Heluflon, Multitherm enjoy a very good reputation.
Multitherm heat-resistant wires have copper cores coated with a nickel alloy, and the insulation is made of fiberglass impregnated with silicone oil. Thanks to this, electrical wiring is able to withstand operating temperatures of up to 400°C without degradation.
Pros and cons of electric stoves for baths and saunas
The fact that the electric furnace is made of metal is the first advantage of this type. Other advantages arise from the fact that electricity is converted directly into thermal energy. Just compare it with firewood, which is full of problems and debris, not to mention the fact that the wood-burning stove itself cannot be mobile - it is tied to the chimney.
Yes, electric stoves for steam saunas are mobile; they only need a sheet of non-flammable material underneath floor-standing models, or they don’t need anything at all if the model is suspended.
IMPORTANT! No chimneys, no debris, and with proper grounding, fire safety is higher than that of gas furnaces.
The numerous advantages of electric stoves can be completely offset by the fact that electricity is an expensive resource
Therefore, those who prefer inexpensive solutions should pay attention to other options. But there are also compromises
After all, the power of a stove that can be installed in an apartment is quite comparable to the power of an electric kettle and less than the power of some steam irons. But the sauna, which such a stove will heat, will be designed for no more than two people.
The second disadvantage is the slight difficulty with wiring. It’s better to invite an electrician who will install three phases if you took a 380-volt oven, and will determine the suitability of the existing wiring and do the grounding. But there are stoves with 220 volts, and this is the usual voltage in a household network.
If we talk about whether an electric heater is good for a sauna in a Russian bath, then a lot depends on the traditional ideas of its owner. Take a look at our articles about the Russian bath (see links above) - they talk a lot about why a metal stove is physically unable to provide the required conditions, and an electric sauna stove is no exception to this rule.
At the same time, among people who are less scrupulous about tradition, there is a widespread opinion that electric stoves for a sauna and bath at the same time are quite suitable, the main thing is that there is a built-in steam generator and fine-tuning of temperature and humidity, allowing you to switch from Finnish to Russian bath mode.
Video on the topic
This video talks about why most electric heaters are not suitable for a Russian bath, but adds information about the extremely few types of stoves that are quite suitable.
By the way, we still have not touched upon such an important issue as the country of production. But it is precisely by this criterion that sauna equipment is often purchased
Electrical assembly and installation procedure
Installation, wiring and connection of electrical wiring in such a specific room as a bathhouse is a complex procedure that is performed in several stages:
External works. The cable is laid in one way or another, and it is inserted into the bathhouse.
Interior work. Laying wires in all rooms, installing lighting, sockets, switches and other devices.
It is noteworthy that interior and exterior work practically do not overlap with each other, so they can be performed simultaneously or swapped. Interior work takes longer because you have to trace wires, install and connect control devices, sockets and switches, and lighting. Let's take a closer look at these procedures.
Switchboard
Before connecting the distribution board, it is necessary to connect the power cable (input) to the area where it is installed. All RCDs are inserted into the panel using machines with a cutoff of 10-30 mA. This is an important point, since each machine must provide a cutoff before the non-release current appears - a value at which a person is not able to independently interrupt contact with the conductors.
Distribution panel with supply cable channelsSource econet.ru
The shield itself is installed at a height of 1.4-1.8 m from the floor level. This is the optimal height at which the machines can be clearly seen.
The power cable is inserted into the panel and distributed into sections. If they are not available, you can immediately distribute food to consumers. The wire for the bath must be copper, three-core, with a grounding conductor connected to a special PE bus on the panel.
Wiring for standard temperature conditions
Typically, several types of cables are used in such premises. Among the most common are the following:
- NYM;
- AVVG;
- PVS;
- VVG.
Such wires can be laid using both hidden and surface methods. In this case, the main condition must be met - ensuring reliable insulation. After all, saunas and baths are usually built from wood, which is easily flammable. Cross-linked polyethylene, polyvinyl chloride, and other polymer materials are used as insulating materials.
If we talk about lighting devices, they are connected via cables:
- NYM 3*1.5;
- VVGng-LS 3*1.5;
- PPGng-HF 3*1.5.
https://youtube.com/watch?v=4KDD06XU380
Sockets are mounted using wires with a cross-section of 2.3 square meters. mm.
How to calculate the cross section correctly
In sauna rooms, according to the fire safety guidelines, only cables with copper conductors can be used.
Photo: variety of electrical cables
A wide range of cables with cross-sections starting from 0.35 sq. mm and above.
To correctly calculate the current value, it is necessary to divide the total power consumption (furnace, lamps, boiler, etc.) by voltage. The standard voltage is 220 V.
In accordance with the obtained indicator, a suitable cross-section of the copper cable is selected. This is easier to do using the PUE table (shown below).
| Cable cross-section, mm² | Conductor diameter, mm | Copper wire | Aluminum wire | ||||
| Current, A | power, kWt | Current, A | power, kWt | ||||
| 220 V | 380 V | 220 V | 380 V | ||||
| 0,5 | 0,80 | 6 | 1,3 | 2,3 | |||
| 0,75 | 0,98 | 10 | 2,2 | 3,8 | |||
| 1,0 | 1,13 | 14 | 3,1 | 5,3 | |||
| 1,5 | 1,38 | 15 | 3,3 | 5,7 | 10 | 2,2 | 3,8 |
| 2,0 | 1,60 | 19 | 4,2 | 7,2 | 14 | 3,1 | 5,3 |
| 2,5 | 1,78 | 21 | 4,6 | 8,0 | 16 | 3,5 | 6,1 |
| 4,0 | 2,26 | 27 | 5,9 | 10,3 | 21 | 4,6 | 8,0 |
| 6,0 | 2,76 | 34 | 7,5 | 12,9 | 26 | 5,7 | 9,9 |
| 10,0 | 3,57 | 50 | 11,0 | 19,0 | 38 | 8,4 | 14,4 |
| 16,0 | 4,51 | 80 | 17,6 | 30,4 | 55 | 12,1 | 20,9 |
| 25,0 | 5,64 | 100 | 22,0 | 38,0 | 65 | 14,3 | 24,7 |
A similar method is used to calculate the current load for a circuit breaker.
The power of not all devices is taken into account, but of a separate line
Features of the electrical network in baths
The primary condition when choosing a designated cable is its thermal resistance. There is a ban on installation in rooms with a high concentration of steam outlets. If we talk about laying wiring in such rooms, due to high humidity, grounding must be created. When choosing and purchasing heat-resistant cables for a bath, it is recommended to familiarize yourself with the categories of rooms that represent such a structure:
- Premises in which normal temperature conditions are constantly present, where it is allowed to install ordinary wires intended for residential buildings.
- Rooms with temperatures reaching up to 150 degrees. In such areas, only heat-resistant wires are necessarily used, which are connected to an electric oven.
Features of connecting an electric furnace
The electric furnace is connected using a three-phase machine and a magnetic starter.
The circuit breaker provides protection against short circuits and voltage surges in the network, the starter provides automatic control of the heating circuit. You will also need heat-resistant cables of the PVKV, PMTK, PRKS, RKGM brands with copper conductors with a cross-section of 3×2.5 mm, capable of withstanding loads up to 4 kW.
To connect the cable, a junction box is used, installed in the neutral zone, followed by entry into the distribution panel. Thus, the electric oven is not connected to a regular outlet, but directly to the panel.
If the operating power of the furnace is less than 4 kW, then it is sufficient to organize a single-phase connection.
Wiring Requirements
- A separate line from the electrical panel to the bathhouse must be equipped with a circuit breaker. Cables go from it to lighting devices such as VVGng and NUM. They can heat up to 70 C and do not support the combustion process.
- The wiring in the steam room is selected with a heat resistance of 170-180 C (Types PMTK, PVKV, RKGM, APPV, etc.). It should not be installed close to the stove. A heat- and moisture-resistant cable with silicone insulation is placed in a box located in a place where there is no high humidity and temperature, and then a regular wire is connected to it, which goes to the shield.
- Hidden wiring is installed, but open wiring is also allowed. In brick walls it is laid under a layer of plaster. It is pulled over wooden surfaces in corrugated pipes attached with metal brackets. Protection with metal pipes is not allowed due to corrosion.
- Wires should not touch wooden surfaces. To achieve this, all electrical equipment is placed on heat-resistant asbestos or ceramic gaskets. Insulators are located horizontally in increments of 35-40 cm, and vertically - 2 for each log.
- Wires for single-phase input are taken three-core to ensure grounding of devices.
Purchase of cables and electrical equipment before the start of installation work
If we are talking about how to properly conduct wiring in a bathhouse, then all equipment and cables must have a high level of protection from exposure to high humidity and temperature. Typically, equipment and materials for such conditions are rated IP24, which protects the system from exposure to particles as small as 1.25 centimeters, as well as splashing water.
Cables in bathhouses must meet certain requirements if we are talking about a steam room and a washing room.
It is recommended to use one of the following brands:
- PVKV;
- PRKA;
- PRKS;
- RKGM (multi-wire);
- PMTK;
- OLFLEX HEAT 205 (single or multi-wire).
Each of these cables can easily withstand humidity and temperature loads of 180 degrees Celsius. If we are talking about how to make electrical wiring in a bathhouse (in a relaxation room, vestibule), then you can use a standard VVGng-LS or NYM cable. Again, it is worth recalling that you need to make a choice in favor of copper-core cables. Their maximum load and resistance to mechanical loads are much higher.
Most often, according to documents, the cable has a cross-section of 2.5 sq. mm, but in fact – 1.75 sq. mm. Accordingly, it may overheat and cause a fire. When it comes to how to properly install wiring in a bathhouse, it is unacceptable to skimp on cables, and PUNP and PUGNP have only household purposes.
Protective automatic shutdown systems (RCDs, automatic circuit breakers and differential circuit breakers) taking into account the load that will be placed on the electrical network as a whole and on each of its branches separately. Each of the installations must be marked on the diagram indicating the parameters for them.
A feature of the operation of such installations is their automatic response to certain parameters of the electric current in the network. The sensitivity of the installation to overload can be of different classes: from A to D. The corresponding marking is applied to the switch body.
Individual characteristics:
- Class A – has the greatest sensitivity. Such installations are used in conditions where the power supply must be turned off in a matter of milliseconds and they are almost never used in everyday life.
- Class B - suitable for cases where the main appliances used can be used under heavy load conditions for some time.
- Class C - the most popular installations for domestic conditions. The machine does not immediately respond to an overload, but turns off the power supply only in the event of serious disturbances in the operation of the system. For example, in case of a short circuit.
- Class D - mounted on the main line through which electrical energy is supplied to the building. Such installations are carried out in duplicate to cut off the supply of electrical energy in the event of failure of class C machines.
If we are talking about how to install light in a bathhouse with your own hands, then all lighting fixtures and sockets should be selected taking into account the level of safety (according to GOST, the value should be IP-44 or IP-65). Complete with sockets, rubber seals must be present.
All lamps must be protected from moisture. The lamp body must be made of materials that are not subject to corrosion, and the lamp itself must be made of heat-resistant glass with increased strength.
It is not allowed to use plastic elements and fluorescent lamps, which simply explode under the influence of temperature, due to which gases are released that are harmful to the human body. It is best to use a fiber optic lighting system that is resistant to high temperatures and humidity.
In the washing room and rest room, it is necessary to install LED lamps, which have sufficient power and at the same time excellently save electrical energy. The advantage of LED lighting fixtures is that they have a voltage of 3 to 12 volts.
Types of electrical wiring in the bathhouse
Wiring in a bathhouse can be open or closed; installation of closed wiring is carried out in Berman boxes; for open ones, ordinary external mounting boxes are used.
Closed mounting box (Berman)
These boxes are available in various sizes, with lids, and with additional fixation points in the walls. In Berman boxes, not only lighting wiring is done, but also switches and sockets are installed with hidden wiring.
Instructions for installing a socket box in a bathhouse
Hidden wiring is installed under the upholstery of walls and ceilings; the cables must be protected with metal casings. These can be pipes or metal corrugated flexible hoses. It is not recommended to use plastic - there is a high risk of damage by rodents. Cable routing for bathhouse lighting for hidden wiring should begin before finishing the walls and ceilings. Simultaneously with the casing, seats for lamps, sockets, switches and mounting boxes are cut out.
Corrugated wiring
Open wiring is much easier to do; bathhouse lighting is connected to cables laid along the walls. Cables must be protected with plastic tubes; you can additionally cover the wiring with decorative covers.
General provisions for proper electrification
So, how to make electrical wiring in a bathhouse? Here's how: electricity is supplied to it from the main distribution panel through a separate power line - and the bathhouse has a separate protective grounding circuit. Moreover, the wiring in the bathhouse is carried out in those places where it will be least noticeable - but at a distance of at least one and a half meters from the radiators and pipes. And not in corners or opposite doors and passages. And here there are several rules:
- The supply voltage must be passed through an RCD and an AV, as well as a step-down transformer for lighting the steam room and washing room.
- The best cable that can be used for electrical wiring in a bathhouse is, according to experienced bath attendants, a VVGngLS 3x2.5 cable. It is copper, in a special shell that does not spread combustion.
- The panel, general switch and distribution boxes must be installed in the dressing room.
- To run wires through the walls in a bathhouse, you need to drill holes right in the center of the log and insert ½-inch steel pipe there. The wiring itself in the bathhouse can be done in a metal, corrugated flexible or special plastic pipe. This one will not light up even if the wiring itself catches fire - it will only melt.
If we are talking specifically about a wooden bathhouse, then all wiring should be exclusively open - but preferably, not along the baseboards, but through the attic. The connection of the wires must be made using a terminal connection - and nothing else. And under no circumstances should they be twisted - all cables must be solid. But what you should definitely avoid when installing electrical wiring in a bathhouse is rubber and vinyl braided wires. Corrugated wire brand H07RN-F is well suited for baths.