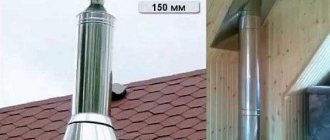
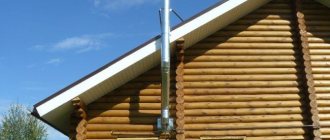
To ensure reliable removal of combustion products outside the house, you need a high-quality chimney. For its installation, a special sandwich pipe is used, which has a number of effective characteristics that allow its operation at high temperatures.
Sandwich pipe chimney
To install it, various methods are used to ensure a safe transition from a brick stove or fireplace pipe to a metal sandwich pipe. You can use industrial adapters or build a chimney yourself.
Advantages and disadvantages of such a connection
Switching to stainless steel sandwich pipes provides the following advantages:
- simpler and faster installation of a new chimney;
- you can install it yourself;
- less expensive;
- the design is lighter in weight, smaller in size;
- soot and other combustion products do not accumulate on smooth walls;
- the device can be brought out either through the roof or through the wall;
- the presence of an insulating layer, which to a certain extent reduces the amount of condensation;
- Possibility of installation through the rafter system.
The disadvantages of sandwich chimneys are the same as those of all modular smoke removal devices:
- over time, some loss of tightness at the joints;
- significant price of the kit and its installation;
- restrictions on service life (15-30 years).
Brief conclusion
The stove in the house performs a number of important functions. The heating system must be cleaned of combustion products in a timely manner. The modern building materials market offers a wide range of alternative elements for chimney systems. Often the usual masonry is combined with lighter sandwich pipes. In this case, it is important to connect the two elements hermetically using one of the transition methods, observing building codes and regulations. Don't forget about safety. Smoke flows must be freely removed from the system.
Do the work yourself or call a professional
The assembly and installation of a sandwich chimney is feasible for almost every middle-aged man, taking into account the need to work on the roof. However, it must be borne in mind that an error in the design, selection of a kit, or installation of the structure can lead to unstable operation of the stove or fireplace and the appearance of carbon monoxide in the house. As a result, to eliminate the negative consequences, additional monetary costs, loss of time and nerves will be necessary.
To save money, it may be better to hire professionals who have experience installing this type of chimney.
Brick chimney design
The power of the stove is directly related to the cross-sectional size of the chimney duct:
For small stoves, a square section with an edge of 120-150 mm will be sufficient.
Most often, this is a channel that has four bricks in a row, so the size of this section is often called a four; For a bathhouse of 15-20 cubic meters or a fireplace, you will need a chimney with a cross-section of “five” or 125x250 mm. When laying, five bricks are placed in a row; For Russian stoves and large sauna heaters, use the “sixth” size with a channel of 250x250 mm. This is a very large cross-section, and should only be used for low-lying pipes or a very large furnace firebox.
Structurally, the laying of a chimney is no different from the laying of the stove itself. The only area that requires the hands and skill of a professional is the top pipe. At this point you need to properly bandage the brick being laid. For a simple tower chimney structure, the pipe can be made of alloy metal and connected to the main brick duct, as shown in the figure.
Approximate cost of work
The cost of installation work for installing a sandwich depends on:
- length of the assembly channel;
- height of the house;
- type of roofing;
- roof configurations.
Thus, the fee for a standard installation of a chimney for a private house with a roof ridge height of up to 6 m will be from 26 thousand rubles. As a rule, the price is clarified by the master directly on the spot.
Often the installation price is set per linear meter, on average from 1,700 rubles per linear meter.
Components of a chimney sandwich system
The diameter of the pipeline depends on the power and type of furnaces. The pipelines carry the main load in the interior of the furnace. The internal diameter of the furnace is indicated in the main characteristics of furnaces or boilers. Then, based on these data, the outer diameter of the pipes is selected. 150 mm internal diameter. In this case, the outer section will be 210 mm.
Stainless steel pipes are used to equip the chimneys of gas boilers and stoves operating on solid fuel. The minimum diameter of sandwich parts is 120 mm, the maximum is up to 200 mm. Several types of fittings are used to connect straight sections and turns:
- bends - to ensure turns at a certain angle;
- tees - connecting a separate section of ventilation or other heating device to the chimney;
- a section of pipe with an inspection - cleaning the walls from soot and dirt;
- adapters - for connecting pipelines of different diameters;
- slide valves or valves - regulate the level of draft in the firebox;
- To protect against precipitation and gusts of wind, the installation of protective devices is provided - a “Thermo” weather vane, cones or simple mushrooms.
Which way is better
The most universal adapter is made in the form of a metal mounting pad, with two pipes in the middle: one at the top, the other at the bottom. The platform is laid on an old brick channel, sandwich pipes are inserted into the nozzles. When joining, as a rule, gaps are formed, to seal which a sealant is used. A simple adapter of this type can be ordered from professional tinsmiths. This photo shows the adapter described above.
In the second method, an inner pipe of double construction is placed in the prepared hole, and the gaps are closed with oven mortar. The outer pipe, supported by bricks, is coated at the joints with the same solution.
In any case, the main requirement is to ensure the tightness of the structure. Therefore, only a special fire-resistant sealant for chimneys is used as a sealing composition.
Of course, the use of adapters reduces labor costs for chimney installation and makes connections more reliable and durable.
Main types of stove chimneys
All chimneys can be divided based on the material from which they are made. Currently used:
- brick chimney. The main advantages of such chimney ducts are high fire resistance and a long service life. The main disadvantages of a brick chimney include the roughness of the internal surface, on which a large amount of foreign substances accumulate, and the need to install a separate foundation. The accumulation of substances affects the frequency of chimney cleaning, and an additional foundation increases the cost of installing the system;
View of a finished brick chimney
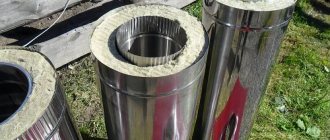
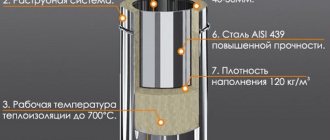
- iron chimney. It is most susceptible to corrosion and therefore requires additional protection. The design is quite light and cheap. It does not require a separate foundation. Builders most often use chimneys made from stainless steel and assembled into modules. Otherwise, such pipes are called sandwich. Sandwich pipes are assembled from two layers of metal, and non-flammable insulation, for example, basalt wool, is laid between them;
View of a finished chimney made from sandwich pipes
- stove chimney made of ceramic pipes. It is heavy and requires the installation of an additional foundation. However, ceramic pipes are heat-resistant and durable. From such pipes it is possible to construct both internal and external chimneys;
External chimney made of ceramic pipes
- chimneys made of polymer pipes. They are characterized by durability, low cost and ease of installation. Most often, polymer chimneys are covered with decorative overlays, for example, made of brick.
Polymer chimney decorated with brickwork
The choice of material for the chimney is determined by the characteristics of the heating device and the desire of the owner.
GOSTs and standards
The connection of a sandwich to a brick pipe must be carried out in accordance with the general rules and regulations established for the installation and operation of chimneys.
The total height of a brick and sandwich chimney from the fireplace or stove to the tip must be at least 5 m, which ensures the required draft.
The assembly connections of the segments of the double device, the transition itself, are mounted so that they do not coincide with the ceiling and rafters.
The inner pipe must be made of stainless steel that meets the requirements of GOST.
The head of the sandwich is placed 50 cm above the roof ridge and at a distance of 150 cm from it.
You need to know that wood can ignite when constantly heated to 170°C. In this regard, compliance with fire safety standards is of particular importance. In the passages through the ceiling and roof, cutting is carried out - laying a thermal insulation layer. The distance from the inner pipe to the edge of the ceiling in the passage must be at least 38 cm.
Pipe head protection
Over time, a brick pipe is destroyed by temperature changes and precipitation. Our products help to protect and sometimes restore it - a chimney and a cover for the pipe:
The main functions of the chimney smoker:
- Protection against precipitation and debris getting into the pipe
- Protection from birds (they can make a nest in the pipe)
- Increased traction
- Protecting the chimney from destruction.
In addition, the chimney on the roof is simply beautiful - forming a single whole with the roof, the chimney gives the pipe a finished look.
Step-by-step DIY connection technique
Video: installing the adapter and passing the ceiling:
Let's look at how to properly install a vertical sandwich pipe on an old brick channel.
- The unusable part of the brick chimney is dismantled.
- Prepare the adapter for installation: bend the bends, cut off the outer rim at the bottom.
- Using the lower pipe, insert the mounting pad into the channel of the old chimney onto the stove mortar and secure it to the bricks in the corners with dowels.
- Then the first segment and subsequently the entire pipe assembly are installed in the upper pipe.
Required tools and materials
- For dismantling you will need a hammer drill, a chisel, and a heavy hammer.
- To cut a hole in the masonry, use a circular saw.
- For installation and fastening - oven mortar, trowel, sealant, screwdriver, self-tapping screws.
Work progress
Often the portion of the old brick channel in the house remains in good condition. Therefore, the outlet in the attic and roof is dismantled.
In this case, dismantling begins before reaching the ceiling 20 cm, preparing a flat surface for the adapter.
The gaps between the nozzle and the brick are sealed with heat-resistant sealant.
A fire-resistant platform is made in places where there is a passage through the attic and the roof.
The assembly connections of the sandwich, if provided for by the manufacturer's instructions, are additionally secured with clamps.
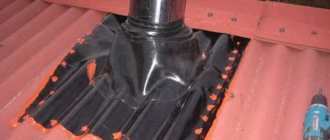
On the roof, the pipe is fixed using a special roofing element, sealed with a silicone nozzle, and the external design of the chimney is made.
Installation features
If the brickwork has to be dismantled close to the brick kiln, then it is better to make a thick-walled single steel pipe made of stainless steel as the first link of the transition chimney. This area, especially in sauna stoves, is characterized by high temperatures during peak loads. The pipe with insulation will overheat and quickly burn out.
To protect the chimney from wind and rain, improve draft and remove smoke, a deflector is placed on top of the chimney, securing it with galvanized screws.
Device
Sandwich chimneys for stoves are made from separate parts:
- Fittings are used for turning, passing through ceilings and exiting outside.
- To lay straight sections, pipes made of thin galvanized or stainless steel are installed.
- For the outer layer, a separate pipe made of steel or other materials is used, the metal thickness is from 0.5 mm.
- The internal part is made of a smaller diameter necessary to create a thermal insulation layer.
- Basalt, mineral wool and other materials are used for thermal insulation.
Description of elements
How to make the transition without an industrial adapter
How to make a transition if there is no adapter?
- After dismantling the collapsed part, a hole is cut out in the brick channel slightly larger than the diameter of the internal channel of the sandwich.
- The inner pipe is inserted into this recess, the gaps are sealed with oven mortar.
- In this case, the outer pipe will rest on the masonry. The cracks at the connection point are simply coated with the same oven solution.
- Subsequent segments are assembled by inserting them into each other.
- A cut is made in the passage through the hole in the ceiling, and only then a channel is drawn through it. They bring the sandwich onto the roof, securing it with an installation platform or simply with scraps of metal profiles.
- You can use the pipe fitting method.
- After dismantling, a superstructure with a gradual narrowing is laid out on the suitable remaining part of the brick trunk in rectangular masonry. She will act as an adapter.
- A so-called mono-thermo transition is inserted into the resulting hole.
- The outer part of the sandwich is cut off, the protruding inner end is inserted into the superstructure. All this is sealed with mortar.
Articles on the topic
Cladding windows with bricks - options, stages of implementation, instructions, advice from masons
Dew point in a brick house - why it is calculated, instructions, advice from masons
Columnar brick foundation - technology, disadvantages, instructions, advice from masons
Brick pediment - advantages, disadvantages, masonry, instructions, advice from masons
Installing a bathtub on bricks - what materials are used, instructions, advice from masons
Cladding a house with bricks - how to calculate how much material is needed, instructions, advice from masons
Strengthening the foundation of a brick house - how to do it, instructions, advice from masons
Brick sides - what they are called, characteristics, instructions, advice from masons
Reviews ()
System care
Maintenance operations will require monitoring the draft level in the chimney and promptly clearing it of soot or debris. Let's look at several situations and measures to eliminate them:
- New chimney, but insufficient draft. There are 2 explanations for this situation. The first one is simple. During the construction of the stove and installation of the chimney, construction debris remained in the ducts. By cleaning the channels, we easily obtain normal traction. If the flame in the stove remains brown, it means that mistakes were made during the construction of the stove or the installation of the chimney. Such a malfunction will require finding the cause, but for this it is better to involve specialists.
- The furnace was put into operation and after several months of operation the draft became insufficient. This means it's time to clean the chimney ducts from soot. To do this, you can pass a cable through the pipe and tie a brush to the end and drag it through the pipes. Traditional recipes are simpler. It is advised to make a large snowball and lower it down the chimney. The snow will gradually melt and fall, removing carbon deposits from the walls.
Therefore, the main chimney maintenance work is to prevent clogging of the channels and periodically check the tightness of the pipe joints.
We make the transition using a metal platform with a pipe
This method allows you to install a chimney without a special adapter.
Perform installation in the following sequence:
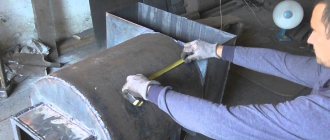
- cut out a platform from a metal plate. Its size must match the configuration of the brick part. Try to ensure that the plate does not protrude beyond its edges;
- mark the places where the platform is attached to the brick opening. Make sure that the fasteners are not located on the edges of the brick or on the seams;
- Drill holes for self-tapping screws in pre-designated places on the metal plate. Make holes in the brickwork, but for dowels;
- insert dowels into the holes made;
- Apply silicone fireproof sealant to the masonry surface;
- Place a metal platform on the sealant layer;
- using self-tapping screws, evenly tighten it with the brick surface;
- After letting the sealant dry, proceed to installing part of the chimney exhaust system from a sandwich pipe.
The adapter plate must be securely fastened to the brick base
By installing a homemade adapter with a pipe, you will speed up the installation of the chimney due to the fact that the pipes fit perfectly together through holes with widened and narrowed ends.
Installation features
When installing a chimney, it is recommended to follow a number of rules.
The basic rule is that all objects surrounding the pipe should heat up by no more than 50 °C. Steel ones tend to heat up, so when installing them it is recommended to lay an additional layer of thermal insulation. This problem can be solved using ready-made sandwich systems.
The chimney must be located at a safe distance from electrical wiring, gas pipes and trees.
Where the pipe passes through walls or roofing, there should be a thick layer of heat-resistant sealant between it and the appropriate material. The same sealant is laid between the pipes at their joints.
When connecting, they are guided by one more rule: one pipe must enter another at a distance that is equal to the radius of the outer section of the pipes.
When assembling the structure, it is worth considering that the chimney should not have any narrowing areas, otherwise the aerodynamics of the pipe will suffer.
Horizontal sections should not be longer than 100cm.
An inspection window is installed at the bottom of the chimney - a removable nozzle. The upper part ends with a head with a spark arrester and a cone.
