One row of logs is called a crown The lower crown is the frame , it becomes the basis of the entire house. For the frame crown, durable hardwood (larch or oak) is selected. All other logs fall on it. Unfortunately, rotting of the lower crown is not uncommon. This is the most problematic part of the design.
To extend the service life of the flashing and the building as a whole, you should not skimp on roof overhangs and wood processing compounds.
Of the coniferous species, preference should be given to pine, which is more durable than spruce and contains less resin. It is highly advisable to use logs harvested in winter for construction. “Frosty” wood is dry, easy to process, and much less susceptible to warping, shrinkage, and rotting processes.
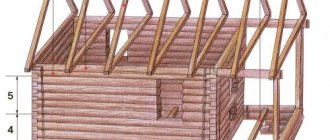
Stage 9. Roof
Construction of a roof on males with layered rafters
Rafter system
As soon as the tree shrinks, you can begin building the roof. If you do this earlier, the roof will simply collapse.
Step 1. Place wooden beams on the wall framing (we have already talked about this).
Step 2. Fix the beams and attach the rafter legs to them in 1 m increments. In the ridge part, cut the rafters at the appropriate angle for the connection.
Step 3. Nail a solid board deck to the rafters (if you plan to use rolled roofing material) or make a sheathing (if you use slate, tiles, etc.).
Step 4. Install the roofing according to the instructions for the specific material.
Step 5. Cover the ridge with galvanized sheet steel to protect it from aggressive environmental influences.
Step 6. Cover the roof gables with siding or clapboard.
How to sew up a pediment
After this, proceed to further planned work - pouring a concrete screed or building a wooden floor (in the second case, the logs are cut into the logs of the second crown and fixed), install insulation, carry out interior finishing and arrangement of the steam room according to your project.
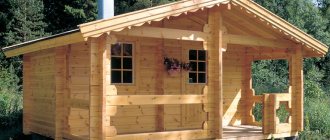
An example of a log house with a shingle roof
An example of a log house with a shingle roof
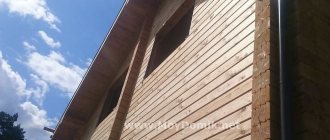
Cornice filing
Roof overhang trim
Marking and cutting logs
To know how to cut down a log house, you need to understand the method of marking logs. To do this, they need to be laid perpendicular to the lower crowns. It is recommended to use staples to secure the structure. This will prevent the log from turning around its axis. Next, using a line, you need to draw the contours of the bowl and longitudinal grooves using several rules:
- One leg of the feature should rest on only 1 log.
- The distance between its points should be half the diameter of the log, depending on the log house used: “to the edge” - the upper one, and “to the edge” - the lower one.
- It is recommended to start drawing with a bowl and end with a longitudinal groove.
- The prepared logs are placed in bowls, and after that it is necessary to process the joint: if there is a large gap, insert wedges, if it is small, remove the excess layer.
It is recommended to mark the log using a line or a chemical pencil. A carpenter's ax must be carefully sharpened before starting a log house. This will make cutting out the bowl easier and will also help avoid unnecessary stress and injury. The bottom of the recess is made smooth so that the gap during installation is minimal.
Log marking Source drevo78.ru
Useful tips for building a log bathhouse with your own hands
- It is difficult for one person to lift logs; you need at least two or three people; it is better to do this with the help of equipment. Organizations engaged in cutting log houses most often use manipulators, lifts, and hoists. Of course, it’s difficult to get equipment at home, but if you have the opportunity to use a wheeled tractor, such as MTZ, YuMZ or T-40, then you can make lifting logs easier. To do this, insert a thin log into the hitch so that its end is under the rear axle of the tractor, and the hitch rail is under it; With this lever you can lift a load up to 2-3 meters.
- The dowels should not fit tightly into the drilled holes; it is better to make them 1-2 mm thinner - in this case, the log house will not hang on the dowels during the shrinkage process.
- You can place the first and removable crowns on wide logs, after first removing the layer of grass under them. If there is rocky, dense soil, it is enough to simply level them.
- From time to time it is worth checking with a hydraulic level whether the log house has sagged on the stumps.
- A difference in height angles of 5-7 cm is allowed; there is no point in adjusting each crown to the same size.
- In the wall, the butt of the next log is placed on the top of the previous one.
- You need to remember the safety rules, use safety glasses and gloves, and work in special clothing.
Results
A wooden log house is one of the most environmentally friendly buildings. Such a house will literally “breathe”, since there is constant air exchange through natural wood. Due to the optimal humidity levels, it is even healthy to live in a wooden log house!
The service life of such houses is much longer than even the most solid buildings. Frame structures, in which the beams are impregnated with an anti-corrosion and fire-resistant composition, can become excellent housing for several generations of a family. Interestingly, the thermal conductivity of a log house is 2.5 times less than that of a house built of brick, and this ensures warmth inside the house in winter and pleasant coolness in summer. The external walls of the log house do not require insulation.
Creating partitions in the bathhouse
Creating partitions in the bathhouse
When the building is surrounded by perimeter walls, you need to allocate separate rooms, which should also be securely separated from each other.
To install wooden partitions, special wooden blocks are provided in advance. When the partition is laid out between the already laid floor joists, it is mounted anywhere, secured to the crossbars.
Sometimes partitions are mounted in the opposite direction to the floor beams. In this case, a purlin is installed in the intended space, which is a reliable basis for the partition.
The partitions in the bathhouse do not carry any load
There are several types of partitions.
- Single solid from boards.
- Double solid boards.
- Double with a gap, that is, the possibility of free air circulation.
- Double with full filling, that is, without drafts.
- Frame and sheathing.
If the simplest partition design is chosen, they are made from boards 4-5 cm thick and 10-20 cm high. They should be planed first. This action can be performed only on one side. The use of boards with a wider diameter is not recommended, because they tend to deform. To ensure complete blocking of the cracks and the possibility of long-term operation, you need to choose tongue and groove material.
Installation of partitions
The bars are connected with steep tenons of 10-12 cm. The pitch of their arrangement is calculated from the height of the boards; it is optimal to take breaks of less than 1 m. If round tenons are not available, nails without heads are used instead, but you should ensure that their length is within 6- 8 cm
On the walls next to the partition it is necessary to draw vertical lines and mark them with a cord. To check the evenness of the fastenings, it is advisable to use a plumb line. In addition to the walls, they should subsequently be drawn along a line to the ceiling and 4x4 cm boards should be nailed to them. Then grooves are formed, the width corresponding to the structure of the bars.
In front of the place where you plan to insert boards for the partition, you should leave a gap, that is, do not fasten the bars at a distance of 20-30 cm. Only fastening wooden guide structures is allowed on the beam. Natural shrinkage of the structure should be provided for in advance. To maximize its compensation, the partitions are measured a few centimeters shorter than the main walls of the bathhouse.
Wooden interior partitions
The bars are first placed in the grooves, then moved until they are closed. The partition is provided without holes, so fastening should be done as tightly as possible, using spikes or quarters.
Skirting boards are nailed down along the perimeter of the space separated by the partition. Usually small holes are formed separating structural elements. They should not be overlooked. They must be caulked with tow or plaster.
Partitions made of timber
A double partition is made with the connectors left or when they are filled with material that plays the role of thermal insulation. It is advisable to use mineral wool in any configuration, including in the form of slabs.
The thickness of the boards is approximately 2-2.5 cm. With these parameters, the gap between the rows will be about 0.4 cm. A double partition is constructed by alternately assembling the first and second sides. When creating gaps is not planned, insulation should be laid between each row of beams in parallel with the assembly of the walls. The upper edges of the boards are held in place by inserting them into the grooves. The bottom edges are nailed to the boards with long nails.
To save on the construction of partitions, they should be constructed using a frame-sheathing method. To assemble the frame, you can choose between tenons, notches or nails. The main material is boards. The support for the frame is a beam. An alternative fastening is carried out on crossbars when inserting structural elements into the grooves.
Frame partition
The upper edge of the structure should not reach the ceiling by 1-2 cm. The remaining gap should be filled with tow mixed with a gypsum solution. You can also use boards that completely cover the joint without leaving any gaps. To insert the door frame into the partition, additional boards should be placed nearby to close the frame leaf.
Video description
Without knowing the technology of building a house, it is easy to make many mistakes. About them in the video:
Foundation
The main and most important element of any building is the foundation. Its depth and character depend on the soil on which the house will stand, on the nature of the wall material and on the number of storeys.
A log house is relatively light in weight. This design quality allows the foundation to be shallow. Almost all options for existing types of foundations are suitable for constructing a log house. Often they make a tape version. For difficult soils, a deep strip foundation or a pile foundation is used. You can also make a slab version.
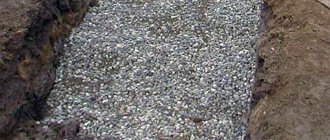
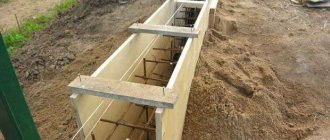
It is worth noting that any version of the foundation should go 300-400 mm into the ground. After pouring it and completely drying, it is necessary to carry out waterproofing (roofing felt with mastic). This is a very important process despite the fact that the house is made of logs.
If a strip foundation is used, it begins with the arrangement of formwork Source bel-dom-stroy.ru
When the foundation is ready, they begin laying the walls Source fabrikadomov.by
Walling
Upon completion of the foundation laying stage, they move on to the main thing - the construction of walls. It is important to know that the first crown (the first row of logs) is never placed directly on the foundation. First, a “backing” board is laid. It is made from linden timber 50-100 mm thick and at least 150 mm wide. Then they move on to assembling the walls from the rounded log house.
Mortgage crown on a shallow monolithic foundation Source domsireni.ru
The first mortgage crown must be cut from below. Its end should match the width of the backing board. This is necessary so that the house rests firmly on the foundation.
Logs for walls are laid in circles (crowns). First, logs are laid that are parallel to each other. Then the other two sides, and insulation is laid on top. It is attached to the log using a construction stapler and should hang down at the edges by 5 cm.
Then the transverse sides of the house are laid, which will rest on the mortgage crown. And we repeat the “procedure” of assembling the house like a construction set.
The assembly of the house is carried out like a “constructor”: each log has its own place Source tula.stroimdom.com
Each of the logs has its own number, which makes it easy to determine where the timber should be located Source saw-wood.ru
The walls of the house smoothly merge into the end of the roof Source domsireni.ru
Ready-made log houses for baths
How to assemble a log bath? Making a log house yourself from scratch is a difficult job that requires refined carpentry skills, and it is better to entrust it to professionals. The highest quality processing of corner joints will be required: Russian, Norwegian or Canadian cutting can be used, but in any case the joints must be smooth and of the highest quality.
Then the log house is disassembled and the logs are delivered to the site itself. This option has several advantages:
- The structure will be warmer, stronger and more reliable than if you cut it yourself. Professional processing of logs guarantees them a long service life, so this solution will be quite profitable. The bathhouse will not be ventilated, the procedures will be quite comfortable.
A ready-made kit is much faster to assemble and does not require special tools. If the quality of processing of logs is good, the work can be completed in 1-2 days. The log bathhouse will be made in accordance with all norms and requirements; the elements of the finished kit are numbered; they just need to be folded in a certain sequence.
Preparing for the construction of a bathhouse
How to assemble a bathhouse from a log house yourself? A number of works must first be completed. Construction begins with a project. If you want to order a ready-made log house, any organization can offer various options for baths.
The classic option is a rectangular structure 4x6 meters. In such a bath there will be space for a dressing room and a washing room, which will serve as a steam room. If the bathhouse has a large area, the space of the soap and steam room can be divided.
How to assemble a bathhouse from a log house with a dressing room? The layout should take into account the location of doors and windows: they are usually made small in order to maximize heat savings in the room.
The standard door height is 160 cm, width is 60-80 cm. The owner must determine the location and size of the windows in accordance with personal lighting preferences.
It is important to choose the right place for the bath. In a small area it is usually located in the opposite corner from the building to ensure compliance with fire regulations
If the size of the plot allows you to choose, the place for the bathhouse is chosen away from the gate and the house itself; it should be located so that you can relax near the bathhouse without disturbing anyone.
Material calculation
How to make a log house and calculate the amount of money spent, if the dimensions of the proposed structure are known - this is an important point in the manufacture or ordering of a finished building. For example, for a bathhouse with dimensions of 3x4 m and a height of 2.4 m with a frame in a bowl.
Due to the fact that the corners of such a structure will protrude 25 cm on each side, when calculating the length and width of the building, 50 cm is added.
If the diameter of the log is known (for example, 24 cm), then the volume of wood can be calculated using the formula 3.5 x 4.5 x 2.4 x 0.24 = 9.072 m³. During assembly, a groove is made in each log, which differs in width from 0.5D to 0.67D. This reduces the final volume of wood, so this formula requires further refinement.
Wide logs for a log house Source promdrevo.ru
| Characteristics of rounded logs | Width of crown groove B=0.5*D (1/2D) | Width of crown groove B=0.6*D (3/5D) | Width of crown groove B=0.67*D (2/3D) | ||||||
| D | B | L | V | B | L | V | B | L | V |
| mm | mm | linear meters | cubic meters | mm | linear meters | cubic meters | mm | linear meters | cubic meters |
| 200 | 100 | 5,75 | 0,180 | 120 | 6,25 | 0,196 | 133 | 6,67 | 0,209 |
| 220 | 110 | 5,22 | 0,199 | 132 | 5,68 | 0,216 | 147 | 6,06 | 0,230 |
| 240 | 120 | 4,79 | 0,217 | 144 | 5,21 | 0,236 | 160 | 5,56 | 0,251 |
| 260 | 130 | 4,42 | 0,235 | 156 | 4,81 | 0,255 | 170 | 5,13 | 0,272 |
| 280 | 140 | 4,11 | 0,253 | 168 | 4,46 | 0,275 | 187 | 4,76 | 0,293 |
| 300 | 150 | 3,83 | 0,271 | 180 | 4,17 | 0,294 | 200 | 4,44 | 0,314 |
| 320 | 160 | 3,59 | 0,289 | 192 | 3,91 | 0,314 | 213 | 4,17 | 0,335 |
| 340 | 170 | 3,38 | 0,307 | 204 | 3,68 | 0,304 | 227 | 3,92 | 0,356 |
| 360 | 180 | 3,19 | 0,325 | 216 | 3,47 | 0,353 | 240 | 3,70 | 0,377 |
| L – the number of linear meters of profiled logs that are necessary for the construction of 1 m² of log wall. | |||||||||
| V – volume of log (cubic capacity of profiled log), which is required for the construction of 1 m² of log house wall. |
Based on the table, the total volume of required materials will be 7.2912 m³, which is already 1.7808 m³ less than the previous calculation. Such calculations will help save money due to the fact that excess wood will not be used.
From this video you will learn how much a log house costs:
The procedure for assembling a log house
Two layers of waterproofing are laid on the foundation. It may be ordinary roofing felt, but in its modern version it is very unreliable and breaks after just a few years. To waterproof a log house, it is better to use a more modern version, something like Gidroizol. In areas with high water levels or large amounts of precipitation, it is advisable to do a combined waterproofing: first coat the foundation with bitumen mastic, and stick waterproofing on it. For reliability, you can use two layers (the second one is also for bitumen mastic).
Example of waterproofing
Before laying logs or beams, they must be treated with antiseptics and fire retardants. But the fact is that if you then plan to sand the log house, it is better not to treat it: treated wood requires many times more effort when sanding. On the other hand, there are parts that will be inaccessible after the frame is assembled. If they are not treated until the wood is dry, fungi may develop or it will darken. Darkening is not scary, it can be bleached, but fungi are worse. Especially for a log bathhouse, where there will be periodically high humidity. The solution then is to coat with impregnation only those parts that are closed, and impregnate the free surfaces after grinding.
After the logs/beams are soaked and dried, the actual assembly of the log house begins. The first crown is laid on the waterproofing, its geometry is checked - the diagonals are measured, the angles are checked. Then it is secured to the foundation with previously laid studs. If there are no studs, drill holes and install anchor bolts (holes are drilled under the caps so that they are recessed). Next - on technology. If you are assembling on dowels, then install them in two rows.
Anchors must be driven to a depth not less than the height of the beam/log
The first crowns can be laid by hand without any problems. As you gain height, it becomes increasingly difficult to lift logs. The problem is solved simply: two inclined beams are installed. Two slings are nailed from the inside to the lower rims of the frame and thrown over the wall. They are threaded under the log/beam that needs to be lifted, and pulled up along the inclined bars (see photo).
This is how logs or beams are lifted onto a log house
The log house is built with solid walls - no windows or doors. They are cut out after the walls are completely removed and the roof is installed. If the log house is left to spend the winter without a roof, you don’t have to cut out the windows/doors: there will be enough ventilation anyway. But if the log house is placed under a roof, then window and door openings are necessary for normal drying.
Before cutting them out, the frame is fastened (a fixing bursa is nailed in, which holds the crowns in a stationary state). After the opening is cut, a frame is installed (a beam that holds the opening and to which the door or window frame is then attached). The beam is held in the groove only due to the force of friction; it is not fixed by anything else. So the logs/beams remain in place and the log house can shrink.
A groove is cut out into which the timber is driven. It is no longer held in place by anything - no nails, no self-tapping screws.
If you cut openings, be sure to install a window frame. At least in this version, as in the photo above - a block driven into a groove
Just pay attention once again: it is not attached to anything. Maintained only by friction
That is, it is simply driven into the groove. If you leave the openings unsecured, the logs/beams will most likely go in different directions and you will become the owner of walls like the one in the photo below. It is possible to level them, but it is long and difficult.
What happens if you don’t put the sapling in place for the winter?
In this case, the doors and windows themselves are not installed: a draft is necessary. If you want to prevent visits, cover the doors with mesh, membrane, and cross the openings with boards, but air must pass through.
After the walls are kicked out, the assembly of the roof truss system begins. The upper crown is used as a Mauerlat. If necessary, holes are cut in it for installing rafter legs. Roofing material does not need to be installed. You can leave the rafters with sheathing covered with a helicopter-protective membrane over the winter. You just need to fasten the membrane according to all the rules: start from the bottom, move up, lay the sheets overlapping one on top of the other, gluing the joints with double-sided tape. Fasten with wide-backed staples from a powerful stapler.
The log house is ready for wintering
Next, caulking of the log house awaits you and you can calm down on this until spring. In the spring - secondary caulking, if the main shrinkage is already completed, by the summer it will be possible to begin finishing work.
Marking the foundation and installing a pile foundation on your own, tying the foundation
Work begins with preparing the site - digging out the roots of large plants, removing 10-15 cm of fertile soil (a recommended step when screwing in metal piles, mandatory when laying driven or poured reinforced concrete supports) and minimal leveling of the site under the future bathhouse.
Optimal results are achieved when laying the foundation for a log bathhouse from metal screw piles with a cross-section of 108 mm or more. The supports are laid at the corners and under the load-bearing walls in increments of no more than 2.5 m, the exact number depends on the weight and number of storeys of the bathhouse, the length depends on the depth of placement of stable layers of soil (from 2 m or more).
The marking of the pile foundation is carried out in 2 steps - preliminary, with marking the places where the supports are screwed in with pegs and pulling the cord to check the level (diagonally, sideways and vertically) and the main one, after digging a pit about 50 cm deep.
After this, the support is inserted into the finished hole exactly in the center and screwed in using a long crowbar or a lever made of a 2-3 meter pipe, placed on the top of the pile. The work is carried out by at least two people (one worker holds the pile in a vertical position, the other presses on the crowbar and turns the pile).
To avoid mistakes, corner piles are screwed in first (taking into account the requirement that the main axis of the support coincide with the center of the future log or timber). And only then, after re-checking the diagonal and sides, the remaining piles are screwed in, usually having the same diameter.
The piles are screwed in to the maximum stop and the support stops wobbling and sagging downwards. Separate requirements are put forward for the foundation for the furnace, which is directly dependent on its weight and design. So, under a capital masonry kiln made of brick, a separate, small slab foundation, not connected to other structures, is laid. If the weight of the unit is within 100 kg (modern wood-burning stoves, gas models), it is enough to further strengthen the ceilings in this place by adding, for example, a beam.
The installed piles are cut with a grinder along the lines previously marked with fishing line and chalk or paint. Before cutting, the evenness of the fishing line is checked using a laser level; by analogy with screw-in, markings begin with corner piles. The internal space of the piles, if necessary (namely, there is a high risk of displacement of the supports by unstable soils), is filled with sand or concrete. In other cases, the stage ends with preparing the piles for tying with timber.
A monolithic reinforced concrete bathhouse is rarely needed; the simplest and most practical way to prepare piles for attaching the lower crown is to weld thick (from 5 mm and above) metal plates on top with dimensions no less than the thickness of the beam. Holes for fasteners (anchor bolts or self-tapping screws) in the plates are prepared in advance.
Upon completion of welding work, the outer parts of the piles and plates are treated with bitumen mastics or anti-corrosion paints.
If there is a high risk of pile displacement, the plates can be replaced with a metal channel, but in most cases this is not necessary. Immediately before putting the bathhouse into operation, the pile foundation should be insulated with a fence made of wood and polystyrene foam or covered with special panels.
Assembling a log bathhouse
The finished log bathhouse is marked with letters or numbers so as not to confuse the logs during the assembly process. The dowels in the log house are placed every 1-1.5 meters. Inter-crown insulation is laid between the logs - moss (in the old fashioned way), tow, linen or jute tape. This must be done carefully, without gaps or large lumps: after assembly it will no longer be possible to correct it. After the initial shrinkage, the log house is additionally caulked with the same material in places where it is necessary. Where the joints are very tight, as is the case in planed log houses, excess insulation is cut off.
Photo of the assembly of a log bathhouse.
After assembly, all that remains is to cut the gables (if any) to the angle of the rafters, and cut out the window and door openings. The assembled log house is impregnated with a water-based antiseptic or another that does not create a film on the surface of the wood, otherwise it will prevent the logs from drying.
Dressing methods
There are two known methods for tying logs. At the same time, there is no functional difference between them; the choice depends solely on the aesthetic preferences of the customer.
With the remainder
In this case, the free ends of the logs protrude beyond the corner. This option is preferable for houses made of round logs. At the junction of the beams, recesses of the appropriate size are formed, into which the next beam is placed and secured using ordinary nails or wooden dowels.
To make the structure look attractive, the beams must be the same length and diameter.
Without a trace
This method of tying logs is considered more economical - there is no free wood left at the corners. The principle of fastening is similar to the previous option, and is suitable for both round and hewn bars.