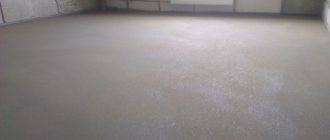
To level concrete or wooden flooring, as well as to create it on the ground in private homes, a concrete screed is used. Often, after some time from the start of use or immediately after drying, cracks form on the coating; in most cases, this defect can be corrected.
To know what to do if cracks occur in the floor screed, you must first understand the reasons for their formation.
Looking for the cause of the problem
To solve the problem once and for all, you need to find and eliminate the cause of its occurrence, otherwise it will recur. This also applies to situations where the floor screed is cracked - what to do with the cracks can only be decided after you understand why they appeared.
In general, on a surface finished with cement mortar, cracks often form due to the low plasticity of the material and its ability to expand and contract with temperature changes. Their occurrence can be avoided only by strictly following the technology of mixing the solution, preparing the base, installing the screed and fulfilling the conditions necessary for its uniform drying.
The slightest deviation in any of the above points is likely to cause cracking of the cement coating. Most often this happens in the following cases:
- errors when mixing the solution - excess water or uneven distribution of components in the mixture;
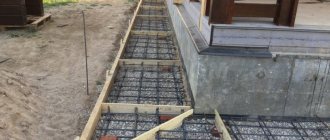
Liquid solution has less strength Source strojlyuks.ru
- insufficient screed thickness;
- weak, sagging or vibrating foundation under the screed;
- absence of damper joints or technological gaps between the screed and the walls;
- uneven drying of the solution due to drafts, temperature changes or as a result of forced drying.
The listed factors refer to gross violations of the manufacturing technology of concrete floor screed, which may lead to the impossibility of restoring the coating using spot repairs. If it is covered with deep cracks over the entire area, crumbles underfoot or “breathes,” the screed must be dismantled and remade.
Dismantling a screed is a dirty, time-consuming and expensive job, so it’s better to do everything right right away Source amazonaws.com
If concrete was poured on an unstable sandy base, on a wooden floor or thermal insulation slabs, and the floor screed cracked, what to do: pour another layer on top with mandatory reinforcement with steel mesh.
Defects in a fresh cement coating may not appear immediately, so after finishing the work you need to wait at least 3-4 weeks and then carry out an inspection. To do this, tap the screed with a rubber mallet, revealing local delaminations of the concrete, and strips of thin paper are glued onto the cracks and left for 10-14 days. If after this time it remains intact, it means that the cracks are stable and will not deepen or expand. If the paper is torn, this indicates that the concrete layer is unreliable - it will continue to deteriorate.
Causes of defects
The cement mixture has low ductility, adhesion and a fairly high coefficient of linear expansion.
Why does floor screed crack? In fact, there are plenty of reasons for flaws to appear on the rough foundation. As practice shows, cracks, dents and potholes can occur even if the grout is professionally poured. What is this connected with? It is worth noting that defects in most cases appear after installation of the cement screed. When laying semi-dry and gypsum mixtures, cracking of the coating occurs much less frequently.
Peaks and valleys in the coating inevitably appear after installation and dismantling of beacons. The reason for the formation of flaws lies in the physical and mechanical properties of the solution itself. The cement mixture has low plasticity, adhesion and a fairly high coefficient of linear expansion. Therefore, even if a little time passes between the installation and dismantling of the beacons, this inevitably leads to the appearance of small holes and cracks.
What are the main reasons for the formation of defects on the screed?
- Incorrect mixing of the solution, in which the water concentration becomes too high;
- Rapid (forced) drying of the coating;
- Uneven drying of the screed around the perimeter;
- Absence of a membrane base (polyethylene) under the solution;
- The presence of high temperature changes and drafts;
- Pouring too thin a layer of mortar;
- Direct contact of the cement mixture with the wall and communications;
- Using a fine-grained mixture that is unsuitable for pouring mortar;
- Absence or non-compliance with the required distances for expansion joints.
The reasons for the appearance of defects on the rough foundation are varied and are not limited to the list presented. The quality of the concrete pavement can also be affected by:
- Incorrect installation of thermal and waterproofing insulation;
- Poor quality cement mixture;
- Heterogeneity of the prepared solution;
- Lack of necessary tools for pouring and leveling concrete;
- Failure to comply with proportions in the process of preparing the working composition.
Making expansion joints
One of the main reasons for cracking of a concrete slab is the lack of compensation gaps around the perimeter of its abutment to vertical barriers - walls, columns, thresholds, etc. And in rooms with a large area, the screed can crack and swell during shrinkage and during linear expansion, if expansion joints are not installed in it, dividing the solid slab into several sections independent from each other.
The expansion joint allows the screed to expand freely Source tb.ru
See also: Catalog of companies that specialize in home insulation
Before repairing cracks in the floor screed, it is necessary to arrange all the necessary technological joints in it, otherwise they will appear again and again. And the sooner you do this, the better.
It will no longer be possible to create gaps between the floor and the wall using a finished screed. But you can cut the grooves as close to the wall as possible using a grinder with a large diameter disk or a wall chaser. If there are columns, a shrinkage seam is made around them, but not parallel to the edges, but in the form of a diamond, so that the corner of the column looks at the straight section of the groove.
If the dimensions of the room on one or both sides exceed 3-4 meters, the seams must be cut across it.
Note! The depth of the groove must be at least a third of the thickness of the screed, and the width must be at least 10 mm.
The finished cracks in the floor are cleaned of debris and primed. After the primer has dried, they are filled with polyurethane sealant or special mastic. After drying, these compositions retain elasticity, which will allow the cut cards to move independently of each other without transferring deforming loads.
Filling the seam with sealant Source stiagka-pola.ru
Recommendations for floor repairs
An example of expansion joints to prevent cracking
Repairing a floor screed is a responsible undertaking that requires strict adherence to the rules for restoring old and freshly poured screeds. To repair the base without any problems, before performing the procedure you should pay attention to the following nuances:
- First you need to find out exactly the reason for the formation of flaws;
- Check whether there are expansion joints on the coating;
- Find out how the cement mixture was poured, what base the solution was laid on (concrete, wood);
- If there are no expansion joints on the floor, before repairing cracks and potholes, it is advisable to take care of laying them;
- To determine whether local delamination of concrete is present, it is advisable to tap the coating with a rubber hammer.
If you ignore all of the above recommendations, within a couple of months potholes, dents and “boiling” concrete will again appear on the base. You can learn more about how to eliminate defects on a cement screed from the video clip.
Do-it-yourself floor screed with expanded clay: methods and calculations of consumption
We repair the screed
How to repair cracks in a floor screed depends on the degree of deformation of the subfloor.
Sealing microcracks
Shallow, small cracks usually do not cause problems. They arise due to improper concrete drying conditions. If they begin to appear soon after pouring, the floors should be wetted and covered with film.
Very thin microcracks can be left untouched or covered with liquid cement mortar or tile adhesive. If the width reaches several millimeters, it is better to play it safe and seal such cracks to the full depth.
- The crack is opened by cutting off the concrete on both sides of it with a grinder with a diamond blade, which is set at an angle to the crack.
If the amount of work is small, you can get by with a chisel and a hammer Source wp.com
- Pieces of concrete and cement dust are removed from the resulting triangular furrow.
- Its walls are well impregnated with a deep penetration primer.
- After the primer has dried, fill the recesses with the solution, applying it with a small slide.
- As soon as the solution sets, but does not completely harden, the excess is removed from the surface with a spatula.
If you immediately level the repair mixture over the surface, then during the drying process it will shrink and a depression will form.
What to do with cracks in heated floors?
With ordinary bases, I think everything is quite simple, but what to do with the holes in the heated floor screed? In most cases, problems begin due to the fact that workers do not adhere to the established floor installation technology and use, for example, too much plasticizer or other material. You can get rid of cracks on a heated floor using the following steps:
- We clear the holes using a screwdriver or other available tool.
- Prime with underfloor heating primer.
- Cover with repair mixture for heated floors.
- We lay the finishing coating.
Here's a video for you, which tells in detail how to get rid of potholes and chips on the screed:
Video description
How to strengthen concrete that is peeling off from the base is described in the video:
Having found out why the floor screed cracked and what to do, you can begin repairs.
- First, by tapping, areas of delamination and voids are identified and marked with chalk.
- In the marked places, holes are drilled in the screed at a distance of 15-20 cm from each other.
- After cleaning and priming, an epoxy mixture is poured into the holes.
- It also seals cracks.
- After the mixture hardens, the holes are filled with liquid cement mortar.
It is important! This method cannot be used if a water or electric heated floor system is installed in the screed, or other communications without an accurate wiring diagram.
When drilling repair holes, there is a high risk of damaging the cable Source sense-life.com
Selecting a mixture for repairing a concrete surface
Before you start repairing the floor in an apartment with your own hands, you need to prepare a mixture for restoring concrete surfaces and structures. They are presented in large quantities in construction stores. In order to choose the right brand of mixture, you need to determine the degree of damage to the concrete surface:
- First degree - there are cavities and shrinkage cracks.
- Second degree – surface peeling, small chips.
- Third degree - cracks within 2 mm with a depth of no more than 40 mm.
- Fourth degree – cracks more than 2 mm, depth up to 10 cm.
- Fifth degree - large potholes and cracks, depth more than 20 cm.
USEFUL INFORMATION: Adhesion - what is it?
The purpose of the repair mixture must be indicated on the packaging. Such manufacturers of mixtures for restoring concrete surfaces as Emaco, Birss, Ceresit, and Bars deserve attention.
Since the price of special thixotropic compositions containing reinforcing microfibers and polymers is quite high, for a small amount of work the mixture can be prepared independently. To do this, take 1 part PVA glue and mix it with 4 parts water. Using this solution, using a construction mixer or a special attachment on a drill, mix the sand-cement mixture in a ratio of 1:3.
Is crack repair always necessary?
Even experienced craftsmen cannot always guarantee that the cement screed will retain its solidity and integrity, since, despite its hardness and strength, it is a fragile material that is completely unable to adapt to environmental changes and withstand excessive loads.
In addition, having an impressive weight, the poured concrete slab under the final coating will not go anywhere, even if it cracks. It is not necessary to repair it if:
- the cracks are small and rare, not prone to expansion;
- when tapping with a mallet or walking along the edges of cracks, dust does not rise from them;
- the base does not vibrate under the weight of a walking person;
- Laminate, linoleum or other covering will be laid on the screed without rigid adhesion to it.
But in the case of finishing the floor with ceramic tiles, the diverging edges of the cracks can transfer stress to the tile adhesive and to the tile itself, hopelessly ruining the expensive coating.
A weak screed is the reason for cracking of tiles Source agromat.ua
Shrinkage cracks in concrete mortar
What you need to know about concrete? This is a multicomponent solution in which chemical reactions occur. The main chemical reaction of concrete mortar is hydration between the cement stone and water, as a result of which the plastic mixture turns into durable stone. These processes are characterized by internal stress of the structure.
The first shrinkage cracks may appear on the concrete surface in the first 6-8 hours after pouring, as it contracts, releasing moisture. Cracks may also appear during the further period of strength gain. What can affect the appearance of cracks:
- Incorrect proportions of concrete mortar components:
- excess water;
- excess cement;
- absence of plasticizers and others.
- Incorrect initial care of the setting mixture. Moisture should not leave the solution too quickly:
- if 10% of the moisture evaporates in a short period of time, then 18% of the strength of concrete is lost;
- if 20% moisture, then 30% strength;
- if 30% moisture, then 50% strength.
Therefore, the solution is protected from drafts and direct sunlight. To do this, the surface is moistened and tightly covered with film. In general, small shrinkage cracks (hairline cracks) are normal for concrete, but their width should be no more than 0.1 mm.
So that there are no cracks
If you think in advance about how to make a screed so that it does not crack, you can avoid the hassle of repairing it. To do this, several conditions must be met.
- The thickness of the screed at its thinnest point should be at least 20 mm, and if the base is sand, expanded clay or insulation boards - at least 30 mm.
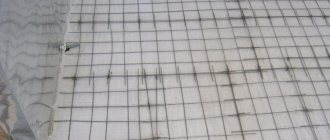
- When installed on a weak or shrinkage-prone base, the screed must be reinforced.
- The screed must be poured over the entire area at once, without taking long breaks.
- If this is not possible, arrange expansion joints at the junction of the dried and fresh mortar.
- Observe the proportions exactly when mixing the solution, taking into account the brand of cement and the moisture content of the sand.
- If, after leveling, puddles of water form on the surface, it means there is too much of it in the solution; it is better to immediately redo this area.
- Avoid drafts during the first days of drying the solution.
- As soon as the screed sets, cover it with film.
- If the air in the room is dry and hot, periodically moisten the surface with water so that the concrete dries evenly.
How to prevent cracks from forming?
The first, most important rule to learn:
Excess water in a batch is your worst enemy. This means that you need to add just enough water to thoroughly mix the solution, but no more. Some inexperienced craftsmen think: the thinner the solution, the better it will level out and “stick” to the base. They are partly right: the liquid mixture is easier to knead and level, but the quality suffers seriously. And if this approach is still tolerable when pouring conventional screeds, then serious problems can arise when installing floating ones.
Ideally, the amount of water for mixing is selected so that the solution can be leveled using the rule, while ensuring that there are no voids in the mass itself. In other words, you should try to keep the amount of water to a minimum. To make it easier to prepare a thick solution, you can add “feri” to the water - a teaspoon of detergent or liquid soap per bucket of water. As a rule, the use of special plasticizers is unjustified - they are not needed if work is carried out at temperatures above +5 C°.
In addition to adequate proportions of water, it is necessary to prevent the solution from drying out quickly. Moisture is necessary for cement mortars to gain strength. Rapid loss of moisture will not allow the cement to display all its characteristics and the screed will not be strong. Therefore, before pouring, you need to take care of the absorbency of the base.
As you know, before pouring it is recommended to prime the base, thereby reducing its absorption. However, this is not a panacea for absorbency. For a smooth concrete base, a primer will be just right, but if there are areas of mortar on the base or the pouring is done over an old screed of poor quality, the best option is to first “saturate” the base with water. The base should be sprayed with water until it stops absorbing moisture, after which excess water is removed from the surface and poured. With such humidification, one should not forget about the danger of flooding the rooms located below and approach the issue wisely.
When you wet the base before pouring, you don’t have to worry about the primer - there is no need for it. Thanks to the wet surface, cement crystals will grow well into the base - even a primer cannot provide such adhesion.
If there are areas of foam blocks or other very porous materials on the base, they need to be puttied to “tear off” with any available cement mixture - for example, tile adhesive. When pouring onto the ground, you need to cover the entire area to be poured with waterproofing material, such as polyethylene.
And a little about the damper tape: this tape made of foamed polyethylene is intended for installation on walls before pouring, at the junction of the screed. When shrinkage of the poured screed occurs, the deformation tape slightly compensates for the narrowing. This is all in theory, but in practice the use of this tape is justified only on floating screeds. When poured directly onto a concrete base, the entire mass of the screed has adhesion not so much to the walls as to the base.
The second issue to pay attention to is reinforcement.
. When pouring wet screeds onto a rigid, immovable base, reinforcement is not required. However, if floating technology is used - a screed device on top of a layer of insulation or sound insulation - reinforcement is necessary. For this, masonry or other mesh is used; it is possible to replace the reinforcement with polypropylene fiber. The installation of screed using semi-dry technology does not require mandatory reinforcement (at least in residential premises).
When reinforcing with mesh, you need to ensure that the individual fragments are connected to each other or at least overlap each other. The minimum thickness of a floating screed is 4 cm. It is recommended to place the reinforcement in the middle of the layer or slightly lower, but the solution should envelop the mesh from below. The option when the mesh is attached to the base before pouring is ineffective, since the rods are in the solution only on one side.
Beacons also interfere with the integrity of the entire reinforcing fabric, therefore, when organizing a floating screed, it is recommended to use beaconless pouring methods. Although here a lot depends on the type of beacons.
Briefly about the main thing
Cracks in screeds are a frequent and poorly controlled phenomenon. They are formed even with strict adherence to the work technique due to uneven shrinkage of the material, which does not have plasticity. They don't always require repairs. But if the defects occupy a large part of the surface and tend to grow and increase, and the floor “breathes” underfoot, the cracks must be sealed using cement mortar, tile adhesive, sealants or epoxy resin, depending on the situation. It is also advisable to fasten the largest crevices with metal brackets in the transverse cuts.
Ratings 0
What is needed to repair the screed?
Before starting the “reanimation” of the leveling base, it is necessary to prepare the following tools and materials:
- grinder and hacksaw;
- perforator;
- metal rod;
- hammer;
- construction syringe;
- epoxy resin;
- quartz sand;
- primer.
After this, it is necessary to determine the type of cracks and carry out repair work.
Visible cracks are quite easy to find, but to find hidden voids, you will need a wooden mallet. Gently tap the base. There is definitely empty space in areas where the sound becomes more sonorous.
Important! If, after visual inspection and tapping, it turns out that more than 30% of the surface is damaged, then it is best to dismantle the unsuitable base and lay a new slab.
After this, you can proceed directly to the repair.