When planning a country house, even an inexperienced developer knows what he will need for construction and is aware in advance of the necessary components of a country house (foundation, walls, roof, ceilings, windows and doors). However, there is one more component in the construction of a summer house, which is not formally included in the scope of the house and therefore is often not paid attention to.
Many people forget about the blind area. But in vain! This is fraught with unpleasant consequences
And if they do, they leave its arrangement for a vague “later”, mistakenly believing that there is no urgency in its construction, because “there is no rain on us.” There is perhaps no more inappropriate saying when it comes to the blind area. The fact is that she’s just “dropping” on her! And if mistakes were made during construction, drops often lead to irreversible results.
If you don't have a blind area.
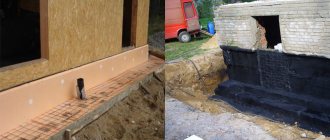
The editorial inbox receives letters with annoying regularity in which summer residents talk about loose foundations, cracks in the walls, and lopsided corners. As real practice shows, this problem often appears as a result of the influence of ground moisture on the “zero cycle” and the movement of heaving soils. But this disaster could definitely have been avoided if the foundation had been protected. This is precisely what the blind area is intended for. That is, it is a mandatory technological component for most types of foundations, and not an additional item of unforeseen expenses imposed by greedy builders in an already growing budget, as many summer residents think.
If the foundation is not protected by a blind area, the appearance of cracks in the walls is a matter of time
It becomes all the more offensive for inexperienced dacha developers, who very, very often do not pay attention to the obligation to implement it. And not only due, but not at all. As a result, the foundation is deprived of protection and becomes directly accessible to moisture, as a result... see above, where we talked about drops.
We build a blind area according to the norms and rules
I hope I have convinced you of the need to arrange a capital blind area. Then let's move on to the nuances of construction, which everyone who is to build housing must know.
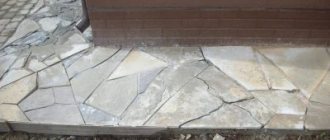
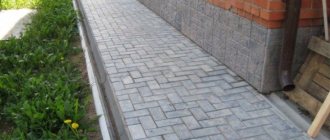
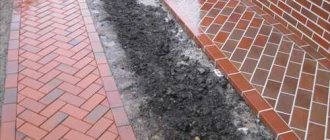
There are two known types of blind areas - hard and soft. When covering the first, concrete, asphalt, stone, paving slabs are used, and for the second, gravel, lawn, and light tiles are used.
You can use lawn to cover the soft blind area
First of all, I think, it is necessary to eliminate the typical technological mistakes that inexperienced builders make when constructing both types of blind area.
When can you insulate yourself, and when should you turn to professionals?
The blind area is one of the simplest elements in the construction of a private house. Any homeowner who knows how to work with their hands can handle it themselves. The main thing is to follow the technology of the device and correctly create a “layer cake” from building materials inside the structure.
There are 3 types of blind area:
- Tough. It is based on pouring concrete or paving. The participation of specialists is recommended here, since the technology is labor-intensive and will require hiring equipment and auxiliary tools.
- Semi-rigid. The final covering here is made of paving slabs, which lie on a concrete base.
Laying out the material and pouring the base require certain skills; it is not always possible to carry out the process efficiently the first time on your own. - Soft blind area. The technology does not involve concrete, so this process is easier to do yourself.
Accordingly, you can insulate the blind area with your own hands with a soft coating that does not require the participation of equipment and concrete work. For other types of coating, the intervention of professionals may be required, but if you act carefully and according to the instructions, insulation and installation of the coating yourself is possible for everyone.
Mistake #1. Dimensions and location
Waterproof blind areas must be constructed around each building. Everything is clear with the length, it is equal to the perimeter of the building, but what should the width be? Is it possible to make the blind area narrow? No way! This would be a fatal mistake! Drops of rain falling from the roofing edge (even with a well-organized drainage system they will still occur) should not fall on open ground. That is, the width of the blind area should be approximately 20 cm wider than the size of the roof overhang.
A narrow blind area is useless - it cannot protect the foundation
It would be appropriate to emphasize here that almost all parameters in construction are quite strictly regulated. To clarify the details that interest you, it is worth looking, for example, at the “Norms and rules for designing complex landscaping on the territory of Moscow MGSN 1.02-02 TSN 30-307-2002”. The regulatory document states in the most definite way: “The width of the blind area for buildings and structures is recommended to be 0.8-1.2 m, and in difficult geological conditions (soils with karsts) - 1.5-3 m.” Additionally, I note that a porch with a staircase often blocks direct access to the outer foundation wall. Of course, here the blind area must expand in order to clearly prevent precipitation from entering the “forbidden zone” at the foundation.
Mistake #2. Stagnant water
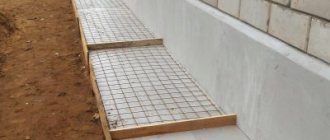
Water that has fallen from the roof remains on the surface of the blind area and forms puddles next to it. This only means that the authors of the blind area did not take care of the slope of its surface. According to the above-mentioned standards MGSN 1.02-02 TSN 30-307-2002, the transverse slope of the blind area should be taken at least 10%. For example, if the width of the protective tape at your dacha is planned to be 1 m, then the height difference between the longitudinal sides of the formwork should be about 10 cm, and no less!
The importance of lateral slope
A failed height difference can be a consequence of unsuccessful concreting of a monolithic blind area if, at the stage of hardening of the concrete mixture, the builders did not ensure that it was given a transverse slope, and the concrete “stacked” into a horizontal position.
The blind area should drain water from the foundation
Drainage trays for drainage along the outer perimeter
The story with water does not end there: to drain it along the outer perimeter of the blind area, it is advisable to provide drainage trays. These can be modern plastic boxes, closed on top with metal bars, or simply sawn along the pipe, laid on a reliable base.
And we will take care of beauty
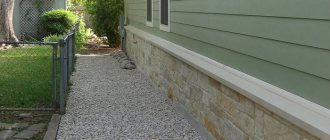
And it is reasonable to frame the structure of the blind area around the perimeter with curb paving stones. It will give the building architectural completeness.
Requirements
There is an existing number of regulatory requirements that tell about its purpose, dimensions, angle of inclination, and other information. It is not indicated in what order the actions should be carried out. The plumb dimensions of the building roof are not related to the width, since all water from the roof must drain through the drainage and drainage system. But it is still recommended to retreat 25-30 cm from the projection of the roof edge.
Mistake #3. Violation of regulations for concrete work
The sad consequence of mistakes of this kind will be the appearance of cracks on the concrete surface of the blind area. How they threaten the foundation structure is not difficult to guess even for a summer resident who is far from construction.
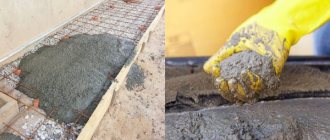
Concrete production must be carried out strictly according to the rules.
The composition of the concrete mixture is probably known to every summer resident: cement, coarse aggregate (crushed stone fraction up to 20 mm), fine aggregate (sand), water. Then why are there so many mistakes on the dacha horizon? The answer is clear: firstly, the errors lie in the incorrect mixing algorithm. Secondly, in violation of the weight ratio of the components: this often happens if they are measured by eye. Experts strongly recommend abandoning such frivolity. Making concrete is not a case where you can count on chance. You can accurately dose the components even in country conditions. How ? In my opinion, nothing better than ordinary buckets has yet been invented, and if in addition you use a steelyard (even a very simple one), the weighing accuracy will be sufficient.
Cracks in the blind area are the result of improperly prepared concrete mixture
Concrete mix proportions
Sequence of mixing components
Mixing time
How long does it take to rotate the bulb of a household concrete mixer? To mix the dry ingredients, 2 minutes are enough, and after gradually adding water, another 2 minutes.
Not only the sequence of adding components is important, but also the mixing time
Eliminate the appearance of cracks
Compaction and tilt
The final stage of concreting is compacting the concrete mixture and imparting a slope in the transverse direction. You will have to rent a vibrating plate, the operation of which will ensure high quality finishing work.
Adviсe
Professional advice will help you correctly install the blind area waterproofing.
- Don't leave waterproofing for later. The blind area must be done immediately during the construction of the building.
- Observe the slope. Try to keep the slope the same throughout the entire perimeter. For this you can use a building level.
- Do not mix concrete and clay.
- To ensure that the insulation does not deform under the weight of the blind area, it is recommended to choose a material with a high density.
- Remember, the blind area does not last forever, it requires care and repair.
- When repairing blind areas, various sealants and mastics are used. The damaged surface is coated to prevent further deformation.
- If there is a large crack or chip on the surface, it is necessary to punch a wedge-shaped hole and fill it with a mixture of concrete. Then cover with film to prevent premature drying.
- The outer layer performs not only a decorative function, but also a protective one. Finishing can be done using paving slabs. Of course, no one forbids you to leave ordinary concrete or crushed stone, but, from the point of view of aesthetics and design, it is better to use decor.
- Numerous reviews on the Internet say that membrane or rolled materials are suitable for waterproofing; they are most often used when used independently.
- You can resort to the advice of the Finns and make a soft blind area.
- For special occasions, when the entire garden around the house is a complete design fantasy, you can use colored crushed stone.
To learn how to properly waterproof a blind area, see the following video.
Mistake #4. The blind area was not insulated
Such an error will lead to negative consequences. If the blind area is not insulated, frost heaving inevitably occurs on heaving soils (clayey, silty sandy loam, loam) in winter, which has a most destructive effect on the foundation structure.
To avoid destruction of the foundation, experts recommend not saving on insulation of the blind area
Advantages of an insulated blind area
- in normal soils, an insulated blind area protects the foundation from the appearance of cracks (when melt and sediment water penetrates into the concrete, which can destroy it when frozen);
- reduces the impact of external low temperatures and reduces home heating costs.
Therefore, experts recommend not saving on insulating the blind area - it will cost you more. As practice shows, in the modern building materials market you can find the ideal combination of high quality and reasonable prices. For example, practicing builders positively characterize the product, in a particular case - extruded polystyrene foam (XPS) TECHNONICOL CARBON ECO with sheet dimensions of 580x1180 mm and a thickness of 50 mm.
Manufacturing on stilts
Installing a blind area on screw piles does not require thorough knowledge. The main rule is to comply with the basic requirements and rules.
To reduce the cost, we choose concrete as a coating. For the pillow we use:
- crushed stone;
- coarse alluvial sand.
With this choice of materials, possible deformation as the temperature decreases will be compensated.
If the house is on stilts, then the base must have ventilation holes, at a height of 40-50 cm from the blind area with mesh protection.
Advice!
In winter, it is better to fill such holes with material to avoid possible freezing.
It is necessary to lay expansion joints using wooden boards, pour concrete in the sections between them and make tiled cladding.
Mistake #5. Soft blind area allows moisture to reach the foundation
When constructing a soft blind area, its top finishing coating can be compacted gravel, green lawn or metlakh tiles. Of course, such coatings require reliable waterproofing protection. The optimal solution to the problem is to use a profiled membrane PLANTER-geo (TechnoNIKOL) and install it on the wall of the house. It will create a sealed layer and block the penetration of precipitation to the foundation.
The PLANTER-geo membrane is laid with an overlap on the wall of the house
High technology guarding buildings
The membrane fabric consists of two layers:
- the lower one is made of high-density polyethylene, has protrusions on the surface in the form of spikes, forming a drainage gap to drain water from the house;
- the top layer is geotextile, which filters water and prevents clogging of the drainage gap.
Waterproofing membrane PLANTER geo
The cost of such a high-tech membrane is close to 250 rubles per 1 m².
Which material to choose?
Since the material is subject to rather stringent requirements, only a few are suitable for insulating blind areas. Each of them can be installed independently.
Expanded polystyrene
A type of foam plastic, it is used more often than other materials due to its versatility and low cost.
Advantages:
- low thermal conductivity and moisture absorption;
- high strength;
- frost-resistant;
- flexible;
- service life reaches 80 years.
Disadvantages: flammable, it is important to securely lock it under the top layer of the blind area and cover it with the plinth facing material.
Suitable for all types of blind areas, ideal for concrete coverings , but it is necessary to lay it with additional insulating material (film or geotextile) to eliminate mechanical impact and the possibility of fire.
Penoizol
It is sprayed on the base of the building and on the bottom of the trench, under the blind area, where a cushion of clay, sand and geotextile is laid.
Advantages:
- applied without joints, in a uniform layer from a special machine with a sprayer;
- dense, does not absorb moisture;
- low thermal conductivity;
- does not allow oxygen to pass through.
- durable, non-flammable.
Flaws:
- application requires the participation of specialists with equipment;
- toxic, respiratory protection is required for all those present and isolation of the neighboring area (so that the plants are not damaged).
Penoizol is not recommended for regions with high humidity and places where there is heavy rain. The material cannot withstand excess water levels and its application is expensive. Sold in various forms, including sliced.
Styrofoam
One of the most famous materials, elastic, is suitable for strengthening expansion joints.
Pros:
- low thermal conductivity;
- affordable;
- easy to lay and model to the desired shape.
High-quality blind area is easy
The main thing is to eliminate the mistakes listed above and use high-quality materials. Once again, I will allow myself to recommend that summer residents (in their own interests!) do not skimp on the construction of a blind area, because the strength of the structure depends on how reliably it protects the foundation! In my opinion, to build a high-quality blind area, it is technically correct to use both products mentioned in the article.
- CARBON ECO slabs are laid on the prepared base (compacted sand) (thereby we protect the foundation from frost).
- To reliably protect the blind area from the negative effects of moisture, a profiled PLANTER-geo membrane is laid on top of the thermal insulation. It is recommended to form a connection between the sheets by overlapping the membranes into four tenons and additionally gluing the joints with PLANTERBAND tape; geotextiles should also be joined together with adhesive tape.
- Next, you can begin to form the finishing layer of gravel or plant substrate; another layer of sand is poured under the tiles or natural stone.
Proper heat and waterproofing during the construction of the blind area.
Photo from the site ivanovo.tiu.ru As you can see, the use of modern high-tech materials is justified: with their help you will create a reliable and beautiful (which is also important, you must admit!) blind area that will faithfully protect the foundation of your house for many years. A blind area around the house is a necessity, but it doesn’t always make sense to make it permanent for years and decades. For example, the building is old and it is planned to be demolished in the near future.
And sometimes it is simply not possible to build such a structure: there is not enough time, effort, materials, etc. In such cases, a temporary blind area will help out. It will divert water from the foundation in good faith, and that is all that is required of it.
Feasibility of construction
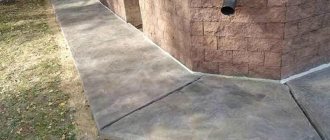
A solid blind area is the most popular option used to remove moisture from the foundation, thereby extending its service life.
But it will not always function correctly, for example, in conditions of heaving soil, a solid structure is rarely used .
In this case, it is advisable to install a soft blind area, which is simpler, cheaper and more repairable. In addition, you can put insulation and waterproofing, as a result of which the structure will perform the same functions as a solid one.
How to construct a simple blind area around a house
A ditch needs to be dug around the perimeter of the building. Its width must be sufficient to drain water flowing from the roof. Plus a small supply. For example, the width of the trench can reach 1 m. We make the depth of the pit approximately 30-35 cm.
We fill the entire length of the trench with sand, which is mixed with crushed stone (preferably of medium-sized fractions). We compact it as conscientiously as possible. The ditch must be completely filled.
We lay bricks along the entire foundation, close to it.
We lay wave slate on the bricks - so that its waves go from the walls of the house - through the backfilled foundation pit - onto the soil or into a equipped drainage ditch. Since the slate is raised to the height of the brick on the side of the house, a good slope is obtained. Water will flow down the slate recesses during rains.
Functions
Blind areas play an important role; their high-quality implementation can protect the foundation of the task from rain and flood waters. Arranging a tape with a hard coating at a certain angle will protect the soils lying along the perimeter of the building from getting wet; if the building’s foundation is poorly waterproofed, it will protect it from getting wet and absorbing any moisture. When frost sets in, moisture that gets into existing cracks or microcracks can expand, which will lead to the destruction of the foundation.
Attention!
Water accumulated in the soil will cause it to swell and destruction will begin.
It is important to consider what soils we are dealing with during construction. For example, clay and loamy soils can directly affect the durability of load-bearing structures. When moisture enters, this type of soil begins to play and form subsidence, causing:
- foundation deformations;
- formation of places with divergence of walls.
This element gives completeness to the capital construction project. It can be reunited with the finishing elements of the local area.
Slate for temporary blind area
Any type of slate that is available to you will do. It can be old-style asbestos-cement slate, corrugated bitumen slate, fiber-cement slate or plastic. In principle, all types of slate are intended for roofing, therefore they are resistant to water, high and low temperatures, and ultraviolet radiation.
But if you have the opportunity to create a blind area only using sheets of old asbestos-cement slate, keep in mind that lichens and mosses will settle on it. On the roof they are a rare occurrence due to the height of their location, but they can quickly master surfaces close to the ground. Therefore, such slate can and should be protected by painting it with acrylic paint for exterior use - it has both frost and moisture resistance.
Painting will protect the slate not only from parasitic plants, but also from destruction. In addition, such a blind area will look much more decorative.
Insulation
Another important point when making a waterproofing blind area is its insulation. Insulation allows you to retain heat in the basement and on the ground floor, increases the operating time of the blind area, and also allows you to save on materials, since the height becomes less than the depth of soil freezing.
Insulation can be done in several ways.
- Expanded polystyrene is quite durable, one might say, an eternal material, which additionally has water-repellent properties. Its weight is so light that its installation is not difficult. Just one layer of this material is enough for a sheet thickness of 10 centimeters. You just need to take care to protect the joints with a special film with a waterproofing effect.
- Polyurethane foam is very frost-resistant. It can withstand up to -60 degrees without changing its qualities. It is environmentally friendly and has excellent thermal insulation.
- Polyfoam has high sound and heat insulation. This is possible due to its foam structure and the abundance of air inside. The material has low water absorption, and also has waterproofing properties and is lightweight. Foam is resistant to temperatures and mold.
How to make a simple drainage system
Along the edge of the slate structure we dig another trench - narrower than the blind area itself. The water that flows down the slate waves will fall into it.
We fill the drainage trench with an even layer of drainage (pebbles, pieces of brick, crushed stone - whatever). It is important that grass does not grow through the drainage, otherwise the efficiency of drainage will quickly decline, and the permeability of water may decrease so much that it will stand on the surface. Therefore, having filled the trench halfway, you should lay a permeable material such as spunboard - it will not allow grass to grow.
If possible, you can arrange a more serious drainage system. For example, make a trench with a slope into a drainage basin and equip it with trays for water drainage.
How to make a simple water catcher
We dig a hole deeper so that a container can fit into it - for example, a barrel or a large saucepan, etc.
We lay drainage trays in the trench, ultimately leading them into the drainage basin.
Options with drainage trays. You can buy the trays themselves and the gratings for them, but this will require funds that are not always rational to spend on installing a temporary blind area and drainage to it. Although there is also a choice here - concrete or plastic trays. In addition, if the temporary blind area is replaced with a permanent one in the future, the drainage system can be left.
But if this is really a temporary construction, you can cut metal or plastic pipes in half lengthwise, thus obtaining full-fledged trays. And instead of store-bought grilles, use any mesh - even ordinary chain-link.
The blind area around the house, even if it is the simplest, but arranged correctly, will protect the foundation and walls of the building from water and dampness.
To move into a house, you first need to build it and equip it to the maximum. I wish it was like that. But more often than not, something somewhere is unfinished and the work has to be completed during the period of operation of the building.
Blind areas quite often appear among the deficiencies. But a temporary blind area option can be implemented very quickly and simply - using old linoleum removed from the floors of a city apartment during renovation.
Linoleum in strips up to 1 m wide is laid around the building, and in order for it to be tightly pressed to the ground, it can be pressed down with bricks, or even attached with nails 150-200 mm long (driving them into the ground. But, of course, first you need to ensure the necessary slope from the walls of the house. As a result, we get a temporary blind area - good protection for the underground from water in the spring and from rain and grass in the summer.
By leaving a comment you agree to the Privacy Policy
Price for turnkey construction services
To calculate the exact cost of the necessary materials and work, you will need the help of a specialist. After all, this is the only way to assess the condition of the soil and select the type of blind area.
It is recommended to carry out work on the installation of a blind area simultaneously with the installation of drainage and storm sewerage.
The final cost of work is influenced by many factors , including:
- material used to construct the structure,
- building area,
- width and depth of the blind area,
- as well as some soil features (flatness, need for dismantling, etc.).