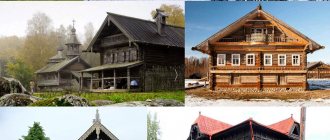
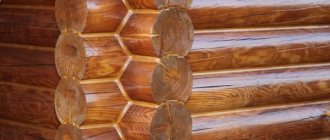
Wood is one of the best building materials, which is used for the construction of modern wooden structures - residential buildings, bathhouses and courtyard buildings.
Among other things, wood has good performance characteristics - reliable thermal insulation, sound insulation, environmental safety and aesthetics.
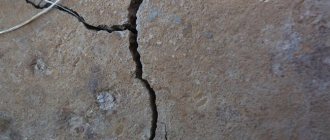
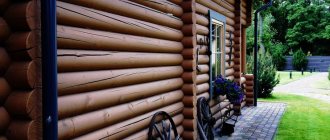
However, despite the obvious advantages of the material, wooden logs are susceptible to cracking and drying out, which ultimately leads to the appearance of cracks.
Wood shrinkage is a natural process that is almost impossible to prevent.
Methods for eliminating cracks in logs
The technology for sealing cracks depends on their size.
Thus, small (up to 2–3 mm) longitudinal cracks are sealed with sealant, dry mixtures, and hardening putties. Cracks and splits larger than 5 mm are filled with a special insulating material and then sealed. Important! When starting to seal cracks, you must first clean them of debris and rot and completely remove loose wood
Grouting microcracks with sandpaper
Microcracks that have just begun to appear on the log should also not be ignored. If they are not eliminated at the initial stage, the cracks will grow deeper into the wood.
You need to sand the cracks manually, selecting the grain of the paper to match the wood. Thus, soft wood is treated with fine-grained paper, while harder varieties are treated with coarse grain. Wood dust generated during processing also serves as a primer. After sanding, the surface is impregnated with antiseptic and varnish.
Grout from sawdust and wood glue or PVA
Small cracks can be easily eliminated with a homemade grout made from fine sawdust and glue (wood glue or PVA) in a 5:1 ratio and mixed thoroughly. The mixture should be thick enough, but not dry, to evenly fill the voids in the wood.
Using a spatula, the grout should be pushed into the cracks and compacted if possible. As the mixture dries, it decreases in volume, so it may be necessary to re-grout with the mixture or wood putty.
Wood putty
Acrylic putties are suitable for filling small cracks - no more than 3 mm. With deeper layers, the dried material will begin to crack and fall out.
Ready-made wood putties are highly waterproof and frost-resistant. In addition, you can choose a mixture that matches the color of a particular type of wood.
Acrylic, polyurethane sealants
The use of acrylic or polyurethane sealant is advisable only to a depth of 5 mm. If the crack in the log is deep, its space is filled with a sealant made of foamed polyethylene, and only after that the surface is filled with sealant using a syringe. At the same time, polyethylene does not react with glue, remaining a kind of shock-absorbing cushion inside the wood.
Arbogypsum
An excellent product for sealing cracks in logs is an arbogypsum mixture. In addition to gypsum, it contains filler made from natural raw materials. Usually this is crushed tree bark, tyrsa, sawdust or straw.
Preparation of arbogypsum involves diluting the dry mixture with water, and the ratio of the components should be as follows: 2 parts gypsum, 6 parts crushed wood, 1 part water. To give the mass plasticity, you can add 1-2 drops of thick shampoo. The resulting mixture is thoroughly mixed until smooth and used immediately.
The prepared arbogypsum solution is placed into the cracks using a spatula, compacted, smoothed over the surface and left to dry completely.
The method of plastering cracks is considered the most durable and durable. This is due to the strong adhesion of both components.
Filling cracks with wood chips
Large, deep cracks are clogged with wedges made from wood chips. The size of the wedge must exceed the size of the slot. To ensure a tight fit, it is hammered in with a hammer, having previously been coated with PVA glue for complete setting.
Next, the surface is puttied with wood putty or a homemade mixture of PVA and sawdust.
Filling cracks and cracks with moss, tow, jute (caulking)
Caulking with moss is a traditional, reliable method of sealing cracks and crevices in log houses. This natural material is an excellent heat-insulating filler, suitable for sealing the deepest cracks.
For caulking, take dry moss, pre-soaked in water for half an hour. After squeezing it well, the moss is rolled out with rollers and driven tightly into the cracks and cracks using a mallet and a wooden spatula.
After drying, the moss increases in volume, densely penetrating into all microcracks. After 2–3 days, you can smooth out the protruding moss residues with a sanding machine.
The use of tow and jute to seal cracks follows the same pattern as with moss, but without soaking.
Putty
This technique is used in cases where there is a small crack or chip on the tree.
It is important to note that sealing cracks using putty gives a cosmetic rather than a practical effect. Moreover, even such sealing of cracks will allow you to perform any operations on the tree again, without fear of damaging it even more (for example, you can safely saw it)
Also, it is strongly recommended to putty before painting the material. To eliminate defects, you must first prepare a mixture purchased at the store. The resulting substance is applied to the damaged surface using a staple so as to fill all the cavities. You will definitely need to wait for the mixture to dry (this will take 15-20 minutes), after which you can begin secondary processing.
We suggest you read: Paper beacons are a myth, they don’t exist
Sealing with sealants
Acrylic or silicone-based joint sealants can eliminate cracks up to 5 mm wide. In addition, they are used to seal seams between crowns. The consumption of such materials is 1 kg per 6–8 linear meters, if the seam thickness does not exceed 5 mm.
It is necessary to assess the condition of the logs and purchase the required amount of material. Sealants are very convenient for carrying out repair operations due to their release form: a special syringe gun allows you to cleanly apply the composition to the surface of the wood and obtain the desired result.
Siliconized sealant is a more durable option, it is resistant to deformation and holds better. For very deep fractures, you can additionally purchase a silicone cord: it is placed in the gap and covered with a compound on top. The work is carried out as follows:
- First you need to assess the number and size of damage. The surface should be thoroughly cleaned of dust and should be free of frost and snow. It is not recommended to apply the sealant at sub-zero temperatures.
You should stick masking tape on the sides of the log - it will allow you to leave the rest of the surface clean, and you won’t have to put it in order for a long time. First, a cord is placed into deep cracks, after which they are filled with sealant using a syringe gun or spatula. If it gets on the very surface of the wood, it should be washed off immediately with a damp cloth. If it hardens, the log will have to be carefully sanded with fine sandpaper. Very soon the sealant will harden and reliably close the defect. The treatment must be repeated periodically, since during the process of shrinking and drying of the wood, small cracks will appear again.
It is better not to carry out major renovations of an old house yourself, but to invite professionals. They will not only complete the job faster, but will also treat all cracks with special compounds and tools, which will allow you to forget about repeated repairs for a long time. This service is not that expensive, besides, it saves a lot of time, and the result will be more reliable.
Cracks in rounded logs are inevitable, so it is very important to carry out timely, high-quality repairs. Annual care for a wooden house is necessary, otherwise the wood can quickly collapse
A large selection of modern products makes it possible to eliminate all damage and restore the strength of the material. After repair it can last for many years
However, it is important not only to carry out repairs on time, but also not to skimp on the quality of lumber, and also to strictly adhere to all construction technologies and rules.
https://youtube.com/watch?v=hH0Nc46T4dM
Semyon Tumanov
Author of publications on 1Drevo.ru with the topics: Windows in a log house | Outbuildings made from cylinders | Cracks in logs | Siding under timber | Bathhouse with attic | Cost of cylindering | Calibrated log | Gas boiler | House foundation made of timber | Autonomous septic tank | Cottage villages | Insulation of a log house | Wooden cottage, etc.
Useful tips
Regardless of what exactly is used to seal cracks - homemade putties, putties or sealants, there are uniform rules.
Knowing the rules, the work on sealing cracks will become better and more durable:
- Carry out such events in the warm season, at above-zero temperatures.
- Before applying any composition, thoroughly clean the surface to be treated from debris, dirt and dust.
- Make sure that the tree is not wet after rain. Choose dry weather for such events.
- If the split is serious and large, pre-glue its edges with masking tape. This will prevent the composition from reaching other places.
- If sealant is accidentally spilled on the surface, wait until it dries and carefully clean the area with sandpaper.
- After finishing the work, the former crack is moistened with water and leveled (you can use a brush). This will give the log a neat and smooth look.
What means would you use to repair cracks in logs?
People's Professional
When planning to build a cottage, house or bathhouse from a log house, select only high-quality logs. It is better if they come with pre-treatment with antiseptic compounds and after prolonged drying. This will protect the wood not only from splitting, but also from the appearance of mold and fungal colonies.
Cracks in logs: WHAT to do
Let's talk about one of the most common problems of log houses - the appearance of cracks in logs. Let's study methods to prevent this problem and ways to deal with cracks that have already appeared. Let’s see if cracked logs are really that bad for the entire log house, and whether it’s worth abandoning construction because of this.
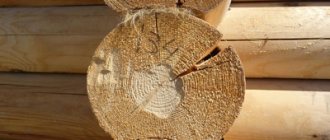
Let us immediately note that the appearance of cracks in drying logs is inevitable. Any wood decreases in size as it gradually dries out. For example, when pine is completely dry, it will shrink along the grain by 0.1–0.3%, and across the grain by 3–5%. And everything would be fine, because fighting the shrinkage of log houses is not so difficult.
However, the dimensions of the internal and external layers of the log change unevenly! For example, let's take the same pine - the outer fibers dry out by more than 8%, and the inner ones - by only 2-3%. This is understandable, because the density of external and internal wood fibers is different. External ones release moisture faster.
As a result, the outside of the log turns out to be almost dry, but moisture remains inside. This difference in humidity and density leads to ruptures in the upper layers and cracks appear.
If the process of cracks appearing in logs is natural and inevitable, is it worth building log houses at all? Yes, because small cracks are just a grid on a log, not a problem for the structure. But expansion of cracks up to 3–5 mm can already lead to serious consequences:
- moisture gets into the cracks, and this can cause the wood to rot;
- cracks can become an excellent access point for bark beetles and other wood pests;
- the structure of the wood and the sealant of the log house are damaged, and deformations are possible.
Despite the inevitability of cracks appearing on logs during drying, there are methods for preventing this phenomenon to avoid large ruptures:
Natural shrinkage extended over time. If the log dries out gradually, in the shade, long before construction begins, the cracks will be much smaller. For example, if the logs dry for only a year, the width of the cracks can reach 6-10 mm, if two - only 1-2 mm; End sealing
It is important to remember that the end of the log itself dries much faster than the rest. It is exposed to active external influences, so shrinkage is intense and cracks appear much earlier than on the log itself
But if you close the moisture exit through the ends, cracks can be minimized. Special sealants, drying oils, wood varnishes, and oil paints are used; Compensation cut. It is made specifically to reduce tension in the fibers of the log. Specialists themselves decide what type of compensation cut is needed; it is made along the axis of the beam, along the upper or lower surface. Some craftsmen do not complete the deformation cut to the end, while others decide to make it over the entire surface. The cut will be hidden by the lower or upper log, that is, it does not affect the characteristics and type of the log house, while compensating for the difference in stress, humidity and density. The cut is usually made with a thickness of 7–10 mm and a depth of 1/6 or 1/5 of the diameter of the log.
Important! Some wood experts are wary of compensation cuts. They believe that it is better to dry the wood for two to three years in a stack to minimize the formation of cracks than to make an extra cut and disrupt the structure of the wood
Prevention methods help to avoid large cracks, and small ones, as many experts believe, do not need to be sealed; there will be no harm to the log house. However, if the crack is larger than 3 mm, you are afraid of the consequences, you can start sealing it. For this purpose, numerous sealants are used today: silicone, acrylic, boutique rubber.
Alternatively, you can use a mixture of sawdust and PVA glue, this is a proven home method. Chips are driven into especially deep cracks, and then these places are covered on top to seal. There are also special putties for wood, but they are used on small cracks - up to 3 mm, otherwise the composition itself may begin to crack.
Another old-fashioned method is caulking cracks with moss, previously moistened so that it swells and clogs all the cracks.
We state: proper, long-term drying of logs minimizes the appearance of cracks; this is the most reliable way to prevent problems.
Therefore, choose logs for your log house wisely and thoughtfully, giving preference to those that have been in the stack for at least two years. In this case, you will not have to deal with cracks; they will not become a problem. published by econet.ru If you have any questions on this topic, ask them to the specialists and readers of our project here.
Processing technology
To ensure good protection of a log house made of rounded or chopped logs, solid timber of natural moisture, it is necessary to follow a certain procedure.
At the first stage, the frame is trimmed immediately upon completion of the assembly. Trimming is the alignment of the protruding parts of the crowns (releases). Typically a chainsaw or electric saw is used. Traditionally, outlets are cut so that the end surfaces form a vertical plane.
To perform quality trimming, you need a good tool and experience working with wood, since the process requires accuracy and precision. Trimming allows you to give the log house an aesthetic appearance.
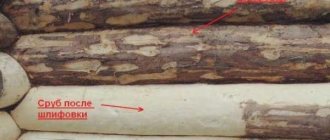
At the second stage, the end cuts are polished. Grinding is necessary to prepare the surface for impregnation with a protective composition. During the grinding process, irregularities are removed; if the log house was assembled some time ago, then various contaminants and mold stains are also removed.
It is important to strip down to a layer of clean, undamaged wood.
Rough grinding is performed with a belt-type grinder; the grain of the abrasive surface should be coarse (P40-60). Then grinding is performed with a finer abrasive. Instead of a grinder, you can use a grinder equipped with a sanding flap attachment.
Grinding is carried out only in dry weather, and only dried logs can be treated with abrasive. When a sander acts on a wet surface, small scuffs (lint) are formed on it, that is, it is impossible to do the job efficiently and achieve a smooth surface.
The third stage is impregnation. This term refers to the application of a wood preservative to the prepared ends of the frame. Regardless of the choice of product designed to protect the tree from rotting, damage by pests and uneven drying, the composition is applied using a wide paint brush.
You should act according to the instructions of the manufacturer of the special equipment. General recommendations are as follows: apply the composition generously, in two or three layers, with intermediate drying for several hours
You should work carefully, completely covering each end with the product and paying special attention to the edges.
It is recommended to carry out work in dry weather. Before processing the ends of the frame, make sure that the wood is not raw. In this case, the protective composition will adhere better and be absorbed better (if it has impregnating properties), while the consumption of the product will be less.
Repairing cracks
If there are deep damage and fiber breaks in the log, experts recommend sealing the cracks in a timely manner to prevent complete destruction of the wood.
Sealing cracks in logs is done in several ways:
- Rubbing with sandpaper;
- Rubbing with glue and sawdust;
- Stuffing with wood chips;
- Sealing with putty mixtures;
- Sealing with sealants;
- Gypsum sealing;
- Caulk with moss, tow or jute.
Rubbing with sandpaper
Small cracks and damage that have just begun to appear on the surface of the log must be eliminated first.
This is done by hand using sandpaper, the grit of which is selected based on the type of wood.
For soft wood, fine grain is suitable, for hard types - large grain. The dust that is formed when sanding the surface can act as a primer base. Antiseptic compounds or varnishes are applied to the treated material.
Rubbing with glue and sawdust
You can seal cracks in logs with a simple putty made from PVA glue or carpenter's adhesive mixture with the addition of sawdust.
The components are mixed in a ratio of 5:1 (5 parts glue - 1 part sawdust) to obtain a thick mass. The resulting putty is applied deep into the cracks using a spatula, reliably filling all existing voids.
After complete drying, the remaining putty is carefully removed with a knife. If necessary, re-mashing is carried out.
Hammering with wood chips
Deep and wide cracks in logs can be hidden using ordinary wood chips sharpened with wedges. In this case, the length of the chip must correspond to the size of the existing crack. To ensure reliable sealing, the chips can be coated with adhesive and driven in with a hammer. Next, the chips are treated with a wood putty mixture.
Sealing with putty mixtures
Cracks in timber up to 3 mm in size can be repaired using modern acrylic wood putties. They quickly eliminate minor defects and do not fall out when drying.
In addition, such mixtures are highly waterproof, resistant to low temperatures, durable and practical.
Safe putties are available in ready-made compounds designed for certain types of wood. The putty is applied using a narrow rubber spatula.
Sealing with sealants
How to repair cracks whose depth reaches 5-6 mm? In these cases, you can use wood sealant (mastic).
Experts recommend using acrylic or polyurethane-based sealant to effectively eliminate shallow defects without negative consequences for the building material.
Deep cracks should be treated as follows: a polyethylene rope is laid on the bottom, and sealant is poured on top. The complete absence of adhesion between the harness and the sealant ensures reliable elimination of cracks.
Plaster seal
Arbogypsum sealant has proven itself well for eliminating cracks in log logs. A reliable and safe material consisting of gypsum and auxiliary components (gypsum, sawdust, straw) ensures reliable filling of existing cracks in any type of lumber.
To prepare the seal, the dry mixture is diluted with water in a ratio of 2:6:1 (2 parts dry gypsum powder, 6 parts sawdust and 1 part water).
The finished sealant should be thick and flexible without lumps or air bubbles. After preparation, the gypsum seal is applied with a spatula into the gap, carefully compacted and left to dry. This method is one of the most effective and durable used in wooden construction to eliminate wood defects.
Caulk with moss, tow or jute
To seal cracks in a log house, you can use caulking technology. This method is used to eliminate deep and wide cracks.
Natural moss, tow and jute are used as insulating materials. For the caulking process, dry moss is prepared, soaked in warm water for 35 minutes.
Next, the squeezed moss is rolled out with a thin roller and compacted into the cracks with a mallet or spatula.
After the sealant has completely dried, its excess is carefully removed. Sealing cracks with jute and tow is done in a similar way.
The sealed log house remains visually attractive and reliably protected from the negative effects of various factors.
All modern options for eliminating cracks are used for internal and external surfaces of logs. They contribute to the rapid restoration of the performance characteristics of wood and reliable protection of the finished structure.
Wood putties
Wood putties are paste-like compounds used to seal cracks, fill depressions, and smooth surfaces. Puttying has become the most popular method of eliminating defects in wood due to its simplicity and accessibility. This technique has its undeniable advantages, but requires knowledge of certain nuances.
Due to their viscosity, putties fill cracks and depressions well. After drying, which occurs quite quickly, the material gains greater strength and can be subjected to standard woodworking procedures - sanding, sawing, planing.
All film-forming coatings - paints, varnishes, enamels - fit well onto the hardened putty. Thanks to various tinting options, it is easy to choose a putty to match the tone of the wood being restored - this is especially important when subsequently applying varnish, stain or wax.
Wood putties are divided into two groups:
- One-component are putties based on aqueous, alkyd or other binders, offered in finished form. Such materials are accessible and extremely practical: just mix the paste-like mixture and you can get to work. The relatively long life of the mixture allows you to slowly work on large areas: sealing cracks in a wooden floor or leveling other large surfaces.
- Two-component - compositions offered in the form of two separate components - putty and hardener. They are mixed immediately before starting work, strictly following the recommendations specified by the manufacturer. They are distinguished from one-component putties by higher strength, better elasticity, almost complete absence of shrinkage, and resistance to water and solvents.
The disadvantages are largely relative - high price and very rapid hardening. The lifetime of two-component putties is on average 4-6 minutes, this creates certain inconveniences when working with large areas, so they are considered to be a material for local repairs - covering up cracks in relatively small areas.
How to cover a crack with putty
All putties gain greater strength after drying, but their hardness is not compensated by sufficient elasticity. With strong fluctuations in the size of wood caused by its shrinkage and swelling, putty joints crack over time. Therefore, this method of sealing cracks is more effective for interior work, where changes in humidity and temperature are not so intense.
Methods for sealing cracks in logs
If preventive measures to combat cracking show insufficient effectiveness, it is time to seal the cracks with special means. Filling cracks in logs will not only “hide” them, but also minimize the threat of rotting of the log frame. We will explore means for filling cracks in wood and consider how to use them.
Driving wood chips. Traditionally, deep and fairly wide cracks in a log are eliminated by driving in wedge-shaped chips, the length of which is equal to the length of the crack. The chips must be made so that they cannot be easily inserted into the gap - only with the use of a hammer. In order to enhance fixation, the immersed part of the chips is coated with PVA dispersion. Having completed driving in, the area of the log with the crack closed in this way is covered with ready-made (factory) putty or one made independently from sawdust mixed with PVA.
Sealing with moss (caulking). In rural areas, the cracks formed in the log house are usually filled with moss.
This method of sealing cracks is doubly convenient - it does not reduce the natural appearance of the wood, and also reliably blocks cold bridges that appear in deep crevices.
Before starting caulking work, the moss must be soaked in water to soften it - place it in a container and fill it with clean water for 30 minutes. After waiting time, pour out the water and squeeze out the moss. Then the moss rolls are rolled up and pushed into the cracks using a wooden spatula. The moss is compacted with a hammer - tapping on the handle of the spatula and plunging new rollers into the gap, we wait until the moss filler begins to spring back.
It will take approximately 2-3 days for the moss placed in the cracks of the logs to completely dry out. As this natural sealant dries, it will expand and seal the crack tightly. Excess moss protruding from the crack after it has dried must be cut off.
PVA putty with sawdust filler. Polyvinyl acetate glue and small sawdust are mixed in a convenient container - the finished mixture should have the consistency of putty. You should fill the cracks in the timber (log) with putty without delay - homemade putty hardens quite quickly. The putty is pushed into the depth of the crevice with a spatula. After curing, the layer of putty in the crack will most likely fall off a little - the resulting groove must be covered with newly formulated putty or a layer of putty for wooden materials.
Acrylic wood putty. Suitable for filling only small wood cracks, whose depth and width are no more than 3 mm. If you try to use it on larger crevices, then, once hardened, it will certainly crack. Acrylic wood putties are sold in ready-to-use form (plastic), they are painted to match the colors of certain types of wood. This material dries quickly, holds securely in cracks and hides them, and is resistant to temperature changes and moisture.
Acrylic sealant. This material, sold in syringes, is not suitable for filling deep defects in wood - it is suitable for cracks no deeper than 5 mm. However, it can be used for deeper crevices - lay a polyethylene rope tightly inside the crack, and cover the top with sealant. Polyethylene does not adhere to acrylic materials - it will serve as an elastic tape that prevents stretching processes and, at the same time, holds the wood together.
Arbogypsum for closing cracks. This material, due to its durability and reliability, is well suited for sealing cracks in timber. Arbogypsum is a solution of gypsum powder in water, into which a filler is introduced, usually vegetable - most often sawdust, but tyrsa, chopped straw and crushed bark are also used.
Mixing arbogypsum is simple - you just need to combine dry gypsum with a filler (for example, fine sawdust) and add water. To obtain a material with higher plasticity, you should add two or three drops of any shampoo to the water. The proportions of the components of arbogypsum are as follows: for one part of gypsum - three parts of filler; two parts gypsum - one part water.
After thoroughly mixing the putty mixture, you should get a dense and fairly plastic mass without lumps
It is important to use ready-made (composed) arbogypsum immediately for its intended purpose - it dries quickly. It is placed into the cracks of the log with a spatula with a seal; after hardening, the putty will reliably close the crack
The use of arbogypsum in work to restore the surface integrity of a log frame is quite effective - the material firmly engages with the layers of wood.
Epoxy resin
Using epoxy resin is the most reliable method for repairing cracks. Two-component products consisting of resin and hardener are easily modified into adhesive filler. With their help, you can obtain a composition of the desired viscosity and color, which will fill cracks, chips, potholes well and provide strong bonding.
After curing, epoxy resin gains strength that exceeds the strength of wood, and due to its fluidity and good adhesion, it penetrates into all cavities and thus restores the integral structure of the wooden product and prevents the further spread of cracks. This method is often used when working with solid wood, where, due to high internal stresses, the problem of cracks is especially acute.
After complete hardening, the epoxy resin turns into an inert and safe plastic of high strength. Epoxy can be used to repair defects in food contact items, such as repairing kitchen countertops or repairing cracks in a cutting board or dining table.
Epoxy resin allows you to not only fill a crack and hide a cosmetic defect, but also completely stabilize the wood. Often this is the only opportunity to restore life to a workpiece that seems hopelessly damaged by through cracks, as in the example shown below.
Modern sealing materials
In addition to the environmentally friendly materials that nature supplies us with, there are modern synthetic materials offered by domestic and foreign industry. Of course, one can argue about the environment, but reliability is guaranteed by the manufacturer.
Silicone sealant
There are many special sealants based on polyurethane. It is not susceptible to temperature changes and is resistant to ultraviolet rays. Putty based on it is quite suitable for sealing the seams of house crowns.
You cannot use polyurethane sealants sold in bottles to seal joints - they are not designed for direct exposure to sunlight!
Log putty
Putting joints with silicone One of these materials is silicone sealant. Since wood tends to absorb moisture and evaporate it, this sealing method is questionable, because evaporation under the sealant layer will not occur, which will sooner or later lead to the formation of rot.
Modern thermal insulation materials are resilient and elastic, so they are used quite widely when solving the question: how to seal seams in a bathhouse.
Their peculiarity is that it is easy to work with such sealants, they dry quickly, and it is possible to apply several layers if necessary. And this is convenient and profitable.
In addition, modern sealing materials have high adhesiveness, which significantly increases thermal insulation properties, and are not afraid of drops and changes in air temperature and humid environment
But, perhaps, the most important thing is that they do not interfere with the ventilation of the room and are safe for health. Sealants not only seal the seams of the bathhouse, but also any splits and cracks that form in the wood over time
Among the newest materials for preserving heat in a bathhouse, special sealing tapes should be noted. They need to be distributed in the space between the beams. They hardly caking, which means that there is no need to use other sealing materials, which creates additional savings. In addition, such a sealant can change its shape when the logs begin to move during the natural shrinkage of the bath.
Preventive measures
Prevention of cracking of timber begins at the stage of cutting down the tree and continues throughout the life of the material:
- It is recommended to cut down a tree in winter, when it does not absorb moisture from the soil. During this period, the trunk is as dry as possible, the process of industrial drying will proceed faster, and the likelihood of wet material entering the construction site is minimized.
- During the production process, special cuts are created inside the timber, similar to small cracks. Their task is to relieve stress from the material when it is under the pressure of the weight of the entire structure.
- The finished structure is painted and protected from moisture, frost and steam. Precipitation and climatic phenomena will in no way bring destruction.
General description of measures for sealing seams in a wooden house
Sealing seams is part of comprehensive work on insulating wooden houses in order to eliminate the risk of “cold bridges” and destruction of materials due to the accumulation of internal moisture or debris. As a rule, they are carried out in combination with trimming and sealing areas adjacent to the foundation, roof, window and door openings. The essence of these works is to fill the joint space with elastic, highly adhesive sealants with low thermal conductivity.
The requirements for sealing materials are quite stringent; in addition to the listed properties, they must be as resistant to ultraviolet radiation and other atmospheric and biological influences as possible. At the same time, sealants must remain breathable and capable of removing accidentally accumulated condensate. For obvious reasons, only a few expensive brands of sealants meet these requirements, which is one of the few disadvantages of the technology.
Specialized sealants for wood do not have a negative impact on the natural processes of shrinkage and movement of a wooden frame. Moreover, sealing the seams with elastic and highly adhesive sealants eliminates the risk of new cracks and deformation of wooden walls.
Significant investments in materials pay off in any case. Seams protected by sealants are not susceptible to destructive moisture and biological influences (moisture does not accumulate inside, insects or fungal microorganisms do not multiply). A wide range of colors allows you to choose a sealant to match the wood and improve the appearance of the log house.
The technology is valued for its efficiency and reliability; if all requirements are met, high-quality sealants protect the seams of wooden houses for decades. In this regard, they compare favorably with natural, but short-lived caulking materials that require renewal or additional compaction every 3-5 years.
At what stage can you start caulking a bathhouse?
If the frame was laid on moss or tow, pieces of material of various lengths protrude between the crowns. In this case, you can begin the initial caulking: trim off the excess fibers, and hide the rest in the seams. You should be careful and take your time, adhering to the rules of caulking. If the log house was laid on tape insulation, then further operations are not necessary.
The first caulking is carried out about 6 months after the construction of the log house walls. During this period, almost all the moisture will leave the logs, new mother-in-law will be visible, and most of the crowns and corners will shrink. After this, you can begin installing doors and windows.
Further caulking is carried out after 12 months. During this time, the log house will be completely stable, so that all found defects can be eliminated. Based on the selected material and the quality of the work performed, you may need a new caulk in about 5 years. Sometimes, due to negligent construction work or if insulation was not laid between the crowns, caulking has to be repeated several more times, every year.
Causes of cracks
When cracks form in the walls of a log house, most owners of such households think about the reasons for their occurrence. In fact, they depend on many factors that affect the tree from its birth to the harvesting of the log.
The key root cause is the uneven shrinkage of logs from the end and sides, under the influence of which internal stresses are created in the fibers, leading to rupture. Especially massive cracking occurs during sudden temperature changes.
On the sunny side of the wood, the density decreases due to a rapid decrease in the level of moisture, and on the cold side it will remain high.
Main reasons:
- The place where the tree grows determines how much the tree has defects - curliness of the wood. Usually, any natural defects are later overgrown with new fibers and hidden by layers of the most ancient growth rings, but during the drying process of the felled tree they are revealed, appearing on its surface in the form of cracks.
- Uneven drying of logs.
The layers closest to the surface dry faster than the inner layers. A situation is created when the outside of the log is almost dry, but the core remains saturated with moisture. As a result, stress occurs on the fibers. The surface layer is subject to a tensile force, and the internal layer is subject to a compressive force. They literally explode the wood from the inside. The process depends on the drying speed; the higher it is, the more cracks there are, and their sizes are wider and deeper. - Shrinkage processes. As a result of such influences, wooden parts twist, changing their shape and linear characteristics.
- Sudden changes in temperature and humidity levels in a finished house as a result of operation. Trying to properly “heat” a home in the first winter season will most likely result in the formation of through cracks due to the difference in temperature and humidity of the walls of the log house.
- Time of year for logging. If it was a warm period, cracking will be high; the best period for harvesting wood for felling is winter.
Is it possible to minimize the risk of splits?
The only condition that guarantees minimal cracking is prolonged drying of the logs under natural conditions.
Long-term drying of wood:
- Increases the strength of the log.
- Significantly extends its service life.
When drying logs naturally, it is important to ensure their uniform drying, that is, the same drying rate for both the outer and inner layers of the log house.
This can be achieved by creating certain conditions for complete drying. This is a cool and completely dry place in which the logs are allowed to dry out for at least 2 years.
From the appearance of the cracks we can deduce how long the wood has been drying:
- 1.5-2 years: crack size up to 2-2.5 mm.
- 1-1.5 years: the splits are already expanding to a width of 7-12 mm.
- Several months: the cracks become larger and occupy a distance of 12-25 mm.
To minimize the risk of faults, a compensation (unloading) cut is sometimes formed on raw logs. This measure relieves the growing stress on the wood fibers and ensures they dry out faster.
The cut is carried out according to special standards:
- it is performed along the log;
- has the appearance of a neat, even groove;
- has a thickness of 7-10 mm;
- it is made with a depth of no more than 1/4 of the diameter of the log itself.
When cutting, to protect the tree from moisture, when collecting, the timber is laid with the cut facing up so that the cut is covered by the log lying on top.
Why are cracks dangerous?
Water easily penetrates into the cracks formed in the logs and moisture accumulates. Which inevitably provokes internal rotting of the tree. And this is dangerous:
- gradual destruction of the structure;
- significant deterioration in thermal insulation qualities;
It was noted that the largest number of cracks appears in the first year of construction and subsidence of logs.
The explanation for cracking is simple: the outside of the wood material dries out much faster than the inside. And when solid wood remains dry on the outside and damp on the inside, this situation automatically “stretches” the outer layers of wood, while the inner ones shrink. The result is the rupture of wood fibers and the formation of cracks on their surface. Moreover, the faster the tree shrinks, the more cracks appear on it.
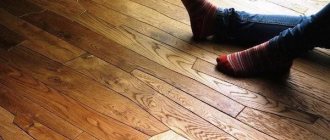
How to fix sagging boards
Deflection of a plank floor appears in two cases:
- the logs are installed at the wrong pitch;
- The material used for finishing is too thin.
Professionals advise, depending on the reason, to install a few more beams or lay a material of a more suitable thickness.
There is another attractive method for eliminating deflection: connecting adjacent boards with dowels.
The operating procedure is as follows:
- Drill a hole at an angle through adjacent boards.
- Insert wooden rods, pre-impregnated with PVA, into the hole filled with adhesive.
- After drying, cut off the protruding elements and sand the surface.
PHOTO: chudopol.ru Wobbly boards must first be fastened
PHOTO: chudopol.ru This is what a plank floor looks like after renovation
How to properly make imitation wood from putty as a way to decorate the surface
To imitate the textured surface of wood, you will need a palette knife, a roller with a wood cut imprint, a textured roller, rubber spatulas, and stencils. For interior finishing, gypsum, acrylic and silicone putties are used. The texture can be created before putting putty on a wooden door, flooring, etc.
The work is carried out in stages:
- A section of the wall is covered with the compound using a metal trowel.
- The mass is leveled to a uniform layer 3-6 mm thick.
- Using a stiff brush, brush or rubber roller, grooves of the wood texture are formed.
- Depending on the type of tree, the furrows can be horizontal or vertical.
- The dried surface is rubbed with a spatula and the surface is dried for 30-40 minutes.
- The surface is then treated with clear varnish or painted.
- Finally, the surfaces are rubbed with a spatula.
Characteristics of specific brands of putty for wooden surfaces, rating of the best of them
Putty mixtures are produced by Russian and foreign companies.
The list of popular brands includes the following:
- "Tikkurila";
- "Eurotex";
- "Master's Choice";
- "Bolars";
- "Lakkakitti";
- Benlinka;
- "Rainbow" 0023;
- EP-0010, etc.
Manufacturers produce materials that differ in texture, purpose, cost, and composition.
"Tikkurila"
Tikkurila brand putty is diluted with water before use. The coating is applied in a layer of up to 2 mm to prevent cracks. The manufacturer produces putties with imitation of natural wood (pine, oak, birch, beech, mahogany).
The line includes a universal white blend. After applying the putty layer, additional painting of the surfaces will not be required. However, when restoring defects and irregularities, varnish, stain or dyes can be applied over the putty.
Consumption is carried out at the rate of 1 liter per area of 1 m2 when applied in a layer of 1 mm. The mass is applied with a trowel, cracks and cracks are sealed with a spatula. The treated bases dry in 4-6 hours. Then the surfaces are sanded.
The material is used to correct unevenness on wooden furniture, doors, floor coverings, etc. It is recommended to fill deep uneven areas in 2-3 layers. Products are stored in a cool room, the air should be dry.
Belinka
The Belinka brand produces putties for finishing wood, correcting joints, defects, and irregularities. The putty contains acrylic dispersion and fillers. The material is plastic, easy to apply, effectively corrects unevenness, cracks, chips, and dries quickly. The putties have good adhesion and are therefore suitable for processing different types of wood. The mixture does not have a strong odor, is environmentally friendly and is suitable for finishing interior spaces (bedrooms, children's rooms), wooden furniture, etc. The material can also be used for facade finishing.
Mixtures allow you to imitate the shade of natural wood (pine, light and dark oak, beech, mahogany). After drying, the white putty can be tinted to a suitable tone using paints and varnishes. The coating is applied in 1-2 layers. Consumption is about 1 kg per 1 m. The multilayer coating dries in 4-5 hours. Work is carried out at a temperature not lower than +10 °C. The shelf life of the material is 24 months. During storage, freezing is not allowed; the optimal temperature to maintain the technical characteristics of the composition is within +5…+30 °C.
Eurotex
Eurotex putty is used to correct unevenness and prepare wooden bases for painting and varnishing. After drying, water-dispersed dyes and varnishes can be applied to the treated surfaces. The composition is suitable for finishing facades. The advantage of the putty is its easy application, quick hardening, and easy sanding after drying. The coating is matte, uniform in composition.
"Rainbow" 0023
Putty brand "Rainbow" 0023 is characterized by high elasticity, low shrinkage, and after hardening it is resistant to deformation. The material is used to correct seams on wooden surfaces. The composition has good adhesion and durability. A 1 mm thick coating dries in 4 hours at a temperature of about +20 ºС. The material is made from environmentally friendly components, is resistant to high humidity and ultraviolet rays, and can be used for interior and facade decoration.
EP 0010
Epoxy putty EP-0010 is used for correcting deep cracks, chips, and priming substrates for painting. The composition is resistant to high humidity, has good adhesion to wooden bases, and therefore can be used for facade finishing. The putty is used for finishing interior spaces with high air humidity (kitchens, bathrooms). The mass is applied with a spatula or by spraying. A hardener is added to the composition to increase the durability of the finish.
"Master's Choice"
Putty of the “Master's Choice” brand has good adhesion, therefore it is used for processing different types of wood. The material is elastic, easy to apply, and exhibits slight shrinkage after drying. The coatings are easy to sand. The composition is universal in use and is suitable for finishing facades, interior spaces, and preparing substrates before painting.
The composition is offered ready-made in large volume packaging. The product can be used to level bases (ceilings, walls) before decorative treatment. The putty is environmentally friendly, safe to use, and comes in a wide range of shades.
"Laccakatty"
Lakkakitti putty is distinguished by its plasticity and high strength after hardening. The composition is applied to the walls with a spatula. The coating is frost-resistant, therefore it is used for facade finishing. Non-shrink characteristics reduce the possibility of cracking on surfaces. The composition is moisture-resistant and resistant to climatic precipitation. No toxic components are used in the production of the product, ensuring safe operation.