Not everyone pays due attention to lighting fixtures when arranging a bathhouse. However, a do-it-yourself lamp for a bathhouse is not only a beautiful and original piece of furniture, but also protects against burns, as well as diffuses light, which plays a huge role, since this is a place where a person should relax both soul and body, and too strong Lighting interferes with this.
There are several options for creating bathhouse lamps with your own hands, photos of which can be found below. Some of them are extremely simple and will not take much time to make. It is especially worth noting wooden structures that will fit perfectly into the interior of any bathhouse.
There are a lot of requirements for lighting devices located in rooms with high humidity and sudden temperature changes. Devices can be dangerous, so when manufacturing such elements you need to take into account all the nuances.
A special requirement for a bath lampshade is reliable protection from a heated light bulb, the ability to properly diffuse the light and make it soft and pleasing to the eye.
Rules for installing lighting fixtures in a steam room
The basic rule when arranging a lighting system for a steam room is not to install devices near the stove. In other areas it is possible; their location will depend only on the owner’s imagination. The most optimal installation option is above the ceiling, but at the same time they should not interfere with the steaming of vacationers sitting on the top shelf.
Sometimes a waterproof lamp is installed in a corner due to infrequent use. This is also a good option. At the boundary of the ceiling surface with the wall, you can mount horizontal lighting devices, you can form a decorative corner screen, and attach an LED strip to a non-flammable base.
In a Russian bath you can install any devices made of heat-resistant material, the base of which is made of heat-resistant plastic, aluminum or stainless steel.
In a Finnish sauna, it is better to install devices with a ceramic base, as others will fail much faster.
Lamp grilles
If you want waterproof lamps for a bath not only to illuminate the room with high quality, but to be absolutely safe, ideally suited to the design of the room, and bring brightness to its interior, make grilles for them, for example, from wooden waste left over from building materials after finishing of saunas, baths. As a result, you will get a completely harmonious, integral picture.
If there is no waste left from finishing materials, and you want to add pleasant aromas to the steam room, then it is better to make gratings from cedar. larches. Pine can only be used if the skin of vacationers is prevented from coming into contact with the grate. The shape of the grille will depend on the placement of the lighting fixture.
Wooden lampshade for bath HARVIA lux
Waiting room
The conditions in the dressing room are not so critical, so the installation of any lighting equipment, in particular sockets and switches, is allowed. According to experts, it is in this room that all devices and electrical appliances should be concentrated as much as possible.
A chandelier is usually installed on the ceiling; it is also possible to use several wall lamps. Sometimes LEDs are installed under the ceiling and shelves. In general, the dressing room is a wide field of activity for designer imagination.
Accommodation options
As mentioned earlier, there are quite a large number of different lamps suitable for installation in baths and saunas. But each room has its own differences, and accordingly, the lighting for them is selected according to the appropriate parameters:
In the steam room
In order to install a lamp in a steam room, you must first carefully select it. The thing is that this, one might say, is the main room in the bathhouse; it is saturated with steam, moisture and hot air. All these factors influence the selection of a lamp; not every model meets these characteristics. In addition, too bright and contrasting lighting also does not speak in favor of certain types of lamps; for the holy of holies of the bath, soft light is needed to help you relax.
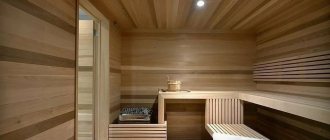
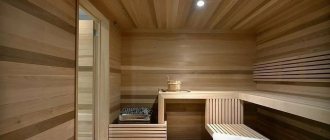
Since the steam room has its own special microclimate, the lamp can be installed in it only on the very top of the wall or at the joints - in the corners. This is due to the fact that the ceiling and walls are one of the least hot surfaces in the steam room, moreover, this location can be called convenient, the light streams from behind and does not strain the eyes of those who are relaxing in the bathhouse. You can install fiber optic lamps, then the lighting will definitely be soft and diffused, this will help you relax.
You can also choose LED lamps, they are heat-resistant, have several lighting modes and rich colors, you can easily save energy with them, and LEDs have a long service life. But in any case, the lamps must be covered with a protective frame or a heat-resistant shade; also, to create an ambience and additional protection, you can cover the light with a beautifully designed wooden grille.
Such lamps are made of heat-resistant material, ceramics or porcelain; the body is additionally strengthened, making it airtight.
In the washing room
Unlike the steam room, in the washing room it is necessary, on the contrary, to have bright and powerful light, since this room is not intended for relaxation, it is necessary in order to wash after the steam room. It is for this purpose that the light in the sink is set to be contrasting and sharp, but it still should not hit the face of the person in the room.
But here you also need to be careful, this room has a source of moisture, you need to protect lamps and wires from accidental contact with water. The switch should be located outside the washing room to prevent water from entering there; for the same purpose, all lamps will have protective waterproof frames or shades.
In the dressing room
In the dressing room, the lighting can be set to almost anything, since the room does not have any special temperature changes or moisture concentration. The classic option would be a chandelier in the center of the room or several lamps that are mounted on the ceiling. The light from such lamps is bright, but does not hurt the eyes and generally creates a fairly comfortable atmosphere in the room.
It is also possible to stylistically design the dressing room in a certain manner, then the lamps can be placed on the wall and executed in accordance with the general concept of the interior.
In the rest room
In the rest room, just like in the dressing room, there is a certain humidity coefficient, so when installing lamps there, you need to be sure that they will have a protection class of at least 1. Lamps for such rooms are quite ordinary, from 75 to 100 Watts , you can also install regular lampshades or sconces.
Sources of light
Based on the type of light source, lamps are divided into several categories. Let's look at the main ones to understand their relevance in the steam room. Ignorance of these nuances can cause a dangerous situation.
Incandescent lamps
These light sources are classic Ilyich bulbs. They have an incandescent filament and produce a predominantly warm light. The advantage is the price, but they have more disadvantages. They convert the bulk of the electricity consumed into heat - a small part is used for light (no more than 5% of total consumption). At the same time, the lamps become so hot even without high temperature that touching them can cause a burn. They are uneconomical, add heat to the lampshade, and are dangerous for the steam room. These also include halogen lamps, whose properties are slightly better.
Luminescent
These models are nothing more than the usual energy-saving light bulbs, which are expensive and advertised as harmless. They are an 11-watt luminous gas-discharge tube that converts UV radiation into visible light using a phosphor and a discharge of mercury vapor. They are electroluminescent, cold cathode and hot start, and flicker and buzz during operation. Their service life is longer than incandescent lamps; compared to them, these varieties emit less carbon dioxide into the air and are not resistant to power surges. During operation, mercury vapor is released into the room.
LED
These light sources are rightfully recognized as harmless. Their price is not much different from fluorescent ones. At minimum power they shine quite brightly, in fact they are energy saving and do not contain mercury. The service life of such light sources is longer than any other analogues.
Their glow is directional, so it will not be possible to illuminate the entire space without shadow corners with one such lamp. However, if you use a perimeter strip light with two rows of diodes, you can achieve even lighting in the steam room. Due to its elasticity, the tape can be laid around the perimeter without the need for cutting. It is easy to mount, which allows for angular lighting options.
Regulatory requirements for wiring in bath rooms
Anyone can install light in a bathhouse and steam room with their own hands. In bath rooms, decorative coverings and objects are affected by:
- temperature;
- hot steam;
- moisture.
Items made from low-quality materials will quickly collapse without protection.
Lamps for steam rooms and washing rooms must have a degree of protection IP-54. Explanation:
- IP is an abbreviation indicating international protection mark;
- 5 - resistance to shock and mechanical stress;
- 4 - degree of protection of the device from moisture.
When choosing a lamp for a bath, you need to consider a number of factors:
- The brightness of the lighting device should be moderate. Bright light will not allow you to relax, dim light will begin to induce sleep.
- The lampshade must be sealed, highly durable - withstand mechanical stress and temperature changes.
- The lamp body should not allow moisture or steam to pass inside. All lampshades must be tightly closed. If an incandescent light bulb is installed inside, it will burst if it gets wet.
- The housing and internal parts of lighting fixtures must be resistant to strong heat.
It is prohibited to use incandescent lamps in the steam room and washing room. If moisture drops in contact, the light bulb will explode.
Correct lighting for the washing area
In a small wash room, 1 lamp will be enough. The lampshade must be sealed to prevent water splashing on the lamp and/or socket.
Wiring for lighting fixtures in the bathhouse must be insulated especially carefully. This will prevent accidental contact of moisture and electricity.
Lighting in the washing room should also be moisture-proof
A large wash room requires the installation of several lamps. Therefore, when choosing their location, you need to take into account the location of the bathtub, sink, bidet, shower stall. It is better to do preliminary zoning of the premises.
As a rule, the washing room is divided into 3 zones:
- in close proximity to a source of moisture;
- at a distance of 0.6 m;
- in a relatively dry space.
Moisture levels are highest near a water source. Therefore, in this area you can install 12 volt bath lamps and lamps. IP indicator for protection against moisture is at least 45 units.
A zone located approximately 60 cm from a direct source of moisture is considered remote from moisture. Here you can use lamps and lamps with an average level of protection.
LED lighting can even be used in a swimming pool
In a dry area, located away from faucets, shower heads, swimming pools, etc., you can use lighting fixtures and lamps with the lowest level of protection.
Video instructions for DIYers: DIY bath lamps
An interesting video that demonstrates the process of making a Chinese LED lamp yourself (by the way, a full article in which we talk about LEDs can be found at this link):
And this video is literally a guide to the correct installation of lighting fixtures in a steam room:
https://youtube.com/watch?v=DkOJMdu336E
The author of this video will share with you ideas, but not master classes for their implementation:
For those interested in learning more about lampshades, including how to make them with your own hands, read our article.
For more information, see the sections about lamps, lighting and wiring in the bathhouse in general.
+++
Sequence of preparatory work
To assemble the lampshade, you first need to prepare the frame and the elements attached to it in the form of a lattice. The master chooses the shape of the frame independently according to a previously developed sketch.
If it is cylindrical, then its upper and lower parts will be the same - rounded with a similar radius. They can even be cut one piece at a time. The same goes for the rectangular or square version, but in this case the top and bottom bases will have a different shape.
On a note! If you need to form a base for a corner model, its shape will be a triangle, rhombus or drop.
Cutting parts according to a template
The frame of the housing must have a volume sufficient to accommodate the prepared lighting fixture with a lamp screwed into its socket - classic or LED.
Next, for the wall-mounted version, you need to prepare the back wall. The distance between the frame blanks will be its width for horizontal modification and its height for vertical modification. It should be wrapped in foil to provide additional reflection to enhance the rays.
Blue lighting will help you relax and enjoy your stay in the sauna.
Advice! Instead of foil, you can use construction tape with similar reflective properties.
At the next stage, all three parts should be fastened together with hardware, since this connection will be invisible to the user.
Practical advice on choosing lighting fixtures for a steam room
The steam room in the bathhouse helps us not only warm up and steam the body, but also relax and unwind. Therefore, the lighting for the steam room should be appropriate: dim, weak, tuning in to a wave of relaxation.
Taking into account the temperature characteristics of a given room, lamps must be extremely heat-resistant and completely sealed, made of special materials. The optimal place to place lamps will be corners and parts of walls under the ceiling.
Among the variety of lamps, the best options for a steam room would be fiber optics. They not only provide the desired lighting, but also have a higher level of safety compared to conventional incandescent lamps.
It is better to place a sauna with yellow light in the steam room
Never use fluorescent lamps in a steam room, as when heated they can explode and spread mercury vapor throughout the room. Too powerful incandescent lamps are also not suitable - they will heat up the protective grilles for the lamps. A power of 75 W will be quite enough.
As for lampshades, the most popular among builders are anti-fog lamps in matte or pastel colors. Additional lighting in the shelf area and at floor level will look very stylish, and it will only enhance the relaxing atmosphere of the room.
We told you about how to properly wire a steam room. As you can see, everything is not so complicated, the main thing is to follow safety rules and choose high-quality light elements from suitable materials. Good luck!
Finishing and arrangement
For finishing you should choose a suitable tree. We are talking about oak, cedar, larch or linden. The sheathing should not be made of resinous species such as pine. Before installation inside, it is better to treat the wood with oily substances. Such impregnation will reduce the hygroscopicity of the material. Decorating with clapboard starts from the ceiling. It is mounted on the sheathing using a tongue and groove mechanism or secured using clamps.
When the lining is mounted on the ceiling, work begins with the walls. The covering will go in parallel with the installation of shelves and will occur in a certain sequence. First, use a level to mark the surface of the walls. At the same time, markings are being made on how the sunbeds with all the elements, including backrests, will be placed.
After this, the side and front parts of the shelves are covered. After this, the remaining walls are sheathed. Now all that remains is to install the skirting boards, both ceiling and floor. Sheathing parts are usually used only in a special case, if at the joints they are fitted one under the other very sloppily. It should be said that this point must be approached carefully, because moisture may begin to collect in the gaps, which may cause the development of fungus and mold in these places.
Already at the end of the work, doors are installed, as well as various lamps and fixtures. The wires must be carefully insulated so that moisture does not get on them and a short circuit does not occur with subsequent fire.
It should be noted that the most beautiful bathhouses come from those who want to introduce some of their own ideas into it and do something non-standard. And a steam room is a room where any material can become a work of art, be it wood, stone or metal. The main thing is that your imagination and finances allow you to realize your ideas.
You can make a steam room with your own hands, although this requires a considerable amount of knowledge. At the same time, if you do everything really correctly, then you can be sure that it will turn out just as good as if you ordered the development of the project and its subsequent implementation from professional builders. In addition, the technology for independently creating such a building has already been tested by more than one person and has proven its high quality and viability. In general, if you want to build a steam room with your own hands, then thanks to the knowledge described above, you can implement such an idea without any problems.
You can find out more about how to make a sauna stove with your own hands.
Rules for conducting electricity
a project is drawn up, a diagram is drawn, on which a drawing is drawn to scale, where everything is indicated:
- lamps;
- switches;
- sockets;
- distribution boxes;
- connecting cables and other elements.
What voltage should I choose for the lights in the steam room?
If a household network (220 V) is taken as a basis, then the following conditions must be adhered to:
- electrical wiring lines must be protected by differential circuit breakers or RCDs;
- organization of TN-C-S bathhouse power supply system;
- A potential equalization system must be implemented in the steam room.
Important: Using lamps designed for high voltage may even cause an explosion at high temperatures and humidity.
Lamp selection
When choosing a lamp, you must adhere to the following recommendations:
- Lamps for baths and saunas should only be stationary; portable ones are prohibited.
- The lamp body must have a high resistance to elevated temperatures and humidity: incandescent lamps and LED lamps (how to make an LED lamp or chandelier yourself?).
- Steam, moisture or water should not get inside the lamp. The lamp must be absolutely dry, since the slightest amount of moisture increases the risk of electric shock, causing the lamp and lampshade to explode as a result.
- It is best to use lamps designed for voltages below 220 V.
- The maximum permissible lamp power should not exceed 75 W, since powerful daytime light sources fail due to exposure to high temperatures.
- Since the temperatures are highest near the ceiling, the lamps are mounted much lower, but so that they well illuminate the entire area of the sauna or steam room.
terms of Use
It is very difficult to select good lamps due to the special conditions of their operation:
- frequent temperature changes;
- high humidity;
- heat.
In this regard, not any lighting fixtures are suitable, but only waterproof lamps with high tightness. At the same time, any owner of a bathhouse or sauna wants them to be aesthetically attractive at the same time and decorate the premises, and not just illuminate them.
How to make a fiber optic light
Each owner independently chooses the type of lighting for his bathhouse, but experts recommend choosing fiber optic lighting.
Lamps of this type can be used even without a wooden lampshade, as they do not dazzle the eyes and can also withstand temperatures up to 200 degrees.
Fiber optic lighting has proven itself to be the safest and most durable. It is very easy to install and also decorate for an exclusive interior.
Making a lamp for a bathhouse with your own hands is simple and inexpensive; for this you need to purchase:
- Wood;
- Glass with a minimum thickness of 4 mm;
- Plywood;
- Heat-resistant film;
- Aluminum tape;
- Glue.
First of all, templates of the main parts are cut out of plywood, and vertical strips, the edges of which are rounded, are cut out of wood. Next, the main parts are fastened to the strips and coated with glue. The fastening points are tightened with self-tapping screws.
The glass is cut out and wrapped with heat-resistant film.
After this, the planks are sawn, coated with glue and tightened with self-tapping screws.
You need to mark points on a couple of strips, then drill holes for the glass. Secure the glass also using strips.
Drill holes with a diameter of 5 mm in the getinax sheet.
On the back side of the panel you need to glue the LEDs using superglue. Aluminum tape serves as a reflector.
Next, a power supply is installed outside the steam room, from which a cable is routed to the lamp through the wall.
The lamp is attached to the walls of the bathhouse using self-tapping screws.
Manufacturing
Before making a homemade lamp, you need to prepare materials, tools, and draw the future device on paper. After this, you can begin assembly.
Materials and tools
For assembly you will need a number of tools and consumables:
Create a drawing
After preparing the tools, you can begin creating the drawing. To do this, on one sheet you need to draw the finished structure in disassembled form, and on the other - in assembly. It is important to indicate in the drawing the dimensions and joints of individual elements.
Scattering screen
The scattering screen can be made from different materials:
Factory device with homemade wooden lampshade
If the lighting device has an unsightly appearance, you can fix it with a homemade wooden lampshade. When manufacturing, you need to take into account some nuances:
If individual elements will be attached with self-tapping screws rather than with dowels or heat-resistant glue, they must be positioned so that
the caps were on the inside. The metal gets very hot during bath procedures, and this option of fastening the screws will protect against unwanted burns.
LED bulbs
When working with LED lamps you need:
Materials
Not all materials are suitable for the production of lampshades and lamp shades due to the specific external influences to which the products are exposed. More suitable are:
- glass. For wall-mounted lampshades, thick milky or matte glass is used. Provided the product is completely sealed, you can use an incandescent lamp. Glass lamps differ in the color and shape of the shades; the top can be covered with a metal grill. There are also exclusive options, for example, a lamp made in the shape of a kerosene lamp. The combination of glass and dark antique metal looks very impressive. Since the product is quite voluminous, it is recommended to use it in spacious baths;
- Heat-resistant types of plastic and plastics, aluminum and stainless steel are also used in the production of lighting fixtures for bathhouses. The main requirement is heat resistance and environmental friendliness;
Staying in such a microclimate is very useful for bronchial pathology, skin and nervous system diseases.
The ionization intensity remains at the same level even after a long period of time. When heated, the molecules of the substance release vapors containing many useful microelements. This property explains the healing effect, which is similar in healing power to the healing effect of salt caves, which have been so popular lately.
Himalayan salt slabs and lampshades differ from each other in shades. You can choose more saturated colors with slightly less transparency, or you can choose products in soft pink shades that transmit light well and simulate mesmerizing lighting, thanks to the beautiful pattern of the material structure.
Lampshades and screens made from Himalayan salt do not require special care. It is enough to carry out wet processing, removing dust and dirt. Salt lamps can be used in any room of a bathhouse or sauna, but from the point of view of health improvement, they will be most useful in a steam room. The products are produced in a wide price range, the cost depends on the size of the model and the complexity of the design, which allows you to purchase a budget version of the lamp.
Wood fits harmoniously into the bath interior, continuing the image and being the final touch of the design. Natural and environmentally friendly material is ideal for the manufacture of wooden screens and grilles. In the factory production of wooden lampshades, abasha, linden and cedar wood is used. These breeds perfectly tolerate the high humidity of a Russian bath and the dry heat of a Finnish sauna, without losing their beautiful appearance, without swelling or drying out.
The cheapest material is linden. It smells nice and withstands temperature changes well. Abash and cedar are expensive species with a beautiful wood structure, durable, moisture-resistant and durable. You can’t get burned on them, which is very convenient in steam rooms and washing rooms.
Lampshades that are made from several wood species with different structures look impressive. For independent production of gratings and screens, it is better to use bast, wicker and birch bark. These are inexpensive species, they cut and polish well, are moisture resistant and are not afraid of high temperatures. Coniferous wood, namely pine and spruce, should not be used in the production of lampshades due to high resin release in hot steam rooms. You can burn your hands on such a product.
Wooden lampshades are made in the form of a lattice or screen with one or more diffuse holes through which the light flux passes. Lamps can be attached to the load-bearing surface in a corner or wall manner. Corner is suitable for small rooms, allowing you to save space and evenly illuminate the space.
The decorative grille is in perfect harmony with the wooden interior of all rooms of the bathhouse and can be made of slats or round rods fixed in the grooves of the frame. This type of lampshade looks great with decorative barrels, buckets and tubs, as well as with foot grates.
Varieties
Often, bathhouses are designed as unique structures, and the decorative design for them is also developed in a single copy, so there are a number of techniques in which such products are made. They differ not only in the method of creation, but also in the materials used. Most often, wood is used in all its forms - from finished boards to unprocessed logs.
Decorative lamp for sauna
Visiting a steam room has a beneficial effect on the human body
Bathhouse interior in rustic style
Lamp protection designs differ in shape and placement rules. So, they can be:
- spherical;
- rectangular;
- cylindrical;
- irregular geometric shape.
On a note! According to the method of orientation in space, they can be horizontal and vertical.
Moreover, the latter have one specific subtype - angular. They look especially original and allow you to illuminate a fairly large space even with compact sizes.
Combination of decorative stone and wood in the interior of a sauna
The lighting located in the benches looks very impressive
Beneath them lies an element of the lighting system, there may even be several of them, which increases the productivity of the facility several times.
How to make a lamp for a bathhouse with your own hands
Making a lighting system for a sauna steam room is a fairly creative process, so there are no strict schemes or restrictions by which the design, shape and general structure of the lamp is selected. But do not forget that the lighting system is planned for a room in which the air temperature and humidity can reach 80o and 90%, respectively. Therefore, before you start making a lamp for the steam room with your own hands, let’s clarify some design requirements:
- The best material for making the frame and lampshade is linden or aspen wood. Anything will do, you can use vines, profiled planks, trimmings of slats and lining, and even tree branches;
- You cannot make a bath lamp from plastic or paint wood with non-heat-resistant varnishes and paints;
- The light bulb socket should only be ceramic, no ebonite or heat-resistant plastic;
- It is best to provide a protective shade in the design of a bath lamp;
- The external lampshade covering the light source can be of any shape and size, but it must be attached to the wall of the steam room using screws and nails, or any other mechanical fastener, no glue or wooden pins.
Advice! If the design uses a regular incandescent lamp, then it is recommended to glue a ring made of heat-resistant silicone onto the upper edge of the socket, which will seal the gap between the glass bulb and the ceramic.
A primitive modification of the standard cartridge allows you to avoid the ingress of microdroplets of water during the process of washing and cleaning the steam room and the entire sauna room.
As a basis for the lighting system in the steam room, it is better to take the popular “Linder”, which is resistant to moisture and high temperature.
Required Tools
The more complex the design of the lampshade and the entire lamp, the more tools and devices will be required for its manufacture. A simple, but at the same time quite nice and convenient version of a wooden sconce for the wall of a steam room can be made using a simple set of tools:
- A set of drawing patterns, rulers, copiers, - any marking devices that help transfer the contours from the drawing to wooden boards and planks;
- Electric drill, hand or machine;
- Electric sharpener with roughing and polishing wheel;
- Hand hacksaw for wood with fine teeth;
- A set of sandpaper with different grain sizes;
- Hammer and wallpaper nails.
In some cases, it is necessary to make additional devices and fixing frames on which the body of the lampshade and the supporting frame can be assembled and knocked down. Therefore, when planning to make a lamp for a steam room with your own hands, you need to at least think through the stages of its assembly and, if possible, prepare in advance the necessary equipment, at least a clamp, tape and steel or copper wire.
The Harvia lamp is used for baths and steam rooms, the best option for basket-type lampshades
Materials for making lamps
It is clear that the main material from which lighting systems for baths are made has been and remains the wood of the species that are most resistant to moisture and high temperatures. With the possible exception of red cedar, sandalwood, and ash, the texture and grain pattern of other types of wood is not particularly expressive or beautiful. Even aspen or linden do not look very interesting.
The exception is the texture of larch, but using coniferous lining to make a bathhouse lamp with your own hands from wood is only possible for auxiliary rooms, for example, a dressing room or a rest room. It is better not to use larch in the steam room, or, before trying to make a body of the workpiece, you need to bleach and remove the resin with a mixture of alcohol and acetone, then with an aqueous solution of ammonia.
A universal lampshade option for any bath room
Advice! If someone likes the tart, rich smell of pine needles, then it is best to try to make a body from juniper branches.
Recently, the use of Tibetan or Altai salt has become extremely popular. Inserts made of salt plates and blocks are used as a scattering screen, and at the same time a device for disinfecting and improving the atmosphere in the bathhouse.
Manufacturing
Before making a homemade lamp, you need to prepare materials, tools, and draw the future device on paper. After this, you can begin assembly.
Materials and tools
For assembly you will need a number of tools and consumables:
To treat wood you need to use a special antiseptic.
Create a drawing
After preparing the tools, you can begin creating the drawing. To do this, on one sheet you need to draw the finished structure in disassembled form, and on the other - in assembly. It is important to indicate in the drawing the dimensions and joints of individual elements.
Scattering screen
The scattering screen can be made from different materials:
All that remains is to mount the scattering shield on the wall, on top of the llama or individual LEDs.
Factory device with homemade wooden lampshade
If the lighting device has an unsightly appearance, you can fix it with a homemade wooden lampshade. When manufacturing, you need to take into account some nuances:
If individual elements will be attached with self-tapping screws rather than with dowels or heat-resistant glue, they must be positioned so that the caps are on the inside. The metal gets very hot during bath procedures, and this option of fastening the screws will protect against unwanted burns.
LED bulbs
When working with LED lamps you need:
There is no need to use a large number of LED strips.
Under the clapboard
According to the rules of the PUE, if you still remember, it is strongly recommended to do open wiring in wooden buildings. However, lining is used in wooden and all other bathhouses - we are accustomed to a wooden interior.
Therefore, let's agree that electrical wiring in a bathhouse under the clapboard is only appropriate if it is not built from a log house or timber. Let's assume that we have a brick or block bathhouse.
In this case, hidden wiring is allowed, as is the use of plastic corrugation (just in case, let’s clarify that there are non-flammable types of corrugation).
There is also a metal one, the use of which is strictly not recommended in wet rooms according to the PUE. But here you have to think: on the one hand, there is increased humidity everywhere in the bathhouse (!) during procedures, on the other hand, it cannot be compared with the humidity in a washing room or steam room.
Therefore, if the metal sleeve is under the plaster, which is under the lining, and the room itself is not a washing room or a steam room, then why not? Especially if you have good ventilation and the gap between the wall and the lining is properly ventilated.
Typically, wiring in brick or block buildings is carried out under a layer of plaster. Moreover, its layer should be no less than 10 mm.
Sauna lampshade: design
Regardless of the chosen material and shape of the future lamp, there are two standard types of design that are designed to be placed either along the wall or in one of the corners.
Corner
This design is considered more compact, as it occupies space that is usually empty during soaring procedures. Therefore, there are fewer options for awkwardly touching or breaking, and the light spreads along two walls at the same time.
In the “top view” projection, it is either a triangle or a trapezoid. This allows it to be mounted on both walls , providing greater stability.
Wall-mounted
The corner location is not always optimal. Then you can use the option of placing the lampshade on the wall surface.
ADVICE! If possible, step back some distance from the ceiling; in a steam room, it is not advisable to mount lamps on the ceiling or directly below it, because the hottest air and steam collects near the ceiling.
Wall-mounted options can be quite varied in design, but when placing it, it is worth considering the convenience of steamers and the direction of light on the objects used in the steam room.
Why is it better to take heat-resistant ones for a Russian bath?
Let us list once again what makes a lamp heat-resistant:
- ceramic base;
- glass shade (borosilicate glass);
- RKGM or PRKS wire in silicone insulation.
However, glass and ceramics also do not react to water in any way and do not deteriorate from it. That is, the properties overlap, and you can take a heat-resistant lamp for the steam room without thinking too much. Unless you save on plastic if it really is cheaper, by the way. Well, on the wires, installing a wire with PVC insulation.
But we will give one argument that will make even this saving unnecessary. The fact is that there are not so many ardent traditionalists regarding the Russian bath; habit rules mainly, who is accustomed to what by family, social circle... And this can differ very significantly from the above figures of temperature and humidity.
In addition, many people opt for an iron stove, which, without lining and other manipulations that reduce its heat transfer, is simply unable to create the conditions of a Russian bathhouse.
Therefore, the real heat in the steam room, which the owner sincerely considers Russian, can be like in a sauna. And this moment of conviction cannot be changed in any way. Therefore, there is no need to be clever, sharpening the electrics to impossible conditions (for a steam room with an iron stove - absolutely impossible) conditions.
Device: features
The most important room in any bathhouse, be it a Russian steam room or a Finnish sauna, is the steam room. The quality of the procedures performed in the steam room will depend on it. Despite the fact that it is very important, it is not so difficult to build, because it consists of a small number of elements. The most important thing is that the arrangement of the room is comfortable and suitable for proper rest.
First of all, it is worth determining the number of shelves and racks, taking into account how many people plan to visit the bathhouse. They must be made of a material that, when exposed to high temperatures, does not fill the air with resins. The best option would be aspen, which has a low price and many positive characteristics.
It is also necessary to install a stove in the bathhouse, which is the most important element in the steam room. After all, it provides the desired temperature in the building, fully warming it up. Currently, any stove can be installed in the steam room. It can be made of brick, stone, metal, even electric models are used.
Don't forget about the washing machine. It can be combined with a steam room, and the veranda can be used as a dressing room. However, this option is not very convenient. After all, then you will have to suspend the process of using steam while taking water procedures. To prevent this from happening, you can install a shower stall.
Where to start
Electrical wiring for bathhouse lighting consists of several systems: an input panel with safety fittings, electrical cables and protective covers, wiring boxes (Berman boxes), switches, sockets and lighting fixtures. This is a classic “budget” set. For exclusive baths, this list can be significantly expanded due to the installation of electronic equipment for controlling decorative lighting, additional motion sensors, etc.
Connection diagram for electrical appliances
According to the accepted classification, baths are divided into four safety zones:
- restrictive zone 0. The zone concerns the internal shower tray and steam room shelves;
- restriction zone 1. Located ≥ 60 centimeters from various types of water sprinklers;
- restrictive zone 2. Limited by a horizontal plane at a distance of 2 m above the floor;
- restrictive zone 3. Horizontal and vertical restrictive conventional planes are located at a distance of 2.25 m.
Zone sizes
Depending on the zone in which you plan to install electrical appliances, the degree of their protection is selected. Electrical equipment must have a degree of protection from IPX7 (in zone 0) to IPX1 (in zone 3). The degree of protection of electrical devices is indicated on the housing or in the instructions for use.
IP protection rating for electrical appliances
The brand of cables must be selected taking into account the maximum peak power and operating temperature conditions.
Cable core thickness for copper wires
But this is not all the problems with unscrupulous companies. To make insulation, they use low-quality plastics, in most cases after recycling. There is no confidence in their reliability. The reliability of insulation largely depends on the ambient temperature; each brand of cable has its own permissible limits. In addition, the higher the temperature of the cable, the higher the resistance of the conductor. In turn, the higher the resistance of the wire, the more it heats up. And this results in a vicious circle, which can cause a cable burnout or fire.
Power copper cable VVG
Methods for laying wires in a bathhouse
Conclusion. The desire to save on cheap cables leads to very real losses and unjustified risks, do not mess with them. It is much more profitable to immediately purchase expensive cables from well-known foreign or domestic brands. Familiarize yourself with the tables characterizing the technical parameters of cables of domestic and foreign production.
Insulation resistance values
We will tell you how to check the insulation below. Often it is impossible to do the verification yourself; you will have to turn to specialized companies for help. At the same time, he can draw up a certificate of compliance of the wiring with existing government regulations. They will also check the quality of the connection of the electrical wiring contacts.
Table for selecting cables by cross-section
This table applies only to products from reputable manufacturers. For everyone else, increase the cable cross-section by at least 25%.
Recommended cables for indoor use
Do not use these cables outdoors; they are susceptible to harsh ultraviolet radiation and sudden temperature changes.
Recommended cables for outdoor use
These are often universal cables and are also suitable for indoor installation. But the rather high price makes their use indoors economically unprofitable; there are much cheaper options.
Domestic cable marking
This table will help you understand each letter and number indicated on the label. Now it will be much easier to choose brands exactly according to your needs. It should be noted that copper cables are not a cheap pleasure; with special knowledge you can save quite impressive amounts.
We have more or less figured out the theoretical section, we can move on to the practical steps of installing lighting in a bathhouse.
Main process
- If the frame is ready, a lattice is prepared for it. It is advisable to make its elements identical so that the finished item looks as attractive as possible. Each of them should be treated with sanding paper so as not to damage your hands with splinters. They can be tubular, plate-shaped, or have a special cross-sectional shape, such as semicircular or triangular.
On a note! The plate blanks can be additionally given shaped outlines, allowing more light to pass out. For the same purpose, some craftsmen subject them to perforation or milling.
All parts must be thoroughly cleaned with sandpaper.
The design can be additionally decorated with decorative carvings
- The prepared slats are secured along the contour with equal spacing using adhesive or hardware.
- This can be done at a right angle or at an angle in two opposite directions to form a diamond-shaped lattice.
- But before tightly fixing all the parts together, it is necessary to provide easy access to the cartridge installed inside, for which purpose holes of appropriate size are formed in one or two frame bases at once. At this point the manufacturing process can be considered complete.
