Author: Yuriy Fedorovich Kolesnikov, thermal power engineer
A stove made from car wheel disks can heat a room up to 15-16 square meters. m, heating a bathhouse or becoming an inexpensive, effective cooking device, which is what this article is actually about. Its main advantage is the availability of high-quality material - thick, resistant and durable steel. Boiler steel in sheets and profiles is expensive, and ordinary structural steel in a furnace structure quickly burns out.
The additional advantage of a disk oven can be seen through experience. Take two pieces of metal of approximately the same size and weight: one from simple steel, and the other cut from a wheel rim, and heat it up stronger, at least in the kitchen on gas. The first one will immediately give off the smell of hot iron, and the second one can be heated to orange (about 900 degrees), without feeling anything unpleasant in the air. A furnace made from wheel rims practically does not dry out the air and does not emit harmful fumes into the atmosphere, because the rims for the wheels are made of special steels that are resistant to corrosion. They are, of course, not standardized for heat resistance, but the reserve of resistance that is built into them is quite enough for a wood-coal stove.
Materials and equipment for work
To make a stove from wheel rims with your own hands, you will need the following set of tools:
- A grinder with metal circles or a gas cutter.
- Welding machine and electrodes.
- Protective equipment: glasses, leggings.
- 2 cuts of 50 cm each of metal pipe with a thickness of 5 mm and a diameter of 160 mm.
- Iron sheet 8 mm.
- Door hangers (can be replaced with large bolts and nuts)
- Fire brick.
- Cement-sand mortar for masonry and clay.
- 4-6 steel channels.
To build the body, you will need 4 disks from a truck, for example a KrAZ. These wheels will make a stove with a diameter of 0.5 m and a wall thickness of 1 cm - this is quite enough to heat a bathhouse or other utility room.
Used wheels from trucks
Note! Wheels from passenger cars will not fit - their radius is too small
Process of creation
Constructing a furnace device from disks with your own hands begins with converting the disks into the necessary structural parts.
Such metamorphoses begin with a disk, which will be the upper compartment of the furnace being manufactured
It is positioned so that the fastening part is at the top. Next, a circular hole is cut using a grinder along the mounting holes and the cut out contents are removed. The dimensions of the circle are determined in relation to the existing cauldron, which will make it possible to achieve the stability of this specific dish. The hole must certainly be perfectly round, and therefore all flaws are corrected immediately.
The disk for the lower compartment of the furnace device is installed with the mounting platform facing down. Then the top one is placed on it, and their mating edges are carefully welded in a circle.
The result should be a welded structural blank
Let's move on to the combustion chamber system. To create it, a rectangular fragment is cut out at the base. Its approximate dimensions in centimeters are ~ 20x12 (for rims from passenger cars). When marking the location of the combustion chamber, it is necessary to make an indent of ~ 2 cm from the lower edge of the disk. Such a trick is guaranteed to provide not only high structural rigidity, but also facilitates the operation of the firebox.
The disk fragment cut out for the combustion chamber is preserved. In the future, it will serve as an excellent firebox door.
After completing the operation of forming the combustion chamber, you can choose two options for the stove under the cauldron from disks. One of them is extremely simple, but the second will require some additional steps.
How to use it correctly?
We install our structure in a tray. Cooking on the stove right away is not recommended. The discs are usually painted and retain oil and brake fluid. Therefore, to prevent the pilaf from smelling like burnt chemicals, the oven is first calcined. To do this, through the top, the firebox is completely filled with firewood. I use lighter fluid, light the flame and let the wood burn completely.
Now, after letting the stove cool, pour out the ash and remaining wood. Using sandpaper and a metal brush, we clean the walls of the oven, removing any remaining paint and carbon deposits. Having completed these works, you can start preparing pilaf and other delicious dishes with the smell of burnt wood.
Now the firewood is put into the firebox through the door. After laying down some tree bark and wood chips, light the flame. Oxygen enters from below through holes in the disk, providing the flame with air supply, and from above, exhaust gases and smoke are discharged into the chimney. This design creates sufficient draft and good combustion conditions.
Cooking process in a homemade cauldron
When preparing dishes, it is important not to add a lot of firewood, maintaining a constant heating temperature in the stove. To do this, do not try to lay a large amount of firewood at once.
High flames will burn food and upset the cook. Everything will come with experience, don’t be afraid to experiment, but it’s better to spend a little more time gradually adding firewood to the firebox than to end up with burnt meat or pilaf.
After cooking, do not immediately begin maintenance and cleaning. It is necessary to let the metal cool, and only then begin to clean out the ash and unburned remains of firewood, pouring them into the tray through the holes in the lower disk. To remove large cinders, you will need to turn the stove over and shake out the waste into a tray. The ash is used to feed garden plants and flowers.
For ease of movement around the site, the stove can be installed on wheels. It all depends on the imagination and skills of the master. This design can be used for frying meat in a frying pan and preparing first courses. But the masterpiece was and remains the oriental crumbly pilaf, which will be prepared for you by a stove for a cauldron made from disks, made by yourself.
Some recommendations for using a disk oven
During operation, some difficulties may arise that can be completely avoided if you follow some simple rules:
The main thing is to reliably weld all the joints of the future stove. During operation, smoke may enter the steam room through unsealed cracks.
This is not very pleasant, so pay special attention to welding work. Of course, with prolonged use due to high temperatures, cracks may occur, but they can be easily eliminated with clay and well-dried sand.
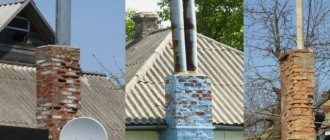
Sand can help find new cracks. Before you start using the stove, it needs to be treated with paint. The paint must be resistant to high temperatures. You need to pay special attention to the upper part of the structure. The evaporation of the liquid occurs precisely in it. Sometimes metal can corrode and, as a result, lose its properties. A stainless steel sheet must be installed on the chimney pipe. High temperature water has a negative effect on structures. A pre-prepared clamp may be suitable for fastening. You can buy it in a store or make it yourself. Observe fire safety. If the floor in the bathhouse is wooden, then there must be a fire-resistant structure. In front of the room where the firebox is located, you need to install a piece of iron 20 by 30 centimeters. This will be a fireproof shield. Insulate the entire area below. Fill the distance between the insulation and the stove with sand and stones. It is recommended to fill the gaps between the stove and the insulation with dry sand and fill the top with stones. These natural materials will absorb the high temperature that the stove gives us. In addition, they perfectly retain the resulting heat and, thanks to this, can allow the stove to maintain the temperature longer even after the fire has died out. And thirdly, this is an excellent decor for your bathhouse.
In conclusion, I would like to say that building a sauna stove yourself from old disks is not so difficult. You just need to follow the recommendations and carry out each stage of work conscientiously.
Fire safety rules when installing homemade stoves
An oven made from car wheels heats primarily with infrared radiation. To convert this flow into warm air, the stove needs to be shielded: surrounded by a casing of steel sheets installed at a distance of 7-10 cm from the heater and with the same gap from the floor.
Safety rules for operating metal furnaces:
- A reinforced concrete slab or steel sheet must be laid on the floor so that the fire-resistant structure extends beyond the contours of the furnace by at least 60 cm in each direction - this will protect against fire if coals accidentally fall out of the firebox.
- The metal stove and chimney must not come into contact with flammable materials. Use insulating pads if necessary.
- Before lighting, always check for draft in the channels. If it is not there, you need to warm up the chimney with a small amount of burnt wood or clean the passages and ash pan.
- Do not use liquid lighters - they may cause fire to escape from the firebox opening.
Shielding a metal stove
Tip! If possible, install the stove in the bathhouse so that the firebox faces the dressing room. This arrangement has many advantages: it is more convenient to heat, in windy weather the smoke will not get into the steam room and the dressing room will get some of the heat.
Why are waste oil furnaces popular?
The main reason for people's love for homemade stoves is the low (or zero) cost of the unit itself and the fuel for it. Some home-grown craftsmen make such heating devices as an experiment and at the same time a useful device.
With the advent of a homemade waste oil stove, the issue of “attaching” recyclable materials no longer exists.
For especially advanced craftsmen, the production of garage furnaces for working out has become another business option. They build custom models and sell them to interested but less skilled garage owners.
How does the unit operate during testing? The process consists of splitting heavy fuel with impurities, which has a rather complex composition. In another way, the process in which there is a lack of oxygen and the combustion of not the fuel itself, but its vapor, is called pyrolysis. The operating principle of pyrolysis equipment is described in our recommended article.
To start the process, it is necessary to evaporate the fuel, then heat the resulting vapor to a temperature of about +300-400 ºС, after which combustion will occur spontaneously. All you have to do is wait for the fuel to burn completely.
There are 2 schemes that are used when making stoves independently:
- filling the tank with oil and setting it on fire, as a result of which the vapors evaporate and begin to burn;
- the use of a burner in which three zones (pyrolysis, ignition and afterburning) are combined and make the combustion process more efficient, controllable and safe.
The second scheme is more complex, requiring serious modification of the fuel and manufacturing precision, so we will consider simpler models from the first group.
Diagram of the design of a simple model of a furnace in production. The air necessary to support the combustion process enters through the neck with a damper. The same damper can partially regulate the combustion force
Advantages of using an oil-based garage stove:
- ease of design and maintenance of the device;
- fuel economy - about 1.5-2 liters per hour;
- absence of soot and soot;
- safety of storage of mining reserves;
- it is possible to connect an air or water heating circuit;
The compactness of the unit is also extremely important for small spaces.
There are also disadvantages:
- the need for regular cleaning of the stove and chimney;
- a mandatory element is a vertical chimney with a height of at least 4 m;
- for furnaces with nozzles, only purified oil should be used (the approximate cost of a filtered product is 8-12 rubles/l);
- One of the conditions for storing mining is above-zero temperature, that is, you need either a room heated in winter or a tank buried in the ground.
Before manufacturing/purchasing a finished furnace or boiler for testing, it is necessary to consider all the pros and cons of home-made devices, and then make a final decision.
Design Features
We have looked at one of the features of constructing a furnace of this type, let’s move on to others. In the vast majority of cases, a disk furnace is configured as a combined furnace. The key reason for this decision is that the steam obtained from the stove, made up entirely of disks, is quite hard and uncomfortable
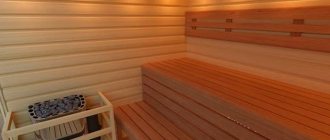
For a sauna, with its low humidity, this is not so important, but in a Russian steam bath this circumstance is certainly worth paying attention to
To obtain high-quality soft steam, you must have a stove with a brick firebox. The discs are used as a container for laying closed stone backfill and as a mounted hot water tank for heating water. The use of an open heater is very limited due to the impossibility of burning the fuel in the stove to its fullest extent, so soot fragments will settle on the stones, which will cause them to enter the steam room atmosphere the first time you try to add steam with a ladle of water.
If it is not possible to build a stone firebox, then it is worth making a full-size stove from cargo disks, which are much larger than passenger cars and have a main seat diameter of about 20 - 22 inches. To reduce the overall height and laying of the disk segments, the design should be made with an embedded-type grate, made of a steel circle with a thickness of 6-10 mm along the diameter of the internal fit and reinforcing rods with a thickness of 12-16 mm.
A hole with a diameter of 150-170 mm is cut in the center of the circle onto which reinforcement sections are welded at intervals. The air passage of such a grate is enough to accelerate to a power of 25-27 kW. When installing the grate, it is necessary to provide a thermal gap within 8-10 mm; a metal ash pan with a diameter of about 200 mm is placed under the grate hole.
Again, taking into account the fact of the formation of hard steam in conditions of high humidity in a Russian steam bath, it is better to use a stove of this type for arranging a Finnish dry steam sauna. In general, step-by-step instructions for making a stove of this type can be viewed in the attached video
In general, step-by-step instructions for making a stove of this type can be viewed in the attached video.
Any type of sauna stove, made with your own hands from available materials, is characterized by its simple design and ease of installation. Thanks to its compact size, the wheeled sauna stove heats up quickly and therefore has high heat transfer.
A homemade disk oven has a number of advantages:
- availability and low cost of building materials;
- ease of manufacture;
- high strength and durability;
- ergonomic design that does not take up much space;
- accelerated heating and high thermal output;
- resistance to mechanical damage and deformation;
- inertness when exposed to high moisture and high temperatures;
- possibility of using different types of fuel - wood, coal, pellets.
We suggest you read: How to install a stove in a wooden house?
Among the disadvantages of the device are the following:
rapid heating of metal discs can lead to injury and burns if the stove is handled carelessly; rapid cooling of the structure will require a doubling of the volume of fuel used.
For these reasons, a stove made from car wheels should not be considered as the main heating equipment for a country house or cottage, but it is quite suitable for temporary heating of bathhouses and technical rooms.
Features, advantages and disadvantages of a homemade potbelly stove
Before assembling the stove, you need to understand the basic requirements that apply to such products. Firstly, the minimum height of the firebox must be at least 45 cm (and if you burn with raw wood and waste, then 65-70 cm or more), the number of elements is selected based on this. Secondly, to make cleaning easier, it is best to make an ash pan at the bottom. In general, the design is not very different from a standard potbelly stove, which is why such options are popular and in demand. The main advantages are:
- The cost of making a potbelly stove for a garage with your own hands from car wheels is one of the lowest. Basic parts can be found for free or at minimal cost, as old and warped parts that cannot be used on the machine will do.
- Long service life. To make the discs, thick steel is used, which will ensure the durability of the potbelly stove. It won't burn out in a few years.
- The material is resistant to temperature changes. The steel alloy can withstand numerous heats without damage and does not deform over time.
- Good heat transfer - due to the properties of steel, the efficiency of the stove is at least 80%. At the same time, the room heats up very quickly, since the material gives off heat well.
- You can make a potbelly stove of any size. The number of connected disks is selected according to the situation; there are no restrictions.
Important!
Only stamped steel discs are suitable for manufacturing.
This variety also has disadvantages that must be taken into account before making a decision:
- It is necessary to clean the chimney and the internal walls of the structure from soot at least once every 2 months. If this is not done, the efficiency of the system is greatly reduced and the consumption of firewood for heating the room increases.
- Steel heats up very quickly and gives off heat well, but it also cools down in a short time. Therefore, it is possible to properly heat the space only with constant burning of wood in the firebox.
- To ensure normal traction, the pipe height must be 2 m or more.
In general, a potbelly stove of this type is almost as good as ready-made solutions. The main thing is to do it correctly and weld the elements well so that there are no gaps. It is also very important to install a good chimney, since if there is insufficient draft, the efficiency of the system is much lower.
How to properly fold a potbelly stove?
Even a beginner can correctly assemble a brick stove-stove on his own. To do this, you need to know and follow the simple rules that pechnoy.guru will provide below.
Scheme and drawing
Below we will look at how to build a potbelly stove out of brick with your own hands. The drawing and dimensions can be seen in photo No. 1:
Photo No. 1 - do-it-yourself drawing of a potbelly stove made of brick
The sequential layout of bricks from a potbelly stove is shown in photo No. 2:
Photo No. 2 - sequential layout of bricks (diagram)
We have decided on the materials and design of the furnace, and the solution is ready. This design does not require a foundation. For comfortable and safe operation, heating must be placed in compliance with all fire safety standards. Having chosen a place, lay two layers of waterproofing. On top we make a preparation of sand, 10 mm thick. Let's start laying:
- We lay a brick on top, without mortar (see photo No. 2, first row). We strictly control horizontality using a level.
- We install the door for the blower. We secure it with wire and wrap it with asbestos cord.
- We continue laying (see photo No. 2, row No. 1).
- Next comes fireclay brick (see photo No. 2). Grate bars will be installed above it.
- We place grate bars directly above the ash pit.
- We place the next row on a spoon. We put the wall at the back without mortar (knockout bricks).
- Installing the firebox door. We secure it with wire and bricks.
- On top we place a row on the bed along the contour of the fourth.
- The next one is again on a spoon. We put 2 bricks at the back.
- The row at the top should overlap the combustion door and end 130 mm above it.
- We continue laying, moving the bricks back a little. Before this, we lay an asbestos cord on which we will install the hob.
- Let's start forming the chimney from the next row. The design provides for the installation of a mounted pipe made of tin or corrugated aluminum. The pipe should not be heavy. Otherwise, the center of gravity may shift.
- On the eleventh row we install a valve to regulate the air flow. Don’t forget to seal it with asbestos cord and cover it with clay.
- Next, we place a chimney pipe in the quadrangle, which we connect to the metal one. The pipe must stand strictly vertically and not lean to the side. For greater stability, it should be covered with three rows of bricks.
- We remove the knockout bricks that we placed on the 4th row and clean the chimney of debris.
- Now the stove should be whitened. Any lime will do. Experts recommend adding blue and a little milk. This way the whitewash will not darken and fly off.
- We install a metal sheet in front of the firebox.
- We install the baseboard.
An example of a finished brick stove
Drying
The cause of cracks is excess moisture in the bricks, so the oven must be thoroughly dried. There are two stages of drying: natural and forced.
- Natural drying lasts at least five days. All doors must be fully open. To increase the intensity of the process, place a fan in front of the firebox or stick it into it and turn on a regular electric incandescent lamp (not an energy-saving one). It will not be possible to completely dry the oven using this method, so we move on to the next step.
- Forced drying is carried out by burning dry wood. This type of fire is carried out once every 24 hours. You should only heat with small dry logs. Open the blower door slightly and open the plug halfway.
When the wood burns out, loosely cover the ash pit. Close the top plug, leaving 1-2 cm. When the coals burn out, open all channels. Carry out this fire for a week. On the first day, about 2 kg of wood is burned. Then add 1 kg every day.
Making a firebox door
This element is the most complex in the entire structure. The following table shows the standardized dimensions of oven doors:
| Size | Blower, cleaning doors, mm | Openings for fire doors, mm | |||
| length | 25 | 25 | 25 | 30 | 25 |
| width | 130 | 130 | 250 | 250 | 250 |
| height | 70 | 140 | 210 | 280 | 140 |
We make the door for the firebox according to the drawings shown in photo No. 3:
Photo No. 3 - drawing of the door for the firebox and cleaning chamber
Metal cladding
A brick potbelly stove can be additionally sheathed with metal. We will get a metal potbelly stove with all the advantages, but without the disadvantages (except for weight). This design will protect the stove from cracking and chipping. This will significantly increase service life. This will require sheet metal 4-6 mm thick. The process is not particularly difficult. The metal sheet is marked, the necessary parts are cut out with a grinder or a cutter. Next, the cladding is carried out and connected using welding and a metal corner.
This design is not only durable, but safer. However, it requires additional costs and labor.
How to make a potbelly stove from rims?
A potbelly stove made from wheel rims will be portable, which is very convenient, since such a design can be used as needed not only in the garage, but also in other rooms. It can be installed both horizontally and vertically. Both models have high heat transfer, and differ from each other only in the presence of grates and the location of the chimney pipe.
Materials
To build a potbelly stove, it is advisable to use parts from the wheels of cars or light-duty trucks. The disks from a multi-tonnage truck are too massive; a potbelly stove from them will turn out to be bulky and heavy. In such a design it will be difficult to ensure tight connections when joining individual elements.
In addition to the disks themselves, to assemble the stove yourself, you will need several additional materials:
- reinforcement rods with a diameter of 20 - 24 mm;
- steel corner;
- sheet metal 4-5 mm thick;
- heat-resistant paint;
- several bolts and nuts;
- pipe with a diameter of 100 - 150 mm and a wall thickness of at least 5 mm.
Tools
The set of tools required to build a potbelly stove from car rims should consist of:
- welding unit and electrodes;
- grinders (angle grinders) with a set of cleaning and cutting discs;
- drills;
- gas cutter;
- sandpaper;
- brushes;
- sledgehammers;
- hammer;
- measuring and marking devices: chalk or marker, tape measure and ruler
To protect the surface of the body and eyes from harmful radiation from the welding arc, sparks and splashes, you need to work in special clothing, complete with a canvas suit and mittens, closed boots, a headgear under the shield, a welder's shield and goggles.
Step-by-step instruction
Schemes for the construction of different models of potbelly stoves made from car wheel rims
Drawing of a vertical model of a potbelly stove made of 4 wheels
When making a furnace from disks yourself, you must follow the following sequence of actions:
- cut out the central part of all four disks with a grinder along with the hubs;
Stage 1
- make two round plates from sheet steel, the diameter of which must correspond to the size of the disks;
- cut a small square opening for the blower on the side surface, and make a door from the separated part of the metal. It is put on bolts welded to the body and secured with nuts. For ease of use, the door is equipped with a metal handle and latch;
Stage 2
- Weld the walls of the two disks together. Cover the bottom of the lower disk with a metal plate and weld legs from a metal corner or fittings to it;
Stage 3
- weld the two remaining disks together and cover the upper part with a circle of sheet steel;
Stage 4
- cut an opening for the firebox in the lower disk of this part of the stove and install a door, similar to the blower door;
Stage 5
Stage 7
- connect all parts of the body into a single structure;
- install the grate. For these purposes, weld guides from a corner inside the combustion chamber and place on it a pre-welded structure made of sheet steel along the edges and reinforcement in the middle. The reinforcement bars must be positioned so that the distance between them does not exceed 2 cm, otherwise small firewood will fall through;
Stage 8
Stage 9
- cut a round hole on the top surface of the device for the chimney;
Stage 10
- if desired, you can arrange the chimney on the side so that you can use the top of the stove as a cooking surface, it will look like this:
Stage 10 (2)
- lower the chimney pipe into the upper hole and weld;
Stage 11
- clean all irregularities and defects on the surface of the device;
- paint the finished device with heat-resistant paint.
- Potbelly stove made from wheel rims - ready!
When making such a potbelly stove, you need to take into account that the special composition of the steel alloy of the wheel rims is not standardized for welding work. Therefore, when connecting disks, you must follow the following rules:
- welding only two mating parts is allowed at a time; assembling the entire device at once is prohibited;
- after a seam has formed, parts with welded edges must be left alone for about 3 - 5 minutes so that the residual internal stress resolves;
- the surface of the weld should be free of any visible defects: cracks, splashes, shells or bubbles.
Step-by-step production of a furnace structure from car wheels
First, you need to prepare the discs - clean them of accumulated debris and dirt, sand the surface from pockets of corrosion and old paint. Assembling the stove into the bathhouse is carried out in stages in the following order:
- Making a hot water tank. The tank design must be completely sealed. To do this, two rims are welded together. A metal sheet is welded to the finished container; it acts as a bottom. A hole is made in the center of the bottom along the diameter of the pipe, which is welded with the fasteners offset to the left or right side. A tap for water supply is mounted on the side. A metal cover is attached to the upper part of the structure.
- After completing the welding work, the structure is checked for leaks. To do this, the tank is filled with water and checked for leaks. After draining the water from the tank, all problem areas are additionally fixed by welding. After checking the tightness, the tank can be installed in the steam room.
- Arrangement of the heater and firebox. The remaining disks are welded together to form a hollow structure. A grid for laying out stones is welded inside the cylinder. The upper part of the structure will remain open, and the lower part will be used as a firebox. A hole is cut from the front part to the size of the firebox door. Door hangers are welded to the walls of the discs, after which the door is hung on them.
- Pouring the foundation. A sauna stove made from wheel rims requires the manufacture of a reliable and durable base. The lower part of the foundation can be filled with a cement-sand mixture, and the top can be lined with refractory bricks. To strengthen the base, it is necessary to install a reinforcing frame made of metal rods on the cement screed.
- Making the lower part of the structure from brick. After the foundation has completely hardened, bricklaying can begin. For this, red brick and clay mortar are used. First, a square-shaped blower is laid with a hole provided for the grate. The protective doors are fixed to the finished firebox.
- To strengthen the furnace structure, it is recommended to use metal channels, which are fixed to the top of the metal platform at a slight angle. The metal part of the structure is connected to the brickwork. The pipe is installed in the chimney and equipped with a metal damper.
The finished design of the stove allows you to heat a steam room and water in just 60 minutes. Control over the fuel combustion process helps maintain the desired temperature for heating the air in the room.
Useful tips
It is important to lay a high-quality seam at the welding site - no defects should be noticeable on it. When working with a welding machine, you cannot try to weld everything at once - the work is done in stages
After welding the parts together, you need to wait until the seam cools down to touch temperature. When assembling the structure, do not forget that for proper operation of the stove it is important to provide the size of the combustion chamber for the type of fuel you plan to use. After completing the work, be sure to test the design and eliminate any identified deficiencies.
Attention! All welding work must be carried out in compliance with safety regulations, wearing protective clothing and a mask. Do not touch parts until they have cooled down
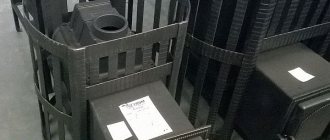
Industrial furnaces
A modern industrial cauldron oven, as a rule, is a well-thought-out and well-designed product. They have optimal sizes, are extremely functional and look elegant.
Examples include furnaces: Samarkand, Vesuvius and Samobranka
The stoves are made of steel and equipped with a retractable ash pan, which can be removed even during combustion. The grate of each of them is cast iron.
Industrial furnaces can be equipped with additional devices and equipment. The kit includes: a barbecue set, a cauldron, a device for hot smoking, a scoop and a chimney pipe, if provided for by the design.
DIY barbecue made from wheel rims
Car wheels can serve as an excellent material for another device - a barbecue. It will be light, making it easy to move. There will also be free access of air into such an oven from the wheel rims, so you will quickly achieve the desired temperature.
There are several ways to make a grill yourself. The simplest is to place the disc on a steel sheet. Here's an ordinary grill for you. But this design has its drawbacks:
- the plane is set too low;
- if the grill stands on the ground, there will be weak draft, which may cause the fire to go out;
- small combustion chamber.
For infrequent use, such a homemade grill is suitable. It is lightweight, so you can take it with you outdoors. However, you can make a more reliable and convenient grill with your own hands.
The working process
For the barbecue you will need:
- two car rims;
- welding machine;
- Bulgarian;
- profile pipe 1 meter;
- bolts and nuts;
- wire.
Now you can start manufacturing.
From the first disk, using a grinder or a gas cutter, you need to cut out the mounting pad.
Next, we weld two disks in a circle so that the remaining partition from the first disk is at the very bottom of the grill.
Door
The next stage is the door. It is needed to make it convenient to add new fuel without removing food from the grill. It will also make it easier to maintain the fire.
First you need to roughly decide where the door will be located. Typically, the fuel hole is made 2–3 cm above the bottom. Sketch the side of the structure, then cut a hole and sand the edges of the cutout. Using bolts, we make hinges on one side of the rectangular hole so that the door opens and closes easily. You need to weld nuts to the door itself so that you can then hang it on the bolts. The final touch is a handle that you can weld on to make the door easier to use.
Legs
What's a barbecue without legs? Typically the length of the legs is about 60–80 cm. This is both a convenient option for cooking and fireproof. But you can choose a different length that is more suitable for you. To make the legs you will need a profile pipe. Cut it into three equal parts and weld it to the grill body. In order for a homemade stove to stand stable, the legs must be placed at the same distance from each other with emphasis on the side and partition.
Pens
Handles for easy movement of the structure, which can be made using thick wire about 8 mm. Determine their approximate location, preferably on the sides of the door, then weld the nuts through which you thread the handles.
Comfortable handles
Unlike other stoves made from wheel rims, there is no need to weld a metal sheet to the bottom of the barbecue; it can interfere with good draft. It is better to cover the bottom with a metal mesh or make a wire grid to create something like a non-standard grate.
As you can see, rims that were just lying around idle can be very useful on the farm. Treat yourself and your loved ones with dishes over an open fire, which will turn out delicious and properly cooked in ovens made from car wheels.
Bottom line
Creating a furnace from car wheels is a complex and time-consuming process. The base material is not standardized for welding, and therefore the use of such furnaces if assembled poorly can be dangerous. Furnaces of this type must operate on solid fuel materials, and only experienced welders can create them.
In general, creating a stove from car wheels is an economical and quick option for heating a garage or bathhouse. What type of stoves do you consider the safest? Share your opinion in the comments!
Tags: disk, KAMAZ, stove, hand, yours
« Previous entry
How to make a stove from rims
To begin with, the wheels are prepared for welding. The entire front side of one of the parts is cut off to allow heat into the area where food will be cooked and to help distribute it evenly. The second part is dealt with in the same way. The third disc is left unchanged. To avoid confusion, it is better to mark the sequence of disks with a marker or chalk.
The lower disk is placed face down on a flat surface. The middle part is installed on it. The inside of the disc should be facing down. Weld in four places. Then install the top part, turning it face down. Weld again in four places. Once again they check the correct assembly so that the parts are positioned strictly vertically, and begin to scald the structure.
To prevent parts from becoming deformed, welding is performed step by step. Having welded a separate section, the part is turned 90 degrees and a small section is welded there, then turned again. Gradually weld both seams this way.
The quality of the connection is checked after beating the slag. If there are any defects, they are corrected. Then install a cleaning circle on the grinder and eliminate irregularities at the places of cuts and joints.
After this, they begin to construct the door for loading fuel. 20 cm are retreated from the lower edge of the future stove and a rectangle 18 cm high and 20 cm long is marked. Using a grinder, an opening is cut along the marking line. The cut off part is not thrown away. A door is made from it. Wire with a cross section of 6 mm is welded on three sides of the part. In the middle part of the window, a part from a profile pipe is welded on the remaining side. The rod for the loop is inserted into the second part from the profile and grabbed from one edge.
Important!
The design of the door can be very different. Possible options can be seen in the photo.
The finished door is installed in place and the second hinge is welded to the disk. On the other hand, a U-shaped handle is welded to the door. A latch is made from a rod and profile and welded to the door. To increase the height of the grill, 3 or 4 legs are welded from below at a small angle. To make the metal fit better, it is cut at an angle.
A chimney is made opposite the door. To do this, mark a hole in the upper part of the middle part according to the size of the pipe and cut it through electric welding. The finished outlet is inserted into the hole, pointing the pipe upward. It should be inserted flush with the main part. The joint is scalded in a circle. Then all seams and cuts are cleaned with a grinder.
Handles are made from a metal rod to carry the stove. To do this, it is clamped in a vice and bent to form a rectangle. Then markings are made on the main part of the stove and handles are welded on opposite sides.
https://youtube.com/watch?v=TglZjwMyJyg
Step-by-step algorithm
The first thing you need for construction is a pair of classic stamped car wheels made of durable metal. The sizes of the disks should be selected to suit your cauldron; option 13 may be suitable, or maybe 15, although a very large design is not needed.
Two stamped white discs
On one of the disks we mark a cutting line, exactly above the round holes, and cut off this circle using a welding machine.
Mark the cutting line
The cut circle will work perfectly as a lid on which you can put pots or a kettle, so don’t rush to throw it away.
The part is cut out
On the second disk, you need to weld the main central hole, which will require a small piece of thick metal.
Preparing the welding machine
We carry out welding work
Then the two disks are placed on top of each other and, using the same welding machine, they are connected into a single structure.
Circular welding process
Welding from all sides
This creates an impressive seam that firmly connects the two discs. To make it more presentable, you can modify it with a grinder, cutting off strongly protruding elements and grinding the edges.
Weld seam
In order for the structure to stand stably at the required level, you will need legs. The legs can be tightly welded to the grill if you are preparing a summer cottage, or you can make the structure detachable. In the second case, the device will be mobile; it can be easily carried in the trunk of a car and, if necessary, assembled. Small pieces of a profile larger in cross-section than the legs themselves can act as fastenings for the legs. These three parts should be welded to the grill on three sides (in this case, a tripod is made).
Leg parts
There is no need for precise calculations here; it is enough to roughly estimate equal distances and weld the necessary parts to the bottom of the grill made of disks at the same angle.
Leg clamps are welded
We also cut out the legs from metal, in particular we use a rectangular profile.
The legs themselves, cut from the profile
It is worth trying on the legs by inserting them into the prepared grooves. If they enter with difficulty, you should process the edges of the parts with a grinder, and then hammer them into the grooves with a hammer.
Legs installed
Next, mark the door that will open directly into the firebox and cut it along the line.
Marking the location of the door
At the next stage, you will have to use your imagination and engineering skills to create a decent hinge for the door. For example, you can make it from one bolt. It is necessary to cut off the cap from it, then select two nuts that are screwed onto it. One nut should be welded to the door, and the second to the wall of the grill. By screwing the bolt onto the threads of both nuts, you get a convenient loop. You can weld any piece of metal of suitable size as a handle.
The door is cut out
You can make two loops using the same bolts, here all the work is done at the discretion of the master.
Loop manufacturing option
To make it easier to transport the grill, you should weld lugs to it on both sides, or at least on one side. Such improvised handles will allow you to comfortably carry the barbecue without fear of getting dirty with soot, soot or dirt.
We weld the handles
For a more uniform smoke output, you can make four even cuts along the diameter of the disk. At this point, work with the hearth to form its shape is completed.
Making cuts from the top
To remove paint from car rims, you should burn the resulting grill on all sides. For final processing, you can use a brush or sandpaper.
Removing paint using improvised means
Then, using heat-resistant paint, you need to paint the structure in a suitable color. Black looks very harmonious.
Paint it black
As you can see, making a grill for a cauldron is quite simple; there are no special tricks here. A simple and convenient design will allow you to install a cauldron and cook pilaf, and if desired, you can make a shish kebab on it using skewers of suitable length.
Ready product
In this simple and uncomplicated way, we create excellent conditions for outdoor recreation, which is accompanied by cooking delicious and healthy food.
Main stages and important features of furnace laying
From the moment the foundation is poured to the start of construction, 3-4 weeks should pass. During this time, the base will gain the necessary strength and will be able to withstand the weight of the brick oven. The work in question requires maximum responsibility and concentration on the part of the performer. Any mistakes can lead to irreparable consequences, so get ready for the work in advance and allocate enough time to complete it.
DIY brick oven
The laying of the furnace is carried out in several stages.
First stage. Lay out the ash pan and the lower part of the first cap from brick. Carry out the laying using the previously discussed sand-clay mortar.
Second phase. Install the ash pan door into the masonry. Use galvanized wire to secure the door.
Install the ash pan door into the masonry
Third stage. Install a grate over the ash pan chamber.
Install a grate over the ash pan chamber
Fourth stage. Mount the firebox. Line the inside of this compartment with fire bricks. Place the bricks “on edge”. At this stage you need to use a special masonry mortar. It is prepared in the same way as the standard one, but instead of simple clay, refractory clay is used, i.e. fireclay. Secure the combustion chamber door using a steel plate and the wire you are already familiar with.
Fifth stage. Continue standard laying until you reach the 12th row. Having reached this row, close the combustion chamber and lay the tiles with burners evenly. This stove must be made of cast iron. Check the evenness of the installation using a building level.
Sixth stage. Lay out the first cap. It is erected at the left edge of the stove. At the same stage, a canal for the summer passage is being built.
Seventh stage. Install the stove and line the walls of the cooking compartment. Lay out the previously mentioned lower cap.
Eighth stage. Install the valve for the mentioned summer passage channel. This valve is located in the inner corner of the cooking compartment.
Ninth stage. Lay the masonry up to the 20th row. When you reach this row, close the brewing compartment and the first hood. Be sure to leave the required number of holes in the solid masonry for the summer passage and lifting channel, as well as the vent for the cooking compartment. Place the bricks on steel corners - this will ensure higher strength and reliability of the stove.
Tenth stage. Close the portal of the brewing compartment with hinged fireplace doors. It is better if the doors have heat-resistant glass inserts. This solution will allow you to monitor the fuel combustion process and admire the flame.
Eleventh stage. Install cleaning doors for easy soot removal. For installation, choose a location that is easiest for you to get to.
Twelfth stage. Lay out the walls of the hood almost to the top edge of the wall opening. Cover the top of the stove with a couple of rows of bricks. Fill the gap between the top of the stove and the jumper with mineral wool. Thanks to this, additional thermal insulation will be provided and heating efficiency will be slightly increased.
Thirteenth stage. Place a decorative band around the upper perimeter of the unit.
Fourteenth stage. Proceed with the installation of the chimney. It is better if the chimney is made of brick. This design will last much longer than the same metal or asbestos pipes.
Heating and cooking stove
Thus, although laying the stove is not a simple task, it can be done with your own hands. It is enough to simply understand the technology and follow the instructions in everything. Remember, the materials for work must be of the highest quality. And stove designs that have been tested over the years will allow you to independently build a unit that will efficiently heat your home for many years without any problems or complaints.
Good luck!
From the metal science course
What is attractive about a stove made from used car rims? Several significant points:
- Sufficient fuel combustion efficiency and heat transfer. There is a rule derived from the practical use of furnaces of this type: a unit of the size of the seat diameter of the disk is able to effectively heat 1 square meter. m of usable area with a conventional ceiling height of 230 cm. That is, one of the most common and affordable seating sizes in the R13-R14 class of passenger cars. A design made on the basis of such disks is capable of heating 14-15 cubic meters. usable space in the bathhouse.
- This stove is made from available materials. At the beginning of spring, as the asphalt melts along with the snow, a mass of broken wheels accumulates at tire workshops. If in some cases the geometry of a damaged disk can be restored by rolling, then cracks in the body of a steel object are reluctantly restored by responsible craftsmen, for a number of objective reasons. We will talk about this in more detail below. In any case, you can get suitable disks for the price of scrap metal.
- The wheel rim is made not from simple structural steel, but from alloy steel, that is, which contains elements that increase its performance characteristics: strength, wear resistance, resistance to various types of deformation. It is clear that the alloy of such steel does not include additives that increase its heat resistance, in particular nickel, but the presence of the same manganese puts such steel in terms of heat resistance several orders of magnitude higher than conventional structural steels presented at metal warehouses.
- The disk shape implies the use of a minimum of technological operations to transform it into a furnace body.
On the principles of using welding in the manufacture of a furnace from disks
A disk sauna stove, like any other, is a source of increased fire hazard, so its manufacture must be approached with the utmost responsibility. Before moving on to a description of the manufacturing technology, let us dwell on a very important and fundamental point. Application of welding. To manufacture a furnace of this type, a large range of tools is not needed.
The disk has already been formed into a cylinder; all that remains is to prepare the segments by removing unnecessary elements from them and welding them into a single structure. For such work, you need an angle grinder, better known as an angle grinder with a range of cutting and grinding wheels with a diameter of 125 mm, a welding machine, preferably an inverter type, and a mechanic’s hammer weighing 0.75 - 1 kg. A plasma cutting machine will be a very good help. It allows you to produce clean radius cuts incomparably faster and more conveniently than an angle grinder. But in the absence of fish, the angle grinder is also a pike.
Now directly about welding. In the mass production of wheel rims, the hot or cold stamping method is used and the properties of the steel are optimized specifically for this technology. Steel has a sufficient degree of plasticity that is inaccessible for a weld, therefore, when carrying out welding work, we adhere to the following rules:
- We strictly observe fire safety when carrying out hot work.
- In one approach, only two mating parts are welded.
- The current strength and the speed of electrode advancement are adjusted in such a way as to obtain the most correct and high-quality seam. Bubbles, cavities, cracks, and splashes are not allowed.
- Upon completion of the weld, the joint is allowed to cool, after which the slag is carefully knocked down and the seam is inspected for visual defects.
- The continuation of the seam can be made only after balancing the temperature of the seam and the body of the part being welded with a temperature close to the environment.
- The internal stresses of the seam and welded parts that arise in production conditions are removed by annealing, which can also be done at home and the use of which we will discuss below.
A word from Experienced! You can check the seam for solidity at home using kerosene tinted with printer ink. Due to its high penetrating power, kerosene seeps through the smallest cracks, and the ink pigment makes the effect visual, naturally on a previously cleaned and dry surface.
Another very important circumstance. A disk stove can only be used as a simple flaming solid fuel stove, in our case a wood stove.
Important! It’s not for nothing that we paid so much attention to welding work. This design has a large number of connections made using a weld. Through poor-quality seams, carbon monoxide can leak into the interior of the bathhouse, which is fraught with fatal consequences. High-quality construction and good ventilation are the key to safe use.
The modern market and technology provide a sufficient selection of materials for welding work. Undoubtedly, it is worth using this circumstance and selecting electrodes with the necessary or as close as possible to the necessary parameters.
A few words about disk dimensions
When starting to design such a stove and selecting materials for it, it is important to know the overall dimensions of the disks in order to fit them properly into the overall heating design and into the interior of the bathhouse as a whole. For better understanding, we present such data in table form:
| Disc size, width and diameter, inches | Corresponding overall dimensions, in mm |
| 5×13 | 12,7×33,02 |
| 6×14 | 15,24×35,56 |
| 6,5×15 | 16,51×38,1 |
It is very important to take into account the dimensions of the disks when setting up the furnace.
A small example. The rules for the design of combustion furnaces operating on wood and solid mineral fuels stipulate that the distance from the grate to the hearth must be at least 600 mm. This is subject to the use of dry conditioned fuel. If raw firewood is used, this distance should be increased to 800 mm. This circumstance will prevent the sedimentation of pyrolysis gases on the furnace bottom, which will lead to the formation of soot deposits, and as a result, a decrease in efficiency and an increased risk of uncontrolled ignition of the soot layer. Knowing the width of the disk, it is easy to design the required number of segments to obtain the specified height of the combustion space.