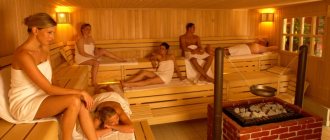
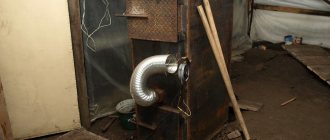
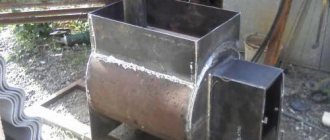
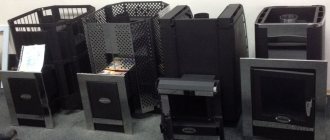
It is difficult to imagine a bathhouse without a stove, because in addition to heating the room, it is also the key to comfort and pleasure from the bathing procedure.
It is easy to make a stove for a bathhouse with your own hands; it will function well and will not require a lot of money and time investment. The simplest model is a sauna stove made from a pipe with a large diameter. Its production does not require special experience and knowledge in this area.
Description of a metal sauna stove and its main characteristics
You can, of course, buy a metal stove for the bathhouse. However, the best option would be to make it yourself. A simple option is a potbelly stove, which is a metal structure equipped with a door and a pipe. Low heat transfer and significant financial costs for purchasing fuel do not allow the heating installation to be used effectively, so it can be seen in rare cases.
Another thing is modern iron stoves. Their attractiveness, high efficiency and highest fire safety rating are impressive. They are made from sheet iron, more than 0.4 centimeters thick. The structural components are:
- It is customary to use a thermal chamber for filling and storing stones;
- There is a tank designed to store water with a volume of 30-70 liters.
An iron sauna stove requires lining with refractory bricks. This makes it possible to evenly heat the air in the room and makes the structure completely safe for use.
Useful video
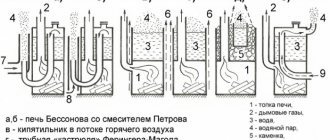
Not just diagrams, but also a description of the advantages and disadvantages of vertical and horizontal structures (not necessarily made of pipes). Plus interesting life hacks.
Even more diagrams, even more explanations about them. However, the main concern of the author of the video is that you get a stove for a real Russian bath. So sauna lovers don’t have to watch it).
+++
We hope that you have received some kind of holistic understanding of what a sauna stove is. Other things can only be learned from practice and experiment. Good luck to you!
Design features of a sauna stove
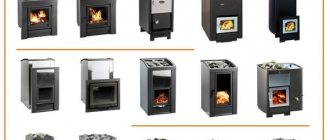
Iron stoves differ in design, the type of which is determined by the drawing.
The following varieties are distinguished:
| Devices with closed design | Compact, economical. To increase the heat capacity, the installations are lined with red refractory bricks both outside and inside. The material is fixed using metal clamps. The stone grate is located in the middle part of the structure. |
| Open Design Devices | They have a small tank and an open heater. They are installed in a steamy room to warm it up quickly and efficiently. A galvanized cover that covers the stones is necessary for greater efficiency of the structure. |
| Combined type structures | A distinctive feature is the presence of a firebox equipped with two valves, a blower, a grate, and a pair of pipes of different diameters (10cm and 14cm). For such installations, sheets made of high quality steel are used. The thickness of the iron reaches 5mm. |
An iron stove for a bathhouse may include a combustion body located horizontally or vertically in relation to the floor, two chambers with vertical loading and a heater located inside the structure. An iron sauna stove can be three-chamber, with horizontal wood loading, a water tank, and a heater.
A vertical firebox makes it possible to save more space in the steam room, however, the wood burns for a short time and will have to be constantly added in order to maintain the required ambient temperature. The horizontal firebox has significant dimensions and takes up significant free space, but the wood burns more slowly. Devices of this type are installed outside the steam room (in the dressing room), so there is a real opportunity to heat both rooms at the same time.
Arrangement of the foundation
Laying brick stoves begins with laying out the foundation, which is the basis for any heating structure, ensuring its strength, reliability and durability.
According to the finished bathhouse design, markings are made at the construction site and a foundation pit up to 65 cm deep is dug. Its width should exceed the dimensions of the stove by 10 cm.
A layer of sand 18 cm thick is laid on the bottom of the pit and moistened with water, then covered with crushed stone, stones and broken bricks. All layers are thoroughly wetted and compacted. The pillow is kept for some time to shrink.
After complete shrinkage of the sand layer, removable formwork is installed, reinforced with an armored belt made of thin reinforcement.
Important! A technological gap of 12 cm must be left between the walls of the formwork and the earthen edges of the pit.
The formwork is filled with concrete mixture to the boundary level, which is 17 cm below the soil surface. The mixture is prepared in proportions - 1: 3 (three parts sand to one part cement) with the addition of the required amount of water.
After the concrete has completely hardened, the formwork is removed, and the existing voids are filled with fine gravel.
Folded roofing felt is used as a waterproofing layer for the foundation. The material is laid on a concrete base layer strictly according to the size of the site.
Types of stoves by shape
Do-it-yourself metal sauna stoves can be in the following shape:
- curly;
- rectangular;
- horizontal;
- cylindrical.
Rectangular installations are considered the most popular because their corner zones do not heat up to very high temperatures. The shape of the device is directly related to the uniform heating of both the installation itself and the room. Cylindrical and round shaped units have the lowest degree of heat transfer, so fairly thick iron is used for their production. Rectangular structures are distinguished by enviable stability, but have cold corners.
Advantages and disadvantages of metal structures
We can highlight the main positive characteristics that a metal sauna stove is endowed with:
- Rapid heating of the body - you can begin basic procedures within 2-3 hours after the oven starts heating up.
- Ergonomic body – compact dimensions allow the stove to be installed even in small rooms.
- Lack of foundation - the equipment does not require the construction of a solid foundation; it is enough to limit yourself to a lightweight foundation.
- Maintaining a constant combustion process - the design allows you to maintain optimal temperature conditions throughout the entire duration of health procedures.
- Generation of soft and clean steam and heat accumulation indoors.
- Affordable cost of materials for self-production of the structure.
- Long service life of the finished device, which can range from 6 to 26 years.
- Reliable operation if the basic fire safety requirements were met during the assembly and installation of the structure.
Along with the positive aspects, a metal sauna stove has significant disadvantages:
- Rapid cooling of the metal after completion of the combustion process.
- Not suitable for heating large areas.
- It is necessary to ensure fire protection of the structure and adjacent surfaces.
Recommendations from specialists for installing an iron sauna stove
The main point is the presence of a high-quality foundation. Afterwards, it is necessary to take a number of measures aimed at fire safety, which are as follows:
- A metal stove should be installed at a distance of at least 100 cm from the wall.
- To avoid fire in the room, it is necessary to cover the walls located in the immediate vicinity of the structure with foil and heat-insulating material, which will enable wooden walls to avoid ignition.
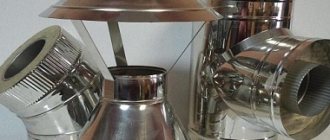
- An iron stove requires chimney insulation. You can resort to sandwich pipes.
- It is imperative to build a brick sarcophagus on top of an iron stove. Its appearance will improve, and safety from possible burns when touching the hot metal walls of the oven will increase.
Mixing connecting masonry mortar
To ensure a reliable and durable brick stove for a bath, it is important to properly mix the masonry mortar. The accuracy of the proportions depends on the quality of the clay - its fat content.
To mix the solution, clay and sand are used in a ratio of 1: 2 (for one clay part, 2 sand parts). The clay is pre-soaked in a small amount of water.
To do this, the material is placed in a container, filled with water and mixed thoroughly. To simplify the kneading process, you can use a drill with an attachment. The clay is kneaded until it becomes sufficiently plastic.
Only after this is slightly damp sand introduced into it in parts and stirred. A well-prepared stove solution should be viscous.
One batch of mortar should not be too much or too little; it should be prepared just enough to be enough to complete 2-3 full brick rows.
Installation of a chimney pipe
How to fold a stove with a chimney after completing the construction of brick walls? The furnace construction manual provides for the preliminary selection of a pipe, which in type and functional features must correspond to the design of the future furnace. For a lightweight design, it is recommended to choose a small pipe made of lightweight and heat-resistant material.
When choosing, you should take into account the appropriate wall thickness of the chimney pipe, which cannot be less than ½ the thickness of the brick. The diameter of the passages for the chimney pipe should be of a similar size.
The length of the upper part of the pipe, located above the roof, should not be less than 55 cm. To equip the smoke exhaust duct, a connecting mortar based on cement or lime is used. The clay-sand mixture is not suitable for such work, since under the influence of precipitation it will quickly wash out and form condensation on the inner walls of the pipe.
The chimney pipe with a minimum number of bends must have a total length of at least 5 meters. The finished design can be equipped with a special gate valve.
Heater with water tank for gas bath
The design is almost no different from a standard unit that runs on wood. Gas sauna stoves are easy to use. They can be connected either to the main gas pipeline or run from cylinders.
When installing a stove with a water tank, you need to take into account the following elements that distinguish it from other models operating on other types of fuel:
- fuse (the ability to control proper operation);
- gas chamber (sealed);
- thermostat (allowing you to regulate the temperature);
- gas cylinders.
An approximate calculation of fuel consumption shows that to ensure high-quality heating of the room for 12 months, you need to have 65 gas cylinders (50 liters each).
The operating principle of the furnaces is based on the passage of gas through a special chamber in which oxygen saturation takes place. It is supplied through a special pipe connected to a central gas pipeline or cylinder.
If a sauna stove with a heat exchanger for heating is heated by gas cylinders, they should be located in a specially designated area. It is best to install them outside the premises so that residential buildings are located at a great distance.
Step-by-step installation instructions 1 - 7 row
Pre-prepare a bitumen gasket for waterproofing. For the first laying, the bricks must be moistened with water. Angles must be checked. The edges of the order are carefully measured so that there are no gaps for the passage of smoke.
For the second row, as well as for all subsequent ones, the order of the bricks must correspond to the placement of the bricks at the junction of the lower ones. The door is installed at the level of the third row. It is secured with galvanized wire or strips of steel, which are more easily attached.
At the level of the fourth row, a well is laid where the ash will fall. Grates are installed through which air enters. The wall at the back under the grate is rounded using pieces of brick.
The door intended for the blower is placed at the level of the sixth row.
At the seventh level, not only a cast-iron door for the firebox is installed, but also a grate.
