The modern market presents a lot of sauna stoves, for every taste, for various tasks, and at a wide variety of prices. However, under certain circumstances, a fully functional unit can be obtained practically for nothing. Naturally, if you have welding and metalwork skills. A striking example is a sauna stove made from a gas cylinder.
Making from a barrel
Among other options, you can use a barrel to make a homemade stove. For example, a sauna stove made from a 200-liter barrel would look good; let’s look at the stages of its manufacture:
- The first step is to determine the required height of the barrel using a grinder;
- Next, the inner walls of the barrel are lined with refractory bricks;
- You can limit the combustion chamber using metal sheets or mesh. Remember that the minimum height of the combustion chamber is 60 cm;
- Stones are laid out on a sheet of metal or mesh;
- Next, you should weld a lid to the barrel and install special doors for ease of use.
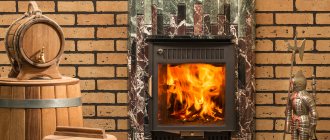
The process of making a stove from a gas cylinder (Option 1)
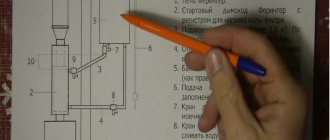
Do-it-yourself stove for a bathhouse: step-by-step instructions with expert recommendations
If you have noticed an ownerless cylinder in your household, and there is nowhere to use it, nevertheless, the heating agent is so necessary, then with a little “magic”, the cylinder can be turned into a stove. The stove will be like a potbelly stove, with a smooth chimney and without a developed area on the walls, like a Breneran. This means that the efficiency of the stove is not high, but this is a very good option for a small country house or for use in a garage. At least the costs for such a stove are minimal, and production is not so problematic, as you will see by reporting now. So, we take a cylinder and, first of all, get rid of explosive gases. It is best to unscrew the valve with a gas wrench and then fill the cylinder with water. Afterwards, you can drain the water and begin mechanical processing of the cylinder. We cut a hole at one end for the door. It is better to first purchase the door on the market (in a store) in order to know what size to cut the cylinder to.
Now on the opposite side you need to make a hole for the chimney or, more simply, for the pipe. In order to contain the heat at least a little, after the stove is heated, it is necessary to introduce a damper. There is also no point in making such a damper yourself; it is easier to find it in trade structures. So, in the end opposite to the door, we cut a hole for the damper in the pipe. Since the shape is a circle, it would be best to first drill a hole for installing a jigsaw, and then using a special blade for metal, cut out this very sphere from the end of the cylinder.
We weld the door. If the door is made of cast iron, then the metals must first be heated. In a heated state, high-carbon alloys can be welded with an ordinary welding machine.
Now you can weld the pipe with the damper.
Now there is very little left. Initially, you need to think about the fact that the stove should stand above the supporting surface. It is better to finally implement this using rods by welding its legs. In order for the firewood to burn better, and also to prevent ash and embers from interfering with the combustion process, it is necessary to provide gaps through which the combustion food would spill out of the wood burning chamber. It is necessary to place a tray under these cracks, into which the ashes will be poured.
Now all that remains is to install the chimney pipe, connecting the elbows together, fortunately this is not a problem now. Chimney fittings are sold in a variety of sizes and shapes. Afterwards you can begin the actual process of operation. As we have already said, the heat capacity of this stove cannot be compared with the “Russian” stove, but its advantages are its small size, quick heating and the ability to make it from a gas cylinder without any problems, with your own hands.
Advantages and disadvantages
A significant advantage of a vertical stove over a horizontal one is its compactness, which allows it to occupy a minimum area in the bathhouse. Suitable for small spaces.
Other benefits include:
- saving money on investments;
- metal, as a reliable material, has excellent mechanical strength and can withstand temperature fluctuations that do not affect this property;
- Sufficiently thick walls of the material provide high heat transfer. After complete combustion of the fuel, heat is retained further;
- the rounded section of the pipe provides powerful heat distribution and the formation of the necessary draft;
- quick heating of the room in less than 1 hour;
- a metal stove will last more than 10 years if its manufacturing is done skillfully;
- The cylindrical shape of the pipe will eliminate unnecessary right angles and long welds. The main reason for the appearance of corrosion and holes through which carbon monoxide leaks is precisely the welds.
The main and common disadvantage of metal construction is that it is more susceptible to corrosion.
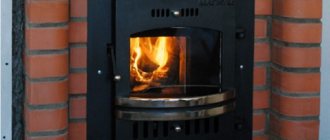
Ways to improve heat transfer from a propane cylinder stove
You can even sleep comfortably in the forest! dry pipe system: do-it-yourself “stove” for a tent
As mentioned above, the main disadvantage of a garage stove made from a gas cylinder is its poor thermal efficiency, because... a significant part of the heat obtained during combustion simply goes out through the chimney along with the gases.
There are several ways to improve the heat transfer of a homemade stove:
- Apply afterburning of flue gases. In this case, the design of the potbelly stove will resemble a “bubafonya” or “slobozhanka” stove. This will make it possible to increase the efficiency of the device by an order of magnitude.
- Extend the chimney pipe. In this case, part of the heat that goes outside remains inside the room. To do this, the pipe is given a broken configuration, without horizontal sections and negative angles.
- Use a smoke pipe. Another cylinder in a vertical position is welded onto the horizontally located stove body from a wood-burning gas cylinder: it will act as a smoke pipe. Improved heat transfer of the stove is achieved here by increasing the area of the heating surface. The condition for preventing smoke from entering the room is the presence of good draft.
- Arrangement of the heater. This technique is widely used in baths, where rubble is used for additional heat accumulation. The metal chimney is equipped with a mesh into which stones are poured to take heat from the pipe and transfer it to the room. In this case, it will take some time to warm up the stones: before this, the air will heat up with some slowdown. But in the future, the surface of the pipe will not burn, and the heated stones will evenly heat the surrounding space. Even after the wood burns out, the accumulated heat will continue to maintain a comfortable temperature in the room for some time.
When selecting stones for backfilling, it is recommended to give preference to round river samples: it is desirable that they have a uniform color without any inclusions. Other types of stones can even be dangerous, bursting when heated, or releasing substances harmful to health.
How to properly make a chimney?
To ensure maximum stability in the operation of a stove structure made from a cylinder, it is imperative to arrange high-quality draft.
To achieve this goal, the cut of the stove chimney pipe must be installed at a certain height. This is slightly higher than the edge of the mounted grate. When connecting a gas chimney to the side, it is necessary to ensure that the length of the strictly horizontal section is approximately 400 mm. At the very bottom of the vertically located part, it is worth organizing high-quality removal of accumulated moisture, as the drawings show.
- At the same time, it is recommended to use certain measures regarding the removal of incoming heat from the chimney part. There are two methods for carrying out this process:
- A horizontal section is being installed at a slight inclination of 35 degrees. Immediately after this, the channel turns upward and leads out. A completed or purchased heat exchanger of a special samovar category is installed on the chimney element; The pipe, which leaves the furnace at a special angle and then passes through the rooms, will be able to transfer warm air. Thanks to this, overall efficiency indicators become higher, while at the same time fuel consumption is seriously reduced.
A heating system based on water fuel will provide the opportunity to install about 2 or 3 radiators in a country house or garage and provide them with heat. Such a device is characterized by simplicity in the manufacturing process, that is, a special water jacket is made in the chimney section, which has two high-quality pipes.
The circulation process present in the water circuit, which is mounted on the body of the stove chimney from a cylinder, will have to be adjusted in a forced manner. A household circulation pump is ideal for this purpose.
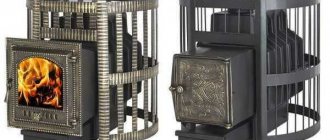
Will a small bottle suffice?
Features, specifics of use and manufacture of the poshekhonka stove
You can also work with a small balloon. It is made according to the same plan as a horizontal stove.
But in this version, instead of drilled holes in the bottom of the stove, a cast iron grate is installed. A window of the required size was cut out for it.
Installation of a cast iron grate
The blower in combination with the grate is welded as follows.
Ash pan made from a piece of channel
- Next, the legs are welded onto the ash pan box, the structure is turned over and the chimney pipe is installed on top and secured by welding.
- After completing work on the potbelly stove, it is installed in a permanent place and the chimney is taken out into the street.
Pyrolysis oven made from cans
Camping stove made from tin cans (bottom view).
Who needs a pyrolysis oven made from cans? Obviously, a person who spends a lot of time in nature. These are tourists, fishermen, hunters and travelers. Considering the fact that factory models are quite expensive and weigh a little more than 300 grams, it is best to start making them yourself. Let us immediately note that for work you will need:
- metal scissors;
- drill.
If you can still use a knife instead of metal scissors, then nothing can replace a drill. Therefore, it is hardly possible to make this device in the field. And there’s no need for this; it’s easier to heat up everything you need over a regular fire. As they say: “Get your sleigh ready in the summer.” In order to make a simple pyrolysis oven with your own hands from cans, you will need just two cans of different diameters. No other materials are needed. Sequence of work:
- in a thicker jar, cut the bottom to the diameter of the thinner jar. The latter should fit very tightly;
- in a thin jar we make holes along the top and bottom edges, as well as in the bottom;
- in a thick jar we make holes only along the top edge, where we did not cut a hole;
- connect two banks. The small one is inserted into the cut hole in the large jar until it stops.
The drilled holes must be wide enough to provide good traction. After you have succeeded in making a pyrolysis oven, all that remains is to check the product. Place it on the ground and put small sticks and paper inside. Since this device is used in field conditions, it is very likely that it will have to be lit with a flint. Matches and paper may get wet. What to do in this case?
A useful life hack for tourists is tinder made from a cotton pad. Tinder is a means of starting a fire. To make waterproof tinder from a cotton pad, simply dip it in melted paraffin. This disc repels moisture and is easily ignited with both matches and flint. To ignite it using only sparks, the cotton wool needs to be torn into small pieces. Once the disk has flared up, it can only be extinguished with water; gusts of wind will not extinguish it.
Read how to choose pipes for heating boilers here.
The best option for making it yourself
The main disadvantage of a classic potbelly stove is its low efficiency, which is expressed in significant fuel consumption and rapid cooling after it burns out. Therefore, modified versions of it are currently used. One of the most popular ways to make a stove from a gas cylinder is to use an old gas cylinder for this. Its sizes vary: miniature 5-liter models are unlikely to be suitable in this case, since the stove will have limited heating capabilities.
As for 12 and 27 liter cylinders, the power of the heater made from them is enough to service small areas. Such devices are able to produce no more than 2-7 kW of heat: they are sometimes used as camp stoves. To make a stationary potbelly stove from a gas cylinder for a garage or cottage, it is recommended to use 50-liter containers, 85 cm high and 30 cm in diameter. The wall thickness here is quite enough to load any fuel. At the same time, the weight of the cylinder allows you to work with it alone.
There is also an option with industrial gas tanks of 40 liters: with approximately the same volume, they have a smaller diameter (25 cm), greater height and thicker walls. Operating a freon cylinder is much more difficult - it is both longer and heavier than a household 50-liter container. If you have the appropriate equipment, it can be shortened to 70 cm: a potbelly stove made in this way will have thicker walls. As a result, it will take more time and fuel to warm it up, but the stove will also take much longer to cool down.
Tips and tricks
Experienced craftsmen advise making a potbelly stove from a gas cylinder, taking into account the following nuances:
The chimney should not take the shortest route. In this case, the heat will leave along with the combustion products. The optimal type of chimney is a broken pipe.
The chimney is made in a broken shape so that heat does not escape from the stove along with the smoke. Curved pipe prevents heat energy from escaping
It’s just important that the pipe is not made of aluminum!
- Any type of fuel can be used as fuel - coal, wood. If necessary, you can burn household waste and carpentry waste in a potbelly stove.
- You can increase heat transfer and make a potbelly stove with high efficiency by increasing the length of the chimney. Parts with straight sections or downward slopes should be avoided.
- If you attach an additional one to the main body cylinder (in the form of a vertical pipe), then you can use the heat twice as much. Such a potbelly stove of two cylinders creates good draft; combustion products and smoke will not enter the room/garage/utility room. In addition, the heat transfer of the heating device will increase.
Main types of oven
A vertical stove is made more often, as it takes up little space and has a neat appearance.
The horizontal design is valued due to the large cooking surface area. The dimensions of the ash pan and the hole for storing firewood in any device are 10x20 and 20x30 cm, respectively. Their markings are applied both to the drawings and to the cylinder itself - this makes it easier to cut out. The location of the holes is chosen arbitrarily, depending on the type of stove.
With the help of such a stove you can heat the room and even cook food outside
The chimney is made from a steel pipe, cutting it into different sections and welding them together. Additionally, you need to insulate it with mineral wool and foil. You can use the finished potbelly stove indoors or outdoors. If the stove is used for cooking outdoors, then it is enough to attach a low pipe for the smoke to escape.
Vertical stove
To create a vertical stove from a propane cylinder, it is placed vertically. It is necessary to cut off the neck, use a marker to draw the markings of the ash pan, chimney and firebox. The holes are cut with a grinder or cutter. Reinforcing bars are cut into identical pieces, forming grate bars. They are welded to the body in parallel rows or in a snake. Hinges for doors are attached, doors are cut out of steel sheet or cast iron. A sliding mechanism or latches are welded to them.
See also: modern types of potbelly stoves.
A hob is necessary if food will be cooked or water will be heated on the stove. To create it, you need to cut out a metal part of suitable size and weld it to the top of the cylinder. After this, all joints and seams are checked for tightness and strength, cleaned and sanded.
The vertical oven is more popular because it takes up less space
The hole for the chimney should be located at the top of the cylinder or on the side, sometimes the pipe passes through the central opening. In the side part, the elbow is first attached, then the chimney itself. Smoke and combustion products come out through the pipe. A metal stand or strong legs are attached to the bottom of the cylinder. Additionally, you can prepare the foundation for the potbelly stove.
Horizontal design
The first step is to create a strong stand. It is made of metal, the legs are welded, and then the body of the finished stove. A marker on the cylinder marks the location of the blower, chimney and fuel holes. The openings are cut with a chisel, grinder or cutter. Using a drill, holes are drilled in the lower part of the body. An ash pan is attached to the top; it is made of strong, heat-resistant metal. A damper is welded to the opening, which will serve as a blower.
The door is prepared from the cut out part of the cylinder. It must be scalded and attached to the body using hinges. Although you can make a cast iron door with a latch and weld it. The chimney should exit from the top rear of the stove. A steel sheet is laid and secured on top of the body to create a flat cooking surface.
A horizontal stove will require more space - this is its main disadvantage
Efficient heat extraction
The gases entering the chimney duct are still at a high temperature. It is not advisable to simply throw them outside; everyone will understand that the efficiency of such an installation will be too low. Taking advantage of the fact that the rocket stove literally pushes combustion products out, craftsmen have come up with 2 ways to extract heat:
- passing gases through channels arranged under the stove bench;
- installing a water circuit on the stove.
A rocket stove with a water circuit is made without a hood; the force of the upward flow of combustion products is used in a multi-pass heat exchanger made of metal. It is not recommended to introduce a coil of water into the gas flow; it will not last long due to the too high temperature. It would be more correct to make a water jacket with metal fins inside the flue, as shown in the diagram:
Another way is to lay horizontal chimney ducts out of brick directly along the floor surface and place a luxurious heated adobe bench on top, connecting a rocket-type stove to it. What is important here is the correct selection of the length of the channels so that the excess pressure is enough to overcome them, otherwise you will still have to take care of organizing natural draft.
Preparatory activities
Since constructing a Bubafonya stove from a gas cylinder will require a welding machine, it is necessary to find a suitable room for the work in advance. It must be equipped with effective ventilation, uninterrupted power supply and reliable wiring (as a rule, the use of welding provokes power surges in the network). The workroom must be well protected from climatic influences and have sufficient space. It is also desirable to have good sound insulation, since the grinder and welding machine are quite noisy tools.
You also need to prepare the following materials:
- Old gas cylinder. This is the basis for a pyrolysis oven. Also suitable for this role is a steel or cast iron barrel with a volume of approximately 200 liters, which has strong, rust-free walls. Often, large fire extinguishers or metal pipes with welded bottoms are used for this.
- Pieces of reinforcement. They will be needed to make handles, which are usually installed on the sides of the case and on top of the lid. This significantly simplifies the procedure for cleaning the stove from combustion residues and moving it from place to place.
- Steel sheet for piston.
- A pair of metal pipes. They are needed for the manufacture of a chimney and air duct. The optimal cross-section for the air pipe is 85-100 mm. Moreover, it is approximately 150 mm higher than the height of the cylinder. For the chimney you will need a wider pipe: its diameter must be at least 150 mm. The length of the smoke channel should not be less than the cross section of the cylinder.
- Channel.
- Material for laying the foundation for the stove.
List of tools required for work:
- Hammer.
- Vise.
- Shovel.
- Master OK.
- Portable welding machine with a set of electrodes.
- Grinder for cutting blanks.
- Tape measure, pencil, plumb line and level.
Independent arrangement from disks
The designs of such furnaces may differ slightly. Someone welds a metal plate in the upper third, increasing the path that the smoke travels, someone welds grates inside from fittings, or makes a heater - outside or inside. In general, there are a sufficient number of ways to modernize the design of a stove, which in its simplest form is simply a potbelly stove. It is these improvements that turn a potbelly stove into a sauna stove.
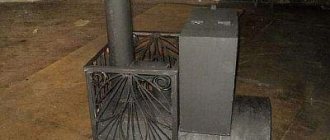
Firing a homemade stove from a gas cylinder showed that very strong heat was coming from the body. There are two options: make a large mesh for stones on top or cover the stove with a brick screen. It was decided to make a heater on top. It was welded using 14-diameter reinforcement.
Mesh for stones on a sauna stove made from a gas cylinder
As you can see, in order to protect the log wall from heat, they built a half-brick brick wall. Its height is not lower than the laying of stones.
Even with a heater on top, the chimney becomes very hot during combustion. There are also options for this:
- Make a mesh for stones on the chimney. This will increase the inertia of the stove; after the wood burns out, the bath will remain warm for a long time. Hard heat will also be removed, and the temperature of the flue gases will become lower, and this will increase fire safety. The design is visible in the photo; you can use a mesh with a wire thickness of 3-4 mm or weld it from a thin rod.
Design of a mesh for stones on a pipe - Make a heat exchanger on the pipe. It can be in several versions: Water jacket. Make a sealed tank around the pipe with two pipes, which are connected to an external water tank (you can power a couple of water heating radiators).
- Just a heat exchanger to increase heat removal. Another cylinder is simply welded around the pipe, only a long and narrow oxygen cylinder. Due to the larger area, heat transfer increases.
The second cylinder - for greater heat removal and better heating of the room - Coil on a pipe. Instead of a water jacket, you can wind several turns of a pipe, preferably copper, around the pipe, through which you can run water to the remote tank.
The principle of operation of a water jacket on a pipe
The principle of operation of a convector on a pipe by Feringer
The ash pan in such a design as described above is inconvenient: you will have to clean it with a poker, scooping out the coals into some kind of container. Not the best option. A retractable one is more convenient in this regard. It is also used as a combustion intensity regulator. The temperature is raised with the ash pan open, combustion is active. After reaching the specified parameters, the ash pan is pushed in, little air flows in, and the combustion almost dies out.
Scheme of a cylinder stove with a retractable ash pan and a heat exchanger
If you need hot water in the bath, you can install a heat exchanger inside the firebox (in the photo above it is shown as a rectangle). The heat exchanger can be made in the form of a tube, bent in the shape of the letter U or C - whichever “fits” best. This is a simpler option. Sometimes it is made in the form of a small flat box with welded pipes.
Adjusting combustion using an ash box is rough. Fine adjustments can be made by welding a metal cup with a slide valve onto the door. By turning the gate, you increase/decrease the amount of air and combustion intensity smoothly, achieving exactly the mode that you need at the moment.
Example of a door with a gate
This idea was taken from Buleryan stoves. It's simple and effective. There are several photos of devices for adjusting the air supply to the firebox below.
How to make a gate on the door
Please note that the gate valve disk must be made either smaller in diameter than the inner diameter of the glass (by 5-10%) or a part is cut out in it (a sector, part of a circle is cut off). This condition is mandatory. This ensures minimal draft, and it is mandatory for safety: it carries away combustion products, preventing people from getting burned.
How to make a sauna stove from a pipe is written here.
The second version of a stove made from a metal gas cylinder will be even more interesting and there are reasons for this. Firstly, more detailed instructions for making the stove will be provided here. Secondly, this stove can be used not only as a stove, but also as a boiler, although it will be necessary to build a small attachment with a copper pipe, coil and tank, where the heated water will be poured.
Although less words and more action, so let’s start explaining how you can make a stove for a bathhouse with a boiler from a gas cylinder. First of all, we take the cylinder, open all the caps and pour water into it to displace the explosive gas. In principle, it was necessary to do the same in the first case. Next, drain the water and the cylinder can be cut. Cut out the door from the end of the tank.
Next, we use tires, which we insert from the back side and weld to the tank. The purpose of these tires is clear: to reduce the gaps, or better yet, remove them altogether, while the door is closed.
Now we sculpt the hinges for the door. You can buy ready-made loops, but if you do everything yourself, then the loops go there too. We use 4 hinges, two for the doors...
...and two on a gas cylinder.
We weld them and install a rod relative to which the door will open. We install the door, and do not forget about the handle with which the stove door will open and close. At the same time, the handle is rotary, like a putter on a gate, so that the door can be locked in the closed position. We will use the small hole on the door as an inspection window. To do this, we cut out a metal plate and attach it to the flange on the door.
Let's start processing the balloon from above. Here we will make a platform so that you can put a ladle or bucket of water on it to heat them up. To do this, you need to cut off the body of the cylinder. Place the plate on top and close the hole at the ends with curly parts.
Don't forget about the chimney. Where would we be without it in the oven?
The pipe is a body of rotation, and the angle grinder cuts in straight lines. This means it will be difficult, but nothing is impossible.
We cut the cylinder body in such a way that a chimney pipe can be inserted from the opposite end of the cylinder. We make a rotary view in the outlet pipe.
It will rotate in the body of the pipe and close after the stove is heated.
Now it is necessary to thoroughly boil all the cracks so that burnt gases are not drawn into the room and so that they do not disperse in the near future. The work is scrupulous, but necessary and important, so work hard.
It's time to put our gas cylinder stove on its feet. We use a square pipe and a shredder. At the ends of the pipe we set the angle at which the legs will stand, and from below we fasten them with a shredder.
Now we can try to light our stove, preferably somewhere in the garden. In this case, we will burn the paint off the body, and secondly, we will observe where the smoke will come out so that, if necessary, we can weld the cracks again.
After the stove is heated, we clean off the remaining paint and paint it with heat-resistant paint.
And we begin the production of the boiler. The boiler will be remote, that is, it will stand separately from the stove, on a shelf that is attached to the wall. In this case, water heating will not occur according to the usual pattern. That is, not due to the fact that the bottom of the tank heats up the fire, but due to the intake of cold water, heating it from the pipe and supplying hot water back to the tank.
This is a cyclic random thermal pump. The water will circulate due to the fact that the heated liquid will rise upward, and therefore pour into the tank through the upper tube, while cold water from the tank will naturally be sucked into the lower tube. This circulation process will occur constantly while the stove is heating and the temperatures of the pipe and water in the coil will be significantly different.
After we have understood the principle of operation of heating from a pipe, we begin to implement this project. To do this, we need a tube, preferably made of metal with good thermal conductivity. In our case it is a copper tube. We leave straight sections for connecting to the tank, the rest is wound onto the pipeline, simply wrapping the coil around the chimney. Now all that remains is to connect the tube to the tank.
To do this, we put on union nuts and flare them onto the tube - coil and screw everything to the tank.
That's all. The cylinder stove is ready, the boiler is functioning. At the same time, there is still room for something that can be placed directly on the stove. Here you can organize a heater to heat up the heat. After all, what would it be like to go to the bathhouse without it!
We have given you two examples of how you can make a stove from a gas cylinder and use it for different needs. Whether it's heating a small garden house, or using a stove for a bath. Both options are quite affordable, pragmatic and worthy of attention. So now it's all up to you. What do you choose based on your needs and goals, what will be the best option for you based on your goals, budget, desires and strengths.
Selection principles
When choosing, you need to consider a number of factors:
Oven dimensions. Its dimensions should not interfere with free movement around the bath premises
It is recommended to choose a design with an external combustion chamber. Fuel consumption. If there is no warm water in the bathhouse, you need to choose a model with a water tank. If you want to buy a universal model, it is recommended to pay attention to units powered by gas or solid fuel. A special mechanism is installed inside the structure, which divides the combustion chamber into two parts for different types of fuel.
The volume of the water tank depends on its location. If it is built-in, the capacity will be small. If it is external, the volume will be greater.
Selection of oven
Advantages and disadvantages
Advantages:
- Small size. The design does not have a large combustion chamber as in stoves that run on solid fuel.
- Furnace equipment allows you to set different temperature conditions. Thanks to this, you can set the optimal temperature and maintain it for a long time.
- If you don’t need to heat the sauna, you can simply heat the water in a mounted or built-in tank.
- Fast heating.
- You can connect gas cylinders if it is impossible to connect a pipe with a central gas supply.
- Fuel efficiency.
- Universal models can use 2–3 types of fuel.
Flaws:
- The risk of explosion is higher than that of equipment operating on other types of fuel.
- It is necessary to constantly change gas cylinders or connect the stove to the central gas supply system.
If there are no problems with the gas supply, there are fewer disadvantages.
Popular models and prices
Popular models:
- Furnace "P-20GT". Power - 20 kW. Suitable for heating steam rooms with a volume of up to 22 m3. There are fastenings for installing a water tank.
- KUTKIN Standard G-2.0. Model for heating rooms up to 16 m3.
- Termofor Taimyr INOX. Suitable for heating steam rooms with a volume of up to 18 m3. The design has two heaters - internal and external.
- Termofor Urengoy Carbon. Made from high strength steel. Suitable for heating rooms up to 12 m3.
- Heat-Malyutkagaz. Equipment power - 16 kW. Designed for heating steam rooms with a volume of up to 12 m3.
The average price of gas stoves is 16,000 rubles.
Types of furnaces
Chimney installation
The chimney is an important component for removing combustion products. They come in three types:
They come in three types:
- Ceramic. A ceramic chimney has the longest shelf life. Maximum resistance to high temperatures.
- Brick. Due to its rough surface, a brick chimney quickly accumulates soot and slows down air draft.
- Steel. A steel chimney is most suitable for a bathhouse due to its affordable price. Also, due to the rapid heating of the metal, a tank is installed and then used for procedures. A stainless steel chimney is the most current. This material is not afraid of water, high temperatures, is not susceptible to corrosion, is lightweight, durable and cheap.
Build process:
- Before installation, you need to mark the location for making the hole.
- A galvanized steel casing is installed on the pipe, after which rings are put on and fixed to the ceiling. The lower pipe is secured with self-tapping screws. The clamps securely fix the chimney.
- The second part is installed on the roof. The holes between the roof and the chimney are filled with expanded clay, clay or asbestos.
Furnace in production
A waste oil furnace operates as follows: a supply of oil is poured into the fuel compartment, it is ignited, and more or less air flow is supplied through the air damper, thus controlling the power of the furnace. Combustion products rise through a vertical perforated pipe and carry with them vapors of evaporating oil.
This mixture is burned along the entire length of the pipe and enters the afterburner chamber, divided into two parts. In the first, oil vapors are burned, in the second, with a lack of oxygen, nitrogen compounds are split into oxygen and nitrogen. The resulting oxygen promotes afterburning of combustion products, ensuring constant temperature and energy efficiency.
Pyrolysis oil furnace
A pyrolysis oil furnace made from a gas cylinder has a very high efficiency - about 80%. The disadvantage of such a pyrolysis device is harmful fumes and an unpleasant odor. This stove is not suitable for residential premises or areas where animals are kept.
Potbelly stoves - proven and simple designs
Potbelly stoves were a hit of the 20s of the last century. At that time, these stoves competed with brick stoves and were installed everywhere, even in apartments. Later, with the advent of centralized heating, they lost their relevance, but are used in garages, dachas, and for heating utility or outbuildings.
Sheet metal
Potbelly stoves from a cylinder, barrel or pipe
The most suitable material for making a potbelly stove for a garage is propane cylinders or a pipe with a thick wall. Barrels are also suitable, but you need to look for ones that are not very large in volume and have a thick wall. In any option, the minimum wall thickness is 2-3 mm, the optimal is 5 mm. Such a stove will serve for many years.
By design they are vertical and horizontal. It is more convenient to burn horizontally with firewood - longer logs will fit. It’s easier to make one extended upward, but the firebox is small in size, so you’ll have to cut the wood finely.
A potbelly stove for a garage can be made from a cylinder or pipe with a thick wall
Vertical
First, how to make a vertical stove for a garage from a cylinder or pipe. Divide the selected segment into two unequal parts. Below is a smaller one for collecting ash, above is the main one for storing firewood. The following is the order of work:
- Cut out the doors. Small at the bottom, solid at the top. We use the cut pieces as doors, so we don’t throw them away.
- We weld the grates in the chosen place. Usually this is steel reinforcement cut into pieces of the required length with a thickness of 12-16 mm. The reinforcement installation step is about 2 cm.
- Weld the bottom if there is none.
- We cut out a hole in the lid for the chimney, weld a strip of metal about 7-10 cm high. It is better to make the outer diameter of the resulting pipe fit standard chimneys. Then there will be no problems with the installation of the chimney.
- We weld the lid with the welded pipe into place.
- Using welding, we attach the locks and hinges to the cut-out door pieces and install it all in place. As a rule, potbelly stoves are not airtight, so there is no need to make seals. But if desired, you can weld a strip of metal 1.5-2 cm wide around the perimeter of the doors. Its protruding part will cover a small gap around the perimeter.
Overall, that's it. All that remains is to assemble the chimney and you can test a new stove for the garage.
Horizontal
If the housing is located horizontally, the ash box is usually welded from below. It can be welded to the required dimensions from sheet steel or a piece of channel of a suitable size can be used. Holes are made in the part of the body that will be directed downwards. It’s better to cut something like grate bars.
How to make a potbelly stove for a garage from a gas cylinder
Then in the upper part of the body we make a pipe for the chimney. To do this, you can weld a cut piece from a pipe of a suitable diameter. After the piece of pipe is installed and the seam is checked, the metal inside the ring is cut out.
Next you can make the legs. The best fit is pieces of a corner, to which small pieces of metal are attached from below so that they stand stable.
The next step is installing the doors. You can cut a piece of metal onto the ash pan, attach hinges and a lock. There are no special problems here. The gaps around the edges do not interfere - combustion air will flow through them.
There will be no difficulties if you are making a door from metal - welding the hinges is not a problem. Only here, in order to be able to at least slightly regulate the combustion, the door needs to be made a little larger - so that the perimeter of the opening is closed.
How to install stove casting on a metal stove
It is problematic to install furnace casting. Suddenly someone wants to have not a steel door, but a cast iron one. Then you need to weld a frame from a steel corner, attach the casting to it with bolts, and weld this entire structure to the body.
From two barrels
Anyone who has used a potbelly stove knows that very hard radiation comes from its body. Often the walls become heated to a red glow. Then it is impossible to be near her. The problem is solved with an interesting design: two barrels of different diameters, inserted one into the other. The gaps between the walls are filled with pebbles, clay mixed with sand (calcined over a fire, then filled in only after it has cooled). The inner barrel acts as a firebox, and the outer one is just the body.
This stove will take longer to heat up. It will not immediately begin to give off heat, but it will be more comfortable in the garage and after the fuel burns out, it will warm the room for another couple of hours - releasing the heat accumulated in the bookmark.
https://youtube.com/watch?v=PEWZxL2ebXE
Organization of the base under the stove
A do-it-yourself sauna stove made from a gas cylinder, as mentioned above, is quite compact and lightweight. Very often, users place a sheet of metal placed on asbestos cardboard under the stove as a heat-resistant base. Let's face it, this decision cannot be called very successful. There are several reasons for this:
- Asbestos is an unfavorable material from the point of view of environmental and sanitary safety, the use of which, in bathhouse conditions, is extremely limited.
- This design, especially on wooden floors, does not have sufficient load-bearing capacity.
- A sheet of metal can create some inconvenience for bathhouse users, especially if its plane is not aligned with the floor.
Materials for a gas sauna stove
According to manufacturing materials:
- Cast iron.
- Steel.
- Brick.
Cast iron structures are not available for independent reproduction, since they are cast on industrial equipment.
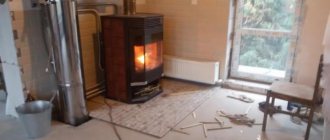
Steel stoves are compact and lightweight. They do not require a massive foundation. The thickness of the metal is about 5 mm. Their walls can become very hot, so usually a protective “casing”, for example, made of brick, is built on several sides of the stove. A sauna equipped with a metal stove warms up in 2–3 hours.
You can also build a hybrid of a brick oven and a gas burner with your own hands. Such a unit will take longer to melt, but it will also retain heat in the room longer.
When deciding whether to build a brick oven, you need to consider:
- There are metal structures inside the array, so welding work cannot be avoided.
- Brickwork is a labor-intensive and time-consuming process that requires special skills.
- The structure will require more space.
- As a base, you will need a concrete slab that is not connected to the foundation of the bathhouse.
- The brick oven needs to be heated 5 – 6 hours before the start of the bath procedures.
- The heat from a brick oven is softer, the masonry does not heat up and does not pose a threat to people and the walls of the building.
Some craftsmen even manage to remake a finished brick wood-burning stove by inserting a burner into it. But you need to remember that a brick is a heat accumulator that is not capable of so quickly absorbing the amount of heat that the burner provides.
Brick oven
Therefore, massive stoves (Russian) and bell-type stoves are not suitable for conversion. You can gasify a Swedish, Dutch and other models with several wells.
The main disadvantage of metal sauna stoves is that they cool down quickly. Therefore, owners of solid fuel stoves are forced to constantly “add” fuel during bathing procedures.
For gas stoves this is not a problem. They simply remain “on” all the time while people are in the bathhouse.
Preparation stage
To be used as a housing for a furnace, the cylinder must meet the following number of parameters:
- The cylinder must be all-metal; composite materials are not suitable - they are not heat-resistant and are quite explosive;
- The volume of the gas cylinder must be at least 12 liters. Stoves made from smaller volume cylinders are not economical due to the low ratio of volume to surface area. The fuel in such a stove will not burn completely due to high heat loss. Cylinders with a volume of 12 to 27 liters are suitable for the manufacture of small stoves for heating small rooms from time to time. The most suitable volume of a gas cylinder is 50 liters. Stoves of this size are suitable for long-term operation and use any fuel efficiently;
Industrial pneumatic cylinders (the common size is 40 liters, smaller sizes are used for helium) are not suitable for converting them into any heating devices using household means. They have very thick walls, and they themselves are heavy and bulky; their shape is not suitable for use as a firebox - they are too elongated in length.
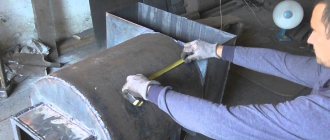
Boiler thermal insulation
Boiler connection diagram.
Before installing the boiler, you need to make its own thermal insulation. This should be done to reduce heat loss and increase system efficiency. Using glue, wrap our boiler with insulating building material. You can also use foam for installation. You can also make thermal insulation using two containers of different sizes. In this option, we isolate the space between the containers we use. This insulation option increases the performance of the water heater and reduces energy costs.
By making a boiler with our own hands, we save a lot. The quality remains virtually unchanged.
Operating rules
Most waste gas cylinder stoves are not suitable for permanent residential use. Their safety level does not really meet fire safety requirements.
When placing such devices, it is important to try to place them on a level surface to prevent the possibility of falling. If the stove is placed on a surface that can catch fire, then it should be placed on mineral cardboard or a sheet of roofing sheet
When using products indoors, it is necessary to take into account that due to the fact that the firebox body is made of metal, the air in the room “burns out” quite quickly
Therefore, it is vital to ensure regular and sufficient ventilation of the premises.
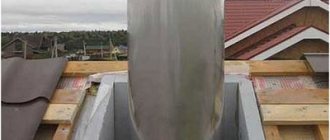
Installation of a chimney for a homemade stove
Smoke removal is a very important process when installing a wood stove in enclosed spaces. Carbon monoxide is quite dangerous to human life and health. In addition, the draft will depend on the quality of the chimney, and therefore the quality of heating and the rate of temperature increase.
A hole was cut in the upper compartment of the stove. Here I used a gas burner, which turned out to be more convenient. The most interesting thing is that chimney pipes, if bought at the markets, will cost a fairly large amount. I was lucky; I had several pieces with a diameter of 100 mm lying in the garage. If there is no way to find them for free, then it is better to try to purchase them at scrap metal collection points.
To make the hole for the pipe more even, I used the rest of the disc from the grinder, although, in fact, there is no need for perfect accuracy here.
Marking the hole for the future chimney
I don’t think it’s worth talking about welding the smoke exhaust pipe itself. Each room has individual dimensions and layout, which means that in the end you won’t be able to find a single repeating option. For greater heat transfer, the chimney can be made using several elbows, although the heat that the flame will emit in such a potbelly stove is sometimes even too much.
The chimney was led out at a slight slope towards the wall, and then to the street (under the garage ceiling)
Work principles
A DIY gas cylinder sauna stove generates heat due to the following elements:
- Blower is a channel at the bottom of the structure through which air is pumped. It provides sufficient oxygen for combustion and collects ash. The blower is equipped with a door that regulates the power of the furnace, increasing or decreasing the amount of incoming air;
- The firebox is the combustion chamber and the main source of heat. It is located at the top of the oven. Between it and the ash pit there is a grate on which firewood or coal is placed;
- A chimney is a channel for removing combustion products outside the room. It can be partially closed (using a wedge gate) to slow down fuel combustion and increase furnace efficiency.
Each of the elements described above takes part in the operation of a homemade sauna stove. The blower allows air into the firebox, creating favorable conditions for burning fuel. Wood or coal burns in the firebox, producing heat. This process is accompanied by the release of carbon monoxide and other components that are removed from the room through the chimney.
Using a throttle valve and a wedge-shaped solution, the power of the furnace is regulated. Well, the door in the firebox is used to load fuel and remove ash.
Design features of this type of furnace
In general, the design of such a product has the following features:
- The front part of the end of the cylinder, directly where the mouth of the valve is located, is cut off, and the end is subsequently equipped with a loading door and a lower ash pan, also equipped with a door with locking and hinged fittings, as a blower;
- In the lower part of the resulting cylinder - the firebox - there is a direct ash box, separated from the combustion space by a grate;
- The upper outer part of the firebox cylinder will be equipped with a basket for holding the stone fill, made from reinforcing rod. In space, this part will occupy approximately ½ of the upper plane, with its displacement closer to the rear end;
- The stove is equipped with legs of various designs, the main task of which is to provide a distance gap between the bottom of the stove and the floor plane;
- The smoke channel is equipped with a slide damper, which, along with the furnace ash door, helps regulate the level of draft and quality, as well as the burning rate of the fuel in its firebox.
In addition, it is worth mentioning such details as thermal cutoff of walls and ceilings. These are areas equipped with heat-resistant screens that are located in close proximity to the combustion source. Practice shows that the most common screens are thin sheets of stainless iron with a polished front, sections of masonry, trimmed with ceramic tiles, and the like. It is worth noting that areas with a mineral coating are often finished with metallized foil, which theoretically should help reflect heat waves into the room.
Operation and first firing
When the homemade stove from a gas cylinder is ready and installed on the prepared base, you need to perform the first heating. For this, it is recommended to use straw, large chips without large firewood. The first heating should be carried out in a gentle mode for 3–4 hours. You need to carefully inspect the connection points for gaps.
Operating rules:
- We must not forget to regularly clean the chimney, ash pan, and grate from soot and ash.
- It is not recommended to throw too much wood into the firebox.
- Surrounding surfaces should be covered with non-combustible materials.
- Place stones in the heater from large to small.
Place a sheet of metal on the floor in front of the stove to prevent it from being burned by coals. Store firewood away from stove equipment.
In order not to spend extra money on buying a stove in a store, you can assemble it yourself from a gas cylinder. To do this, it is enough to have basic skills in using a welding machine, grinder, or drill.
You can learn more about making a stove from a gas cylinder from the video:
A little history
The development of the Bubafonya stove is attributed to folk craftsman Afanasy Bubyakin from Kolyma. Subsequently, a new invention was named in his honor. During his experiments, Afanasy relied on the design of the Lithuanian-made Stropuva pyrolysis boiler.
The domestic inventor tried to simplify the design as much as possible so that it could be built with your own hands. This specificity of Bubafoni explains its high popularity. Considering that the material for the manufacture of this device is mainly improvised means, it cannot boast of external aesthetics. The strengths of the stove are its simplicity, efficiency and reliability.
Drawing up a drawing
The main proportion in the process of making a homemade Bubafonya stove from a gas cylinder is the mathematical ratio of the parameter of the internal diameter of the body and its height. It should be between three and five to one. The optimal diameter is from 30 to 80 cm.
Making the diameter of the stove body less than 30 cm is not effective, since oxygen will circulate too quickly through the combustion chamber without fully reacting with the wood. This leads to a noticeable decrease in the efficiency of the device. In chambers with a diameter of more than 80 cm, another problem arises - in it, the firewood on the edge burns very slowly, and in the center - faster. As the fuel burns out, a hole appears into which the piston descends. As a result, the flame gradually fades away. In the drawing, it is more convenient to denote the diameter by the letter D, and the height by H.
How to install a cast iron door on a metal cylinder
When making a sauna stove from a gas cylinder with your own hands, it is easier to attach a ready-made casting than to weld the door yourself. But it’s not clear how to join two different metals. It's really simple. Buy the cast iron door you like or the size that suits you. It comes with a frame. The same frame is welded from a metal corner of a suitable size. It is welded to the cylinder, and the cast iron door is bolted to it.
How to attach a cast iron door to a gas cylinder
To seal between the frames, you can lay a layer of asbestos or mineral wool cardboard (just make sure that it can withstand high temperatures - up to 1200°C minimum). You can do it differently - weld a small edge of 1-2 cm onto the metal frame, which will cover the gap.
Solid fuel stove
How can you make a stove from a gas cylinder? The first question that arises even before starting work is: what is the best way to position the cylinder - horizontally or vertically?
If you want to use the stove for cooking, you will have to place the cylinders horizontally.
In the vertical version, grates will have to be installed inside the cylinder; in the horizontal version, this can be done at will.
But in a horizontal design, you will have to weld a tray to collect ash, and in a vertical design, when installing the grates at a sufficient height, you don’t have to make an ash pan.
Home craftsmen make them themselves from a piece of metal cut from a cylinder when making a hole for the combustion chamber.
In this case, you only need to purchase hinges and a latch handle. For a purchased door, you will have to weld a frame welded from corners onto the cylinder around the perimeter of the holes, and then bolt the fittings onto it.
Before you start cutting or welding metal, you need to empty the container of gas. The cylinder is filled to the top with water, then it is drained and only after that they begin to work.
Stages of manufacturing a horizontal potbelly stove:
- cut off the upper part of the container with a grinder;
- install a grate made of bent reinforcement inside the cylinder;
- the fittings are welded to the container;
- cut out a circle equal to the outer diameter of the cylinder from steel 4 mm thick;
- rectangular holes are cut in the circle - the first for the firebox, the second for the ash pan;
- weld a steel circle;
- secure the doors;
- cover the doors along the contour with asbestos cement;
- begin to re-equip the rear part of the stove - cut out a hole for the chimney equal to the diameter of the pipe;
- weld a chimney from a thick-walled pipe.
When the cylinder is positioned vertically, the result is a structure that takes up minimal space.
This cylinder stove is suitable for a bathhouse, a small living space, and can be placed in a garage.
Stages of manufacturing a vertical potbelly stove:
- cut off the upper part of the cylinder with a grinder;
- a large hole is cut out on the front of the future furnace for the firebox, below - for the ash pan, through which the structure will be cleaned of ash;
- A grate made of reinforcing bars is lowered inside the cylinder and welded to the walls;
- a border is welded onto the holes under the doors and covered with asbestos-cement cord;
- weld the top - it was cut off only to install the grate;
- a chimney opening is made on top or on the side.
How to make a horizontal stove in a bathhouse
On the Internet you can find a lot of information on the manufacture of various metal sauna stoves, including drawings and videos. The information is not always complete and understandable to ordinary people; there are many repetitions. Therefore, below in the photo and drawings is a working copy of a metal sauna stove made by our project expert Vitaly Dashko from a cylinder with a diameter of 0.5 m and a wall thickness of 5 mm.
A sauna heater made from a cylinder is somewhat simpler to manufacture and more convenient to use, this will become clear later. You can weld a stove into a bathhouse in the same way from a DN500 pipe (outer diameter is 530 mm).
To carry out the work, you must prepare the following additional materials:
- sheet metal (Steel 10-20) 4 mm thick - for doors;
- asbestos cord - for door seals;
- a piece of pipe DN150 for the chimney pipe;
- reinforcement made of low-carbon steel of periodic profile, diameter 16-20 mm is suitable;
- corner 25 x 3 mm;
- suitable rolled metal for legs;
- door handles are purchased.
Note. If the same stove is made from a DN500 pipe, then in addition you will need sheet steel 5 mm thick for mounting the side walls of the firebox.
Recommendations for selecting metal
To make a sauna stove reliable and last for many years, you need to choose the right grade of metal. Since such heat generators are usually assembled from scrap materials or materials purchased from scrap metal, high-carbon or alloy steel may be among the scraps, which is extremely undesirable. The best option is steel with a carbon content of up to 2% (St10, St20).
Checking the color of sparks from steel on sandpaper
When welding high-carbon metal, the seams may crack immediately after the parts cool. Another point: this steel is susceptible to hardening and can be hardened by exposure to high temperatures at maximum operating mode. This leads to deformation and rupture of welds. It is also better not to mess with alloy steels, unless you are a professional welder.
It is quite easy to identify low carbon metals. It is necessary to bring the edge of the sheet to the rotating circle of the emery machine to study the color and behavior of the sparks. They should be light yellow and fall in a straight line, as shown in the photo above. If the color of the spark is closer to white and it scatters in different directions with many “stars,” then the material contains a high percentage of carbon. Dull orange, red or bright white color indicates that the steel is alloyed.
Work order
It makes no sense to list all the necessary tools for work; it is enough to mention a welding inverter, an angle grinder (grinder) and measuring devices. Instead of a grinder, a gas cutter is also perfect. The first operation is cutting off the side of the cylinder along the factory weld with preliminary filling with water. We get an open opening for installing grate bars into the firebox of the stove and a cut-off part where we need to put the doors.
Then you need to cut the iron into pieces of certain sizes, focusing on the drawing of a metal sauna stove:
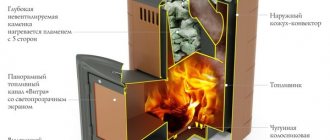
An important point regarding the question of how to correctly place the chimney pipe on the stove body. To avoid large heat losses, you should not fit it to the back, as various craftsmen do. It is better to cut a hole and weld the pipe on top, departing from the edge at least 150 mm, as shown in the drawing. This will allow the flue gases to circulate in the back of the firebox before escaping outside and in this way transfer heat more intensively to the bathhouse room.
According to the dimensions indicated in the drawing, it is necessary to make a grate from the reinforcement by welding many transverse rods to 2 longitudinal rods with a pitch of 45-50 mm, as was done in the photo:
The design of this metal sauna stove provides for the grate to be supported on 2 corners, attached to the inner walls of the firebox by electric welding. The grate bars should not be rigidly tied to the corners, but simply lie on top, as shown in the sectional drawing of the stove:
In the cut-off part of the body, openings are cut out with a grinder, where the door frame is installed. Ribs are welded to the inside of the doors themselves, then awnings and purchased handles. A sealing asbestos cord is placed between the ribs. It is better to mount the doors in place after the grate has been installed in the homemade oven and the cut-off part has been hermetically welded into place.
Due to the fact that the cylinder has curves on the sides, a gentle rise of the bottom part is formed from the inside in front of the ash pan door. Thanks to it, a metal sauna stove made from a cylinder with your own hands is easy to clean, and the ash is easy to shovel out. In a homemade pipe stove, an inconvenient threshold will appear in this place, so the door should be placed as low as possible.
To protect against hard infrared radiation emanating from hot metal walls, and also in accordance with the rules for constructing a bathhouse, the expert recommends enclosing the body with a mesh, filling it to the top with stones. Simply put, make a homemade heater that surrounds the stove on all sides except the front. Not just any stones are suitable for filling, but those recommended for the bath:
- soapstone;
- basalt;
- river pebbles;
- white or crimson quartzite;
- gabbro-diabase.
Potbelly stove with remote firebox
The design of the previous version of the heater involves heating the bath from inside the steam room, which is not always convenient. There are many factory-made models on sale that have a so-called remote firebox, which allows all manipulations to be carried out from the adjacent room - the dressing room. You can also safely store firewood there.
The framing of the front panel with doors opening into the dressing room is made according to the thickness of the steam room wall
Anyone who is able to make a homemade metal stove from a pipe can easily weld an external firebox to it if necessary. The algorithm for carrying out the work is preserved, only the doors are installed on the front part of the firebox artificially pushed forward. A metal sauna stove is shown in detail and with dimensions in the drawing:
Note. The total length of the housing and a separate protruding structure may vary depending on the installation conditions of the heater (wall thickness, dimensions of the steam room, and so on). How a similar stove design with a drawer is welded in practice is described in the video:
In both presented designs, the amount of combustion air is regulated by opening the ash chamber door. Regulation can be optimized by installing a simple device with a spring-loaded flap in the door. It is easy to make from a piece of pipe with a diameter of 57 or 76 mm and a piece of thin metal. A 6 mm hole is drilled in the pipe, an axle made of the same wire is inserted into it, and a metal damper is welded to it. The end of the axle is fixed with a nut and a spring, as shown in the figure:
A homemade air damper can be easily integrated into the combustion door
We improve heat transfer
The biggest problem with potbelly stoves: inefficient heat consumption. Most of it literally flies into the chimney with flue gases. This disadvantage is effectively combated in upper combustion furnaces with afterburning of flue gases, such as the Bubafonya furnace (also, by the way, can be made from a gas cylinder) and Slobozhanka.
A variant of a potbelly stove made from propane cylinders with secondary combustion - the efficiency is higher than that of “conventional” models.
Another way to improve heat transfer is to make the chimney longer, thereby increasing the amount of heat that will remain in the room. When designing such a broken chimney, it is better to avoid horizontal sections, and even more so areas with a negative slope.
This gas cylinder stove runs on wood. We increased heat transfer by making a long broken chimney
Another option to use the heat of flue gases is to weld a vertical cylinder-smoke pipe to a horizontally located cylinder-housing. Due to the larger area, heat transfer will be higher. You just need to create good draft so that the smoke does not go into the room.
Such a potbelly stove made from a gas cylinder will warm up the room faster
You can do it the way they do in sauna stoves: put a mesh around a metal pipe and pour stones into it. They will take heat from the pipe and then release it into the room. But. Firstly, until the stones heat up, the air will warm up slowly. Secondly, not all stones are suitable, but only the round ones that are along the rivers. Moreover, they are uniformly colored without inclusions. Others cannot be filled in: they can explode from high temperatures no worse than a fragmentation shell, or emit radon, which is very harmful in significant concentrations.
The solution can be found at sauna stoves: build a grid for stones on the pipe
But this solution also has advantages: firstly, the pipe will not burn. The stones produce even heat. Secondly, after the furnace goes out, they will maintain the temperature in the room.
Often you need to quickly heat a room. To do this, you can use a regular fan that will blow through the body and/or pipe of the furnace. But the same idea can be implemented with a stationary version: weld through pipes into the potbelly stove cylinder in the upper part. On one side, attach a fan to them (heat-resistant, preferably with several speeds, so that you can regulate the temperature).
Pipes are welded into the upper part of the cylinder and pass through. On one side, a fan is attached to them, which drives air through them, quickly warming up the room.
Another option that allows you to achieve active air movement along the walls of the case and not use a fan: make a casing around the case at a distance of 2-3 cm, but not solid, but with holes at the bottom and top. Buleryan stoves or metal sauna stoves work on this principle.
One of the options for such a casing around a horizontally located cylinder is visible in the photo below. Through the gaps at the bottom, cold air located near the floor is sucked in. Passing along the hot body, it heats up and comes out from above.
This is a stove lying on its side: the casing is not solid, there are decent gaps at the bottom and top
The principle is not new, but it is no less effective. Look at the photo below to see what the finished stove looks like with such a casing.
Potbelly stove with improved convection around the body for quick heating of the room
Here is another implemented casing, around a potbelly stove made from a horizontally located cylinder
Note the non-standard door fastening
This shiny sheet improves room heating
A homemade boiler from a gas cylinder for water heating can be made using the same principle: weld a water jacket around the cylinder and connect it to the radiators. Just don’t forget that the system must have an expansion tank with a volume of 10% of the total displacement.
You now know how to make a potbelly stove from a gas cylinder and how to improve it. Watch another video about an interesting option for a combined stove for a summer house or garage made of brick and a gas cylinder.
https://youtube.com/watch?v=SMVD6li2QI4
We increase the efficiency of the furnace
A potbelly stove can heat a room in literally a matter of minutes. Moreover, you can throw whatever comes to hand into the firebox: since it does not have an extensive network of chimneys, and the smoke in it comes out “directly,” you don’t have to worry about them getting clogged. But if a conventional heating stove installed in premises for permanent residence has an extensive network of chimneys that retain heat, in a potbelly stove it goes directly into the pipe, so its efficiency is not very high. That is why it is too “gluttonous” and requires a lot of fuel.
To reduce fuel consumption, you can use the following tips from experienced stove-makers:• firebox door and vent
in such an oven must be as airtight as possible; otherwise, the air supply to the potbelly stove will increase, and the fuel will burn out too quickly; • to regulate the release of warm smoke in the chimney, it is advisable to provide a damper
;• next to the stove, you can provide
side metal screens
at a distance of 5-6 cm from the stove, in which case it will heat the room not only by radiation of heat, but also by convection (circulation of warm air);• potbelly stove, “dressed” in a metal casing, will help retain heat much longer;
Potbelly stove in a casing
Round stove with an afterburning chamber and a casing with a heat gun
• to retain heat in the room, elbows should be built up in the pipe; however, soot will be retained in them, so it is advisable to create a collapsible structure; • the pipe can also be given a stepped shape: arrange the elbows in stages, making a 30° turn with each step; in this case, each of the elbows must be securely attached to the wall with rods;
Stove with chimney elbows
• chimney capacity
should be less than the productivity of the furnace itself, in which case hot gases will not go into the pipe immediately; its diameter should be only 2.7 times larger than the volume of the firebox, for example, with a firebox volume of 40 liters, the diameter should be 110 mm; • you can increase the efficiency of the stove by blowing the chimney with a fan
– this will turn the stove into a kind of smoke cannon; • to reduce air circulation,
the firewood in the stove
should be stacked as tightly as possible;
if it is heated with coal, you need to stir up the resulting ash as little as possible; • to regulate the air flow, the door to the ash pit can be made adjustable by providing it with vertically located slots and a latch
.
which will cover these gaps; • to increase the heating area, it can be ribbed, that is, strips of metal
to the stove; • if you place a couple of
buckets or a metal box with sand
.
then they will accumulate heat and store it even after the stove goes out; sand backfill or a heat accumulator made of stones
can also be sewn inside the metal body of the furnace;
Scheme of a potbelly stove with sand backfill, the stove is made of a pipe with a diameter of 500 mm, its length is 650 mm
• oven lined with 1-2 layers of brick
. will retain heat much longer;
• the volume of the furnace also matters: the larger the area of its walls
. the more heat they will release into the room; • bricks or metal sheet
. on which the stove is installed will help not only protect the room from fire, but also retain heat.
Related video: Do-it-yourself potbelly stove stove
8f772c3fed439782b7a382d3001fa981.jpe
Selection and preparation of the cylinder
If we compare gas cylinders based on the volume/wall thickness/weight ratio, the best option is to make a stove from a 50-liter propane cylinder. Its height is 85 cm and its diameter is 30 cm. Thanks to the sufficient thickness of the metal, such a homemade stove will not burn out over several seasons of active use.
Choosing a cylinder for the stove
The manufacture of the furnace begins with the preparation of the cylinder. To eliminate the risk of gas residue exploding when cutting the cylinder, it should be properly prepared.
To this end
:
- unscrew the tank valve and leave overnight so that the gas evaporates;
- turn the cylinder upside down and drain the condensate into an unnecessary container;
- fill the container to the top with water;
- drain the water completely.
Self-production of a balloon furnace
We take a medium or large cylinder, but it should not be too small. In addition, we will need:
- a small curved pipe (diameter approximately 15 cm);
- a long pipe of the same diameter for making a chimney;
- material for making the door handle;
- door hinges;
- box needed for making a ventilation hole;
- long rod to regulate air flow.
Tools:
- angle grinder;
- welding machine.
The furnace manufacturing process begins with emptying the gas cylinder:
- To do this, in a well-ventilated place, open the cylinder valve and let the gas escape. But that is not all. Then you need to unscrew the valve and release the gas. Then you need to fill the cylinder with water, which will finally displace the gas from the cylinder.
- Next, cut off the top of the balloon. The resulting edges need to be sanded. We mark a hole in the side for the door and on the opposite side for the chimney. Next you need to cut out the door and attach it in place on the hinges. It will be closed using a special latch. The cut is made using an angle grinder.
- Next, a hole for the chimney is made in the same way and a pipe that was prepared in advance is welded. The chimney pipe is made by welding two pieces of pipe: a curved one and a long one.
- Next, a third hole is made - the air duct. It is made below the door. This is a rectangular hole 5 by 5 centimeters. A rectangular box without a lid is welded there. There, a piece of metal is welded onto the central axis. By rotating it using a small lever, you can adjust the airflow for the oven.
- In order to get rid of gaps on the door, small steel strips can be welded around the perimeter. This completes the furnace manufacturing process.
Required materials and tools
Naturally, to make such a potbelly stove you will need a gas (propane) cylinder. You will also need a metal pipe for making a chimney pipe, a rod of fittings for the grate, an angle or channel for making legs, metal hinges for the firebox doors and ash pan, as well as sheet metal with a thickness of at least 3 mm for making an ash pan located outside the cylinder body (removal is optional , but preferred).
And you will also need consumables: cutting and sharpening wheels (one sharpening wheel is enough) for the grinder, 3 mm electrodes (one package). If the product is to be painted with heat-resistant paint, you will need a metal brush to prepare the surfaces of the oven.
Required tool:
- plumbing tools (open-end wrench for unscrewing the cylinder valve, hammer, chisel, file, clamp, etc.);
- grinder for cutting holes in the cylinder and other work;
- welding machine;
- measuring instrument (ruler, tape measure, square, level);
What do you need to prepare?
From the tools you need to collect:
- welding machine (200A);
- grinder – “grinder”, preferably with discs with a diameter of at least 180 mm;
- electrodes;
- circles for grinding and cutting metal;
- hammer cleaning slag from welding;
- a brush with metal bristles;
- folding meter, tape measure, chalk or marker for marking;
- drill and drill bits of the required diameters;
- chisel, regular hammer and pliers.
From materials, in addition to one or two gas cylinders, you must purchase:
- a sheet of metal, at least three millimeters thick - it is useful for constructing a hob and ash pan;
- ready-made cast iron doors, or you can also make them yourself from a metal sheet or a piece of metal cut from a cylinder;
- chimney pipe;
- corner or thick reinforcement - they will be needed for the manufacture of legs and grate. The latter can be purchased ready-made (from cast iron) or constructed using holes drilled in the bottom of the cylinder.
It should be noted here that both a standard gas cylinder and a small cylinder are suitable for the manufacture of such a stove.
As mentioned above, a cylinder stove can be vertical or horizontal. You can choose the one you need based on the amount of space allocated for installing the potbelly stove and the ease of its operation.
Preparing the balloon
Proper preparation of the cylinder is a very important step before starting work, especially if the potbelly stove is made from a container that recently contained gas. Residual gas may remain inside, and when cutting, which is accompanied by sparks, the cylinder may explode
- Therefore, you first need to unscrew the valve located on top of the cylinder and clear the passage for the remaining gas to escape - this procedure will take some time. It is better to leave the container open overnight in the open air or in a well-ventilated non-residential area, or even better - fill it with water to the very top.
- Next, the container is turned over and the resulting condensate is drained. It has a very unpleasant odor, so this process should also not be carried out in a room where people live.
The washed container no longer poses any risk of explosion when working with it, and you can safely begin the cutting process.
Types of oil furnaces
Using waste oil, you can make the already discussed pyrolysis furnace. Another type of oil stove made from a gas cylinder is a dropper or long-burning stove. There is a brick at the bottom of the combustion chamber. Above it there is a tube supplying oil (or diesel fuel).
Using a valve with a poppet valve, the oil supply is adjusted so that approximately one drop drips per minute. To start the furnace, a small puddle of oil is poured onto the brick and set on fire, the brick becomes hot, and the next drops burst into flames upon contact with it. Combustion products rise to the top of the stove and heat it.
Potbelly stove in the garage: pros and cons
Car enthusiasts install a homemade potbelly stove in the garage for several reasons:
- the stove heats the room in winter;
- you can cook food or heat a kettle on a potbelly stove;
- With a design approach, a homemade heating device can become a decoration for the garage.
We advise you to read in more detail why a potbelly stove smokes and find answers to your questions.
A potbelly stove has a number of advantages compared to other heating devices:
- For kindling, you can use a variety of fuels - firewood, coals, construction waste, petroleum products, waste oil, etc.
- The main advantage of a potbelly stove is the speed of heating the room. Thanks to its high efficiency and power, the stove will heat a garage of 50-60 square meters. m. in 15-20 minutes.
- The stove distributes heat evenly regardless of where it is located.
- A potbelly stove is an economical heating device. For example, heating a garage with a potbelly stove will cost several times less than with an electric heater.
- An additional advantage of a potbelly stove in the garage is the ability to cook or warm up food. When creating a stove yourself, it is enough to attach a metal cooking surface to its upper part.
- A homemade stove will cost the car owner almost free if there is an unnecessary barrel, sheet of metal and pipe lying around in the garage.
We previously wrote an article about installing a potbelly stove for heating and recommended adding it to your bookmarks.
The potbelly stove will fit harmoniously into the interior of any garage. In addition to the heating function, the heating device has a “cooking mode”. A hob is installed at the top of the stove, where you can heat a kettle or cook food.
The disadvantages of a potbelly stove in the garage are:
- the need to install a chimney in the garage;
- periodic cleaning of the chimney;
- the need for constant fuel supply;
- inability to accumulate heat.