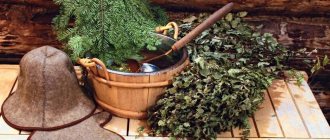
What is comfort in the home? This is when it’s warm in winter and cool in summer, walking on a pleasant-to-touch, non-icy floor covering, comfortable furniture and a cozy bed for you and your children. Children fall asleep faster and sleep better when it is warm and comfortable to sleep on soft, children's mattresses https://mebelsait.dp.ua/detskie-matrasy.
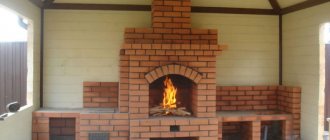
When you think about building your own home, you have a desire to make it warm and cozy. Modern gas and electric boilers, converters, etc. cope with heating the house, but they cannot create a cozy atmosphere. That is why stove heating is being actively used again.
The stove is a highlight of the design and an economical heating device. It is much easier to find an experienced stove maker to lay a stove. But this long-forgotten craft has only just begun to gain popularity, and there are very few experienced stove makers.
Therefore, a reasonable question arises: “How to build a brick oven with your own hands?”
Laying out a stove correctly requires a lot of effort, and you will also have to study a lot of instructions for laying brick stoves.
Types of stoves
The first step is to choose a stove that is right for you. The most popular are:
- Dutch;
- Russian;
- Swede.
Combined options
Combined wood and clinker tile finishing
The lining of the fireplace insert is more interesting in a combined version. The combination of stone and wood fireplace trim gives an original decorative look to the living room. Finishing with modern materials can be interspersed with marble or natural stones, combined with wooden elements and stone, thermal tiles and plasterboard.
Wood finishing seems undesirable from the point of view of fire safety, but processing with non-combustible materials makes the wood resistant to heat. It is advisable to use it for framing a fireplace portal and making a mantelpiece. It is advisable to use heat-resistant species - alder or ash.
For combined finishing, the technique of separating the lower and upper zones of the fireplace is used. Heavy materials are laid below, wood and plaster are placed on top. This finish separates the areas of use: stove, place for firewood, fireplace mantel, chimney trim.
https://youtube.com/watch?v=hWIoTbhcLXc
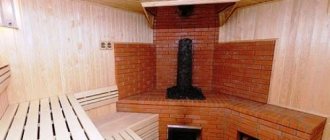
Russian stove
Large-sized and multifunctional oven. But its size is justified by the presence of free space where you can relax. There is a firebox under the bed where you can cook food. Next to the firebox there is a stove, and just below there is a vent that keeps the fire going. There is also a niche for freshly prepared food.
A Russian stove can easily heat a room larger than 40 square meters. But a full-fledged robot will require a lot of raw materials.
Marking the base
Where to start? And how to ensure even seams? Marking the walls helps with this. It is necessary to determine the starting points of installation. To do this, use a laser or water level. The latter option is preferable if you have a limited budget. It is in no way inferior to the technological version. Plus, in a small area, using a laser does not have any pronounced advantages.
The following recommendations will help you understand where to start and how to work:
- in most cases you need to start from the corners (at least there should be whole elements in the corners);
- with seamless cladding, it is better to lay the stone from the bottom up, and when laying with subsequent jointing (especially when laying porous slabs), it will be more convenient to go from top to bottom - this way the slabs will not become dirty;
- whole slabs - the most visible places; usually these are the top and corners, but you need to look at the situation;
- Usually the bottom row is left for last - it is more convenient to cover the floor with trimming, rather than adjusting the floor covering to the stove stone.
Based on this, the starting points are determined. After this, either lay the first row along the laser mark, or pull the beacon cord (according to the marks).
Recommendation! When laying from top to bottom, it is advisable to use an adhesive with low fluidity. In this regard, the compositions differ from each other - there are also those that do not allow the tiles to “float”, while maintaining plasticity for half an hour
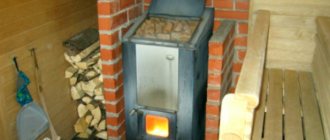
Swede
Refer to compact options. Length and width – 1 meter. The main function is to heat the room, but you can also cook food on it. The unusual thing about such a stove is that the stove is built in the kitchen, and the rest of the stove will be in another part of the house.
This design is fire hazardous. But the risk of fire is reduced with the help of dampers.
About tiles
The tiled stove is a truly luxurious structure, even if it is dilapidated, see fig. However, tiling is definitely not the kind of work that can be done by studying the technology from the descriptions; This is an even more delicate matter, requiring experience and accuracy than cladding with natural stone.
Tiled stoves and fireplaces
Tiles are generally prepared from the same kaolin mass as high-quality tiles. To harmonize with TKR and improve the heating technology of the furnace, the tiles are molded into box-shaped ones with a cavity - a tiller, pos. 1a next rice. – which is filled with sand during the cladding process. You need mountain sand with rough grains and a minimal admixture of clay; it does not swell, does not sinter or cake due to cyclic heating. The tiles are placed on a greasy clay mortar; The clay used is white, the sand is the same mountain sand. Add half a glass to a glass of table salt to a bucket of the prepared solution.
Cladding the stove with tiles
Before facing, the tiles are laid out and sorted out, as in the case of wild stone, achieving evenness in the rows. The dimensions of the tiles have been standardized by GOST since 1947, but the tolerance is quite wide, approx. 1.5 mm. It is impossible to achieve less due to the properties of the material itself. With a cladding height of 10 rows, the spacing of the seams can reach 15 mm, which, as you understand, is in no way acceptable.
The tiling is done in order, tying the tiles together with steel pins and wire. As a rule, the stove is lined with tiles in the order of its construction, and the lining must always be ahead of the masonry, as shown in pos. 3. In this case, the tiles are knitted with anchor loops, as in pos. 1b. Some craftsmen (qualitatively few) know how to tile walk-in stoves; in this case, knitting is done with anchor pins, pos. 2.
Construction rules
A homemade stove must meet fire safety requirements. Therefore, special attention must be paid to preparation for construction.
- Decide on the location of the oven.
- Prepare the correct drawing.
- Buy quality materials for construction.
- Purchase of tools.
- Create a cost estimate.
Correctly drawn up drawings will become your main assistants, since it is the drawings of a homemade brick oven that help you avoid many mistakes. Ready-made plans can be found on the Internet.
When choosing an installation location, you need to take into account the area of the room and the type of oven. It’s difficult to calculate everything yourself, so it’s easier to use a reduced model of a brick oven, a photo of which is available on the Internet.
How to decorate stoves and fireplaces in a private home with your own hands? Finishing methods
A folded stove does not always look complete and in almost all cases requires additional intervention using finishing materials
If for one owner the functionality of the device is enough, and he does not want to cover it with anything other than plaster, then for another, it is important that the guests of his house are amazed by the elegance of artificial stone or correctly selected tiles
Plaster
This type of finishing involves covering the stove with the same mortar that was used for masonry.
It not only loses to other materials in terms of external components, but also reduces efficiency by 5-10%, reducing the thermal conductivity of the furnace.
The time for heating the walls increases by 20-30%.
Therefore, before applying plaster, you need to think about whether it is worth saving or whether additional investments are possible.
Reference. Plaster without the use of top material looks dull, but it will save a lot of money if the task is only the practical use of the stove, that is, heating the room.
Whitewash
Our ancestors also whitewashed the stove for each season, since expensive materials were not available to all people. In order to whitewash a stove, you do not need to have great skill. This is the simplest finishing method: lime or chalk mortar is applied to the stove
It is important to remember that this type of coating requires careful treatment on the part of residents, since white color is easily soiled
Coloring
Modern manufacturers produce various heat-resistant paints. It is this type of material that is necessary when covering the surface of a folded stove, since its wall will often be exposed to thermal stress when ignited. If desired, the painted surface can be coated with a special varnish.
Photo 1. Painting the stove with white paint. When lining such products, it is necessary to choose heat-resistant materials.
Is it possible to coat it with clay?
The use of clay mortar to strengthen the stove is justified by the fact that it contains sand, which strengthens the surface of the walls and provides additional protection against chips and other cracks. This type of finishing is not original and is used mainly for practical purposes that do not involve giving the house individuality and implementing design ideas.
Decorative artificial stone: gypsum, acrylic. Photo
Many homeowners want to see their stove lined with stone. But not everyone can afford to buy expensive materials. For these purposes, artificial stone is used for decoration, which in many properties is not only not inferior to natural stone, but also has additional positive characteristics:
- simple masonry that even a novice craftsman can handle;
- the oven being laid out will not be bulky, because the material is light in structure;
- saving money when choosing finishes;
- wide choice of shapes and colors;
- the opportunity to realize various creative fantasies when decorating the interior.
In addition, the material differs in structural diversity:
Gypsum dough. Externally it resembles natural sandstone and has good strength characteristics.
Photo 2. Finishing the fireplace and the walls next to it with artificial stone based on gypsum dough.
Acrylic stone. Even more durable than the previous version.
Photo 3. Fireplace with acrylic stone cladding, the color of which resembles natural marble.
- Artificial stone with the presence of natural stone chips.
- Porcelain tiles. It consists of several types of clay, mineral salts, marble chips and pigments. Great resistance to mechanical damage and high temperatures.
Selection of working tools
Compliance with the technology and the quality of the work performed will also directly depend on the auxiliary measuring instruments and tools that must be used during the work on laying the furnace.
When laying a furnace, measuring, construction and many other auxiliary tools are used:
- Jointing - pours the mortar into the seams and gives the joints an aesthetic appearance. It will come in handy if the stove is left without lining or plaster.
- Trowel.
- Hammer-pick.
- Shovel for mortar.
- Plumb.
- Stove line.
Preparation for finishing
First you need to calculate the amount of material. If the stone will cover the entire area of the walls in the hallway, you should subtract the area of the openings and add 10%! (MISSING) If the decor will be located around openings, niches, in separate fragments on open walls, draw a rough sketch of the decoration and take measurements of each area. Then the area is summed up and 10-15% of the trimming is added. When purchasing material, you should remember that the amount of stone with an angular shape is calculated in linear meters, and of a regular shape - in square meters.
Artificial stone in the hallway
Additionally you will need:
hacksaw or grinder (depending on the type of stone); Bulgarian simple spatula 7-9 cm; Spatula notched spatula 15-17 cm; Notched trowel level; Professional cast Kapro level long ruler; pencil; paint brushes; varnish; file; acrylic primer. Acrylic primer for walls
Artificial stone can be attached using liquid nails, cement-based or gypsum-based glue. The glue consumption must be indicated on the packaging, so when purchasing, you should know exactly the finishing area and take it with a small margin.
Liquid Nails
If you use gypsum stone, you will need a special miter box with high sides for cutting.
Plastic miter box
When everything you need has been purchased, you should start preparing the surface.
Step 1. Dismantling the coating
Dismantling the coating
If the stone covers the hallway walls completely, the old coating is removed completely to the base. If separate areas are intended for decoration, the coating must be dismantled very carefully.
On the wallpaper, mark the boundaries of the finish with a pencil and carefully trim it with a utility knife, leaving a margin of 1-2 cm wide for stones. The wallpaper glue is soaked in water and removed with a spatula, the walls are thoroughly washed
They also remove the paint if it is peeling or cracked, and clean off any loose plaster.
Step 2. Leveling the walls
putty
The stone should be laid on a flat, smooth surface - this will facilitate the work process and increase the strength of the decorative coating. Therefore, all small cracks, gaps, and depressions are filled with putty, and if there are differences of more than 5 mm, it is better to plaster the entire area
Particular attention should be paid to doorways: deep cracks may form around the perimeter of the frame, for sealing of which it is recommended to use a cement solution
Step 3: Priming
Padding
Dry walls must be lightly sanded to smooth out the unevenness of the puttied areas, and then wiped with a rag to remove dust. After this, the surface is treated 1-2 times with an acrylic primer. If there is wallpaper around the perimeter of the areas to be treated, the primer should be applied so as to cover an edge 1 cm wide - what will be hidden under the cladding.
Materials
The heat transfer and durability of the stove will depend on the material used in construction. Therefore this stage is very important.
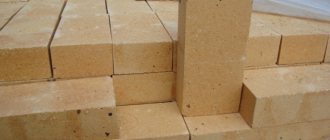
For cladding, ceramic bricks are used - grade M-500. It is insensitive to temperature changes. And the combustion chamber needs to be laid out only from refractory bricks.
In addition to bricks, the following is used:
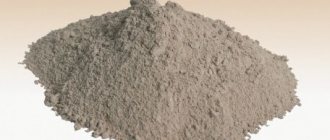
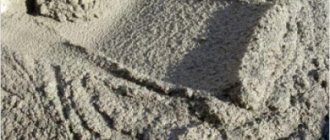
- Sifted sand.
- Clay – normal fat content.
cutting
Figure 8. Options for cutting stone and tiles
Stone on a concrete base is cut with a grinder with a diamond wheel. When laying ceramic granite, use a specialized tool - a tile cutter.
When decorating the corners of stone cladding, do not use tiled corners. Instead, they make a bevel - they cut the sidewalls at an angle of 45 degrees. On an industrial scale, electric tile cutters are used for this purpose, but in our case, a grinder is sufficient. If the stone is soft, the process does not require much effort and high qualifications. Cut corners can be effectively joined to each other.
Foundation for the stove
The basis for a homemade stove is made at the time of construction, since a brick stove requires a strong foundation
First, they dig a hole. It is necessary to take into account that the width and length of the pit must exceed the size of the foundation by 20 cm
Afterwards, the pit is leveled and half filled with sifted sand, compacted well and leveled. Waterproofing is laid on top of the sand, and formwork is installed.
Next, all free space is filled with concrete mortar, bringing it to ground level. Be sure to check the surface for horizontalness using a building level.
After 5-6 days the concrete should harden. After that, the formwork is dismantled, waterproofing is laid and the foundation is brought to the floor. There are two ways to bring the foundation to the floor:
- lay out of brick;
- re-build the formwork, filling it with concrete up to the beginning of the floor. All voids are covered with sand, compacting it.
Concrete mortar recipe - one part of cement contains 2.5 parts of sand and four parts of gravel.
Tile
Currently, traditional methods of finishing stoves are increasingly inferior to cladding with special tile materials; plaster is sometimes used to fill gaps in tiled surfaces. Tiling the stove has a number of advantages:
- Stove tiles are safe and environmentally friendly.
- There is a wide range of binding compounds (adhesives and primers, see below) for cladding heating appliances on sale, which makes the whole job no more difficult than laying tiles or porcelain tiles on the floor or walls.
- The facing stove tiles and adhesives for them are fully consistent according to TKR with brickwork on clay mortar, which ensures the strength and durability of the finish.
- The thermal parameters of a tiled stove either improve slightly or remain unchanged. Their slight deterioration occurs in some cases.
- The cost of covering a fireplace/stove with tiles with your own hands and to order is an order of magnitude less than other types of decorative finishing.
Tiles for lining furnaces are made on the basis of annealed aluminosilicate (clay) ceramics; as a rule - dry or semi-dry molding. Ceramic tiles for cladding stoves are mainly used in the following types: clinker, terracotta and majolica. Available in flat, L-shaped profiles for corners and shaped (shaped) - curved, with rounded edges, complex shapes.
Clinker and terracotta
Clinker tiles are in some ways analogous to clinker bricks and paving slabs: they are highly burnt ceramic mass, i.e. fired at 1200 degrees and above. For decorative cladding, cheaper single-firing clinker is used; The molding of the plastic initial mass is carried out by extrusion, i.e. pushing through. The main advantage of clinker tiles is their low cost, approx. 1000 rub. for 1 sq. m, and a small TKR, which allows cladding with seams of 3-4 mm. Disadvantages: firstly, fragility, as a result of which clinker tiles with a thickness of 8 mm or more are required for lining stoves; fireplaces with their smaller TC can be lined with clinker with a thickness of 6 mm.
The most significant disadvantage of clinker tiles for cladding heating devices is their rather high thermal resistance; clinker cladding reduces the efficiency of the stove by 2-3 percentage points, which is why fireplaces are predominantly lined with clinker tiles. Decorative flaws - rough surface and uneven color - are not fatal, because... both can be introduced into the overall design, pos. 1 in Fig.
Cladding of stoves and fireplaces with clinker and terracotta tiles
The mass for terracotta tiles is prepared on the basis of pottery clays with the addition of chamotte and mineral pigments, so the color of terracotta tiles for facing fireplaces/stoves is more varied, more even, and smooth color transitions can be obtained, pos. 2. Molding – semi-dry pressing, firing at 1000 degrees. The increased quality of the initial mass makes it possible to produce tiles up to 40x40 cm in size or more, from which it is possible to assemble figured compositions, pos. 3.
The specific gravity of terracotta tiles is less than that of clinker tiles, and they adhere very firmly to glue, which makes it possible to apply both design and structural solutions that are unattainable with other materials. For example, the cladding belt above the firebox of a compact corner fireplace (item 4) can only be made of terracotta; something else will fall out of there soon.
In addition to color, terracotta can be given a texture that imitates many types of brick and stone masonry, see next. rice. It also has a thermal advantage: lining the stove with terracotta increases its efficiency by 3-4 percentage points. Nothing comes for free, so terracotta approx. 25% more expensive than clinker of the same thickness. But this is compensated by the advantages of terracotta and the fact that tiles made from it for cladding under the same conditions can be 1-2 mm thinner.
Samples of terracotta tile textures for cladding stoves and fireplaces
Majolica
Majolica is a type of terracotta with a glazed surface, onto which a design can be applied by burning in, see fig. The surface of majolica can be smooth and embossed, glossy and matte. Matte majolica of a suitable color matches aesthetically well with wooden parts; This is the only way, apart from very expensive and complex tiles, to fit a fireplace into a portal decorated with wood, on the right in Fig. In everything except heating technology, majolica is equivalent to tiles, but in comparison with its artistic merits it costs divinely: without a pattern it is 28-29% more expensive than clinker, and decorated tiles are 32-35% more expensive. Majolica is placed on the surface to be coated in the same way as clinker and terracotta, see below.
Cladding of stoves and fireplaces with majolica
How to tile
Cladding a fireplace or stove with glued tiles is carried out with the application of a backing made of reinforcing mesh, which distributes thermal and mechanical stress more or less evenly over the area of the tiled surface. Without a grid, individual tiles will soon start to fall off. For this reason, the use of fiberglass mesh is undesirable; a steel mesh that conducts heat well is needed.
The total thickness of the mesh should not be greater than the thickness of the adhesive layer, i.e. 3-4 mm; therefore, the mesh is required from wire no thicker than 1.5-2 mm, with a mesh size from 30x30 to 50x50. If the glue instructions indicate a seam thickness of more than 5 mm, you need to use a chain-link mesh made of wire of the same thickness. You cannot use a wire mesh thicker than 2 mm; its own thermal deformations can damage the structure of the device.
The actual cladding is possible in 2 ways: with cutting of seams and 2-component glue or without cutting; in this case, the adhesive can be one-component (for more information about adhesives for stove facing tiles, see below). In both cases, the tile joints are left at 10-12 mm (thermal deformations!) and filled with a special mineral-based grout or silicone filler, also for stove work.
Cladding using the first method is very labor-intensive, because surface preparation is required and the seams are cut in the same way as for plaster, but the structure of the furnace is subject to minimal mechanical stress and there is no metal left in the brick that can cause cracking due to its thermal expansion. In this case:
- The base surface is prepared for cladding in areas of no more than 1.5 square meters. m so that the primer for the glue does not have time to dry out;
- A layer of primer for adhesive of the recommended thickness is applied to the next area and completely fills the selected seams;
- Bracket for fastening reinforcing mesh
Immediately, while the primer is damp and plastic, the mesh is temporarily secured at the top and bottom at 3-4 points with self-tapping screws in propylene dowels. They can only be driven into bricks, not into seams! The dowels are not driven in completely, so that later they can be pulled out by grasping them with pliers. As a result, the mesh should lie flat on the damp soil, slightly pressing into it;
- The mesh with a horizontal pitch of 250-350 mm and after 2-3 bricks is secured with wire brackets (see figure on the right), inserting them into the soil that fills the grooves;
- Once the primer has completely dried, the temporary mesh fasteners are removed, the dowels are removed and the holes from them are rubbed with the same primer;
- When the grout of the holes dries, the primer holding the mesh will already gain sufficient strength. Now apply glue and lay the tiles.
According to the second method, the mesh is attached to the brickwork with steel hardware without cutting the seams. Here the problem is with dowels: steel dowels can cause cracks in the masonry due to the large difference in the TCR of metal and brick, plastic dowels will soften from heating and will no longer hold the mesh, and with it the entire cladding. For more information about facing fireplaces with terracotta tiles using glue on a mesh, see the video
Video: tiling the stove with terracotta tiles
You can add the following to the video:
- The tiles should be glued with belts of no more than 3-4 rows (on the left in the figure below); The next belt is glued when the glue of the previous one has firmly set. Otherwise, the lower tiles may creep and peel off under the weight of the upper ones.
- Grouting of joints begins when the glue sets, but does not gain full strength, otherwise either microcracks will appear in the joints after the grout has completely dried, or individual tiles may peel off.
- Sunken seams are rubbed manually with mineral grout from a plaster falcon (in the center in the figure). The grout is smoothed with a rubber spatula; its residues smeared on the sides are immediately removed with a damp cloth. Dried grout only lends itself to abrasive, and it won’t even spare the tiles.
- It is more convenient to fill convex seams using a mounting gun, on the right in Fig. This is the only possible way to fill seams with silicone, because... It sticks a lot to the tool for decorative cutting of seams.
Gluing tiles and grouting joints when facing a stove or fireplace
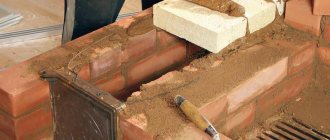
Masonry process
The masonry mixture is prepared from sifted sand and clay. The clay is left in water for a couple of hours, after which it is sifted through a sieve. Currently, there is no need to prepare this mixture yourself. A number of companies offer ready-made masonry mixtures in various packaging. Using such masonry mixtures is preferable to making them yourself.
Industrial sieves sift a finer fraction of sand and clay, which makes it possible to obtain a more plastic and homogeneous mixture. This mixture will eliminate the formation of voids and air bubbles in the seams during laying.
First, the outer layer, which consists of bricks, is assembled, and then the middle. There should be no voids in the seams, so fill them with a clay mixture.
The first rows are built using solid bricks. The first row of stitches requires dressing. After the first rows are ready, the brick will have to be cut.
The chopped side of the brick should be inside the masonry. This rule is also used when constructing smoke ducts. The chimney is built from red burnt brick. And the opening of the firebox is created using a metal corner, a “lock” layout.
Before the first fire, it is recommended to wait 3 weeks.
Types of decorative stone and their features
There are many types of decorative stone, and each of them has its own characteristics. For example, gypsum material is not suitable for rooms with high humidity, while natural material is quite suitable both in the bathroom and in the hallway. The cost of the panels also depends on this parameter, and the appearance should not be discounted. Let's look at the main types of such finishing materials.
Gypsum decorative stone and its features
Gypsum stone for interior decoration is very convenient. It is easy to process, has low weight, and is also quite low in cost. Most often it is sold unpainted, which allows you to choose any desired shade.
But we cannot help but note some disadvantages. The hygroscopic material does not allow it to be washed with large amounts of water. Also, do not rub it too hard - you can ruin the coating. Although you can protect it from external influences by covering it with varnish. Another alternative option is gypsum decorative stone with a polymer coating. But it costs a little more. We offer our dear reader several photos of wall decoration with decorative gypsum stone:
Decorative stone in the interior of the hallway: photo of cement finishing
Today this is the most common option, which is more durable than gypsum. Caring for such surfaces is quite simple - it is not afraid of cleaning even with the use of detergents. However, cement tiles also have their disadvantages. Due to the strength of the material, it is quite difficult to process. Also, such tiles are heavier and more expensive. Below you can see what cement facing stone looks like for interior decoration:
Natural stone: advantages and disadvantages
Wall decoration with natural materials is the most expensive, but its durability is higher than that of other materials. However, it is worth considering that, despite the apparent environmental cleanliness, some agglomerates can emit various toxins or even radiation.
Installation of natural stone is somewhat more difficult than artificial stone. This is due to the fairly large weight. But it doesn’t matter what the humidity in the room is. It is even suitable for exterior decoration. It also does not require any special care and can easily withstand cleaning with various means, including aggressive ones. Photos of interior finishing with facing stone in the interior can be seen below:
Decorative brick: features of finishing with similar material
It can be called the most convenient to install. Quite light, but at the same time durable. However, it will not always be appropriate. It is not customary to tile bathrooms and toilets with it. But for a living room decorated in the loft style, it will come in handy.
We invite you to look at photos of decorative bricks in the interior, laid by home craftsmen:
Related article:
Wallpaper “under the stone”: photo in the interior
Below are photos of finishing the kitchen with decorative stone and wallpaper, as well as two materials together:
Related article:
Photos of brick stoves
Briefly about the main thing
There are several types of facing tiles: based on clay, natural or artificial stone. The material must be fireproof, heat-resistant, durable, not absorb moisture, conduct heat well and at the same time have an attractive appearance.
The building materials market offers models for every taste and budget: pretty terracotta and harsh fireclay tiles, amazing majolica and delicate faience, majestic marble and modest tiles, strict porcelain tiles and luxurious brooms.
There are two cladding technologies: glue and metal frame. The choice of tiles is made according to technical characteristics, taking into account markings, design and colors, and cladding technology according to the expected operating conditions.
Ratings 0