Wooden houses have been built in Rus' since ancient times and have not lost their popularity in our time. This is due to the unique properties of wood, a natural, environmentally friendly natural material. Almost all the masterpieces of Russian wooden architecture were built by our ancestors without a single nail, chopping into a bowl. The name of the method is due to the type of connection of logs into a single structure. A semicircular recess in the form of a bowl was cut out in the lower log, into which the upper log was tightly placed at a right angle. The result was a durable, beautiful, warm structure that was not drafty in the corners.
Varieties of the method
The assembly of the log house can be done in the following ways:
- Cutting in oblo, called Russian, in which the cutting of the bowl occurs in the lower crown. The classic bowl is cut out smooth, but to prevent possible displacements, a protruding spike (fat tail) can be left in the bowl. It is in this way that the architectural monuments made of wood that have survived to this day were erected;
- Cutting in the okhlop or Siberian cutting, in which the bowl is cut from the bottom of the upper rims. Many construction companies and “carpenters” do their best to promote the advantages of this method, claiming that moisture will accumulate in the bowls of the log house, causing the wood to rot. And then why did our wise great-grandfathers rarely use it? The casket opens simply. It is enough to consider how logs work in a finished log house. As the volume decreases, the inner layers of wood dry more slowly than the upper layers, so cracks form in the outer layer. When cutting a longitudinal groove in logs, cracks appear first of all in this weakened section. The groove expands, trying to turn around. The lower position of the bowl prevents this, preventing the groove from opening with the appearance of additional gaps, which does not happen when the bowl rests on top of the log. And the accumulation of moisture in the joint is generally an idle invention; with high-quality caulking, moisture will never reach the wood, only the top layer of moss or jute will get wet, which will gradually dry out under natural conditions. Modern “specialists” advertise Siberian cutting because it is easier to manufacture. The cuttings can be done below on a specially equipped area, but in the first method this will have to be done at the top of the log house.
How to efficiently and quickly cut down?
The term “cutting” has been preserved historically, although modern craftsmen, when building houses from logs, more often use a chainsaw instead of an ax. Highly professional carpenters also perform the lines for the notches with a saw. After marking the cutting areas, cut down or saw out the bowl in such a way that when assembling the log house, the log will lie down, embedded exactly halfway into the adjacent bottom row.
To ensure a tight fit of the crowns to each other, lengthen the selected bowl by choosing a longitudinal oval with a groove. Select the size of the additional notch depending on the local weather. The colder the winter, the wider it should be. To ensure a tight fit, equalize the depth and volume of the wood cut for the oval.
Check the correctness and accuracy of the work performed by test laying the logs. The precisely processed surface of the upper log should fit tightly onto the lower log with its entire plane. The laid part should not have any gaps or cracks. If they form, mark again and adjust the cutting until the logs fit snugly.
Photo: a lot of interesting things on this topic can be gleaned from old books written with the participation of experienced carpentry masters.
To seal the connections, use an additional cutting element - a tenon. If you are cutting a warm building, take into account the location of the annual rings, since the looser southern parts of the rings should be inside the log house. To maintain the level of the rows in the horizontal direction, do not miss an important point. In log houses, the butt of the log is alternated with its narrower part. To align the crowns, cut down alternately - first in the wide part of the log, then in the narrow one.
Advantages of the technology of cutting a log house into a bowl with your own hands
- strength of nodal fastening in the structure;
- excellent thermal insulation of the house due to the non-ventilated corners;
- the traditional grandeur of the Russian tower;
- environmentally friendly wooden construction;
- magnificent appearance of natural wood that does not require additional finishing;
- increased structural stability allows construction of several floors.
When comparing whether it is better to build a frame in a claw or in a bowl, the choice of the second method of construction is preferable, this is confirmed by many years of experience in our national wooden architecture.
Final Tips
Having mastered the craft of a carpenter, you will save significantly on construction. Start learning the basics by making a log gazebo for the garden. Then, build a small bathhouse on your site. The experience gained will allow you to master the construction of a house. A technologically precisely manufactured log house will be warm and will give the building durability and reliability and provide exceptional environmental friendliness, especially if you use cedar lining for internal cladding.
On other pages of our website you can see a lot of interesting things about log houses and log baths.
Flaws
There cannot be ideal designs; the disadvantages of the design under consideration include the following points:
- sufficient complexity of execution without experience in carrying out similar work;
- difficulty in installing exterior decoration due to protruding corners;
- the presence of corner protrusions leads to a decrease in the useful length of the crowns and, accordingly, to an increase in the cost of the log house by up to 10%. This argument is cited as the main one in the debate on the topic of chopping into the paw or into the bowl, which is better. But a felled log house needs enhanced thermal insulation of the corners, which practically reduces real savings to zero. And insufficient rigidity leads to the fragility of the building due to the change in geometric dimensions with the appearance of cracks.
Tools required for making a log house
The process of making a log house involves carrying out work on marking the logs and the felling itself. Without special tools, it is impossible to perform quality work.
Therefore, after consulting with professionals, purchase:
- carpenter's axe;
- chainsaw (or an electric saw);
- chisel;
carpenter's line (you can make it yourself).
Wood selection
Preference is given to coniferous species. Most often, pine is used, which is distinguished by a smooth trunk of uniform thickness along almost the entire length, a minimum number of knots, and resistance to decay. The best wood is considered to be from the northern zones, cut down in winter. In winter, the movement of sap in the tree is minimal, which leads to less cracking of winter preparations when dried. The blanks must have the same overall dimensions, the recommended diameter is ≥ 22 cm. The larger the better, this will reduce the number of node connections and increase the thermal performance inside the building.
The material is sanded and trimmed from the inside to the thickness of the upper section. To ensure the stability of the log house against weather conditions, the blanks must be oriented along the annual rings. The part with thin rings is located outward, and the part with thicker rings is located inward. The prepared workpieces are dried in a ventilated stack, providing shelter from precipitation. Minimum drying time ≥ 6 months.
Carpentry Feature Improvement
Time works to improve the instrument and does not stand still. When drawing markings, the main thing is to ensure horizontal and vertical compliance with the line; for this, the ends of the carpenter's line are set using level bubbles. A Canadian inventor proposed an innovation in the form of a marking tool based on a carpenter's line, which he called a scriber. The Russian skilled carpenter did not further elaborate and developed a different version of the scriber, which later became known as the carpenter’s compass.
Briefly about the main thing
The log house is most often made from pine or other coniferous wood.
The main advantage of a wooden log house is thermal insulation and environmental friendliness.
When choosing a log manufacturing technology, it is recommended to take into account the level of knowledge and skill. If it is not high enough, then it is better to contact specialists.
It is necessary to use high-quality thermal insulation and means to combat fungus and insects. This will extend the life of the building.
All logs for a log house must be treated with a fire retardant to avoid fire in the structure.
Suggestions from professionals
As already mentioned, there are a lot of varieties of such pairing. The cutting of a log into a bowl can be Russian, Canadian, or Siberian. The Norwegian carriage is unusually beautiful. It is a log of a special geometric shape chopped on all sides, which together gives a picture of carving. By consulting with specialists, you can choose an acceptable option for yourself, since complexity still affects the cost of the work.
Video description
In this video you will see how to caulk a log house with tow:
- Jute . An environmentally friendly type of insulation that retains heat well, but has a short service life (3 years) due to the fact that it strongly absorbs moisture.
Old jute is difficult to get out of the cracks, so it is rarely used. There are also differences between types of jute. For example, tow is too hard and has low density. Because of this, it is necessary to caulk the log house in several stages to achieve the desired density.
Flax-jute contains 50% flax fibers, so it requires additional treatment to prevent insects and rot. Jute felt consists of 10% flax fibers, but has high flexibility and good density. It also requires additional insect repellent treatment.
- Lnovatin . Due to heavy treatment with insect repellent chemicals, it is not environmentally friendly. It has a service life of 3 years and is attached to the structure using a construction stapler.
Felt made of jute Source drevtorg.rf
See also: Catalog of house projects made from hand-cut logs and timber
- Synthetic compounds . They cost more than other materials, but are easier to use.
Such substances are used in combination with natural material (cord). To do this, the thread is placed in the gap and filled with sealant, which is leveled with a small spatula.
The disadvantage of this method of sealing log cracks is that when exposed to sunlight, the sealant will dry out and begin to crumble. To do this, the place of putty must be covered with planks.
Also, synthetic compounds harden and can expand and contract with temperature changes, which can lead to cracks in the wood. To avoid this, it is necessary to use elastic compounds.
The right combination of sealing materials helps avoid the formation of damage and fungus, and also increases the thermal insulation of walls. This is necessary when constructing buildings in cold regions or when assembling a bathhouse, since in such rooms rapid cooling of the air can be critical.
Synthetic sealant for log houses Source td-artemov.ru
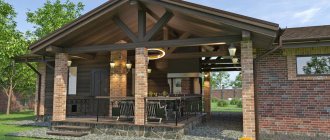
Stage 9. Roof
Construction of a roof on males with layered raftersRafter system
As soon as the tree shrinks, you can begin building the roof. If you do this earlier, the roof will simply collapse.
Step 1. Place wooden beams on the wall framing (we have already talked about this).
Step 2. Fix the beams and attach the rafter legs to them in 1 m increments. In the ridge part, cut the rafters at the appropriate angle for the connection.
Step 3. Nail a solid board deck to the rafters (if you plan to use rolled roofing material) or make a sheathing (if you use slate, tiles, etc.).
Step 4. Install the roofing according to the instructions for the specific material.
Step 5. Cover the ridge with galvanized sheet steel to protect it from aggressive environmental influences.
Step 6. Cover the roof gables with siding or clapboard.
How to sew up a pediment
After this, proceed to further planned work - pouring a concrete screed or building a wooden floor (in the second case, the logs are cut into the logs of the second crown and fixed), install insulation, carry out interior finishing and arrangement of the steam room according to your project.
An example of a log house with a shingle roof. An example of a log house with a shingle roof. Eaves lining. Roof overhangs lining.