Knitting reinforcement is one of the main stages of work to create a reinforcement frame. By connecting the reinforcement, a reinforcing structure is created, thanks to which the concrete receives greater strength in both compression and tension. If the rods are connected incorrectly, the finished monolithic structure will not receive the design strength. In order to avoid this, we will look at how to knit reinforcement correctly, observing all the rules and regulations, and what tool can be used to do the work; this will be useful for novice reinforcement makers and for experienced builders.
Strip foundation in private construction: features and limitations
The basis of the strip foundation is concrete. This material was widely used as a basis for the construction of buildings back in Ancient Rome. And only 200 years ago they figured out how to increase its strength using a frame made of steel rods. A new building material, reinforced concrete, combined the advantageous characteristics of metal and concrete and made it possible to build impressive structures. The process of placing a metal frame in concrete began to be called reinforcement.
When a country house is being designed, a strip foundation is most often chosen as the basis for it. The preparation of a strip base (like any other) takes 25-30% of the construction cost; the reason for its demand is a successful combination of qualities:
- Simple in design.
- Suitable for projects with basements (unlike the pile-screw analogue) and heavy floors (reinforced concrete, monolithic).
- Does not require the use of special equipment.
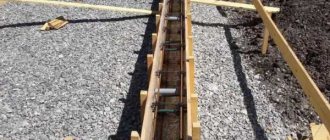
Strip foundation in formwork Source profundamenti.ru
Despite its wide distribution, strip foundation also has limitations in use:
- Beneficial only on dry and rocky soils.
- Not suitable for installation on problematic (wet, heaving, peaty) soil; it will have to be poured to great depth, which is unprofitable.
The shape of the strip foundation is determined by the layout; it has a closed shape and is laid along the entire perimeter of the house, under load-bearing walls and internal partitions.
Required wire
When choosing wire, the following factors must be considered:
- Manufacturing accuracy class. The accuracy class is determined by the production method. There is a wire of a higher accuracy class, its deviation of the actual size, diameter, from that declared by the manufacturer along the entire length of the wire is less than that of a wire of a lower accuracy class. However, for knitting reinforcement, the accuracy class is not particularly important.
- Wire rolling method. There are two types of rolled products: cold-rolled and hot-rolled. Cold-rolled steel is rolled out from blanks by presses without heating. With the hot rolling method, rolled steel is rolled out in a heated state, which gives greater strength.
- Which group in terms of tensile strength does the wire belong to (there are the first and second groups);
- Degree of corrosion resistance. On this basis, there is only one difference - whether there is a galvanized coating on the wire or not.
The criterion for choosing a wire is very simple, you need a wire that is called “knitting” . It has a full set of necessary characteristics: sufficient softness with the declared strength, abrasion resistance and reliability when fastened.
Galvanized wire is considered overkill. The optimal diameter of the knitting wire is 1.2-1.4 mm. A wire with a diameter of 1.6-2 mm takes a lot of force, as a result of which construction slows down, and the piece is too weak, it will simply burst.
Care must be taken to ensure that the reinforcement connection remains rigid after tying the knot: the frame must remain motionless during pouring.
This will ensure the reliability of the structure after hardening. You need to check the rigidity of the connection of the reinforcement by touching the rods - if they are rigidly fixed, they will not move, which means everything is in order. You should not test the strength of the knot itself, otherwise there is a risk of loosening the binding. The length of wire recommended for one knitting point is from 30 to 50 cm. The wire itself is extremely cheap - about 50 rubles. for 100 meters. To avoid running out of it at the wrong time due to loss or excessive consumption, it is recommended to buy it with a double supply. 100 rubles for 200 meters is quite inexpensive.
Prerequisites: why reinforcement is needed
The foundation is created in order to withstand the load of the structure; It works best with evenly applied pressure. But in practice, the load is too often uneven and internal stresses arise in the foundation. The reason may be both changes in the soil and design miscalculations (unequal weight of individual parts of the structure).
Design errors will definitely become noticeable Source homeklondike.site
Concrete has excellent resistance to axial compression and weak resistance to tension. Reinforcing bars have natural plasticity and compensate for the lack of concrete. The latter, in turn, protects the metal from corrosion.
During operation, concrete (which resists compression) and metal (tension) are able to most effectively resist multidirectional loads, protecting the structure from destruction. Correctly carried out reinforcement not only increases strength, but is also a means of saving: it allows you to reduce the cost of concrete (reduce the massiveness of the foundation).
About the need for strengthening
To what extent is it necessary to strengthen a concrete mass with steel wire? After all, concrete has fairly high strength characteristics. Indeed, concrete has increased resistance to compressive loads, but requires reinforcement against the destructive effects of tensile forces.
The greatest likelihood of stretching is on the surface of the base, this is where the reinforcement should be placed
This feature of concrete can be compensated for by laying steel rods at two levels of the base. This solution increases the strength characteristics of the array, allowing it to maintain integrity under the influence of bending loads, torques and tensile forces.
Reinforcement requirements
The strip foundation is laid with a margin of safety; it must be resistant to external factors (mechanical and climatic). How to correctly knit reinforcement for a strip foundation is described in the provisions of SNiP 52-01-2003, which contain detailed requirements for design and materials. There are a number of requirements for fittings:
- The placement of the reinforcement cage should not interfere with the correct technological pouring of concrete.
- The reinforcement is installed with a given design step.
Calculation of the spacing of clamps when reinforcing a corner Source ep2nnov.ru
- At frame intersections, floating (movable) connections of rods are not allowed using any connection method.
- It is necessary to create a protective anti-corrosion layer for the structure.
- Replacing the type of load-bearing rods is allowed if the calculated load-bearing capacity remains the same.
See also: Contacts of construction companies that offer foundation repair and design services
Rod diameter
In SNiPs, which define the rules, regulations and requirements for construction stages, the diameter of the reinforcement is calculated based on the geometric dimensions of the foundation. Its amount should be more than 0.1% of the cross-sectional area of the base.
The cross-sectional area is calculated by multiplying the height and width of the rectangular strip. For example, for a base 60 cm high and 30 cm wide, the cross-sectional area is 1800 cm2.
- The area of the metal rod must accordingly be greater than 1.8 cm2, for the example under consideration 2 cm2.
- For a rod with a diameter of 10 mm, the cross-section is 0.78, for 12 cm - 1.13.
- Accordingly, we will need three and two rods with the necessary margin.
- But a thread requires at least four, this will give a margin of safety.
To save on the cost of consumables, it is allowed to use a smaller diameter rod and smooth reinforcement of class A I, but only in non-critical areas: for jumpers, fastening clamps, in the middle of the frame.
Materials and tools used for reinforcement
Since the reinforcement cage increases the stability of the structure by taking on a significant part of the load, its quality becomes fundamental. The frame is formed from interconnected reinforcing bars. Various are used for knitting the frame:
Types of fittings
Manufacturers offer fittings that can be divided into:
- Material of manufacture. Steel reinforcement is a classic, time-tested option; It is divided into 6 strength classes, it can be bent and welded. Composite reinforcement contains carbon, basalt, glass or aramid fibers. It is lighter, cheaper, does not corrode, does not bend and cannot be welded.
Reinforcement with a periodic profile has improved characteristics Source yar-limb.ru
- Profile. Reinforcement with a smooth profile is more often used as connecting jumpers. Reinforcement with a periodic profile has a relief surface, which improves adhesion to concrete.
Connection materials
Knitting of reinforcement for a strip foundation, the pattern of which can change, is done using:
- Knitting wire. Reliable and common knot connection technology. There are different knitting patterns.
- Threaded and crimp couplings (at mechanical joints).
- Metal paper clips. The reinforcement elements are connected without tying a knot.
- Plastic clamps and clips (fasteners). Plastic products provide simple and quick installation and are resistant to corrosion. Their use is not approved by all professionals.
Composite reinforcement bars secured with a clamp Source 1-detective.ru
- Welding. The process is fast, but the welds form a rigid connection, differ in density from the base metal and are susceptible to corrosion. When the load changes, they burst and reduce the strength of the foundation. The method is suitable for connecting rods of large diameters (in industrial facilities); To obtain a high-quality weld, you need a highly qualified welder.
Methods
You can tie reinforcement with wire using a number of tools and devices known to everyone. Let's list them.
- Special pistol. He gets the job done quickly. However, this tool is quite expensive: it costs about 1 thousand dollars. But with it it is impossible to approach the internal pins of a wide and high foundation frame. This device is convenient to work only at the extreme points of the frame.
- Crochet hook. It is used both as a hand tool, in the handle of which a ball bearing is installed for ease of rotation, and as a semi-automatic one, inserted into the chuck of a drill or screwdriver.
- Pliers or pliers. When using them, no additional tools are required. But they are not very convenient in the process of securing the wire.
- Nail. It is better to bend it into a crochet hook. This device is passed between a double bent wire and the reinforcement and twisted until the wire is tightened like a tourniquet to stop bleeding. If you don’t have a suitable nail, you can use a Phillips screwdriver or a piece of thin smooth reinforcement (up to 5 mm thick).
Whatever tool is used, the properties of the wire must be the same - low-carbon steel is used, its softness is close to that of ordinary metal without any additives.
You can soften any steel by heating it red-hot and then letting it cool under normal conditions.
If there is no opportunity or desire to purchase ready-made binding wire, then you can burn any old tire, after which only steel wire of the required softness will remain. But burned steel partially turns into scale, becomes thinner and more brittle, so this solution is a last resort.
Requirements for reinforcement cage parameters
The rods that make up the structure differ in purpose:
- Working fittings. This is the name given to the longitudinal horizontal rods placed along the foundation strip.
- Clamps. They are divided into transverse horizontal and vertical, connecting the frame into a single whole.
The reinforcement frame of the foundation in private construction often has the following parameters:
- Fittings. Metal or composite, with a cross-section of 11-14 mm (for a small outbuilding), with a periodic profile and a cross-section of 12-18 mm (for reinforcing a strip foundation).
An example of how to knit foundation reinforcement with transverse clamps Source massimo.spb.ru
Grillage
The external similarity of the grillage to a strip foundation leads to errors in self-reinforcement. The tape experiences tension at the base from the prefabricated loads of the cottage, and at the top from swelling of the soil. Heaving forces never act on the grillage, since it is separated from the ground by a crushable layer of polystyrene foam or an air gap of 10–20 cm. However, here a bending moment arises in the vertical direction in places where the posts are rigidly pinched into the beams.
Important! For a grillage, it is not enough to make a standard frame of longitudinal rods tied with clamps. It is necessary to further strengthen the top row near the columns (piles and pillars), and the entire lower belt.
Diagram of the correct reinforcement of the grillage/pile interface.
Recommendations on how to properly knit reinforcement joints apply only to steel rods. It is not recommended to use composite reinforcement in foundations, which, when tensile forces appear, first elongates and only then begins to absorb loads. This is fraught with the opening of cracks in the base of the upper part of the concrete foundation beams that make up the grillage.
We recommend reading: Reinforcement of the grillage of a pile foundation.
Video description
How to properly crochet reinforcement in the video:
Calculation of the amount of consumables for tying reinforcement
The amount of material (in linear meters) is calculated based on:
- Foundation parameters (length, width, depth)
- Reinforcement schemes (number of layers and longitudinal rods in width)
Most often, reinforcement material is sold not by linear meters, but by kilograms. There are special tables for converting values. Plastic fittings are often sold by linear meters.
Scheme of strip foundation reinforcement Source kamtehnopark.ru
Methods
knit reinforcement using different methods:
- manually;
- using an inertial semi-automatic hook;
- using a special knitting gun.
Manual
The knitting pattern does not depend on the tool. The above describes knitting by hand, that is, using a regular hook.
Such a tool can be purchased at a hardware store or made independently. It is made from sharpened reinforcement. The handle is fused with melted plastic.
The hook itself can have almost any bend and length. The master chooses the most convenient hook configuration for himself experimentally.
This option is used for self-construction of small buildings, when the economy of the process is important and there is no need to rush.
Semi-automatic
The tool, which works on the inertial principle, also has the shape of a hook. Its use speeds up and simplifies the process. It is inexpensive and sold in hardware stores.
The operating principle of such a tool is as follows:
- hook the wire and pull it upward with force;
- at this time, the leg of the hook, which has a spiral thread and is placed in a plastic case, rotates, twisting the wire;
- If after one such movement the wire loop is not twisted tightly enough, hook the loop again and pull.
Semiautomatic is used by professional builders in the construction of private houses.
Using a knitting gun
The gun is a complete construction equipment.
It performs the knitting automatically. When creating a frame, the gun is simply brought to the joint, after which you need to press a lever or button (depending on the model of the tool).
The gun will wrap the wire around the joint, tighten it, and cut it. The whole procedure takes a few seconds.
Such equipment is used mainly at large facilities. When building small cottages with your own hands, purchasing such expensive equipment will be impractical.
The video contains tips and guidance on tying reinforcement with a screwdriver and a hook:
Reinforcement knitting pattern, corner reinforcement
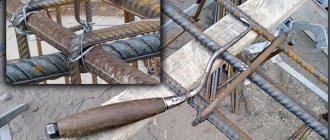
The correct knitting of reinforcement for a strip foundation, optimal in many respects, is a “cage” connection of the reinforcing frame rods. In this case, the rows are secured with wire (or other chosen method) at an angle of 90°. The knitting pattern consists of several sequential operations:
- A fragment 25-30 cm long is cut from a coil of knitting wire (for rods with a cross-section of 8-16 mm).
- The wire is bent in half and placed under the overlap of the rods, placing it diagonally.
- The hook is hooked onto the loop (the place where the wire is bent), the opposite end of the wire is circled over the intersection of the rods and placed above the hook.
- By rotating the hook around the upper end of the wire, a twist of 3-4 turns is created.
- The hook is removed, the ends of the wire are bent inside the structure.
Hook selection
The choice of hook for knitting reinforcement is influenced by the following factors.
- Remoteness of construction stores and household markets where you can purchase a ready-made industrial hook. In many cases, it is made from a large nail (with a working pin diameter of up to 5 and a length of 100 mm). The hook should be long enough to allow the tying wire to spin more easily. The longer the lever, the easier it is to wind it.
- Unwillingness or inability to incur extra expenses. There is no need to purchase a tool made of low-quality steel, which breaks after several dozen or a couple of hundred uses, if a high-quality analogue is not found. This doesn't just apply to hooks.
- The desire and ability to overcome numerous minor difficulties on your own. If you don’t want to stretch out construction for extra hours and days, purchasing a ready-made device is considered a quick option.
- Product performance characteristics. If the construction process, for example, arranging foundations, is a permanent responsibility of the master (and not a rarely solved matter), then it is recommended to purchase a high-quality crochet hook. Such a tool will last ten years, or even more. The best material is hardened tool steel or stainless steel. A slightly worse option is considered to be tool steel with the addition of chromium, molybdenum, cobalt and other additives. It is not recommended to purchase products made from low-carbon steel alloy.
Having purchased or made a knitting tool and the wire itself, you can begin tying the reinforcement for the frame.
Video description
About the intricacies of reinforcement in the video:
The corners of a strip foundation cannot be reinforced by simply overlapping the rods; This is considered a gross violation of technology. To reinforce the corners and connect adjacent linear elements with them, bent rods are used; the corner fragment is reinforced with L-shaped or U-shaped anchors.
Rods laid at the corners of a building without bending, at right angles, are unable to create a rigid structure. Such sections of the foundation are highly likely to be subject to destruction in the future.
Reinforcement of corners requires compliance with technology Source zen.yandex.ru
Reinforcement technology: execution order and features of the stages
The frame for the future foundation is calculated and installed based on the dimensions of the trench, using working reinforcement and auxiliary wire. Its parameters are calculated in advance, taking into account the expected load; It is convenient to assemble the structure on a long workbench. Installation of fittings takes place in stages:
- Vertical elements (clamps) are assembled. The vertical position of the rods is checked using a plumb line.
- The lower horizontal belt is mounted. The lower belt works to deflect the foundation downwards. It is attached with a knitting wire to vertical clamps.
- The upper horizontal belt is mounted. Its task is to resist the upward bending of the foundation strip.
- Corner elements are mounted. They need to be given special attention because they connect the sides of the foundation. Additional rigidity is provided by additional vertical posts, which are laid twice as often.
- The formwork for the foundation is being prepared.
Installation of a linear fragment of a reinforcing frame Source beton-house.com
- The prepared reinforcing frame is being laid. During the installation process, pipes are laid between the reinforcement bars (the utility and ventilation systems will subsequently be laid through them).
- Concrete is poured. Filling is carried out in several stages, with each layer leveled (manually or with a vibrating platform). This technology ensures uniform distribution of the concrete mixture.
- The foundation is being waterproofed. After the concrete has dried, the foundation strip is covered with bitumen mastic or roofing felt. This operation is an important measure to preserve the foundation.
If the frame is assembled in a trench, rods are first driven into the ground, observing the calculated distances. Transverse jumpers, lower and upper reinforcing belts are fixed to them.
Distance between rods
According to SNiPs, the distance between horizontal threads should not exceed 40 cm; for unloaded bases, 50 cm is allowed.
Important! The edge of the metal reinforcement should not come into contact with the formwork and should not come out of the thickness of the concrete!
The minimum distance to the edge of the foundation tape is 5 cm. If the width of the base is 35 cm, subtract a margin of 10 cm and get a horizontal thread pitch of 25 cm. The value is less than the established one and meets the requirements.
- For shallow foundations up to 80 cm high, two horizontal strips are allowed. We retreat the recommended 5 cm from the bottom and top of the monolith, obtaining a height between the threads of 70 cm.
- The jumpers are installed vertically and horizontally with a minimum pitch of 30 cm.
- When constructing a main wall made of sand-lime brick, a multi-storey building, or locating the structure on moving and heaving soils, the cell pitch is reduced and the number of threads is added.
