Any autonomous device for heating rooms requires a device for removing toxic products of fuel combustion. Stove chimneys can have different designs, heights or diameters, and during their construction a number of technological nuances and features must be taken into account.
The construction of a chimney is the most important stage in the construction of a brick stove, the correct execution of which determines not only the efficiency of its operation, but also the well-being of the residents of the house.
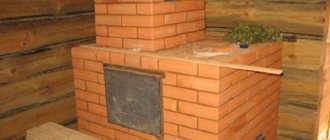
Wood stove design
Despite the fairly wide variety of models (cast iron, brick), almost all wood-burning stoves have the same design elements:
- Foundation or foundation. A necessary element when installing any stove. Its main purpose is to prevent deformation of the soil or floor surface under the stove.
- Frame. Can be lined with brick or made of cast iron.
- Combustion chamber. The space in which combustible material is converted into heat.
- Ash pit. From the name it becomes clear that the resulting ash and ash fall into the ash pan.
- Kamenka. More complex designs of sauna stoves include a heater - a space inside the stove filled with stones to produce dry steam. .
- Chimney. System for removing smoke from the room. Chimney design is a very important part of installing a wood stove. An incorrectly installed chimney can lead to disastrous consequences when heating a room with a stove. We will talk in detail about the design of a wood stove chimney, its installation and operating rules in this article.
More detailed information about the design and types of wood-burning stoves can be found on our website. Anyone interested in purchasing their own heating boiler should read it.
Full range of design and installation services
carries out a full range of work on the design, installation and commissioning of smoke removal routes of any level of complexity, length and design. The company’s installation department specialists will prepare a detailed technical work plan, taking into account all the nuances of the structure, its design and layout, as well as taking into account the personal needs and wishes of the customer. Drawing up a plan is possible both at the initial stages of construction and in finished buildings.
The project plan is drawn up with an accurate calculation of the cost of both all work and the required chimney elements, which is undoubtedly convenient for the customer. After approval of the project, a team of specialists arrives at the client’s site and promptly carries out high-quality installation of the smoke exhaust system, followed by commissioning. A big advantage is testing and a full check of the functionality of the heating and smoke exhaust system upon completion of the work. The client receives long-term guarantees of the quality of the constructed smoke removal system, installed in accordance with all fire and operational safety rules and regulations.
Chimneys of wood stoves: purpose and operation
What is a standard smoke exhaust system? The chimney (for wood-burning stoves, including) is a vertically installed channel in the form of a pipe, the purpose of which is to remove all products formed during the combustion process to the street.
A variety of materials are used to make chimneys, from brick and metal to asbestos cement and concrete. The choice of material depends on the placement conditions, the stove model and the frequency of its use, as well as on the volume of the combustion chamber.
It should be noted that any chimney requires special care. Without attention, the chimney will quickly become clogged, lose draft and cease to fully cope with its functions. The best thing to do is to clean the pipes before the start of the season of constant operation of the furnace. A necessary procedure for caring for a chimney is checking the pipe and sleeve, as well as inspecting for cracks.
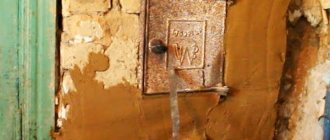
Did you call a chimney sweep?
It is also necessary to take care of cleaning the stove chimneys. For a flow chimney, one or two cleaning doors are sufficient; in a bell-type system, it is necessary to install from two to four such doors, because ash and fumes are deposited evenly over the entire surface of the dome, as well as in the places of transitions from one dome to another.
Gradually, row by row, raising the firebox and chimney passages, we are gradually approaching the moment of installing the cast iron stove. To do this, you need to select a groove in the bricks and mount the hob.
Poor draft in the chimney: consequences
A prerequisite for the proper functioning of the chimney is the presence of natural draft. Poor draft in the chimney of a wood stove will cause smoke to accumulate in the room, and air (necessary to maintain the fire) will cease to flow.
To prevent this from happening, it is necessary to take the issue of designing the chimney duct very seriously. Errors or poor-quality calculations will lead to the formation of too strong or too weak draft inside the chimney duct.
When can you start heating?
After all the rows have been laid out, the stove must be coated with clay, or, if it is a beautiful new brick, all the seams must be thoroughly coated and the stove must be allowed to dry completely.
After a week has passed, which is the minimum time the stove should dry out, you can begin to gradually heat it, adding firewood in very small portions. In order to “break through” the draft, it is recommended to burn newspaper while cleaning the stove before starting a fire in the firebox.
It's okay if the oven smokes a little the first three or four times. This only means that she is still a little damp inside. If the stove continues to smoke even after a week of constant firing, this means only one thing - a mistake was made somewhere. And then you will have to either shift the oven completely, or look for ways to troubleshoot problems with minimal losses. Based on this, it is best to carry out this work in the summer, and not just before the heating season.
In any case, the construction of stoves is a much more complex process than ordinary brickwork. It requires spatial, even mathematical, thinking. But if you give it the proper time and attention, the result will warm your soul and warm your home for many years to come.
Advantages of a wood-burning stove in a bathhouse and sauna
Installing a wood-burning stove in a bathhouse is undoubtedly a smart decision. Thanks to its features, it is not only practical, but also profitable:
- The low cost of fuel will allow you to significantly save on heating;
- Thanks to the natural heat, the steam room warms up twice as quickly as with gas;
- A wide range of wood-burning stoves will allow you to choose a design that is ideal in size and price;
Find out more about wood-burning sauna stoves, their operating features and advantages.
The chimneys of a wood-burning sauna stove have a number of design features that distinguish them from standard smoke exhaust systems. The most important thing is to make sure that carbon monoxide does not penetrate into the steam room, and soot does not settle on the walls of your bathhouse.
Reliability of masonry
When laying chimneys, the difficult issue of installing a closure or cap arises. Because It is customary to make passages one brick wide; to block it, you need to place two bricks end-to-end over it. In this case, the seam does not rest on anything. Such a ceiling device looks, at first glance, weak and unreliable, and one would like to lay a rail for support, but this is not necessary.
Firstly, the rest of the furnace array stands on the second half of these bricks, preventing them from falling through. And secondly, the overlap is done in two rows, in the first row the bricks are laid end to end, and in the second row the bricks are tied, and the brick is laid on the seam. Thus, a kind of “lock” is obtained that firmly seals the passage of smoke.
Chimneys for a bathhouse: internal or external?
All chimneys of wood-burning stoves for baths are usually divided according to the principle of their installation into internal and external. In Russia, internal systems are more popular. They allow you to significantly save heat indoors, while external ones are more typical of Western-style baths and have more of an aesthetic function.
Each of the models has a number of advantages and disadvantages:
- Interior. It is distinguished by increased internal draft, significantly exceeding the draft of the external chimney. When installing it, there is no need for additional insulation and the presence of a door for cleaning the pipe from soot. In general, caring for it is much simpler than external care and requires almost no significant action. Another advantage is the fact that the internal chimney retains heat inside the room for a long time. The only drawback is the complex design.
- External. When installing it, you will not have to make holes in the walls and roof, however, the natural draft of such a chimney is much lower. In general, as already mentioned, its installation is more of an aesthetic nature.
How to lay it out of brick?
Rules for installing a horizontal chimney
Building a fireplace with your own hands is not an easy process, and putting together a snake chimney is much more difficult than assembling a metal chimney.
To properly make a chimney, you must follow the following rules:
- The cross-section must be the same along the entire length;
- Sharp corners inside the chimney must be minimized;
- The inner surface should be as smooth as possible.
The fewer sharp corners, the less likely it is for turbulence to occur and, therefore, the better the traction.
Scheme and drawing
The dimensions of a standard brick are 250x120x65mm, therefore half a brick is 125mm in length. To create one channel, you should lay out 2 rows 65 + 65 mm = 130 mm. To this size it is necessary to add the thickness of the mortar layer.
The resulting chimney should have a design cross-section of 140x125x125mm. Maintaining dimensions is very important.
Step-by-step action plan
- To maintain the dimensions, a novice craftsman should use a special pattern, and no special calculations are required here. The required size of a standard chimney, as you remember, should be 125x125x140mm;
- We lay out the bricks in 2 rows to form a channel;
- The thickness of the seams must be strictly observed. Even a minimal deviation leads to a change in the size of the section. You can control the thickness of the seam using a building level;
- If necessary, the brick is knocked down with a special hammer with a wooden or rubber tip;
- Once the channel is ready, it is necessary to begin blocking. We lay another row of bricks along one side of the channel, as in the figure:
- We carefully remove the entire solution. Internal seams must be filled entirely with mortar;
- Laying floor bricks requires some skill.
We apply the brick without mortar to the structure, thus understanding where to attach it. Using a grinder, we round off the sharp corners that will be located inside the chimney. If necessary, cut the brick to size.
- We apply the solution to the parts where the brick comes into contact with the walls of the finished chimney and firmly attach the brick to the structure;
- When laying the last brick into the ceiling, you need to check the size of the vertical turn. If necessary, it can be trimmed.
Chimney installation: calculation and main mistakes
When installing a smoke exhaust system, it is very important to correctly calculate the chimney for a wood-burning stove. Any errors that are made during the calculation process will affect its work in the future.
When calculating the chimneys of wood-burning stoves, we pay attention to two indicators - the height and diameter of the pipe section. We will talk about the section and its types later, first we will deal with the height.
When calculating the optimal height of the structure, it should be understood that the chimney must maintain natural draft. The chimney should not be too high (despite the fact that in a high chimney the draft will increase, too much cold air will flow inside). However, you can’t make it too low, in which case you risk losing traction altogether.
Calculating the height of a chimney is a complex operation that is best left to a professional. However, if you decide to do it yourself, then remember two things:
- Pipe diameter and height are directly related and vary depending on each other;
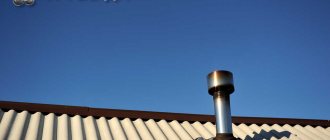
- In general, the height of the chimney above the roof level cannot be less than 500 mm.
Building regulations
The installation of chimneys is determined by the provisions of SNiP 41-01-2003.
The chimney design must meet the following regulatory requirements:
- the minimum height must be at least 5,000 mm or grate;
- when located on the roof slope at a distance of less than 1.5 m to the ridge, the pipe should be 500 mm higher than the ridge;
- when located on the roof slope at a distance of 1.5-3 m to the ridge, the pipe must be no lower than the ridge;
- when located on the roof slope at a distance of more than 3 m to the ridge, the angle between the horizontal and the line passing through the ridge and the top of the pipe should be no more than 10°;
- the head must rise above the flat roof to a height of at least 1,000 mm;
- the maximum length of each horizontal and inclined section should not exceed 1000 mm, the total length of their projections onto the horizontal should not exceed 2000 mm. If there are oblique and horizontal sections, it is necessary to extend the pipe by the length of the horizontal projections. For ceramics, horizontal sections are not allowed.
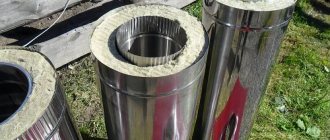
Chimney material: brick and metal
So, what types of wood stove chimney are there and how do they differ? First of all, it should be said that the design of the chimney depends on the material from which it is made:
- Brick. The use of brick necessitates the construction of a serious foundation and the absence of plaster inside the pipe itself (reason: condensation in the chimney pipe of a wood-burning stove).
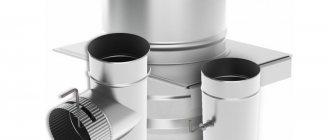
- Metal. Pipes made of stainless metals are a system of modules, each of which is represented by a separate element. Stainless steel is much better suited for a chimney, due to the fact that it is not susceptible to condensation and soot. There are also double-walled stainless steel pipe models with built-in insulation.
Expert advice
It is necessary to choose pipes in which the thickness of the outer metal layer is 1 mm (not 0.5 mm). It’s very easy to check - for a product with a thin wall, the wall bends if you squeeze it with your hands.
When installing sandwich structures, it is necessary to use a special sealant for high operating temperatures (automotive sealant with an operating temperature of 500° is not suitable).
If the pipe rises more than one meter above the roof, it should be reinforced with guy wires.
The places where the sandwich passes through the roof and ceiling must be additionally insulated.
Calculation of diameter and optimal cross-section
Calculating the diameter of the chimney for a wood-burning stove is a key point on which the further functioning of the entire system depends. Like height, diameter affects the strength of natural draft and the temperature in the chimney. To avoid mistakes, it would be smartest to use a special table for the ratio of diameter and height.
When calculating, it is important to remember: the most optimal cross-section of the chimney is a cylinder. It provides sufficient traction force and allows you to cope with the problem of uneven heating of the channel walls.
Snake - an effective solution
This is how chimneys appeared, built on the “snake” principle, or, more simply, multi-turn chimneys, the length of which is many times greater than the length of a straight pipe.
Movement of gases in a horizontal chimney.
There are multi-turn chimneys, vertical and horizontal. In vertical multi-turn chimneys, the location of the main channels is directed strictly vertically. The main disadvantage of such a chimney is uneven heating.
In contrast, a horizontal multi-turn chimney heats up much more efficiently. Since hot gases tend to rise upward, and the upper area of a horizontal chimney is much larger than that of a vertical chimney, accordingly, heating is carried out much better using the same volume of fuel.
The hottest areas.
Three basic rules
It is much more difficult to assemble a multi-pass chimney for a stove than to assemble a modular gas exhaust system for a gas boiler. When performing work, you must follow strict rules:
- The cross-section of the chimney must be strictly the same size throughout the entire chimney.
- It is necessary to minimize sharp corners inside the chimney.
- Keep the inner surface smooth.
At first glance, these are very simple rules, but how can you follow them in practice?
Brick and chimney - dimensions matter
When faced with laying a horizontal chimney for the first time (see Do-it-yourself chimney), even an experienced craftsman can be stumped when following these rules.
But let's look at everything in order.
- A standard brick has a size of 250×120×65 mm . What do we have in this case?
- It is clear that half a brick will have a size of 1 25 × 120 × 65 mm . Since we are covering the horizontal section of the chimney with brick, we decided on a size of 125 mm.
- Since the height of the brick is 65 mm , it becomes clear that to create one channel you will need to lay out two rows, 65 + 65 = 130 , add to this two layers of mortar.
Our chimney will have a cross-section of 125×125×140 mm . This is very important to remember, since when laying chimneys of this kind, many make a grave mistake.
Dimensions.
If the horizontal part of the chimney has a size of 125 × 125 × 140 mm , then the maximum length of the vertical section of the smoke circulation is arranged completely arbitrarily, i.e. as it turns out.
This should not be allowed if, when laying the last brick of the floor, the size of the vertical transition does not correspond to the above parameters, cut the brick to maintain the size. Again, this is very important.
Swirls - methods for solving the problem
The next question is minimizing sharp corners. If you imagine the movement of combustion products inside the chimney as a water flow, it becomes clear that turbulence will appear at the sharp corners of the brickwork, preventing the normal movement of gases and, as a result, deterioration of draft.
Swirls inside the chimney.
The only correct solution in this case would be to smooth out the sharp corners inside the chimney.
Examining the transitions inside the chimney, it is clear that it is possible to smooth out sharp corners only at the very ceiling of the smoke channel. This is done by simply chipping off the sharp corners of the brick. This must be done very carefully and carefully.
Smoothed corners.
Our advice: to smooth out the sharp edges of the brick, use an electric sander. This is much faster and the result will be much better.
Condensation Formation
Condensation in the chimney pipe of a wood stove is a problem that any owner will face sooner or later. Regardless of the type of furnace, condensation, one way or another, will begin to accumulate inside the channel and interfere with proper operation. To combat this, a condensate drain is used, which allows you to almost completely forget about this problem.
There are also preventive ways to deal with settling condensate. For example, use only high-quality dry fuel or significantly insulate the pipe.
Chimneys for long-burning stoves
A long-burning stove is a necessity dictated by the harsh conditions of the northern regions of Russia. Its distinctive features include significant fuel economy and safety. However, chimneys for long-burning stoves also have their own nuances.
Firstly, when assembling a chimney for a long-burning stove, it would be wise to place the pipes in the opposite order from the gas movement. Thanks to this trick, you will get rid of the problem of resin condensation that leaks out when burning wood.
Secondly, make sure that there is good access to the chimney, and that its individual parts are secured with self-tapping screws. This way, you can disassemble it and clean the soot that has formed inside.
Thirdly, remember that 120 mm chimneys for long-burning stoves are the best option.