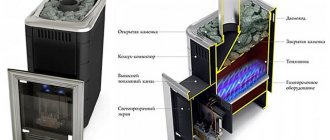
A potbelly stove is often used to heat temporary buildings, garages, greenhouses, and utility rooms. But it also emits combustion products, a lot of smoke from burned wood or other fuels.
Therefore, you will need to decide how to make a chimney for a potbelly stove and where it is best to install it so that it is inexpensive and effective. Moreover, you can do it yourself. Moreover, everything is not as complicated as it might seem at first glance.
To make it easier for you to understand the assembly and installation of the chimney, in this article we looked at the step-by-step process, starting with the selection of material and assembly and ending with checking the functionality of the already installed system.
Calculation of a chimney for a potbelly stove
After the stove is installed and ready for use, it is necessary to install a chimney that can function properly, retain heat in the room and at the same time prevent combustion waste from entering the air of the room where the stove is installed. To do this, you need to correctly calculate the diameter of the pipe, its length and think about how it will exhaust the smoke into fresh air.
In order for the heating system to have the highest efficiency, it is necessary that the pipe for the potbelly stove provides sufficient draft.
Expert opinion
Pavel Kruglov
Stove maker with 25 years of experience
The best ratio of pipe diameter to combustion chamber is 2.7 millimeters to 1 liter. For example, let's take a potbelly stove with a combustion chamber of 50 liters: 2.7*50=135 mm. It is this chimney diameter that will be optimal for the efficient operation of a 50-liter potbelly stove.
Once the diameter of the chimney pipe has been determined, the length of the entire pipeline should be calculated. In these calculations, it is important to take into account not only the location of the potbelly stove, but also how far from the ridge the chimney is located on the roof.
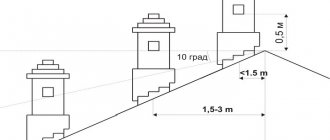
The pipe outlet above the roof should be located according to certain rules:
- The chimney is located from the roof ridge at a distance of up to 1500 millimeters, which means the pipe outlet should be located at a height of 50 centimeters above the top of the ridge;
- With a distance to the canopy of 150-300 centimeters, the pipeline outlet can be positioned at the same level with it;
- If the chimney is located near the edge of the roof, then its outlet should be slightly lower than the ridge, or at the same level with it;
The second option for the pipe exit is through the wall, and not through the roof. In this case, the end of the chimney should be located just below the top of the roof ridge.
But the main long pipe will be the total distance from the pipe outlet to the potbelly stove itself - the calculations in each individual case will be different, it all depends on what floor, in what place in the room and at what height the potbelly stove will be located.
Making an ash pit
An ash pan is a grate near a potbelly stove, on which fuel will subsequently be placed to heat the room.
A good ash pan provides the combustion chamber with a sufficient amount of air (that is, oxygen), and also provides good draft, thereby ensuring better combustion. In most cases, ash pans in potbelly stoves leave “much to be desired,” so upgrading the ash pan will help improve the performance of the potbelly stove.
An effective ash pit should be made of heat-resistant material and have a door, thanks to which you can avoid smoke in the room. Improving the ash pan will help turn an ordinary potbelly stove into something like a fireplace.
Instructions
Making an ash pan yourself will require certain skills from you, and the production must be in accordance with the instructions:
- First you need to weld the box to the size of the potbelly stove, without the top wall and leave a rectangular cutout in the end wall. Steel is most often used in production. The dimensions must correspond to the width and length of the potbelly stove itself.
- Make holes in the bottom of the stove. The diameter of the holes should be about 20 mm.
Drilling holes for the ash pan
- Weld the box to the stove.
- Install the door into the ash pan.
This design will give better and more uniform operation of the potbelly stove.
Materials and their quantity
The list of materials required for the construction of a chimney varies depending on what kind of pipe structure it is decided to install. If the exit will be directly through the roof, then fewer corner bends will be required.
A standard size chimney will require the following number of pipes:
- 1 elbow 120 cm long, 10 cm in diameter;
- 2 elbows 120 cm long, 16 cm in diameter;
- 3 butt elbows 16*10 cm;
- Tee with a diameter of 16 cm and a plug for it;
- Fungus – 20 cm;
- Sealant.
In addition, for the construction of various chimney structures, other parts may be needed: an anti-spill canopy, a passage glass, thermal insulation materials.
Expert opinion
Pavel Kruglov
Stove maker with 25 years of experience
A huge role is played by what kind of pipes for the stove chimney it was decided to purchase, since the number, size and types of bends will depend on what kind of structure will be installed. If it was decided that the smoke exhaust system will be located outside the room, then it will no longer be possible to install it inside the building, since then a different set of parts will be required.
Design Features
Despite the huge selection of materials for the construction of chimneys, the most widely used today are double-circuit steel pipes, popularly called “sandwich”.
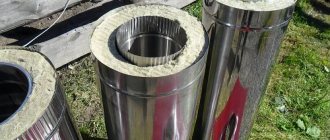
The sandwich type chimney is a two-layer structure. Between two metal pipes of different diameters there is a layer of heat-insulating material, which simultaneously serves as insulation and insulation.
Video: Chimney made from sandwich pipes
Compared to single-circuit pipes, which are made from steel 0.5 mm thick, the double-circuit design is characterized by increased fire safety and better technical characteristics. To install a chimney outside the building, single-circuit pipes are not recommended. After all, due to only one layer, they are simply not able to retain heat in the cold season. Due to a sharp temperature difference, condensation forms in such a chimney, reducing draft and creating blockages in the pipe.
Construction of a double-circuit sandwich pipe
Therefore, to install a chimney through a wall, the best option would be to purchase sandwich pipes. The popularity of such a double-circuit chimney is due to its low price compared to a brick chimney, attractive appearance, excellent technical characteristics, fire safety and long-term operation.
In addition, you can do the installation of a chimney made of this material yourself. And although there are some nuances and subtleties here, even a beginner can cope with the task if you strictly follow our detailed instructions.
Tools
You only need cutting tools: grinder, jigsaw, knife. All work is carried out manually and does not require special equipment.
Installation diagram
There are several types of chimneys; the most suitable type of design is selected individually.
Installation methods
It is important to take into account the collection of condensate in the system, so it is necessary to have a plug, a condensate drain and a container for collecting condensate.
If the potbelly stove is installed through a wall from a pipeline located on the street, then it would be advisable to lead the chimney through a window so that you do not have to prepare a hole for the pipeline in the ceiling.
The outer part of the chimney is insulated using thermal insulation and covered with protective material. A fungus is installed at the end of the pipe, which will protect the chimney from debris, rain, various small animals and foreign objects.
Floor preparation
The chimney pipe for a potbelly stove is most often installed in such a way that it passes through the ceiling, therefore, before installing and fixing the pipeline structure, it is necessary to make a hole for it in the ceiling: using a jigsaw or other cutting tool, having a diameter suitable for the passage of a glass for elbows of the internal chimney.
Example of a hole for a chimney pipe
Pass-through glass
The passage glass is installed in the hole before the chimney for the potbelly stove is assembled. The diameter of the glass should be selected according to the diameter of the inner pipe, although sometimes the joint is made before the chimney passes through the ceiling. It should be understood that it is important to secure the glass tightly - it serves as a retainer. But in addition to this, the pipeline must also be attached to the surface of the wall.
If installed incorrectly, the following consequences may occur:
If there are easily flammable materials, insulation or wooden parts in the ceiling, then they must be removed so that they do not come into contact with the passage glass.
Once the pipe has been inserted, the whole thing needs to be sealed with a fire-resistant material, such as heat-resistant sealant or special fire-resistant wool.
The following stages of work are shown in the photo:
Sealing
Pipe outlet to the roof
Roof work
At the last stage you need to put a deflector on the pipe
Tips for working
- The pipes used in the structure are located exclusively in a vertical position; to fix them, it is best to use special brackets with dimensions corresponding to the elbows of the system. To save money, you can make the brackets yourself using a metal corner.
- All connections must be treated with sealant so that there are no holes through which smoke can escape into the room air. There is a large selection of sealants on the market that are suitable for sealing pipeline seams for smoke exit:
- High temperature sealants;
- Heat-resistant sealants;
- Heat-resistant sealants;
- Heat-resistant sealants;
High temperature and heat resistant sealants are used to seal areas that reach temperatures of 350 degrees Celsius. Since the chimney for a potbelly stove heats up to higher temperatures, these types of sealants are only suitable for parts outside the piping system.
Heat-resistant and heat-resistant polymers can withstand enormous temperatures, up to 1500 degrees Celsius - they are the most suitable choice for a potbelly stove chimney.
Connecting the chimney to the stove
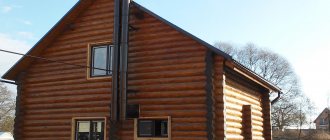
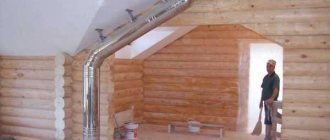
The chimney coming out of the potbelly stove, called internal, is connected to the street, external pipeline, in the attic or in the under-roof part of the roof. The beginning of the internal chimney is the segment coming out of the stove pipe, which is joined at the elbow to the ceiling.
When installing an internal chimney, it is important to correctly connect the pipe to the stove pipe - since if this is done incorrectly, smoke may escape into the air in the room, which will make it impossible for the heating system to function properly.
Expert opinion
Pavel Kruglov
Stove maker with 25 years of experience
The chimney is connected to the potbelly stove using a heat-resistant seal and a special clamp. It is important to make a completely sealed structure, since any breakthrough of gases can lead to poisoning of those inside the room.
Chimney connected to potbelly stove
Installation recommendations
Knowing how to properly make a chimney for a potbelly stove in compliance with the standards for installing sandwich pipes will help ensure safety.
To form a vertical channel, a straight section of pipe is installed on the vertical outlet of the potbelly stove, sealing the connection with sealant or asbestos cord. The seal not only makes the connection more reliable, but also prevents air suction, increasing draft in the firebox. Then a straight connecting element is installed, sealed and the next section of pipe is installed, gradually raising it to the ceiling. When using ready-made pipes, it is advisable to connect them so that, if repairs are necessary, you can remove the section from the stove to the ceiling and the pipe inside the attic separately from each other. In this case, the connecting element is installed at the top and bottom on a segment that will pass through the ceiling and roof.
To isolate a hot pipe from wooden parts, install a pass-through glass (finished element) in the ceiling or make formwork from thin sheet metal (diameter 15-20 cm larger than the diameter of the pipe). A section of the chimney is inserted into the glass, and the space inside the formwork or glass is filled with a non-flammable heat insulator (mineral wool, expanded clay, clay). The same is done when wiring through the roof. A rain cap is placed on the upper end.
If the outlet pipe of the potbelly stove is located on the side, proceed differently:
- A tee with one plugged end is placed on the pipe. When cleaning mechanically, soot can be removed through it.
- Then they install a pipe running inside the room - vertical or horizontal, and stretch it to the outlet through the wall or ceiling. Fastening to the wall - on brackets, maintaining clearances to prevent fire. Wooden walls need to be insulated with asbestos and tin.
- Carry out wiring through a wall or ceiling made of flammable material according to the scheme described above (through a glass). If the ceiling or wall is concrete, then it is enough to wrap the pipe with asbestos at the passage point. This will protect contacting parts from temperature changes and destruction.
If the pipe is laid on the outside of the building, it is fastened to brackets. With this installation, the tee is installed after the chimney section has been brought out from the stove pipe to the street, pointing the plugged end down. On the opposite branch of the tee, a vertical pipe of the required height is built, ending it with a cap. To reduce heat loss and condensation inside the pipe, external insulation is made of non-combustible materials. The sandwich does not require insulation.
Making a pipe from a sheet yourself is quite labor-intensive. Without skills in working with metal, it is difficult to make a high-quality welded joint. Therefore, it is not advisable to save on the purchase of ready-made chimney pipes: both galvanized and sandwich pipes are fireproof and reliable in operation. Installing a pipeline from ready-made parts does not take much time and is within the capabilities of any home craftsman.
Is it worth covering the pipe with bricks?
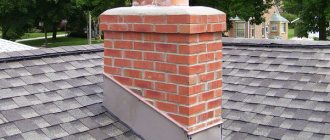
A metal chimney pipe for a potbelly stove does not require special protection from external influences, but due to the visual effect and possible contact with a hot pipe, enterprising owners often line the pipeline with bricks.
Expert opinion
Pavel Kruglov
Stove maker with 25 years of experience
But the construction of a chimney using brickwork is prohibited - such structures are not suitable for this heating system; only a galvanized pipe for a potbelly stove is suitable for this role, it will provide good draft, it is easy to clean and check for defects. Simplicity of installation and easy maintenance are the main advantages of this hood.
Layout nuances and factors influencing chimney parameters
To design an impeccable option, it is unimaginable to make do with only calculations and diagrams. The flue intersects with important structural parts of the house, which means that it certainly affects the plan. In the case when the owner wants to install it closer to the ridge, he may encounter many difficulties. Therefore, it is better to place the chimney at a great distance.
The height should be selected taking into account the design features:
- Apartment design;
- chimney geometry;
- number of residential floors;
- ease of installation of chimney ducts;
- potential accessibility for maintenance work on the boiler unit and smoke ventilation unit;
- type of building material used during the construction of partitions and rafter systems;
- the number of heat sources connected to a single chimney.
It is necessary to indicate that, in accordance with the standards for the installation of heat supply systems in individual dwellings, only one boiler is allowed to be connected to one gas duct. In special cases, it is allowed to exhaust boiler gases through one chimney from 2 units. For proper functioning of heating equipment, a cut must be placed in the middle of such a structure. Furnaces in multi-storey buildings up to 3 floors are placed one on top of the other, and their smoke ducts are placed in a similar manner so that the flue gases have the opportunity to escape through one shaft.
The vast majority of designers prefer the use of channels that are installed during the construction of building walls in brickwork - they can significantly save money on building materials.
A chimney that cannot be installed in a main wall, install smoke ventilation ducts as close as possible to the ridge girder.
The construction of a wall chimney is carried out using a displacer template, lined with brickwork on all sides. It is made in the form of a wooden box, with a cross-section equal to the diameter of the chimney. Having reached the top of the template, it is moved higher, after which it is covered again. The process continues until the construction of the load-bearing wall is completed.
Often, brick pipes are placed on the inside of the main walls; in this case, the most efficient heating of the cottage can be organized, with low specific heating costs. Sometimes smoke ducts are placed in external walls, but this method will be the most expensive and will require significant effort when servicing the smoke ventilation ducts. In the option of installing a smoke ventilation system in an external wall, the width of the pipe wall is larger.
Impeccable calculation of the chimney increases the efficiency of the home heating source and guarantees the safe operation of heating sources. Otherwise, toxic gases can enter the living space and harm the health of residents.
Care and cleaning
The overall quality and efficiency of the heating system directly depends on the condition of the chimney, so periodically attention should be paid to its systematic care.
Every year it is necessary to conduct a complete inspection of the pipeline to detect cracks, burnouts, rust and other defects that can lead to unpleasant consequences. During the inspection, the entire chimney structure should be simultaneously cleaned of soot - this can be done by burning aspen wood in the stove.
How to install?
Experienced experts recommend placing the potbelly stove approximately in the corners of the room, and leading the chimney pipe to the other side. Using this arrangement, you can achieve maximum heat transfer from the furnace. To prevent the heat from leaving along with the smoke, the pipe should be pulled at an angle of 30 degrees. You should also try to avoid straight sections of pipe located horizontally.
To place a potbelly stove in a garage, you need a supply ventilation system and good exhaust.
You should never place the stove close to the car. The potbelly stove should be at a distance of 1.5, or even 2 meters from it. Also, any flammable items and compositions must be moved from the potbelly stove to an approximately similar distance.
Brick walls should be installed on the sides and in front of the stove. This not only provides protection from accidental contact with a hot structure, but also ensures the accumulation of heat generated by the stove, which can significantly increase the efficiency level of the potbelly stove.
If the walls of the garage are made of wood, then there should be about 100 cm of free space between them and the stove itself. The wooden walls themselves must be covered with asbestos sheets, lined with bricks, or protected with some other fire-resistant means.
It is extremely important to place a sheet of iron up to two cm thick at the base of the potbelly stove or pour a concrete screed, which will help prevent the spread of fire if sparks, coals, etc. fall out of the stove
The potbelly stove should be used exclusively in rooms where good ventilation is provided. The main factor in fire is oxygen. Therefore, fresh air must enter the garage in good volumes, otherwise the fire simply will not ignite, and there will be a minimum of heat from such a stove. Sometimes it is enough for this purpose to leave a not very wide gap between the garage door and the ground. If there is no such gap, then you need to either make it yourself or make a supply ventilation system.
Under no circumstances should you leave flammable materials near the stove.
Conclusion
Installing an exhaust pipe for a potbelly stove is not a complicated process and can be done independently, without the involvement of specialists. The main thing is to follow fire safety rules, not allow the chimney to come into contact with easily flammable materials and monitor the tightness of the structure.
With a responsible approach to the installation of the potbelly stove and the installation of the chimney, as well as proper operation, no problems will arise when using the heating system. If the entire system is installed incorrectly, then like a boiler or fireplace, a potbelly stove can cause a fire.
Which one is better to choose?
The choice of chimney is governed by several factors that affect the installation and operation of the heating system.
Factors:
- type of potbelly stove;
- volume of the furnace section;
- method of connection to the structure;
- indoor location;
- the need to carry the stove;
- chimney material;
- requirements for pipe design.
In fact, the chimney is selected for a specific type of stove, and not vice versa. Otherwise, the heating system will not operate properly. This especially applies to the requirement for a minimum pipe diameter.
https://youtube.com/watch?v=GZSBTiboI3I
Warm brick
A potbelly stove using wood, coal and other types of fuel can significantly increase its efficiency. To do this, it is enough to build a screen of baked clay bricks around it with your own hands. If you look carefully at the drawings of such a mini-building, you will see that the bricks are laid at a short distance from the walls of the stove (about 10-15 cm), and, if desired, around the chimney.
Bricks require a foundation. Do you want the masonry to last a long time? Then fill the base one at a time to form a monolith. It is better to take concrete as the material for the foundation, which should be reinforced with steel reinforcement yourself. It is advisable to place the reinforcement layer at a distance of approximately 5 cm from the surface of the concrete pad.
Ventilation holes are made at the bottom and top of the brickwork, which will ensure air movement (heated masses will go up, cold air flows will come from below). Ventilation also prolongs the life of the metal walls of the potbelly stove, delaying the moment of their burning due to cooling by circulating air.
Bricks laid around the stove accumulate heat and then release it for a long time, warming the air in the room even after the stove goes out. In addition, brickwork additionally protects objects surrounding the stove from fire.
If desired, you can completely lay out the stove from brick. Such a structure is advantageous in that it will last for many years without additional effort on the part of the owner. However, there are also certain disadvantages. The disadvantages of this option include the following:
- the process of laying out such a stove is quite labor-intensive and is suitable only for those people who have experience in masonry with their own hands;
- a brick stove is quite expensive, as it requires the use of fireproof materials, including fireclay bricks and special clay for mortar.
In order to get a small potbelly stove with wood, it is enough to lay out a cone measuring 2 by 2.5 bricks, 9 bricks high. In the combustion chamber, rows 2-4 are laid out of fireclay bricks. An ordinary fired clay brick is suitable for a chimney, into which you must remember to insert a stainless steel sleeve.
Whatever the method of making a miniature stove or potbelly fireplace with your own hands, whether you make them according to a drawing or by eye, the main thing is that at the end you get an effective heating device, and in an expanded configuration also a hob for cooking. Look around for suitable materials (barrels, sheet iron, etc.) and go ahead to your own homemade stove or even a potbelly stove!
How to make a wood splitter with your own hands? How to install a sandwich chimney with your own hands It’s not difficult to build a chimney for a boiler with your own hands Do-it-yourself metal stove How to make a smokehouse yourself at home or in the country
