Materials
You can hem the ceiling along wooden beams with various materials. Designs that combine original finishing options from several panels look beautiful, resulting in a completely or partially smooth coating. Such a surface can be additionally covered with foam tiles, textured wallpaper or painted.
In addition, in modern design, a variety of materials are used for cladding ceilings.
Fiberboard. Sheets of the product are cut in such a way that their end parts are placed in the middle of the beam. The fiberboard is attached to the structure using wooden beams measuring 20×40 mm or fixed with special logs. To do this, recesses are cut out in the boards and an additional corner or beam is inserted.
With this type of finishing, it is important to ensure that the fiberboard panels do not sag. Therefore, they are nailed and laid with the seam offset or in a checkerboard pattern. Plywood
Plywood
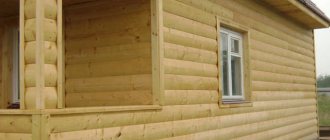
If the texture of the wood is not important for the interior of the room, then the ceilings are sheathed with plywood, it is attached with self-tapping screws and nailed down. In this case, you need to pay attention to the thickness of the beams, since this material is heavy. The thickness of the sheets is selected depending on the distance between the logs. Upon completion of the sheathing, the seams are sealed with wood putty or mastic. Then the surface is well primed and covered with finishing.
Then the surface is well primed and covered with finishing.
- OSB (OSB) boards. This material is considered inexpensive, easy to install and easy to process. OSB boards can be used to cover ceilings in any room. The only drawback of the product is the presence of resin in its composition, but if the material is made with high quality, then during its operation the emission of formaldehyde will be small. The slabs are assembled quickly, since their design is similar to lining and has special grooves. After such covering, the ceilings acquire a smooth and seamless surface.
- Drywall. It is the most common material for covering surfaces; it is easily attached to both wooden and aluminum frames. With its help, you can create beautiful multi-level systems or simply create an insert between wooden beams. After installing the drywall, it is necessary to seal all the joints; to do this, apply a special construction mesh and cover it with putty.
- Sandwich panels. They are an excellent insulation material that is easily joined using a special connection. The panels are screwed to the beams with self-tapping screws and then painted. The material is available with a matte and glossy surface and does not require additional processing. They can either completely cover the ceiling or make separate inserts vertically or horizontally.
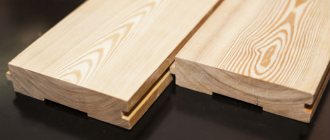
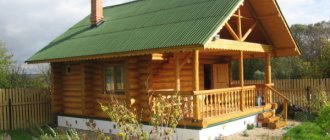
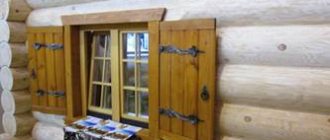
- Wooden lining. It is one of the most popular types of material that looks beautiful in the cladding of private houses; wood products are environmentally friendly and have a pleasant aroma. The board-lined ceiling maintains a certain microclimate in the room and absorbs excess moisture. If such a structure is installed correctly, it will last for many years and provide good sound and heat insulation. Most often, clapboards made of cedar, alder, pine and oak are chosen for cladding ceilings. Its width varies from 30 mm to 150 mm, and its length can reach six meters. Of course, such cladding is considered expensive, since, in addition to installation, the boards must be additionally coated with varnish, which, when dried, creates a protective film and makes the coating resistant to moisture.
Decorative structures made of polyurethane
They are also very convenient for masking communications and unattractive structural details. Using polyurethane elements, they decorate not only the ceiling, but also other surfaces. For example, interior boards can be used to very beautifully emphasize corners or decorate walls.
Polyurethane beams are easily mounted to a load-bearing wooden block or metal profile using self-tapping screws. To prevent the metal heads of the screws from spoiling the overall appearance, they are recessed deeply and painted over with a wax pencil to match the color of the surface or covered with plugs of the appropriate shade.
An even simpler way to install polyurethane beams is with liquid nails using small wooden blocks to additionally secure the ends of the beam with self-tapping screws, as shown in the instructions below.
The joints of the beams are covered with special decorative belts that skillfully imitate forging: they are available in several colors to match different types of metal.
In addition to decorative belts, massive “antique” chains and ropes of rough texture are used to decorate beams. Lamps are selected so that their design matches the overall style of the room. Polyurethane false beams, hollow inside, perfectly hide communications, so spotlights are often built into them, giving the interior an elegant, original look.
Design features of floors
The main feature of such ceilings is that they consist of several layers.
- Support beams. They form the base, are placed on the surface of the ceiling at a certain distance and are attached to each other using timber.
- Attic floor. It is a flooring made of wooden planks that separates the roof from the floors.
- Insulation. Polyurethane foam, mineral wool and polystyrene are most often used as thermal insulation. This layer of construction protects the room from cold air currents that can penetrate through the roof or interfloor ceilings.
- Vapor barrier. It is laid in order to prevent the accumulation of condensation and create an optimal microclimate in the room.
- Rough ceiling. It is a coating that is attached to the sheathing; OSB boards, boards or plywood sheets are used as the finishing material for cladding. The sheathing is usually made from slats. After installing the rough ceiling, decorative cladding is performed, with the help of which the covering is either completely sewn up, or the beams are simply hidden.
Before making a black ceiling, in order to obtain a high-quality result, you should understand what constitutes an interfloor ceiling in a wooden building. It consists of several layers and each performs a specific function. Provided that all elements are assembled correctly, the ceiling will be reliable and will last for a long period.
The interfloor ceiling in the basic version has 5 layers:
- Plank floor. If there is another floor on top, you also need to lay a floor for it. The plank layer can be rough, for finishing, it can be used as a finishing option.
- Vapor barrier. Despite the fact that some owners do not make this layer, to obtain a high-quality result it is advisable to lay a vapor barrier material.
- Insulation. Creating thermal insulation is necessary to keep the house warm. This is especially important when there is an unheated attic or roof above the ceiling.
- Waterproofing. This layer is needed to protect the wood from destruction due to moisture.
- Rough ceiling in a wooden house. It is used to attach finishing trim. It is also a support for waterproofing, insulation and vapor barrier.
There are different options for completing the final finishing of the ceiling. The most popular is the use of plasterboard boards. To secure them, a metal frame is assembled. This finishing method is practical, easy to implement and inexpensive. The result is excellent if everything is done correctly.
To install a rough ceiling on wooden beams, first boards are attached to them, then insulation and waterproofing are laid, and then all that remains is to finish the ceiling surface with plasterboard or other material.
Any wooden ceilings are laid on the frame and frame-panel structure of the house, since its walls are not designed for heavy loads.
Here the ceiling is a horizontal fence, a kind of wall, but the installation of this ceiling differs from the construction of walls.
Sections of ceiling beams
- The load-bearing base of the ceiling is made of wood - beams, the size of which is calculated in the diagram of the power frame of the house.
- The beams are made from round timber, processed into beams, edging or boards with a thickness of at least 60 mm, which are installed on the edge. You can use 50mm thick boards paired with nails or staples. But it’s better to construct a box from boards.
On large spans, the beam is also supported on internal walls, or even on intermediate pillars
- Sheet flooring is made in non-residential premises due to its low noise-absorbing and heat-insulating qualities. The essence of the ceiling: plank flooring is placed on the load-bearing beams - the floor of the attic.
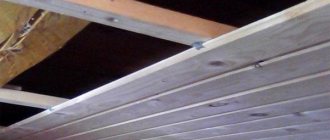
- A hemmed ceiling is made in a country house or attic house, since the thermal insulation properties of such a ceiling are sufficient only for seasonal use of the room. To do this, we fill tongue-and-groove boards on both sides of the beams.
- We lay sound-absorbing material on the bottom lining. The insulation backfill on the boards of the lower floor should be light so as not to tear the boards away from the beam. Sawdust or husk will do. This is the ceiling of the lower floor.
- The top flooring is the attic floor.
1 – sheets of drywall; 2 - tongue and groove boards - floor panel; 3 - waterproofing; 4 - sound insulation; 5 – floor beam; 6 - lag; 7 - floor boards; 8 - cranial beam bars
Preliminary calculations
The clapboard board has standard dimensions, which greatly simplifies the calculation of the required material.
When making calculations, you should try to minimize the number of joints when laying the lining. In case of unexpected damage, it is necessary to purchase material with a small reserve. Correct calculations will make the task easier and eliminate unnecessary costs and labor. Before starting work, you need to calculate the amount of materials required
To finish the ceiling in a room measuring 2.5 by 3 m, lining plates 6 m long are usually purchased. They will need to be cut exactly in the middle. This will make it possible to use the material completely without waste. Additionally, you also need to purchase a support beam, preferably pine. The following table will help you correctly calculate the dimensions of the sheathing elements.
Table. The required dimensions of the ceilings to calculate the load are 0.4 tons per 1 m².
| Step width, m | Span m/beams, m | Log diameter, mm | Beam dimensions, |
| 2 | 1 | 130 | 12x8 |
| 2 | 0,6 | 110 | 10x7 |
| 2,5 | 1 | 150 | 14x10 |
| 2,5 | 0,6 | 140 | 14x9 |
| 3 | 1 | 170 | 16x11 |
| 3 | 0,6 | 140 | 14x9 |
| 3,5 | 1 | 190 | 18x12 |
| 3,5 | 0,6 | 160 | 15x10 |
| 4 | 1 | 190 | 18x12 |
| 4 | 0,6 | 160 | 15x10 |
| 4,5 | 1 | 220 | 22x14 |
| 4,5 | 0,6 | 190 | 18x12 |
| 5 | 1 | 250 | 24x16 |
| 5 | 0,6 | 200 | 18x14 |
| 5,5 | 1 | 240 | 22x16 |
| 5,5 | 0,6 | 200 | 18x14 |
| 6 | 1 | 270 | 25x18 |
| 6 | 0,6 | 230 | 22x14 |
| 6,5 | 1 | 290 | 25x20 |
| 6,5 | 0,6 | 250 | 23x15 |
| 7 | 1 | 310 | 27x20 |
| 7 | 0,6 | 270 | 26x15 |
| 7,5 | 1 | 330 | 30x27 |
| 7,5 | 0,6 | 290 | 28x16 |
What materials and tools are needed?
To work, you will need a very minimal set of tools, which, as a rule, is at the disposal of any “home” master:
- Roulette
- Building level
- Hammer (if the ceilings and floors are made of concrete)
- Screwdriver or screwdriver
- Marker or pencil
- Hacksaw or jigsaw
- Hammer
In addition to the necessary tools, you should stock up on materials for work:
- Plywood sheets of selected thickness and size
- Antiseptic impregnation (for treating sheathing parts and floor surfaces)
- Bars or slats for constructing sheathing
- Quite a lot of screws
- Plinth or other decorative material for finishing the joints of the wall and ceiling
If you intend to paint the finished coating, you will need to purchase paint and rollers for its application. You can prepare several brushes to paint areas of the coating near the walls and in the corners. It is inconvenient to work with a roller in such places.
Installation technology
The main stages of installing a stretch ceiling:
- Cleaning walls and ceilings from dirt, treating surfaces with protective agents.
- Determining the location of lighting fixtures, installing mortgages and supplying electrical wiring.
- Marking and fastening profiles at a distance of about 10 cm from the rough ceiling. The baguette is screwed with 6x50 wood screws or universal galvanized screws with a pitch of 10-15 cm.
- Warming up the room with a heat gun and tensioning the fabric. The film is tucked into the baguette starting from the corners and gradually moving towards the center. Fabric ceilings do not require heating and are stretched from the middle of the walls to the corners; upon completion of the work, the remaining fabric is cut off with a knife.
- Installation of lighting fixtures. In places where spotlights are installed, special thermal rings are glued to the canvas, protecting the film from tearing and overheating. Next, a hole is cut inside the tread ring and a lighting fixture is attached to the insert.
- Sealing of butt joints. The places where the baguettes adhere to the wall are covered with decorative tape, masking the installation joints.
Features of installation in a house with beams
If the design project provides for the external location of the beams, the installation of the tension fabric has some features. There are two ways to make wooden beams on the outside of the finish:
- The canvas is stretched over pre-installed base beams. Decorative false beams are installed on top.
- The stretch ceiling material is fixed in the spaces between the beams. To do this, it is divided into fragments of the required configuration.
It is much easier to do the work using the first method, but if the ceilings are low, it is not recommended to use it, since the usable area of the space is reduced. The second method is more complicated to implement, but can be used in any room.
Recommendations: how to paint a plywood ceiling
Despite the fact that painting a plywood ceiling is quite simple, you should not approach this procedure with excessive self-confidence. The focus is not so much on the aesthetic, but on the practical component. For many, it will be a discovery that the correct choice of paint begins with studying the texture of the surface. It is recommended that the colorant preserve the physical structure of the wood and its appearance.
Its task is to hide the base from prying eyes. There is also a little trick that allows you to simultaneously protect the base and preserve the natural color of the plywood. After this, the surface is covered with 2-3 layers of varnish.
Next comes stain, which comes in several types:
- Nitro stain;
- Dry mixture;
- Alcohol base;
- Water based.
Attention should be paid to the color of the stain, because you should not choose too contrasting shades for your home or office space. Designers make an important caveat
If the owners of the room want to get a color that is rich in all respects, then the ceiling is finished in at least 2-3 layers. Besides this, there are a few more tricks to transform the interior of a room.
Selection of films for waterproofing and vapor barrier
A simple polyethylene film will cope with the functions of waterproofing. It is important to choose the most durable one offered.
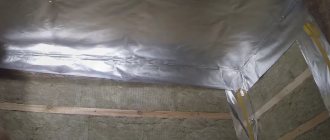
Vapor protection involves the use of special foam material, which has a layer of foil on one side. This material will provide additional heat retention. Although you can use regular foil.
Finishing and decor options
If the veranda is closed, then the following options for finishing and decorating the ceiling are possible:
- Whitewashing - lime or chalk mixed with water is applied to a carefully leveled surface; it's cheap but boring. You need to whiten in several layers, drying each one. Condensation will leave dark or yellow stains, moisture will make this finish wet, so you will have to whitewash it often.
- Painting - choose oil- or acrylic-based paint in a light shade, it is resistant to moisture, and this color scheme will create the feeling that the space has become larger. If you have a penchant for drawing, you can create patterns to your liking. This is the least labor-intensive option that does not require special qualifications for execution, but all the errors of the base will be clearly visible.
- Wallpaper - for such decor it is necessary that the veranda be heated. You can choose any colors or buy a type for painting and do it yourself. They can be varnished. Modern sellers can offer non-woven, vinyl or liquid wallpaper. However, in conditions of high humidity, the glue loses its properties, and this finish will soon become unusable.
So, there are many options for covering the ceiling on the veranda; there are those that are installed by specialists, and those that can be installed without qualifications. The main requirement for a material is the ability to withstand the conditions in which it will be used. But do not forget that you will not feel comfortable on a veranda with a coating that you do not like visually.
Preparing the surface for repair
Typically, repairing a rough ceiling includes the following steps:
- removal of old coatings;
- plastering the surface;
- applying putty;
- padding;
- fine finishing.
If monolithic construction technology was used during the construction of the building, then the rough ceiling should initially be even and smooth. It does not require additional leveling, so repair work will be limited to finishing putty and primer, after which it will be possible to begin finishing.
With prefabricated slabs the situation is somewhat more complicated. Often you have to additionally level the ceiling. In a good situation, and this happens extremely rarely, it is enough to go over the seams between the slabs with putty and apply a primer. But more often you have to follow all the steps to prepare the ceiling for repairs.
Before finishing, the rough ceiling is carefully prepared so that the fresh coating looks presentable and lasts for many years. However, before carrying out repair work, it is advisable to cover the floor with newspapers or film. This will save you from having to wash them.
So, the preparation of the ceiling begins by removing the remnants of the old coating from it. As a rule, to remove whitewash, you need to walk across the ceiling with a rag soaked in soapy water or a soda solution, then rinse the ceiling with clean water and let it dry. But it happens that the layer is so thick that it has to be scraped off with a spatula.
What means to remove paint depends on what kind of paint material was applied to the ceiling. If it is water-based paint, then the surface is washed with a vinegar solution. In the case of adhesive paint, you will need a one percent solution of hydrochloric acid, and with oil paint, special removers with an alkaline reaction.
To remove wallpaper from the ceiling, use a spatula. To speed up the process, the material is pre-moistened. If there are contaminants left under the old coating, they are also removed:
- Soot. It is removed using a two percent solution of hydrochloric acid and treated with boiling water.
- Greasey oil stains. They will go away if you use a warm solution of soda ash (five percent).
- Rust. The ceiling is washed with water, after which a solution of copper sulfate (ten percent) is applied to it.
- Mold. Special antiseptic solutions will help get rid of it.
The appearance of fungus or mold on the ceiling indicates high humidity in the room. Getting rid of these pests will not correct the problem. It is necessary to determine the cause of dampness in the room, eliminate it, and then make repairs.
Measures for finishing the ceiling surface
First, you need to calculate exactly how the plywood sheets will be placed on the ceiling, since their edges must certainly be attached to the sheathing in order to avoid peeling and sagging of the material.
It is important to observe 2 points:
- solid fragments must be screwed in the center of the ceiling;
- Trimming fragments should be installed around the perimeter.
The lathing is fixed according to the following rules:
- The sheathing must be fastened to the concrete ceiling using quick installation.
- The lathing is attached to the wooden ceiling with screws, the length of which should not be less than 40 millimeters.
- The appearance of the finished sheathing will look like a series of beams located parallel to each other on the ceiling.
Adviсe
The process of installing a rough ceiling covering has its own subtleties, knowledge of which allows you to save materials and perform the job efficiently:
when installing with boards, it is important to correctly calculate the dimensions of the elements so that as little waste as possible remains; if the length of the board is more than necessary, then the slats are not attached to the last beam; if less, they are cut to the length of the last beam. It must be taken into account that the slats can be fixed on the back side of the beam; wooden slats are considered the best option because they are installed much faster than other materials; vapor barrier materials are laid taking into account how the room will be used
The material is laid along the entire perimeter of the ceiling surface. With the help of such a layer, the wooden ceiling will not rot or mold.
If it is impossible to install thermal insulation on a concrete surface, then a suspended frame structure is first constructed.
Design
The design of the ceiling in a wooden house is subject to a specific stylistic direction. This way you can introduce the necessary mood and convey a certain atmosphere to any interior, which, regardless of the chosen style, should please and correspond to the temperament of the owners of the house, taking into account the opinions of everyone. With a skillful approach to ceiling design, you can visually make any room in the house aesthetically pleasing.
For classical trends, which include classics, neoclassics, classicism, Italian style and notes of English design, it is worth choosing plasterboard structures on a frame. To decorate the ceiling according to all the canons of palace solemnity, it is worth decorating the box with lighting, a chandelier with crystal and decor in the form of plaster stucco, as well as moldings or ceiling plinths. Additionally, you can install strip lighting around the perimeter of the box, and if space allows, install two central lamps in the ceiling.
If modern trends are chosen as the basis for the style, you can decorate the ceiling with stretch fabric or its combination with plasterboard. Options with photo printing on a film or textile base of stretched fabric, selected in the same style as the interior design, will look good. If the style is minimalism or modern, you can limit yourself to a plain panel without a pattern with a glossy texture. This solution will visually increase the volume of the room.
Wood cladding materials look great in ecological style ceiling decoration. It is possible to combine two different finishes. For example, you can combine false beams with panels, using them around the perimeter, leaving space inside for wooden tiles. There are many design options, but you need to apply the cladding carefully: if the floor in the interior of the room is laid out in a solid pattern, an imbalance is possible.
Ceiling materials are applicable in the design of vintage styles, which include Provence, Baroque
In this case, it is important to cover it with white material, using light-colored lamps to decorate the ceiling
It is impossible not to note the creative trends of loft and grunge. Even they can be recreated in a wooden house using beams, imitation of communication systems, and ergonomic adjustable lamps (spots) in the design.
Such design options will be especially appropriate on the attic floor, where there are natural beams and the ceiling height allows the use of pendant lamps. In addition to beams, painting and unusual lamps, such a ceiling can be decorated with windows or their imitation, skillfully complemented by LED lighting. False windows look realistic, and at the same time fill the space with light spots, which is especially lacking in the attic space. You can use this technique in the bedroom, as well as the living room, by choosing a successful image with photo printing for decoration.
Board installation
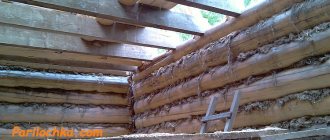
It is a reliable basis for the implementation of the intended design. The structure is hemmed with treated boards or narrower slats, clapboard, which, even without cladding, can emphasize any design, especially antique. The boards are attached at a distance of no more than 30-40 cm from each other - if we do not have enough funds. Ideally, end-to-end with minimal gaps between each other. Also, if the wooden ceiling will be plastered with heavy clay with antique decor, then it is necessary to connect the slats not on one beam, but in a checkerboard pattern, if the facing finish is clapboard, slabs, plasterboard, then you can save a lot of time by securing all the slats to one beam .
The structure is hemmed with treated boards or narrower slats
There is one method for a high-quality installation of a rough ceiling, which I really like: the boards (inches, 25 mm) are not cut to length (6 m), not fed through windows, doors, but from the outside, under the joists, on the side of the building, all the slats at once . To do this, two people are enough, you need to make sure that the distance between the wall and the beam lying on it is 5 cm, and I also secure the boards together with a metal plate. A mauerlat (a wooden lath, for ease of construction) is placed under them, under it there are strips of roofing material on three sides, the 4th side is needed to supply the wooden lath and materials, I install the last beam with the mauerlat on this side at the end.
Beams in a private house
Subtleties during the initial board finishing
Let's consider the main subtleties of the work, allowing you to make a rough base and a wooden ceiling much faster and save a lot of timber
It is important that the board extends the entire length of the room, lays on the walls, which is very convenient, there is no need to level, trim a lot of boards, and in fact there is no small waste. All slats along their entire length are placed on the outside of the wall, then moved by one person, and a second person arranges them from the inside of the building onto another wall.
Ceiling board
After the material is supplied, it is leveled and then mounted with self-tapping screws to the beams. It should be noted that even 2 self-tapping screws are enough to hold a person on the board from above, which simplifies assembly and speeds up work when feeding slats and adjusting them. If the length is much longer than required, then the slats are not attached to the last beam; if less, then they are cut along the last beam with a jigsaw along the entire length, taking into account that the slats can be secured to the beam on the other side. The missing length can be easily eliminated in the same way - by feeding all the material, fixing it on the logs, we also cut off the remaining hanging length with a jigsaw, having first placed an evenly long strip under the material so that the cut is even.
DIY rough ceiling
Completion of installation
The design of our design is such that a small gap remains at the edge, for which we cut the required width from the inch to the full length, after which we mount it to the beams. Then we are left with one side from which we fed the timber. We attach roofing felt and Mauerlat to it with strips; let me remind you that we don’t have timber at the edge, so the boards can be bent upward, for which they are not nailed to the outermost existing beam. After assembly, they are nailed to the mauerlat and nailed to the timber.
When performing work, do not forget about safety
When performing finishing work, it is extremely important not to forget that the wooden ceiling is not yet ready, the bars at the edge are not screwed in, you need to be on the walls and in the places where the beams are attached, in order to avoid injuries. There are also MDF boards - they are a reliable support for the implementation of design masterpieces and finishing
Assembly is carried out much faster than with a board. But a ceiling made of wooden slats wins against MDF boards, because the remains will definitely be used for the frame for filing. Not to mention the high price of MDF, so the boards are inferior, but rough assembly is also faster, which is a significant plus.
Wooden ceiling upholstery
How to hem a bathroom ceiling
The bathroom ceiling must meet the following requirements:
- be moisture resistant;
- be easy to care for;
- do not be afraid of sudden temperature changes;
- to look nice.
Most often, designs from:
- plastic panels that quickly assemble into a single plane, are easy to clean, and resistant to mold;
- metal slats. The coating will retain its original appearance for a long time. At the same time, the design is successfully combined with different types of lighting devices;
- drywall. To do this, choose gypsum boards marked moisture-resistant, and to paint the sheets use water-dispersed silicate or silicone paints.
Lining the ceiling will add aesthetics to the room, create and maintain a comfortable microclimate in the house throughout its service life. If you approach the work responsibly, purchase high-quality materials and carefully complete the finishing, the decorative false ceiling will last at least 10 years.
Ceiling tiles
Polystyrene tiles are a budget-friendly type of finishing that allows you to get a washable ceiling covering, smooth or with a pattern. Ceiling tiles can be either white or colored, usually pastel shades, and their surface is rough or laminated. Due to their moisture resistance, the tiles can be glued in the bathroom and kitchen, as well as on the balcony. The durability of polystyrene tiles is from 2 to 10 years, depending on operating conditions.
Options for installing plywood on the ceiling in a wooden building
There are different options for installing plywood sheets on the ceiling of a wooden house. The size of the ceiling in a wooden house depends on the purpose of the room.
Typically, the following layers should be present (from top to bottom):
- Rough or finishing floor of an upper floor or attic.
- Vapor barrier.
- Floor beams.
- Thermal insulation placed between the beams.
- Vapor barrier layer.
- Lathing.
- Rough or finished plywood ceiling.
Tools and necessary materials
Depending on the method of installing plywood sheets, you may need different materials and tools from the following list:
- ladder;
- drill;
- screwdriver;
- construction and laser level;
- wooden slats or metal profiles for making sheathing;
- dowels and screws;
- chop cord;
- plywood sheets;
- perforated hangers;
- glue for working with wood, if you plan to glue the sheet to the base;
- roulette;
- ruler;
- pencil;
- notched spatula;
- jigsaw for cutting wood;
- antiseptic impregnation or primer for wood.
If the house is new and no work on waterproofing the floor has been carried out before, then the film is attached to the floor beams with a stapler, overlapping the strips by 150 mm and gluing the joints with tape. The material is placed on the walls to a height of 20-30 cm.
Installation on the lathing
Plywood ceilings in a wooden house are easiest to install on lathing. This method is suitable if the base ceiling surface has defects and is not even. Please note that when installing plywood on the sheathing, the height of the room will decrease by at least 3-5 cm. The exact value depends on the communications being laid, the evenness of the base and the thickness of the sheathing.
We carry out the installation of plywood sheets on the sheathing in the following sequence:
- If the base ceiling is uneven, you need to find the lowest angle in the room using a laser level. Then we calculate how much the new ceiling will go down and put this value down from the found angle. After this, we transfer the marks to the remaining corners and connect them using a paint cord.
- According to the markings on the walls, we attach sheathing bars or a metal profile. They are installed around the perimeter of the entire room.
- Then we attach longitudinal lathing strips to the batten on the wall surface in increments of 40-50 cm. If the structure is mounted from the base ceiling at some distance, then we use perforated hangers to fix the battens to the ceiling.
- Next, we check the evenness and horizontality of the frame and proceed to installing the plywood.
- We begin to attach the sheets from one of the corners of the room. The junction of adjacent slabs should be in the middle of the sheathing strip. We fasten the sheets with wood or metal screws, installing them in increments of 15-20 cm.
- We leave a gap of 2-3 mm between adjacent slabs to compensate for the expansion of the material when the temperature and humidity in the room changes.
- We cut the last slabs in the row to length and width.
Installation with glue
If the house has a rough ceiling and it is relatively flat, then plywood sheets can be glued directly to the base. First you need to prepare the basic wooden ceiling. To do this, it is cleaned of the old finish. Then all holes and cracks are carefully puttied and significant irregularities are eliminated. After the solution has dried, the surface is treated with a wood primer.
Now you can start gluing the plywood sheets. Apply the adhesive mixture to the back side of the slab using a notched trowel and distribute it evenly over the surface. Then we apply the slab to the ceiling and press it well. We hold the sheet for about a minute so that the adhesive mixture has time to set.
Adjacent slabs are glued with a gap of 2-3 mm. They also leave a technological gap of 0.5 cm around the perimeter of the room. Subsequently, it will be covered with a ceiling plinth. Before finishing, the seams between the sheets are carefully puttied and sanded.
Installation on beams
Now let's talk about how to line a ceiling with plywood over wooden beams. This method is suitable for a new building in which the ceiling has not yet been finished. First you need to attach a layer of waterproofing film to the beams. We described how to do this above. After this, the waterproofing layer is additionally fixed with a wooden sheathing 2 cm thick. This is necessary so that there is an air gap between the plywood covering and the waterproofing layer. Thanks to air circulation, condensation will not accumulate here, which will contribute to the appearance of mold and rot, as well as deterioration of materials.
Next, we screw the plywood sheets to the sheathing with self-tapping screws. We install fasteners in increments of 10-15 cm around the perimeter of the sheet. You can additionally secure the plate in the central part. Don't forget about the gaps between the slabs and around the perimeter of the room.
Each layer has its own role
So, we have an overlap between two heated rooms.
Is insulation always needed?
Why is a thermal insulation layer needed in the interfloor beam ceiling:
- If this was meant to reduce noise between two rooms, then this was done in vain.
- The wooden floor installed on the second floor itself reduces the noise level quite well.
- The decorative layer also contributes to noise insulation. The wooden structure is designed in such a way that the ordinary human voice is well absorbed by the structure of the tree itself.
- If you were hoping to reduce the noise from small children playing on the second floor, this is also completely in vain. These are just unnecessary costs.
Interfloor ceiling without insulation
- Sharp blows to wood are well transmitted to the entire structure. And since your building is nothing more than a single wooden structure, sound vibrations will pass not only through the ceiling, but also along the walls.
- Therefore, even if you lay down at least a meter of thermal insulation, the jumping of your children will still be heard on the lower floor.
- In this case, one could have done something completely different. Once you had the second floor floors installed, you could simply level them using a piece of timber installed across the joists. You can subsequently install a decorative coating on it.
What about vapor barrier?
Many people will ask the question: is a vapor barrier necessary? It gives rise to another question: - why are you arranging it? Vapor barrier is also not needed always and everywhere.
Having two heated rooms that have relatively the same temperature regime, you are free from condensation that occurs from temperature changes. In this case, there is a threat of condensation arising from human activity.
Everything seems to be correct, but let's figure it out. In this situation, condensation formation is minimized.
What should be done in this case?Note: Even if a small amount of condensation collects on the vapor barrier located inside the ceiling, where will it go? It will spread to wooden structures in contact with the vapor barrier, which will ultimately lead to rot and mold (read more here), major repairs cannot be avoided.
Tip: Before installation (and not after it), it is simply necessary to treat wooden structures with protective impregnations. Then they will not be afraid of moisture, much less minimal condensation, which most likely will not happen in ordinary living rooms.
If there is an unheated room above the ceiling
In this case, a vapor barrier device becomes completely unnecessary for the ceiling.
Using this example using a vapor barrier, it becomes clear that proper planning and understanding of what we want to get from a particular structure allows us to complete the work much faster, while spending a minimum of money.
It’s another matter when a rough ceiling is installed between the heated and cold rooms. But even here, not everything is simple. After all, the ceiling in one room can simultaneously act as a floor in another, or not be a floor at all, and this is very important.
The attic floor must be insulated
First of all, you need to pay special attention to the strength of the coating, its ability to withstand a certain load, and only secondly everything else.
The installation principle can be fundamentally different in both cases, since in one you will have access to both sides of your ceiling, and in the other it is limited to only one.
Attic ceiling
So, we are faced with the task of installing a ceiling in the attic. It has floor joists and a roof covering. In this case, it becomes clear that access to the ceiling can only be achieved from the side of the room.
Insulated and vapor-insulated roof slopes are ready for finishing cladding
- In this case, the floor lags are the rafters. When laying the roof, the builders were required to install sheathing. Our task is to arrange a rough ceiling and thermal insulation.
- The first step is to install thermal insulation. It is laid between the rafters. Thermal insulation must fit between the rafters with some force.
- Thermal insulation has been laid, now it’s the turn of the vapor barrier - in this case it is necessary. The film is attached to the sheathing using a construction stapler, and is additionally fixed with elements of the counter-lattice, on which the sheathing material will be mounted.
Features of the installation of ceilings on beams
Contents of the material
As floor beams, beams with a section of 150x150 or 150x200 or boards 50x150 or 150x100 sewn together are usually used. These materials provide sufficient strength and allow you to make the lining from almost any material.
How to hem a ceiling on wooden beams
The ceilings can be interfloor or attic. In the first case, they separate the heated rooms, so only sound insulation is required. It is performed using mineral or basalt wool, which additionally have heat-insulating properties. A sufficient layer of thermal insulation is required in attic floors.
To protect the insulation from moisture vapor and liquid leaks, vapor and waterproofing is also necessary. It is made using special films made of non-woven material. The ceiling pie is shown in the figure.
Ceiling installation on beams
Purpose of the elements of the ceiling pie:
- vapor barrier film prevents the penetration of moisture vapor from inside the room;
- sheathing made of slats, onto which the finishing sheathing is later mounted;
- sound or heat insulation in the form of mats or slabs;
- waterproofing is a vapor-permeable diffusion membrane.
With this arrangement of floors, the decorative finishing of the ceiling will be protected from deformation, moisture and condensation, regardless of the material chosen.
There are two ways to hem a decorative ceiling covering:
- completely sewing up and hiding the beams under the trim;
- using them as a decorative element.
In the case of hemming from below, insulation and sound insulation are laid between the beams. A vapor barrier and a finished ceiling are hemmed underneath, and a waterproofing membrane and the floor of the upper floor or attic are placed on top. This method is used when the ceiling height is sufficient, when there is no need to save space.
When using beams to decorate the ceiling, the finishing finish is laid on top of the beams or hemmed to the bars attached to their side surface. A vapor barrier is laid over the beams, floor joists are placed on top, and insulation is laid between them. A layer of waterproofing and floors are laid on top.
Options for lining the ceiling on beams
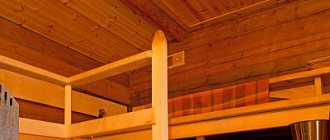
In this case, the beams can be additionally covered with boards and painted in a suitable shade. Using this technique, you can create a stylish ceiling without reducing its height - it will not put pressure and visually reduce the space.
Rough plywood ceiling
Plywood is considered an ideal material for making a rough ceiling on beams. With its help, it will be easy to make a base for placing the cake from an insulating, waterproofing, vapor-permeable layer.
When the ceiling is hemmed with plywood along the beams, its sheets are exposed to a minimum of mechanical and thermal load. For such work, the dimensions of the material used must correspond to the interbeam distance.
The sequence of manufacturing this type of rough ceiling:
- if necessary, assemble a slatted frame and attach it to wooden beams from below;
- cut sheets of material 4-6 millimeters thick are hemmed to the sheathing;
- Sound-insulating and heat-protective mats and waterproofing films are placed on plywood.
The work on arranging the rough ceiling is carried out in such a way as to subsequently use the lattice frame and beams as the basis for installing finishing plasterboard panels.
The thickness of the plywood is selected taking into account the load on the ceiling surface. The fact is that plywood sheathing in a wooden household can perform not only an auxiliary, but also a main function. An excellent finishing material for cladding ceilings are laminated panels with a cross-section of 10 - 20 millimeters.
Preparatory work
To make a plywood ceiling with your own hands, you need to carry out a number of preparatory work. If we are talking about a concrete ceiling, then it needs to be cleaned of the old coating, loose fragments removed and all potholes and cracks sealed with cement-sand mortar. Then the surface is sanded, dust is removed from it, and finally coated with a bactericidal primer. In the case of wood, the situation is a little simpler: in most houses no preparation is required at all, but in rare cases it is necessary to impregnate the floor with an antiseptic compound.
Various mounting options
If the question arises of how to cover a ceiling with plywood, then you first need to figure out how you plan to use the space between the material and the ceiling. In addition, it is possible to install the slabs with glue to maintain the height of the walls.
Corner mounting
The installation method is suitable if you need to leave space between the ceiling and the finished surface to store some things.
The plywood ceiling finish looks like this:
- The first step is to apply markings. To do this, you need to determine the collapse of the ceiling using a laser level or plumb line.
- Step back from the corner 10 - 15 cm to the side and down the wall to a distance that is equal to the sum of the size of the blockage, the thickness of the plywood sheet and a margin of 0.5 cm, and use the corner to mark two points where the fasteners will be installed. You can increase the distance so that you get mezzanines of the desired size.
- The distance between the corners should be 20 cm. This is how you need to mark two opposite walls.
- Using a screwdriver and self-tapping screws or a hammer drill and dowel screws, install the first pair of corners on opposite walls.
- A sheet of plywood is simply laid on the corners and pressed against the wall.
- Next, install the next pair and lay the entire ceiling.
- The last slab will have to be trimmed a little with a jigsaw before installation.
Suspension mounting
In this case, plywood sheathing can only play a decorative role.
Step-by-step installation instructions:
- Step back from the wall 10 - 15 cm and draw a longitudinal line on the ceiling.
- Line out the entire ceiling in 10 cm increments.
- Metal hangers are installed according to the markings, taking into account the size of the ceiling collapse.
- Wooden blocks are screwed onto the hangers using ordinary self-tapping screws.
- Plywood slabs are installed one by one using self-tapping screws, which secure the material to the bars.
- The last element will need to be trimmed with a jigsaw.
Installation on mastic
Covering the ceiling with sheets of plywood and mastic is only possible if the surface is perfectly flat and well prepared. This installation method is good because it does not take much time, and the resulting structure will practically not reduce the height of the walls.
To veneer the ceiling, you need to do the following:
- Apply markings to the ceiling, stepping back from each wall by 1 - 2 cm.
- Apply a layer of epoxy glue to the back of the plywood, and then sprinkle it with coarse sand. This is necessary to increase the reliability of the connection between the ceiling and the slab.
- After the layer has completely dried, you need to apply mastic. To do this, the substance is scooped up with a shaped spatula and transferred to the previously prepared back side of the plywood.
- A sheet of plywood is pressed against the ceiling and aligned with the markings.
- The next sheet is laid taking into account an expansion joint of 2 - 3 mm. This way the entire surface is collected.
Features of working alone
It is easier to entrust the installation of a rough ceiling to specialists. However, if the owner has the appropriate experience and skills, he can complete the work alone. The procedure in this situation will not change, but you need to pay attention to the following:
- When choosing materials, preference is given to lighter ones. It must be taken into account that you will have to hold them yourself. From this point of view, PVC panels or MDF would be more preferable.
- When working with boards, it is recommended to install the ceiling on top of the floor beams. If you line the ceiling with a board, you will need to make special spacers for support.
After the ceiling is installed, you need to ensure the presence of all the other layers provided by the technology, but this work will be easier to do.
Stretch ceilings and fireplace
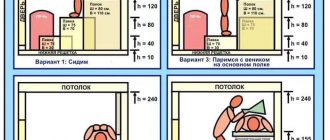
Quite often, in country houses, not only decorative, electric fireplaces are installed, but also real ones are built, with “live” fire, and, accordingly, increased heat transfer. In this case, it is recommended to combine the suspended ceiling with another coating in the “risk zone”.
Smiler200FORUMHOUSE Member
...I’m trying to combine a suspended ceiling and plasterboard, since the heat coming from the fireplace is quite strong, is that possible?
It’s even necessary, and you can separate it with both plasterboard and wood, for example, as Navigator6989 did.
How to make a ceiling in a wooden houseDo-it-yourself ceilingRough ceilingCeiling construction
In this video I’ll show you how to make a ceiling in a wooden house with your own hands, I’ll tell you about some secrets when filing a rough ceiling, which worked well when building a bathhouse from timber, so I decided to use them when installing a ceiling in a house made of timber. Watch other videos on the channel dedicated to building a house from profiled timber with your own hands:
Waterproofing a strip foundation with glass insulation // DIY foundation // Laying a plinth: https://www.youtube.com/watch?v=1NoDm…
Markings for laying the first row of a brick plinth//Laying a plinth with your own hands: https://www.youtube.com/watch?v=YmjAU…
Laying the first row of bricks//Single-row corner ligation system: https://www.youtube.com/watch?v=sPDY8…
We cover the vertical seams in the brickwork // Basement: https://www.youtube.com/watch?v=krW7j…
Laying the second row of bricks//Single-row corner ligation system: https://www.youtube.com/watch?v=b_oEx…
How to level the foundation // Leveling the foundation // Setting angles to the horizon // Review of the laser level: https://www.youtube.com/watch?v=87mJT…
Ventilation in the basement: https://www.youtube.com/watch?v=IzGe1…
Is it possible to fill the foundation in parts // Do-it-yourself foundation: https://www.youtube.com/watch?v=y7BG2…
Penoplex instead of a lining board: https://www.youtube.com/watch?v=JOoDW…
Stencils for assembling timber into a “Warm Corner”: https://www.youtube.com/watch?v=Dj8T6…
Connecting timber into a warm corner: https://www.youtube.com/watch?v=1w-Hh...
How to trim profiled timber in the corners when assembling it into a “Warm Corner”: https://www.youtube.com/watch?v=dtHGk…
The simplest exhaust ventilation//Ceiling insulation with sawdust: https://www.youtube.com/watch?v=wbvF5…
Assembling a house from timber using dowels: https://www.youtube.com/watch?v=fpQkF...
How to bleach wood // Frost vs Whiteness: https://www.youtube.com/watch?v=AEhlS…
Floor joists in a house made of timber: https://www.youtube.com/watch?v=uXKKe...
Simple do-it-yourself septic tank//Sewerage for a private house: https://www.youtube.com/watch?v=MJRxU…
Installation of shrinkage compensators (aka adjustable lift (jack): https://www.youtube.com/watch?v=nAoDM…
Floor beams//Installation of floor beams: https://www.youtube.com/watch?v=CxIoh…
Installation of studs during the construction of a house made of profiled timber //Shrinkage of a house made of timber: https://www.youtube.com/watch?v=S1Nuz…
The simplest exhaust ventilation in a private house. Part 2//How to get rid of condensation in ventilation: https://www.youtube.com/watch?v=SH_PY…
Preserving a house made of timber for the winter // Preparing an unfinished house for winter: https://www.youtube.com/watch?v=CI6mE…
Heating a private house//Breneran solid fuel boiler//Leningradka//Single-pipe heating system: https://www.youtube.com/watch?v=VpkPf…
Spring unit strength. Beginning of the 2022 construction season: https://www.youtube.com/watch?v=tL6AF…
Mauerlat // House made of profiled timber // Application of the “Strength” knot.: https://www.youtube.com/watch?v=tXq_2…
House made of profiled timber//Do-it-yourself house//Gables: https://www.youtube.com/watch?v=SpB2-…
Installation of truss beams//Lay down with chopped gables: https://www.youtube.com/watch?v=kCSia…
Installation of the ridge of a house made of timber // Ridge beam: https://www.youtube.com/watch?v=8pKMV…
Splicing rafters along the length: https://www.youtube.com/watch?v=PXBFx...
DIY roof. Part 1//Preparation of gables: https://www.youtube.com/watch?v=rAsAk…
DIY roof. Part 2//Installation and fastening of rafters: https://www.youtube.com/watch?v=Zu6XK…
DIY roof. Part 3//Installing slides//Roof sheathing//Banner instead of roofing felt: https://www.youtube.com/watch?v=mHj79…
Do-it-yourself pigtail // Preparing the opening // Making a casing: https://www.youtube.com/watch?v=JRKqm…
Water well//Do-it-yourself well//How to drill a well//Zhelonka: https://www.youtube.com/watch?v=M2l9Y…
Cellar in the house//Filling the floors in the underground//Basement of a private house: https://www.youtube.com/watch?v=3Jfxt…
Laying sewer pipes underground//Do-it-yourself sewerage in a private house//Sewer slope: https://www.youtube.com/watch?v=6Nscs…
What happened to the house after the winter//House made of profiled timber//Review of a house made of timber: https://www.youtube.com/watch?v=JGC4C…
Leveling a wall in a wooden house//Bent a wall from a timber//How to level a wall: https://www.youtube.com/watch?v=0O87Q…