I am a stove maker by profession. I have been laying hearths and fireplaces for 28 years. Over the years, the two questions I hear most often are: “How much will the stove cost?” The second question: “How long does it take to dry before it can be heated at full capacity?”
Questions that are pressing and of concern to the customer. In the article I will tell you how long it takes for a stove to dry after laying.
Furnace making is not just a profession. This is a way of life, even a philosophy. During editing, I delve into all the subtleties of the process. I try to feel every little detail, and not just do the work automatically.
I will answer the question of how long it takes for a stove to dry based on my own experience. Another master with other materials and in another region will have different deadlines.
Why plaster a stove?
Quite a large number of people are wondering about the need to plaster the stove.
In most cases, a freshly laid stove has an attractive appearance that you want to leave unchanged, however, if the work is done at a sufficient level, and taking into account the use of high-quality materials, you can create a new engineering solution. How to properly seal a stove so it doesn't crack
Why do you need to plaster the stove:
- The first reason is its pleasant appearance. The room takes on an aesthetic and finished look.
- The second reason is design advantages.
- Strength and durability are improved.
- The tightness is enhanced.
- Energy efficiency increases.
- The possibility of insects developing in the masonry is excluded.
- Fire safety increases.
Temperature changes have a negative impact on the structure. After a certain amount of time, cracks may form, which will have a detrimental effect on the room (unpleasant odor from furniture, clothing) and on health (some of the combustion products will enter the room, and there is a possibility of carbon monoxide poisoning).
If the stove was not built from synthetic materials, in the future there is the possibility of the emergence of certain types of insects that will negatively affect the integrity of the structure. Plastering the stove will help avoid this problem.
Energy efficiency can be improved by applying a layer of plaster, which increases the thickness of the walls. As a result, the stove retains heat longer, and less fuel is needed to maintain heat.
The brickwork of the stove is subjected to constant and intense thermal stress. Flue gas heating temperature is 450-550°C. The brickwork constantly “walks”, expands when heated and returns to its original state when cooling. Over time, the seams crack and lose their tightness. To avoid rapid destruction, the stove masonry is plastered.
Plaster applied correctly to the surface of the stove provides the following advantages:
- The strength of the masonry increases.
- The tightness of the seams improves, which prevents carbon monoxide from entering the living room or steam room.
- Improves appearance. After applying the plaster mixture for stoves and fireplaces, the surface is tiled with ceramic tiles, natural stone or whitewashed. Some compositions create texture when applied and do not require additional finishing.
- Antiseptic properties - the plaster layer prevents insects from entering the seams of the brickwork; when antifungal components are added to the composition, the appearance of mold is prevented.
To prevent the stove in the bathhouse from cracking, it must be plastered with the correct solution, with strict adherence to the technological process. Any violations lead to the layer beginning to crack and fall off in pieces over time.
Quite often, plastering a brick oven is done with your own hands. There are several reasons for this: the opportunity to significantly save money, fully control the quality of work, and the absence of a specialist. All of the above can be the reason why they start doing the work themselves.
To properly plaster the masonry of a stove or fireplace, adhere to several basic rules:
- Plaster cannot be applied until the masonry has completely hardened. The clay mortar used for laying bricks gains strength no earlier than after 30 days.
- The surface temperature of the stove and the humidity in the room should be the same. If the method of forced drying of the masonry (with a firebox) was used, wait until the walls cool down. Work cannot begin until a stable, natural temperature has been established in the room.
Craftsmen advise holding off on plastering a freshly laid stove for at least a month. One of the common reasons for constant cracking of walls is untimely, early plastering of surfaces.
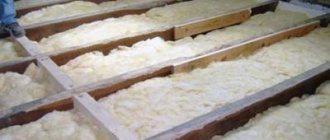
Cracks in the plaster of a sauna or heating stove installed for heating are quite common. In fact, this is a completely normal process caused by strong heating of the surface. Small cracks can be easily repaired with a new portion of clay mixture.
Modern ready-made solutions contain reinforced fiber and additives, which, when properly applied to the surface, prevent cracking.
Despite the type of plaster chosen, critical mistakes are made during the work, leading to the appearance of cracks and peeling of the composition. Causes of cracking:
- Poor-quality masonry - the thicker the plaster layer, the higher the likelihood of it peeling off from the wall. Uneven masonry is the main cause of rapid cracking.
- Violations of the technological process associated with applying the composition to the wall.
- The use of clay-sand mortar made with non-compliance with the proportions of the components.
- Violations of the integrity of the brickwork.
- Applying the composition to the wall on fresh masonry that has not dried properly.
All mistakes lead to rapid cracking of the wall surface and peeling of the plaster from the brickwork.
How to make heat-resistant plaster mortar
Most often, not a cement-sand mixture, but a clay mixture is used for finishing fireplaces and stoves. This material is able to retain its properties at temperatures above 100 °C. Like cement, clay for finishing stoves is mixed with sand. The latter is first thoroughly sifted through a fine sieve. The amount of sand required to prepare a high-quality mixture of sand depends primarily on the fat content of the clay.
Typically, the ratio of fatty clay and sand in plaster mortar for stoves is 1:3 or 1:4. To strengthen the composition, you need to add straw or hemp to it. Plastering a clay oven with high quality can also be done if a little fiberglass (0.2%) is mixed into the solution. In any case, the mixture should be diluted in such a way that it is as homogeneous as possible. The clay itself must first be soaked for at least 3 days.
When answering the question of how to properly plaster a stove so that it does not crack, you should think about using other options for heat-resistant mixtures. The method of preparing the solution discussed above is far from the only one. There are many recipes for such plasters. If desired, you can make a heat-resistant solution, for example, by mixing:
- clay, sand and cement in proportions 1:2:1 with the addition of 1% asbestos;
- gypsum, lime and sand in a ratio of 1:2:1 plus 2% fiberglass;
- clay, sand and lime in a ratio of 1:2:1 with the addition of 2% asbestos.
To make the stove look neat, carefully leveling the surface of the plaster is not enough. In addition, you will need to decorate the corners beautifully. To make them as neat as possible, it is worth using leveling slats. After the solution has dried, they should simply be removed. Instead of slats, you can also take an aluminum profile designed for attaching drywall.
For plastering heating stoves, heat-resistant solutions based on clay, sand, asbestos and gypsum are used. You can prepare a wear-resistant mortar for plastering the stove using one of the following recipes:
- Mixing components: 1 part clay, 2 parts sand, 1 part lime paste and 1/10 part asbestos. Everything is thoroughly mixed with the gradual addition of water to obtain a viscous solution.
- Mixing components: 1 part clay, 2 parts sand and ½ part water. 1 part of cement (M 300, 400) and 1/10 part of asbestos are added to the resulting mass. All components are thoroughly mixed again, and if necessary, some water is added to obtain a thick, creamy solution. They can be used to plaster surfaces within 60 minutes after preparation.
- Combination of components: 2 parts lime paste and 1 part sand. Next, 1 part of gypsum, 1 part of water and 2/10 parts of asbestos are added to the resulting mass. Everything is thoroughly mixed until a viscous solution is obtained. Ready-made oven plaster is used to treat the surface for the first 15 minutes.
- Composition of components: 1 part clay, 2 parts sand and 1/10 part asbestos. Water is added to the resulting mixture to obtain a thick solution.
Heat-resistant plaster for stoves and fireplaces, produced in a wide range by many manufacturers. If you wish, you can make the solution yourself, although this will require some effort and time.
The composition of the mortar for plastering a brick stove or fireplace is selected depending on the type of brick (fireclay, red), the clay used and other factors.
Additionally, the operating and performance characteristics of the composition used are taken into account. The meaning is:
- Surface heating temperature.
- Direct exposure to fire.
- Further wall cladding.
The stove in the bathhouse must be plastered with a solution whose composition and properties optimally meet all the specified requirements.
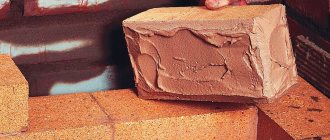
The easiest way to plaster is to coat the stove with clay. Clay has several advantages:
- The material is cheap - you can get clay and sand in a quarry. It is better to choose deposits closer to a body of water. If sand and clay are mined yourself, the composition will be almost free (excluding transport costs).
- Thermal and operational characteristics - in terms of its composition and heat transfer, clay is identical to the red brick used for masonry. The linear expansion of the materials is the same. For these reasons, the composition of ready-made mixtures for plastering a refractory brick oven always includes clay.
During plastering, it is necessary to achieve a tight fit to the surface of the brick. To do this, carefully observe the proportions of clay and sand when preparing the solution, and also apply the recommendations of experienced craftsmen when applying the composition to the brickwork.
The preparation of clay mortar for plastering a bathhouse and any other brick stove proceeds as follows:
- Clay mass is prepared. For finishing, clay with a normal consistency is suitable; lean and greasy material will have to be diluted with impurities. Furnaces made of refractory bricks are plastered with a mortar made from fireclay clay and the same sand. The composition is mixed 1 to 1.
- Preparation of the solution. Sifted clay powder is poured into the container. Fill with water to completely cover the composition. Subsequent layers are laid in a similar manner until the container is completely filled.
- After about a day, the mixture is thoroughly mixed and water is added.
After two to three days, sand is added to the solution. Traditional methods recommend adding fine manure or bran to the finished composition to prevent rupture of the plaster layer and the appearance of small cracks.
Liquid glass can be used to strengthen the plaster layer in two ways. Some craftsmen add liquid glass directly to the clay mixture before plastering, others use it as a primer, applying it diluted to a dry surface.
Preparing a clay-sand mortar for plastering red brick stoves is a labor-intensive process that requires a lot of physical effort and time. It will take 2-3 days to prepare for finishing.
The difficulty of preparing clay-sand mortar yourself explains the popularity (despite the high cost) of ready-made plaster. The range includes mixtures intended for finishing and repair work.
Mixtures of the following brands are in demand:
- Plitonit Super Fireplace Thermal plaster.
- Plitonit SuperFireplace OgneUpor.
- Pechnik
- Borovichi CMEA.
- RS parade.
- Terracotta.
The list contains modern, heat-resistant, high-strength mortars suitable for any type of brick kiln. Manufacturers produce formulations in the form of dry and ready-to-use mixtures. A series of some brands produce primers, as well as textured (decorative) compositions.
When choosing the appropriate type of mixture for plaster, pay attention to several characteristics:
- Heating temperature - basically, plastering compositions are intended for application to a surface heated to 600-800°C. Special heat-resistant Terracotta plaster compositions can withstand temperatures above 1200°C; they are used for finishing combustion chambers and open hearths.
- Purpose – solutions are used for finishing and initial finishing. Good properties and strength characteristics make it possible to further cladding with natural stone or ceramic tiles.
- The components are recommended mixtures for plastering stoves; they contain plasticizers, liquid glass, and additives that increase heat resistance. The components used affect the properties and characteristics of the preparation. Thus, mixtures based on terracotta clay are infused after stirring for 30-60 minutes.
Plaster mortars have advantages over clay: greater strength, ease of preparation, quick drying and good adhesion to brickwork.
Another popular way to finish a brick surface is decorative plaster for the stove. Finishing advantages:
- Obtaining a beautiful textured surface.
- Small layer thickness.
- High strength structural fireproof plaster.
The mixtures contain plasticizers that promote the elasticity of the top layer and prevent its damage. The buyer is offered several types of decorative solutions:
- Mixtures with mineral chips are easy to apply and cover minor defects and chips. The color of the filler stone varies from white to black.
- Compositions for obtaining heterogeneous texture. Decorative plaster for fireplaces and stoves is presented in a wide range, from standard bark beetle to unique compositions that create almost any texture. The beauty of appearance directly depends on the craftsman performing the work.
Decorating the stove with decorative plaster will only work if the brickwork is even. The maximum application thickness is no more than 0.5 cm. If the differences are greater, you will first need to level the surface.
Modern building mixtures for plastering stoves in bathhouses contain reinforced fibers, are characterized by good adhesion to the surface, and plasticizers provide elasticity and prevent the appearance of cracks.
The result and duration of operation of the applied layer depends on competently carried out work, including:
- Surface preparation.
- Compliance with the mixture application technology.
Failure to carry out the work step by step leads to cracking of the plaster layer and its separation from the brickwork.
There are many ways to apply plaster composition to the walls of the furnace. General recommendations have been developed aimed at improving the bond between plaster and masonry. Good adhesion prevents the mortar from peeling off the brick and, accordingly, prevents cracking.
The work is carried out in several stages:
- Applying primer – priming the oven is mandatory. During processing, special compositions with small particles of granite or marble are used. For better adhesion to the plaster, the masonry is primed twice.
- Reinforcement - for applying clay, previously they used burlap. Now, when plastering a brick oven with ready-made compounds, a mesh is used. The second option is preferable and provides better adhesion to the surface. For fastening, nails are used in the seams. Fixation is carried out in increments of 20*20 cm. The mesh cell size should be 1*1cm.
- Beacons are placed - the slats give direction and help align the walls on a plane. Installation of beacons is carried out at a level or plumb. The slats are special perforated metal strips or corners, wooden blocks installed on the edges of the stove.
How long does clay mixture take to harden?
When constructing a furnace, it is imperative to use refractory material for both internal and facing work. Among the advantages of chamotte mortar are:
- High level of environmental friendliness.
- Excellent steam permeability.
- Resistant to high temperatures and temperature changes.
- Long service life.
However, the masonry mixture is not famous for its advantages alone. It also has certain disadvantages. First of all, it is necessary to address the issue of price. Even if you prepare the solution yourself, its cost will be very high, when drawing an analogy with other materials in this group.
The mixture contains phenolic resin. This element has a high level of toxicity, and accordingly, environmental pollution occurs during production. And the work itself at the enterprise does not benefit anyone, since a lot of harmful dust is generated during the entire work process.
Factory produced mixture
As for efficiency, it is not as high as we would like. For example, if you need to lay only 25 bricks, then you will need to purchase about 20 kg of clay mass, but to lay one cubic meter of structure you will need as much as 100 kg of material.
The time for complete drying of fireclay paste in air is 72 hours, inside the brickwork this time increases, it depends on the thickness of the masonry, temperature and humidity of the surrounding air. Petrification of fireclay mortar occurs at 800 degrees Celsius.
Important! Fireclay masonry does not like sudden changes in temperature.
The furnace is heated for the first time three days after construction is completed. Use thin, quickly burning logs. The dampers and vents are fully opened during the first fire. Then the stove is dried for a week, burning small portions of wood daily.
Fireclay masonry dries faster than masonry made from ordinary clay-sand mortar and ceramic bricks, but only the firebox is usually made of fireclay. Therefore, the timing of the start of operation of a furnace with fireclay masonry will be the same as the timing of use of a furnace built on clay and lime mortar. In summer, a new stove is heated to maximum after 10-14 days, in winter - after a month.
How to make heat-resistant plaster mortar
- ready-made specialized formulations;
- clay compositions.
Main characteristics of various types of plaster
Used for plastering stoves made of bricks and which are exposed to high temperatures, you can purchase a dry mixture in the assortment of construction stores called: plaster for stoves and fireplaces.
It is important to bring this mixture to working condition using the instructions on the package.
The most common types of ready-made formulations:
- Stroybrig Tanilit PC7.5 25;
- Dauer M-150;
- Volma Aquaslayer MN;
- Eunice Teplon White;
- EK TT100 Inside;
- Magma TechnoPlaster;
People started using this plaster mixture quite a long time ago. It consists of clay, purified construction sand, slaked lime, construction cement and water.
Clay mortar
In order for the mortar to remain on the stove as firmly as possible in the future, it is not enough to use reinforcing additives in the form of straw or tow. When finishing, you should also use a special fiberglass mesh. This material can be purchased today in almost any construction supermarket.
Fiberglass plaster mesh is very inexpensive - about 30 rubles per 1 m2. When used on a stove, the finish lasts much longer. Instead of fiberglass, you can use metal mesh to reinforce the solution.
How to choose quality clay
Fireclay clay called “Kaolin” and ready-made mixtures are sold in construction stores. There are good reviews about both Russian and foreign manufacturers of this heat-resistant material. The best is considered to be fireclay produced at Western European enterprises.
When choosing materials, pay attention to the year of production and its quality. A high-quality mixture and clay do not contain particles exceeding the fraction size indicated on the packaging.
The mixture for preparing the solution should not contain crushed stone or sand larger than 2.5 mm.
The letter “U” on the package indicates that the fireclay is made from recycled, recycled material. The letter “Ш” means that the material has not been recycled, it is better suited for laying the firebox.
Construction materials are stored in specially equipped warehouses. If fireclay is stored in a dry room, in sealed bags, at a temperature from plus 40 to minus 40 degrees, then the shelf life of mixtures and clays is unlimited. Long-term storage (more than three years) in conditions of high humidity will lead to deterioration of the properties of the material due to moisture saturation.
What tools will you need?
Before you start plastering the stove, among other things, you should prepare:
- solution container;
- trowel;
- sandpaper for grouting;
- broom or brush;
- bucket with water;
- construction level.
To carry out the work you will need:
- Angle spatula.
- Master OK.
- Sandpaper with abrasiveness No. 60 and No. 100.
- Sandpaper grater.
- Chisel for notching.
- Rule.
- Brush.
- Roller.
- Brush with metal teeth.
- Building level.
- A regular mesh for sifting sand.
- Metal mesh for wiping clay.
- Container for mixing the solution.
Plastering tools
With the help of these construction tools, you can do all the necessary work on plastering the stove with minimal time and in compliance with quality standards.
To prepare this plaster mixture to working condition, it is necessary to carry out the following work:
- Pour ¼ purified water into the prepared container.
- Pour in a certain amount of the mixture, following the instructions on the package.
- Stir the mixture, bringing it to a homogeneous consistency, without forming lumps, using a construction mixer with the required attachment.
- The resulting solution must be allowed to brew for five to ten minutes.
- Apply the mixture to the work surface, stirring first.
Procedure for preparing cement plaster mortar
For thrifty owners, there is a cheaper, but no less high-quality option - preparing the mixture for plastering yourself. The main component will be clay, preferably fireclay.
Cooking technologies:
- Place one part clay and one part water in a container.
- Bring the clay to a thick sour cream state.
- Add purified construction sand, cement, and slaked lime.
- The resulting mass must be brought to a homogeneous state using a construction mixer.
- During the mixing process, it is necessary to add water, but carefully so that the mixture is not liquid.
- The resulting plaster mixture must be allowed to sit for five to ten minutes.
- Apply the mixture to the prepared work surface, stirring first.
To achieve the proper quality of the mixture, it is necessary to use clean water (technical or spring). Since impurities can adversely affect the quality and properties of the mixture.
The portion of sand that needs to be added depends on the properties of the clay. If the fat content of the clay is high, then the ratio of sand to clay should be 1:3 or 1:4.
If it is necessary to increase the strength of the mixture, asbestos or fiberglass must be added.
A mixture of proper quality must meet the following properties:
- The consistency should be similar to thick sour cream.
- Should be easy to apply to the work surface.
- Contain no hard lumps.
Clay mixture for laying a stove
To plaster a heating stove in a private house or bathhouse, you need to prepare the following set of tools and materials:
- Spatulas of various widths for taking out plaster composition and treating surfaces.
- Trowel (trowel) for distributing the composition on brick and stone walls.
- Grater (grater) for leveling treated surfaces.
- Hammer for driving nails. Nails are used to secure the mesh.
- Wire mesh with cells measuring 10×10 mm to strengthen the treated surface.
- Scissors for cutting mesh.
- Hammer (fist) for use together with a trojan, gear and chisel.
- A trowel for leveling the surface after plastering.
- Chisel for applying notches that increase the adhesion of the composition to the surface.
- Brushes of various sizes.
- An electric drill with a mixing attachment for preparing the plaster mixture.
- Volume container for kneading.
- A wire brush for cleaning surfaces and joints.
- Dry mixtures for mixing plaster.
- Deep penetration antifungal primer.
- Asbestos to increase the stability of the composition.
- Lime for whitewashing.
- Level, rule and staff for leveling corners.
- Personal protective equipment – rubber gloves, goggles.
Preparing the necessary materials
First of all, it is necessary to dwell on one point. Thanks to technological progress and the widespread production of building materials, there is currently one technique using which it is not difficult to prepare clay for laying a stove.
The technology is suitable for those people who do not have practical experience in this area, as well as for those who decided to invest once, build a brick structure in their home and never worry about it again.
We are talking about a wide range of ready-made masonry mixtures. They are available for free sale and are packaged in branded bags. All you need to do is purchase the required amount of material and, using the recommendations on the packaging, dilute it correctly.
First of all, it will be necessary to obtain clay of the type that is available in a particular region. It will be most convenient to stock up on it in those places where mining has already been carried out on the ground, in ravines or under the river coastline.
After the raw materials have been extracted in the required quantity, they should be transported to the place where the structure is supposed to be erected. Fireclay clay is poured into a prepared container and filled with water. Liquids and material should be taken in a ratio of 1:4 according to volume. Soaking lasts for 48 hours.
The hammer drill makes the job much easier
Next, you need to strain the mass through a mesh with cells measuring 3x3 mm, which will make it possible to rid the material of various impurities and stones. Unfortunately, it is almost impossible to obtain sand in the same way. Firstly, it lies deep, and secondly, it can be punishable by administrative liability, so it is better to buy it legally.
A high-quality solution can only be made if you use dry sand, preferably pre-cleaned. Adding wet material is not acceptable, so if it gets wet, it needs to be given time to dry. When the mass is dry, it is also sifted through a mesh with cells of about 1.5 mm.
Once you have figured out what fireclay mortar is, and have also prepared all the components, you can begin the mixing procedure.
Spraying the mixture
Ready-made stove plaster can also be used for finishing. There are many varieties of such mixtures. But the most popular are “Pechnik” and “Terracotta”. The advantage of such plasters in comparison with those prepared by hand is a high degree of heat resistance. “Pechnik” and “Terracotta” are able to withstand temperatures up to 200 degrees.
Whatever mixture is used for plastering the stove, purchased or homemade, there is no need to prepare a large amount of it at once. The volume of a single serving should not exceed 8-10 liters. In any case, the solution needs to be developed in a maximum of 2-2.5 hours.
The first layer of plaster is necessary to level the surface of the stove. Spraying, as the name suggests, is done using the same broom or brush. The thickness of this layer should ultimately be 3-5 mm. After the spray is leveled, you need to stretch the pre-cut fiberglass mesh on the surface of the furnace, lightly pressing it into the solution.
There are other types of solutions that need to be used for plastering the stove, depending on the quality of the surface, the degree of damage to the previous plaster, and other properties. Table below:
- clay - 1, sand - 2, asbestos - 0.1;
- clay - 1, sand - 2, cement - 1, asbestos - 0.1;
- clay - 1, sand - 2, lime - 1, asbestos - 0.1;
- gypsum - 1, lime - 2, sand - 1, asbestos - 0.2;
- gypsum - 1, lime - 2, sand - 1, fiberglass - 0.2.
Advantages and disadvantages of clay compositions
The following features are highlighted as advantages:
- clay is a natural and environmentally friendly product;
- solutions perfectly absorb water and release it, which prolongs the service life of coatings;
- reasonable cost;
- the remains of the used solution are stored for a long time;
- the material perfectly protects the surface from mechanical impacts;
- the elasticity of the material allows it to be applied without any problems;
- Not only internal, but also external surfaces are finished with a clay mixture;
- using the solution, level and decorate the surfaces.
In addition to the positive aspects, clay-based plaster has a number of disadvantages, which explain most cases why clay cracks:
- There is no exact recipe for preparing the solution; craftsmen prepare the mixture using their own experience;
- there is a possibility that the surface will become covered with cracks;
- Such compositions are rarely used; there are few experienced craftsmen who know how to cover a stove with clay so that it does not crack.
Building materials stores sell special glue designed for repairing stoves, which is durable and heat resistant. For its production, refractory cement and fireclay powder are used.
They produce plastic and solid mixtures. The first of them is used to fill the cracks, and the second is used to plaster the entire stove surface. The main advantage of oven glue is that it dries quickly.
The main component of fireclay clay mortar is burnt kaolin (fireclay). Kaolin is a natural clay, sedimentary rock. This is a very viscous, plastic material.
Kaolin clay consists of kaolinite. The chemical formula of this mineral is Al4[Si4O10](OH)8. Clay contains impurities:
- oxides of potassium, magnesium, calcium, sodium;
- hydroxides of iron, titanium and their sulfides.
Kaolinite is fired at a temperature of 1300-1850 degrees Celsius. When heated, bound water is removed from the mineral formula and fireclay is obtained. During the beneficiation and roasting process, sulfides and hydroxides of titanium and iron are removed.
The fired mass is partially sintered and loses its plasticity; after heat treatment, the material acquires its main quality - fire resistance. Pieces of the resulting fireclay are crushed to a finely dispersed state and to crushed stone with a fragment size of 0.5-2.5 mm. Depending on the firing technology, two types of fireclay are obtained:
- highly annealed (water absorption - from 2 to 10% water);
- low-annealed (water absorption - up to 25% water).
Reference. Regular clay contains not only kaolinite, but also other clay minerals. The amount of constitutional water reaches 14%. The low (compared to fireclay) heat resistance of ordinary clays is associated with their heterogeneous composition and a large amount of bound water.
General rules for carrying out work
Before directly plastering the stove onto the work surface, the following work must be completed.
- The plaster must be stirred to achieve a homogeneous mass and the consistency of thick sour cream.
- It is important to remove all contaminants from the working surface of the stove (dust, remnants of the previous plaster that were used when laying the stove).
- To improve the “grip of the mortar,” you need to clear the masonry seams to a depth of about fifty millimeters.
- Before application, it is important to heat the oven a little in order to achieve 20–25 degrees of heat;
- On warm walls, the plaster will lie more evenly, and an excellent level of quality will be achieved.
After all the preparatory procedures, you need to proceed to the main part:
- Additional surface cleaning.
- Treatment of cracks.
- Surface primer.
- Installation of reinforcing mesh.
- Plastering the stove
Plaster application process
It is important to start work by treating the surface of the oven. If there is old plaster on it, it must be removed. Exposed brickwork must be perfectly clean. You can use a spatula to clean it. The surface must be cleaned carefully, avoiding sudden movements that could damage the masonry.
If cracks are found on the surface, they should be treated with special oven glue.
To treat cracks, the glue is brought to a thick sour cream state, after which the surface must be cleaned of dust with a brush. Then, it is important to moisten the same brush with water and treat the holes. Next, this defect must be treated with glue using a spatula.
After all defects have been eliminated, it is necessary to apply a primer mixture to the working surface. An acrylate mixture is suitable, which is capable of penetrating deeply into the material, filling all the pores, and forming a film on the surface.
This will ensure a stronger connection between the primer and putty. The mixture should be applied with a brush and rubbed in. After this, you need to dry the oven, leaving it on for a day.
To strengthen the plaster, it is necessary to install a reinforcing mesh, attaching it to the stove using self-tapping screws. It is important to note that the screws should be planted to a depth of no more than 8–10 centimeters. And place the attachment points in a checkerboard pattern.
Then, after the first layer of plaster has dried, you need to apply another layer of primer, then plaster again. A total of three coats must be applied.
After applying the entire mixture, it is necessary to treat the surface with sandpaper, abrasiveness No. 60, and then No. 100, after treatment, the oven should be cleaned of dust with a brush.
The ratio is as follows:
- lime whitewash (10 parts);
- salt (0.1 part);
- water (1 part).
To prepare the finishing mixture, you need to dilute the salt in hot water, cool to room temperature, and add lime whitewash.
Apply the mixture to the stove and leave for a day.
If you follow all stages of the technological process, you can properly plaster the stove yourself so that the decorative finish does not crack.
At this stage, the surfaces are completely cleaned of old mortar, dirt and dust. The seams between bricks or stone are cleared with a trowel and hammer to a depth of 150 mm. This will ensure reliable adhesion of the surface to the plaster composition.
After dismantling the old cladding, the surfaces are cleaned with a wire brush and a clean dry rag to avoid dirty stains that may appear through the fresh plaster layer.
The prepared surfaces are treated with an antifungal primer. 10 cm nails are driven into the cleaned seams at an angle with the heads raised above the surface up to 0.5 cm. The horizontal step between nails should be 15 cm, the vertical step - every 2 rows. A wire is fixed to the nails, and a metal mesh is placed on top. The reinforced base will ensure good adhesion of the plaster to the surface being treated.
To align the outer corners of the structure, steel corners are used, fixed with an adhesive mixture.
You can plaster the stove with ready-made store-bought or homemade solutions.
If a ready-made dry composition is used for work, then the kneading is carried out according to the instructions:
- Water is poured into the container. Next, dry mass is added in the proportions indicated on the package.
- Kneading is carried out with a construction mixer until a viscous homogeneous mass is obtained.
- The finished mixture is kept for a quarter of an hour, mixed again, and then used for surface treatment.
To independently mix a solution for plastering surfaces, traditional components are used, which are mixed in the required proportions. Recipes for homemade compositions are given above.
Depending on the condition of the surfaces, the stove structure can be plastered in one of two ways.
What is fireclay clay, description
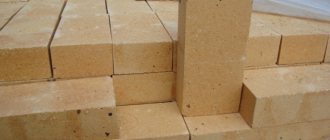
Fireclay clay can be found in stores in the form of dry building mass, which is added to masonry and plaster mortars. Fireclay bricks are also sold. Fired kaolin can be white with creamy tones or gray-brown, depending on the firing.
Compound
Fireclay is made from clay, which contains highly dispersed hydroaluminosilicates. This clay is formed into pieces of any shape or pressed briquettes and fired in special ovens heated to a very high temperature.
There are many recipes for making fireclay mass. Some compositions add more calcined powder, others consist of coarse powder, more water in one mass, etc.
Fireclay also varies in duration and firing temperature. As a result, masses of different colors and textures come out of the ovens.
Fire clay consists of many chemical elements:
- Quartz (Si02);
- Aluminum oxide ceramics (Al2O3);
- Calcium oxide (CaO);
- Potassium oxide (K2O);
- Magnesium oxide (MgO);
- Sodium oxide (Na2O),
- Iron oxide (Fe2O3.
Preparatory activities
Before you start plastering the stove itself, its surface should be thoroughly cleaned. Under no circumstances should the solution be applied to smoked or dusty bricks. Otherwise, he won’t last long in the future. After cleaning, the stove should be heated. But there is no need to put too much firewood or coal into the firebox. Plaster for stoves and fireplaces is applied only to a warm surface.
It is impossible to finish the stove immediately after finishing its laying. You need to wait at least two weeks. The masonry must be thoroughly hardened before plastering.
Before you start applying the mortar, among other things, you should select 10 mm seams between the bricks. In this case, the heat-resistant mixture for plastering stoves will adhere to the surface better. You also need to drive small nails into the masonry, onto which the reinforcing mesh will subsequently be stretched.
Drying brick kilns after laying
After finishing the furnace laying, it cannot be used immediately. High-quality drying of the heating unit requires the implementation of specific actions, for which you must certainly follow the recommendations of specialists.
The following tools will be required:
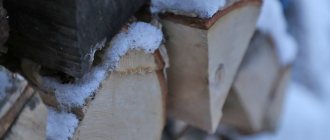
- an ax for chopping wood;
- saw;
- oven tongs.
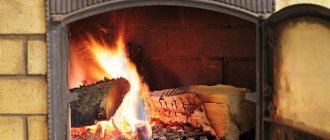
Drying ovens is carried out in several ways. One of them looks like this. Using exclusively dry firewood, light a small fire on the grate and maintain it for 1.5 hours. When drying, the blower door and valve are kept in the open position.
The brick structure is heated 2 times during the day so that its outer walls do not fog up and they have a grayish tint. You can do this method on how to dry a stove after laying it yourself. It must be dried very efficiently, otherwise the entire masonry will suffer.
What tools will you need?
Heat-resistant and practical materials are used for cladding heating stoves: ceramic and fireclay tiles, tiles, artificial stone and plasterboard. Plaster is especially in demand - an affordable finishing material that can be prepared from cheap consumable components. In addition, you can plaster surfaces yourself in the shortest possible time without outside help.
Plastering the stove is carried out for the following purposes:
- Leveling brick or masonry surfaces.
- Restoration of the old plaster layer (in case of deformation, cracking, chipping).
- Restoration of masonry mixture in connecting seams.
- Antiseptic treatment of seams to prevent the development of pathogenic microorganisms and insects.
- Increased thermal inertia of equipment.
Plastering technology
Well, the preparatory measures have been completed and the tools are ready. Now let's see how to plaster a stove. To prevent the applied mixture from cracking and crumbling, this work must be done correctly. Plastering is usually carried out in several stages. The surface of the oven is first wetted with clean warm water. You can moisten it with a regular broom. Then the following are executed:
- spraying solution;
- padding;
- cover.
The main defects when plastering a stove
Violation of the technology for applying the plaster composition can lead to the appearance of defects on the surface of the furnace. If the solution was applied to dry brickwork, this could result in peeling and cracking of the finish. On an excessively moistened surface, chips and bubbles may appear, which must be eliminated after thoroughly drying the structure.
Using poorly slaked lime can result in small blisters that are prone to peeling and crumbling.
Small cracks and chips appear as a result of improper mixing of the plaster solution or failure to comply with the proportions of the main components. Also, large thickness of layers or insufficient drying can lead to cracking.
The proposed plastering methods allow us to obtain a practical, reliable and durable stove design.
Covering
The last layer of plaster is necessary in order to completely level the surface of the stove. The primer needs to be moistened quite generously before applying it. The solution in this case should be used even less thick than for the first two layers. The mixture should fill absolutely all cracks and irregularities remaining on the surface.
The thickness of the covering layer can be from 2 to 5 mm. It is impossible to level the stove in planes with plaster. Ultimately, the total thickness of the finishing layer should be no more than 1-1.5 cm. When laying out brick stoves for your home with your own hands, this should be kept in mind. When performing this work, you should initially try to make the walls as even as possible.
Oven drying and safety precautions
When performing the drying process for brick kilns, you should definitely follow the rules to ensure safe handling:
- Before starting the kindling, you need to check the draft and make sure that the valves and views located on the chimney are open.
- Dry newspaper should be burned in the space above the view to eliminate damp and cold air.
- If there is no traction, the unit cannot be operated.
- It is prohibited to store firewood close to the stove if its volume exceeds the needs of one firebox.
- The combustion chamber is filled no more than 2/3.
- Do not accumulate coals in the firebox and allow them to fall outside.
- In strong winds, do not dry the stove using a firebox.
By the way, if you had to repair cracks in the masonry, many people are interested in when you can fire the stove after repairs. There is no need to rush - you need to wait until the solution is completely dry.
Furnace painting
So, now you know how to plaster a stove so it doesn’t crack. Of course, after the applied solution has dried, its surface must also be whitened. It is best to use a milk-chalk mixture for this purpose. This whitewash tolerates temperature changes well and also does not get dirty.
In order to prepare it, you just need to mix 1 kg of crushed chalk with 2 liters of milk. You can also paint the stove with regular lime. This finish will also not deteriorate due to high temperatures. In order for the lime to stick better to a hot surface, you can add a little table salt (35 g per 1 kg).
You cannot paint stoves and fireplaces using oil paint. The drying oil contained in such paints will begin to evaporate at high temperatures, and an unpleasant odor will appear in the room.
Using fireclay clay
If the furnace does not heat up to more than 1000°C degrees, then a solution of fireclay clay can be used for its construction. In situations where this indicator inside the firebox significantly exceeds the normal limits, the combustion chamber must be lined with bricks that are resistant to high temperatures.
Furnace laying
For these works, you should also prepare a furnace solution using one of the following methods:
- In a specialized hardware store, purchase clay for laying stoves, which contains kaolin, and then make the batch yourself according to the instructions.
- Get fireclay sand and then mix it as described below.
If the second option is chosen, then they go to a place where you can easily get fireclay sand or buy it in a store, and you will also need white or gray clay that is resistant to high temperatures.
All components are taken in the following ratio:
- One part heat-resistant clay.
- One part regular clay.
- Four parts of fireclay.
Subsequently, the preparation of the material occurs in the same way as ordinary clay would be prepared. It is only very important to monitor the fat content of the solution so that the structure does not crack in the future. Knowing clearly how to prepare fireclay mortar for laying a furnace, you can be sure that the erected structure will be strong.