A master who knows how to connect an outlet without errors will protect residents from electric shock. This is the main thing, but not the only thing. An incorrectly connected outlet will not provide adequate power to various devices. It will be inconvenient to use, completely unreliable and will not last long.
The information contained in this article can be studied quickly. But valuable information about the specifics of working with the home electrical network will be useful for many years. Sockets, switches, switches and other fittings have to be repaired, reinstalled or installed in a new location from time to time. It is better to do this in such a way that the safety and reliability of the device does not raise any doubts.
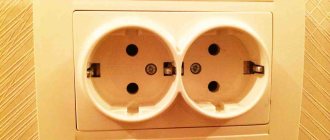
Socket device
The main components of the socket are an assembled block, protected on the back by a socket box, and on the outside by a decorative box with a fixed screw. The box in most cases consists of a front panel and a frame. The socket box is used only for those sockets that will be installed on the wall, and not in a recess. The block includes:
- frame;
- phase and neutral contacts, into which the plug is connected;
- terminals for connecting electrical wires;
- ground contact;
- movable or rigidly fixed legs for mounting in a box or on a flat surface.
Grounding is not provided for all sockets; the simplest devices do not have it. When screwing in the screws, the movable legs move apart, securing them to the walls of the plastic boxes. Double-tongue claws hold the joint more securely, as they are sharper and penetrate deeper into the plastic.
If the terminals to which the power cable is connected are screw terminals, they should be lubricated before use, for which cold solder is used.
Installation in drywall
For this process we will need the following tools:
- Drill or screwdriver.
- Drywall bit (Ø 67 mm) is a special drill attachment used for cutting holes.
A set of crowns of various diameters for working with drywall.
As a last resort, if there is no such attachment, then the holes can be cut with an ordinary stationery knife, but this is not recommended. On the other hand, you can do without a drill or screwdriver.
- A screwdriver (with its help, the socket is disassembled and assembled, and the “glass” is screwed on).
First of all, we should install the socket box, this is done as follows:
- We install the bit with a crown on the screwdriver (drill), and then cut a hole in the marked place.
- We break out the plug for the wire in the mounting socket, and then insert the electrical wires there.
- We insert the “glass” into the drywall and tighten the clamping screws (marked in green in Fig. 1).
When the socket box is installed, you can begin finishing work, and upon completion, we continue with the installation of the built-in electrical point. The sequence of actions is as follows:
- We disassemble the structure into elements; as a rule, it is enough to remove the front panel.
- Connect the wires to the terminals.
- We install the base with the mechanism in the “glass”, set it level, and then fix it.
Fixing the socket - Screw on the front panel.
Common types of sockets
Connecting an outlet begins with choosing the right one. There are hundreds of types and subtypes of sockets, all of them differ from each other in both design and purpose. But there are not so many devices that are most common in everyday life; GOST 7396.1-89 recommends their use depending on further operating conditions.
- Type C 1a. Socket without grounding. In operating mode it must withstand up to 10A direct current, up to 16A alternating current and voltage up to 250 V. Such an outlet can ensure the operation of simple devices that do not require grounding;
- Type C 2a. On the sides of this outlet there are two contacts for grounding. The operating parameters are the same as those of the first type, but you can already connect a high-power electrical device to such an outlet. We are talking about washing machines, electric ovens, water heaters, water pumps and similar devices;
- Type C 3a. The same device as C 2a, but with a pin type grounding;
- Type C 5. Sockets from the Soviet period, well suited for equipment left over from the same times. Withstands up to 6A;
- Type C6. So-called Euro-sockets with wider holes for the plug and a body protruding above the wall. Suitable for electrical appliances with a suitable plug.
Before installing sockets, you should select the cable. For options with grounding, it must be three-wire, without grounding - two-wire. Typically, a conductor with yellow insulation is intended for grounding, red or brown for the phase wire, and blue for the neutral wire. The wire cross-section is selected depending on the upcoming load.
Moisture and dust protection are designated, for example, IP44. This marking indicates that a device is installed in the network that is protected from solid particles larger than 1 mm in size and from all-round splashes.
It is not advisable to install sockets in a bathroom or bathhouse, but it is often difficult to do without it. If there is no other way out, you need to choose a waterproof device equipped with a special lid.
Wiring and socket installation method
Usually, to install a socket in a concrete wall, it is necessary to make a special channel (drilling), drill holes for the socket box, install the wire and box, and then install the socket.
Installing sockets in drywall requires similar work, the only difference being that you have to put in much less effort.
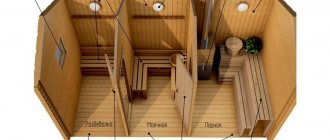
On wooden or adobe walls, the wiring is attached in an open way, since it is unsafe to deepen it from the point of view of fire safety rules. A socket with a socket box is installed on such a wall. If we are talking about, for example, a steam room, then the installation of the wire must be carried out using special plastic boxes.
Pad
There are two possibilities for correct installation. You can hide or expose all the electrical wiring. This all depends on the type of room, humidity level, chemical activity and fire hazard.
The external type is fixed in a variety of ways. There are advantages and disadvantages here. Repairs are much easier to carry out, and you won’t have to scratch the wall. Everything can be done in a couple of hours.
It all comes down to the not-so-pleasant appearance, which spoils the interior of the living room, living room or kitchen. It is also influenced by a variety of external factors. It is not difficult to damage such wiring.
Just don’t forget that in wooden houses it is strictly necessary to carry out everything using the open method. Otherwise, there is a high chance of short circuiting and rapid fire.
Connection type
How to properly connect the outlet(s), based on the number and characteristics of electrical appliances that will be connected to them? First you need to select the connection type. There are two of them:
- "loop", or serial connection;
- "star" or parallel connection.
“Loop” - connecting each subsequent outlet actually from the previous one. This applies to zero, phase and grounding. In this way it is convenient to assemble up to five or more sockets in one row, vertical or horizontal. The disadvantage is that it is not recommended to connect powerful equipment to such outlets.
“Star” - with this socket connection scheme, it is connected directly to the distribution box. It is done like this:
- Using special caps, regular electrical tape or other devices, the required number of wires leading to the sockets is connected to the power wire in the distribution box;
- Each outlet receives its own wires from the distribution box, which allows you to connect devices with high power consumption without risk to the outlet itself;
- To make such a connection, you should choose wires that are smaller in cross-section and capabilities than the wire connected to the junction box. For example, if a 25A cable with a cross section of 2.5 sq.m. is supplied to the box. mm, you can connect 16A wires with a cross section of 1.5 square meters to it. mm.
Recessed socket box
The first rule concerns the socket itself. If you are installing not a final, but a pass-through socket, that is, one on which the cable will not end, but go further down or sideways, to other sockets or switches, always use recessed socket boxes.
The standard one comes with a depth of 45mm, but you need to take 60mm. This is necessary for compact placement of the wires, especially the grounding conductor (why this will be discussed below).
Do not try to cram all the conductors, so to speak, back to back. There will be no benefit from such savings, but only harm.
In addition, the installation itself will be of higher quality, more convenient and will not cause insoluble difficulties. For example, when the socket or its frame does not fit snugly against the wall. Because of this, the wires will have to be shortened. Again, disassemble everything, re-install and dismantle.
Here is a photo of a standard recessed socket in a standard socket box.
The entire space that remains inside it for installing wires is about 1 cm. If you use a model with a depth of 60mm, then you will add as much as 1.5cm of installation depth.
Feel what is called the difference.
At what height should sockets be installed?
The installation height of sockets is determined based on purely practical considerations. It is necessary to take into account user convenience, the length of the power cable for heavy devices (refrigerator, washing machine) and safety. Sockets break down from time to time and need to be replaced or repaired. When preparing installation, you should remember this.
The distance to the sockets from the floor is usually from 30 to 80 cm. When installing at a low height, you should take care of the safety of children by choosing devices with special curtains. The upper point of the outlet location is not determined by the standards.
But you need to know that there should be at least 15 cm from the floor slab to the socket, and at least 10 cm from the edge of the window opening. A socket block installed away from the window is better protected from temperature changes, from water, dust and other atmospheric factors.
Installation process
Electricians have one strict rule, which corresponds to the official safety standard. When performing any work on the network, you must turn off the power supply. Moreover, double control will not be superfluous: after the circuit breaker is turned off, from time to time it is necessary to check the wiring for the presence of current. Scrupulousness in this matter will help to avoid many troubles.
Stage one: preparatory work
The socket tends to come apart into parts, and this should be done at the preparatory stage. It is necessary to unscrew the housing, which is secured with a non-removable screw. If the outlet has a socket box, you need to remove it too. The point is to gain access to the terminals to which the wires will be attached.
Here it should be clarified that not all socket boxes are removable. There are also those that are one piece with the block. In this case, the disassembly process is somewhat simplified.
If the socket will have to be mounted on top of a concrete wall, it is recommended to use plastic dowels. For them, it is necessary to drill the wall in advance according to the diameter of the dowel and the location of the mounting holes on the socket box. If we are talking about a wooden wall, it is quite possible to get by with self-tapping screws.
Hidden installation of an outlet is somewhat more complicated. Under the socket box, you will need to drill a hole of the appropriate diameter and depth in a brick or concrete wall. A core drill for concrete, a hammer drill or impact drill, a chisel and a hammer will be useful for this work. A round groove is cut with a core drill.
Anything inside this groove is removed using the tools mentioned above. The wire leading to the junction box will also have to be hidden under the plaster. To do this, you need to make a groove with a hammer drill, drill or wall chaser, if you have one.
It is also necessary to connect the wires to the power cable in the junction box.
Each master chooses his own method, but the three most popular are:
- Use of PPE caps. The insulation from the wire should be removed by 3 cm, twisted with the power cable, put the cap on top and screw it on;
- The use of VAGO terminal blocks is more promising, since the process is simplified to the limit, and you can connect the required number of wires, creating several parallel lines. The wire is stripped to one and a half centimeters and inserted into the terminal block. When installed correctly, a click is heard;
- The same as in the first method, but instead of caps, electrical tape is used.
For all types of connections, care must be taken to ensure that adjacent conductors do not come into contact with the cleaned parts. Otherwise, a short circuit will occur when turned on.
Stage two: connecting the wires to the outlet
A double or triple cable must be connected to the socket terminals, positioning it so that all wiring is separate inside the housing. The connection must be reliable, but contact between cleaned parts of the conductors must not be allowed.
That's why:
- General insulation is removed. If the socket is not overhead, experts recommend leaving up to 20 cm of cable for future use. The total insulation needs to be removed one and a half centimeters more;
- There is no place to place extra wire in a surface-mounted socket, so the cable length should be no more than required. It is recommended to insert the total insulation into the socket body by about half a centimeter if the wire is mounted on a wall without a box;
- To connect the wires to the terminals, they must be stripped of about a centimeter of insulation;
- The contact between the wire and the terminal should be as large and reliable as possible. It is recommended to twist the cleaned wire into a ring and then clamp it with a screw to the contact pad. The aluminum or copper ring can be further flattened with a hammer;
- The screws are tightened firmly, but not excessively. Excessive force can damage the outlet, which contains many fragile plastic elements.
Stage three: connect the outlet
The socket box or socket box in the case of a surface-mounted socket was prepared at the previous stages. All that remains is to secure the block and then screw on the decorative box.
The legs are screwed alternately, each by several turns, otherwise distortion will inevitably occur. In this case, it is necessary to control the position of the block so that the line between the paws remains parallel to the floor line. The block itself should go deep into the box to the required depth. Otherwise, the decorative box will also be installed unevenly. The legs are screwed all the way. If the socket box is selected correctly, the structure will hold securely.
When the assembly is completed, all that remains is to connect the circuit breakers and check the functionality of the outlet. But you shouldn’t make the common mistake of turning on some household appliance first. To check the presence of voltage, use a multimeter.
Important! To protect your home from fire, and your family and friends from electric shock, the home handyman must constantly remember the safety rules while working.
Important Safety Tips
Installation work must be carried out during a complete power outage. To do this, turn off the circuit breakers or plugs in the distribution panel. It is strictly forbidden to turn them on until the work is completed, so family members should be warned about the repair.
First make sure the conductors are de-energized. This is possible using an indicator screwdriver. Working under voltage is prohibited!
What you need to pay attention to during installation:
- monitor the condition of cable insulation and do not use damaged ones;
- Do not cut live conductors with wire cutters;
- It is advisable to follow the recommendations for installing electrical outlets - no lower than 20 cm from the floor.
To work you will need a professional tool:
- indicator screwdriver;
- perforator;
- alabaster;
- Phillips and flat screwdrivers;
- pliers;
- stationery knife for stripping insulation;
- rubber gloves, safety glasses;
- the socket itself;
- conductors;
- socket box
The tool must have insulated handles.