A sauna stove with a remote firebox allows for increased ease of maintenance. In addition, it ensures safety and comfort during bathing procedures.
The price of a stove with a remote firebox is comparable to the price of a regular sauna stove.
The firebox is the most noticeable (sometimes the only noticeable) element of a sauna stove.
Is it possible to eliminate the disadvantages of a steel sauna firebox yourself?
Stoves with steel fireboxes can be purchased both in regular and online stores. Often, factory-made furnace devices do not need additional brick protection, since their own is already thought out. However, this solution leads to temperature changes: first we are faced with rapid heating of the firebox, and then with its rapid cooling. Therefore, bricks and tiles for the stove in the bathhouse should be used for a more uniform distribution of heat, so that there is no overheating, followed by a sharp cold snap.
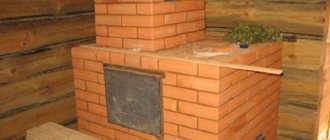
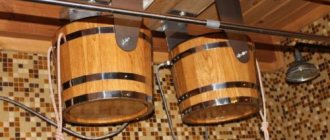
stove with a remote firebox for a bath without lining
You can make a metal stove yourself if you have welding skills. In this case, you can make even more accurate dimensions to suit your bathhouse project. However, it is worth noting that factory fireboxes use the experience of several craftsmen and designers, which you may not be aware of. Therefore, on the one hand, you can win in price and accuracy, but on the other hand, you can lose in the quality of heat removal and the ability of the stove to burn fuel (in some factory models this figure is extremely high and has been achieved through developments for many years). In general, it’s up to you: really assess your strengths and make a decision.
Important point! You should not be negligent in selecting filler for a heater stove, which is often used in baths. Some pebbles can turn a steam room into a room with a dangerous accumulation of carbon monoxide. White veins and inclusions on them are a sure sign of a low-quality product.
Review of the most popular models
The Steam Master Tunnel WT stove-heater from the Finnish company Narvi has an external firebox equipped with a glass door in a decorative frame. Connoisseurs of high-quality steam will appreciate such a sauna stove, which can cope with a steam room with a volume of up to 25 cubic meters. m.
Heated, moist air that is particularly soft is created in the room thanks to efficient air exchange and a unique lid design equipped with a thermal hood. When the heater heats up, the top element closes, as a result of which the heat is contained in the stone compartment and does not dry out the humid air in the room. To prepare the steam room for use, the oven needs to be thoroughly heated for an hour and a half.
In the production of the Steam Master heater, enameled and especially durable steel is used. The first type of material is needed for the manufacture of the outer casing, the second - for the arch of the firebox and pipes. The ideal installation of the unit is ensured by equipping the heater with adjustable legs. The dimensions of such a stove with a firebox from the dressing room are 1000x470x520 mm, and the weight is 220 kg. The unit is estimated at 70 thousand rubles.
The Fero JK model from Kastor (Finland) is a wood-burning stove with an external firebox, which is used for heating saunas and baths with a volume of 12-22 cubic meters. m. An innovative cumulative unit with a ceramic firebox and an insulated casing can heat up in literally an hour and a half using dry chopped firewood. Due to the finishing of the internal walls with vermiculite, which has increased heat resistance (up to 1300 degrees), the oven can heat up to maximum temperature. At the same time, the stones will have time to become red-hot and will provide an excellent vaping temperature for many hours. A heater of this type is filled with heat-resistant natural or artificial ceramic (KERKES brand) stone. The dimensions of the device are 570x1225x510 mm, the weight of the cobblestones is 75 kg. The cost of the unit is 125 thousand rubles.
Stove with remote firebox: dressing room or street?
Installing a stove with an external external firebox in a bathhouse usually involves two options for placing the firebox door:
- taking it outside;
- creating a corridor in the wall for connecting the steam room and dressing room with a stove device.
The first option has a number of unpleasant moments:
- constant work as a stove maker, throwing firewood while we steam;
- If you do it yourself, you won’t be able to steam comfortably.
This option is acceptable if the steam room is heated with coal. In this case, we will avoid contaminating the dressing room with fine coal chips and unpleasant odors.
What should you pay attention to when installing an external firebox in a bathhouse?
It is important to consider the following:
- take care to ensure the fire safety of the structure. First, look at the regulations that apply to combustible building materials such as wood. For example, if the distance between the wall log and the stove is less than 1 meter, this is considered a violation, so it is better to install bricks between them;
- position the combustion door so that it does not interfere with anyone and opens all the way, that is. had no obstacles to the normal laying of firewood.
How to quickly flood a bathhouse from a dressing room and the best way to do it
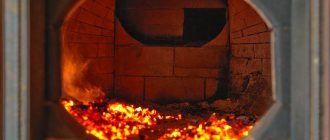
Figure 6. Stove firebox in progress
The firebox will be even more effective if you pay attention to the following points:
- wet wood can cause the flame to go out after a while; the reason is the formation of a large amount of carbon monoxide inside the chamber; It’s better to forget about undried fuel altogether, but if an unpleasant situation arises, you need to close the combustion damper and open the chimney and damper for 10-20 minutes; after this, you can open the outer door (of the chamber) for a while;
- It is not recommended to move logs that are not at least 50% burned;
- It is advisable to shovel the coals that formed earlier than others into the center of the furnace bottom and cover them with burning fuel and hot coals;
- It is better that the temperature in the firebox exceeds 200 degrees; in this case, soot almost does not settle on the chimney walls.
The quality of the steam depends on what kind of firewood we use during the kindling process.
Let's look at the most popular types of firewood.
They were considered the best material in Rus'. The wood creates thick steam and is easy to saw. You will not need to store such kindling for more than 2 years; during this period, the wood loses its characteristic aroma.
If there is insufficient air supply to the furnace, birch tar begins to burn along with the smoke. Its abundant release can harden on the walls of the pipe and even cause a fire.
Choose mid-aged oak because young wood will smell charcoal when burned, and older wood will have a lot of ash, which can make the air heavy. The chosen material should create a lot of steam and smell fresh.
Such material is not easy to ignite. To do this, you need to put it in an already preheated and heated oven. Many rural residents believe that by burning aspen logs, they clean the chimney.
The main advantages of such ignition are its low price and the ability to maintain temperature for a long time.
They are very easy to prepare. They have no shelf life and even after 2 years in a dried state they emit their unique aroma. If you chip a tree, the bark will turn red when exposed to air, this feature makes the wood stand out from other trees. When burned, the material gives off heat, but almost does not cause smoke. You should choose alder that grows in soil with a low degree of humidity.
Due to the peculiarities of the internal assembly of stove equipment, the rules for kindling may differ for each model, despite the fact that they are externally similar to each other. Preparation before the steam procedure takes place directly in the oven.
Therefore, below we provide universal tips suitable for most models of this equipment:
- Before you start lighting the bath, you must thoroughly clean the room and bring there all the necessary accessories for steaming.
- Next, you need to ventilate the room for 20-30 minutes, this is done to remove foreign odors.
- All products of previous combustion, in particular ash, should be removed.
Do not throw away fireproof residues; they can be used as fertilizer.
- You need to bring firewood and leave it near the stove.
Be careful that the wood does not touch the stove and that sparks do not fall on it, otherwise there may be a fire.
Preparing the heater:
- If it is usually closed, we simply wash it to remove soot.
- If it is closed, wash the stones with water at room temperature.
We place wood chips in the kindling compartment of the stove. You can get them yourself, for example, by grinding or peeling dry firewood.
- To ignite, place paper under the shavings, but do not set it on fire.
In addition to this, you can light a flame:
- Using birch bark.
- Dry flammable substance.
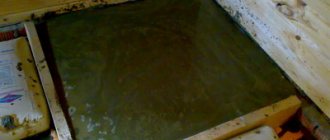
Foundation for a sauna stove
The installation of any stove begins with the foundation, and when the floor of a country house is concrete, this already solves one problem - there is no need to make a special foundation. Here you can only decorate the floor with ceramic decorative tiles for beauty and ease of cleaning. It was a completely different story when we built a wooden house.
Here you already need to take care of sufficient thermal insulation of the floor. Fire safety is also of paramount importance: metal sheets must occupy a space of at least 40 cm in front of the door. This is necessary in order to avoid coals falling out of the stove onto the wooden floor.
Is a foundation always needed for a stove?
If the stove-heater does not exceed 700-750 kg, there is no need for a foundation. Steel fireboxes supplied by online stores are still usually less than this weight. But if you love cast iron structures, you most likely cannot do without pouring concrete. Likewise, a foundation will be required if the firebox is surrounded by large brickwork. In any case, in controversial situations it is better not to neglect safety and carry out the appropriate work.
The procedure for carrying out work on the construction of the foundation
The stove foundation is an important element of the future bathhouse. The quality of work on its installation greatly influences the following parameters:
- stove safety;
- its service life;
- correct operation of all components of the heating device.
Let's look at the step-by-step procedure for constructing a stove bath foundation:
- At the location where the firebox is installed, a pit is prepared, the perimeter of which is 15-20 cm larger than that of the stove being installed, and the depth is 50 cm;
- After compaction, the bottom of the pit is sprinkled with a mixture of crushed stone and sand;
- Waterproofing is laid in the form of a polyethylene film;
- The road mesh reinforcing the foundation is attached to the reinforcement using wire or welding. The mesh frame has a perimeter 5-7 centimeters smaller than that of the oven being created;
- A concrete solution is prepared from a mixture of sand and cement in a ratio of 3:1, which is used to fill the foundation pit;
- The leveling is carried out using a vibrating screed, and then the result is checked using a level;
- When the solution has hardened, it is covered with two layers of roofing material;
- Using fireclay bricks, they form the basis for the future furnace.
Most commonly used types of wood
Each type of wood has its own density and calorific value. These indicators affect the amount of fuel burned that is necessary to achieve the desired temperature in the room.
If we compare tree species growing in Russia in terms of heat release, then the hornbeam has the highest value, and the poplar has the lowest. Consequently, to warm up the steam room to the required temperature, less hornbeam firewood will be required, and more poplar wood. From this we conclude that the best firewood for a bathhouse is hornbeam.
However, it does not grow everywhere. Therefore, you should pay attention to what kind of wood is common in the area where the bathhouse is located. Let's give an example: hornbeam has the highest calorific value. But if the bathhouse is built in a place where it does not grow, then a lot of money will be spent on purchasing hornbeam firewood.
You can heat a sauna with the following types of wood:
- Hornbeam has the highest calorific value. Burning takes a long time and no smoke is produced.
- Linden, aspen and poplar have a relatively low density. What is the reason for their fairly rapid combustion without the formation of coals, they have a low calorific value.
- Acacia - has a good calorific value and maintains a constant temperature in the combustion chamber.
- Oak is a good fuel for a sauna. As it burns, the steam room is filled with a pleasant forest aroma. Harvesting firewood from oak begins in late spring (others - at the end of winter or early spring). It has a high heat transfer rate, but its cost is also high. Such firewood can be stored for quite a long time without changing its quality and performance.
- Spruce, pine, thuja - grow everywhere, their price is low, and are used only if it is not possible to use other species. The main disadvantage of conifers is their resin content. They do not burn completely and fall on the walls of the chimney, as a result of which it becomes clogged.
- Birch flares up quickly, combustion occurs evenly and for a long time, while substances are released that clean and disinfect the steam room, and also fill the air with a pleasant aroma. The best firewood is one that has been recently dried, as the aroma is significantly reduced 3 years after the tree is cut down. When using birch firewood, the air dosage must be observed. If smoke is generated, tar will begin to be released, resulting in the chimney becoming clogged.
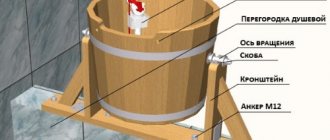
Preparing the stove for installation in the dressing room wall
dressing room with remote firebox
Step 1. Mark a hole in the wall slightly larger than the size of the firebox and cut it out. Allowances vary between 20-30 cm.
Step 2. Depending on the method of exit of the chimney, a hole is cut in the wall, the diameter of which should be wider than the pipe being installed. Why is this so? The following arguments are usually given in favor of installing a chimney not through the roof, but through the wall:
- there is no need to carry out complex fire safety work on the roof and ceiling;
- there is no need to purchase the roof elements necessary to cover it in this case;
- Leaks are effectively prevented.
Step 3. Check that the firebox matches the space cut out for it. If deficiencies are identified, repeated corrections are made until the stove fits in all the holes made for it. If there are no complaints, we proceed to installing the heater.
After bringing the firebox into the room next to the steam room, we fill the gap between the walls and the stove with brick, and cover the top with metal or cover it with plaster. On the floor we lay a square sheet of non-flammable material (the most practical is metal) with a side of 40-45 cm.
Preparation
Firewood quality
Using a scoop, remove ash and unburnt coals from the stove into any suitable container. They can simply be thrown away or used as fertilizer for plants.
Then you need to add firewood and, for safety reasons, place it away from the firebox.
Next, the stones are prepared. If a closed heater is installed, then they must be rinsed to remove soot. If the open-type heater and steam room have already been used, then the stones need to be washed again. To do this, take warm water.
If the bathhouse does not have a full-fledged washing room with a shower, then the following steps should be taken: check the water tank (if installed) for the presence of a sufficient amount of water, prepare cool water for washing.
It is important to remember that the water boiler connected to the stove must always be filled, even if warm water will not be used. The fact is that the boiler can simply burst due to strong exposure to high temperatures.
If the steam room is a separate room with a door, then it should be closed. Next, the doors and valves at the combustion chamber, blower and smoke view are fully opened. If there are two valves in the design of the smoke view, it is necessary to open the one through which fire and smoke directly exit into the pipe; the valve of the heating channel for the water tank and heater does not need to be opened.
It is necessary to prepare the following materials:
- Birch bark. It needs to be cut into thin pieces. To do this, you can use a sharp knife. Instead, you can take shavings or chop short chips.
- Newsprint.
- 4 logs. They should be dry and small in diameter (about the same thickness). The firewood must be of such a size that it can be easily inserted into the stove firebox.
Next is the “seed”:
- Two thin logs are placed parallel to each other on the grate. The distance between them should be equal to the width of your palm. The logs should be placed immediately behind the first vent holes from the ash pit.
- The paper is crumpled and placed between the logs.
- A little wood chips are poured on top of the paper.
- The two remaining logs are laid diagonally on top, leaving a small gap between them.
Installation of a chimney through a wall
Previously, we talked about two ways to remove smoke gases through a chimney, through the roof and through the wall. Let's consider the second installation option step by step.
- At this stage we need to select a metal pipe of the required size. In our case, we will need 2 or more elbows. This minimum is necessary because one turn of the pipe will be directly above the boiler (initially the pipe runs horizontally inside the house), and the second time the chimney will turn vertically upward on the street.
- We measure the distance from the stove to the wall (taking into account the size of the elbow), and then set the distance upward to the location of the future hole for the pipe to be brought out.
- When we have marked where the chimney will go outside, we make a hole in the wall. Since the wall materials may be different, the tools for the work will also be different. We will show you what you need using the example of a wooden country house. We will need long drills for woodworking, a chisel and, possibly, an electric saw. A lot of holes are drilled with a drill, the remaining wood is removed using a chisel, and the edges are cleaned with a saw. To avoid wasting time aligning the edges of the circle, it is easier to make the hole square. It is easier to cut it with an electric/chainsaw. In this case, basalt wool with foil-coated front surfaces is laid along the edges as close as possible to the pipe being installed.
- The pipe is cut so as to take into account the allowances for the connection in the sockets. This helps prevent the effect of turbulence, which reduces the draft in the chimney.
- We treat parts of the chimney that are planned to be installed inside the bathhouse with a sealant that can withstand temperatures from 2000 degrees. At a minimum, these are two pipes arranged sequentially vertically and horizontally, and an elbow connecting them. The length of the last link should be such that 10-15 centimeters protrude from the outside.
- As mentioned above, basalt wool will serve as insulation in the hole made. You can also insulate the tree with sheet steel, securing it with self-tapping screws.
- Outside, the chimney should consist of one elbow and a vertical pipe. Otherwise, the oven may not work well. However, a condensate collector can be installed there, which only has a positive effect on the operation.
- Next, using standard brackets, our chimney is attached to the wall like a drainpipe.
- At the final stage, it is necessary to test the chimney for leaks. To do this, you need to use water to find out whether the joints of the structure are airtight. If water appears in some places, you need to reassemble the chimney. After all, condensation can destroy the chimney and is a source of ice plugs. Its danger lies in the fact that such problems can lead to the appearance of carbon monoxide in the living room.
Often steam room owners have an important question: is it necessary to install dampers in sauna stoves? Of course not, because this can cause carbon monoxide poisoning if you rush to close them.
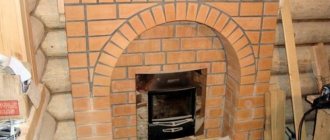
So, the chimney is installed. What to do next? At the next stage, you can start lining the stove with bricks. It will not only protect against burns, but will also help the stove release heat more evenly. Additionally, for aesthetic purposes, you can line the stove structure with tiles.
Finnish sauna or Russian bath? Determining the heater
The type of heater determines the moisture temperature regime, which means you will have to choose what you like best: a classic Russian bath or a Finnish sauna.
Artemenko Vyacheslav Manager of the store on the street. Kollontai, 18
The Russian bath is characterized by high humidity (60%) at moderate air temperatures (60-65 degrees Celsius).
The Finnish sauna, on the contrary, is characterized by high air temperatures (90, 100 and above degrees Celsius) with minimal humidity (10-15%, less often 20%).
The principle of creating a temperature regime in a steam room due to the type of heater is quite simple. Let us remember physics: the hotter the surface on which water falls, the fewer moisture particles (fractions) are formed.
Open heater - stones lie “on top”. The stones are open to the eye, so they come into contact with air, and as a result they cool down. This heater creates a temperature regime close to a Finnish sauna. The temperature of the stones when water is supplied is within 200, maximum 250 degrees Celsius. When water hits the stones, it forms coarse-grained steam (like steam from a boiling kettle), tubers of smoke are formed, which make it difficult to breathe.
Closed heater - stones are hidden in a compartment. The stones are kept in a closed place - this is a special, usually metal, compartment in a sauna stove. Such stones are enveloped in fire from all sides and become very hot (400-450 degrees Celsius). When water is applied to such stones, finely dispersed steam is formed, which feels light and “soft”. This heater dries quickly and recovers.
Combined heater. The design of the stove is made in such a way that there is both a visible, open part, and a closed, inner part of the heater. In such models, the open part of the heater performs more of a decorative function. The main supply of water goes to the closed part, forming light, fine steam. If you wish, you can, of course, supply water to the open heater, but the steam, again, will be harsher. Note that the open heater in such models additionally plays the role of a convector that extinguishes infrared radiation.
Fig 2. Types of sauna stove heaters
Lining the stove with bricks step by step
- We make markings on the floor, taking into account a distance of 3-4 cm from the firebox.
- It is necessary to lay waterproofing around its perimeter to help the floor dry.
- After thoroughly mixing the concrete solution, spread it around the perimeter.
- We lay the bottom row of bricks on it. Next, taking into account all the features of the brickwork construction, the walls of the furnace are erected. Sealing of joints is carried out using a solution that has not yet hardened.
The stove is ready for use after all layers of masonry have completely dried.
Features of installation work
How to install a stove in a bathhouse to avoid ridiculous mistakes? There are several tips from craftsmen who have performed such work several times and built the heating themselves. Tips from stove makers.
- Firebox door location. You need to think about the door exit for any design. The door should be opened where there will be no people present. Throwing firewood while washing is inconvenient.
- Separate steam room. How to place the product so that the steam is directed directly into the steam room needs to be thought out in advance, even on the drawings. You can steam without any problems. A person will not interfere with those who are simply washing.
- Ventilation lines. The accumulation of steam and heat should not exceed the norms. Stale air will not create the atmosphere of lightness and healing that is expected from a Russian bathhouse.
Those who like to spend time in the steam room will receive the maximum temperature; they will not need to get up for each portion of steam if everything is at hand.
Installation of sauna stoves is carried out in accordance with fire and electrical safety requirements. Each rule requires precise execution. All electrical lines require protection from any possible sparks or damage.
The next video contains recommendations for installing a stove in a bathhouse.
The influence of the stove design on the location of the remote combustion door
As a rule, sauna stove structures with an external remote firebox are made of materials such as cast iron or steel. What is their difference from conventional ovens? First of all, we are talking about a remote channel, which in massive structures can be removable, and in lightweight ones it can be made of stainless steel and welded.
As we said earlier, in this option the fuel loading areas can be located both in the dressing room and on the street side. With any option, the advantage is that the steam room is not cluttered with firewood, and smoke does not get into it at all. Comfort, in a word!
The external channel is made in two versions: in the form of a pyramid or a rectangle. It should be wider where the door is attached. Models of stoves for dressing rooms with panoramic glass may be interesting due to convenient control over the rate of fuel combustion without constantly opening the door. An option such as glass blowing eliminates the layering of soot on the elements inside the furnace.
The main part of the furnace structure, as we have already learned, is placed on the foundation and is separated from the outer part by thermal insulation materials. The combustion glass should be positioned so that opening the door between rooms does not interfere with the addition of fuel.
Let's consider this option when the remote firebox is placed outside the bathhouse. Of course, going outside is not always pleasant and convenient, however, if you have an employee, and, in principle, we are dealing with a commercial project, no problems arise. Also, this measure saves when there is a catastrophic lack of space inside the bathhouse.
In addition, in a private house such a solution is acceptable in warmer climatic conditions than central Russia. If there is a fence around and the temperature does not drop below 20 degrees, then this approach is completely justified. In addition, coal heating clearly suggests that an outdoor location of a stove with an external firebox is preferable due to the fact that this fuel, although energy-intensive, very pollutes the room. The best place for him is outside the bathhouse building!
What else can influence the choice? What is the best location for the remote firebox door?
Please note that there may be dampness inside the premises. This can be observed not only in the steam room or washing room, but also in the dressing room. This leads to the fact that the firewood will be damp. Also, if the ventilation constantly draws smoke into the steam room, it is better to organize the loading of fuel cells from the street side.
The advantage of placing a door with large glass indoors is the ability to enjoy the view of the fire in the relaxation room. By decorating the stove with a tiled panel, you can greatly transform the interior, adding a large portion of comfort. With this option, firewood can be stored in the dressing room. This will allow you not to go outside and be in a constant comfortable state.
Rating of the TOP 10 best stoves for wood-burning saunas in 2022
| TOP 3 best stoves for Russian wood-fired baths by price/quality in 2022 | ||
| 1 | Harvia M2 | Find out the price |
| 2 | Vesuvius Sensation Aqua 22 (DT-4) | Find out the price |
| 3 | Harvia M3 SL | Find out the price |
| TOP 3 best cast iron stoves for baths | ||
| 1 | Vesuvius LEGEND FORGING 16 (205) | Find out the price |
| 2 | Vesuvius Legend Retro 24 (DT-4) | Find out the price |
| 3 | Ermak 20 Standard mesh (cast iron) | Find out the price |
| TOP 2 best stoves for saunas with a water circuit | ||
| 1 | Harvia 20SL Boiler | Find out the price |
| 2 | TMF Geyser Micra 2022 Carbon | Find out the price |
| TOP 2 best budget stoves for wood-burning saunas | ||
| 1 | Teplodar Rus 12 L | Find out the price |
| 2 | Ermak 12 Classic | Find out the price |
Safety measures in bathhouses with remote fireboxes
A metal sauna stove heats up to thousands of degrees during operation, therefore preventing dangerous situations by taking safety measures is one of the most important tasks. We all know cases where neglecting them led to great disaster. Therefore, measures to ensure fire protection are, literally, vital for bath complexes, especially during commercial operation of the structure. The reason is simple: for legal entities and officials, the penalties are usually more severe.
Installation requirements from a fire safety point of view
If your firebox is not equipped with factory-installed protective screens to protect walls and floors, these tips will be useful when installing stoves with a remote firebox.
- Place the stove at a distance of 0.5 m from the walls surrounding it, and install a thermal insulation screen next to the partition inside which the combustion channel runs.
- If the side wall has metal or cement protection at least 1 mm thick, the gap can be half as much (0.25 m). Accordingly, a double sheet makes it possible to reduce the distance to the walls by 4 times (0.12 m). It is worth remembering that the heat-insulating material should not come into contact with the ceiling and floor and it is necessary to have a gap of 2-3 centimeters between it and the wall.
- There should be no less than 1.2 meters between the top of the structure and the ceiling. It is better to retreat the same amount from the door of the room to the edge of the furnace room. The firebox channel should be located 0.4 m from the wall made of timber and other wooden materials. If there is a screen, the distance, as mentioned above, is reduced.
- Finishing work with materials such as stone and brick is not only aesthetics and heat collection, but also one of the fire protection measures.
- To conclude the description of protective measures, we can highlight
- In order to ensure fire safety, the walls of the metal unit must be lined with stone or brick. Finishing the firebox of a sauna stove is a necessary undertaking. A steel sheet is placed under the stove structure, which will prevent fire if coals get on the floor. A square measuring 40x40 centimeters is placed in front of the firebox door.
Required Security Measures
First of all, you need to maintain fire distances. There should be at least 400 mm from the stove body to the wooden cladding of the walls of the bathhouse, but if the surface is lined with a brick or steel screen, then the distance is reduced to 250 mm. At the same time, the screen itself must be larger in size than the side profile of the stove by at least 10 cm in one direction. The wall itself is laid out in ½ brick, it is not worth doing less.
The safety ventilation gap between the wall and the furnace body, 50 mm wide, is often sealed with a fire-resistant heat insulator, for example, basalt fiber. As a result, the brickwork of the wall heats up less, which reduces the risk of cracking of the masonry. Experts recommend not doing this, since the stove and remote firebox are cooled unevenly, and cracks may appear in the housing. In addition, using open mineral wool in a bathhouse can lead to an allergic skin reaction.
The second requirement is the installation of a heat shield for the chimney. The distance from the ceiling of the bathhouse to the stove body must be at least 1200 mm. The wooden cladding of the walls from the ceiling to the body above the firebox must be covered with a heat insulator, possibly with vermiculite cardboard, and sewn up with a stainless steel sheet.
Types of chimneys and the procedure for their installation
Chimneys are channels that remove combustion waste. They can be made from non-combustible materials such as brick, metal and high temperature ceramics.
- The first option involves creating a massive foundation, since the brick structure itself has significant weight.
- The simplest and most inexpensive installation solution is a metal chimney. However, it also has its drawbacks: it is necessary to ensure that its elements do not become excessively hot, otherwise the wooden structure may catch fire, and a person may get burned.
- Ceramics are resistant to corrosion and high temperatures. It is considered safe from a fire protection point of view. Of course, a ceramic chimney is more difficult to install than a metal one, but much easier than a brick one. And the durability will surprise anyone - 30-35 years.
Self-installation of the furnace outlet channel can be fraught with a number of difficulties, so do it using the drawings. And without minimal skills, it is better to entrust such an important part of furnace installation to specialists.
How do you install a chimney onto the roof yourself?
Have you decided to connect a pipe through a pipe to the stove to independently bring the outlet channel to the roof? To simplify your work, pass the steel chimney through a special sleeve installed in the ceiling. It is sold in many large stores. If this option is not for you, read on.
The output channel is laid as follows:
- A hole is cut in the ceiling with a distance from the chimney walls to the floor beams and the ends of the boards of at least 0.25 m on all sides.
- A protective box made of galvanized steel is bent, the corners of which can be fastened with self-tapping screws.
- The resulting box is inserted into the hole under the chimney. Moreover, this should be done from above, and its surface should not protrude into the steam room. Basalt heat-resistant cardboard is inserted between the walls of the box and the ceiling.
- At the bottom you can attach moisture-resistant drywall with a hole made in it for the chimney.
- We install the firebox chimney pipes, and then fill the voids with pieces of basalt wool.
We may need a "Flash Master" when passing through the roof. This is a silicone rubber sleeve that can withstand high temperatures. It is important to remember that the chimney must be at least 0.8 m above the roof.
As you can easily understand, when installing stoves with a remote firebox for a bathhouse on your own, certain difficulties may arise, for example, understanding the nuances of assembling the structure. Whether your stove will be safe and the process itself will be comfortable depends on following all the recommendations.
We recommend that you familiarize yourself with our tiled sauna stoves. A double-sided sauna stove with an external firebox may be of interest on the topic of the article.
Fuel types
Not all novice bathhouse attendants know what is the best way to heat a bathhouse. Firewood is the most suitable for this.
They have the following advantages:
- not explosive;
- uniform and long-lasting combustion, thanks to which the room warms up to the optimal temperature;
- relatively inexpensive;
- generate quite a lot of heat.
Also a good option for heating a bathhouse are various wood waste processing products. For example, pellets are compressed sawdust in the form of granules.
You cannot heat a stove in a bathhouse with coal. This is explained by the peculiarities of its combustion: at first it gives off the generated heat quite quickly, as a result the system quickly warms up, and then slowly smolders, maintaining the elevated temperature for some time. This heating method is not acceptable for a bathhouse, but for a residential building it is optimal.
It is strictly forbidden to use used oil, as there is a high risk of fire and explosion.
If the bathhouse has a classic heater that burns fuel, then it can only be firewood.
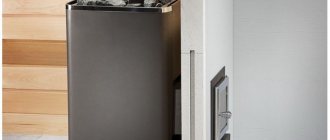
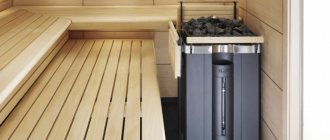
Electric sauna stoves are now widely used. A separate section will be devoted to them (read: “Which electric sauna stove to choose: types and installation methods”).
Both metal and brick stoves are installed in the bathhouse. Both are allowed to be heated with coal and wood.
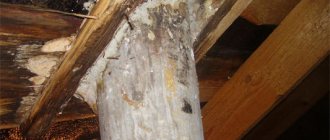
You can use different types of firewood. The main thing is that they burn slowly, provide a lot of heat and do not smoke. It is not recommended to use damaged wood. If there is rot or mold, the entire bathhouse room may become saturated with unpleasant odors.
Oak firewood
If you heat the stove with wood from young oak, then there will not be enough heat in the bathhouse, although the aroma will spread in the room. Also not suitable is old oak wood, which is often rotten inside and the bark produces a lot of ash.
But a middle-aged tree burns for a long time. It is strong and solid. When burning it produces a lot of heat. To heat a room, much less is required than other types of firewood.
Alder firewood
A good option for heating a sauna stove. They can be stored for a long time and do not emit much smoke when burned. They emit fumes that clean the chimney well.
After taking an alder bath, a person feels cheerful. It is believed to be an anti-cold remedy.
Birch firewood
Birch firewood has the best heat transfer. Compared to other firewood, birch produces 30% more energy. They are easy to light the stove. They burn smoothly, and the heat remains in the coals for a long time. This air disinfects the room and makes it easy to breathe.
Aspen firewood
This type of fuel does not produce much heat. However, its evaporation is a soot loosening agent. By acting on the walls of the chimney, soot falls down. Then it is easy to clean. When burning, aspen firewood does not produce a lot of soot and smoke.
Linden firewood
It is difficult to light a stove with this type of wood. But when they flare up, they give off a lot of heat for a long time. Such baths are considered healing. The disadvantage of firewood is its short shelf life. After two years they begin to deteriorate.
Firewood from pine needles
This type of wood can quickly ignite equipment. During combustion, a pleasant, forest smell spreads. But there are also disadvantages. To achieve long-term heat, a large number of them is required. When burned, they emit a lot of smoke. They crackle. Sparks fly in different directions. Therefore, you need to constantly ensure that there is no fire.
Other types
These include ash, poplar, and willow. This low-grade firewood burns out quickly without producing much heat. At the same time, they release a tart odor.
SNiP requirements for construction
A concrete base or metal sheet is laid under the stove and firebox
Installation requirements and standards are set out in SNiP 41.01 - 2003, section 6.6. By following the instructions, you can protect the building from fire.
Some requirements for installing a sauna stove:
- the foundation is finished on top with a heat-resistant coating, a metal sheet (at least 4 mm) is placed on top;
- use asbestos-cement sheets, mineral wool, foam glass, and structural heat-resistant mica for protection;
- an iron sheet measuring at least 40 x 80 cm is placed on the floor in front of the door;
- the opening in the wall for the passage of the channel is lined with brick;
- in premises of the temporary stay category, which include bathhouse buildings, it is allowed to install stoves with a heating temperature of 120°C;
- It is not recommended to use forced exhaust if there is no provision of fresh air into the dressing room;
- Do not vent smoke from the fireplace into the ventilation duct.
The brick tub is made using a special mortar for heat-resistant structures; the rows are kept horizontal.
Installation on a wooden floor
Options
There are three options for installing a heat-resistant base:
- a metal sheet;
- brick;
- natural or artificial stone;
- ceramic or porcelain tiles. The minimum size of protection should be 40 cm.
Preparing the walls
As already mentioned, it is easier to decorate the walls with refractories than to take away useful space from the steam room. The most economical, but not the best option is to nail a sheet of metal to the wall on bars.
In general, we have the following options:
- attach the refractory sheet to the wall;
- plaster it (it is better to make the layer more than 2.5 cm);
- make a brick casing for the stove;
- lay it out with bricks instead of a wooden wall.
If the stove is located close to the wall, then you will need a two-layer mineralite with an air gap of 3 cm between these layers of ceramic bushings. It looks something like this: wooden wall - first layer of mineralite - bushings - second layer of mineralite.
When space allows, you can get by with one layer, but grommets are also used to attach it to a wooden wall.
Heat-resistant tiles or mirror stainless steel are sometimes placed on top of the mineralite. The latter perfectly reflects heat, but heats up itself, so it can be attached to any refractory material - mineral wool, ceramic fiber, superisol, etc.
Those who brought the firebox into the dressing room either put up a brick wall, or then cut out part of the timber. A space is left in the brick with a reserve for the combustion tunnel, where a heat insulator, for example, mineral wool, is subsequently placed. It is also used at the junction of brick and wooden walls. If you don’t want to replace the entire wall, make a portal - at least a meter wide.
Ceiling preparation and chimney installation
Often the cause of a fire is the section of the ceiling where the chimney is located. There are many errors associated with the passage of a chimney through ceilings.
The specific cause of the fire may be:
- pipe overheating;
- cracks in the pipe allowing sparks to pass through;
- shortcomings in the distance to combustible objects.
If you haven't thought about the position of the stove in advance, there may be a beam above it. In this case, part of the beam is cut out and fastened with jumpers to adjacent beams. The empty space above the center of the pipe passage must be at least 90 cm in diameter.
The chimney is installed from the pipe that comes out of the stove. In the case of a larger diameter monopipe, an adapter is put on the pipe. The first pipe passing through the steam room will be a monopipe
A gate is installed on it, then it continues again, but not to the end (this is very important!) of the overlap, because there they put a “start” on it - an adapter for a sandwich pipe that will pass through the ceilings
Pipe connections should not be in overlap areas.
It is important to know here that although sandwiches are the most common, they are a dangerous type of chimney. An analogue of sandwich pipes is ceramic or brick chimneys, but both options are heavier and more expensive
The outer side of the box can be wrapped with basalt cardboard to prevent it from touching the wood. The pipe is then laid on the roof through a hole larger in diameter than the pipe itself. Next, it is sealed with sealant, a master flush is put on and secured to the roof with self-tapping screws at intervals of 5 cm. Finally, a deflector or umbrella is installed.
Preparing the oven
Before installing the chimney, the stove should already be located in its designated place. It is recommended to heat it outside first
It is extremely important to do this, because... the first fire is usually accompanied by burnout of industrial heat-resistant paint
The oven may smoke a little and smell. This is a normal state for her. At the same time, you will find out whether it has any manufacturing defects.
New stones should also be tried out in the fresh air, not inside, because they can also sting the throat and eyes.
Strictly follow the step-by-step instructions for installing a metal stove.
Drying the bath
There are two components to quickly drying wet rooms: heating and ventilation. They should not be considered separately, because together they work most effectively. You just need to combine them in a specific case.
How to dry: ventilation methods
The ventilation system is laid at the stage of construction of the bathhouse (see here about the diagrams and design of the bathhouse ventilation). Therefore, if something is forgotten, it may be too late to redo everything.
vents are usually made in the foundation - these are through holes lined with sewer (most often) pipes that lead to the underground space. They have plugs on the outside that allow you to open and close them at the right time.
More details about the scheme can be found here
Such vents are opened only after procedures. And they serve for better ventilation and drying of the bath.
Also, another through hole is usually made in the wall of the steam room under the shelves On the inside it has an adjustable plug. This hole is also used to speed up the drying of the steam room.
You can dry the bathhouse in winter with the help of ventilation by opening and doors wide - after all, the air inside is much more saturated with water vapor. But you shouldn’t think that all the moisture will leave the bathhouse only thanks to open doors and windows.
In addition to ways to create a draft simply by opening holes, there is another method where ventilation actively cooperates with heating and works when the stove is on - this is bastu, which you can read about here.
Well, don’t forget that even if natural ventilation is not installed correctly or its power is not enough to ventilate the bathhouse, you can always install fans in the air ducts . Forced ventilation, although noisy, is still effective.
BY THE WAY! Heat guns can help here too.
For those who believe that heating alone is enough, and ventilation becomes optional, we recommend watching the video by Konstantin Bely:
Useful tips
When heating the stove, the smoke must go freely into the chimney, since if carbon monoxide is not removed through the hood, it can cause serious harm to the human body. If a problem exists, you must immediately find the cause of the weak draft and eliminate it.
Several ways to determine the absence or interruption of furnace draft:
- The easiest way is a regular sheet of paper or a lit match, brought to the open door while the stove is firing. If the sheet or flame of a match deviates inward, then there is a draft. If there is no deviation or it occurs outward, then there may be a so-called backdraft, which can be very dangerous.
- One of the reasons for weakening draft may be a depressurized chimney, crack, break, pipe shift, or other defects.
- Another danger is an accidental spark falling into a crack in the chimney onto flammable material, which leads to a fire.
- The small size of the blower through which the exhaust is made can lead not only to the occurrence of reverse draft, but also to an insufficient supply of oxygen to the fuel combustion process.
- Blockages in the chimney can also interfere with the process of normal draft. In this case, regular chimney cleaning will help restore normal air movement. It should be noted that the presence of even one elbow in the pipe, where the bulk of soot accumulates as a result of aerodynamic processes, will greatly complicate the work of the “chimney sweep”.
- If for some reason the stove cannot be heated for a long period of time, an air plug consisting of dense air layers may form in the chimney. As a rule, it resolves immediately after regular heating begins on its own.
- Insufficient firebox volume.
- A wide and long chimney does not work with a small firebox.
Brief analysis of frequently encountered statements
Having opened two or three items at random in the top lines of the search results, a novice bathhouse owner is likely to encounter such statements.
I don’t dry anything (I don’t ventilate), and everything is fine
This statement can often be found as part of the answer to a newbie’s question about drying on third-party forums, and even in specialized bathhouses.
However, the laws of physics and biology, when combined together, are inexorable:
- If moisture has nowhere to go, it will remain indoors.
- High humidity at “room” temperature (range 10 – 40°C) leads to processes such as rotting, mold and mildew growth.
If a person really leaves everything after the steam room and leaves, then this may mean that:
- He recently acquired a bathhouse and has not yet felt the result in the form of rotten boards and black deposits in the corners and joints. He still has a long way to go.
- The bathhouse was built for him by smart people who provided automatic ventilation mechanisms. The drying process takes place without the participation of the owner.
Hence the conclusion: it is necessary to dry the bathhouse, and for this you need to know how to organize everything.
Just open the doors and that's it
What is attractive about this method is its simplicity. But here, too, not everything is clear. Opening the door to the steam room will actually improve air exchange. But in one bathhouse this can solve the drying issue, in another it will not be enough, and in a third it may be contraindicated to open the doors at all.
Expert opinion
Lovkachev Boris Petrovich
Bath master who knows everything about steaming
I have water supply to my bathhouse, so if I open the windows and doors in winter, I will freeze the pipes.
The drying method by opening the doors will be discussed in more detail below.
Use a fan heater
It would seem that the solution is incredibly simple: install an additional electrical appliance that will blow hot air into the steam room. As a precaution, it is indicated not to place the device on a wet floor (although to dry, excess moisture should be removed from the room with a rag or sponge).
In fact, a bathhouse that needs to be dried using a fan heater is the wrong bathhouse. In addition to the additional energy consumption (after all, it will take more than one hour to dry), there is an inconvenience with the power cord. Imagine that after using a robot vacuum cleaner you will have to additionally sweep away the dust with a broom into a dustpan - such an allegory suggests itself.
Drying the bath after the operating cycle should occur without the involvement of extraneous heat sources.
Rub with linseed oil
This advice wanders from one article to another.
In order to facilitate the drying process, it is recommended to thoroughly rub the wooden paneling, and especially horizontal surfaces - grates, shelves - with linseed oil. Oil will not help dry the steam room! However, impregnation has its advantages - the boards will be less susceptible to rot and mold, and will not dry out during the drying process.
Instead of linseed oil, some bathhouse owners recommend using lamp oil - it is inexpensive and has the highest degree of purification.
Putting the stove into operation
During the first kindling, the stove is heated for 1.5 hours, then proceed to a full fire
The brickwork is dried at a temperature of +5 - +30°C. At this time, doors and valves are opened around the clock. The first kindling takes place without the use of flammable liquids and flammable materials. Use dry newspapers and small wood chips. After obtaining a stable fire, you can add logs in small portions.
The ashpit is kept open, the intensity of combustion is controlled by closing or opening the door. Check the draft and heating rate. The heating process lasts 1 - 1.5 hours, then you can proceed to normal heating of the stove.