The power supply of any room must ensure the ability to quickly connect electrical installations (including household appliances). For this purpose, sockets placed on the walls are used. Since the connection of sockets to the power cable must be reliable and safe, the Electrical Installation Rules (ELR) require that each socket have a housing that provides protection against electric shock. Sockets designed for wall-mounted installation (including outdoor) have their own housing that meets safety measures. For devices built into the wall, installation of socket boxes is provided.
Receptacle boxes serve multiple functions
- Structural: the box must be firmly fixed in the wall, and securely hold the socket itself.
- Electrical safety. Boxes for brick, concrete and plasterboard walls are made of dielectric materials and prevent electrical potential from reaching the load-bearing structures from the contacts.
- In addition, the outlet itself is protected. Moisture, dust, and foreign objects do not penetrate inside the case.
- Fire safety. If a fire occurs inside the socket, the flame does not penetrate beyond the socket box.
- There is also an aesthetic component. When installing socket boxes in a brick or concrete wall, the seat looks neat. A flat surface is obtained around the outlet.
Rules for installing socket boxes
- A correctly installed socket box should not protrude or be too recessed into the wall, that is, it should be built flush with the finished wall. A finished wall is considered to be a wall that has already been prepared for painting. We will consider cases when it is planned to lay tiles or some other false panels on the wall below.
- Socket boxes must be installed strictly level, even if there is only one socket box, it must be set level to avoid difficulties in the further installation of sockets or switches.
- A correctly installed socket box should hold very tightly in the socket.
What to do if, while drilling, a drill or bit gets into the reinforcement?
There are several ways to remove rebar. One of the fastest and most painless is knocking out the reinforcement with a chisel - an attachment for a hammer drill. If the crown gets into the reinforcement (an indirect sign of it getting into the reinforcement is sparks or a clear slowdown in the drilling process), it is better to remove this reinforcement, otherwise you will ruin the crown.
The second less convenient way is to use an old crown. It doesn’t matter which way you do it, with a diamond or a drill bit, in both cases we simply drill out the reinforcement. The reinforcement metal is very soft and can be easily broken through with a hammer drill. And the third, dirty way, is to simply drill out the reinforcement using a grinder with a diamond disc on the stone.
Types and characteristics of socket boxes
Modern sockets in appearance and installation method differ significantly from those installed in Soviet-era houses.
If previously they were simply embedded in the wall without the possibility of replacement, today installing them and, if necessary, changing the socket is not particularly difficult.
A socket box is a mounting device designed for reliable fastening of electrical installation products for hidden wiring.
Regardless of whether the installation of a single or a group of socket boxes is carried out, before their installation, the walls are chipped
When buried in a brick or concrete wall, these mounting boxes or glasses are secured with alabaster
The socket box is fastened to partitions and false walls made of plasterboard using adjustable spacer legs
Almost all building materials and slab options used in rough wall cladding are suitable for installing socket boxes in them
In the line of products for hidden wiring you can find options for arranging log and timber buildings
Socket boxes are used for installing single switches, power points and socket blocks
During operation, it is easier to tighten the “loose” mechanism in the socket box. With its use, installation is carried out faster and more accurately
Selecting a socket box based on wall material
The main selection criterion is the material of the walls into which the socket boxes will be installed.
On this basis, there is the following classification of boxes:
- structures intended for installation in walls made of solid materials: concrete, reinforced concrete, aerated concrete, brick;
- glasses for walls made of composite materials: plasterboard, plastic boards, chipboard, plywood and others.
In the first case, the socket box is a round glass without any additional elements. It is fixed to the wall using mortar.
There are mounting holes in its walls or bottom for electrical wiring. When installing a socket box, it is enough to remove the jumpers and push out the plug.
Socket boxes with side docking units allow you to quickly and easily install two or more sockets at once
To install several sockets located nearby, you can use glasses, on the side of which there is a fastening mechanism. The socket boxes are connected to each other using special grooves and combined into blocks.
Drywall boxes contain special plastic or metal clamping tabs designed to secure elements into hollow walls. The clamps are attached to screws, which rotate to adjust their position.
When the screw is turned, the foot rises or lowers. Clockwise rotation brings the clamping element closer to the wall and secures the glass in the drywall
What shapes are the products produced in?
Round socket boxes have become most widespread. It is very easy for them to make a hole in the wall using a variety of tools.
Round glasses can be used both for mounting a single socket or switch, and they can be combined into groups, connecting to each other using docking units.
Square boxes, although not used as often, have certain advantages. Their volume is much larger, so you can hide a lot of wires in them.
They are often used to install elements of the “smart home” system. There are single and group square-shaped socket boxes designed to install up to five sockets.
There are also oval boxes on sale, which, like square ones, have a large internal space. They are convenient because you can immediately connect a double socket to them. All the products described above are mounted in walls and used for hidden wiring.
There is another type of mounting boxes that stand somewhat apart - plastic linings or multiboxes, designed for open installation on the baseboard. They are designed for one or more outlets and are usually square in shape.
This type of installation of plastic overlays can only be used on dismountable plastic skirting boards
External socket boxes have two modifications - designs with installation to the middle of the baseboard or to the floor. Since multiboxes are mounted on top of the baseboard, their distinctive feature is their aesthetic appeal and original design.
Installation box size
An important parameter of socket boxes is their dimensions, which are selected based on specific installation conditions. The fork dimensions are 60-70 mm in diameter and 25-80 mm in depth.
Standard designs have external dimensions of 45 x 68 mm, but it must be taken into account that the internal depth in this case will be 40 and the diameter 65 mm.
When installing several round socket boxes in a group, one of them, which has an increased depth, can, in addition to its main purpose, serve as a distribution box
Glasses of increased sizes, the depth of which is about 80 mm, are advisable to use when there is no distribution box in the electrical wiring, and its functions are performed by the electrical outlet itself. As for square products, as a rule, they have a size of 70x70 or 60x60 mm.
Material for making mounting boxes
The most popular are socket boxes made of non-flammable plastic. They can be installed in concrete walls and structures made of composite materials.
There are also metal boxes, which were used everywhere in the past, but today they have almost been replaced by plastic products.
Metal socket boxes are usually installed when installing electrical wiring in wooden houses. They are made of galvanized or non-ferrous metal and cannot be welded, so the connection to a metal pipe is made by soldering.
For safety reasons and fire prevention, when installing electrical wiring in wooden houses, it is necessary to use metal socket boxes
Basic rules for installing socket boxes
Before installing the socket box, you must select the location for its installation. But since the socket is a source of increased danger, its placement in some rooms is subject to special requirements specified in the “Rules for Electrical Installations” (PUE).
According to the PUE:
- there must be a distance of at least 50 cm from the electrical outlet to the pipe through which the gas passes;
- sockets in the bathroom can be installed at a distance of at least 60 cm from the source of splashes (sink, shower, bath);
- It is recommended to install switches on the side where the door handle is located, and the distance from the device to the floor should be up to 100 cm;
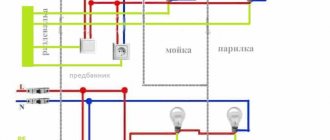
- You cannot install sockets in saunas, baths, or rooms where laundry is done.
There are no special rules for other premises. Sockets should be placed in such a way that their use is convenient for all family members.
It is also necessary to follow safety requirements and install devices taking into account the location of electrical appliances in the house so that their cords reach the outlets without the use of extension cords.
Recommended installation locations for sockets and switches in the room from the point of view of practicality and convenience
Installation of a socket box in a concrete base
If you have already decided where your sockets will be located, you can begin installation work, which consists of several stages.
Before installing the socket box in concrete, markings are made, then a hole is made in the wall and a gypsum solution is prepared.
To install the socket box, we drill a hole in the wall. For brick and concrete we select a crown for concrete, for plasterboard - for wood
We use a chisel to destroy the material within the drilled hole. We carefully refine it with a chisel
Let's try the socket box to the installation site. It should fit freely into the hole so that the outer edge is flush with the wall
Carefully, using a sharp construction knife, break out the plugs of the holes through which the wires will be fed
Using a brush with medium-hard bristles, clean the hole from dust formed during drilling and apply primer
We apply plaster mortar or alabaster into the hole, prepared only in the volume necessary for fastening the box, distribute the composition evenly and quickly
We install the socket box in the recess with the solution added to it. We align its position, focusing on the plane of the wall and the mounting fixtures of the glass
We remove the excess compound squeezed out of the hole during installation of the socket box in a workshop, at the same time leveling the solution around
Marking the wall
The sequence of marking work is as follows:
- Using a tape measure, measure the distance from the floor to the intended installation location of the socket box;
- if the floor covering has not yet been laid, then you need to add another 5 cm;
- using a building level, draw two lines: horizontal and vertical with an intersection point at the place where the box will be installed;
- Place the glass against the wall and trace it with a pencil.
If two or more socket boxes are to be installed, then first draw a horizontal line using a building level. It should be located at the distance from the floor where the sockets will be placed.
Find the center of the first box and draw a vertical line through it. Then set aside exactly 71 mm and draw the second vertical. The center of the second glass will be located in this place. The marking of the following socket boxes is done in the same way.
When installing several socket boxes, it is necessary to make very clear markings and correctly determine the horizontal line so that all boxes are on the same level
Punching a hole in concrete
There are several ways to make holes in a brick or concrete wall. The simplest of them is using a concrete crown with pobedit teeth, which, when cutting into the wall, makes a circle of the required size.
In the center of the crown there is a drill bit made of pobedit for making a central hole.
Since standard socket boxes have an outer diameter of 67-68 mm, a crown with a diameter of 70 mm is suitable for the job. The nozzle is put on a hammer drill or drill, placed on the marked line and a hole is made.
Then the nozzle is pulled out, and the entire remaining layer of concrete is knocked out of the hole with a chisel and hammer.
The hole should be 4-5 mm deeper than the height of the socket box; for this, the crown must be completely recessed into the wall
If you don’t have a concrete crown, you can make a hole with a drill with a Pobedit drill bit. First, a central hole is drilled to the entire depth of the nozzle, and then holes are made along the circumference line with the same drill.
The more of them, the easier it will be to hollow out a hole of the required diameter and depth with a chisel and hammer or hammer drill.
Another way is to make a square hole using a grinder with a diamond blade attachment. First, the central lines are cut, and then along the entire perimeter of the socket box. The process, as always, is completed with a chisel and hammer.
Installing the box into the wall
After the hole is made, you need to clean it well and insert a socket into it for fitting. It should fit freely in width, and in depth there should be a margin of approximately 5 mm for the solution.
If everything worked out as it should, then now you need to make a passage from the top or bottom of the hole (depending on the location of the electrical wiring in the room) for laying the wire.
From the hole made with a drill (in soft walls with a chisel or chisel), a groove is laid along which the electrical wire will run
The socket box also needs to be prepared. We turn it over with the bottom side where the slots for the wires are and cut one of them with a knife. We run the wire there and insert the box into the wall to check.
To secure the glass, prepare a solution from plaster or alabaster, which should have the consistency of sour cream. It is worth considering that the solution made from these materials hardens very quickly, and you have no more than three to four minutes to complete the process of installing the socket box. After five minutes the mixture will no longer be suitable.
Two minutes before placing the box in the wall, the hole is moistened with water. After the liquid is absorbed, a layer of gypsum is applied to its walls with a spatula. A wire is threaded into the glass, its back part is also smeared with the solution, and the socket box is inserted into the hole.
Adjust the position of the box so that its edge is flush with the wall and the screws are horizontal.
To completely fix the glass, a solution is also placed in all cracks and gaps, and then the wall around the socket is coated with gypsum mixture
Combining several socket boxes
How the marking of two or more electrical outlets is carried out was described above. Holes are made using the same methods as for a single box. The only difference is the need to connect the holes together. This can be done using a chisel or angle grinder.
Before installation work, the socket boxes must be joined to each other using a side fastening element. Installation into the wall is carried out similarly to the installation of a single glass.
An important point that you must pay attention to when attaching a block of boxes is the strict alignment of the socket boxes horizontally while fixing them in the wall with gypsum mortar. It is necessary to carry out this part of the installation only using a building level.
The figure clearly shows all the stages of work on installing several socket boxes in a concrete wall
How to install a light switch
This article is about how to install a light switch. Generally speaking, light switches are used to control electrical lighting in residential and commercial buildings. In most of these cases, the light switches are mounted on the wall at a specific location in the room, the height at which they are mounted or the shape of the switches varies depending on the desire.
Light switch - has many types: single and multiple, internal and external. The light switch must be installed by a person experienced in electrical work.
To install the switch, you must do the following...
How to install a light switch
The first thing you need to do is turn off the breaker. Some people believe that it is safe to turn off only the meter on which you install the switch, but we strongly recommend that you keep the main power supply switch turned off.
Then, use a voltage tester on each wire to make sure there is no electricity and everything is safe. We emphasize that it is better to check this several times before touching the electrical wires.
Switch connection wiring
The next step of the project is to remove any paint, residue or dirt from the box using pliers. Make sure that the area under the switch is free of debris and excess materials. This operation is important, especially if you are dealing with a newly built house or a repainted room.
However, even if you are replacing the old switch, you need to make sure that the new electric light switch will be installed and aligned properly.
After you have purchased the light switch, you must open it using a screwdriver. This operation is important because you will connect the electrical wires to the inside of the switch.
Installing a box in hollow walls
Socket boxes designed for walls made of composite materials, in particular plasterboard, have a slightly different design than installation boxes for concrete and brick bases.
Fixing the glass in the wall is done without gypsum mortar, which makes installing the socket box into plasterboard much faster and easier.
To make holes, it is better to use a wood crown, as they are smooth and neat, which makes the process of installing the socket box easier.
At the top of the glass there are four screws arranged in pairs. Two of them protrude slightly outward and are intended for attaching a switch or socket.
The other two are slightly recessed into the socket body. On the bottom of each screw there is a metal or plastic tab, which, when the screw is turned, moves and fixes the box in the drywall.
Before inserting the glass into the wall, run the electrical wire through the pre-made hole in the back of the box
Before installing the socket box, make markings as described above. Making a hole in drywall is much easier than making a hole in a concrete wall. You can simply cut a circle with a knife or drill along the contour with a drill, and then cut it with the same knife.
However, when using these methods, the edges are not very smooth. In addition, drywall is a rather fragile material and can break.
It is best to do the job using a wood crown. After the hole is prepared, bring the wire out into it and insert the socket so that the screws are positioned horizontally. Secure the cup into the drywall by tightening the two recessed screws clockwise.
For fixation in plasterboard slabs, socket boxes are equipped with specific fastenings with tightening bolts
After installing the socket box in a pre-formed hole and checking its position, the tightening screws are tightened clockwise
The coupling bolts do not need to be tightened all the way straight away. They are tightened one by one until the socket is in perfect position.
In order to be able to insert wires into the socket box to connect the electrical installation device, it is necessary to break out the “plugs”
Preparing the solution
Since it is necessary to quickly fix the socket in a concrete wall, gypsum or alabaster-based mixtures are used for fastening. A pure gypsum solution hardens in 3-5 minutes, which requires constant mixing of small portions of the mixture and regular cleaning of the container from the hardened material.
To increase the shelf life of the solution, use a mixture consisting of 3 parts gypsum and 2 parts Knauf Rotband gypsum plaster or equivalent. It is not recommended to use pure plaster due to the reduced mechanical strength of the hardened material.
The solution is mixed in a 3-4 liter container made of elastic material. To dissolve the powder in water, use a mixer clamped in the chuck of a drill or hammer drill (in non-stress mode). Before mixing the batch mixtures, the container is cleared of any remaining solidified solution.
Installation of socket boxes in ceramic tiles
If it is necessary to install a socket or switch in a wall that is supposed to be tiled, marking and making holes in the concrete should be done before finishing work begins. Electrical wires are laid in advance in the resulting recesses.
After laying the tiles, markings are made again and holes of the required depth are drilled in it. It is best to drill the tile with a diamond core bit, periodically cooling it with water.
A gypsum solution is placed in the recesses, it is also applied to the back of the socket box, and then the box is pressed into the hole and leveled.
To install several sockets, a template is made in advance, according to which the wall is marked
Hole cutting
After marking, in the marked centers of the circle it is necessary to make a hole using a drill with a slightly larger diameter than the crown drill (for example, an 8-10mm drill). We drill a hole with a margin, taking into account the length of the drill bit of the crown itself (but do not forget about neighbors and thin walls). This method is also suitable when working with a diamond core bit in drilling mode.
The process of gating. After drilling holes in the center of the future circle, you need to use a crown to go deeper into the wall a few millimeters (this only applies to the method of working with a hammer drill!). Along the intended circle, you need to drill the maximum possible number of holes to make it easier for the crown to “gnaw” the concrete.
With a diamond crown, you just need to drill - without chiselling, periodically letting the crown cool. It is worth noting that if a diamond bit gets on the reinforcement, its service life is significantly reduced.
When working with an angle grinder, the whole task comes down to making cuts in the wall to the required depth and hollowing out the area where the socket boxes will be located.
The nuances of installing a multibox on a plinth
What should you do if your house has already undergone high-quality repairs, but you need another point to connect electrical household appliances?
In this case, it is not at all necessary to rip off the new wallpaper and ditch the wall; you can make a socket directly on the baseboard.
Multiboxes fit all types of standard single sockets. They can accommodate not only electrical, but also telephone sockets, as well as Internet cable connectors.
However, it should be noted that this method can only be used on collapsible plastic skirting boards with a cable channel. Before installing the socket box, it is necessary to lay the wire inside the baseboard.
To do this, remove the cover from the part where the socket will be located. This operation is performed from a corner or from a nearby plug; simply pry the cover with a screwdriver and carefully remove it.
Cut the baseboard so that there is a gap the width of which matches the size of the plastic trim. Insert the multibox into it, thread the wire through the hole in its body, and secure the socket box with dowels.
