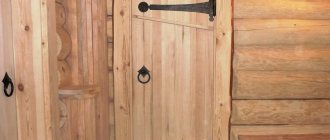
The stove, known to many as a potbelly stove, is one of the most popular heating devices. Designs of this kind are found in many private homes. But the peculiarity of a potbelly stove, as well as any other stove, is that over time it loses its original appearance and there is a need for painting in order to restore its former aesthetic qualities. Therefore, today we will talk about how to paint a potbelly stove: what materials can be used, how to carry out this procedure in general.
How to paint a potbelly stove
- 1 Painting a brick structure
- 2 Painting a metal potbelly stove that is not covered with plaster or brick 2.1 Video - Powder painting
- 2.2 Information on heat-resistant paints
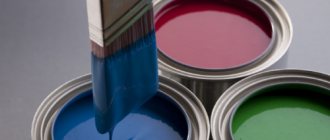
Let’s immediately make a reservation that various finishing materials can be used to paint a potbelly stove. The choice of one or another of them depends on both personal wishes and financial capabilities. In addition, the material from which the stove is made is also important.
How and how to paint a potbelly stove - step-by-step instructions
A potbelly stove is an excellent heating device for a private home. Over time, the aesthetic qualities of the potbelly stove deteriorate, so painting may be required. The technique of applying the coloring composition and the direct selection of products for the work are important points that it is recommended to pay special attention to.
- How to paint a cast iron stove?
- Paint selection
- Application sequence
- Final works
- Painting a potbelly stove lined with bricks
- paint
- Lime
- Varnish
- Burnishing for metal furnace
- How often should you paint?
- Conclusion
How to coat
In order for enamel or paint to stick well and for a long time on the metal surface of the stove, it is not enough to choose the appropriate composition. It is necessary to strictly adhere to the technology when applying it. All the necessary information is on the packaging, but the principle is the same for any product.
Surface cleaning
Dust, dirt, rust, old coating and any other layers will not allow the paint to adhere well to the surface and adhere to it. They need to be removed.
- First, they use a metal brush to remove obvious contaminants and loose rust.
- Then the surface is brought to a shine with a drill with abrasive attachments or sandpaper.
Lime painting: preparatory stage
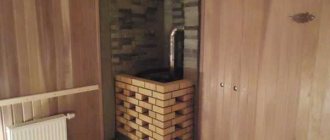
A potbelly stove can be made of metal. This design is shown in Fig. 1. The oven can also be made of brick. Stoves can be painted using different finishing materials. Thus, for finishing brick structures, an affordable and fairly high-quality material called lime is often used. To paint a potbelly stove yourself, prepare the following required materials, fixtures and tools:
- Brushes and rollers;
- Bucket;
- Solvent (can be replaced with alcohol);
- Enamel in aerosol;
- Lime;
- Water;
- Dyes;
- Glue.
Construction of a potbelly stove made of metal.
Before painting the potbelly stove, you need to prepare a solution suitable for this. Take a bucket or other container, add lime and fill it with the same amount of water. After this, mix the mixture thoroughly and add animal glue to it. You can purchase this glue at a store that specializes in selling various painting supplies. You will need relatively little glue - about 100 g per 10 liters of solution. Before you add glue to the lime mortar, be sure to dilute it in a separate container (an ordinary bucket will do) with a small amount of water.
To understand whether a lime-based solution is ready, you need to do the following: take a small piece of glass, fix it vertically and apply a little solution. If the paint spreads no more than 3 cm, then everything was done correctly, you can begin finishing the stove.
If you want to paint your potbelly stove not white, but some other color, then you will need to add a little dye to the solution. Potassium permanganate, blue or synthetic paints can be used as a dye. The specific option is selected depending on what shade you want to get.
Painting a brick structure
Potbelly stoves are often made from metal (as you can see in the image above). But sometimes such a stove is laid out of brick (as an option, the metal structure is finished with brick). In this case, you can choose from several available finishing materials, although brick kilns are often covered with the most affordable (and very high-quality) material known as lime. The painting procedure here will consist of several stages.
Equipment and consumables
To paint a potbelly stove with your own hands, prepare everything that is included in the list below:
- brushes;
- solvent (although it can be replaced with regular alcohol);
- capacity;
- rollers;
- glue;
- enamel (necessarily in the form of an aerosol);
- dyes;
- water;
- lime.
Preparing work surfaces
Before proceeding directly to painting, thoroughly clean the surface of the oven from dirt and dust. If there is cracked plaster, be sure to clean it. Such preparation will allow you to ensure the highest quality results. The surfaces will be painted evenly, and the resulting result will decorate the house for many years.
Preparation of the solution
It is, of course, necessary to begin work by preparing the appropriate solution. To do this, you will need a bucket (or any other suitable container), where you should put the lime and fill it with water (the proportions in this case are 1:1). Next, mix the components thoroughly and add glue to them (only a substance of animal origin is required).
Note! This glue can be purchased at most stores that specialize in selling various types of goods intended for painting.
You will need a little glue - about 100 grams per 10 liters of the finished solution. But before adding glue to the lime mixture, it must be diluted in a separate container (use a second bucket for this) with a small volume of water.
Checking the lime mortar for readiness is done as follows: take a small piece of glass, fix it somewhere in a vertical position and apply a small amount of the mixture. If the latter after this spreads by more than three centimeters, then you have done everything correctly and can, with a clear conscience, proceed directly to painting the structure.
We continue the conversation about how to paint a potbelly stove. If it is planned not to be white, but of some other color, then add a little of the appropriate dye to the lime mixture. In this case, such a dye may well be blue, potassium permanganate, or paints of synthetic origin. This or that option is determined based on what color the stove should be.
Application of the solution
First, it is worth noting that the solution will be covered in two layers. Application can be done either with a brush designed for whitewashing or with a roller with medium bristles.
Note! You should not apply lime in an overly thick layer, as this will not result in a perfect, uniform and attractive surface.
- Before you begin, add a little salt to the mixture to prevent streaking. Directly during painting, move the brush in one direction - either only vertically, or only horizontally.
- After applying the first layer of the mixture, give the potbelly stove some time so that it (the layer) dries sufficiently. Next, paint all surfaces a second time in the same way. It is important that layer No. 2 is thinner than layer No. 1.
- As soon as all surfaces of the stove are covered with lime mortar, begin the next stage of work, which consists of finishing the cast iron elements of this heating device - that is, the doors and handles. Typically, neither paint nor a previously prepared lime mixture will be suitable for processing them. All elements made of cast iron should be coated only with special enamel, made in the form of an aerosol and resistant to high temperatures. Such enamel does not crack, therefore, it will retain its original external characteristics for a long time.
- Before applying enamel, thoroughly degrease all working surfaces. For these purposes, as noted above, you can use either a solvent or ordinary alcohol. As for priming, there is no need for it in our case, since no primer is in any case capable of withstanding the elevated temperatures to which the oven will heat up. In a word, after degreasing, proceed immediately to painting.
- First, shake the can of aerosol enamel thoroughly and spray the paint from a distance of approximately 24-27 centimeters onto the cast iron parts of the stove. As soon as the enamel has dried, you can begin to actually operate the potbelly stove.
Note! It is very convenient to use a special sprayer, which is described in the image below.
Painting a metal stove that is not covered with plaster or brick
If the heating device in the house is not finished with anything, but it urgently needs to be updated, then you are probably wondering how to paint the potbelly stove in this case. Let’s say right away that not just any paint is suitable for this. The fact is that during operation, the stove can heat up to a very high temperature, and, of course, not all finishing materials can withstand such conditions. Only heat-resistant types of paints made on the basis of silicone and silicon are suitable for painting. Only in this case will the potbelly stove retain its original appearance for a long time.
Video - Powder painting
Information about heat-resistant paints
Using heat-resistant enamels, not only the desired design is achieved, protecting the surfaces of the potbelly stove from the penetration of dirt, but also resistance to high humidity. Moreover, all metal elements will be protected from rust and oxidation. Such compositions are produced mainly in the form of suspensions, and are based on heat-resistant varnishes that contain silicone and silicon.
3 Options for making a potbelly stove
Previously, we talked about how to make different versions of a potbelly stove yourself. We advise you to read this manual right now, see details here
Such enamels are produced in jars or in spray cans (spray). If stone surfaces are painted, the material is absorbed into the porous structure of the surfaces and forms a thin film on them, which, in fact, is a protective layer.
Packaging
You can purchase heat-resistant paints in various packaging - these can be spray cans or jars. From cans, paint is simply sprayed over the surface, and from a can, paint is used with brushes, rollers or special sprayers.
The volume of the cylinder is usually 500 ml. Cans are produced in 400 g, 800 g, 2.5 kg and 5 kg. There are also large buckets of 5-15 kg and barrels.
Exactly how to apply thermal paint is everyone’s personal choice. For some, it will be more convenient to use a brush or roller, while others will opt for a spray can. In the latter case, the material consumption will be significantly lower, and the paint will apply more evenly and evenly.
Pros and cons of silver
People have been using silver paint for more than a century, and during this time no one has had time to get tired of the paint. On the contrary, it is used more and more often for various needs. What is the secret of such popularity? It's all about the huge number of advantages it has:
- Silver does not flake and is quite durable and at the same time thin material. But at the same time, if you need to, you can easily get rid of the paint.
- The paint turns into a protective layer for the surfaces it is applied to. It creates a thin but even, smooth layer, fully displaying the surface texture.
- It is used on various materials - from wood to concrete and metal.
- Long service life, so the paint does not deteriorate in water for 3 years, nominally about 7 years, but in reality even longer.
- Not afraid of high temperatures.
- Invulnerable to corrosion.
- Non-toxic.
- Dries quickly.
- Painted in a pleasant silver color.
- With its help, you can achieve different shades of metal using pigments.
How often should you paint?
Maintaining a marketable appearance is the main goal of the home owner, who noticed that the potbelly stove was slightly deteriorated in appearance. If chips or scratches appear on its surface, it’s time to renew the coating.
Coloring should be repeated every 5-7 years. If the pigment layer is damaged earlier, this indicates low quality of the product used last time or errors on the part of the performer. Also, cracked old paint does not protect the surface of the stove well, so updating it also plays a protective role, not just an aesthetic one.
How to choose stove paint
You cannot paint a stove with ordinary paints: the maximum temperatures they can withstand are 40-50°C. At the very first fire, such a coating will swell, bubble, begin to change color before our eyes, and also smoke and spread “aromas”. Therefore, it is clear: special compounds that can withstand high temperatures are required.
The degree of heat resistance required depends on the type of oven. If it is an iron sauna stove, it can heat up to 600-800°C or even more: in the combustion zone the temperature is higher, but depending on the design, the outer walls may not heat up so much. For the external surface of bricks, high values are not needed: +200°C is definitely enough.
A very important requirement is that heat-resistant paint for the stove must be suitable for indoor use. For sauna stoves, it is desirable that it protects against high humidity.
Terminology
Heat-resistant, heat-resistant and fire-resistant paints are suitable for painting surfaces with high temperatures. Fire retardants cannot be used. Although the name is similar, the purpose of this paint is different: when heated to a certain temperature (around 200°C), it swells into a bubble, blocking the access of oxygen to the structure, thus preventing its destruction. The effect is useful, but not in our case.
Heat-resistant compounds usually have a range of application up to +600°C. They can be used to paint metal parts of brick stoves and fireplaces, and metal heating stoves. The body of metal sauna stoves should not be coated with such paints: in some places the temperature can rise to +800°C. There are heat-resistant enamels for them that can withstand temperatures up to +800°C or even up to +1000°C.
Fireproof metal paint for stoves can withstand the presence of open fire. Their operating temperature is even higher, but for domestic use such compositions are unprofitable: they are expensive.
There are also high temperature paints. They are used for painting radiators of heating systems or some parts in engines. Most often, they behave normally if they heat up no higher than 200°C. They can only be used for stoves made of brick; they are suitable for painting seams or tinting the surface of a brick stove.
There are also heat-resistant varnishes. They tolerate heat up to 250-300°C normally. If a brick is treated with this varnish, the surface will become shiny and the color will become brighter.
Heat-resistant varnish from different manufacturers. It can be used to protect the brick sauna stove from moisture
What are we going to paint?
To decide what paint to paint the stove with, pay attention to what surfaces the composition is intended for. Often the area of application is indicated in large letters on the packaging. For example: heat-resistant paint for metal. If the scope of application is extensive, it is indicated in smaller font, but it must be present on the can, as well as the company name. If this data is not available, do not buy. Most likely this is a cheap fake, and the combination of questionable quality and high temperatures can be hazardous to health.
Burnishing for metal furnace
A metal furnace can be processed efficiently and quickly using the bluing procedure.
Instructions:
- Complete high-quality cleaning. Dirt and dust must be completely removed. The coating is washed, treated with a brush, and the localization of cracks in which dirt accumulates is established.
- Removal of oxides. Take a brush and dip it into a 5% sulfuric acid solution. The surface is processed completely, including cracks, gaps, and irregularities.
- Acid removal. A solution is prepared for subsequent treatment of the entire oven area. You need to prepare 50 grams of laundry soap and dissolve it in a liter of water. Using a brush, the composition is applied, all areas are well worked out.
- Surface treatment is the last stage. Take sodium hydroxide (50g/l). Operating temperature – 140 degrees. Treatment is carried out using a sprayer to which the product is added.
Sodium hydroxide
The procedure lasts at least one hour. You need to be careful with the materials used - most are toxic and hazardous to health upon direct contact, especially with mucous membranes. Use gloves and a protective mask.
How to choose heat-resistant paint for stoves
When choosing paint to cover the stove, you must adhere to the following rules:
- it must be resistant to steam;
- have a high level of surface protection from temperature changes;
- must prevent the formation of corrosion;
- ability to withstand temperatures from 80 to 750 degrees;
- Possibility of use in dry and wet environments.
There are paints on sale that were developed specifically for brick and metal stove structures . For some ovens, it is possible to use mixtures in various combinations or simply use one type of heat-resistant paint.
The paint must be of high quality. If the paint material is of poor quality, then when heated it may begin to release toxic substances. The product must be certified. The documents must clearly indicate what maximum temperature the composition can withstand and what substances it will release during the heating process. If there is no certificate, it is better to refuse such a purchase, because a low-quality product can have a bad effect not only on the quality of finishing work, but also on people’s health.
Painting the stove in the bathhouse
Before starting work, prepare the tools, location and surface of the iron furnace.
Necessary tool
For paint in cans, purchase a 15 cm wide roller or a brush with fine bristles. You will also need:
- metal brush;
- sandpaper;
- grinder with grinding disc;
- solvent;
- rags;
- newspapers or plastic wrap.
The grinder is used to speed up the processing of large surfaces. The roller and brush are replaced with a spray gun, provided that a compressor is available. Newspapers and plastic film are needed to protect walls and ceilings from drips and drips.
Surface preparation
Surface preparation depends on the condition of the metal and the type of paint composition.
- A dirty sauna stove is washed from soot with water and household chemicals. This will remove some of the fat.
- Large particles of rust are removed with a metal brush, walking along the edges. They do not achieve the shine of the metal.
- Using fine sandpaper, remove rust residue from an iron sauna stove and level the surface so that the paint lies evenly.
- Use a broom and a dry cloth to remove any remaining abrasive.
- The oven is washed, wiped and dried.
- The rags are soaked in a solvent and passed over all surfaces of the iron stove. After drying, blow off the lint or wipe it with a microfiber cloth.
Applying paint
The perimeter floor and the walls near which the iron stove is installed in the bathhouse are covered with polyethylene or paper and the seams are glued together with regular or masking tape. Before painting, provide ventilation to avoid poisoning by solvent vapors. Use a respirator with carbon filters, gloves, goggles, a protective suit or old clothes.
After opening the bottle, stir the paint for 2-5 minutes to achieve a uniform consistency. This is necessary because during storage the suspension settles. If stove paint needs to be thinned, use solvents recommended by the manufacturer. For manual application, the composition is made thicker; for a spray gun, the thickness is reduced. The sprayer is filled through a filter, nylon stocking or paint sieve to trap solid particles that can clog the nozzle.
Sawdust firebox
Sawdust is not a high-quality fuel; it burns poorly. But they are easily accessible and popular. The design of a furnace of this modification forms two metal cylinders of different diameters. A pipe with a smaller diameter is placed in a pipe with a larger one, turning into a combustion chamber. A hole with a diameter of 5 cm is created at the bottom.
The chimney is located at the bottom of the outer cylinder. A steel box is welded under the ash. The potbelly stove is equipped with a door. A core of wood up to 60 cm high is inserted into a cylinder of smaller diameter. Sawdust is poured and pressed around it so that it burns as slowly as possible. The core is removed and a fuel chamber is obtained. The stove is ignited through an ash box using shavings and bark. When the fire reaches the top layer of sawdust, the stove is covered with a lid.
So, potbelly stoves have faithfully served people for many years. These unpretentious simple designs still provide heat, although they consume a lot of fuel, which is why they got their name. But modern models have learned to combat the hunger of bourgeois women, giving them a ticket to a long life.
Preparatory work and painting process
The preparation process begins with cleaning the working surface, that is, you need to remove all dirt, remove uneven surfaces, and seal cracks. Then you can start the process.
Important: Please note that ordinary putty will not work for this procedure!
To prepare such a mixture with your own hands, you need to crush one red brick with a hammer. The consistency must be similar to “flour”. The result is poured into a container, 10 chicken proteins are added and beaten. The thick mixture is capable of qualitatively eliminating all imperfections in the furnace surface. For this procedure you will need a hard brush. This stage must be treated with special attention, since the outcome of all work depends on the result obtained!
Before painting, the surface must be thoroughly cleaned
Once you are sure that the putty has dried, proceed to the next step. Now you need to treat the entire surface with drying oil (oil). Thanks to this, you can significantly save on enamel and also improve the quality of its application. Considering that some of the material will simply be absorbed into the surface, the layer of such oil should be quite thick.
This material will be perfectly complemented by the following publications:
- Review of Termofor heating stoves for home and bathhouses - the best from Siberia
- Operating principle of a condensing heating boiler: overview of the main manufacturers
Conclusion
Coloring is a simple procedure. It usually lasts several days due to the need to apply 2-3 layers, between which it is better to wait at least a day so that the material dries well.
It is important to use high-quality materials and tools - this will be reflected in the result. The main thing is to wait until each layer dries, clean the surfaces well, and work with gloves.
For painting, enamel paints that are resistant to high temperatures, lime, and varnish can be used. When choosing, proceed from the desired effect and cost of the material.
Source
Sequence of the paint application process
Like all previous processes, this stage of the “marafet” must also be done responsibly and with love. It is worth paying attention to the fact that the heat-resistant enamel is not too thick. If the composition is too viscous, there is a risk that the surface will not absorb the paint enough, and it will simply be impossible to work with such material. It is highly recommended to dilute it. A solvent designed for organic materials will help in this matter.
Tip: There are times when you don’t have something necessary at hand, and this also happens in the case of a solvent. In this situation, you can use regular turpentine.
The required thickness is ready and now you can begin the actual process of painting the stove. It is very important that the first coat of paint is thin. After it has completely dried, the next layer is applied. An indicator that the layer has laid evenly will be indicated by the absence of gaps, that is, the surface of the potbelly stove will not be visible in certain places. In case of defects, you need to apply a control layer, through which the bricks should definitely not be visible. Now you can paint all the cast iron elements.
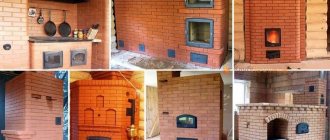
Potbelly stove after painting, lined with bricks
Paint for a potbelly stove decorated with bricks with your own hands
It happens that there is no suitable paint in the store, and there is simply no time to look for something more or less suitable. In this case, you can prepare it at home.
This process requires turpentine and PF-283 varnish, which must be mixed in a one-to-one ratio. The mixture must be thoroughly stirred. A properly prepared mixture will be transparent and matte. Now, as for the desired color. To do this, the gouache (its color should match your preferences) must be thoroughly dried in order to then make a powder from it. The result obtained is added to the mixture and the desired paint color is ready. You can safely begin the process.
How to paint a brick sauna stove
Painting the outer surface of a brick sauna stove does not require high heat resistance. The surface rarely heats up above 70-80°C. Except that near the furnace casting the temperatures may be higher. Therefore, heat resistance up to 200°C is more than enough.
- Ecoterra. This is a heat-resistant paint for brick ovens with the highest heating temperature of up to 400°C, applied to concrete and ceramic substrates. Color - red-brown, matte surface.
- Anti-corrosion heat-resistant ELCON enamel can withstand heating up to 700°C for brick kilns. The same manufacturer has heat-resistant varnish KO-85. It can withstand temperatures up to 250°C. For decorative treatment of brick surfaces, this is what you need.
- Can be applied to brick and heat-resistant paint for Certa stoves (CERTA).
- Aerosol Bosny can be applied to ceramics (brick belongs to this group of materials) and even glass.
- Thermal paint KO-8101 can be used for both metal and brick stoves.
There are traditional ways to improve a brick kiln. If the brick is ugly, the stove is plastered, then whitewashed with lime or chalk mortar. To make the surface smoother, it can be puttied after plastering, and to avoid getting your hands or clothes dirty, use water-based emulsion instead of traditional lime and chalk.
If you paint the metal parts of a brick oven, the rest of the surface must be protected
If you need to paint the metal parts of the stove, choose a composition from those that are suitable for metal stoves with temperatures of 800 degrees and above. First, the parts must be cleaned of old paint, dirt and rust to bare metal. Then cover the surface around the door (they are most often painted) with paper (secure with masking tape) and you can paint.
Paint selection
It is absolutely clear that the final result directly depends on the choice of the correct composition for coating surfaces; to do this correctly, we recommend that you read this section of the article.
Primary requirements
So, before you paint an iron stove for a bathhouse or garage, you should know what requirements the composition must meet:
- The heat resistance limit should be at least +300 degrees, and even better +600. Although the oven never heats up to such temperatures, a good margin of safety allows the coating to cope well with loads and serve for many years. As a rule, the packaging indicates that the paint for fireplaces or stoves is heat-resistant.
The packaging always indicates that the composition is resistant to high temperatures.
- Any seller will give recommendations on how to paint a metal stove, but do not neglect checking product certificates, since this group of products must have documents certifying quality, because the use of improper products is not only undesirable, but even dangerous.
- Remember that any metal stove paint releases various substances when heated. That is why it is important that the composition does not include dangerous and harmful components, because evaporation from the surface at high temperatures increases tenfold. In addition, some components can cause an unpleasant odor in the room.
- If metal stove paint is purchased in regular cans, then you will have to use brushes, a roller or a spray bottle. But you can also purchase a more modern version - the composition in cylinders, then the work process is greatly simplified, just shake the container and you can start applying it to the surface.
Aerosol can - a convenient solution
The most popular brands of compounds
Let's look at the most common options that are found in trade and have proven themselves among buyers:
- Organosilicate fireproof paint for metal furnaces has long been known to consumers and is widely used for a variety of jobs. It can withstand temperatures up to 600 degrees, which provides the necessary reliability. Compositions of this group are marked KO, the most popular brand is KO-8111, it has high properties, and its price is quite affordable.
- If you do the work yourself, Certa aerosol paint is suitable for you, and if the volume of work is large, you can purchase products from this brand in regular cans. This is an excellent option, which is characterized by high heat resistance (up to +650 degrees), the possibility of application at sub-zero temperatures and even in an electrostatic field.
Certa paints are an excellent solution for your stove
- Fire-retardant paints for metal Polistil are also often used when painting heated surfaces; this option provides not only resistance to heat, but also protects the surface from exposure to open fire. This option is a rather expensive solution.
- Electrical conductive paint Zinga is also sometimes used for this type of work, but this is not a very good solution, since the composition forms a smooth silver surface, which transfers heat much worse than a dark and embossed one. Remember that small irregularities in the metal significantly improve heat transfer.