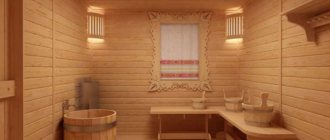
Of course, one of the most important elements in arranging a bathhouse is the stove.
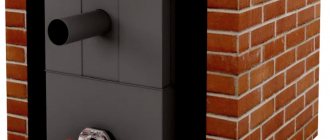
Metal stove lined with brick (in the steam room)
Before you begin to study the instructions for proper brick laying, you should answer the main question: why is it necessary to line the stove in a bathhouse with bricks? Perhaps your particular stove model does not require this action?!
Before and after
Compared to metal, brick retains heat much longer, which means the stove will cool down much longer.
The stove in the bathhouse plays no less important role than in the house. The effectiveness of all bath procedures and a comfortable atmosphere depend on how quickly it heats up and retains heat. Being in a cold room is unpleasant, and being in an excessively overheated room is dangerous to your health.
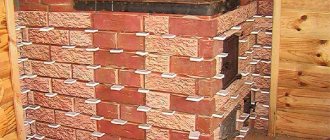
Metal stove in a steam room with 1/2 brick
Methods for lining a stove in a bathhouse
During the combustion process, the hearth heats up to a high temperature, which is accompanied by its thermal expansion.
All this must be taken into account when choosing a facing material and the method of its application. In this case, you need to plan the finishing of not only the walls, but also the pipes. You can cover the oven with the following materials:
- Ordinary red brick made of baked clay. It is better to choose solid blocks that conduct well and retain heat longer.
- Monolithic ceramic brick. An excellent material characterized by average thermal conductivity, strength and resistance to sudden temperature changes.
- Fireclay refractory stone. It is used for masonry fireboxes; it absorbs heat well, and therefore is not suitable for exterior decoration.
There are the following options for lining the hearth, regardless of its location:
- Continuous cladding. This is the easiest way to finish a boiler. It is similar to laying tiles on the floors and walls of rooms. Only here there are some nuances. The first is the correct choice of cladding. It is necessary to take tiles that are resistant to high temperatures and have the same coefficient of thermal expansion as metal. Another condition is the preparation of a solution with the desired composition. A mixture of clay, sand and cement is best. The seams must be grouted with a special waterproof grout.
- Heat shield. This design is a blank brick wall, laid at a distance of 2-3 cm from the outer surface of the boiler. The advantage of this design is that the heat is transferred to the stone, which ensures good heating of the room, while simultaneously preventing the risk of fire and burns. In addition, the absence of contact between metal and brick eliminates the appearance of cracks due to uneven thermal expansion of materials.
- Facing-convector with vents. Such structures are used for lining high-power fires, which are developed by pyrolysis plants or long-burning boilers. A vertical half-brick wall is laid out 4-5 cm from the stove. Vents are left in the lower and upper parts through which air circulates under the influence of changes in altitude and air temperature. This system works efficiently, evenly distributing heat throughout the steam room.
Some useful tips
To ensure that the brick lining is correct and lasts for many years, you should use the following recommendations:
- the masonry is carried out in the usual way with dressing in half a brick;
- the structure cannot be connected to the bath walls;
- withstand a seam thickness of 5 mm;
- leave a gap of 3-5 cm between the metal walls of the stove and the screen;
- in the lower rows it is imperative to make openings through which cold air can freely enter. Accordingly, in the upper ones there are the same holes for the release of hot heat. Both below and above there should be no more than 2-3 openings, otherwise the wall, as a heat shield, will not fulfill its direct function;
- after laying each row, it is necessary to check it with a level: verticality and horizontality must be maintained everywhere;
- Carefully remove any remaining solution from both the inside and outside.
Oven screen options
It is recommended to line the sauna stove with half a brick; this is the best option. If the screen is made as thick as a brick, it will take a long time to heat up. In addition, a foundation will have to be built for such masonry. If you resort to a quarter-brick design, the bathhouse room will warm up quickly, but the radiation will be harsh. Regardless of the thickness of the masonry, the distance between the surface of the metal stove and the wall varies in the range of up to 10 cm.
The screens can be a solid structure with ventilation windows, while the chimney is often also made of brick. Another solution is possible: to cover only certain elements of the furnace.
As for decor, there are many different options. The neatly executed masonry itself looks quite beautiful. The color of the red brick contributes to the design of the stove structure. At the owner's request, the bath stove can be faced with porcelain stoneware, decorative brick, natural stone, and tiles. The choice is a matter of taste and the costs planned for these purposes.
Ventilation windows for convection of air leaving and entering the oven
This is an important option that allows you to stabilize the air flows “washing” the furnace and improve the uniformity of heat transfer. If it is round (stove), then the ideology of ventilation ducts is preserved. Try to arrange them symmetrically, on three sides (conditionally), with two windows at the top and bottom, as it would be approximately in a rectangular masonry.
Classic option: two windows in the second row from the top and the second row from the bottom. So, on each side. The lower openings will provide suction of cold air, and the upper ones will provide the release of heated air. In addition, circulation will have a beneficial effect on the metal of the furnace.
Material and tools
Before starting finishing work, you need to prepare tools and consumables:
- reinforcing mesh;
- roofing felt;
- crushed stone, sand, cement, clay;
- heat-resistant mortar for bricklaying;
- boards, bars, slats for formwork;
- bayonet, shovel;
- trowel, trowel;
- building level, tape measure;
- knitting mesh, fittings.
Many people are interested in what kind of brick to line an iron stove in a bathhouse. You cannot use standard building bricks for this. For this it is better to use:
- refractory brick (fireclay);
- clinker brick.
Silicate blocks are not suitable for lining furnaces, since a large amount of lime is used in their production. Because of it, bricks are destroyed when exposed to high temperatures for a long time.
Bricks can have smooth or patterned surfaces. The latter are more suitable for decorative design of bath rooms.
Clinker brick
When deciding how to properly line an iron stove with bricks, you first need to decide on the materials suitable for this. They must have special characteristics.
Brick
The main material for cladding must be of high quality: without voids, with high heat resistance and fire resistance.
You can choose which brick to line an iron stove in a bathhouse from two options:
Clay brick. It is used for lining the body, masonry of the firebox and chimney of a wood-burning stove. It can be ordinary, front, or with a decorative front surface.
Fireclay brick With this type of masonry, the brick is placed on a spoon - a narrow long part
Solution
The ideal masonry mortar is made from clay and sand in certain proportions, which depend on the quality of the clay. Without experience, it is very difficult to do it. Therefore, it is best to buy a ready-made refractory mixture based on red clay.
Before covering the cast-iron firebox with brick, you just need to dilute it with water, as required by the instructions on the package.
Heat-resistant terracotta mixture
In addition to bricks and masonry mixture, masonry mesh and fire-resistant sheet materials may be needed to create a protective screen for wooden surfaces. And also roofing felt as a waterproofing material.
628998fca4610673d66cabc89e37795b.jpe
Tools
The following tools will be required to complete this job:
- Container for solution;
- Trowel for typing it;
- Hammer for adjusting bricks;
- Pickaxe for dividing them into parts;
- Jointing for seams;
- Ordering is a strip with divisions applied to it, the distance between which is equal to the height of one or several rows, taking into account the thickness of the seam;
- Construction level and plumb line for level control;
- Cord for controlling the evenness of horizontal rows.
Tools required for masonry
A sponge or rag and a bucket of clean water will also help to remove the solution from the front surface of the masonry.
Masonry mortar
Durability depends on its quality.
Sand . It should be fine without impurities and poured through a sieve with a mesh of 1.5 mm.
Clay. Pour into a container and fill with good water (not musty), then stir. After kneading, the water should cover the clay. The mixture is left to “sour” for 2-3 days. Then filter through a sieve, rubbing out lumps. Add a new portion of fresh clay to the container and soak again. And so on until the required volume of paste-like consistency is formed.
Clays have different fat content. Particularly oily ones are “neutralized” by adding sand (otherwise they dry out and crack). The proportion of added sand ranges from 0.5 to 1.5 by volume. A good solution is to use fireclay clay. Some craftsmen add heat-resistant glue. However, I will not recommend it because the results may vary.
The resulting solution should easily slide off the surface of the tool (trowel or shovel). Try putting a layer of mortar on the brick, and then after 5 minutes. lift. If the bottom brick stays in place (doesn't come off), then the mixture is correct.
Masonry materials
To build a partition around an iron stove you will need the following set of building materials:
- clay (ceramic) brick without voids;
- ready-made masonry mixture intended for stoves and fireplaces;
- metal corners with a shelf width of 35-45 mm;
- steel wire;
- stove fittings – doors, valves;
- water.
If you place a stone on its edge, you will save materials, but the heat capacity of the fence will decrease
In order for the screen near the potbelly stove to fulfill its function and conserve heat for a long time, the red brick must be solid. Hollow varieties are also acceptable for use, but their massiveness and heat capacity are significantly lower. Another option is natural stone (marble, granite), but it will cost more and is much more difficult to install.
A few words about which solution is best to use to line a stove in a steam room. If you are far from baking, then do not hesitate to buy a ready-made clay-sand mixture in the store. When this is not possible, prepare a solution from pure natural clay without impurities according to this recipe:
- Take a large container and soak the clay in it for 1 day. The consistency is thick, in the form of liquid.
- Pass the mixture through a coarse sieve to break up any lumps and remove any solids.
- Mix 1 bucket of slurry with 2.5 buckets of sand.
Immediately before laying, you can add a little cement to the solution for strength (no more than 200 grams per bucket) and mix thoroughly.
Step-by-step instruction
Forming the base
In order for a brick-lined sauna stove to be strong and reliable, it is important to lay the foundation correctly. The strip foundation is considered the easiest to assemble and install.
To equip it, the wooden floor elements in the house are first dismantled, after which a trench is dug, the bottom of which is covered with a sand-crushed stone mixture. Everything is compacted well and watered. The next stage is concreting the foundation. For the strength and reliability of the structure, it is recommended to additionally lay a reinforcing mesh into the foundation before pouring it. The solution is then left to dry. Until the base is completely dry, further work is not recommended.
Preparation
Before constructing the protective apron, it is recommended to soak the lining brick for 12 hours. To do this, the required amount of material is separated, cleaned if necessary and placed in cold water. This event is necessary to ensure that the blocks do not absorb moisture from the solution during the formation of the order.
How to prepare brick mortar?
The installation of a metal furnace will be reliable if a cement-clay mixture is used as a masonry mortar. Both components are taken in equal proportions and diluted with water to obtain a creamy consistency. To mix the solution well and obtain a homogeneous mass, it is recommended to use a construction mixer. After mixing, you need to let the masonry mixture thicken, and then proceed directly to the masonry.
Bricklaying
In order for the apron to be reliable, it is important to correctly calculate the permissible distance between the brick wall and the iron body, because if the gap is small, the masonry will quickly crack and you will have to redo everything all over again. On average, it will take up to 15 orders to form a screen
It is recommended to divide the work into 2 stages: on the first day, form half of the rows, then leave the structure to dry until the morning. Then the rest of the masonry is done, the optimal row thickness is half a brick. The ordering scheme is presented in the table:
| Row | Description of work |
| 1 | The perimeter is completely laid with bricks, the row is started from the corner, with strict observance of evenness of laying |
| 2 | The wall is built up, reinforcement is carried out, air gaps are formed |
| 3 | Posted as 1st |
| 4—5 | A portal is formed for the firebox door and ash pan, |
| 6—8 | A metal corner is placed above the base of the portal |
| 9 | Can be stacked randomly |
Depending on personal preferences, you can arrange the arrangement with an arch at the level of the stove where the coals are located. This way the smoldering embers will be visible and you can admire them for a long time. You can also complete the arrangement by installing a round pipe in the bathhouse through which the smoke will come out. In none of the selected options, the step-by-step instructions for forming the order do not change.
11e848e1d3edc9508581e7ba9670a865.jpe b93bf8b1cfe8d748c9f00f0289d65ea6.jpe ca0a0831eef5a22c9c2b40b8d044df0d.jpe 4ee5b7901e5b4f12fd8d62f5 442bdc66.jpe
First heating
When the brick finish dries, and this lasts on average up to 2 weeks, it is important to put the device into operation correctly. To do this, 2-3 test fires are performed, during which a minimum of firewood is used
This will prevent excessive heating and cracking of the structure. In this way, it will be possible to safely dry wet areas, thanks to which the stove will serve reliably and for a long time.
Fire safety requirements
When installing any sauna stove, it is necessary to strictly comply with fire safety requirements, since the walls of the device heat up to fairly high temperatures during its operation. In order to ensure maximum safety and not have problems with regulatory organizations, it is recommended to install the stove in accordance with the provisions prescribed in SNiP 41-01-2003 (Chapter 6.6).
- The first thing that needs to be done is to equip a reliable foundation for the main structure of the stove, which will be adjacent to the wall dividing the room. The foundation should be covered with heat-resistant material and then with metal sheet. Asbestos sheets were previously used as heat-resistant insulation. Today on sale you can find panels of pressed mineral wool, which is less dangerous from an environmental point of view, sheets of foam glass or EZHKAKH (heat-resistant structural mica plastic).
- It is also necessary to provide a metal flooring in front of the combustion door, which will prevent the wooden floor from catching fire and simplify debris removal. The size of the pre-furnace sheet must be at least 400×800 mm.
- If the partition between the steam room and the dressing room is wooden, then the opening through which the fuel channel will pass must be separated from the wood by brick or stone masonry. The distance between the stove and wooden walls should be 400÷450 mm.
In the version shown, the owner chose to fill the opening with bricks
- Provided that an opening is installed along the end part of the wall through which the combustion channel will pass, a gasket made of heat-insulating material (mineral basalt wool or cement-fiber sheet) with a thickness of 40÷50 mm, the distance between the part of the wall built from combustible material and the outer wall oven can be reduced to 250 mm. If thicker thermal insulation material is installed, the safe distance can be 125 mm.
- The distance between the ceiling of the bathhouse and the surface of the stove should not be less than 1200 mm.
- The distance from the edge of the combustion door to the nearest door must be at least 1250 mm.
- If you purchased a non-factory-made stove, or the device is independently made from sheet metal, then it is best to cover it with brick. Thus, it is possible to protect the structure of the bathhouse from fire, and people taking water procedures from burns. Factory products, as a rule, are made with double walls, between which thermal insulation material is laid or convection channels pass through.
How to determine the required thermal power of a sauna stove?
A potbelly stove has a simple design and operating principle; installing a stove with your own hands, although difficult, is a possible process. During installation, follow the manufacturer’s recommendations, as well as fire and safety rules:
- The stove is installed no closer than 1 m from flammable surfaces made or lined with wood. The walls near the stove are insulated. The surface is covered with heat-insulating material, after which it is sheathed with a metal sheet. From the firebox door to the opposite wall or partition, leave a distance of at least 1.25 m.
- The base for the stove must be strong and non-flammable. The optimal solution is floors lined with ceramic tiles. If this is not possible or the potbelly stove is mounted on a wooden floor, make a cement pad.
- The chimney pipe is installed using fire breaks. When passing through the roof and floor slabs, cuttings are made with a mandatory insert of heat-insulating material.
For the stove to operate, a stable draft is required. The installation of the pipe should ensure stable traction characteristics.
Separate requirements stipulate how to position the stove in the bathhouse, depending on the layout of the room.
The location of the stove is important, determining the efficiency of heating the steam room. You will need to make a project with clearly marked ventilation ducts, sun beds, and sinks. The location of the stove should ensure comfortable and uniform heating of the room and reduce the cost of connecting the water supply and chimney.
Installation of a potbelly stove in a wooden bathhouse is carried out according to the following rules:
- The stove is installed opposite the front door.
- Fire distances to adjacent walls are maintained.
- Be sure to protect the ceiling where the pipe is installed. To properly start the chimney, you need to take into account that the horizontal sections should not be more than 3 linear meters, 2 corner couplings. The head of the pipe must rise above the level of the flat roof by at least 0.5 m.
- It is recommended that the storage container be located not far from the washing area, within 2-3 meters.
The metal, while heating the furnace, becomes red-hot. To prevent burns from accidentally touching the steel, the stove is lined. Any refractory material with good heat transfer is suitable for performing the work.
Facing is performed in several ways:
- Fireclay brick, specially designed for cladding and construction of furnaces. Has good accumulating properties. After heating, a brick made of fireclay clay takes a long time to cool down and gives off heat. The disadvantage of the solution is the unsightly appearance of fireclay. The lined stove is subsequently lined with ceramic tiles or stone.
- Red brick - both hollow and solid versions are suitable. The use of facing or facade building materials is not allowed, since when heated, its surface begins to delaminate.
To line a metal stove with bricks, use ready-made or self-made clay mortar. For tiling, special adhesives are used.
Each firebox increases the strength of the masonry. But the first 1-2 furnaces are not carried out at full capacity. Convection wells are provided in the brickwork to improve the circulation of heated and cold air communicating with the furnace.
Using a potbelly stove with a water heating tank has several advantages. The work is based on the heating of convection currents, which allows you to quickly and evenly warm up the steam room. At the same time, during the fire, the water for washing is heated.
The thickness of the furnace metal is at least 4-5 mm. Experience shows that with intensive use of a potbelly stove with a tank for heating water, the stove will last at least 5-7 years, after which it will require partial repairs or replacement.
Another advantage is the following design feature. The wood-burning stove is a Canadian-type potbelly stove, uses the principle of long combustion, and continues to operate on one load for 4-6 hours. One kindling of the stove will last for the whole day.
It is convenient to heat a bathhouse with a potbelly stove, since heat begins to flow into the steam room almost immediately. It will take about an hour to fully warm up the steam room.
A wood-burning stove for a bathhouse has several disadvantages that must be kept in mind during operation. The body gets very hot during combustion, which is especially noticeable in the door area. It is not recommended to overheat the stove; this can lead to deformation and sagging of the fire door.
In general, a potbelly stove is a good option for those who are looking for a universal stove that can create the microclimate of a sauna and Russian bath, after simply switching the levers and dampers.
The capriciousness of the cast iron stove design is associated with low mechanical strength, a tendency to punctures and the development of hidden cracks. A bathhouse, and especially a steam room, is a combination of a hot surface of stones, metal and water. Steel can withstand contrasting temperature changes in the heater relatively painlessly, brick does not like it, and cast iron stoves are catastrophically afraid.
Therefore, during installation you will need to solve several main problems:
- Correctly install the cast iron stove body on the foundation;
- Provide protection from water getting on the hot surfaces of the cast iron stove;
- Install the chimney pipe without loading the cast iron outlet pipe of the stove.
With its own weight of 150-200 kg, the cast iron body puts significant pressure on the wooden floors in the steam room. Therefore, when installing the stove, you will need to either make a concrete or pile foundation, or equalize the load on the logs so that the weight of the structure with the loaded heater is distributed over at least three beams.
Theoretical calculations show that with normal and correct production of the floor with a lag pitch of 60 cm, the strength of the underground beams is quite enough to install a stove even with a brick screen 10 stones high. To equalize the load, when installing under the legs of the housing, you will need to lay a clay-asbestos screed with a thickness of at least 5 cm.
The installation of cast iron in the steam room of the bath will need to be done according to a free scheme. This means that the supports of the cast iron body remain loose and can slide along the steel sheet when heated.
The furnace body is extremely sensitive to improper distribution of vertical load. Most often, a skew in the distribution of weight on the supports occurs when the chimney pipes are installed incorrectly.
Another mistake during installation is an attempt to compensate for the pressure on the body from the weight of the chimney pipes by transferring part of the force to the firebox tunnel. In this installation option, the tunnel body acts as an additional support, which is strictly unacceptable. The firebox in the tunnel must have a certain gap, sometimes air, but better filled with basalt wool. Otherwise, under the weight of the chimney pipes after heating, the firebox will be damaged or simply chipped.
When installing chimney pipes, it is important to prevent the load from the weight of the chimney outlet channels from being transferred to the outlet pipe of the housing. Therefore, when lateral exhaust of combustion products occurs, the chimney pipes are not suspended from the ceiling beam. The structure rests on a rigid support in the area where the outlet from the chamber connects with the rotary elbow of the chimney.
Beam fastening of chimney pipes is carried out in the form of a sliding clamp. In this case, experts recommend using cast iron flue pipes for the lower part of the chimney. Unlike steel pipes, they are much more durable and do not create bending forces and vertical loads, like brick or ceramic chimney options.
The vertical outlet from the cast iron body is unloaded in a similar way, using an additional support and a rotary elbow.
If the installation is carried out taking into account the basic recommendations, the service life of a good quality cast iron stove can easily reach 30-40 years. But often a cast iron structure is mistakenly considered to be very durable and reliable in any, even the most barbaric, manner.
In a steam room, especially if the heating circuit has an open heater design, it is almost impossible to prevent water flows from reaching the hot cast iron body past the stones. As a result, the firebox or outlet pipe may burst as a result of thermal shock. In addition to complete destruction or splitting, cracks may form through which some carbon monoxide begins to penetrate into the steam room.
Manufacturers of cast iron stoves are well aware of the shortcomings of their products, so in most cases they will offer you a bath heater made of cast iron, with a special lining or screens made of chromed steel. More expensive models may have lining made of chalcopyrite or jadeite, which protects the cast iron from water and improves the appearance of the structure.
Therefore, when installing simple structures, even imported ones, it is considered more appropriate to cover them with a thin screen, ¼ brick thick.
A cast-iron stove, covered with brickwork, with a firebox placed in the dressing room, turns out to be much more convenient and practical than a steel or brick one. Installing protection and maintaining thermal clearances allow the body to work in a bathhouse for decades without problems.
Sauna stoves with an external fuel channel can be made of cast iron or steel. The design of this device differs from a conventional furnace for heating a bath precisely in the presence of a remote firebox, which can be removable - in heavy cast iron versions of products, or have an integral structure - in steel models. Thanks to this configuration of the stove, the combustion chamber door is moved into the room adjacent to the steam room or even outside.
Moving the furnace firebox into the dressing room provides many advantages during operation:
- When the stove is fired, two rooms are heated at once - the steam room and the dressing room.
- It becomes possible to add firewood, constantly supporting the combustion process while the steam room is in use.
- Since there will be no need to open and close the firebox door from the steam room side, the stove can be protected with a safety barrier (brick screen), which will eliminate the risk of burn injuries during water procedures.
- Garbage, which is often brought into the room along with firewood, will not get into the steam room.
- It becomes possible to place a niche next to the firebox for drying firewood, which, of course, cannot be done in a steam room.
- It ensures that clean air is maintained in the steam room, since when the door is opened to add firewood, gaseous products of wood combustion can enter the room in small quantities.
- The absence of a firebox door in a steam room will significantly save the free space of the room, and so, as a rule, it will not be too voluminous. Therefore, it becomes possible to install the heating device in a convenient location on the wall dividing the room.
Base structure
Before laying brick over the unit, you need to thoroughly prepare and strengthen the base for it. Since metal structures are light in weight, they do not require a separate foundation for the furnace, but brick cladding will provide an additional load of tens of kilograms.
Not every floor covering can withstand such a mass. For this reason, before covering the boiler with bricks, it is imperative to dismantle the floor and arrange a separate foundation - columnar or monolithic.
Most often, a monolithic base is made. To do this, the floor under the stove is dismantled. The foundation parameters should be such that there is a gap of 10 to 15 centimeters between the future brick cladding and the metal body of the unit.
First, they dig a hole approximately 30 centimeters deep, pour crushed stone and sand onto the bottom, compact it, install reinforcement and fill it with concrete mortar. The foundation will harden in about 2 weeks.
To arrange a columnar foundation, pillars are installed at the corners of the facing box and in places of the highest load. The advantage of this base is that no drainage or waterproofing is required.
The sequence of actions during the construction of a columnar foundation is as follows:
- Markings are made at the corners of the furnace for mounting the pillars.
- Dig holes located strictly vertically, having a depth of about 50 centimeters.
- A 10-centimeter layer of sand is poured into the bottom of all holes and compacted.
- Prepare a solution of cement and sand in a 1:2 ratio; it should have the consistency of thick sour cream.
- The solution is poured over the layer of sand in a 10-centimeter layer. Crushed stone or brick chips are added to it.
- After hardening, brick pillars are laid out so that they rise 7–10 centimeters above the floor.
- Install the lower trim beam. The most reliable way would be to lay the channel around the perimeter and weld the edge.
The use of concrete pillars is allowed. You can make sure that they are vertical using a building level.
The method of constructing the base depends on whether it already exists and what kind it is. It also depends on whether you are covering an already connected and operating stove or installing it and covering it at the same time.
If you have already poured a solid concrete foundation with a thickness of 20 cm or more, it will most likely withstand the expected load. In this case, you can line the iron stove with bricks immediately, without preparatory work.
If there is no foundation for the furnace, it is recommended to pour a solid reinforced concrete base. Its area should be larger than the cladding area. When calculating it, keep in mind that the distance from the metal body to the brick walls is assumed to be 8-10 cm.
The foundation is being prepared in stages:
First, you need to dig a hole 30 cm deep in the ground, fill it with sand, crushed stone, broken bricks and compact this pillow;
Installation of crushed stone cushion under the base
- Then, along the perimeter of the pit, formwork is built up to the level of the floor in the combustion room;
- A concrete mixture is poured into it, which is reinforced with metal mesh or rods;
Poured base for stove and cladding
- The concrete base must be allowed to dry for 2-3 weeks;
- After which it is covered with roofing felt and a brick platform one or two rows high is laid on top of it.
The brick base is laid on a layer of waterproofing. A common picture is that it is necessary to cover an already working stove with bricks
This is possible if the wooden flooring is able to withstand the additional load from the brickwork. To verify this, the floor must be disassembled and the joists inspected. To do this, the stove will still have to be temporarily dismantled by disconnecting it from the chimney.
ffcaa0f9f1b6b9a8cdc29457b0afc02c.jpe
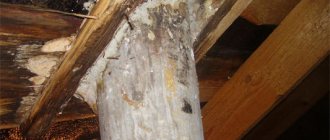
After opening the floors, inspect the joists.
They must be dry, without signs of damage or rot, and the distance between them should not exceed 60-80 cm. If it is larger, another support with a cross-section of at least 10-15 cm must be laid in the place where the stove is installed.
The distance between the logs and their cross-section must be such as to withstand the load from the furnace
The floor boards themselves should be dry and strong, and their thickness should be no less than 30-40 mm.
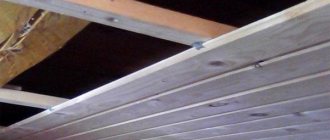
After the inspection and reconstruction of the wooden base, first a metal sheet and then a fire-resistant material such as asbestos cardboard are laid on the floor according to the markings and secured with self-tapping screws. And a brick foundation is already laid on it.
Part of the stove and brick walls will rest on a wooden floor - we cover it with fireproof material
Foundation arrangement
Now on the Internet you can find many drawings, photos, and plans for building a foundation for lining a stove in a bathhouse with bricks. What is this building?
The foundation is made in the form of a quadrangular well, the height of which is equal to the height of the furnace. To cover the metal walls, use solid or masonry with windows, through which not only fuel is thrown in, but also ventilation around the heating surface is enhanced.
According to experts, wooden floor beams can withstand up to 650-700 kg of load. Although practically, it is not recommended to give a load of more than 400 kg per 1 m². Therefore, it is advisable to further strengthen the existing frame with an iron structure from an angle (50 mm), or screw piles, provided that approximately 180-200 bricks weighing 3.5 kg each will be used for the screen.
Foundation construction algorithm
- Cut a square of a certain size in the floor (if it is already installed), dig a pit approximately 35-45 cm deep.
- Fill the bottom with coarse crushed stone, lay waterproofing, and install formwork.
- Place pieces of reinforcement in the foundation frame, apply the required amount of mastic waterproofing, and fill the structure with concrete approximately 15-20 cm above the ground.
- Bring the “pillow” to the floor level with ordinary bricks, on which the stove and lining will be placed.
- Wait about 3 weeks until the concrete shrinks, then lay thermal insulation and steel sheet (3-5 mm thick) under the stove.
Preparation of the solution
In order to properly line an iron stove in a bathhouse, it is best to use a classic clay-sand mortar. You can add a small amount (about a sixth) of grade 400 cement to it. This ingredient can only strengthen the entire structure, since the temperature of the future screen will not be high enough.
Since little clay is required, it is best to buy it at a building materials store. For rural residents, such a problem as purchasing clay should not exist.
To prepare the solution, you need to take sifted sand and mix it with clay in equal proportions. Add water gradually until you get a thick mixture that can easily slide off the trowel.
What other materials are used to line a sauna stove?
It turns out that not only bricks can be used to line sauna stoves. Granite or marble slabs are an excellent substitute. They also tolerate temperature changes well, have a large mass and high thermal conductivity. In addition, such finishing will give the bath room an unusually beautiful and unique look. Not everyone can afford such luxury, from a financial point of view. But if you have some leftovers, you can use them to build a stove partition.
True, the installation of such slabs is a little more difficult in comparison with brickwork. To ensure a beautiful appearance of the lined stove, it is necessary that the work be carried out by a specialist. At the very least, the owner needs to at least consult with such a person.
Minerite slabs are also used to construct a heat shield. With their help, the wall is mounted much easier and faster, even in comparison with masonry, and is able to withstand temperatures of 360-400⁰C. But the heat capacity of this material is low, so it can be used as a good partition that will not be able to accumulate heat.
Technologies
There are several proven technologies for bricklaying around metal furnace equipment:
- Heat shield. A brick fence that does not exceed the dimensions of the furnace in height. Promotes better heat transfer.
- Continuous cladding. It quickly releases heat to the surrounding space, which increases the cost of heating the premises. This technology is used when it is necessary to make a beautiful decorative design, sacrificing the performance of the furnace equipment.
- Convector masonry, which has vents. Suitable for metal heating units. In this case, the size of the steam room is not important.
Cast iron stove lining
The advantages of this solution
A metal stove heats up very quickly, but cools down just as quickly. In order for the temperature in the bath to be comfortable, it must be constantly heated during washing. And this is an extra consumption of firewood or other fuel.
In addition, the heat from the hot metal is too dry, and it is easy to get burned on its surface and cause serious injury.
Hot metal walls are a common cause of burns
But if you line an iron stove with brick, these disadvantages disappear, but significant advantages appear.
Namely:
- Long and uniform heat transfer, since the heated brick cools down slowly;
- Reduced fuel costs, the price of which is of particular importance if the stove heats the house and is heated daily;
- The heat from such a stove is not sharp and scalding, but soft and pleasant;
- It's much safer to be around her;
- A lined potbelly stove looks much more aesthetically pleasing;
Homemade potbelly stoves made of ferrous metal especially need finishing
Covering a metal stove with brick is much easier than laying a fireplace with a chimney, and it will cost less.
Today, a metal stove in a bathhouse is already a standard equipment, without which it is difficult to imagine the wellness procedure beloved by many. Compared to other types of ovens, it has a number of advantages:
- Easy to install. It is easy to make with your own hands.
- Easy and simple operation.
- It melts quickly.
- Has good traction.
- High performance.
- Economical in fuel consumption and affordable in price.
But in order to really appreciate all these advantages to the maximum, you need to learn how to use it correctly!
Oven in the steam room
No one, of course, would argue that a stone stove is ideal for a bathhouse. But it needs to be heated for at least 5 hours so that it really begins to give off its heat, imagine how much firewood will be consumed during this time. And this, in turn, does not suit everyone. And the price of a brick building will be many times higher than that of a metal stove lined with stone.
Air mass movement pattern
In addition, in order to build a brick stove for a bathhouse, you need to have the basic skills and knowledge of a stove maker, since in this design you need to take into account many nuances that are invisible, but play a decisive role!
Brick oven
A metal stove can be bought ready-made, and the lining will not entail large financial expenses.
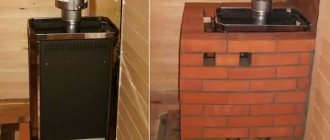
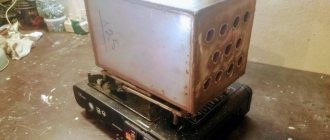
Metal stove without brick lining
What necessary parameters should a metal sauna stove have?
- It should have small dimensions so as not to clutter up the space.
- You should not choose too high a power, since the sauna room is usually small. It will be difficult to control the optimal temperature.
- The characteristics of the stove must strictly comply with fire safety regulations.
In addition, it is necessary to take into account the location where the stove is located. According to SNiP standards, the metal unit must be located at a distance of at least 15 cm from wooden floors.
95bb0a6a0ae6834cc7092d91d0c2ddad.jpeSauna stove
Finishing
The solution may take time to set, so it is better to wait 2-3 days. Finishing involves cleaning the brick from the mortar and giving it a uniform shade.
It is more convenient to remove excess solution using a drill with a brush attachment. The work is dusty, so use a respirator and goggles.
After cleaning, stains of uneven color may remain on the bricks. To even out the shade, use a solution of laundry soap and water and a hard, dense brush. After this, the brick “coat” is washed with water. The result is a beautiful shade without blemishes.
Carry out the first fire after lining slowly, allowing the brick to gradually absorb the heat.
That's probably all. I think that you will feel the comfort of a lined stove right away. The heat will become more balanced, and the heat source will delight you with a pleasant view and pleasure from independent work.
Subscribe to the blog for updates and stay up to date with all articles. Good luck and soft steam to your bathhouse! See you!
Wisdom Quote: The greatest happiness in life is the confidence that you are loved (Hugo Victor Marie).
Since ancient times, people have used the bathhouse to cleanse the body and soul . The bathhouse has always been used not only for purely hygienic purposes, but also provided an opportunity to relax with friends and unwind after a hard day at work.
The fate of any bath structure directly depends on how correctly the steam room stove . It is not entirely comfortable to be in a weakly heated bathhouse, but in an overheated one it is sometimes even dangerous to health. The role of the stove in the bathhouse is no less important than heating the living space in the house. The effectiveness of all bath procedures depends entirely on how quickly the stove can heat up and how long it can retain heat.
Insulation methods
There are several techniques that allow you to reliably insulate wooden structures from the heat of the stove. Some of them involve a fairly large amount of work, while others are much simpler.
- Creating a protective box from brick or stone.
- Installation of a special industrially manufactured screen.
- Creating a protective structure with your own hands from non-combustible materials.
The construction of a box made of brick or stone will require the most time - it will be necessary to lay out several walls that will protect the wood from heat. In addition, this protection option requires a gap between the wood and the brickwork from 5 to 15 centimeters. There should be about 10 centimeters between the casing being built and the walls of the stove. All this eats up useful space and requires some mason skills to work on.
Factory screens are installed quite simply and are not that expensive. They could be an ideal solution if they did not require even larger technological gaps between different surfaces. Therefore, such finishing of the wall near the stove is possible only in a fairly spacious bathhouse. If you need to save space, it is better to look for another solution that allows you to reduce all the gaps from wooden partitions.
The third option allows you to reduce distances to 15 centimeters, which is already more acceptable
At the same time, this method allows you to create the most beautiful design, which is important. However, there will be a lot of work and the costs in this option may be much higher than in the previous ones. In addition, this insulation method requires a more detailed consideration due to the features of the assembled structure
In addition, this insulation method requires a more detailed consideration due to the characteristics of the assembled structure.
Surface marking
It must take into account the “backlog” for the brickwork.
Before laying the first row, you need to measure the distance from the walls of the stove to the bricks. By the way, if you bought a factory-made stove, then the installation instructions should indicate the tolerances for the gaps necessary for air circulation between the stove and the masonry. The approximate range is 5-10 cm. This is an important point that determines the efficiency of heat transfer.
Advice. If the oven is factory-made and equipped with a convection protective screen for the oven (casing), it is recommended to remove it. Now, this brickwork function.
The advantages of this solution
Below is a list of the advantages that this design has:
- Even heat distribution. This is due to the fact that the brick first accumulates energy and then releases it into space.
- The presence of pleasant warmth instead of scorching heat. There is always humid air in the room due to the fast and efficient heating of the stones.
- Long-term preservation of high temperature. Brick is a natural accumulator of thermal energy. That is why you can heat the sauna well and steam there for several hours, without thinking about additionally increasing the temperature or adding fuel again.
- Ensuring safety while in the steam room. Hot metal poses a certain danger: the possibility of accidental burns upon contact with the walls of the tank. The lining of the sauna stove with bars acts as a barrier that protects against extreme heat and sudden injury.
What kind of brick is best to line a stove?
As always, the start of work is preceded by the selection of suitable material. It must be said that when constructing such small structures, homeowners tend to use materials available on the farm or their remains from previous construction. This desire is quite understandable, so we will approach the selection of bricks from the same point of view. So, there may be remains of bricks in the household:
- silicate;
- fireproof (fireclay);
- red hollow;
- red ceramic solid.
Let's go in order. Sand-lime brick based on a slaked lime binder is very durable and tolerates various environmental conditions well, which is why it is an excellent cladding material for houses. But lining a metal stove with lime-based bricks is a useless option.
Lime material is not suitable for the temperature range at which the sauna stove operates, and yet there is still high humidity in the room. In such conditions, sand-lime brick will begin to collapse quite quickly. In addition, it is heavier than red brick and requires mandatory cladding, since its original appearance will not fit into any interior.
Fireclay stone is suitable in all respects for the construction of a heat shield. It is not afraid of temperature changes, the weight and heat capacity of the brick is almost the same as that of a red stove brick. The situation is worse with the appearance; not every homeowner will like it inside the house or bathhouse. But the solution here is simple: the stove is lined with porcelain stoneware or other material.
If you take any red brick, then this is what you need for a heat shield. Of course, the best option is a solid stone, but a hollow one will also work quite well. True, it will not retain heat for a long time, since it does not have such massiveness and heat capacity as a solid stone.
It must be said that lining a metal stove with brick allows the use of both standard stone sizes 250 x 120 x 65 mm and thicker ones 250 x 120 x 88 mm. The quantity depends on the height of the heater and the type of masonry; as a rule, it is done in the usual way, half a brick. You can put the partition in a quarter of a stone, but then you will need to take additional measures to strengthen it and bandage it, which complicates the process.
Types of bricks
To choose the right material, you need to take into account certain nuances. An iron stove heats up significantly during operation, so it is recommended to choose one of the following types of bricks:
- Refractory. This material is the most optimal in terms of operation, however, it is also the most expensive. This is the most preferred type of brick.
Refractory brick is best suited for cladding, but it is expensive Source selmo.com.ua
- Silicate. It is not recommended to use an iron stove for cladding, since the components included in the composition react poorly to elevated temperatures. Therefore, already laid brick needs additional finishing.
Sand-lime brick is not often used for finishing, but it is the most budget option Source ytimg.com
- Red . Due to its high heat resistance and excellent thermal performance, this brick is often chosen for organizing a screen. Solid products are considered the best option, while hollow bricks are not recommended because they both heat up quickly and cool down quickly. This material has an attractive appearance and, when installed correctly, can decorate the interior of a bath room.
Attention! If wooden elements are located near the brickwork, they must be treated with protective compounds to prevent the surfaces from spontaneous combustion.
Red brick will be an ideal solution for finishing a stove Source t-spectr.ru
See also: Catalog of companies that specialize in the design and installation of fireplaces and stoves