Metal stoves, which are most often used in steam rooms, pose a threat to humans. At a minimum, the lack of protection leads to discomfort for vacationers. A protective screen for the stove makes bathing procedures safe and allows you to regulate the temperature in the room.
There are several options to solve the problem associated with the high temperature of the heat generator. In some cases, additional protection is not needed at all - a certain category of stove models is already shielded. In other cases, the optimal solution is to use brick protection.
When bathhouse walls need to be protected from fire
The distance between the stove and the nearby wall should be safe, that is, it should be enough so that infrared rays have less of an impact on the surface and a fire does not break out in the bathhouse.
Extract from SNiP III-G.11-62
Recess width and method of insulation of walls and partitions
The safe distance between the sauna stove and the walls is determined on the basis of fire safety standards SNiP III-G.11-62 for the operation of stoves installed in rooms with walls or ceilings exposed to fire:
- for stoves laid in 1 brick and walls protected with lime or lime-cement plaster, a layer of 25 mm, or brick cladding on asbestos or clay 40 mm thick - no less than 13 cm;
- for stoves laid in half brick and walls protected with lime-gypsum plaster, a layer of 25 mm or asbestos-vermiculite slabs with a thickness of 40 mm - no less than 320 mm;
- for metal stoves protected by heat-resistant, fire-resistant, fireproof coating and walls protected by 25 mm lime-gypsum plaster - no less than 700 mm;
- for metal stoves that do not have heat-resistant, fire-resistant, fireproof coatings and walls protected with 25 mm lime-gypsum plaster - no less than 1000 mm.
Fireproof distances
Installing a stove in a bathhouse + screen
Safe distances for factory heater stoves can be clarified in the product data sheet
Based on SNIP 2.04.05-91, a safe distance is established from the top of the stove to the ceiling:
- with a ceiling that is protected by a steel sheet 10 mm thick, laid on asbestos cardboard or plaster laid on a steel mesh and covering the stove with 3 rows of brick - no less than 250 mm,
- with a protected ceiling and a thermally insulated ceiling of the top of the metal stove, no less than 800 mm,
- with an unprotected ceiling and a stove with an overlap of 2 rows of bricks - no less than 1 m.
- with an unprotected ceiling and non-thermally insulated ceiling - no less than 1.2 m.
Fireproof installation of a heater in a bathhouse
Protective brick screen diagram + dimensions
It is clear that a safe distance of 1 m between the stove and the wall can only be ensured in bathhouses with a large area. In private baths with a small area, every centimeter of usable space is saved, so the stoves are placed at a short distance from the walls, and to protect against heat, a brick screen is built or metal sheets are used as cladding, as well as other non-combustible materials that significantly reduce the permissible safe distance.
Schemes for installing a stove in a bathhouse and SNiP recommendations
Burning
This is the easiest way when you need to remove insulation to transfer wires. This is also the most effective method if the inside is made of polyvinyl chloride. When a small area needs to be treated, use a lighter or soldering iron. Under thermal influence, the winding softens and it simply comes off the wire. If the winding thickness is small, this option is the most effective.
There is one drawback - it has a smell. Therefore, work must be carried out in a room with access to fresh air. Toxic emissions during the firing process negatively affect the body.
Which method is better to choose?
The finishing of the wall from the stove for different types and sizes of baths is used in different shapes and materials. The main thing is to ensure the fire safety of your steam room and protect the walls from deformation at high heating temperatures.
Otherwise, everything depends on the capabilities and desires of the steam room owners. You can use heat-resistant tiles or expensive tiles, or you can simply cover the walls and ceiling with mineral wool and a layer of metal foil. By leveling the walls with sheets of plasterboard with surfaces not exposed to open fire, you can paint the steam room with heat-resistant paint using Minerita.
If the bathhouse is large, you may not need to perform this work if the conditions of SNIP and fire safety are met. By making the concrete base larger in size than the stove and maintaining a gap of 1 m to the walls, you can safely use the heater and enjoy the steam
In any case, it is important to take care of safety and then your sauna will serve you for a long time
Finishing
The solution may take time to set, so it is better to wait 2-3 days. Finishing involves cleaning the brick from the mortar and giving it a uniform shade.
It is more convenient to remove excess solution using a drill with a brush attachment. The work is dusty, so use a respirator and goggles.
After cleaning, stains of uneven color may remain on the bricks. To even out the shade, use a solution of laundry soap and water and a hard, dense brush. After this, the brick “coat” is washed with water. The result is a beautiful shade without blemishes.
Carry out the first fire after lining slowly, allowing the brick to gradually absorb the heat.
That's probably all. I think that you will feel the comfort of a lined stove right away. The heat will become more balanced, and the heat source will delight you with a pleasant view and pleasure from independent work.
Subscribe to the blog for updates and stay up to date with all articles. Good luck and soft steam to your bathhouse! See you!
Wisdom Quote: The greatest happiness in life is the confidence that you are loved (Hugo Victor Marie).
Where to put the stove in the bathhouse?
The location of the stove depends on many factors, in particular, on its type, as well as on the location of the firebox (in the same or in an adjacent room). In addition, fire safety is important - there should be at least half a meter from all fuel.
So, those who decide to install a brick oven make a foundation for it, so the location is already determined at the sketch stage. But with a metal stove, sometimes people delay until the last minute, not knowing which model to buy. Therefore, it happens that already finished walls have to be cut and other unnecessary work done.
IMPORTANT! The location of the supply ventilation depends on the location of the stove, so it’s better to think in advance. In addition to ventilation, it is worth thinking about fire safety, especially in a bathhouse with flammable walls
Often, in order to provide it, part of the wall is made of brick. Which again speaks to the need for planning.
In addition to ventilation, it is worth thinking about fire safety, especially in a bathhouse with flammable walls. Often, in order to provide it, part of the wall is made of brick. Which again speaks to the need for planning.
The location of the stove in a bathhouse with a separate steam room
There can be two options:
- or the stove, together with the firebox, is located entirely in the steam room, which means it only heats it;
- or the firebox is moved to the adjacent room, which allows for partial heating of that room too.
The location of the stove in a bathhouse with a separate steam room: option with a firebox from the rest room. Diagram from the article about the hood
In the first case, during the cold season you will have to think about how and with what to heat the neighboring rooms, in the second - the same problem remains only partially.
Stove in a bathhouse with washing and steam room
Here you can also find several solutions. The firebox can be taken not to the rest room or dressing room, but to the washing room. But this is problematic from the point of view of storing firewood. Therefore there are other options.
Stove in a bathhouse with washing and steam room
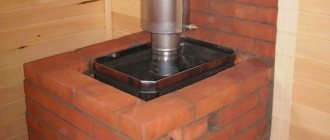
You don’t have to remove the stove at all, just install a water tank on top, which will be connected through the wall to the “samovar” on the chimney pipe in the steam room. “Samovar” is a heat exchanger (!stoves with a heat exchanger are reviewed here), which can be found on sale; with its help, water for the washing room is heated, and from the tank there is heat sufficient to maintain a normal temperature of 30-32 degrees in the washing room.
In some cases, the problem is solved by additional heat sources - a warm floor or a second stove.
Video
The following video shows an explanation of the diagram shown above:
Is a foundation always needed for a furnace?
We already said above that no, it is not always needed. The need for it arises only when the weight of the sauna stove with everything associated (from the water tank to all the bricks that line the floor, stove and chimney) exceeds 700 kg. If the total weight is lower, you can simply lay the base with bricks instead of a foundation, put 12 mm asbestos on top, and on top of it - a steel sheet of any thickness (from 1 mm). The topic is discussed in detail here.
IMPORTANT! A separate foundation for a brick oven is made so that it has its own shrinkage, not related to the shrinkage of the house. Such a foundation is made thoroughly, deepened to the load-bearing layer
If the stove weighs more than 700 kg, but not much, then you can make a shallow foundation
Such a foundation is made thoroughly, deepened to the load-bearing layer. If the stove weighs more than 700 kg, but not by much, then you can make a shallow foundation.
Usually the foundation for the furnace is not brought up to the height of the subfloor, because then the bricks are laid and the height is compared. The area of the stove foundation should be 15-20 cm larger than the area of the stove base on each side.
The video below clearly demonstrates the process of pouring a foundation for a bathhouse yourself. The video is a little dark, but it gives you an idea of the process.
Foundation arrangement
Now on the Internet you can find many drawings, photos, and plans for building a foundation for lining a stove in a bathhouse with bricks. What is this building?
The foundation is made in the form of a quadrangular well, the height of which is equal to the height of the furnace. To cover the metal walls, use solid or masonry with windows, through which not only fuel is thrown in, but also ventilation around the heating surface is enhanced.
According to experts, wooden floor beams can withstand up to 650-700 kg of load. Although practically, it is not recommended to give a load of more than 400 kg per 1 m². Therefore, it is advisable to further strengthen the existing frame with an iron structure from an angle (50 mm), or screw piles, provided that approximately 180-200 bricks weighing 3.5 kg each will be used for the screen.
Foundation construction algorithm
- Cut a square of a certain size in the floor (if it is already installed), dig a pit approximately 35-45 cm deep.
- Fill the bottom with coarse crushed stone, lay waterproofing, and install formwork.
- Place pieces of reinforcement in the foundation frame, apply the required amount of mastic waterproofing, and fill the structure with concrete approximately 15-20 cm above the ground.
- Bring the “pillow” to the floor level with ordinary bricks, on which the stove and lining will be placed.
- Wait about 3 weeks until the concrete shrinks, then lay thermal insulation and steel sheet (3-5 mm thick) under the stove.
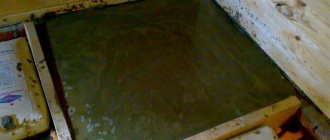
Preparation of the solution
In order to properly line an iron stove in a bathhouse, it is best to use a classic clay-sand mortar. You can add a small amount (about a sixth) of grade 400 cement to it. This ingredient can only strengthen the entire structure, since the temperature of the future screen will not be high enough.
Since little clay is required, it is best to buy it at a building materials store. For rural residents, such a problem as purchasing clay should not exist.
To prepare the solution, you need to take sifted sand and mix it with clay in equal proportions. Add water gradually until you get a thick mixture that can easily slide off the trowel.
What other materials are used to line a sauna stove?
It turns out that not only bricks can be used to line sauna stoves. Granite or marble slabs are an excellent substitute. They also tolerate temperature changes well, have a large mass and high thermal conductivity. In addition, such finishing will give the bath room an unusually beautiful and unique look. Not everyone can afford such luxury, from a financial point of view. But if you have some leftovers, you can use them to build a stove partition.
True, the installation of such slabs is a little more difficult in comparison with brickwork. To ensure a beautiful appearance of the lined stove, it is necessary that the work be carried out by a specialist. At the very least, the owner needs to at least consult with such a person.
Minerite slabs are also used to construct a heat shield. With their help, the wall is mounted much easier and faster, even in comparison with masonry, and is able to withstand temperatures of 360-400⁰C. But the heat capacity of this material is low, so it can be used as a good partition that will not be able to accumulate heat.
Types of structures
To begin with, it is necessary to say that there are two types of similar structures that have a similar purpose and at the same time can perform different additional functions. Modern protective screens for sauna stoves quite often combine several different materials and are made in accordance with the design of the stove.
Taking into account these features, the craftsmen try to combine all the properties of similar products in order to achieve maximum results.
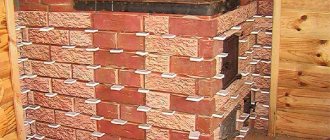
Full brick lining will allow for insulation around the entire perimeter of the device
Brick walls and trim
- Very often when creating ovens with their own hands, craftsmen resort to creating brick screens.
- Usually this is a partition that separates the metal product from the walls. It prevents the spread of infrared radiation to wooden surfaces and protects them from high temperatures that can lead to fire.
- The installation instructions also advise installing such structures between metal sauna stoves and the place where people will be. So intense radiation will heat the partition, which will play the role of an additional heater. However, it is worth remembering that when using a simple wall, you should leave a small air space.
The simplest brick partition can become an excellent screen
- Some craftsmen suggest immediately framing the entire sauna stove with a wall of brick or stone so that it can perform both tasks simultaneously. This way the structure will protect the walls of the room and prevent intense radiation from getting outside.
- It is worth noting that the screen for the sauna stove does not need to be used if the structure already has its own lining. This also applies to brick stoves, which actually themselves represent a firebox with thermal protection.
- For the manufacture of such structures, only red ceramic bricks or other materials with similar properties are suitable. The fact is that it tolerates moisture well and can withstand large temperature changes. Some craftsmen use special stones for this, which have low thermal conductivity and at the same time retain heat well.
Some craftsmen recommend simply sewing up the entire stove, which will give it a good appearance and help additionally retain heat.
Reflective surfaces
- Quite often, craftsmen recommend using a stainless steel screen for a bath. It should be noted that this metal must be perfectly polished and reflect infrared radiation.
- Such systems are usually used on back walls near stoves. They protect the surface from intense heating and at the same time redirect the heat inside the room. This allows you to reduce the cost of kindling and maintaining the regime.
Polished stainless steel screens
- Such heat-resistant screens for sauna stoves work very effectively even with brick stoves or when combined with stone partitions.
- Some manufacturers, making structures for heating baths, actively use them to improve the technical characteristics of their products. At the same time, professional craftsmen prefer to additionally mount bath screens made of stone or brick so that they absorb all the radiation, converting it into normal heating.
Screens with reflective surface
- Special attention is due to the fact that the metal also gets very hot and, if it comes into contact with wooden surfaces, can lead to a fire. That is why it is best to protect such a screen for a bath on the reverse side with heat-resistant material or create a small air gap.
- Quite often on sale you can see screens made of metal with a matte surface. Their price may be several times less, but they are less effective, and professional bath attendants claim that such screens are generally useless and only take up extra space.
- It is worth noting that such structures require periodic maintenance, since plaque and stains appear on them over time. To do this, they can be wiped with a special detergent or lemon juice.
Factory product made in the form of a fence
Types of partitions
Depending on the functional purpose and configuration, screens are conventionally divided into the following types:
Brick protective screen for the furnace.
- Protective partitions. Protect people from direct exposure to radiant heat.
- Fire screens. They are built between a wooden wall and a stove in accordance with the requirements of regulatory documents.
- Decorative. They are made in the shape of a semicircle or in the form of arched vaults over steel stoves made of pipe.
A fire screen is in any case necessary for fencing wooden structures, even when the sauna stove is equipped with a metal casing. The rules allow the use of ordinary sheet metal for this purpose, but a brick partition will look much more aesthetically pleasing.
Covering homemade heaters of various designs with bricks is a way to successfully cover them, since such products do not shine with beauty. If the heat source is welded from a vertical pipe, a circular screen can be built around it. A brick arch is built above the horizontal pipe.
How to secure a bathhouse
In order to make the walls of the steam room fireproof, special cladding materials are used.
They not only reduce the intensity of the impact of infrared rays on the structure of the building, but also prevent fire.
Without fail, the height of the casing must be at least 120 centimeters above the surface of the heating device.
There should also be a small gap between the sheathing and the wall surface, usually no more than three centimeters.
Also, do not forget about the technical gaps that should be located at the top and bottom of the skin; they will ensure uninterrupted air convection.
Why and when is a protective screen required?
Heat from the stove is transferred to people and surrounding objects in two ways:
- through air; when heated, the air transfers the generated heat;
- through infrared radiation.
Only the first option is suitable for people - it is safe and comfortable. When taking bath procedures, you can always easily and quickly increase the temperature in the steam room. It is enough to moisten the stones. But, unfortunately, we also have to deal with infrared radiation. The latter is characteristic of all heated objects.
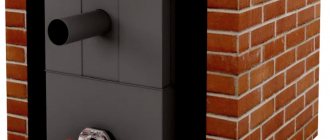
The temperature of the sauna stove reaches 300-400 degrees and higher. At such a high temperature of the metal walls, a powerful stream of infrared radiation is formed, which can lead to burns. The problem is especially relevant for small home baths, where there is nowhere to hide from the negative flow.
Mid-price ovens are in many cases equipped with metal convection protection. Expensive models are shielded with ceramic or stone cladding, which also plays a decorative role. But inexpensive and “handicraft” models almost never have thermal insulation.
Brick (or, less preferably, metal) protection is required in such cases:
- when the body of a freestanding metal stove is not covered with anything;
- if the factory shielding is made poorly and does not protect well from thermal radiation;
- if the heat generator is equipped with casing, but is installed too close to a wall made of flammable materials; Since most often the walls in steam rooms are wooden, providing protection is necessary in most cases.
Situations where sauna stoves are made entirely of brick are rare. Such structures take up a lot of space and therefore require large premises. Much more often we deal with small-sized steam rooms, for which the described situations are true.
Carrying out masonry
Covering the oven
How to properly line a sauna iron stove with bricks? When covering a stove in a steam room, you should assume that the masonry is made in half a brick. To ensure air access, at least two holes the size of half a brick must remain in the second row of laid bricks. When carrying out the work, you should also remember that it is necessary to leave holes both for storing firewood and for accessing the ash pit. The size of the holes must ensure that the corresponding doors open freely.
Having brought the masonry to the upper edge of the door, corners should be installed on the outside and inside. They will provide support for the next brick rows and ensure uniform distribution of the load of the bricks laid on top.
During work, you can periodically leave holes to allow air circulation.
In its upper part, the masonry can remain open. In this case, the last row is laid out according to the level of the water tank. It is possible to construct a vault and cover a metal pipe with bricks only for purely decorative purposes. The work of arranging the masonry is much easier to complete if the masonry on top does not overlap
This is especially important for those who have to do such work for the first time.
Calculation and dimensions
Before starting finishing work, you need to mark the location of the portal, figure out what shape it will be, and where the individual elements will be fixed. To calculate the amount of brick, you need to know the size of the portal for the stove to the bathhouse. Calculation order:
- Calculate the area of the masonry.
- To the resulting value add 2 rows of bricks, which will be the base.
- Divide the total area of the masonry by the area of the sides of one brick.
- Add 10% of the resulting value to the calculated area.
Depending on the size of the stove and the owner’s wishes, the portals can be vertical or horizontal.
Vertical portal
Tiles
Finishing the stove in a steam room is often done with a special type of slab. They are called tiles. The technology for producing such material is inexpensive. At the same time, the appearance of the finish is spectacular. This material may have the appearance of a thick tile on the surface. However, this effect can be achieved by using tiles without a pattern.
However, much more popular are the materials of this group, which have three-dimensional patterns on the front surface. Such tiles are laid using the same technology as regular tiles. However, the thickness of the finishing layer in this case will be greater. This material is also used to finish part of the floor and wall near the stove.
A special feature of such tiles is the need for correct selection before installation. Each finishing element must be selected according to color. The tiles are compared to each other by shape and shade of glaze. If necessary, uneven edges are sanded before installation. The end result should be a smooth portal. It will become a real masterpiece.
Features of installing a brick screen yourself
Such protection for a metal stove is arranged in compliance with certain requirements to ensure the efficiency of the design.
Material selection
For masonry construction, it is recommended to use solid material that does not have void areas. The need for bricks is determined taking into account the size of the furnace and the additional area around it. You should also take into account the base for the stove, which will take from one to two full rows of bricks. If you plan to cover the stove on top and remove the chimney, this is also taken into account in the calculations. And lastly, decide how you will lay the bricks - half a brick or a quarter. All that remains is to make simple mathematical calculations and add a reserve stock of five to ten percent.
In order for the masonry to turn out to be of high quality, it is necessary to choose the right solution. Most often, ready-made masonry mixtures are used for arranging stoves, which are purchased at construction stores. They contain all the necessary components to maintain the integrity of the masonry during high heat. There is a second option - a clay-based solution.
Masonry mixture for arranging stoves
In addition, you will need a sheet of heat-resistant and waterproofing material, which will be laid under the base. As a rule, ordinary roofing material is used for these purposes.
If you plan to install an upper vault, prepare metal corners for the lintels along which the masonry will be laid.
Preparation and strengthening of the foundation
The base is first prepared, which must be sufficiently rigid and non-flammable. Roofing material is spread on the surface of the concrete screed, the base is laid out in one or two rows, which is given time to dry completely.
If the floor is wooden, you will have to dismantle some of the boards to build the foundation. In this case, part of the soil is removed, a cushion of sand and crushed stone is installed, formwork is installed and a concrete screed is poured over the reinforcement frame.
Stages of constructing a brick screen
The algorithm of actions is as follows:
- We are preparing a container for water in which we will soak the bricks for about thirty minutes,
- We mark using strong thread or fishing line. We will lay the masonry along this line,
- mix the required amount of mortar mixture,
- cover the heater with polyethylene to keep it clean,
- We start the row from the corner section, check the evenness of the laying of each stone, trim them, remove excess mortar. It is necessary to ensure that the suture areas are the same - within 7 mm,
- we start the second row from the same point as the first, but we start it with half a brick,
- When driving the third row, do not forget to leave a couple of holes in it for air circulation,
- the next five rows are displayed solid,
- When working near the fire door and ash pan, you must ensure that the bricks do not subsequently interfere with the opening of the doors,
- in the top rows we again leave a couple of holes,
- To make the screen attractive, we perform cross-linking.
The process of lining a metal furnace with bricks
The entire process of lining an iron stove can be divided into several stages.
Stage 1 Foundation
The most important stage of any construction is the installation of the foundation. The durability and strength of the entire structure depends on the quality of its installation. If during the initial construction a foundation was made for the stove, then in order to cover the metal firebox you will not need to construct a new foundation. But if you are unsure of the strength of the old foundation, you need to take the time to build a new foundation, since the weight of the entire structure will increase significantly. If the total weight of the entire structure is less than 700 kg, the foundation need not be erected.
Foundation construction procedure:
- After the issue of where to install the stove has been decided, it is necessary to cut floorboards around the perimeter of the structure, taking into account that the size of the foundation should be 10–15 cm larger on each side.
- Next, you need to dig a pit up to 40 cm deep.
- Then it is necessary to build wooden formwork according to the size of the pit and the planned structure.
- The next step will be to waterproof the foundation.
- Then we pour a cushion of sand and crushed stone of the middle fraction to retain moisture.
- We fill the foundation with cement mortar and be sure to lay a layer of reinforcing mesh on top. We use a building level to check the evenness of the surface.
- Then you need to wait time for the concrete screed to completely harden.
Stage 2 Foundation construction
- After the foundation mortar has completely hardened, you need to lay out the base in one row of brickwork.
- We check again with a building level that the surface is horizontal.
- We lay a layer of roofing material to waterproof the base.
- It is necessary to lay a sheet of iron on top, which should exceed the size of the brickwork by 10 cm around the perimeter.
- Then we install a metal stove.
Stage 3 Preparation of the solution
A mixture of cement and clay will serve as an ideal mortar for lining a metal firebox with bricks. Experienced stove makers advise determining the proportion of these components by appearance. It is believed that it is necessary to take the same amount of cement and clay, while adding up to 30% river sand to the solution.
The main thing when preparing the solution is to achieve a homogeneous mass, without pebbles and lumps, reminiscent in appearance of thick sour cream. To check the quality of the prepared masonry mortar, you need to apply a little of the mixture to the brick. A high-quality mortar should not flow or slide off the brick. If the mixture is not very thick, you can add a small amount of sand.
Stage 4 Brick preparation
To complete this stage of work, it is necessary to soak a selected number of bricks for masonry in water for 12 hours. This action is required to ensure that the brick does not absorb moisture from the mortar during laying. When using old bricks, it must be cleaned of sand and old mortar.
Stage 5 How to line a metal stove
The average height of the structure will occupy 13–15 rows of masonry. Therefore, it is advisable to divide the entire work process into two stages. First you need to lay 7-8 rows and let them dry. The next day, after checking the shrinkage, we lay the remaining section of the structure.
Brick finishing process:
- You need to build a row starting from the corner of the structure, not forgetting to control the horizontal laying with a building level. Checking the correct angle should be carried out using a plumb line or a protractor.
- It is necessary to spread a reinforcing mesh on the second row to increase the strength of the structure.
- On the same row you need to start creating air gaps through which heated air will flow into the room. This operation must be repeated on rows 6 and 8. It is not advisable to make many holes. Two at the top and two at the bottom will be enough.
- The third row is laid out in the same way as the first.
- In the place where you plan to install the door for fuel and the blower, you need to lay a metal corner.
- The last row is laid out randomly.
Stage 6 Pre-firing of the furnace
An important stage is the preparation of the manufactured structure for its further operation. Do not immediately heat the oven to maximum temperature. It is necessary to perform 2-3 preliminary fires, which use a minimum amount of fuel. Such actions will allow the solution to dry thoroughly. Remember that there are a large number of schemes and methods for lining a metal stove with bricks, which you can learn about in detail on many construction Internet portals.
How to make a protective screen for a sauna stove with your own hands?
Rest assured that there is nothing difficult in creating a protective screen for a bathhouse with your own hands.
It is recommended to prepare all the necessary materials and tools in advance, as otherwise this will significantly slow down the progress of work. Having everything you need will help not only not to stop construction and installation, but also will not confuse the overall “engineering idea”.
Made of brick
Brick and concrete mixture are used as the main working material. Mixtures that are designed for use at high temperatures should be used. If you do not want to spend money on purchasing it, then you should add clay to the standard mixture. This will strengthen the future structure.
When calculating, it is necessary to take into account three parameters to determine the required amount of brick, namely:
- Width;
- Height;
- Length.
Keep in mind that in the masonry it is necessary to calculate an additional few millimeters between the bricks for the concrete mixture.
- The manufacturing process is no different from laying bricks. All that needs to be done is to create a kind of brick “fence” around the stove of the required height.
- After installation, it takes at least 5-7 days for the solution to dry completely. A longer period is required due to the confined space - the solution dries worse in it.
- After completing the last stage of work, you should additionally check the strength of the masonry. If necessary, additional basalt slabs can be installed on top of the brick to provide greater security.
Made of metal
Metal structures are more durable, since this material can more easily withstand temperature changes. The complexity of installation and the price of such slabs are slightly higher than their brick counterparts.
The work will require sheet metal: zinc sheets or steel, as well as additional mineral insulating materials that are not subject to combustion and melting at high temperatures. A welding machine and sheet fastening mechanisms are also required.
The thickness of the insulating material should be at least two centimeters, and the height of the shield should be 5-10% greater than the height of the furnace. Remember that the wall of the structure is double, so eight sheets of metal are required to complete the job.
Step-by-step manufacturing instructions
- Prepare all necessary materials and consumables;
- Place the insulating material in an even layer on the sheet of metal;
- A second layer of metal is applied on top;
- Special fasteners are welded using a welding machine to hold the structure together.
- The produced sheets must be installed around the furnace on all sides using fasteners.
- It is recommended to place insulation under the bottom to prevent unintentional charring of the floor and fire in the room.
Decorative plaster
You can decorate the stove in a bathhouse with your own hands using decorative plaster. This type of material began to be used for such purposes relatively recently. Decorative plaster in this case has certain features. It is not applied to directly finish the brick or metal surface of the stove. This material creates a barrier between the heater and the walls. At the same time, modern varieties of plaster allow you to create interesting design effects.
Plaster is used to finish walls adjacent to the stove. It is worth considering that this material is used if the heater is installed not in a steam room, but, for example, in a relaxation room. The fact is that decorative plaster has a lower moisture resistance. Therefore, it can be used in relatively dry rooms.
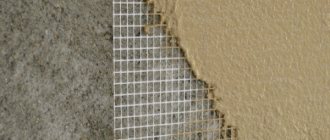
Decorative plaster may contain different components. This can be clay and sand, fireclay, gypsum and asbestos, lime. There are also cement-based compositions. The composition may include fiberglass, salt, and chopped straw as additives. Before installation, a fiberglass mesh is installed on the surface. Plaster is applied to it. The heat resistance and thermal conductivity of decorative plaster is high.
Recommendations
When assembling protective screens, various difficulties may arise. To avoid them, you need to consider some recommendations:
- A gap of 3 cm must be left between the brickwork and the heating walls of the furnace. Otherwise, the brickwork will quickly crack from overheating and the pressure of the expanding metal.
- When mixing the solution, you need to choose components that are resistant to high heat.
- The protection, made of stainless steel, quickly loses its visual properties if the stove is fired very often. To preserve the appearance, you can coat metal surfaces with special paint or regularly wipe them with detergents.
By following these recommendations, you can make durable, effective protection for walls and floors from the heat of the stove.
We invite you to read: Construction of a swimming pool in a bathhouse
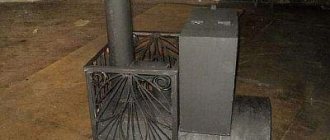
Increasingly, metal stoves are being installed in modern baths. Their walls become very hot during operation, which negatively affects nearby surfaces of the room. To protect wooden walls from heat, you need to make a special screen. It can be made of metal and brick, combined with thermal insulation materials.
Purpose
A reflective screen for a bathhouse performs several functions:
- improves the appearance of the room in which the stove is located;
- protects bathhouse visitors from getting burns;
- prevents coals from falling out of an open firebox;
- directs heat flow.
The main task of the screen is to protect wooden surfaces that are located close to stove equipment from fire.
A brick screen for a sauna stove is a simple option for protecting wooden walls:
- It is not difficult to lay brickwork along the corner walls to a width slightly greater than the size of the stove and a height slightly greater than the height of the stove. Anyone can do it
- a more economical option in terms of the amount of bricks and labor costs compared to installing a brick partition
- no additional foundation is required, because the fencing masonry can be supported on the foundation of the furnace itself.
When constructing a brick screen for a sauna stove, the question arises about the mortar that needs to be used for masonry. Some people think that it is necessary to make the mortar according to the old recipe with clay, because, like, the cement mortar will crack. Yes, it would be nice to use a special solution for brick stoves, but only professional stove makers with extensive practical experience can work with it, and beginners will have a hard time.
Therefore, do not complicate it and do not make the problem because of the mortar: lay the bricks on a regular cement-sand mortar: if the seams are kept minimal (6-8mm), then there will be nothing to crack. This is not a stove, but just a protective screen that does not carry any load.
It needs to be folded at a distance of 10-12cm from the wooden wall for its ventilation, and it is also necessary to move away from the metal of the stove at a distance of 8-10cm so that air circulates along the surfaces of the stove.
The enclosure of a sauna stove in a steam room can perform several functions at once:
- Protecting all bathhouse visitors from accidental burns;
- Improving the visual qualities of the bath interior;
- Adjusting the heat flow in the bath.
What types of stoves can be used in a sauna?
Today, the choice of steamer is extremely diverse: you can buy a stove and make it yourself, or buy it and modify it, but there are a lot of options. Let's reduce them to several main types. Ovens are:
- brick;
- metal (including with brick lining);
- electric.
Brick kilns
Traditional stoves for the Russian “white” bath are brick. They have a number of advantages, since there is a direct connection between such a stove and the requirements of a Russian bath.
In particular, a brick oven provides uniform heating, and most importantly, light steam, that is, formed at a high temperature, from which the steamer does not have breathing problems, as from heavy low-temperature steam.
But a brick oven also has its drawbacks. Built entirely of brick, it will be heavy, expensive and will require some skill in maintenance (! inexpensive stove options are presented in a separate article). You need to decide at the design stage, because there will be costs for a separate foundation for it.
Heaters in brick kilns come in all types:
- flow-through, where stones are washed by fire;
- blind, where the stone is separated by a solid sheet of metal from the fire;
- open - with stones on the surface;
- closed - with a door covering the heater compartment;
- bell-type - a type of closed blind with more efficient heating.
Metal furnaces
A very common option because it is more budget-friendly compared to a solid brick stove. The material used is either cast iron or steel - both of different grades.
IMPORTANT! A metal stove without a surround will overheat the room. This is good for a sauna, but not for a Russian bath.
The fact is that metal heats up quickly, and stones heat up slowly. And always during heating, most of the heat is released into the room. Bare metal will give off too much heat to the room, which should not heat above 40-60 degrees. And the stone must heat up to 400 degrees to produce light steam. This creates a big contradiction: in order to heat the stone to produce good steam, you will have to greatly overheat the bathhouse.
The solution to this problem is usually to install a brick lining around a metal stove. This redistributes the heat released during combustion, the brick accumulates it and releases it more softly and for a long time than metal.
On the other hand, they are suitable for saunas, where the air temperature is higher and the steam is much less.
The disadvantages of this type of stoves include the fact that they not only heat up quickly, but also cool down quickly. Therefore, the bath procedure has to be interrupted in order to heat the stove again.
The cost of a metal stove will be lower than a brick one also because it does not require such a solid foundation. A foundation is sometimes necessary, but it can be shallow, and in some cases they are generally limited to a layer of refractories under the stove and that’s it.
There are a lot of varieties of metal stoves - both homemade and factory-made. One of them is worth mentioning separately.
Electric heaters
Electric stoves were originally created for saunas. But then models appeared that are capable of working in Russian bath mode. Those who decide to opt for an electric stove should find out whether the selected model has one or two modes. However, there is a simple criterion:
IMPORTANT! Models with a load of stones of 20-40 kilograms are intended exclusively for saunas; you simply cannot pour a lot of water on them. Models for Russian baths begin with a load of stones of 60 kilograms. Electric heaters are usually bought by those who expect to get quick results with a minimum of effort
There is no need to cook firewood or wait for the stove to heat up (! The corresponding section is dedicated to wood stoves). It all comes down solely to electricity costs (well, electric heaters themselves cost a lot). The second advantage of these stoves is that they are quite compact, and up to a certain weight they can also be mounted on the wall, freeing up space in the steam room. Floor models allow free rearrangement - they are not connected to chimneys and foundations
Electric heaters are usually bought by those who expect to get quick results with a minimum of effort. There is no need to cook firewood or wait for the stove to heat up (! The corresponding section is dedicated to wood stoves). It all comes down solely to electricity costs (well, electric heaters themselves cost a lot). The second advantage of these stoves is that they are quite compact, and up to a certain weight they can also be mounted on the wall, freeing up space in the steam room. Floor models allow free rearrangement - they are not connected to chimneys and foundations.
Technologies
There are several proven technologies for bricklaying around metal furnace equipment:
- Heat shield. A brick fence that does not exceed the dimensions of the furnace in height. Promotes better heat transfer.
- Continuous cladding. It quickly releases heat to the surrounding space, which increases the cost of heating the premises. This technology is used when it is necessary to make a beautiful decorative design, sacrificing the performance of the furnace equipment.
- Convector masonry, which has vents. Suitable for metal heating units. In this case, the size of the steam room is not important.
Cast iron stove lining
Fire safety requirements
The stove in the bathhouse and sauna must be installed in accordance with existing fire safety regulations. The mentioned requirements provide for fire insulation of the stove by maintaining minimum distances to walls and other objects in the room. Such requirements affect the design of the bathhouse and sauna premises, causing inconvenience in its layout.
In addition to the functions of thermal protection and fire safety, the stove screen performs another useful function. It speeds up the heating process of the heater, reducing the preparation time of the room. necessary to start the bath procedure. Since the main heat carrier in a bathhouse is steam, it can be obtained with a furnace screen much earlier than without one.
Masonry mortar
The inner surface of the brick lining of the stove can heat up to 350-400 degrees, so a regular cement-sand masonry mortar is only suitable for the screen of a sauna stove, spaced at least 7-8 cm from its body. In other cases, you need to use a clay-cement mortar, because stove clay is fragile and hygroscopic.
To prepare a solution for lining a stove with bricks, you must first sift the dry clay through a sieve with a mesh size of 1.5 mm. Next, the fat content of the clay solution is adjusted:
- A test portion of clay is mixed with mountain or ravine sand of fraction up to 1 mm in a 1:1 ratio by volume.
- Cover with water and knead until the dough becomes thick.
- Roll into a rope (sausage) approx. thick. 2 cm and length approx. 30 cm.
- Allow to dry not in direct light for 1-3 hours at a temperature of 30-15 degrees, respectively.
- Bend the tourniquet into a ring.
- If the rope is deeply cracked in several places or broken, the initial (base) solution is thin, you need to add more clay.
- The tourniquet bent smoothly or only the dried crust cracked - the base solution is greasy, you need to add more sand.
- The tourniquet cracked more or less evenly along its length to no more than 1/4 of the thickness - the fat content of the base solution is optimal.
A test portion of the working solution is prepared by replacing 1/8-1/3 of the clay with cement from M400; Usually they give 1/5 to start with. The dry mixture is gradually mixed with water, kneading until the cream becomes thick. Then check the solution for fluidity: dip a clean trowel into it and remove it, holding the nose down. There are 3 possible cases here:
- The solution drains, leaving stains on the trowel or completely exposing the metal - there is a lot of water;
- The solution drains, leaving a lumpy layer with lumps on the trowel - there is not enough water;
- The solution drains, leaving a thin, even layer of water in moderation.
Now you need to check the solution for stickiness (adhesion); This is important for laying half/quarter bricks. Take a brick, dip it in water, and apply a 3-5 mm layer of solution onto its bed with a trowel.
Immediately take a dry brick and place it on a layer of solution, without pressing down, immediately lift it. The mortar should not stretch behind the dry brick; sticking of several small, match-head-sized lumps is acceptable. If the mortar follows the dry brick, the proportion of clay in the base mortar must be reduced, respectively. increase the proportion of cement.
Next, the dry brick is again placed on the mortar, tapped with the handle of a trowel and left for 5-6 minutes. They try to lift it, the wet brick should rise with it. If it remains lying or gradually comes off while hanging, you need to add more clay in the base solution and, accordingly. less cement.
Manufacturing of furnace equipment
You can assemble a simple stove for a black sauna with your own hands. To do this, you need to come up with a design, draw up a drawing, prepare tools with consumables, and perform assembly.
Drawing up a diagram
The first stage of self-construction of furnace equipment is drawing up a diagram. In the drawing you need to note the dimensions and design of the stove, indicate the location of the stones. After preparing the drawing, you can calculate the amount of consumables.
Preparation of tools and materials
After drawing up the diagram, you need to prepare tools and consumables:
- Stones that will accumulate heat will not be destroyed by temperature changes or exposure to moisture. It is better to use jadeite.
- Set of locksmith tools.
- Metal rods.
- Fireclay bricks.
- Boards, fittings, wire.
- Container for mixing masonry mortar.
- Trowel, spatulas of different sizes.
- Bayonet, shovel.
- Welding machine.
- Hammer.
Dimensions and location of the structure
To calculate the dimensions, you need to choose a place for a homemade stove and adhere to some rules:
- For a steam room with a volume of 10 m3, the following equipment dimensions are suitable - 150 by 100 cm, height up to 50 cm.
- The optimal shape is rectangular. Thanks to it, the room will warm up evenly.
- It is better to install the structure opposite the door. This way the cold air will spread heat throughout the room.
Foundation
A homemade stove for a black sauna will weigh a lot. Therefore, you need to build a foundation for it. Foundation construction process:
- Dig a pit 60 cm deep.
- Place a 15 cm thick layer of sand at the bottom of the hole.
- Pour a second layer of expanded clay 15 cm thick and compact it.
- Lay two layers of roofing felt on top of the expanded clay.
- Tie a metal frame from reinforcement and place it in the hole.
- Put together the formwork. Make it so high that its height exceeds the bathhouse floor by 50 cm.
- Mix the cement mortar and pour it into the formwork to the required height.
Wait until the base hardens (7–10 days), disassemble the formwork.
Construction of the structure
Oven assembly process:
- Place 2 layers of roofing felt on the base for waterproofing.
- Mark the dimensions of the structure.
- Mix the masonry mortar. To do this, you need to mix 5 parts clay with 1 part cement.
- Lay out the first row of fireclay bricks and check it with a building level.
- The next rows are laid so that the seams do not coincide.
- Stop at the 4th–5th row and install a grate made of thick reinforcement.
- Leave space for a combustion hole through the row of bricks.
- Secure the grate on which the stones will be laid.
- Make the last row of fireclay bricks.
You need to start laying out the stones from large to small.
Conclusion
The importance of the above-mentioned bath structure cannot be overestimated, therefore the design of this stage of construction should be carried out at the very beginning. Remember that the safety you provide is precisely the factor that will allow you to enjoy your bathhouse and your work for many years!
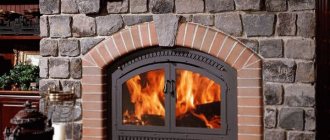
During the heating of the bath, the surface of the stove heats up to 300-400°C
At the same time, it begins to emit infrared rays and itself becomes a source of heating. The coming heat is distributed throughout the steam room, but first of all it hits the walls adjacent to the stove. If the walls are wooden, then under the influence of high temperatures their charring begins. And there it’s already a stone’s throw away! The only truly effective way to insulate wooden walls from heat is to create protective screens and cladding from non-combustible materials in the bathhouse.
During the heating of the bath, the surface of the stove heats up to 300-400°C. At the same time, it begins to emit infrared rays and itself becomes a source of heating. The coming heat is distributed throughout the steam room, but first of all it hits the walls adjacent to the stove. If the walls are wooden, then under the influence of high temperatures their charring begins. And there it’s already a stone’s throw away! The only truly effective way to insulate wooden walls from heat is to create protective screens and cladding from non-combustible materials in the bathhouse.
Additional aspects
It is worth understanding that not all situations require a protective screen at all. For example, for brick kilns with an initially protected firebox, fences are not required. If the screen needs to be installed, then red ceramic materials are selected for it, capable of withstanding severe temperature changes and exposure to moisture.
Often, a bathhouse screen made of stainless steel loses much of its visual quality over time. To ensure their normal decorative properties, it is necessary to periodically wipe the metal with special cleaning compounds.
Conclusion
A DIY sauna stove screen is an important sauna structure that can prevent accidental burns and balance the operation of the stove. By implementing one of the proposed schemes, you can achieve a combination of protection efficiency, good functionality of the stove and good visual qualities of the entire system.