Profiled timber is a practical material made from solid natural wood, intended for the construction of shrinkage and turnkey structures. The latter option is easily implemented under the condition of chamber drying. But the traditional method remains preferable for most owners of suburban areas.
Construction of a bathhouse for shrinkage from timber with natural humidity is cheaper. Classic technology allows you to achieve maximum results by following the basic rules during the installation process and taking simple special measures after completing the assembly of the log house to prevent negative consequences.
Saunas made of timber for shrinkage
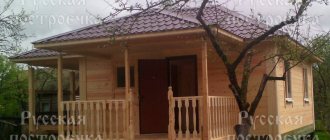
A bathhouse made of timber for shrinkage is a ready-made log house made of wooden beams with a foundation, rafter frame and roof (metal tiles or ondulin), internal rough ceilings and floors, window and door openings, and internal partitions.
In such a bathhouse, only insulation, steam and waterproofing, finishing and decor are missing, engineering communications are not connected - first the bathhouse goes through a six-month stage of drying out and complete shrinkage, and the full construction period in this case will be up to 1 year.
I am ready to design and build such a structure on your site in Moscow, St. Petersburg and Veliky Novgorod on favorable terms.
Marking and foundation
The essence of marking is to mark the location of the future structure in the selected area. For this, wooden pegs and ordinary rope or fishing line are often used. An ideal rectangular trench for the foundation will only be possible in a situation where the diagonals of this figure are the same.
To equip the foundation you will need the following materials:
- Concrete;
- Sand;
- Crushed stone;
- Wooden formwork;
- Ruberoid;
- Materials for insulation.
For a bathhouse, you can equip a strip or columnar foundation. The load-bearing capacity of such foundations will be quite sufficient for the construction of even a large building made of timber.
For the foundation, you can equip formwork or do without it at all. Sometimes it is enough to simply equip a trench, put a cushion of sand and crushed stone on the bottom, and then pour concrete. The width of the foundation must be suitable for installing the timber.
How wood shrinks
Due to natural physical phenomena, any constructed building changes its original height values during the first six months. This is due to the thinning of the masonry joints between the structural elements of the building under the influence of gravity. And even if in structures built from chemically produced materials such compression is practically imperceptible and insignificant, with wood everything is much more complicated.
Since wood has a fibrous structure and largely contains moisture, the process of shrinkage of buildings made from it will be much more noticeable and visually noticeable.
How to make a bath floor correctly
The floor in the bathhouse is arranged on a frame made of logs 5 cm thick
It is important to treat them with waterproofing solutions and antiseptics. The logs are placed directly on a concrete foundation, previously covered with a layer of roofing material
Planed boards are laid correctly (with a gap) on them. A small gap of up to 5 mm needs to be made to drain the water.
The boards are fastened with iron screws and nails. New logs are placed on top, between which insulation is placed (basalt wool, polystyrene foam, expanded clay). The insulation is covered with polyethylene with a thickness of at least 3 mm. A flooring made of planks (only hardwood is suitable), cork slabs or fiber mats is laid on this frame. It should be raised approximately 5 cm to ensure continuous drying. After laying them, the floor should be sanded.
Along with wood, concrete floors are common, which have a structure of several layers:
- compacted crushed stone;
- cement mortar;
- vapor barrier layer;
- polystyrene foam insulation;
- polyethylene film;
- another level of cement mortar;
- reinforcement mesh filled with concrete.
Bathhouses made of wood are considered classics of the genre in Russia - we can say that wood has been the national building material for centuries. Certain architectural and aesthetic traditions have developed that characterize wood as the best raw material for construction.
The bathhouse is rightfully considered an integral part of Slavic culture and an indispensable attribute of its history. Moreover, the concept of “Russian bath” is perceived not so much as a process of ordinary washing, but as a certain custom of bodily and spiritual cleansing. This process of visiting a bathhouse has developed and improved over several centuries.
Types of shrinkage
When constructing a bathhouse for shrinkage, you need to take into account that there are two types of this phenomenon:
- Natural - occurs as individual structural elements dry out and their sizes decrease. The higher the initial moisture level of the wood, the more shrinkage it will experience.
- Mechanical changes in the size of a structure are associated with increased pressure on its components. The lower crowns of the log house experience the greatest load, therefore, the heavier and larger the log house is erected, the more noticeable its shrinkage will be.
As a rule, the initial shrinkage takes about six months, but the wood in the log house will finally dry out no earlier than a year and a half.
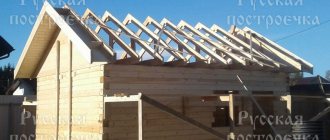
Roof
There are two options: gable or single slope. For a bathhouse measuring 3x3, you can use the simplest option - a lean-to slope.
Installation of pitched roofs
If you choose this option, then you need to do the ceiling right away. For a bathhouse, it must be insulated; you can choose mineral wool (much more expensive and more complex) or polystyrene foam (cheaper and faster). Let's focus on a simple option - foam insulation. It is not afraid of moisture, and there is no need to use various steam and water barriers.
Foam insulation
Characteristics of foam plastic
Prices for foam insulation
PSB foam insulation
Insulation needs to be installed in several stages:
- nail edged boards to the ceiling beams from below, 20 mm thick is sufficient;
- lay foam boards on them. Place them as tightly as possible, avoid gaps. Polystyrene foam can be cut perfectly with a special carpenter's knife under a ruler. During the marking period, provide dimensions 1÷1.5 cm larger - the foam will shrink during installation, the insulation will become airtight;
- Lay any boards on top of the beams, these can be various sections, slabs, etc. The main requirement for them is to withstand the weight of people during the installation of the roof. Once the roofing work is completed, no one will walk on the roof anymore.
Ceiling insulation with foam plastic
If the roof is gable, then make a temporary ceiling, and insulation can be done later. Is everything ready? Great, let's build a roof.
| №№ | Illustration | Description and explanations |
| Step 1. | Check the vertical position and dimensions of the top crown. The dimensions are normal - excellent, there are significant horizontal deviations - no problem, we will level the horizontality with rafters. | |
| Step 2. | Determine the angle of inclination of the slope. We recommend an inclination angle of approximately 20°. Another important point is which direction the rainwater will flow, take into account the features of the site, the location of the entrance doors and the features of existing buildings. | |
| Step 3. | Place a stop for the rafters at the calculated height. It’s simple to do - install vertical supports from beams of a given height, place a horizontal beam on them. The distance between the supports is approximately 1.5 meters. The structure can be assembled without cuts; it is enough to use metal corners and self-tapping screws. In order for the stop to withstand angular forces, secure it with corner boards to the floor beams. | |
| Step 4. | Measure the length of the rafters taking into account the overhang. For our case, 3.2 meters is enough. For rafters, use 50x100 mm boards; for a 3x3 meter bathhouse, 6 pieces are enough. | |
| Step 5. | Install the outer rafters, stretch a rope between them and lay all the rest along it. To secure it to the beams, it’s safer to make notches; if you don’t have the desire or skill, use metal corners. | |
| Step 6. | Ondulin | For the roofing we chose ondulin - one of the cheapest and fairly high-quality materials. You should not use various advertised hydrobarriers. Firstly, if you install the roofing material correctly, there will be no leaks. Secondly, if they exist, then no barriers will help: they will sag under the weight of the water and tear over time. |
| Step 7 | Lathing. Ondulin is in many ways similar to ordinary asbestos slate, the difference is that it has less physical characteristics in terms of the perception of vertical forces. This means that the sheathing should be laid more often; each sheet of ondulin should rest on four slats. The distance between the slats is 35÷40 cm. Instead of slats, you can use narrow unedged boards; they are almost the same in cost, but when nailing ondulin, there is less chance that the nail will “go nowhere.” | |
| Step 8 | Ondulin fastening | Carefully align the first row, do not rush the sheets to arrive immediately; for beginners, it is advisable to lay out the entire row and check its position, and only then pick up a hammer and nails. Ondulin can be fastened with ordinary slate nails; fixation is carried out in the upper wave. The lower the slope angle, the greater the overlap of sheets should be. In our case, the sheets should overlap by about ten centimeters. Be careful not to overdo it with driving force, so as not to damage the wave. If you wish, install a drainage system. |
| Step 9 | Fill up the spaces between the rafters and the wall of the bathhouse on the side of the elevation of the slope with boards, install wind boards. |
That's it, urgent work is done, the log house can be left for the winter. During this time, the bathhouse will shrink and the relative humidity will stabilize to natural values. If you want to wash faster in your own bathhouse, continue construction work.
What is shrinkage?
Wood shrinkage is a natural process in which moisture evaporates from lumber. This leads to a change in the size of the building. To understand why this phenomenon occurs, you need to study the types of moisture that are present in different types of wood:
- Hygroscopic - fills the walls of wood cells.
- Capillary - located in the intercellular space, cell cavities.
- Chemically bound - found in the substances that make up wood.
The moisture level of freshly cut wood is 50%.
The shrinkage process is influenced by a number of factors:
- The initial percentage of wood moisture content.
- The type of wood used to make lumber.
- Type of timber.
- Availability of inter-crown insulation.
- General construction technology of log house.
- Method of connecting crowns.
- The climatic zone in which the building is being erected.
- Dimensions of the bath.
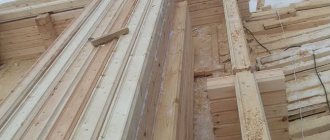
Without pre-drying, lumber with high humidity levels can take 2–2.5 years to dry. The problem is the loss of time, deformation of the material itself. Therefore, builders recommend buying lumber that has been kiln-dried.
Profiled timber after kiln drying
In what order to install a log bathhouse
It's no secret that the first crown of the house
or any other building - the most responsible. Since the dimensions of the lumber were known to me in advance, I precisely adjusted the layout of the future bathhouse and the size of the foundation to their length. Having accurately marked the first crown, it was enough in the future to use only a plumb line and a level so that the walls and corners of the bathhouse were vertical.
Log bathhouse. First crown
Before laying the first crown on the surface of the bathhouse foundation, I made waterproofing from two layers of RKP-350 roofing material.
Log bathhouse
, thanks to horizontal insulation, will not be exposed to ground moisture, which can rise through the foundation concrete due to capillary pores.
After the first crown, the rest are arranged. The entire frame made of timber
must be mounted along the crowns so that the lumber in the corners and other junctions is tied to each other.
How to connect beams in corners
To connect the beams in the corners, I decided to use the simplest method, but quite sufficient for strength and heat protection - in a dressing with a root tenon (sometimes it is called a “warm corner”). It’s easier than not to tie the lumber together at all, installing them end-to-end, but then you would have to use staples to tie them together, and the corners of the bathhouse would be blown out.
Log bathhouse. Warm corner
All other methods that were in demand in the past - in a paw, in half a tree, in a cup, I immediately “rejected” as unreasonably complex. With modern means and methods for sealing joints, you can easily avoid unnecessary labor costs.
In order not to mark the configuration of the cutouts in the lumber for each corner separately, I simply made two cardboard templates, according to which I marked the ends. After this, making one or two cuts with a chainsaw and removing excess wood with a hammer and a wide chisel is a matter of a couple of minutes. The direction of the spike on each row must be changed. That is, if in an even row the tenon is on the right and the groove is on the left, in the odd row there should be a groove on the right and a tenon on the left. This bandage firmly holds the crowns together in height, preventing the frame from falling apart.
How to join a beam to a long wall
In some cases, it is necessary to make a T-shaped connection of the timber. This need arises when connecting an internal wall to an external one. I got three such connections for each crown.
It is better to make a T-shaped junction using a method that carpenters call a “dovetail” (in some sources this method is called a “frying pan connection”).
Log bathhouse. Dovetail connection
To do this, the end of the adjacent beam is cut out in a shape reminiscent of this very tail, and a corresponding notch is made in the long beam. After installing the unit, the connection must be wedged. For this, wedges made of dense, dry wood are used.
This type of connection provides sufficient strength and is completely airtight, since there are no through vertical joints.
How to connect crowns to tie a bathhouse frame
The connection of the crowns with each other must be carried out in order to ensure the strength of the structure of the bathhouse frame vertically. In other words, this is necessary so that the crowns do not move relative to each other. Previously, this operation was performed on wooden dowels - rods of round or square cross-section. They were driven into pre-drilled holes, connecting two or three adjacent crowns.
Not wanting to waste time preparing these dowels and drilling large diameter holes, I simply used 200 mm long nails. The nails are hammered very quickly, and if you deepen the head 3-5 cm into the upper beam, the nail will securely connect the two crowns, preventing them from moving.
To finish the nail and immerse it completely into the drilled hole, you need to use a hammer. If you don’t have it on hand, you can use an old, worn-out drill bit from a rotary hammer with a diameter of 10 mm.
Ways to minimize deformation
If mechanical loads can still be dealt with somehow, for example, using special technologies for laying logs or using a powerful foundation, then natural shrinkage cannot be completely eliminated.
To reduce the negative consequences of shrinkage, the following methods are used:
- If you use wood with natural moisture, the percentage of deformation in comparison with dried or glued options will be the highest. Therefore, you need to select wood for a bath very carefully, paying attention to quality.
- When building a bathhouse from timber for shrinkage, you must strictly follow the technology. The gaps between the individual elements should be minimal so that the fit is very tight. This approach will reduce the degree of deformation of the structure during the shrinkage process.
- Openings for windows and doors also need to be protected from deformation. To do this, small indentations of 3-4 cm are made in the upper part, and special bars are stuffed on the sides, which are inexpensive.
- The ends of the logs must be treated with special means to protect them from precipitation, temperature changes and moisture. Additional board overlays provide additional resistance to external factors.
However, no matter what tricks you resort to, the building will still shrink to one degree or another. Therefore, a log building needs to be left for some time for the elements to dry out and finally take shape.
Choosing the right timber for the first crown
The timber must be selected and prepared in advance so as not to be distracted by small details and shortcomings during the construction process. To install the first crown, you should choose high-quality material, since the integrity of the structure during operation depends on it:
- the timber must be perfectly flat;
- there should be no knots or chips on the surface;
- the main condition is the maximum density of the timber rings; to make such material, the middle part of the tree is taken;
- timber with traces of blue on the surface of the wood is categorically unacceptable not only for the first crown, but also for the entire log house.
The finished timber produced at the factory is usually already processed and completely ready for use, but additional processing will not hurt, especially for the construction of a bathhouse. Thoroughly coat the timber with mastic, which is pre-mixed with the waste. Impregnation based on this composition is perfectly absorbed into wood. The ends of the timber do not need to be processed; they should remain bare and release moisture during drying and shrinkage of the structure.
It is how carefully you process the timber that determines how long the lower crown, and therefore all the walls of your bathhouse, will serve faithfully.
Sequence of bath assembly for shrinkage
Following the technology, it is quite possible to assemble a bathhouse from timber or logs with your own hands. Of course, some experience and skills in construction work will be very useful.
As an example, let’s look at a robotic design for constructing a bathhouse for shrinkage from profiled timber of natural moisture with a pre-prepared foundation.
The step-by-step work plan is as follows:
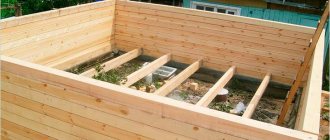
- On the finished foundation, a lower binding crown of the thickest beams is laid, on which all subsequent rows will be laid. In places where the logs are widest, logs for the flooring are installed. At the corners, the beams are connected “into a paw”.
- The next stage is the removal of the walls, the gaps between the logs are laid with jute. The corners can be butt-jointed, doweled, tenon-jointed, or dovetailed.
- To maintain horizontal lines, vertical supports are installed in places where windows and doors will be located. At the same time, it is equally important to ensure that the width of the openings corresponds to the designed one.
- Ceiling beams begin to be laid on the finished walls, onto which the Mauerlat is secured. It is made from thick timber. Fix the Mauerlat onto the upper rims.
- A rafter system with braces is attached to the fixed Mauerlat. The rafters, located at an angle, are fastened to the ridge beam. The end parts are covered with a special frame on which the internal insulation will be located.
- A sheathing is secured over the rafters for installation of the selected roofing material. The pitch between the crossbars of the sheathing will depend on what kind of material will be used. Often, it can be solid, made of boards with a thickness of 25 mm.
It is worth noting that wooden elements are fastened together using metal or wood dowels, although the latter are more preferable since their characteristics coincide with the main material of the building.
Completion
Thus, we figured out what a shrinkage bathhouse is and found out that after installing the roof, such a structure must definitely stand. The minimum period for shrinkage is six months, after which only some violations of the original dimensions of the building can be detected.
But the period during which final shrinkage occurs will depend on the type and quality of the purchased material, as well as its size and humidity. It is preferable if already dried timber with a low percentage of humidity is used for construction.
Important requirements for bathhouse premises
In order for a bathhouse to become a favorite place to relax, you need to take into account a number of certain nuances during its construction.
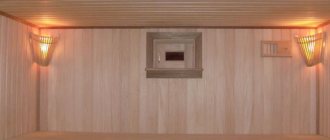
Steam room
The size of the steam room should not be large, otherwise it will be difficult to heat it and maintain the desired temperature in it for a long time
It is important to consider the length of the bench - it should be comfortable for each family member. Often the length of the bench is about 2 meters, and the size of the steam room is from 2.5 by 2.5 meters to 3.5 by 3.5 meters. The height of the ceiling in the bath should not be lower than 2.5 meters, so that you can raise your arms in the steam room, as well as to maintain the correct volume of the steam layer - otherwise the steam layer will be unstable. The entrance door to the steam room should have a threshold of 25–30 cm from the level of the threshold of the entrance door to the bathhouse
Or the floor height in the steam room should be 25–30 cm higher than other rooms in the bathhouse. For what? So that the cold air from the dressing room does not “flow” into the steam room. To preserve heat, the width of the door to the steam room should be no more than 60 cm. Flow ventilation should be provided. This could be a window in a steam room, an exhaust vent, or a view in a chimney. The window in the steam room should be no higher than 1 meter from the floor and size 40 by 50 cm
Bath broomSource moydom.media
Bake
If the bathhouse is planned to be heated from only one stove, then all rooms must touch it, or, in other words, be adjacent to the stove.
It is desirable that the furnace firebox opens into the vestibule. This will allow you to avoid dragging dirt, bringing in firewood and removing combustion products, and will also provide an additional flow of oxygen to the stove, the wood will burn better.
Restroom
There must be at least two doors to the relaxation room from the steam room. Otherwise, it will be damp, and the steam from the steam room will cool and settle in this particular room.
Washing and changing room
It is not necessary to have a washing machine in the bathhouse. However, if it is provided for by the project, there must be a window for ventilation. The recommended window size is 60 by 60 cm.
Many bathhouse owners believe that if the relaxation room is furnished with upholstered furniture, then it is worth adding a dressing room with a bench and a hanger. Or you can set up a locker room in the washroom, and drying yourself in it is a matter of taste. If you abandon the locker room, you can increase the area of the rest room.
Tambour and toilet
The vestibule is one of the most controversial places in the bathhouse. Some people don’t need it, while others consider two doors and a micro vestibule between them sufficient. Often its presence is dictated by the habit of steaming in winter. To use the bathhouse in the cold season, it is better to include a vestibule in the plan.
There is also no consensus on how much a toilet is needed in a bathhouse. Much again depends on whether the bathhouse will be used in winter or not, whether it is a separate building or combined with the main house, on the wishes of the homeowners, and also on whether the bathhouse will also serve as a guest house in the winter season.
Comfortable rest is the main goal of building a bathhouse. Source ru.dreamstime.com
Possible problems
When shrinking a log house, a number of defects may occur that will lead to serious problems:
- Changing the geometry of load-bearing walls and partitions.
- Cracking of the building facade. Occurs due to the influence of critical temperatures and lack of effective ventilation.
- Warp walls.
- Jamming of windows and doors.
Due to the high humidity of wooden surfaces, the risk of infection by fungi and mold increases. To protect the material from damage, you need to pre-treat the timber with a special antiseptic.
Cracking of timber
About construction lumber
To build a durable and functional bathhouse, the following types of building materials are used:
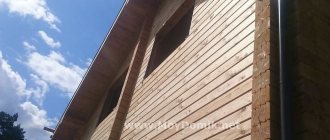
- Planed timber. The most affordable and affordable (in terms of price) material made from coniferous wood. It is used both for the construction of a log house and for load-bearing parts (floor joists, roofing elements, floor beams). Raw planed timber is subject to significant shrinkage (up to 10–15 cm per wall), which is why the surface of the walls inevitably becomes covered with cracks. For this reason, walls made of planed timber require external and internal cladding (which significantly increases the budget); After drying, the walls need caulking.
- Glued laminated timber. It consists of several lamella boards glued together and pressed together. Production is very technological, which is reflected in the cost. Not everyone considers laminated veneer lumber a suitable material for building a bathhouse, pointing out the presence of vertical adhesive layers that prevent air exchange (material with horizontal adhesive layers is practically not produced). Glued laminated timber is less susceptible to cracking than other lumber, as it undergoes thorough drying and pressing.
Shipment of corrugated timber for the future bathhouseSource rubankom.com
- Profiled timber. Manufacturers offer dried timber (more expensive) and timber with natural moisture content (UW). The material has a special profile section with precise geometry, which allows you to quickly build walls. The complex profile also has additional advantages - the walls are of high quality, the penetration of cold and moisture through the roof joints is difficult. The natural beauty of the walls does not require finishing, and the insulation remains invisible. When using EB corrugated timber, construction takes place with a break necessary for the building to shrink. It may take 10-12 months before final finishing. Shrinkage of dried corrugated timber takes 5-6 months.
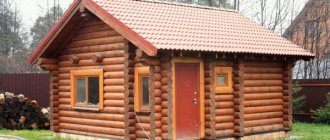
- Rounded log. The material is processed using high-precision equipment and has the same dimensions along its entire length. The walls are assembled quickly, do not require finishing and are durable and stylish. Like any wooden material, a log inevitably develops cracks. Shrinkage of the walls can continue for six months or a year.
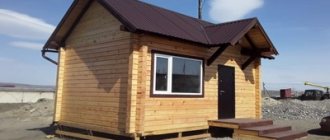
A timber bathhouse with a terrace is ready for shrinkageSource stroy-maks53.ru
Myths
There are several common myths associated with the shrinkage process that can lead to serious mistakes during construction:
- In order for moisture to leave the timber faster, it needs to be tightened with bolts and self-tapping screws, tightening the crowns. Additional clamps do not affect the rate at which the wood moisture level decreases.
- To maintain the integrity of door or window openings, you need to leave 5–10 cm gaps above them. The frames or frames will not be compressed, but the wall will sag on the side posts of the openings. Because of this, the door frame or window opening may move to the side.
- If you make a compensatory longitudinal cut, cracks will not appear on the front surfaces. Cutting allows you to get rid of cracks, but they cannot protect against all the defects that appear when wood dries out.
How to choose the right timber for construction?
The most important stage in building a bathhouse from timber with your own hands is the choice of the wood itself. After all, the performance characteristics of the steam room will directly depend on this
The first thing you need to pay attention to before purchasing is the complete absence of cracks in the finished logs. After all, even the smallest, insignificant of them will certainly give a defect during shrinkage, constantly expanding in the future and even subsequently becoming the cause of wood rotting
Secondly, there should not be any light blue spots on the surface of the beams - this is evidence that the rotting process is already in full swing inside, possibly provoked by fungi - it is no longer possible to build a bathhouse or a house from such material. Also, timber for building a bathhouse is considered defective if it shows wormholes or traces of being eaten by bugs.
But a good, high-quality timber will look smooth and perfectly even. If any distortions or defects are visible, all this will affect when laying the crowns, and the construction of a bathhouse made of timber will drag on indefinitely.
The timber is profiled and solid. The profiled one has tenons and crown grooves along the entire length, which are additionally ground. Such elements are easier to connect with each other. And the main advantage is that it is almost impossible for precipitation and moisture to penetrate into such walls. But among the disadvantages, we highlight the fact that this material has poor endurance and low fire-fighting properties. will have to be treated with additional propylene. Solid timber is also used for construction. But it usually doesn’t look very aesthetically pleasing and you will need to cover it with siding or a block house.
But how much timber is needed for a bathhouse and how to calculate it? It all depends on the project. Any experienced craftsman will be able to estimate by eye the required amount of material, and if an agreement for the delivery of wood is concluded with some supplier, he will calculate everything on his own and will bring only the strictly required number of elements - no more, no less.
And, if it so happens that among the delivered beams one or two turned out to be defective, there is no need to use them for firewood - they can be sawn and the good parts can be used to make smaller construction elements: slats, door and window frames, and even floor boards. But the rejected material will definitely need to be burned - in order to prevent contamination of high-quality wood. That is why, even at the stage of the contract with the company, how much timber is needed for a bathhouse according to the chosen project, it is better to overpay a little and order “spare” ones - those that can later be trimmed and replace damaged ones, if any are found (two or three will be enough).
When is the best time to finish a bath?
To avoid the appearance of defects in the interior finishing of a timber bathhouse, our experts do not recommend performing finishing work during construction or immediately after completion of construction work. If the customer plans to sheathe the internal and external surfaces of the walls of the bathhouse with clapboard and siding, then this should be done only after the building has settled, otherwise the sheathing will go in waves under the weight of the settled crowns of the log house.
We offer our customers a choice of 2 options:
- begin construction work in the fall so that the bathhouse, built for shrinkage, will settle over the winter, and begin finishing in the spring;
- build a turnkey bathhouse from timber at any time convenient for the customer.
Selection of building materials.
Below is a list of materials that will be needed to build a bathhouse from timber:
a) timber 150x150 mm, although it is possible to use timber with a cross-section of 100 mm or 200 mm;
b) floorboard (edged board 150x50 mm 4 meters long is excellent);
c) hardwood boards for ceiling construction (usually lining with a width of 100 mm and a thickness of 20 mm or more is used);
d) material for wall decoration (as a rule, the same lining is used);
e) material for vapor barrier (an excellent option would be to use a vapor barrier film);
e) waterproofing (it is advisable to use penofol, although polyethylene film is suitable);
g) ceiling insulation (mineral wool materials are a good option);
h) sheet asbestos for insulating wooden structures from temperature influences, including for walls near the stove and elements located next to the chimney;
i) cement, sand and crushed stone for foundation construction (recommendation - cement should be purchased before starting construction);
j) roofing material for the roof, which can be selected based on personal preferences and the main thing is that it fits seamlessly into the surrounding roofs of other buildings;
Thatched roof is comfortable unusual and cheap
Bathhouse roof made of shingles
Polycarbonate roof for a bathhouse
l) insulation for the inter-crown space (it is better to use jute, although moss or tow are perfect).
The best time to start construction is spring, since after completion of the main construction work it is necessary for the timber to dry and shrink. This requires at least 6 months.
How to minimize shrinkage deformations?
To eliminate the risk of skewing walls, the appearance of a large number of cracks on wooden surfaces, and destruction of window and door openings, it is recommended to perform a number of actions:
- Before starting construction, make a high-quality waterproofing of the base so that moisture coming from the ground does not damage the wood. To do this, the foundation must be covered with liquid mastic, and 2 layers of roofing material should be laid on top of it. It is recommended to cover the first crown with used motor oil.
- To build a log house, use kiln-dried lumber.
- Maintain humidity in bath rooms at 40–70%. Also avoid temperature changes.
- Compensation bars must be installed along the edges of window and door openings. There should be about 4 cm of free space from the box or frame itself to the top of the opening.
- When constructing a log house, it is important to strictly follow the technology. Between the individual crowns you need to place jute insulation. The distance between individual bars should be minimal.
- The crowns can be connected to each other using wooden or metal dowels. It is recommended to choose the first option, since the wood may begin to rot at the junction with the metal.
- You also need to pay attention to the processing of the ends. It is recommended to cover them with protective compounds. The product should slow down the release of moisture. Additionally, boards are placed on top of the ends, which enhance protection from environmental factors.
- If individual supports are to be erected from timber, compensatory bowls (screw jacks) must be installed on top. With their help, you can adjust the location of the support during shrinkage, which will preserve their load-bearing qualities.
By performing these actions, you can minimize the occurrence of shrinkage defects, but you will not be able to completely cope with this problem.
Wooden dowels for timber
Work during the shrinkage period
The fairly long process of settling an already built house can be used to qualitatively prepare the house for finishing at a calm pace:
- Insulation or caulking of seams.
- Antiseptic treatment of walls against insects, mold, in order to increase fire resistance.
- Wall sanding – performed 6 months after construction.
- Toning the walls of the log house and covering them with a protective composition.
- Waterproofing the foundation - additional treatment of it using special waterproofing compounds, drainage of groundwater. (in case of using a concrete foundation)
- Connection of communications, installation of blind areas, wastewater drainage systems and other external works.
Advantages of shrinkable baths
A bathhouse in a country area is a pleasant addition, a place where you can meet friends, relax and unwind after a hard week. Having your own steam room has a lot of advantages - you don’t need to sign up and wait for the appointed hour, waste time on the road, or spoil your vacation with thoughts about the sanitary condition of the establishment. In your own sauna, you just need to heat the stove and you can enjoy your relaxation.
Shrinkage construction means assembling the frame of the structure and installing the rafter system. After this, the log bathhouse made of profiled timber is left for 6-12 months. After complete drying, finishing begins.
Sources
- https://www.StroimIzBrusa.ru/bani/pod-usadku/
- https://banyaspec.com/montazh-i-remont/banya-pod-usadku-posledovatelnost-i-pravila-stroitelstva.html
- https://probani.guru/podgotovkastoitelstvo/banya-iz-brusa-pod-usadku/
- https://rus-bani.com/bani-pod-usadku/
- https://Wood-Brus.ru/bani-pod-usadku
- https://stroymir53.ru/bani/bani-iz-brusa-pod-ysadky/
- https://brus-bani.com/banya-pod-usadku/
Rafter system and roof of the bathhouse
The roof is gable, the roofing is ondulin. To make a rafter system, you need to take 50x150 mm boards, the distance between the rafter legs is 80 centimeters. In total, the roof will need 8 pairs of rafters, the total length of the boards is 128 linear meters. During the calculations, we took into account that the six-meter boards would have to be increased.
Splicing rafters along the length
Extension of rafters along the length
The distance between the sheathing slats is 70 centimeters; by simple arithmetic calculations we determine that to arrange the sheathing you will need ≈180 linear meters of 20×50 mm slats. The gables are covered with clapboard; it will remain after the interior walls and ceilings are upholstered.
The gables are covered with clapboard
Clapboard pediment
Sheathing the pediment
General scheme of gable cladding
Video - Installation of ondulin
The attic space of the bathhouse is not used; the ceiling surface can be covered with any scraps of lumber, plywood sheets or OSB.
Temporary ceiling
Example of ceiling cladding
Rough ceiling
Sheathing example
To make carpentry you need to have special machines, fixtures, tools and practical experience. We strongly advise beginners and amateurs to order the production of these products from specialized companies. You can use wooden structures (very beautiful, but very expensive) or metal-plastic ones (they have acceptable average values for all indicators).
Moldings
Choosing a project and building materials
For the construction of a log house, the following types of timber are used.
| Varieties | Characteristics |
| Profiled. | Its shrinkage is minimal (3–5%), since special methods are used to reduce the moisture content of the wood. A bathhouse made from it produces a minimum number of cracks, because the system of tenons and grooves promotes a tight fit of the beams to each other. |
| Glued. | Consisting of specially treated and longitudinally glued boards and is resistant to cracking. Almost no shrinkage (only 1%). |
| Ordinary. | With natural moisture, the timber ensures shrinkage of the log house by 50% greater than the use of blanks that are dried in special chambers. |
Baths made of timber have great versatility. They come in one-story, two-story, have different shapes and are combined with a variety of materials.
When choosing a project for a future building, you should pay attention to every detail
Single-story baths do not have stairs, which take up useful space. This circumstance allows you to optimally distribute space for different rooms. The project is ideal for a small family.
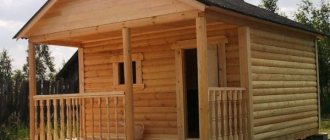
The bathhouse with a veranda looks picturesque. The project also assumes the presence of premises on the top floor.
Carrying out assembly work
It is quite possible to do a high-quality installation of timber with your own hands if you familiarize yourself with the sequence of actions. However, any skills in construction will not be superfluous.
The following are instructions for laying profiled products with natural moisture, but before that the base must be ready.
The basic assembly diagram is presented.
These are the basic elements of a gable roof.
Addition! The fragments are connected using metal or wooden dowels. The last of them are the most preferable, since they are made of the same material as the main elements.
Shrinkage of the log house - wait, you can’t work
The list of disadvantages of buildings made of wood necessarily includes its tendency to shrink. Yes, unfortunately, you can’t do without this, this is a feature of natural material, and the more natural it is, the deeper these processes are. But, I think, this is unlikely to stop someone who decided on an option that has been proven for centuries.
The greatest shrinkage phenomena are observed in solid round timber, slightly less in rounded logs and beams; profiled timber that has been dried in a chamber and glued practically does not suffer from this.
Why does shrinkage occur?
The shrinkage process can be explained in a nutshell as follows: the log house shrinks by a certain amount after some time. Everything seems simple and clear - wood is a natural material because it is subject to various influences directly related to its structure and properties. But if you delve deeper, everything is much more difficult and many probably don’t even want to understand this, they just need specific numbers - when and how much. Still, let’s delve a little deeper into this topic.
There are two forms of wood shrinkage - shrinkage and mechanical.
Shrinkage is the most complex process, because its speed and intensity are influenced by many factors. To begin with, let's briefly talk about the basis of this phenomenon: any freshly cut tree, regardless of the time of year, contains a large amount of moisture. It is found in wood fibers in both free and bound states. Free water is intercellular water; it begins to come to the surface immediately after the tree is cut down. The process of its evaporation proceeds relatively quickly and directly depends on the ambient temperature - the higher the temperature, the faster it evaporates. Bound water is found in the walls of wood cells and comes out gradually and over a long period of time under natural conditions; this process can only be accelerated in drying chambers. True, such equipment is most often designed only for fine gauges.
So, as the log loses moisture, it gradually loses not only weight, but also volume. Moreover, given that the wood fibers are elongated along the trunk, the loss of volume occurs by reducing its diameter.
Mechanical shrinkage is usually called the deformation of wood under the influence of weight; here it is meant that in the finished log house, the upper logs put pressure on the lower ones, as a result of which they are slightly compressed. To this we can add one more point, which for some reason is not mentioned by many - this is the compression of inter-crown insulation. For example, this phenomenon in a dry log house collected on moss gives the highest percentage of shrinkage among other factors.
The shrinkage process is influenced by a number of factors:
— tree species (wood density, initial natural moisture content), — time of year of felling, — period and method of assortment processing, — drying of logs (log house) after debarking (felling), — log house cutting technology, — weather at the time of construction, — type of inter-crown insulation, - climatic conditions of the region and area, - construction features (height, number of load-bearing walls), - presence of finishing.
Taking into account all of the above, we present the figures (of course approximate) for the shrinkage of a one-story bathhouse made of various materials:
Solid log - 8-12cm OCB - 7-10cm Beam: - planed - 5-7cm, - profiled - 3-5cm, - laminated - 1-3cm
As you can see, the first options have quite serious indicators, which makes it clear why the finishing will need to be delayed.
How did they do it in the old days?
Wood has long been a traditional material for construction, at least where there were forests. Many will probably be interested in how things were with this matter in the old days.
And it was like this: with rare exceptions, log houses from freshly felled forests were not immediately erected; the harvested logs were debarked right in the forest and often left to “mature” here until the next year or transported to the site of future construction. Here the round timber was stacked to dry, not forgetting to cover it from rain and sun with flooring. Thus, the tree “flyed”, gradually gave up moisture and grew stronger. In future buildings, such logs gave significantly less shrinkage, which made it possible to start finishing it earlier.
If the log house was cut down immediately, then they also left it for a year, and sometimes two, to dry in a place well ventilated on all sides, and only after that they began to build a house or bathhouse. After the walls were brought under the roof, all work was suspended, they waited for the log house to settle and finally dry out, as the old people said, “to become rusty,” and only then began the finishing work.
We are not in a hurry to finish the bath
Announcements and advertisements from manufacturers are replete with offers to sell log houses for shrinkage, what does this mean? This means that it was made from fresh wood, with normal humidity and not undergone long-term natural or forced drying. Those. your bathhouse will be built in two stages: first you purchase a ready-made log house, put it under the roof, and only then (after 6-12 months) you begin to arrange it.
Of course, many companies will not refuse you to build a building in a couple of months, which is called “turnkey”, but is it necessary - it is better to build slowly, controlling the shrinkage process and the behavior of the logs (beams), than to correct quite predictable consequences later. After all, no one will offer you a well-maintained log house - this is too troublesome.
So the log house was purchased and safely erected on a foundation prepared in advance. What do we do next? And then we continue to do construction - we erect the roof, lay the floor and ceiling, arrange communications (not all). At the same time, if the temperature allows, we make sure to take measures to protect the wood from adverse weather conditions and woodworms.
After completing these works, we leave the building to shrink; the time period is difficult to accurately determine due to the above factors.
Perhaps those who are not particularly patient will ask the question - is it possible to somehow speed up this? Yes, of course you can, only in the future you yourself will not be happy about it and here’s why. The shrinkage process can really be accelerated by regularly drying the room or by starting to heat it. Moisture will naturally evaporate faster, and accordingly the log house will shrink earlier than it is supposed to. It seems like there are only advantages - saving time, effort and money, but that’s it for now. After a while, you will be surprised to see how your beautiful logs will begin to burst with large and small cracks - this is precisely the result of accelerated drying. For future owners of rounded bathhouses, we note that no amount of compensation cuts will save you from this, no matter what the builders say about it.
Shrinkage compensators
The shrinkage process does not proceed evenly, this is due to unequal evaporation of moisture in different places of the log house, for example, at the junctions of logs, moisture does not come out as intensively, trees even of the same species have different structure and density. In addition, somewhere the foundation may sag, somewhere a log may hang out due to poor-quality or incorrectly installed insulation. In general, you need to constantly monitor it, yes, it’s not entirely easy, but such a log house will then be warm, durable and will not require repairs in a couple of years.
When controlling shrinkage, special attention is paid to problem areas - purlins and embedded logs, outlets for attics, roofs, terraces, etc. These elements, being a continuation of the walls of the log house, sit down with it, but the vertical supports that hold them practically do not sit down. In this case, there is a high risk of the building becoming distorted or even breaking the above parts. In the old days, wooden wedges driven between them were called upon to protect against this - as the logs settled, they squeezed them out under the influence of weight, thereby protecting the outlets from bulging upward.
Currently, no one uses wedges anymore, everyone uses so-called compensators, they are also called shrinkage jacks or elevators. They are designed very simply - two stainless steel plates fastened in the middle with a threaded screw, a nut is also screwed on here, and this is where the clearance height is adjusted, loosening or tightening.
Compensator checks are carried out at certain intervals, in winter once every 2-3 weeks, in warm weather every 7 days.
How long do you need to wait
Voicing the time it will take for a wooden building to completely shrink is neither rewarding nor correct. We will give only approximate periods that are most often mentioned by builders: the main shrinkage processes occur during the first year after the construction of the log house, and in the next 4-6 months. the logs finally take their shape. Although it should be noted that in the future, over the course of 3-5 years, the bathhouse continues to shrink slightly, but this no longer carries with it any consequences.
When starting exterior and interior finishing, be sure to set aside the required percentage (with a margin) for shrinkage. For example, when installing windows, doors, or laying communications, be sure to leave space at the top so that later the logs do not hang and damage these elements.
After reading all this, some people will think - but the tree is capricious, then harvest the forest at a certain period, then not every species will do, then cut it down this way or that, in general it’s just a headache, maybe a bathhouse made of blocks would be better? But you must admit that the properties of wood are so good and obvious that they will not force you to retreat in the face of difficulties that arise, especially since all this can be solved.
Source
Why use timber
Wood is a natural and environmentally friendly material with high performance characteristics. Therefore, it is not surprising that for the implementation of most projects of modern baths, timber is used, which has a number of undeniable advantages:
- Wooden beams are environmentally friendly, safe and natural, do not contain harmful substances;
- It is practical and easy to use, fits well and does not produce waste. In addition, timber is more economical and affordable compared to logs;
- The construction of a bathhouse can be done independently, even by a novice master. To implement the project, you will need a ready-made plan for the future construction, minimal experience in working with building materials and a basic set of tools;
- The construction of timber walls is carried out directly on the foundation, which greatly simplifies the construction process.
Final part
After the roof is erected, the bathhouse must be left to stand for at least six months, since after this period of time the deformations are not very significant. However, the final shrinkage period depends on the quality of the timber used, so you must initially select a material that has the correct cross-section and relatively low humidity. For more information, see the video in this article.
Did you like the article? Subscribe to our Yandex.Zen channel
What is better: cut into a paw or into a bowl?
Let's summarize: to the question of what is better - a log house in a bowl or a claw - the correct answer in each individual case depends on the characteristics of the future house. Those who want to get a log house with a traditional appearance should choose to cut it into a bowl: it will turn out not only more beautiful, but also warmer.
Interesting materials:
What is the rank of the pronoun where? What Rh factor will the child have if the father is negative? What is the penalty if you don't give a receipt? What is the penalty if you trade without an individual entrepreneur? What is potassium phosphate fertilizer? The desk audit is completed, when will the money be transferred? What is urea? Why did the potatoes turn dark after cooking? Who was Jesus' father? What was Amir Temur's nationality?
It sounds strange, but log house buyers don't need a log house!
As practice shows, the majority of clients who buy log houses do not need a log house as such: they do not want a “designer” made of logs, they want a house or a bathhouse made from a log house.
And we understand this perfectly! Therefore, we offer , which includes all the costs that will be required for its construction:
These are the main costs that are necessary for a log house to appear on your site.
As for the delivery of the log house, we deliberately did not include this important item in the list of costs, because delivery is calculated separately for each region and negotiated individually with each customer.
What problems will have to be solved after shrinkage?
Due to the fact that each log in a log house changes (deforms) according to its nature, the overall structural strength of the structure becomes weaker. This can lead to its complete destruction, especially if the log house was delivered with technological violations or the technical calculation of the structure was made incorrectly, and an error in the design can lead to destruction.
Lesser problems would be walls collapsing, corners sagging, a breach of integrity (crack) in the foundation, twisting of individual crowns, beams falling out, floor bending, etc. Which will also require considerable effort to correct.
If you have poorly covered the log house with a temporary roof, then the moisture accumulated inside can lead to rotting of the logs.
Well, if you did everything correctly during construction and design, then the least you can get away with is cracks and crevices that require sealing, caulking and sealing. As well as deformation of window-door openings.